RSS
 

Posts Tagged ‘You’re’

What to Post on Instagram When You’re Out of Ideas

28 Jan

The post What to Post on Instagram When You’re Out of Ideas appeared first on Digital Photography School. It was authored by Charlie Moss.

what-to-post-on-Instagram

Ever find yourself stuck knowing what to post on Instagram? I’m sure we’ve all read the guides that tell you to use apps to plan and schedule your social media presence weeks in advance. But despite best intentions, I still only ever manage to post as and when I think about it!

what to post on Instagram

ISO400, 35mm (50mm equiv.), f4, 1/60th sec

That often leaves me with a block, not knowing what to post. And I know I’m not alone in this.

The truth is, if you’ve not created any new photographs for a while that you can share, then you might be wondering if it’s worth posting anything at all.

The answer is almost always yes. It’s always worth posting something! But what to post?

Here are some ideas for what to post on Instagram that you can create from your image archive.

Behind the scenes shots

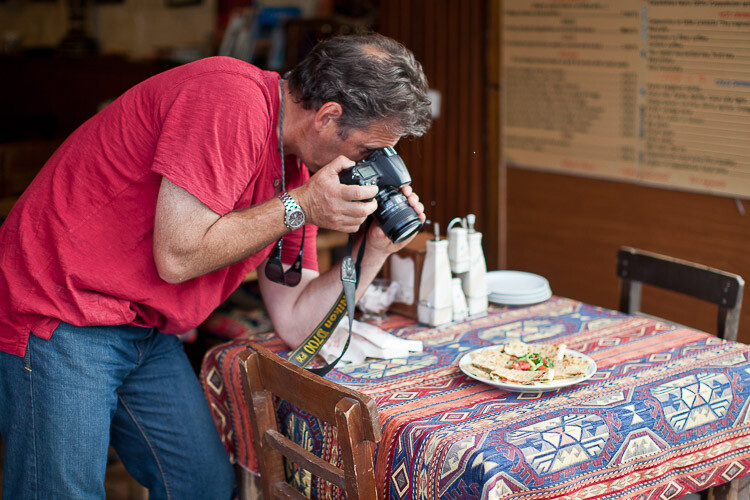
If you’re shooting with a buddy, always get them to take a behind the scenes shot of you with your camera. In fact, get them to take a few and return the favor! If you make an effort to take these shots as often as you can, you’ll never be short of images that you can post when you’re stuck for what to post on Instagram.

The benefit of these kinds of behind the scenes images is that your audience will get to know you and feel connected to both you and your work. They’ll feel like they’re a part of your creative process and, therefore, have a more emotional investment.

Image: Original image shot on an iPhone in natural light.

Original image shot on an iPhone in natural light.

If you tend to shoot by yourself, then this gets a little tricker, but I’ve had good success in posting my tabletop and studio setups to Instagram stories. Sometimes I’ve even posted images that I’m halfway through retouching to my stories – as long as the subject doesn’t mind. It gets people interested, asking questions and starting conversations.

#FollowFriday

Something that I’ve noticed on Instagram over the years is that the more time you spend building others up, the more you will be repaid in kindness (and likes – of course).

what to post on Instagram

ISO400, 35mm (50mm equiv.), f4, 1/40th sec

The ‘followfriday’ hashtag is a great way of building other people up, promoting their work, and also providing a useful service to the people who follow you. Everyone wants to find more interesting people to follow on social media. By recommending those people whose work you love to your followers, you’re helping them discover new and exciting people to follow.

I usually do #followfriday shout-outs in my Instagram stories. By choosing a photograph that I love from the other persons’ feed and sharing it to my stories, I find that I get great engagement from my followers. And at the same time, if I have an important announcement to make about my work, I can post it, and I know that more eyes will see it than usual.

#ThrowbackThursday

Who doesn’t love digging through the old photo albums to find some real gems from the past? As true as this is for finding embarrassing family photos, I like to do it with my photography work too!

Image: The original image was shot in the studio with a beauty dish.

The original image was shot in the studio with a beauty dish.

‘Throwback Thursday’ is a great opportunity to showcase some older work that has been somewhat forgotten. It’s a global hashtag that people with all kinds of interests and backgrounds both post on and follow. If you’re wondering what to post on Instagram, this can be a fun exercise in delving back into your archive to see what you might have forgotten about or even missed the first time around.

If your Lightroom catalog is organized, this shouldn’t be a tough task. All the photos should be there and laid out for you in a logical way, ready to sort through and find (old) new pictures to post on Instagram.

Hopefully, you’ll gain some new and unexpected followers when you do post from the archives!

Tips, tricks, and tutorials

Even a photographer who is a relative beginner has a neat trick or tip that they’ve learned and that they can share. Think about your workflow when it comes to taking photos – what have you come up with that is a neat little hack that could help others?

what to post on Instagram

Original image shot in the studio with a beauty dish.

I love to post these kinds of little short lessons on Instagram stories as a short series. Using the tools right on my iPhone, like Image Markup, I can draw on pictures to illustrate the point I’m making.

In order to make it work, you need to find something simple that will fit into just four or five slides. In the set above, I also included a photo of a Rembrandt painting for comparison.

The tip you’re giving should be easy to understand in less than a minute. Otherwise, you might find it’s better to write a blog post or use another longer-format approach.

Keep it coherent

If there’s one thing that’s true when it comes to Instagram, it’s that coherent profiles are usually the most successful. That’s easier said than done if you’re a beginner as it takes a while to establish a consistent style.

Don’t forget that Lightroom presets can be a great way to make your images look like they belong together.

As you start to see a coherent look emerge that you like, stick to it! People will come to expect a particular look and feel from your Instagram posts, and it’ll be one of the reasons that they keep coming back for more.

Image: The small circles at the top of the grid are the Story Highlights. You can use them to keep i...

The small circles at the top of the grid are the Story Highlights. You can use them to keep important stories at the top of your Instagram profile page.

Don’t forget to use Instagram stories. You can create “Story Highlight” sections on your Instagram profile page to keep all the interesting content you’ve uploaded, together in one place. This extends the life of a story that you post from 24 hours and giving it a permanent place on your profile page.

I use this as a way to bookmark useful info I’ve posted or small portfolios that I might want people to look at. You could keep all your tutorials in one, and your #ThrowbackThursday stories in another!

Most importantly, though, when you’re wondering what to post on Instagram, just post something! Consistency is key on social media. Keep posting, and your work will stay at the forefront of people’s minds!

The post What to Post on Instagram When You’re Out of Ideas appeared first on Digital Photography School. It was authored by Charlie Moss.


Digital Photography School

 
Comments Off on What to Post on Instagram When You’re Out of Ideas

Posted in Photography


‘It should cost…’ The three main ways you’re wrong about camera prices

22 Jan

Every time a camera is launched, our comment section is flooded with comments saying ‘it’s too expensive,’ irrespective of what the price is set at. Are all the camera makers utterly out-of-touch with reality, or is there something else going on?

I’m going to explain the three main misunderstandings that I see prompting these comments. I’m not advocating for higher prices, nor trying to suggest that manufacturers never get it wrong, but just trying to highlight why cameras are priced the way they are.

A new model is always going to cost more than the outgoing one

Prices decline with time. No matter what your pricing strategy, an older product (particularly in a fairly fast-moving marking like electronics) cannot demand as high a price at the end of their lifecycle as they can at the beginning.

This may sound obvious, but the consequence is that a new model will always look expensive compared with the model it replaces.

The D780 was launched at the same price as the D750, so is cheaper in real terms. But heavy discounting of the D750 makes the new camera look very pricey.

This is the error we most often see: ‘How can they charge $ 2200, when I can buy the old model for $ 1400?’

To which the response is: ‘How can they not?’ If you offer your new model at the price of the outgoing one, then what does its price look like, at end-of-life? Do you then have to match that price with the next generation model? That approach would end up with you giving cameras away within a couple of product generations, which isn’t exactly a winning strategy in an already contracting industry.

Prices decline with time, so new cameras tend to be released at around the same cost that the old one was launched at. The alternative (launching to match the current market prices) is a pell-mell race to the bottom.

So cameras tend to be released at around the same prices that the preceding model was launched at. After all, camera makers are companies: they exist to make as much profit as they can. Their job is to maximize the amount of money they generate from each product.

The main exception to matching the previous model’s launch price is if the new model has been stripped-down to hit a lower price point or re-positioned to attract a different audience.

Case study: The stripped-down mass-market special

Sony’s a6000 was launched for $ 799 with a kit zoom: around $ 200 lower than the existing NEX-6 model. It gained a couple of additional features and updates but also saw a drop in viewfinder resolution and had less substantial feeling construction: distinct hints that it wasn’t a like-for-like replacement model.

Sony’s insistence on assigning similar names to all its models doesn’t help, but the pricing alone makes it easier to recognize the a6300 as more of an NEX-6 replacement than an a6000 update. Sure enough, both the a6000 and a6300 continued alongside one another for the next few years: one targeting the ‘price conscious’ consumer, the other offering better build, an NEX-6 level viewfinder and 4K video, for people who were comfortable to spend a bit more.

Manufacturers will occasional try to re-position a particular model, making it cheaper or more expensive, perhaps trying to make room for a new model.

Case study: two models in the place of one

Panasonic’s GX8 had a significantly higher spec and was launched for $ 200 more than the preceding GX7. This created the space for a less expensive GX85 to sit underneath. Looking at the launch prices suggests that Panasonic thought there were two different types of customer buying the GX7: some that wanted a small, mid-priced model and some who wanted something more ambitious, and were willing to pay for it.

However, the next model refresh saw the GX9 launched back at the same price as the GX7 (and called the GX7 III in some markets). ‘This isn’t a GX8 replacement at all’ complained some would-be buyers. The pricing indicated that they were probably partly right.

The lesson in all of this is that you can better interpret a manufacturer’s intentions by comparing the price of a new model to the launch price of the outgoing model, not its depressed end-of-life price.

Case study: getting the price wrong

Manufacturers don’t always get their pricing right, of course. Nikon entered the prime-lens APS-C compact market in 2013 with the Coolpix A, an attractive camera with a 28mm equivalent F2.8 lens. Perhaps emboldened by Fujifilm’s success selling its X100 models for $ 1299, Nikon priced its camera at $ 1099.

Around a month later, Ricoh launched an APS-C version of its much-loved GR, also with a 28mm equiv F2.8 lens, for $ 799. The Coolpix A was a pretty good camera (though we preferred the GR), but without the retro appeal, hybrid viewfinder and burgeoning reputation of the Fujifilm, or the establish fan-base of the GR, that $ 1099 price tag looked awkward.

Without access to sales data, we can’t know for certain how many units were sold at full price but by the second half of 2014, the price had collapsed to just $ 580. A lot of people got a bargain at that discounted price, but it’s noticeable that Nikon hasn’t shown any further interest in that niche.

Of course, sometimes manufacturers will keep old models on the market at a newly lowered price (the Sony a7 II and a7R II, for instance). This makes life a little more complex but should really just focus your attention on what really matters: ‘does the new model offer enough compelling improvements to overlook the older model?’

Your country probably isn’t being ripped-off, even if the US launch price seems cheaper

The RX100 VI was launched for $ 1298 in the US and the equivalent of $ 1450 in Europe. But that’s not the whole story.

The other complaint we regularly see is that the launch price in country ‘X’ is higher than a direct conversion of the US dollar price. There are two main reasons for this.

The first is that US prices tend to be quoted without sales tax, whereas most other countries tend to include sales tax/VAT/GST in consumer-facing communications. As a results, US prices tend to look less expensive simply because the price quoted isn’t the price most people are legally expected to pay. Your local tax level may be more expensive, but that’s more likely to do with your country’s history, style of government and degree of healthcare provision and social support: none of which can be blamed on camera makers.

The second factor is that price competition varies greatly between countries. US prices tend to stay at or near the Manufacturer’s Recommended Sales Price until the manufacturer chooses to adjust it. Countries with more competition between retailers tend to see prices quickly fall away from the initial asking price: early adopters end up paying full price, but anyone buying a few months (or sometimes weeks) later, will get a much better deal.

Case study: why are cameras more expensive in Europe?

Sony’s RX100 VI had an initial MSRP of $ 1298 in the US and €1299 in Europe. This looks bad: €1299 was worth $ 1450 in July 2019. Outrageous, right?

But, if I went to buy one today, I’d end up paying $ 1429 after tax in the US ($ 1298 plus my 10.1% local sales tax rate). If I lived in Germany and bought the same model from a large internet retailer, I’d have to pay €1180, including VAT, which is equivalent to $ 1315.

So, although the launch price in your country may look outrageous, compared with the US price, that doesn’t mean you’ll get ripped-off. The last two times I’ve looked at buying cameras in the US and UK, I found the year-old model I was shopping for to be less expensive in the UK, even with higher local taxes. I’ll concede that this was before the pound plummeted following the Brexit vote: but again, that’s not really the fault of camera makers.

Some things are supposed to look expensive

Marketers have all manner of theories about how to price their goods, and different strategies for maximizing the amount of profit they can make from a specific product. Very few of these have much to do with the costs involved in developing, manufacturing, distributing and supporting that product. Most strategies set the price high enough to make this money back, but there are exceptions even to that.

So there’s little point looking at a product and saying ‘they’ve removed ‘x,’ so it should be cheaper,’ or expecting the price to relate in any way to your estimation of the costs involved.

For instance, a premium pricing strategy holds that it’s sometimes beneficial to price your goods so highly that you end up selling fewer than you could, but at greater profit: the high price and resulting scarcity in itself contributes to the perceived value of the product.

A premium pricing strategy holds that the high price in itself contributes to the perceived value of the product

‘That’s silly,’ you might think: ‘that wouldn’t work on me.’ But it does. Like it or not, you respond to pricing. Read through the comment section of the launch of any Leica product: you’ll see an audience dramatically polarized between ‘it’s not worth that’ and ‘if you could afford it, you’d understand.’ The same goes for luxury items, whether they be Range Rovers or Rolex watches: if they weren’t expensive, they wouldn’t have the same cachet.

This discussion is almost entirely divorced from whether the products themselves are any good (to the degree that any assessment can be entirely rational and dispassionate), it’s primarily a reflection of differing personal responses to the price.

Perceived value is entirely personal and both responses are equally right and wrong: a premium product isn’t worth its exaggerated price to the person who doesn’t care about prestige, scarcity, brand history and reputation or the degree to which something is hand-built, but it is worth it for someone to whom those factors contribute to the item feeling special, or more meaningful.

Is it worth it?

Which ultimately brings us to the question that’s really at stake: not ‘is it too expensive?’ but ‘does it appear to represent good value to me?

Again, manufacturers are for-profit companies. They aren’t aiming to offer the product you want at a price you want to pay: they’re trying to price it at the maximum amount you’re willing to pay.

In other words: it’s always going to be a bit more expensive than you’d like.

Articles: Digital Photography Review (dpreview.com)

 
Comments Off on ‘It should cost…’ The three main ways you’re wrong about camera prices

Posted in Uncategorized


The 7 Nature Photography Mistakes You Don’t Know You’re Making

19 Jun

The post The 7 Nature Photography Mistakes You Don’t Know You’re Making appeared first on Digital Photography School. It was authored by Jaymes Dempsey.

Do you like to do nature photography?

Then you might be making these 7 mistakes.

And here’s the thing:

These nature photography mistakes are the kind that you don’t even know you’re making. They’re the type of mistakes that are easy to miss, but they’re absolutely critical to your photography.

To discover these mistakes (and to ensure you never make them again!), read on!

1. Shooting under bad lighting

I’m going to start with the single most critical, most common mistake I see nature photographers making:

Shooting in poor lighting conditions.

Because good light is absolutely essential to good nature photography.

In fact, I’d go so far as to say that without good light, you cannot get a good photo. It’s so easy to have the perfect setup, the perfect composition, and the perfect settings…

…only to ruin the shot with bad light.

So what counts as bad light?

Two main situations.

First, shooting under the harsh, midday sun will pretty much always ruin your shots. The midday sun just isn’t good for nature photography!

And second, shooting in low light, at any time of the day. Unless you’re shooting with a tripod, your shots will end up grainy or blurry, which you definitely don’t want.

Which begs the question:

What is good light?

I recommend that you do nature photography at two main times.

First, you can capture some great nature photography under cloudy skies. Cloudy light is especially great for photography that involves color because the clouds diffuse the light and saturate the colors.

Second, you can always rely on the golden hours, which are the two hours after sunrise and before sunset. Golden-hour light is warm, wonderful and, well, golden. It’s perfect for capturing that stunning, once-in-a-lifetime shot.

In fact, most of the best nature photography you’ve seen was probably taken during golden hour. It’s just that amazing!

2. Shooting your subject from a standing height

Here’s another common nature photography mistake:

Not paying attention to your angle!

(More specifically, photographing from a standing height, so that you’re shooting down toward your subject.)

This is especially problematic in wildlife and macro photography, where shooting downward conveys a sense of dominance and separation.

Instead of shooting downward, try to get on a level with your subject. That way, the viewer will feel much more connected, like they’re in the same world as your subject.

And don’t just shoot from a single angle. Try to experiment with different possibilities, and take note of the way a different angle results in a different nature photo.

This is a great way to get out of a creative rut: Force yourself to shoot a subject from an angle you’ve never used before. Get on the ground and shoot upward!

3. Using a (slightly) messy background

In nature photography, the background is absolutely essential.

If you don’t include the perfect background, then your photos just won’t stun the viewer.

And one of the easiest mistakes to make is using a messy background.

You’ve got to do everything you can to avoid the mess. You must avoid chaos. Instead, you need to produce a background that’s as simple as possible:

  • Uniform in color
  • No additional subjects
  • No lines or shapes

Your goal is to make your subject stand out. And to do that, you have to eliminate everything that’s unnecessary in the background. Only include the essentials.

4. Photographing low-quality subjects

Once you’ve found a subject…

…do you check to make sure that it’s not damaged, dirty, or poor quality?

It’s so easy to forget this step. And yet it’s critical to capturing a stunning nature photo.

I recommend you always do a quick evaluation of your subject.

If it’s a flower, then you’ll want to ask yourself:

  • Are there any blemishes or holes?
  • Are there any spots of dirt or mud?
  • Are there any insects in the center of the flower?

If it’s a landscape, then think about:

  • Whether there’s any litter or human-made items
  • Whether your foreground subject is damaged

Your evaluation doesn’t need to be in-depth. You should just spend enough time to be certain your subject is in good shape.

5. Not including a point of focus in your compositions

This is another quick way to ruin a great nature photo.

Because basically, every composition must have a point of focus.

By this, I mean that you must include a subject. Something that viewers can latch onto. The subject can be whatever you like (as long as it’s there!).

If you’re shooting landscapes, then try to include a subject in both the foreground and the background. Ideally, the foreground subject will lead the eye to the background.

If you’re shooting wildlife, then your subject is pretty much guaranteed. Just make sure that you emphasize the wildlife in your photo!

And if you’re shooting macro photos, then make sure that an aspect of your subject is tack-sharp, so that your viewer’s eyes go straight to it.

6. Shooting low-contrast scenes

This mistake is a bit more advanced, but still important to keep in mind.

When you’re doing nature photography, you should strive to avoid ultra-low contrast scenes.

By ‘low-contrast scenes,’ I’m referring to those with very little variation in tone (that is, lights and darks) and color.

A low-contrast scene might be almost entirely white.

Or it might be entirely red, or blue, or black.

What’s the problem with low-contrast scenes?

The lack of contrast makes every element blend in. So no single element stands out, and the photo becomes boring.

Which is exactly what you want to avoid.

Instead, look for scenes where the subject pops off the background. And look for scenes where you have some nice shadows and nice highlights.

I should note: It is possible to use low-contrast scenes for an artistic effect. But you have to do it deliberately, and it’s extremely easy to mess it up.

So I recommend you stick to high-contrast scenes. That’s how you’ll avoid low-contrast issues!

7. Not post-processing your nature photos

There are three fundamental aspects of every nature photo. They are:

  1. Light
  2. Composition
  3. Post-Processing

If you can nail all three of these things, then you’re set. Your photos will be stunning. And we’ve already talked about light, and how you should shoot during the golden hours. We’ve already talked about composition, and how you must include a point of focus.

But we haven’t talked about post-processing. And here’s the thing:

Without post-processing, your nature photos just won’t stand out. Because editing is what adds that finishing touch, that last bit of shine, to your nature photography.

Now, you don’t have to do much editing. But there are a few things I recommend you do to every photo:

  1. Check the exposure. It’s especially common to let your photos remain underexposed. So make sure that the shadows in your photo still look nice and detailed.
  2. Check the contrast. In general, I recommend boosting the contrast of your nature photos. This gives an extra bit of punch and will help your images stand out.
  3. Check the saturation. While it’s easy to overdo this step, a little bit of saturation goes a long way. You want your colors to look deep, but natural.

If you can just follow these three steps, then your nature photography will look so much better.

Nature photography mistakes: conclusion

Now you should know all about these seven deadly nature photography mistakes.

And you’re prepared to avoid them!

The key is to just keep a lookout. Maybe even create a checklist.

Then, when you’re shooting in the field, you’ll make sure that none of these happens, and your photography will turn out better than ever.

Have any nature photography mistakes that I didn’t discuss? Share them in the comments!


nature photography mistakes

The post The 7 Nature Photography Mistakes You Don’t Know You’re Making appeared first on Digital Photography School. It was authored by Jaymes Dempsey.


Digital Photography School

 
Comments Off on The 7 Nature Photography Mistakes You Don’t Know You’re Making

Posted in Photography


How Do You Know When You’re Ready to Start Charging for Your Photography?

09 May

The post How Do You Know When You’re Ready to Start Charging for Your Photography? appeared first on Digital Photography School. It was authored by Carl Spring.

An image from my first wedding. One of the scariest days of my life.

How do you know when you’re ready to start charging for your photography?

When someone is willing to pay you for them.

There you go. In twenty-two words, I have answered one of the most-asked questions in photography.

In all seriousness though, that is pretty much it.

You only have to look at the story of many photographers and how they started. They simply took an offer to get paid, fearing they were not ready.

Let’s be honest right out of the gate. You will be nervous as hell – probably convinced you are a fraud – and will be fearful of delivering the images to the client. Awaiting their reaction, you may wonder why anyone would pay you to take photos. This is natural and is more commonly known as “imposter syndrome.”

Imposter syndrome

To put it simply, it is the feeling that your work isn’t very good and doesn’t deserve the attention it gets. Albert Einstein also suffered from this, so if this sounds like you, you are in good company.

The truth is, people who are highly skilled or accomplished tend to think others are just as skilled. Because you see what you do as simple, you don’t see the vast amount of skill involved in the work you do. You take it for granted because it comes so easily to you.

It is also human nature to be more critical of your own work than that of others. Put this into a world of social media where everyone is #livingtheirbestlife, and there is what appears to be a never-ending stream of amazing images you see as better than yours. Now you have the perfect storm.

The fact that Einstein suffered from this shows there seems to be no level of accomplishment that makes you able to see worth in what you do. In some cases, higher accolades and awards make things worse.

You just need to remember you are skilled in what you do and your work is good.

Unfortunately, if you suffer from imposter syndrome, you may never be able to rid yourself of it. However, there are things you can do to make it easier. Tactics include talking with others about your issues and taking note of the positive feedback you get. People don’t have to say nice things about your work; they say them because they mean it!

Most importantly, remember that almost everybody suffers from this in one respect or another. I suffer from this badly. Repeatedly, I think my work is awful and wonder why people want to pay me to take their photographs. I convince myself that unless I have taken the best photograph in the history of photography of whatever I am shooting, then it is a failure.

Luckily, I have a great family who support me through the tough times and remind me that people pay for my work because I am a good photographer.

Band portrait again grunge background

I had shot lots of bands, but few band portraits at this point. They were nervous as I had photographed artists they loved. I was nervous because they were paying me for portraits. Imposter syndrome at its finest.

Fake it til you make it – except for weddings! 

There is always a huge element of “fake it til you make it.” You sometimes need to have faith in yourself and go for it. Standing at the edge of the diving board is the worst place to be because you have time to think. Sometimes you need to jump off and try your best. At times it will be graceful, sometimes you may bellyflop. However, in reality, all that is hurt is your pride (and your belly obviously).

Let’s say a friend asks you to photograph their kids because they have seen photos on your Facebook and want some of their kids. They are happy to pay you for the photos too.

My advice is to go for it.

Let’s say the worst happens, and the photos turn out to all be awful (this is more than likely not going to happen. Even if you do not get loads of great shots, you should get a few keepers).  All you do is own up and say you are not happy with the photos and they deserve better. The only thing that is an issue is you have to give up more time to retake the photos.

Photographing a family portrait is the perfect example of when fake it until you make it is okay. Shooting a wedding, however, is not!

The fact that weddings are a one-off event and if you are not 100% certain you can deliver, then you shouldn’t do it.

I have seen (as I am sure many of you have) people on Facebook groups asking questions like “I’m photographing my first wedding next week, I have this lens and that lens. Which will be better? Also, do I need a flash?”

This is irresponsible. You need a certain level of skill and knowledge to photograph a wedding, especially if you are getting paid for it. You cannot gain the knowledge to photograph a wedding by asking questions in a Facebook group a few days before the event. You need to have it before you take on a wedding.

There are always news stories about a wedding photographer getting sued for ruining a couple’s wedding day. Please don’t become one of those. If you aren’t sure if you are ready to photograph a wedding, you probably aren’t.

With that said, your knowledge does not have to be in wedding photography. I know lots of photographers who have never photographed a wedding, but I am sure they would do an awesome job. As a starting point, you need to know how to photograph in a variety of lighting situations. You need to know how to solve exposure issues your camera may throw up, and you need some spare gear in case your main camera dies.

You need a headshot to apply to acting school? Of course, I can (I had no idea).

What equipment do I need if I’m NOT shooting a wedding?

For most photography there are three simple questions:

  • Do you have a camera?
  • Do you have a lens?
  • Do you have a memory card?

If you answered yes to the above three questions, then you have the right equipment to be paid for your photography. Will a variety of lenses and gear make things easier? Yes, but a beginner DSLR with a kit lens is more than capable of producing beautiful images people will be happy to pay you for. 

What equipment do I need if I’m shooting a wedding?

As with the knowledge requirements above, the gear requirements for shooting a wedding are different. A wedding requires a different amount of equipment. The most important is to have two camera bodies. If you have one camera body and something goes wrong, you are in a mess. A spare camera body may not be needed, but it is better not to need something and have it there than to need it desperately and it not be there.

In terms of lenses, most wedding photographers tend to go for two f/2.8 zoom lenses or two to three prime lenses. What is best for you depends on how you like to shoot. Fast lenses are always best for weddings as you can use wider apertures to get more light into the camera in low light scenarios such as dark churches.

For those of you looking for specifics, a zoom lens shooter will use a 24-70 f/2.8 and a 70-200 f/2.8. They may also have a prime lens with an even larger aperture for situations where there is really poor light.

A prime lens shooter mostly works with a 35mm and an 85mm. They may also have a 135mm or a 24mm. These are generally f/1.8 or faster.

Now again these are the basics. I have not included flashes, memory cards, hard drive backups, etc.

I will take this opportunity to remind you again; you really do need a high level of skill and equipment to be able to shoot a wedding. It is hard work if you know what you’re doing. If you don’t, it is like a 12-hour waking nightmare.

camping pods in rural England

Want me to shoot your camping space. Of course, I can. It will be…The first part of the sentence was easy. Asking for the money was always harder. In this case, the client said, “I was expecting to pay more than that.”

What should I charge?

Now for those of you starting to charge, you will always wonder how much should I ask? When you are first starting, you may photograph for an incredibly low rate, and that’s fine.

No matter what some may say, you are not ruining the photography industry by charging $ 100 including all the images when you are starting out. The truth is, people looking for photography at that price point are not going to be purchasing from photographers who charge thousands of dollars for a photo shoot.

There isn’t a right or wrong answer. My first family shoot I charged £50 including the images. My first full wedding I charged £500. Would I charge that now? Of course not. However, at the time, I got some cash, I built my portfolio, and most importantly it built my confidence.

The follow on question is how do you know when you are ready to charge more? Again this is down to you, your ability to deliver beautiful images and your confidence.

The moment I decided to raise my prices was when I was paid £600 to photograph a wedding where the couple had spent over £10,000. They didn’t book me for my price; they loved my work.

After that wedding, I doubled my wedding prices.

This led to more inquiries. Not only that, but I also received inquiries for the type of weddings I wanted to photograph. Was I convinced that raising my prices that much would mean no-one would book me? Of course, but they did, and I eventually raised them again. You just have to be confident, and remember, your prices are something you can easily change.

A photo from one of my first family photoshoots. I got paid the grand total of £50 including all images. Even then, I convinced myself I might be overcharging.

Conclusion

There you have it. You are now ready to start charging. Or, maybe you’re not.

The fact remains that in most situations when people offer to pay you, you are ready. The only thing that might mean you are not is you and your confidence.

You might be the type of person who will happily throw yourself off the 10m diving board and see what happens. Or, you might be the type of person who starts on the side of the pool and works your way up until you are at the 10m mark, confident you won’t bellyflop.

However, at some point, you need to leap. It will be scary, but I promise you, it won’t be as scary as it is in your head.


The post How Do You Know When You’re Ready to Start Charging for Your Photography? appeared first on Digital Photography School. It was authored by Carl Spring.


Digital Photography School

 
Comments Off on How Do You Know When You’re Ready to Start Charging for Your Photography?

Posted in Photography


12 Photography Errors You’ll Make When You’re New to Photography

17 Apr

The post 12 Photography Errors You’ll Make When You’re New to Photography appeared first on Digital Photography School. It was authored by Simon Bond.

It’s a universal truth that everyone has to start somewhere. It’s also true that when you start something new, you’ll make mistakes. All the expert writers on this site will have gone through this process – myself included. In this article, you’ll learn about 12 common photography errors that are typically made, and how you can quickly correct those mistakes. So read on if you want to avoid some of the pitfalls of photography, and fast forward to creating amazing photos!

To demonstrate that everyone has to start somewhere, the photos used here are among my earliest photos. Taken with an SLR camera, and of course in the days of film. There are plenty of mistakes in the set of images in this article. At this point, I certainly knew my way around an SLR camera, but clearly there were still things for me to learn.

1. Crop in the wrong place in pursuit of minimalism

You’ll have heard photography is the art of subtraction. That is, removing unwanted elements from your frame will give you better photos. You’ve arrived at a popular location to take photos, only to find crowds of people there. The solution is to begin your photo, where the head of the tallest person in that crowd ends.

In other words, crop your photo halfway up the side of a building. While this does remove that unwanted element, it leads to a poorly composed photo in the pursuit of minimalism. This could arise from other objects like parked cars, or wires in the wrong place in your image. So what can you do instead of this overly tight composition?

  • Arrive early – One of the best ways to avoid crowds of people or cars is to arrive early. Wake up for sunrise, and get that great angle before the crowds get in the way of it.
  • Multiple photos – Set you camera up on a tripod, and take a sequence of photos of the same scene. Ensure people are moving around. Then stack the photos in Photoshop, and use the median function to remove people from the photo.
  • Cloning – You can use clone stamping to remove elements in the photo you don’t wish to be there. This requires some skill, but can be used to remove wires, people and sometimes larger objects.

This is a photo that would benefit from more foreground being visible. There is too much dead space at the top of the image.

2. Photograph into the light

Not taking the time to plan when you’ll visit a location will lead to this mistake. Perhaps you’re on a walking tour, and your next location is a famous landmark. It just happens to have the sun behind it, with all the interesting detail of the object obscured by bad light. The same is also true when you photograph a person towards the light, unless you’re reflecting light back onto them or using external flash then the portrait is likely to be lacking. So what solutions are there for this problem?

  • Know the light – Do your research on the location you’re visiting, and make sure to arrive when the sun is in the right direction. You can use suncalc for this purpose, it shows the direction of the sun in relation to time of day and geographic location.
  • Change sides – In some cases, you can move to the other side of a building, where you’ll be able to photograph a person from the other direction. This is a relatively simple solution that can improve your results.
  • Light modifiers – The use of reflector discs and or off-camera flash can make portrait photography towards the light possible.
  • Digital blending – Photographing towards the light, when the main subject is larger than you’d be able to light with external flash? You can instead bracket your photos, and use digital blending with your image. This is an effective solution when you want to photograph towards a sunset.

A photo that’s reasonably composed but that would have benefited from being taken at another time of the day. This type of photo would work well during blue hour.

3. Never change your point of view

If all your photos are taken from a standing position, or perhaps seated position when you’re eating, then you’re missing a trick. A change in perspective is a great way to produce much more interesting photos.

That’s not to say there aren’t great photos to be taken in a standing position. A lot of street photography and portrait photography uses this perspective to great effect. There are plenty of other angles to use though, and adding variety to your photography through these angles is a great idea.

Changing your angle might be as simple as kneeling down, or as challenging as finding access to a high vantage point from a nearby building. The worm’s eye view and bird’s eye views can be used to great effect.

You don’t need to photograph straight up or straight down though. Photographing from lower down might emphasize a leading line on the road that much more, or allow plants and flowers to become a more important element within your frame.

Clearly the focus of the image is the roof tiling and the eagles. Area’s to the top and bottom of this image are not needed, and different framing should have been used.

4. Over reliance on post-processing

One of the common photography errors you can make is an over-reliance on post-processing. The aim as much as possible should be to get your result in-camera.

Your camera is, after all, an incredibly powerful creative tool. Of course, it’s important to learn post-processing. If you don’t do so, you’ll be at a disadvantage. It’s a good idea to learn how to use your camera and post-processing in conjunction with each other.

What can happen if you allow your skill in post-processing to outstrip your knowledge of the camera?

  • Fix the photo – Instead of getting the photo right in camera, the idea is to correct mistakes in post-processing. This will stall your progression as a photographer, and it makes you a lazy photographer.
  • New photography techniques – Post-processing can add that “x factor” to your image. So much so, that you may progress more slowly in learning new camera techniques.
  • Transformations – It’s possible to make some quite radical changes to your photo. Compositing images is certainly something you should learn. It’s also possible to just change the sky in a landscape scene to something more dramatic. In doing this, are you as motivated to return to a location many times, until you get a dramatic sky in real life?
  • Filters – Post-processing is all about subtle changes. Overcooking your photo by using a filter at too strong a strength might make your photo stand out, but perhaps not in a good way.

This photo needed to be taken at another time of the day when the sun lights up the building. The lamp to the left also adds nothing and should be removed by changing the angle.

5. Not learning your camera settings

Your camera is fulling of settings that affect your image. A lot of these settings are connected to one another as well. The relationship between aperture, shutter speed, and ISO is fundamental to photography. You need to take the time to learn each of these settings on their own, and how changing one of them can impact another setting. The first and most important thing to do here is to stop using your camera on automatic.

One setting at a time

You won’t learn everything at once, but you want to get to the point that you subconsciously know the correct settings to use. It’s a good idea to spend time getting to know one particular camera setting at a time and what it does.

A good setting to focus on is aperture.

Learn how aperture can be used to control the depth of field, blur the background, and perhaps produce a starburst in your photos. Having learnt how this setting works, move onto a new setting and learn that one.

This detail photo would have been improved by using a larger aperture. At the time this sort of lens wasn’t available to me.

6. Not using selective focus

Getting sharp images is an important part of photography. To get the sharpest images you’ll need to learn how to use the focus settings on your camera correctly. One of the most important of these settings is selective auto-focus.

Another of the common photography errors is to let your camera decide where to focus for you.

Instead, you should be in control of this process.

It’s not always the case that you’ll want to have your focus point in the center of the image. Use selective focus, so your camera focuses where you want it to focus. Your camera will have a grid array that can be seen through the viewfinder. Use your camera’s direction controls to move the focus point to the appropriate position, and you’ll be ready to photograph.

The photo uses the rule of thirds, so composition is okay. The tree on the left is somewhat distracting though.

7. Going it alone

Photography is a great past time to practice on your own. It dovetails very well with nice long walks by yourself in the country or city. Indeed you can learn a lot about your craft through self-exploration, and perhaps reading articles on sites such as this one. To only do this would be a mistake though. There are a lot of good reasons to seek out and befriend other photographers. Here are a few things you’ll gain from teaming up with other people.

  • Feedback – One of the best ways to improve as a photographer is feedback. Some of the best feedback you’ll receive is from fellow photographers.
  • Collaborations – Not all photography is easy to achieve on your own. Once you start using off-camera flash to photograph models, working as a team makes sense.
  • Learning – Tapping into the knowledge base of other photographers is invaluable. Different people learn about different things in photography, so being able to share that knowledge helps a lot.

The horizon line isn’t straight, showing this photo was taken too quickly. Another indicator of this is not waiting for the man to move out-of-frame. A rushed photo, and a poor result.

8. Not developing your own style

This is true not just in photography, but in many art forms. It’s easy to look to famous photographers, or perhaps local established ones, and look to emulate their photography. It’s a good idea to learn about how photographers take their images on a technical level. Once you know how other photographers work though, it’s then time to interpret these techniques in your own way.

There are, as mentioned, many benefits to joining a group of photographers, but one potential pitfall is developing their style of photography. Learn what makes their photography work, then spend a bit of time of your own developing a style that suits your work.

A photo that is spoiled by the wire at the top of the frame. Simply moving forward and using the same composition would have removed this wire from the photo.

9. Not learning new techniques

As you progress and become comfortable in your skin, you’ll come to one of the next big photography errors. You’ve developed a style, but then stopped progressing. It’s an easy trap to fall into, especially if you’re getting attention for the photography you’re now producing.

Photography is always evolving and to stay at the vanguard of the field you need to be learning new techniques. They might not necessarily become your signature style, but learning new ideas allows you to freshen up those styles that are your signature techniques. This might lead to you combining two photography techniques. You might learn a different way of post-processing your images that allows you to improve all the photos you take in the future.

This was once a photo I liked. Today, I know that it really needed a graduated neutral density filter for the sky. This aspect of photography was something I’d not learnt at this point.

10. No main subject

How do you elevate a good photograph into a great one? To do that you’ll need a narrative to your photo, and that means a main subject.

It’s possible to take nice photos of a landscape or abstract detail photos that are very eye-catching. A silhouetted person on the brow of a hill instantly adds more story to your scene, making it a stronger composition. A detail photo with one part of the image that’s different? Now you have a photo with a subject.

Sometimes the main subject will be readily available, like a single tree in a landscape scene. At other times you may need to wait patiently for a person to walk into your scene, thereby giving your scene its subject.

This is an awkward photo that lacks a main subject, and leaves a lot of dead space on the right.

11. Too many distracting elements

In photography, you want to keep it simple. Once you’ve settled on a strong main subject, you need to frame it correctly.

Another regular in the photography errors list is a busy photo. This is often because the background has too many elements, but distracting elements can also extend to the foreground. How can you eliminate extra elements from your scene such as unwanted wires? It’s true that you could use post-processing. On the other hand, you can develop your photographer’s craft. So what options are there?

  • Angle – That means changing the angle, perhaps as dramatically as walking to the other side of your main subject.
  • Focal length – You can also use different focal lengths, longer focal lengths will compress your scene which might allow you to remove things you don’t want from the frame.
  • Aperture – Get stuck on automatic mode and you won’t learn about this. A great way of removing a busy background is to blur it out. You can do this by using a large aperture, the resultant shallow depth of field will blur the background but keep your main subject sharp.
  • Closer – Walking closer to your subject, when that’s possible, means you’ll remove elements from your frame. They’ll now be behind you, but you might need to use a wider focal length to take the photo.

The water makes some nice patterns, but the photo lacks interest. In addition to this, the bottom is overexpose. A well-placed GND filter could have fixed that problem.

12. Bad composition

There are some basic rules of composition, and it’s worth knowing what they are. These are things like the rule of thirds, leading lines, and framing. It’s also true that not every photo benefits by doggedly sticking to the rule of thirds, those photos that use minimalism for instance might not work so well. It is a good idea to know what composition techniques work though, and to look at how you can apply them to your photography. When you don’t do this you’ll begin your photographic journey with awkward composition mistakes.

Chloe, I miss you. This is quite a nice photo of this dog. The foot should not have been cut off though, and the angle is clearly from a standing position. Kneeling down might have worked better here.

Cut down on your photography errors!

As you’ll see, there are lots of photography errors you can make. Are there any on this list you’ve made? Perhaps there are other photography errors you’ve made while learning, and you can share them with the community here? As we all know, making mistakes is a part of the learning process.

So now it’s time to pick up the camera, and having read this article, hopefully you’ll know more of the photography errors to avoid!


The post 12 Photography Errors You’ll Make When You’re New to Photography appeared first on Digital Photography School. It was authored by Simon Bond.


Digital Photography School

 
Comments Off on 12 Photography Errors You’ll Make When You’re New to Photography

Posted in Photography


100 Things to Photograph When You’re Out of Ideas

08 Mar

The post 100 Things to Photograph When You’re Out of Ideas appeared first on Digital Photography School. It was authored by Mat Coker.

Sooner or later we all run out of things to photograph. Or we think we have. In reality, there are countless things right in front of you worth photographing. It’s easy to get stuck in a rut photographing the same thing over and over, eventually leaving your camera in the bag for weeks at a time.

To help you figure out what to photograph when your mind is blank, I’ve compiled a list of more than 100 ideas. You can even combine items on this list to create hundreds of combinations of things to photograph.

There are several categories to choose from and I recommend trying a category you don’t have much experience with.

I normally just walk right by windows. But the light, frost and paper crane caught my eye.

Nature

There is a whole world waiting to be explored by you and your camera. And it’s not just what your eyes can see but what is hidden underneath and behind or inside.

You walk right over the surface of the earth every day, but everything you see has it’s own surface to be explored. Pull out your macro lens and inspect the surfaces of the natural world.

  • Flowers
  • Trees, branches, bark
  • Vines
  • Leaves
  • Fruits and vegetables
  • Driftwood
  • Tall grass

Consider photographing places such as:

  • Fields
  • Orchard (in bloom or full of fruit)
  • Pumpkin patch
  • Sunflower field

When I first got my camera, I would take pictures of flowers. I was never happy with the photos but didn’t understand why. One evening I photographed this garden and loved the way this photo looked. Once I learned about light, I realized why I love this photo. It’s incredibly soft light produced by the last 5 minutes of light before the sunset.

If you choose to photograph flowers, don’t just go for the typical flower shot. Focus on the petals, leaves, stems, and even dig down to the roots. Light is essential to plant life. Photograph them in harsh noon light, golden hour, and play with backlight to make silhouettes. Crack open seeds and nuts to explore their inner world. Don’t forget to photograph them after it rains.

Then keep exploring water.

  • Water (sprinkler, hose)
  • Rain
  • Creek, pond, lake, ocean
  • Waves
  • Ice
  • Snow
  • Steam

There is no need to limit nature photography to daylight hours. When the moon is bright it is a wonderful light source. This is especially true when the landscape is covered in snow because it reflects the light.

Even “the ground” is a worthy subject.

  • Rocks
  • Sand
  • Gravel
  • Soil

If you’re more of a people photographer than a nature photographer, consider bringing people along with you to have in the photos. Especially when it comes to:

  • Pathways
  • Trails
  • Dirt roads

People

There are many ways to photograph people. Yes, they could be posing. But you can also capture candid moments. Don’t pressure yourself to try something as big as portrait, street, or wedding photography. Just find somebody you can take pictures of. You don’t have to know what you’re doing, just do it and something interesting will emerge.

Families (yours or a friends):

  • Newborn
  • Toddler
  • Child
  • Teen
  • Siblings
  • Twins, triplets
  • A whole family
  • 3+ generations

If you’re going out with friends to a park bring your camera along and tune into candid moments.

Kids:

One single child could provide you with an infinite number of possible photos:

  • Playing with bubbles
  • At a playground
  • Riding bikes
  • Playing sports
  • Swimming
  • Balancing

Photograph your friends with:

  • An interesting job
  • Hobby
  • Music
  • Farm
  • Sports
  • Artist
  • Chef
  • Tools
  • Business

You could expand your skills or even produce an entire portfolio just by committing to photograph a few people over the course of a month or two.

Animals

  • Pets
  • Friend’s animals
  • A farm
  • A vet
  • A shelter
  • Pet store (offer them social media photos)
  • Zoo
  • Aquarium
  • Bugs
  • Birds
  • Fish, water creatures

Remember to turn off your flash when photographing through glass so that it doesn’t create a reflection.

Events

When it comes to events you’re automatically combining people, places, food, animals and interesting activities. You can find plenty of events listed on your city’s website.

  • Sports
  • Public event/festival
  • Street photography
  • Parade
  • Contact a media network to see what photos they need
  • Local charity event
  • Animal shelter
  • Farmer’s Market
  • Fishers/Boaters/Marina
  • Air show
  • Car show
  • Dance
  • Concert

Stroll around with your camera at public events and photograph little details. This was at a car show.

Photography contests

Contests are a great way of generating ideas of things to photograph. Let somebody else think of the subject matter and then take up the challenge to photograph it in the most interesting way possible.

Search for contests in:

  • Your city website
  • Local paper
  • Photography magazine
  • Online
  • DPS challenges

Look around your home town or city and pay attention to icons that you normally just pass by. Or flip through tourist pamphlets and then photograph icons in new ways.

Architecture

  • Old buildings
  • Ruins
  • Modern buildings
  • Glass buildings
  • Interiors
  • Exteriors
  • Barns

I’m not normally one to photograph architecture, but I had been watching this house as it dilapidated over the years. I wanted to create a picture that captures the way it feels when I drive by.

Meaningful objects

  • Products for a small business
  • Crafts for friends Etsy store
  • Family heirlooms
  • Museum artifacts
  • Junkyard (rusty, textured items)
  • Food

Look for texture in the objects that you photograph.

Seasons and time of day

Don’t just photograph something and then move on. Consider what photos you might make of nature, people, animals, and events in each unique season.

  • Winter
  • Spring
  • Summer
  • Fall

I played baseball as a kid and feel nostalgic about it every autumn. One year I took a beat up old ball out to an abandoned ball diamond and photographed it. It allowed me to play with golden hour light for the first time and practice bringing my vision to life.

Remember that every season brings variety with each new day.

  • Sunrise
  • Midday
  • Sunset
  • Night
  • Moonlight
  • Cloudy day
  • Stormy day

This scene caught my attention because of the time of day. The golden sunrise reminds me of when I started work at sunrise for my first job out of high school.

Technique

In addition to all the possibilities mentioned above, consider what technique you might use to capture your images.

  • Black and white
  • Silhouettes
  • Close up, macro
  • Shadows
  • Reflections

Also, consider the unique possibilities when you focus on:

  • Angles
  • Background
  • Light

I knew when I took this photo of footprints in tire treads that it would be a black and white photo. The texture made me think black and white.

Choose something you always look at but never see.

Right now, there are likely 100 things in front of you just waiting to be photographed. Choose one thing to practice with.

Please, add to this list in the comment section below.


The post 100 Things to Photograph When You’re Out of Ideas appeared first on Digital Photography School. It was authored by Mat Coker.


Digital Photography School

 
Comments Off on 100 Things to Photograph When You’re Out of Ideas

Posted in Photography


You Should See what You’re Missing – Disadvantages of Shooting JPGs

31 May

In this article, learn about some of the disadvantages of shooting JPGs. It’s easy to see issues when they are in plain sight, but it’s much more difficult to see things when they are hidden. This situation applies to photographic images containing deep shadows and bright highlights.

When the tonal balance of a scene is unbalanced, some of the critical detail and even emotion of the photo can get lost in the process. The balance and distinction of all five tone-zones (highlight, quarter, middle, three-quarter, and shadow) are critical to image clarity.

Detail

Two Ladies Dresden - You Should See what You’re Missing - Disadvantages of Shooting JPGs

The above shot was captured in Dresden Germany while my camera was in Manual Mode (all the settings must be manually balanced). Obviously, my choice of exposure settings was horribly wrong. For that, I offer no excuses.

When something like this happens and you don’t have the chance to retake the image, you can still salvage most of the colors and tones if your camera was set to capture RAW images. Then you can judiciously adjust the tonal settings in RAW interpreter software (you can see my adjustments for that image below).

Two Ladies CR - You Should See what You’re Missing - Disadvantages of Shooting JPGs

My normal mode of shooting is to capture both JPEG and RAW images for this very reason. Had I only captured the JPEG file, recovery attempts would have been ugly. RAW files capture a latitude of tones well beyond the limited range of JPEGs.

Clarity

Mirror - You Should See what You’re Missing - Disadvantages of Shooting JPGs

Imagine trying to either shave or put on makeup in front of a fogged mirror. This would be a recipe for disaster. As long as water droplets remain on the mirror, the light waves are disrupted and the clarity is diffused. Mirrors, like good photos, rely on clarity. And in photography, clarity is always a product of contrast.

When clear distinctions are not present in the tonal range, detail gets lost. In this case, both the highlight and shadow are indistinct. There is no clear distinction between the highlights (the very lightest zone in the picture) and the shadows (the very darkest zone in the picture).

High Contrast Scenes

This reenactment of Shakespeare’s Macbeth at Atlanta’s Renaissance Festival took place at high noon on a very bright and sunny day (images below.

Renaissance image - You Should See what You’re Missing - Disadvantages of Shooting JPGs

Original image

While the camera correctly recorded both the strong highlight and the deep shadow, the contrast was so intense that detail was lost in both the highlight and shadow areas of the image. High contrast scenes often occur during daylight hours under cloudless or even partly cloudy skies.

The sun’s light was so intense that entire areas of the image are brightly illuminated while others are quite dimly lit. While our eyes can adjust to a wide gamut of light, the digital camera sensor cannot adjust to both extremes at the same time.

Renaissance image after - You Should See what You’re Missing - Disadvantages of Shooting JPGs

After editing

While detail is the product of contrast; I’m not talking about overall contrast, but internal tone-zone contrast. For a full range picture to display detail, there must be a clear separation of these five zones.

5 Zone Histogram

“Tone-zones” is a term I use to describe the five easily identified tones in a digital photograph. Almost all photos contain all five zones. The only exceptions are extreme high-key and extreme low-key photos.

The same lack of detail can be observed in very high contrast scenes; ones whose lighting range covers everything from black to white. The photo below shows a scene typically found in strong sunlight situations. The drama of contrast certainly makes the picture attractive, but significant detail is missing, and it’s missing in broad daylight.

Lost in the Shadows

In the image below left, the camera’s exposure setting averaged the exposure between the darkest and lightest values in the scene. Unfortunately, the strong sunlight cast dark shadows beneath the walkways and the image sensor had no way to distinguish these tones. The image on the right is after processing.


The most common challenge that we all face is when an image is bathed in light and perfectly exposed, but areas of deep shade conceal detail. The camera averaged all the light in the scene but could not compensate for the strong shadows. The image sensor captures the full range of light between highlights and shadows. But it cannot alter the internal contrast of the overall range, as it cannot discern what human eyesight perceives as “balanced” lighting.

Genoa Bridge before - You Should See what You’re Missing - Disadvantages of Shooting JPGs

The bridge pictured above is a prime example of the camera encountering too much light or dynamic range.

Notice that both the highlights (top left) are completely blown out and the darkest shadows (inside the tunnel beneath the bridge) are also plugged up. This situation requires human intervention. Careful adjustments to the shadows and highlights via Photoshop’s Highlights/Shadows dialog restored the detail. I converted the grayscale image to RGB and added the sepia look via the Hue/Saturation dialog.

Genoa Bridge After

Your camera and your eyes see differently

The tonality problem stems from the fact that your eyes can see and your mind can process much more dynamic lighting than your camera is capable of doing. The very scene that your mind pictured before you took the shot appeared a whole lot more detailed than the one that showed up on your monitor. So what happened, and why?

Every time you focus your eyes on a subject, your eye adjusts to the lighting in the portion of the scene that you want to see. Your eye’s pupil opens up to see detail in darker areas and closes (like the aperture in your lens) down to filter out the extremely bright light. Your eye has a distinct advantage over a digital camera though because it adapts to the lighting in each portion of the scene almost instantly.

When your attention shifts slightly, your eye adjusts to render the lighting perfectly. Well, almost perfectly. You still have limitations such as you can’t stare directly into the sun and see detail and you can’t distinguish serious detail under moonlight, but you get the idea.

This visual acclimation happens constantly and quite automatically because your eyes see real life pretty much the same way that a video captures motion; scores of individual “still” shots projected onto your mind every second. They appear and are adjusted by your mind so quickly that you don’t even notice that it happens.

Your camera is at a disadvantage

Your camera, on the other hand, captures one frozen moment of time for each picture. And since the camera cannot adjust to different areas of the scene individually, the current exposure setting only captures as much light range as it can within a single shot. Your camera’s limitations are determined largely by the ISO, shutter speed and aperture settings that you dialed in at the time the shot was captured.

This is in addition to the disadvantages of shooting JPGs.

While your camera does have limitations, there are adjustments you can make to both the internal and overall contrast of each image. Making these adjustments will bring your photos much closer in appearance to what your mind perceived when you clicked the shutter.

Low Contrast and Bad Color Balance

No matter how advanced your camera or how experienced a photographer you are, occasionally you end up with an exposure dud like this one. If the subject is important enough, you’ve got to find a way to rescue and restore the image to its full tonal range, color balance, and detail. The interior lighting of this centuries-old castle chapel was mixed and dark.


Your major adjustments are Hue, Saturation, and Luminance. To make the most of these tools I strongly suggest that you capture your images in RAW format and adjust them in a RAW interpreter (Lightroom, Camera Raw, Exposure X-3, ON1 Photo Raw, etc.). The major controls are very similar in each of these packages.

Conclusion

So do not ever be satisfied with what first appears on your monitor. If you captured the image in RAW format, you’ve recorded all the color and light information possible. On the other hand, if you only saved a JPEG file, your adjustments will be quite limited. Learn to move colors and tones around in your RAW images to see what your missing.

Push pixels around and stay focused.

The post You Should See what You’re Missing – Disadvantages of Shooting JPGs appeared first on Digital Photography School.


Digital Photography School

 
Comments Off on You Should See what You’re Missing – Disadvantages of Shooting JPGs

Posted in Photography


Dunning-Kruger Effect: Why you’re not as good a photographer as you think you are

13 Apr

Have you ever noticed that as you learn more about the world of photography, you tend to realize just how little you actually know? This phenomenon is what’s referred to as the Dunning-Kruger effect.

London-based photographer Jamie Windsor recently took to his YouTube channel to explain what it is, how it affects you and your work and even shares five things you can do to overcome thinking you know more than you actually do.

A chart from the video showing how perceived ability compares with actual ability according to the Dunning-Kruger Effect.

As explained in the video, the name of the phenomenon came from two social psychologists David Dunning and Justin Kruger. During a study, the two recognized that the less competent someone was at a given task, the better they thought they were. Put more simply, if you think you’re a great photographer, there’s a good chance you’re not nearly as amazing as you think you are.

Almost everyone falls victim to the Dunning Kruger effect at some point in their career. But the more self-aware you can become, the less likely you are to fall into the trap of being a bad photographer who thinks they’re good. To help combat this downward spiral, Windsor shares a few tips, which we’ve paraphrased and elaborated on below:

  1. Beware of feeling comfortable – If you start feeling comfortable in your abilities, try something new and expand your horizons. Don’t get complacent.
  2. Learn to let go of old work – Always try to one-up yourself and make your next shot your best shot. If you still think that shot from four years ago is your best, you probably haven’t improved much.
  3. Ask for feedback and constructive critique – It’s not always easy to hear, but an outside perspective can help you get a broader and more realistic view of your skills and ability.
  4. Always keep learning – “You have never learnt everything.” Never think you’ve finished learning something—everything is a rabbit hole of knowledge.
  5. Feeling bad about your old work is a sign of progress – Thinking your old work isn’t great means you’ve learned where you’ve fallen short and know how to improve your work.

In the end, Windsor emphasizes that no matter what you think of your work or how far you’ve come, it’s ultimately about enjoying the ride. His parting piece of advice is to ‘learn why you’re doing things, not just how to do them’.

To find more videos, head over to Windsor’s YouTube channel and subscribe.

via Reddit

Articles: Digital Photography Review (dpreview.com)

 
Comments Off on Dunning-Kruger Effect: Why you’re not as good a photographer as you think you are

Posted in Uncategorized


6 Mistake to Avoid When You’re Starting Out in Photography

15 Jan

Like most hobbies or professions, every photographer started out somewhere. This usually means they also made mistakes along the way from which they have learned.

The thing to remember is that everyone makes mistakes – even seasoned pros might on the odd occasion get things wrong, but the key is to learn from your mistakes and move on. As you become more experienced the mistakes will get less and less, but in the meantime, here are six mistakes to avoid when you’re just starting out in photography.

6 Mistake to Avoid When You're Starting Out in Photography

#1 – Avoid Skipping Over the Camera Manual

I often get asked if I have any advice for people starting out in photography and my first tip is to read the camera manual cover to cover. Even now, whenever I upgrade my camera I always read the manual a couple of times. Besides the fact that your camera is the tool you need to use to capture photos so you need to understand how to use it, the manual also has a wealth of information about photography.

Set yourself a task of reading each part over and over again until you understand it, then practice it using your camera until it becomes second nature to you. In an instant, you should be able to change settings, focus points, review images, and so on.

Cameras these days offer so many possibilities and you can only use your camera to its full potential if you know and understand everything about it.

6 Mistake to Avoid When You're Starting Out in Photography

#2 – Avoid Blaming Your Gear

Every new photographer has probably at some point early on in their photography journey said the words, “If only I had a better camera I could take better photos”. While better cameras allow you to take better photos by giving you more control, bigger image sizes, less noise, etc., that alone will not make you a better photographer and thus make you capture better photos.

A good photograph requires that many elements come together and regardless of the camera that you have, a boring or uninspiring subject will still be boring and uninspiring even shot with the latest high-end camera.

If you really want to improve your photography, first you need to improve the creative and visual elements. Things like being able to light the scene or subject nicely, compose/frame your image correctly and actually find interesting opportunities to photograph. Once you have mastered these parts, your photos will look better regardless of the camera you are using.

6 Mistake to Avoid When You're Starting Out in Photography

#3 – Avoid Skipping the Theory Parts of Learning

Like most things, the more you practice photography the better you will become. It’s easy to forget that there is actually some science and theory behind photography.

Now while you don’t need to understand every intricate part of the theory (unless you want to) and be able to recite color temperatures off by heart, it still does help if you know some of the basics. It can help you in your photography, but also it can give you an indication of the limitations of modern day DSLRs.

The great thing is that there is tons of information about photography online these days and you can learn as much or as little as you want to, at your own pace, in your own time.

6 Mistake to Avoid When You're Starting Out in Photography

#4 – Avoid Comparing Yourself to Others

When you are starting out in photography there will always be a part of you that looks at your work and compares it to other people’s. While you should always look at other photographer’s work and be influenced by those who you admire, trying to compare yourself to others is not only a pointless exercise but it might actually be detrimental to your long-term success.

You will find yourself trying to copy other people rather than developing your own style which is what can help you and your photos stand out from the crowd. So don’t get consumed by comparing your work to others, view other people’s work with admiration but never envy.

6 Mistake to Avoid When You're Starting Out in Photography

#5 – Not Being True to Yourself

One of the great things about photography is that you could send a brief to multiple photographers and they will all likely come back with different work. Whether it’s in their interpretation, their vision or their style – the key is that their work will all probably look different even if that difference is subtle. It’s this uniqueness that makes photography such a wonderful art form to be involved in. But all of those photographers have one thing in common and that is that they stay true to their own way of working.

Sure, at times you’ll have to adapt when working for clients on a brief, but when photographing for yourself, there should always be a synergy in your work. If you want a test to see if you have developed your own style, lay out a whole load of your photos on a table. You should immediately see a connection between them. If you don’t, then ask yourself why and try to understand what is different.

6 Mistake to Avoid When You're Starting Out in Photography

#6 – Not Doing What You Love

Most photographers will tell you that they absolutely love what they do, and they wouldn’t want to be doing anything else.

If photography is a hobby for you, why would you want to photograph something you don’t enjoy? Most people get into photography with a part of it that they really enjoy. For some, it’s travel images, for others, it might be food or weddings. Some people like shooting wildlife photos and others like sports photography.

Whatever your passion is, you’ll be far better off focusing on the things you love photographing rather than things you don’t enjoy as that passion will likely be shown in the quality of your work.

6 Mistake to Avoid When You're Starting Out in Photography

Conclusion

While this may seem like an obvious list, it’s incredible how often people still fall into these pitfalls. If you want a few more mistakes to avoid – go here.

Photography for many people is a hobby, and as such should be like any other hobby, an enjoyable activity. Avoid these beginner pitfalls and you’ll be sure to enjoy your photography even more and it will show in your work.

The post 6 Mistake to Avoid When You’re Starting Out in Photography by Kav Dadfar appeared first on Digital Photography School.


Digital Photography School

 
Comments Off on 6 Mistake to Avoid When You’re Starting Out in Photography

Posted in Photography


What to Photograph on Vacation When You’re Feeling Uninspired

28 Nov

Vacation is a great time not only to recharge and relax but also to practice your travel photography skills. Whether you’re a pro with lots of gear, or a hobbyist with your first camera, there are plenty of photo opportunities in a new place. In fact, there can be so many that you can easily get overwhelmed or uninspired to shoot anything at all.

If you hit a wall and don’t know what to photograph while traveling, here are some ways to fire up your creativity.

What to Photograph on Vacation When You're Feeling Uninspired

1. Shoot with a different lens

An easy way to literally change your perspective of the world is to use a lens you don’t normally shoot with. Trade your zoom lens for a prime and notice the way you view and capture the world from a fixed focal length.

If you usually shoot close-ups, try your hand at shooting wide, or vice-versa. If cost is an issue, invest in affordable or third-party lens options, or simply rent a lens.

2. Change up your camera

Similar to the point above, try your hand and shooting with a totally different camera. If you normally shoot with a DSLR, restrict yourself to shooting with a point and shoot or even your cell phone. Many small, compact cameras have improved greatly in image quality, and they might surprise you with their quailty.

By giving yourself a new technical challenge, you’ll open up room for creativity.

Mobile phone photography - What to Photograph on Vacation When You're Feeling Uninspired

3. Put yourself on assignment

One of the best ways to shoot more is to have an objective or project in mind. Even if you’re not on official assignment, you can invent a similar scenario. Think of the ideal photography project that you’d want to do for a client, such as luxury vacation photos of Mexico, and aim to make that photo portfolio.

These are the type of personal project that you could easily use later in your portfolio if you ever seek out paid, professional work.

4. Start a themed personal project

On the note of personal projects, here’s an easy one that you can do over the course of one trip or many. Pick out a theme or photography subject that interests you and capture versions of it in new places you travel.

As an example, you could photograph cultural foods unique to the region you’re in and put them in an album of “Ethnic Foods from Around the World.” Or focus on a topic such as unique doors of Italy, as I did on a recent trip.

Having a theme helps you focus and gives you something to look out for and photograph as you travel.

personal project photos  - What to Photograph on Vacation When You're Feeling Uninspired

This photo came about by simply talking to a beekeeper about my personal project surrounding farms. Before I knew it, I was suited up and having close encounters with honeybees.

5. Take advantage of Golden and Blue Hour

There are certain times of day when just about everything looks photogenic thanks to the positioning of the sun. While sunset and sunrise are obvious times of day, also consider Golden and Blue Hour, those times of the day just before/after sunrise and sunset.

On most days, this is when the lighting gets the most dramatic and optimal for shooting in natural lighting.

6. Do some research

If you’re in a new part of the world and don’t know what to photograph, check out what others have shot before. Go online and check Instagram hashtags or do a Google image search for the town you’re in. Find the iconic shots that others have taken and visit those places yourself.

Not only does this put you on a fun discovery quest, but it also gives you a chance to put your own unique twist on famous places.

travel photography tips - What to Photograph on Vacation When You're Feeling Uninspired

This photo came about thanks to poking around Google Maps and Google Image search.

7. Find some meetups

Thanks to social media and the availability of quality camera gear, there are talented photographers in just about every corner of the world. And odds are, there are easy ways to meet them in person. Try to attend Insta Meets or Meet-Ups for photographers in new places that you visit.

Or if you follow and admire a certain photographer’s work on social media, shoot them a message and see if they would like to meet and shoot in person. These are great ways connect to locals and get inspired to shoot in a new place.

8. Just go shoot (or don’t)

If you’ve reached the end of this article and still feel overwhelmed, just pick up any camera you have and go out and shoot! Don’t worry about finding the perfect image; just snap away at whatever inspires you.

Or keep your camera in your bag and just enjoy the moment. Sometimes, a little break from photography is exactly what you need to inspire your creativity.

travel photography tips - What to Photograph on Vacation When You're Feeling Uninspired

Sometimes the perfect photo unfolds in front of you when you least expect it.

Over to You

What tips do you have for getting past a creative slump? Please let us know in the comments below!

mobile phone photography - What to Photograph on Vacation When You're Feeling Uninspired

Did you know that smartphones like the Samsung Galaxy S8 can capture lightning? I gave it a shot on a pure whim and captured this image.

travel photography tips

Attending a cultural performance might inspire your creativity as well. Milan, Italy.

The post What to Photograph on Vacation When You’re Feeling Uninspired by Suzi Pratt appeared first on Digital Photography School.


Digital Photography School

 
Comments Off on What to Photograph on Vacation When You’re Feeling Uninspired

Posted in Photography