RSS
 

Posts Tagged ‘Women’

For Women Photographers: Review of the Madison Camera Bag by Aide de Camp

24 Nov

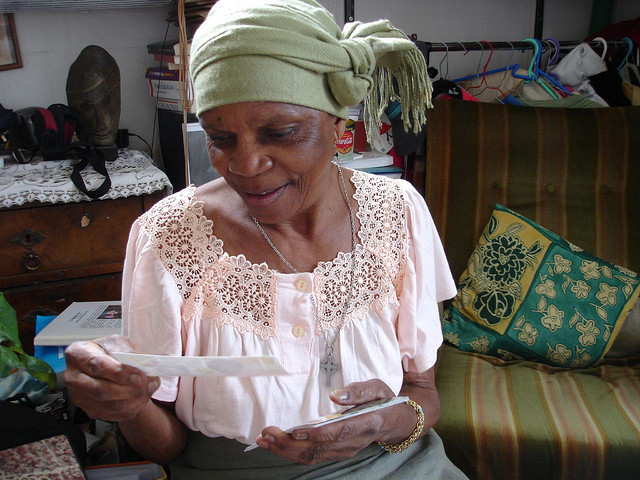
Last weekend, I went out on a photo date with Madison, and came home swooning. In a world where camera bags largely take the form of backpacks, shoulder sling bags, and messenger bags, finding a vessel to transport camera gear is notoriously difficult for women who would rather carry something that appears more feminine.

That is the problem identified by Michele Ng, a former marketing executive who founded Aide de Camp with the intent of producing attractive camera bags for busy and active women. The result is a collection of bags that, on the surface, resemble purses or totes that a woman would be proud to flaunt on her shoulder, yet on the inside are padded and structured to keep expensive camera gear safe. I took Madison, one of Aide de Camp’s flagship bags, on a test run and was very pleasantly surprised with the results.

Suzi-Pratt-Madison-6

Impressive from the get-go

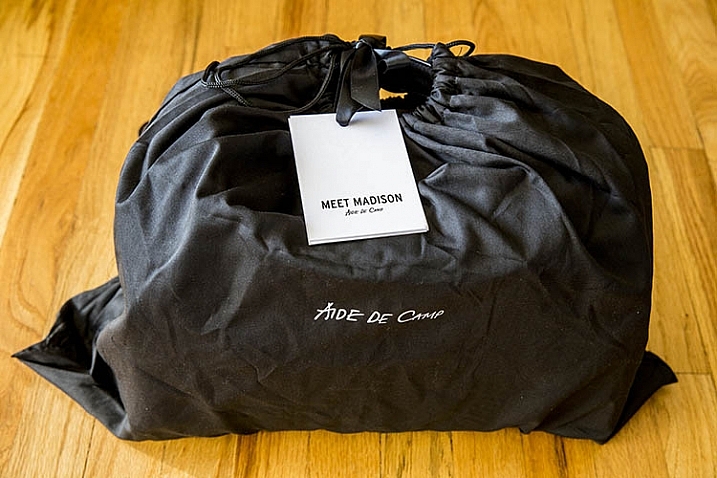
Aide de Camp’s products impress from the moment you open their packaging. Instead of the distinctly unstylish cardboard and bubble wrapped items we’ve come to expect from most other retailers, the Madison camera bag arrived at my doorstep in a sturdy black cardboard box and black fabric pouch, both totally solid enough to reuse in other ways. It was like unwrapping a Christmas present, and it set the tone for the pretty, yet functional, product inside.

fashionable camera bag

Surprisingly large

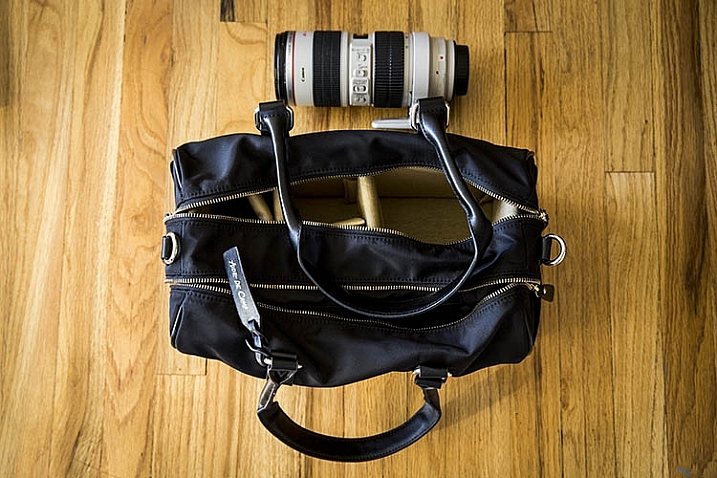
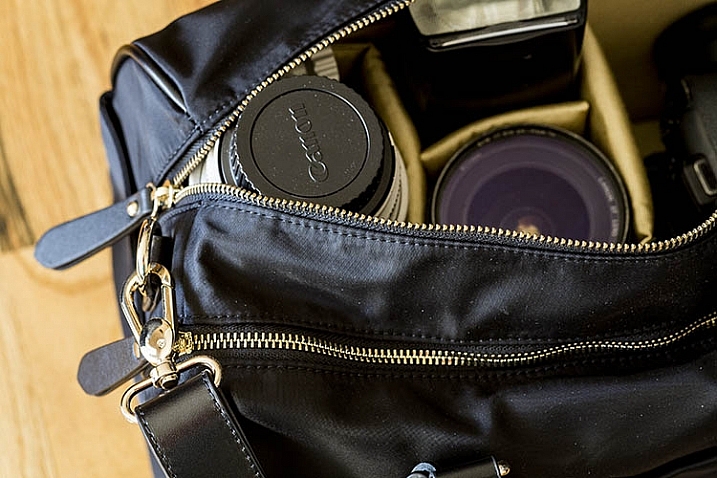
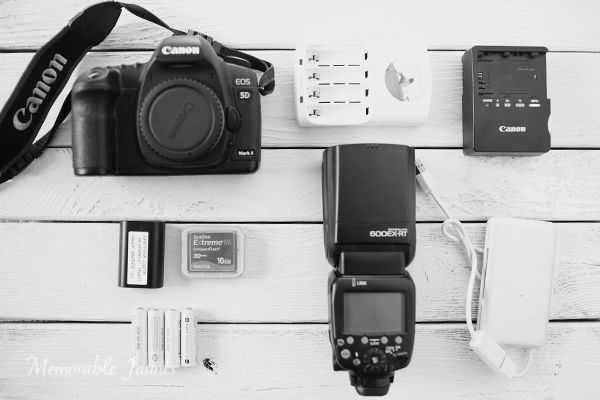
Madison’s approximate dimensions are 14.5″W x 8.5″H x 8″D, making it a pretty sizable shoulder bag, as pictured below with a Canon 70-200mm f/2.8 in the frame as a reference to its size. The bag has two main compartments; one with a thickly padded, removable camera insert box, and the other with thinner compartments for holding everyday items such as a wallet, tablet, e-reader, etc.

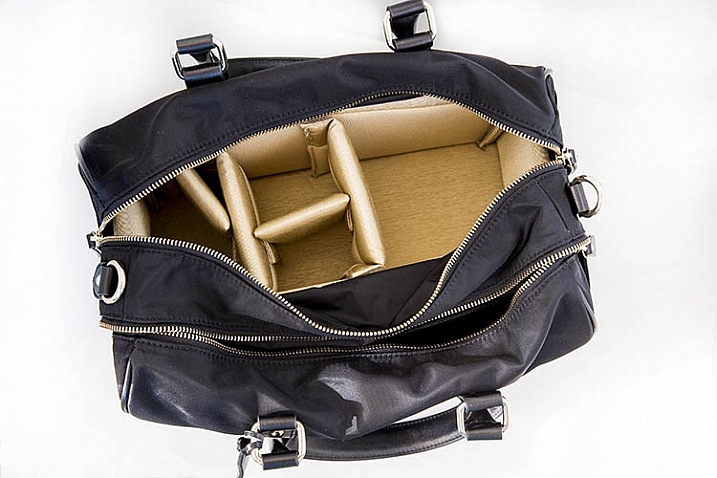
The spacious, easily accessible, secondary pocket was a definite perk as many other camera bags seem to add extra pockets as an afterthought, making them impossibly thin and difficult to access. Also, the removable insert is sold on its own item on Aide de Camp’s website, making it easy to convert just about any spacious bag into a camera bag. Given the fact that Madison, and most Aide de Camp bags, come with a removable camera insert, this bag could easily double as a weekend or overnight bag.

Suzi-Pratt-Madison-4

Suzi-Pratt-Madison-5

Fits more gear than you would expect

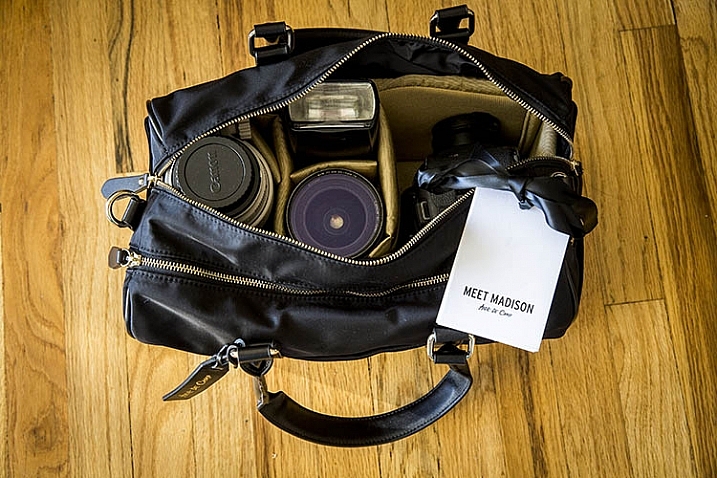
Given Madison’s ample size, it should come as no surprise that you can pack almost all of your essential camera gear in this bag. The bag’s website promised that both mirrorless camera systems and small DSLR cameras could fit, yet I was amazed when even my larger Canon 5D Mark III with a 50mm f/1.4 lens attached was able to comfortably sit in Madison’s camera insert box without feeling too cramped. I was also able to put a Canon 580 EXII flash, a Canon 16-35mm f/2.8, and Canon 70-200mm f/2.8 lens in the camera section of the bag and zip it up without too much of a hassle, although the telephoto lens was just barely able to fit. Even with the camera section fully maxed out, the secondary pocket was still pretty spacious and I could easily slip a tablet, e-reader, and other essential items in with no problem.

Suzi-Pratt-Madison-2

Made of premium materials

After unwrapping Madison, I was struck by how solidly built the bag was, while at the same time maintaining a sleek, rich appearance. Madison’s exterior is composed of water-resistant lightweight nylon along with genuine leather handles and trim, and 14-karat gold plated zippers. The bag itself has two short 9″ long handles, but it also comes with an optional cross body strap that is adjustable from 34-53 inches in length.

Suzi-Pratt-Madison-1

Only one feature to be wary of

For all of Madison’s fashionable and practical features, there is one glaring detail that is hard to notice: the bag’s straps are not padded, making it not very ergonomic if you were to pack the bag with heavy camera gear. In that sense, it’s wise to follow Aide de Camp’s recommendation and only put mirrorless or compact DSLR camera gear in this bag if you plan to carry it for a long time.

Over to you

Do you think there’s a demand for camera bags that appear more feminine and fashionable? If so, would you give Madison a try? Have you tried other similar brands? What did you think?

googletag.cmd.push(function() {
tablet_slots.push( googletag.defineSlot( “/1005424/_dPSv4_tab-all-article-bottom_(300×250)”, [300, 250], “pb-ad-78623” ).addService( googletag.pubads() ) ); } );

googletag.cmd.push(function() {
mobile_slots.push( googletag.defineSlot( “/1005424/_dPSv4_mob-all-article-bottom_(300×250)”, [300, 250], “pb-ad-78158” ).addService( googletag.pubads() ) ); } );

The post For Women Photographers: Review of the Madison Camera Bag by Aide de Camp by Suzi Pratt appeared first on Digital Photography School.


Digital Photography School

 
Comments Off on For Women Photographers: Review of the Madison Camera Bag by Aide de Camp

Posted in Photography


Portrait Tips for Posing Women

15 Jun

Editor’s note: this week we will be featuring a series of articles on posing for portraits. Look for a new one each day. If you miss any make sure you subscribe to our newsletter and you’ll get a reminder of all our articles once a week.

Let’s face it – unless you are working with professional models who know exactly what to do, and how to pose in front of the camera with little to no direction from the photographer, most of your clients, especially women are self-conscious and stiff the moment they get in front of the camera. Nervous laughs and fidgety hands are all signs that they are uncomfortable; they need to feel at ease and are looking for a lot of direction from the photographer. As photographers that is our primary job – to make the client feel comfortable with us, being in front of the camera, and also give them beautiful photos of themselves. To that end, there are some simple tips and poses that work wonders especially for posing women in portraiture.

DPS Articles for posing tips for women 07

#1 Put them at ease and make them laugh

Even before you start taking their pictures, make small talk; ask them about their day and try to get them to relax. Find out what they think is their good side, and why, and keep that in mind while photographing them. If all else fails and they are still very uncomfortable and stiff, have them close their eyes, and at the count of three, open them and give you a very natural smile. This works almost 100% of the time. When they have their eyes closed, they relax their body and face and are able to gather their composure for a few seconds. If you have a continuous photographing mode in your camera (i.e. burst mode), use that to take a quick series with their eyes closed and when they open them. There is bound to be one that will work.

DPS Articles for posing tips for women 06

 #2 Avoid stiff limbs

Choose poses that avoid awkward angles to their hands and feet. Have them sit down on a chair, on the floor, or even on the sidewalk. With older women, have them sit on a chair and cross their legs. This gives a little poise and grace to the image. With younger women, or if you are outside, have them sit down on the ground, or lean against a wall or a fence, and cross their legs at the ankles. Always make sure there is a little bend in the limbs to soften the stance.

DPS Articles for posing tips for women 05

#3 Give them something to do with their hands

Often when posing people if the hands are awkwardly hanging on the side of their body, it looks weird and unnatural. Instead direct your clients by giving them something to do with their hands. Touching their face lightly, putting their hands through their hair, twirling the ends of their hair with their hands, holding the folds of their dress, interlacing their fingers, and putting their hands on their lap all work well. This gives women something to focus on, and helps them relax.
Give your clients something to do with their hands.

Give your clients something to do with their hands.

#4 Find the right angle to point the camera

Women always want pictures that make them look slimmer. This is easily achievable by a small change in the angle of the camera. Photographing from slightly above the client with the camera pointing downward, elongates the neck and gives a long lean effect to the face. This also helps define the jaw line. One caution, don’t photograph down at a 90 degree angle to the face. Not only is this an uncomfortable pose to hold when the client is looking straight up, but you don’t want to photograph down someone’s nose!

If you have to photograph women straight on where the camera is parallel to the face, have your clients slightly tilt their head to the right or left. Again, this relaxes the face, neck, and shoulders and gives a little twist to the normal straight-on portrait photo. Sometimes standing behind the client and having them look over their shoulder at you also works. To me this is a very natural and candid pose – as if they were doing something and turned to take a casual candid photo. One thing to be watch out for here is unflattering creases around the neck.

DPS Articles for posing tips for women 02

Looking up at the camera

DPS Articles for posing tips for women 03

#5 Environmental elements

There is just something really magical about the wind blowing and lifting the hair, or even beautiful catchlights in the eyes. This almost instantly adds a wow factor to a portrait. If you happen to be outside, try and use such environmental factors to your advantage. If you are indoors, the same effect can be achieved with a small fan, simple hair dryer, or even an extra reflector used to create some wind.

For catchlights, if you are outdoors, place your client in an open shade area and look towards a light source (the sun or even an off-camera flash). If it happens to be a cloudy day, or if you are photographing inside in a studio, catchlights can be achieved with reflectors. If you have a reflector that has multiple colored sides, use the sliver side and hold it at a 90 degree angle, or less, to the face. Play with the reflector placement to get the right look you want.

DPS Articles for posing tips for women 04
To me, all these tips have a common thread – pose your client such that they are comfortable in the pose. An uncomfortable pose or stance will show itself  obviously in your images, no matter how lovely you think the pose is. Never force a client into a particular pose.

Feel free to share tips that work for you when posing women for portraits.

Check out more in this week’s posing series here:

  • Portrait Posing Tips- How to Help People to Relax and Take Better Photos
  • 5 Unposing Tips for Kids for More Natural Photos
  • How to Pose People for Headshots

googletag.cmd.push(function() {
tablet_slots.push( googletag.defineSlot( “/1005424/_dPSv4_tab-all-article-bottom_(300×250)”, [300, 250], “pb-ad-78623” ).addService( googletag.pubads() ) ); } );

googletag.cmd.push(function() {
mobile_slots.push( googletag.defineSlot( “/1005424/_dPSv4_mob-all-article-bottom_(300×250)”, [300, 250], “pb-ad-78158” ).addService( googletag.pubads() ) ); } );

The post Portrait Tips for Posing Women by Karthika Gupta appeared first on Digital Photography School.


Digital Photography School

 
Comments Off on Portrait Tips for Posing Women

Posted in Photography


Safety Tips for Travel Photographers (Particularly Women)

06 Mar

Let me first address the obvious that while this article talks about safety tips for women photographers, it does not mean that these tips don’t apply to men as well. Most are general tips that could be applied to both genders. Being a woman photographer who has started to venture out alone for photoshoots and solo photowalks, these are things that I notice and practice as I do travel photography.

Solo Hiking in the Appalachian Trail in Great Smoky Mountain National Park USA

Solo Hiking the Appalachian Trail – Great Smoky Mountain National Park, USA

It all started with a single trip. A couple of years ago while visiting Great Smoky Mountain National Park in the US, I decided to flex my muscles and go for a solo hike with my young kids. This was supposed to be a bonding experience as well as a confidence booster that I could do this alone. So off we went, water bottle and camera in hand to hike a two to three mile stretch of the Appalachian Trail.

Half way into the trail, my confidence took a nose dive, as I realized I had done several stupid things – I vaguely remember telling my husband the actual trail we were going to take, we only had one bottle of water among the three of us, I was carrying 20lbs of photo gear and I had no emergency kit or even a phone. My kids, then 7 and 3, were hot and cranky and there was no end in sight. In my paranoia of either being attacked by a bear or a crazy psychopath on the trail, we literally sprinted the entire way. Thankfully, my husband had started off at the other end of the trail and met up with us. While it was an adreallian pumping, nerve racking experience, it did make me realize that with a few simple tips, one can travel smart, safe and actually have a wonderful time.

#1 Research, research and then do more research

Bird Photography in Chennai India

A google maps satellite search revealed a bird photographer’s paradise literally five minutes from home when I travelled to Chennai, India

There is no lack of informational resources for someone wanting to travel anywhere in the world. Between maps, guide books and online forums we can pretty much take a virtual tour in our pajamas and not have to leave the comfort of our homes. But if you are anything like me, the wanderlust bug is very prominent and the urge to escape the clutches of everyday life too urgent to ignore. Make sure you know everything there is to know about the place you want to visit. Scope out all the possible locations that interest you in detail. There are many online photography and travel forums where you can post questions around photographic opportunities for specific locations.

#2 Record and insure your gear

This is one of those business expenses that may seem like it is discretionary but trust me, it is absolutely critical especially if you plan to travel extensively. Having that peace of mind that your gear is as protected as it can be is very liberating.

#3 Blend in as much as you can

Safe Travel Tips for Photographers DPS Article Memorable Jaunts

A simple bag pack to carry your equipment might be the best travel gear to blend in with the locals

With a camera in one hand and a map/guide book in the other, chances are you already stand out from the local crowd. Try not to make it more obvious in the way you dress or behave. The smart thing to do is to blend in with the locals. Dress like the locals wherever possible, then if you have done your research and planned out your excursion you don’t need to hold on to the map (a sure giveaway that you are a tourist).

#4 Keep an updated itinerary with family and friends at all times

Safe travel tips for women photographers DPS Memorable Jaunts Article

Have a plan of where you want to go and what you want to do and make sure you communicate that to the right people

This seems like a no-brainer but often times is easily overlooked. It’s one of those travel smart strategies that could literally save a life. This is one time when having a game plan for where you want to go, and when you want to get there is advisable particularly for solo travellers. Avoid changing plans on the fly – especially if you have taken the time to research and scope out the best photographic opportunities for your trip. If you have to change travel plans, make sure changes are communicated to the right people, at the right time.

#5 Plan for emergencies

Lets face it – this is life, not a scripted, rehearsed, movie set. Chances are things are going to go wrong – travel plans may change, equipment may malfunction, batteries may run out. Regardless, have a plan of action for some of the more obvious mishaps. Keep numbers handy for any local camera shops in case you need to use them in a pinch – definitely a much cheaper option than having things shipped or mailed to you, especially if you are out of the country.

#6 Listen to your gut

Words like “gut feeling” and “woman’s intuition” do actually exist, and more often than not, they are spot on. Trust your instincts. At the end of the day missing a photo opportunity is not as critical as being safe. Don’t do anything that you are not comfortable doing.

#7 Carry only the essentials

Safe travel tips for photographers DPS Memorable Jaunts Article

We photographers LOVE our gear and cannot imagine being away from it. Most of us feel we need every lens and gadget for every shoot for those what if situations. But challenge yourself to pack light. Maybe you only want to shoot with a wide angle lens or the nifty-fifty. Carry only what you need and not all the gear you own – your body will thank you.

#8 Carry personal protection equipment

No, I am NOT advocating carrying a gun or other such personal protection mechanisms. Personal protection can mean different things to different people and can also differ based on the situation. For a while I carried pepper spray in my purse. Then I switched to a swiss army knife. Then I decided that my 90lb german shepherd dog was my best defense mechanism especially for local sunrise and sunset photo excursions. Choose what is appropriate and practical for you.

Do you have any safe travels tips to share based on your personal experiences? Feel free to share…

googletag.cmd.push(function() {
tablet_slots.push( googletag.defineSlot( “/1005424/_dPSv4_tab-all-article-bottom_(300×250)”, [300, 250], “pb-ad-78623” ).addService( googletag.pubads() ) ); } );

googletag.cmd.push(function() {
mobile_slots.push( googletag.defineSlot( “/1005424/_dPSv4_mob-all-article-bottom_(300×250)”, [300, 250], “pb-ad-78158” ).addService( googletag.pubads() ) ); } );

The post Safety Tips for Travel Photographers (Particularly Women) by Karthika Gupta appeared first on Digital Photography School.


Digital Photography School

 
Comments Off on Safety Tips for Travel Photographers (Particularly Women)

Posted in Photography


F-Stop Gear’s Kashmir camera bag is designed for women

04 Dec

F-Stop Gear has introduced Kashmir, a camera backpack designed specifically for women. Kashmir is billed as an ultra-light camera pack with a harness system and torso height adjusted to complement a woman’s body, something accomplished through the use of an Ultra Lite EVA-padded hip belt and what the maker says are ‘female specific S-shoulder straps’. The bag is being funded through Kickstarter. Read more

Articles: Digital Photography Review (dpreview.com)

 
Comments Off on F-Stop Gear’s Kashmir camera bag is designed for women

Posted in Uncategorized


Women To Get A Stronger Image In Stock Photography

22 Feb

women-stock

The stock industry is about to change.

We’ve heard that before but this time the change, if it happens, will be positive, affect content rather than distribution and will give new opportunities to photographers to shoot not just more images but more interesting images.

The change is coming from Sheryl Sandberg. Facebook’s CEO has teamed up with Getty to promote a new collection of images that portray women in a more positive way. Instead of the usual clichéd stock images of women in suits, women holding babies and women laughing alone with salad, the collection will show girls on skateboards, women in the operating theatre and women planing wood. Even men get a look in with dads now shown wearing the bjorn.

The collection currently contains more than 2,500 images which will be returned alongside the usual results for relevant search terms. Buyers can also search the collection exclusively. Ten percent of the proceeds from the photos will go to LeanIn.org, Sandberg’s non-profit organization.

The aim, says Sandberg, is to change the way women and girls are portrayed in the media and to remove many of the old stereotypes that she believes hold women and girls back.

“When we see images of women and girls and men, they often fall into the stereotypes that we’re trying to overcome,” Sheryl Sandberg told The New York Times, “and you can’t be what you can’t see.”

The effect of the shift in imagery could be huge. The three most-searched keywords on Getty are “women”, “business” and “family” and yet buyers often complain they can’t find the images that portray those keywords in the way they want. Writing in The Cut last November, for example, Emily Shornick produced a slideshow of results for the keywords the publication typically needs to illustrate. “Girl power” and “feminist” returned women, often scantily clad, in boxing gloves and gripping dumbbells and power tools; “career women” stand on cliffs or climb symbolic ladders, hold folders and fall asleep on computers; a “businesswoman” is a multi-armed octopus who can hold a baby, a computer, a frying pan and an iron in her many hands. Despite the millions of images available on stock sites, few of the results produced the “feminine sass” the publication was hoping to find when it searched for “girl power.”

The aims of Getty’s new collection then are laudable. More images of women engineers and female coders in the media and in advertising can only be a good thing for encouraging girls to take up the sciences. They may even come as a relief to photographers looking for a shoot more creative than one that involves telling another model in a business suit to hold a laptop and smile.

Do Advertisers Want Strong Women?

The question, though, is whether buyers will go for these new portrayals. The Cut might be looking for sassy images of girl power but how representative is that magazine of buyers in general?

It’s possible, in fact, that despite the advances women have made in the workplace over the last few decades, art buyers have gone backwards.

In 1981, Lego’s famous ad showed a little girl holding a model made of colored bricks. That ad wasn’t just portraying the creativity that its product allowed children to enjoy. It was also suggesting that its bricks were for all children, boys and girls alike. Today’s toy marketing is much more gendered. Stores now are more likely to have pink shelves for girls and blue shelves for boys. In catalogs, girls brush princesses, pet puppies and play with dolls; boys build towers, push cars and experiment with chemistry sets.


toys-stock

That three-quarters of the more feminist images now included in Getty’s Lean In collection aren’t new suggests the company might indeed struggle to make sales. Those photos were drawn from Getty’s main collection where, presumably, they were passed over by buyers who chose instead to purchase images with traditional portrayals.

For photographers, that represents a dilemma. As keen as photographers might be to produce more positive depictions of girls and women, they have to shoot what sells not what they wish customers would buy (especially if that 10 percent donation to LeanIn.org is taken before Getty has calculated their royalties.) Restaurant owners might wish people would buy fruit juice instead of soda, but if people buy soda, they’ll continue to offer it. This wouldn’t be the first time that buyers have complained about the stereotyped nature of stock imagery even as they fill their shopping carts with it.

Getty Can Make The Market

The real strength of this initiative though is that Getty has thrown its weight behind it. The company doesn’t just supply images to a market. It also tries to influence that market. Each year, its research department issues reports on trends in the stock industry. That tells photographers what they might want to shoot if they want to increase their sales but it also tells buyers what they should be buying if they don’t want their ads to look old and out of date. Getty is influential enough to create trends as well as report on them. Current trends, the company says, include a preference for realistic body shapes and more shots of women at work.

Getty’s collaboration with Lean In is a positive move but photographers will need to be careful. It’s easy for Getty to promote a particular kind of image but if the sales of those new images fail to occur it will be the photographers who are left holding the bill for the shoots. Photographers who find that their traditional portrayals of happy salad eaters and boxing businesswomen make them profits shouldn’t have to risk their revenues to please buyers who are afraid to take risks themselves.

The best strategy will be to continue shooting images that you know can find buyers, keep an eye on the trends and the Lean In collection, and ease more positive portrayals into the shoots as you see those becoming popular.

If the stock industry is changing again, we’ll all need to manage that change carefully.


Photopreneur – Make Money Selling Your Photos

 
Comments Off on Women To Get A Stronger Image In Stock Photography

Posted in Equipment


Inspiring Portraits of Women – a Collection of Images

31 Jan

mona-lisa.jpg
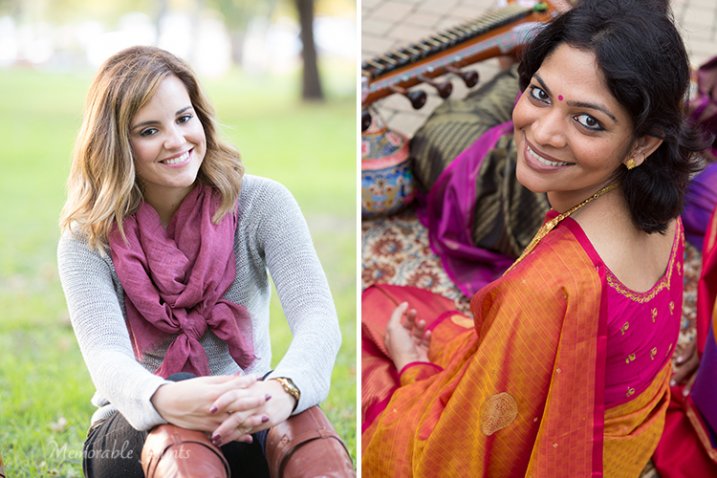
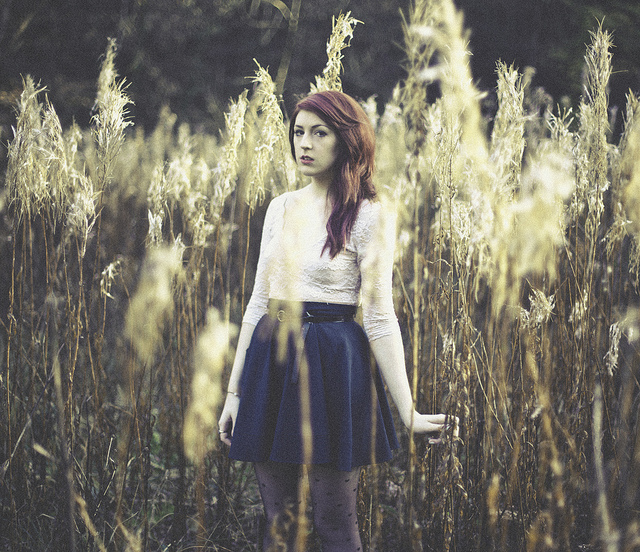
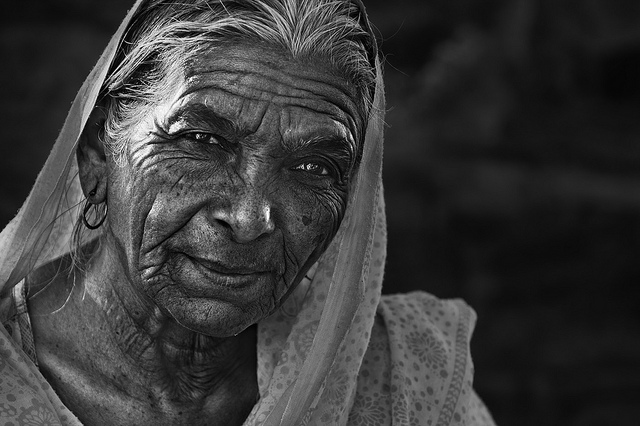
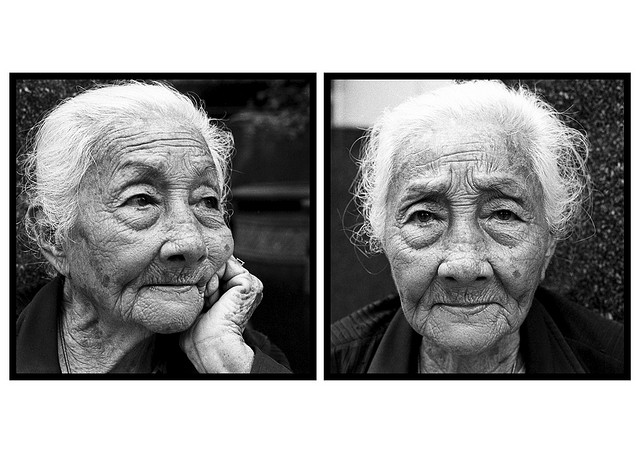
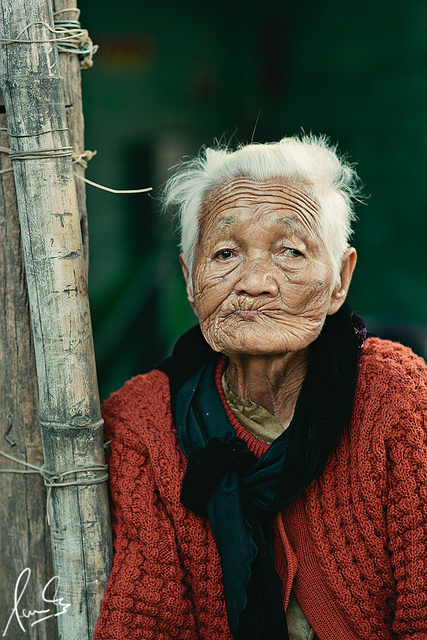
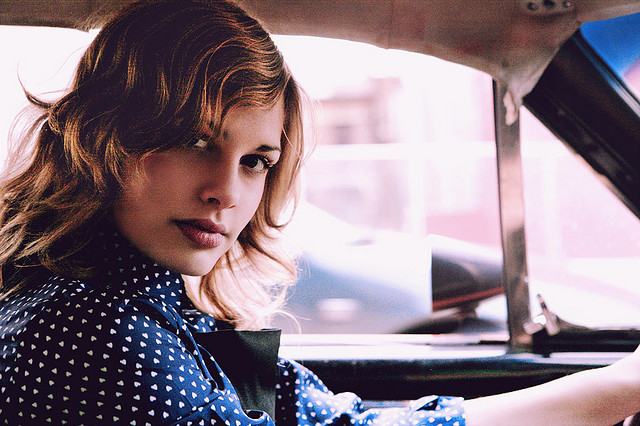
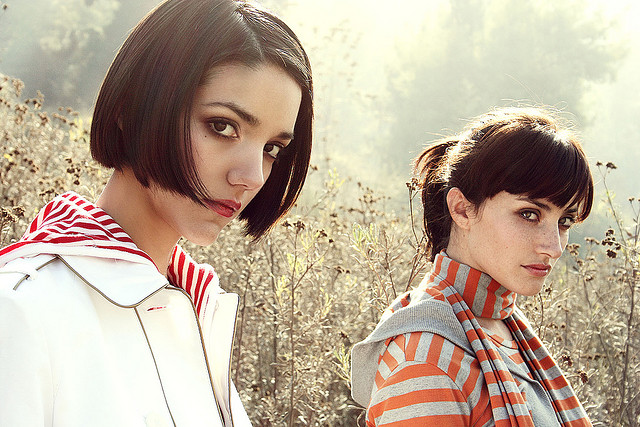
This week as part of our Portrait Deep Dive we’re going to look at portraits of ladies. So let’s start with one of the most famous, the Mona Lisa.

Darren wrote – What the Mona Lisa can teach us about taking great portraits

Painted almost 600 years ago she’s still as lovely today as she was then. Why does this painting work so well? What about it is so intriguing? Is it the lighting, or her sly smile? I like to think it’s because she’s an elegant woman of her time.

Old, young, trendy, casual, sporty, elegant, contemptuous, spirited, or shy; today we celebrate the ladies.

Let’s look at some inspiring portraits of women in this collection today:

By Zuhair A. Al-Traifi

By Trey Ratcliff

By Sukanto Debnath

By Christopher Walker

By www.karlocamero.com

By joshuaporter.co.uk

By Zuhair A. Al-Traifi

By Andy Leddy

By Petras Gagilas

By Andy Leddy

By Sukanto Debnath

By Chloe Wright

By Ronn aka “Blue” Aldaman

By Girish Suryawanshi

By Prachanart Viriyaraks

By hydropeek

By nicksushkevich

By Sacha Fernandez

By Ryan Seyeau

By Julie Kertesz

By Vineet Radhakrishnan

By MD. Hasibul Haque Sakib

By LynchianDreams

By kris krüg

By ????????? ????????

By Dorret

By andrea floris

By Steve Jurvetson

By Hannah Kate

By Simón Pais-Thomas

By Joe Gunawan | fotosiamo.com

By Simón Pais-Thomas

By LBY

By Simón Pais-Thomas

By Lotus Carroll

By Micha? Huniewicz

By Sean Molin

By reway2007

Missed some of the articles earlier this week? Check out:

  • The rewards of photographing people when you travel
  • How to create portraits with depth
  • How to choose the perfect portrait lens

Do you have a favorite portrait of a special lady in your life? Or perhaps yourself? Please, do share!

The post Inspiring Portraits of Women – a Collection of Images by Darlene Hildebrandt appeared first on Digital Photography School.


Digital Photography School

 
Comments Off on Inspiring Portraits of Women – a Collection of Images

Posted in Photography


7 Tips for Helping Women Love having their Photo Taken by You

14 Oct

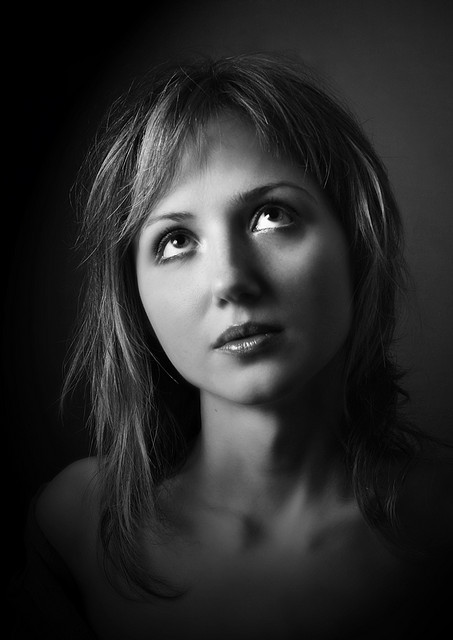
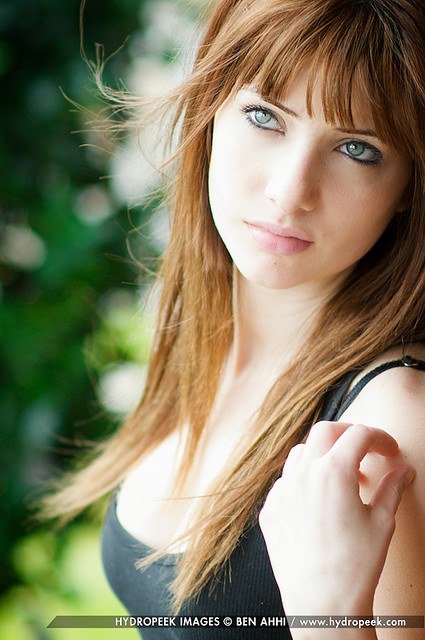
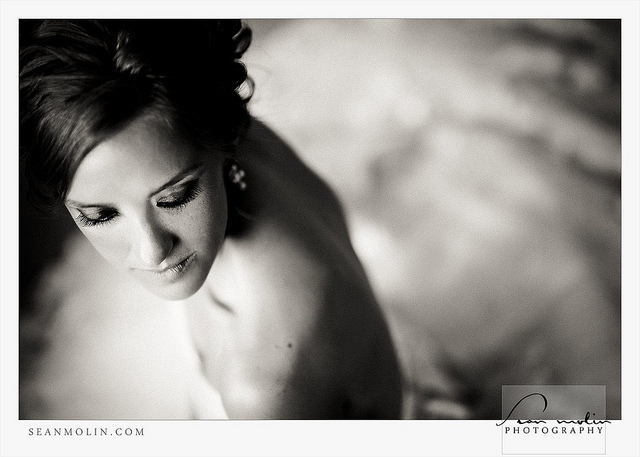
When I look at a picture of myself, I can point out a million things I hate: my hair is always flat, I hate the ptosis in my left eye, I hate the shape of my brow bone, I have a bad complexion. And I’m a photographer! How can I expect women in front of my camera to feel any different than I do when I have to endure having my photo taken? I know that some men hate having their photo taken, too, and many of them probably aren’t as easy to admit that they hate their complexion or the shape of their brow bone, but I’m sure they think these things.

As in any situation, we photographers just need to start by asking ourselves…what would we want? How would we want a photographer to treat us? It’s a pretty simple, solution, really…to behave in line with the golden rule.

Women usually aren’t afraid to offer criticism about themselves. In fact, we’re downright professionals at criticizing ourselves. So if a woman truly hates having her photo taken, she usually says so upon making the booking with you. At that point, I would first congratulate her on coming to the point of actually making the booking in the first place. That’s a big step!

I wouldn’t have a questionnaire for her to fill out about the things she hates about herself. And I wouldn’t make promises and I definitely wouldn’t mention the word ‘Photoshop’. The instant you say ‘Photoshop’, I guarantee that 90% of women instantly begin thinking of Madonna, Kim Kardashian…any and every celebrity who looks NOTHING in real person like they do in magazines. And they may expect/require you to edit every last hair on their head, freckle on their body, roll of fat on their hips. And before you know it, you’ve aged 10 years infront of your computer editing one session.

Instead, this is how I would proceed:

  • Upon the first conversation and placing the booking, just assure her that having photographs taken by a professional is different and if she’s never done it before, she will probably love it in the end.
  • Simply ask: “what do you hate about it?” This will probably lead on to things she hates about herself. But don’t let her dwell on it too long. Ask what she loves about herself. Make notes about all this and keep them to yourself.
  • When you start shooting,  she might behave or seem awkward and uncomfortable. If so, talk to her as you’re shooting. Ask if she feels a certain side is her ‘good side’. Get her laughing. Tell her she looks great. But don’t patronize her. I mean…I know my left eye is droopy from Ptosis. If someone said it wasn’t, that would make me more uncomfortable.
  • When I edit, I will subtly smooth and ‘suck in’ bumps and bulges. I won’t eradicate them all together because that wouldn’t be natural. But I just do a little work that she won’t even notice and I’ve never had a woman as to get her muffin top put back the way it was! Of course, I understand that this is a controversial topic and doesn’t work for everyone.

Some tips on photographing women:

  • For goodness sake. Please PLEASE be responsible with low shots. I very rarely see a photo of a woman taken from down low (looking up) that doesn’t make her look totally unattractive. This isn’t a good angle no matter the size or shape of who you’re photographing. Friends don’t let friends get photographed this way so beware that a loving friend may tackle you at any point should you choose to proceed with a low shot.
  • On the opposite side of the spectrum. shooting from above (or even a slightly down-angeled POV) can be very flattering for a lady, particularly a fuller figured one. But also beware that this is the calling card of a large lady – this trick has become so well known. Don’t overdo it or you’ll be kind of highlighting the fact that she’s larger rather than minimizing it.
  • Learn from the red carpet – those poses aren’t accidental. Celebrities have training for how to handle the red carpet photographers. Learn their tricks so you can guide your subjects through poses that will highlight their lovely long legs or help minimize their post-partum baby bulge. And you don’t have to tell them what you’re doing because naturally, that will make them feel self conscious.

One hour with a sensitive professional can change a woman’s view of herself forever.

Post originally from: Digital Photography Tips.

Check out our more Photography Tips at Photography Tips for Beginners, Portrait Photography Tips and Wedding Photography Tips.

7 Tips for Helping Women Love having their Photo Taken by You

The post 7 Tips for Helping Women Love having their Photo Taken by You by Elizabeth Halford appeared first on Digital Photography School.


Digital Photography School

 
Comments Off on 7 Tips for Helping Women Love having their Photo Taken by You

Posted in Photography


Posing Guide for Photographing Women: 7 More Poses to Get You 21 Different Photos [Part III]

20 Jul

A post by Kaspars Grinvalds from Posing App.

This is the third article in the series. You may want to look at the previous ones here: 7 standing poses [Part I] and 7 sitting poses [Part II].

Let’s move on with 7 lying down poses for women. And again I’ll briefly try to describe the process, how I tried to slightly adjust these poses in order to get three different photos for each pose.

Pose 1

Pose1

Very simple pose to start with. After getting the model into initial position, ask her to raise the upper body as high as she comfortably can.

7poses3 1

Photo 1: The first picture is the result of recreating this simple pose. Notice that you should shoot from very low angle, nearly from the ground level.

Photo 2: With such a basic pose as this one, you always have different options to variate – different hand placements, head tilts, eye directions and face expressions. In this shot the only difference is hand placement and slightly lowered upper body.

Photo 3: And I continued by asking the model to lower down even more. Notice that tighter crop is also a nice option to differentiate your shots.

Pose 2

Pose2

Very similar pose as the first one, but this angle is better for including longer model’s body line in the frame. And notice that one of the model’s legs is bent in the knee. This helps to raise her bum up for a better looking body shape.

7poses3 2

Photo 4: If you compare this shot with the first one, you will notice that it is nearly the same pose, but the changed angle gives different look to the image.

Photo 5: And again I continued with different hand placement. Note that hand doesn’t support the head, it actually doesn’t support anything, it’s just placed in the hair.

Photo 6: And one more hand placement variation and tighter cropping.

Pose 3

Pose3

Another very similar pose to the previous ones, the main difference again is the shooting angle – right from the front. At this point the model hasn’t even moved from the initial position, it’s the photographer who moves gradually around her.

7poses3 3

Photo 7: Here the model already started to repeat the gestures from earlier shots. Don’t be afraid to take these nearly similar poses as these minor variations might be invaluable when selecting the final choice of images in post production.

Photo 8: The variations with both hands stretched in front.

Photo 9: And close-up crop again, but this time with the eyes closed.

Pose 4

Pose4

We continued with the next easy and straightforward lying down pose.

7poses3 4

Photo 10: An easy to describe and really easy to execute pose.

Photo 11: Again, only couple of options to change here. Arms could be connected under the breast line as in this example. The arms could also be stretched back behind the head for another variation.

Photo 12: And in this photo the model tried to achieve kind of dreamy look with eyes closed and hands placed asymmetrically.

Pose 5

Pose5

Lying down very low. Works very good as well for close-up portrait shots.

7poses3 5

Photo 13: As my model was lying on the sandy beach, I asked her to support the head on the hand, but in other settings the head might as well touch the ground.

Photo 14: Here I asked the model to raise the head higher and keep the hands placed asymmetrically.

Photo 15: And the next variation was sleeping pose with eyes closed.

Pose 6

Pose6

Lying down on the side. Couple of points to check. The left leg is crossed over the right. The left arm is rested on the hip and partly hidden behind the body. The right hand is placed under the head but it supports it with only the tips of the fingers. If the model’s head would be fully supported by the hand the pose would just indicate tiredness.

7poses3 6

Photo 16: Following the previously described instructions, the model easily recreated the sample pose.

Photo 17: Here basically only the right hand’s placement is different. And placing it down on the ground instantly raises her upper body higher.

Photo 18: From there she straightened the supporting hand and raised the body even more higher.

Pose 7

Pose7

And finally a bit more demanding pose. The biggest challenge for the model is to keep an air of relaxation. Ask her to fold her head back as far as possible while slightly facing it to the camera. And this posture for sure works best with eyes closed.

7poses3 7

Photo 19: If the model can manage to look relaxed, the results will be rewarding.

Photo 20: This pose is a nice variation to the previous one as it’s far more simple for the model to recreate.

Photo 21: And here I asked the model to raise higher up and took the shot from above.

So, together with the previous articles – 7 standing poses [Part I] and 7 sitting poses [Part II] – you now have lots of poses to choose from. For more variation and a more dynamic result I would suggest to choose a few from each article and mix them in a single shoot. You will very soon discover that even a small number of starting poses is more than enough to have a great, productive session.

All of these illustrations and many more posing samples are available on Posing App for your mobile devices.

Kaspars Grinvalds is a photographer working and living in Riga, Latvia. He is the author of Posing App where more poses and tips about people photography are available.

Post originally from: Digital Photography Tips.

Check out our more Photography Tips at Photography Tips for Beginners, Portrait Photography Tips and Wedding Photography Tips.

Posing Guide for Photographing Women: 7 More Poses to Get You 21 Different Photos [Part III]


Digital Photography School

 
Comments Off on Posing Guide for Photographing Women: 7 More Poses to Get You 21 Different Photos [Part III]

Posted in Photography


Posing Guide for Photographing Women: 7 More Poses to Get You 21 Different Photos [Part II]

21 Jun

A post by Kaspars Grinvalds from Posing App.

If you haven’t read the first article in this series, I would kindly recommend you to start with Posing Guide for Photographing Women: 7 Poses to Get You 21 Different Photos – Part I where we started with 7 standing poses.

Let’s continue this time with 7 sitting poses for female subjects and their possible variations in order to get at least three different shots for each pose.

Pose 1

Pose1

Nice and simple pose to start with. Ask your model to sit comfortably with knees placed together. One hand relaxed on the knees while the other hand placed near the neck. And remind her to straighten the spine.

7poses2 1

Photo 1 – This basic starting point provides you with many different choices to continue with. But in the very beginning you may want to just test different shooting angles and heights and check what works best for your model.

Photo 2 – After I got the first shot similar to the sample, I asked the model to lower both arms and rest them on the knees.

Photo 3 – And finally I returned to the initial pose and took a close-up portrait shot.

Pose 2

Pose2

Another easy pose with hands placed together between the legs. Notice that arms should not be completely straightened, rather slightly bend at the elbows. Also in the sample pose it is illustrated that toes should be straightened in order to raise the knees slightly up.

7poses2 2

Photo 4 – The model easily recreated the sample pose and we could move on with some variations.

Photo 5 – This shot is exactly the same pose just taken from a side. Minor change but already different result.

Photo 6 – And again one more close-up portrait shot but this time the model is looking down her own body.

Pose 3

Pose3

Another very simple pose with one leg crossed over the other. And I have to say here that including the legs in the frame can be challenging because it doesn’t work with all body types. If your model is curvy, consider framing closer comps (for example as in photos with the previous pose).

7poses2 3

Photo 7 – My model was with slim body type, nice legs and stylish shoes, so I chose to go for a full height frame.

Photo 8 – In exactly the same manner as with the previous sample I simply took this shot from a different angle. The model didn’t change anything, just turned her head to the camera.

Photo 9 – After that we repeated the already tested posture with one hand close to the neck. This hand movement is a very nice variation and works in many posing scenarios.

Pose 4

Pose4

This pose however is even more demanding than the previous one because it is all about the legs and thus there is no point of cropping them out. And nice shoes are a must.

7poses2 4

Photo 10 – Recreating it isn’t hard as the pose is fun and creates nice and playful mood to the photo.

Photo 11 – Here the model is looking down and kind of fixes her shoe. Very subtle changes but completely different photo.

Photo 12 – And once again the same pose but taken from a side creates one more variation.

Pose 5

Pose5

Simple and easy pose for the model sitting on the ground. And to my mind, in contrast to the previous on the chair poses, sitting on the ground works better barefoot.

7poses2 5

Photo 13 – The pose is kind of very natural and is easy to recreate. And as a result the model looks really relaxed.

Photo 14 – After recreating the initial pose, different hand placement options are available. Here for example the model raised them and connected on the knee.

Photo 15 – Only two minor adjustments to the initial pose were made here. Putting one hand up in the hair and slightly curving upper body part to the side. This also lowers the raised knee. The result is another friendly and natural looking pose.

Pose 6

Pose6

Another easy sitting on the ground pose. Very suitable for different close-up portrait shots.

7poses2 6

Photo 16 – While sitting in the initial pose try making two different versions with only the front arm and then with both arms raised on the knees. Both versions works well.

Photo 17 – A slight hand placement variation. This variation works very well for tight crops.

Photo 18 – And don’t be afraid to be spontaneous from time to time. This photo was just an improvisation on the go while sitting in the initial pose.

Pose 7

Pose7

And finally I purposely chose also one simple portrait pose for the sitting samples. Despite the fact that only face is visible in the frame, it’s more comfortable for the model to recreate it while being seated.

7poses2 7

Photo 19 – Here I tried to illustrate the previous statement and showed the sitting position. You may visualize how it would work cropped only around the face.

Photo 20 – Keeping the “portrait with hands around the face” concept in mind, try different variations by moving hands around and making different head tilts.

Photo 21 – In order to achieve the most natural postures in the image ask the model to really move hands around. In this particular example she moved her hand through her hair and I made several shots and afterwards chose the best hand position.

So, this was a process of using 7 sample poses as the starting point to create 21 different photos. I encourage you to try this approach to posing your subjects in a similar workflow and most probably you will find your own and even better ways to achieve some great results.

All of these illustrations and many more posing samples are available on Posing App for your mobile devices.

Kaspars Grinvalds is a photographer working and living in Riga, Latvia. He is the author of Posing App where more poses and tips about people photography are available.

Post originally from: Digital Photography Tips.

Check out our more Photography Tips at Photography Tips for Beginners, Portrait Photography Tips and Wedding Photography Tips.

Posing Guide for Photographing Women: 7 More Poses to Get You 21 Different Photos [Part II]


Digital Photography School

 
Comments Off on Posing Guide for Photographing Women: 7 More Poses to Get You 21 Different Photos [Part II]

Posted in Photography


Women Posing Guide in Action: 7 Sample Poses – 21 Different Photos

04 Jun

A post by Kaspars Grinvalds from Posing App.

Previously published articles in the Posing Guide series contained hand illustrated posing samples as a guide or reference during your photo shoots. Based upon feedback and questions I received about these guides, I wanted to describe the process in a little more detail and show some real photos created while using these posing techniques.

I’d like to begin by stating once again – the main purpose of using posing samples is only to get your model into some starting point. That’s it. You don’t need to (and quite often you wouldn’t be able to) precisely recreate even the simplified illustrated pose.

This will be a three part series looking at standing, sitting and laying down poses for female models. For the the first article I chose seven sample standing poses and by slightly adjusting each pose I got 21 different photos. Now, let’s take a look at this process.

Pose 1

Pose1

It is a good idea to start your photo shoot with some very basic, easy pose. That’s why I chose this one to begin with. It’s easy to describe and easy to understand – “portrait shot from a side”. So you might start with saying to your model “Ok, turn with your side towards me, turn your head to me and look right over the shoulder at the camera. Straighten your spine and keep hands loose by sides.”

7poses 1

Photo 1 – With these instructions you should get something like the first picture. The next thing without changing the pose, is to “find” the face expression you’re looking for. You may want to try moving from very subtle smirks to stronger smiles or even laughter. And once you have the expression (or different ones) you’re after, tell and show it to the model. Thereby it will be easy for the model to learn and repeat it.

Photo 2 – After I got the simple and kind expression I was looking for, I slightly changed my position and asked the model to keep looking back over her shoulder to the camera. Exactly the same pose, just taken from another angle and you already have a slightly different photo.

Photo 3 – Also many different looking directions and head tilts are possible. In this particular example I asked the model to look back down her body. This look works very well in many posing situations, creating yet another variation just by slightly adjusting the starting pose.

Pose 2

Pose2

Seeing this sample illustration you should grab only the basic idea – “portrait shot with hands around the face”. That’s all you need for playing around with initial sample pose. Eventually you will come up with some nice variations of your own.

7poses 2

Photo 4 – Before getting to the hands, ask the model to stand facing the camera and support her body weight on just one leg. This instantly curves her body and her shoulder line is shifted. After that ask her to gently move her hands around the face and in the hair. Generally look for asymmetrical hand placements, but as you can imagine – many variations are possible.

Photo 5 – In this shot the only difference is slight tilting of the head and putting one hand behind the hair.

Photo 6 – To differentiate the look and feel, I once again asked the model to look down her own body and cropped tighter around the face. And again with only minor adjustments from one pose we’ve got 3 different photos.

Pose 3

Pose3

Another easy pose with very simple idea – “hands connected on the chest”. Notice that hands are not really “crossed”, but “connected”. Also you should warn your model not to grip them too tight or press upper arms against the body. Simply put, the posture should feel comfortable and subtle.

7poses 3

Photo 7 – Before taking this shot, I showed the model the sample illustration and she tried to recreate it. This is as close as you usually get if you recreate the sample pose.

Photo 8 – The outlines don’t and won’t match perfectly. In this particular example I took a shot from higher angle aiming slightly down because I saw that this angle works better for the model.

Photo 9 – Another simple way of transforming the pose is simply mirroring it the other way around. And to even more differentiate it from the first shot, I asked the model to lean against a wall.

And then I moved closer and took a head shot for just another variation of the same pose.

Pose 4

Pose4

This simple pose is again self-explanatory – “the model turned to the side with one hand on the waist”. That’s all I tried to recreate.

7poses 4

Photo 10 – Here I started straight away with mirroring the sample pose because this was the better looking side for my model. Remember that it is different for each person. If you are not sure, take both variations and ask your model which one she prefers.

Photo 11 – From side view I followed to 45 degree position and asked the model to keep looking to the camera.

Photo 12 – Lastly, I just moved farther away for wider frame. The same pose, but these minor variations provide you with greater choice of images to select from in post.

Pose 5

Pose5

This pose provides simple yet elegant at the wall concept – “standing at the wall with hands behind the back”.

7poses 5

Photo 13 – Start with asking your model to support herself at the wall with her back. After that the first thing to take care of is shifting her body weight on one leg with the other crossed over it. Even if the legs are not visible in the frame, it is critical for forming the model’s body in S shape. Then ask her to place her hands behind her back asymmetrically. Finally ask her to lean forward slightly away from the wall with her upper body part.

Photo 14 – As usual I tried changing my shooting angle and took the next shot more from a side.

Photo 15 – And I continued to experiment with slightly different hand placement and head tilt. These images might be very similar, but most probably your subjects will be grateful for this kind of choice.

Pose 6

Pose6

Another at the wall pose but this time with the model facing the wall. Easy to describe and recreate. Both hands are gently placed on the wall right in front of her just below the breast line.

7poses 6

Photo 16 – With the previous instructions the model easily achieved the described pose. And again I chose mirroring the sample illustration which already is one variation for any pose.

Photo 17 – Here I changed the shooting angle nearly parallel to the wall and cropped for a portrait shot.

Photo 18 – Finally the model changed the hand placement asymmetrically for just another variation.

Pose 7

Pose7

This is a bit more challenging pose than the previous ones, so definitely some guidance for the model is required in order to recreate it.

7poses 7

Photo 19 – The trick for the model here is to stand slightly off the wall and support herself against the wall with the front shoulder only. Front hand is loosened by the wall. After that the model should support the body weight on the outer leg, kicking the hip out with the inner leg crossed over. The back arm rests on the hip and the elbow is pulled behind her back.

Photo 20 – After managing the starting pose I started to variate it. Here I moved closer for tighter crop and asked the model to lean slightly forward along the wall.

Photo 21 – And finally I asked the model to turn sideways, supporting against the wall with both shoulders. And to further differentiate the shots I asked her to look down her body.

So, that’s it. Out of 7 sample poses we managed to get 21 different shots. And as you can easily imagine, even these are only samples, adjustments and variations are indeed endless.

All of these illustrations and many more posing samples are available on Posing App for your mobile devices.

Kaspars Grinvalds is a photographer working and living in Riga, Latvia. He is the author of Posing App where more poses and tips about people photography are available.

(function(d){
var f = d.getElementsByTagName(‘SCRIPT’)[0], p = d.createElement(‘SCRIPT’);
p.type = ‘text/javascript’;
p.setAttribute(‘data-pin-hover’, true);
p.async = true;
p.src = ‘//assets.pinterest.com/js/pinit.js’;
f.parentNode.insertBefore(p, f);
}(document));

Post originally from: Digital Photography Tips.

Check out our more Photography Tips at Photography Tips for Beginners, Portrait Photography Tips and Wedding Photography Tips.

Women Posing Guide in Action: 7 Sample Poses – 21 Different Photos


Digital Photography School

 
Comments Off on Women Posing Guide in Action: 7 Sample Poses – 21 Different Photos

Posted in Photography