RSS
 

Posts Tagged ‘Window’

How to Achieve Great Portraits with Window Light

21 Jun

The post How to Achieve Great Portraits with Window Light appeared first on Digital Photography School. It was authored by Mat Coker.

dps-great-portraits-with-window-light

When you learn to do portraits with window light you can set up a studio anywhere there is a window.

In this tutorial, I’ll give you all the important information, including what to do with different window sizes, where to position the person, and how to make their eyes sparkle.

You’ll see examples of newborns/infants, children, professional headshots, and candid moments.

The bigger the window, the nicer the light

The first thing that you should know about making portraits with window light is that the bigger the window, the nicer the light. What each photographer considers to be “good” light is relative. But many photographers want soft light for portraits.

If you would like soft light for your portraits, then you need a large window. If you want harsh light, look for a smaller window.

This principle is true for all light sources; the larger the light source, the softer the light will appear on your subject.

Natural light portrait
Notice how dark and crisp the shadows are when using a small window (approximately 12 inches by 12 inches). ISO 1600 f/2.5 1/320 sec
window light portrait
But the window in this photo was about ten times the size, resulting in brighter light and softer shadows. ISO 1600 f/2.4 1/500 sec

Remember that small windows are more likely to create harsh looking light with dark, crisp shadows, while larger windows will produce softer-looking light with gradual, subtle shadows.

A larger window will also create more sparkle in the eyes (you’ll learn how to do that below).

Where to position the person

Now you know how to get soft light or harsh light for your portraits.

The next thing you need to know is where to position the person for the portrait.

If you have beautiful soft light, but you position the person wrong, then the light won’t look pleasing on the person’s face.

Portrait lighting usually looks best when the light source is in front of the person, but off to the side. It also helps if the light source is a little higher up.

portraits with window light
Notice that the window is beside the infant and that she is placed back a bit.
Natural portraits portrait with window light
This is the resulting portrait. 50mm ISO 1600 f/4.0 1/500 sec
laying down portraits with window light
In this case, I laid her down with the window above her. I could have turned her to the side a little bit, but decided not to because I like the way the catchlights will appear in her eyes.
laying down portraits with window light
This is the resulting portrait with bright catchlights. 50mm ISO 1600 f/4.0 1/250 sec

Do not sit them in direct sunlight

If there is direct sunlight coming in the window, make sure that you do not sit your subject in the direct sunlight. If you do, the window will no longer be the true light source; rather, the harsh sunlight will now be the light source.

infant portraits with window light
Notice how the two girls are positioned in this photo. The one on the left is in direct sunlight, while the one on the right is out of the direct sunlight.

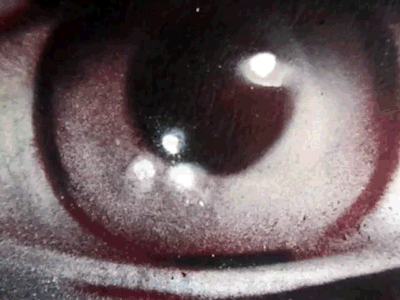
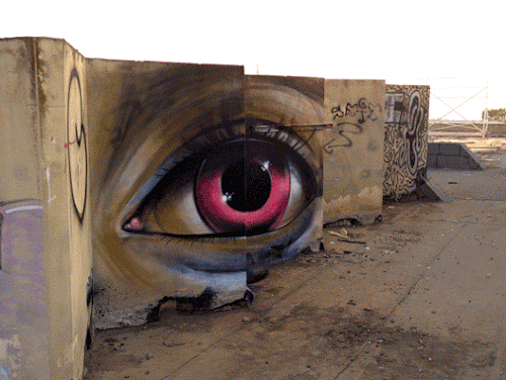
How to make their eyes sparkle

The sparkle in the eye that you see in portraits is called a catchlight. You create catchlights by making sure that the window is reflected in your subject’s eyes.

catch lights portraits with window light
Do you see the sparkle in the top left corner of her eyes? This is the window reflecting in her eyes. 50mm ISO 1600 f/4.0 1/500 sec
Position of catch lights
You can tell where the window is positioned by where the reflection is in her eyes. Now that she has turned her head, the catchlights are in the lower part of her eyes. 50mm ISO 1600 f/4.0 1/500 sec

When doing portraits with window light, be sure to bring your portrait to life with catchlights.

How to get rid of unwanted shadows

It can be hard to take a portrait using a window and have no shadows on the face. But you can fill in those shadows or make them disappear using a reflector. Remember, you can use any large white surface as a reflector.

Window light for headshots

At this point, you understand that large windows create soft light, you can use a reflector to fill in shadows, and that catchlights create a sparkle in the eye. You’re on your way to having a pro studio set up in your living room!

Here is a setup that you can use for headshot portraits with window light.

portraits with window light
The same principles apply; a large window will make softer light, set your subject beside and behind the window a bit.
window light headshots
Notice the soft light and nice catchlights. A reflector was used for this portrait.
candid portrait with window light
No reflector was used for this portrait.

Window light in everyday life

Now that you know the principles, you can use window light with candid photography as well.

Remember that it is often good to have the light source coming from the side. However, you can experiment by putting the window behind your subject to make creative silhouettes. You can also get creative by allowing direct sunlight to fall on your subject.

Did you know your home was filled with such great light sources?

Studio strobe lights are wonderful to use, but they’re not always affordable or practical to drag around.

Once you know the principles, you can use windows just as effectively and creatively as strobe lights.

Remember these principles when making portraits with window light:

  • Larger windows create softer light
  • Smaller windows create harsh shadows
  • Do not sit your subject in direct sunlight
  • Have the window to the side and in front of your subject
  • Use a reflector to fill in shadows
  • Catchlights create a sparkle in the eyes
  • Use a backdrop for professional portraits
  • Get creative with backlight and candid moments

One of the best ways to get started is to use a toy as a model. Go and have some fun with this and share your results with us in the comments!

The post How to Achieve Great Portraits with Window Light appeared first on Digital Photography School. It was authored by Mat Coker.


Digital Photography School

 
Comments Off on How to Achieve Great Portraits with Window Light

Posted in Photography


Weekly Photography Challenge – Window Light

23 May

The post Weekly Photography Challenge – Window Light appeared first on Digital Photography School. It was authored by Caz Nowaczyk.

Since many of us are still limited to where we can go, this week’s photography challenge topic is the WINDOW LIGHT!

window light reflected on walls
The window light here has cast shadows on the floor. I also made this black and white and boosted the contrast. © Caz Nowaczyk

Window light is the way that the sunlight comes through a window or glass door and creates interesting light-play on walls, floors and other surfaces. It creates shadows, it can sometimes create colors. Anyway, get your cameras out and capture the way the light falls through your windows.

You can also play with them in post-processing if you like – make them black and white, or boost contrast. The possibilities are endless.

I look forward to seeing your shots!

window light reflected on walls
I loved the way the light made this little bokeh balls of light on the wall. © Caz Nowaczyk
window light reflected on walls
This was the light reflecting through blinds onto the wall and ceiling. They made for interesting shapes. © Caz Nowaczyk
Weekly Photography Challenge – Window Light
Morning sunlight streams through my front glass door, which has an ornate metal pattern. It creates interesting shapes in the shadow on the wood paneling. I decided to boost the contrast and make this one black and white too. © Caz Nowaczyk

Check out some of the articles below that give you tips on this week’s challenge.

Tips for photographing WINDOW LIGHT

How to Achieve Great Black and White Photos in Editing

How to Use Color Temperature in Black and White Conversions

How to Create Silky Split Toned Black and White Photos Using Luminosity Masks

12 Tips For Indoor Natural Light Photography

How to Split Tone Black and White Photos in Lightroom

Simply upload your shot into the comment field (look for the little camera icon in the Disqus comments section) and they’ll get embedded for us all to see. Or, if you’d prefer, upload them to your favorite photo-sharing site and leave the link to them. Show me your best images in this week’s challenge.

Share in the dPS Facebook Group

You can also share your images in the dPS Facebook group as the challenge is posted there each week as well.

If you tag your photos on Flickr, Instagram, Twitter or other sites – tag them as #DPSwindowLight to help others find them. Linking back to this page might also help others know what you’re doing so that they can share in the fun.

The post Weekly Photography Challenge – Window Light appeared first on Digital Photography School. It was authored by Caz Nowaczyk.


Digital Photography School

 
Comments Off on Weekly Photography Challenge – Window Light

Posted in Photography


Weekly Photography Challenge – Window Views

18 Apr

The post Weekly Photography Challenge – Window Views appeared first on Digital Photography School. It was authored by Caz Nowaczyk.

Since we are all stuck indoors, this week’s photography challenge topic is the WINDOW VIEWS!

Weekly Photography Challenge – Window Views
unsplash-logoChristie Kim

You might want to do a full interior scene with the view as a partial element, or you may like to shoot with the window itself in the frame. Alternatively, you may just want to do a photo of your view from an open window, with no hint of the window in sight.

If you choose to do the full interior with the window view, you may need to play with bracketing your exposures and HDR in editing to get an even exposure for the interior and the view.

So, check out these pics to give you some ideas, have fun, and I look forward to seeing what you come up with!

Weekly Photography Challenge – Window Views
unsplash-logoHaibin Wu
Weekly Photography Challenge – Window Views
unsplash-logoKelly Arnold
Weekly Photography Challenge – Window Views
unsplash-logoNicholas Design

Check out some of the articles below that give you tips on this week’s challenge.

Tips for photographing the WINDOW VIEWS

Tips for Shooting Cityscapes Through a Window at Blue Hour

Tips for Minimizing Reflections When Photographing Through Windows

Tips for Photographing Real Estate Interiors

How to Photograph a Real Estate Interior or Property

A Guide to Creating Stunning HDR Images

How to Use Bracketing to get Your Best Shot – 3 Different Methods

6 Types of Bracketing Your Camera Can Do and How to Use Them

Simply upload your shot into the comment field (look for the little camera icon in the Disqus comments section) and they’ll get embedded for us all to see or if you’d prefer, upload them to your favorite photo-sharing site and leave the link to them. Show me your best images in this week’s challenge.

Share in the dPS Facebook Group

You can also share your images in the dPS Facebook group as the challenge is posted there each week as well.

If you tag your photos on Flickr, Instagram, Twitter or other sites – tag them as #DPSWindowViews to help others find them. Linking back to this page might also help others know what you’re doing so that they can share in the fun.

The post Weekly Photography Challenge – Window Views appeared first on Digital Photography School. It was authored by Caz Nowaczyk.


Digital Photography School

 
Comments Off on Weekly Photography Challenge – Window Views

Posted in Photography


Widen your window: a message to landscape photographers

17 Mar

If there’s one thing landscape photographers obsess over more than gear, it’s light. And often, we fall into the trap of treating light as a zero-sum game – either a sunset is amazing or it’s a complete fizzer. This all-or-nothing mindset is detrimental to our growth as photographers and the work we can produce.

Instead, when we approach our time in the field with a richer appreciation for the subtle, ever-changing interplay between light and landscape, we foster greater opportunities for creative expression.

Expectations create limitations

Early in my landscape photography journey, I would fixate on burning sunrises and sunsets. Almost obsessively, I would track the clouds each day, searching for the signs of a promising explosion of color. While every month or two the heavens would align, more often than not, the sky either fizzled out or failed to produce the color I had hoped for.

By tying our time in the field to ‘great light’, we limit our opportunities

Chasing idealized visions of light, I’d either a) go out anticipating perfect conditions, only to be disheartened when it didn’t materialize, or b) I wouldn’t go out at all if there weren’t signs of a banger on the way. I’m not sure which was worse. Both mindsets have been harmful to my development as a photographer. In hindsight, internalizing the concept of ‘perfect light’ falling across each scene was an unrealistic expectation—one that set me up for disappointment and hampered the images I took.

By tying our time in the field to ‘great light’, we limit our opportunities. Opportunities to grow in versatility. Opportunities to better experience landscapes and compose scenes. Opportunities to expand, refine and execute on our photographic vision.

Go out earlier, stay out later

If you’re the kind of person who, like I was, predominantly shoots 20 minutes either side of sunset (or sunrise), then consider widening your capture window. That is, arrive on location an hour earlier, and continue taking images well into twilight.

This enables you to gain a more rounded understanding of the key elements of the scenes unfolding before you. Exploring locations without looming time pressures offers you the freedom to discover compelling compositions. Compositions that may not present themselves to others who simply arrive at the car park 10 minutes before sunset.

Time is a limited resource, particularly so for some more than others

(Note: This emphasis on time is understandably more difficult for people traveling or working another full-time job—people like me. Time is a limited resource, particularly so for some more than others. If that’s you, then reflect on your priorities. Do you want to capture a collection of good images from multiple locations? Or is your preference for a handful of great images—images that you’d be proud to add to your portfolio?)

Additionally, expanding your capture window forces you to experience the landscape under ever-changing lighting conditions. Over a one hour period on sunset, a scene can change from golden side light, to indirect light from colorful clouds overhead, to soft, yet moody, blue light before dusk arrives. Sometimes a burning sky can be too overwhelming, commanding all the attention in an image, while softer light during twilight may better emphasize the mid-ground and foreground elements.

Challenge yourself

By allowing yourself more time, you can still reserve a window for your ideal composition later in the shoot. Having that composition safely scheduled away opens up new opportunities to create images you not only previously overlooked, but may have entirely not thought possible.

Furthermore, this mindset needn’t – and shouldn’t – apply to sunrise/sunset scenes. Challenge yourself to head out during non-ideal conditions. When time allows, explore landscapes in the middle of the day, after (or for those more adventurous, during) rain or even under moonlight.

Without a colorful sky acting as a crutch to make the scene interesting, how else might you compose it make it compelling? For seascapes, try shooting handheld and getting even closer to the action. For forest scenes, consider shooting with a telephoto lens to really focus in on the subject and remove all distractions. While it’s approaching cliche, experiment by adding a human element to your image for an enhanced sense of scale and place. And when all else fails, shoot abstract – capture intimate details that hone in on key elements of the landscape.

Final thoughts

This article shouldn’t be treated as a prescriptive guide – nor would I want it to be. Each of us has our unique way of seeing and capturing the world around us. That’s one of the reasons so many landscape photographers are passionate about their craft. It’s a medium for personal expression.

Rather, I’m sharing this article to encourage you to expand the scope of your photography and of your potential as an artist. To broaden your view of the images you can (and hopefully will want) to create. To open up new possibilities for your creative vision.


Mitch Green is a Melbourne based Travel and Landscape photographer. He can be found via his website, through Instagram, or down by the beach at 5am waiting for sunrise.

Articles: Digital Photography Review (dpreview.com)

 
Comments Off on Widen your window: a message to landscape photographers

Posted in Uncategorized


How to Mimic Window Light in a Studio Environment

24 Jun

One of the most common reasons you hear from photographers who avoid off-camera flash lighting is that it looks artificial. Yes, studio lighting can look artificial, but sometimes that’s part of the charm. Nobody claims portraits made with a ringlight look natural, but that doesn’t stop the thousands of photographers (myself included) that use them all of the time. But that doesn’t mean that it is impossible to mimic window light in the studio.

In fact, that’s kind of the point most of the time.

How to Mimic Window Light in a Studio Environment - portrait of a lady in the studio

Obtaining natural looking result in a studio is fairly easy with a few basic tools and some know how.

With studio lighting, you can create whatever lighting you want at any time. Providing that you have the right tools (and they are pretty basic), creating natural looking portraits in a studio environment with off-camera flash is exactly as difficult as creating portraits using window light.

Why is window light so wonderful?

b/w window light portrait - How to Mimic Window Light in a Studio Environment

Window light has a lot of wonderful qualities that make it a great choice for photographing people and other subjects.

In a nutshell, windows give you a constant (during daylight hours) and large light source to work with. The light itself is soft, diffused (assuming that direct sunlight is not entering through the window), and lends itself well to virtually all subjects including portraits.

It also tends to be very directional (depends on how you position yourself and the subject in relation to the window), making it easy to work with to shape your subject.

two b/w portraits - How to Mimic Window Light in a Studio Environment

Window light can give a variety of results depending on the time of day and the size and shape of the window. As such, there is no one size fits all solution to mimic window light and recreate it in the studio.

On top of that, we see things lit in window light all day, every day. It is a very natural state of things and it’s how we recognize the world around us. This familiarity makes window light an obvious choice.

Add to that that the master painters created a great many of their portraits in a studio lit by window light. The most obvious point of reference here would be Rembrandt since this style of lighting is one of the most common techniques that photographers use today.

The reasons for unnatural looking light

b/w portrait with ring lighting used - How to Mimic Window Light in a Studio Environment

Some light sources, like the ringlight used here, are by nature very unnatural looking. When trying to recreate natural light, try to stay away from specialist tools like these and tri-flectors.

There are a couple of reasons why studio lighting can look canned and unnatural. These are:

  • Too many lights – When using natural light, you’re usually shooting with only one light source. Perhaps there’s a reflector involved or there might be multiple windows, but for the most part, it’s one light. Going into a studio environment where a single setup can involve a key light, a fill light, a hair light, two rim lights and two background lights can feel both complicated and wrong (unnatural). Fair enough.
  • The modifiers are too small – In most cases, windows are quite big. This means that the light source you are using to light your subject is large. Big light sources give soft, flattering light. Add some mesh curtains to that window and the light gets even softer and more diffused. What does that tell you about the size of modifier you need to use on your studio portraits to get soft light?
  • The lights are too far away – In terms of the softness of the light, it’s the size of the light source in relation to the subject that determines how soft or hard it appears. If you have an 8′ octabox twenty feet from your subject, it will appear quite small comparatively; therefore, the light will be a bit hard. If you have a small pop-up softbox on there, it will be even harder. Bring your lights in as close as you dare to get for the softest light possible. If you have a small modifier, I recommend having it so close you can barely shoot past it without getting the light source in the frame.
  • You’re using an odd light source – Specialist lights, like the ringlight used in the image above, create light that you wouldn’t normally find in natural scenarios. Even if a viewer doesn’t understand the why behind it, people are quite intuitive when things seem weird. If you’re going for a natural look, avoid lights like these.

How to recreate and mimic window light in the studio

Here, you’ll see just how easy it is to mimic natural light in a studio environment. Here’s what you’ll need to get started:

  • An off-camera light source. Strobes, flashguns and continuous lights will all work equally well.
  • A large light modifier. These examples use a 5′ Octabox (or recessed softbox as PixaPro like to call it), but anything will do. If you don’t have any large modifiers yet and are unsure about what to get, consider starting with a large translucent umbrella. They’re big, dirt cheap, fold away easily and produce a nice, soft light.
  • White or silver reflector. This one’s optional, but you should have one anyway. If you’re using a really big modifier, the wraparound of the light may mean you don’t even need it, but they are useful for filling in dark shadows on the unlit side of your subject.

Setting up

behind the scenes studio shots - How to Mimic Window Light in a Studio Environment

A medium sized octabox placed close to an above the subject and a silver reflector was all it took to create these images.

To get started, place your light about three or four feet from your subject. Turn the light so that it’s forty-five degrees (in relation to your subject.) Raise the light up as high as you can (making sure the subject still has catchlights in their eyes). High ceilings are a bonus.

The reason for this is that with window light, the light is often coming from above. The window is shaping the light into the room, but it is still coming down into the room. If you’re using modelling lights or continuous lights, watch the catchlights in your subject’s eyes. Once they are falling towards the top of their eyes, you’re good to go.

Likewise, also watch where the shadows are falling. If the contrast seems too high, introduce a reflector. This does take practice, so don’t worry if you can’t tell just yet. It may help if you squint your eyes tightly. This makes it easier to see the contrast. In these examples, the silver reflector was placed flat and in front of the subject at around waist level.

Now, all that you have to do is to take a light meter reading (or take a test shot), adjust your settings (either in-camera or on the flash) and start taking photos.

portrait of a lady in pink - How to Mimic Window Light in a Studio Environment

To start with, try having your subject turned toward either the light or the camera. Beyond that, there’s not really much else to it.

How to Mimic Window Light in a Studio Environment

Practice makes it simple

If you are completely new to off-camera lighting, this may seem like a lot to get. I promise it’s not. Once you’ve set this up a few times, it becomes so easy that there’s not much more effort involved than placing someone in front of a window.

The advantages here are that you aren’t at the mercy of the weather or the time of day and once you get started with a set-up, the light won’t change unless you tell it to.

Just remember to keep the light both high and close and there isn’t much room to go wrong.

two images of a lady - How to Mimic Window Light in a Studio Environment

Putting it to use

If you’ve had any hesitance to use studio lights for any of the reasons listed in this article, hopefully, you can see that with the right techniques, you needn’t worry at all. Honestly, it’s not as difficult or complicated as it seems. If you’re still unsure, rent a studio for an hour and put it to practice. You may be surprised at what you find out and learn.

The post How to Mimic Window Light in a Studio Environment appeared first on Digital Photography School.


Digital Photography School

 
Comments Off on How to Mimic Window Light in a Studio Environment

Posted in Photography


Tips for Shooting Cityscapes Through a Window at Blue Hour

10 Nov

Shooting cityscape photos from inside a building (such as an observation deck of a tower, hotel room, etc.) pose a different set of challenges that you won’t experience shooting outdoors. Here are a few easy-to-follow tips for shooting the city at blue hour, with a focus on how to eliminate unwanted reflections from the glass.

Japan - Tips for Shooting Through a Glass Window of an Observation Deck at Blue Hour

Shanghai - Tips for Shooting Through a Glass Window of an Observation Deck at Blue Hour

Vietnam - Tips for Shooting Through a Glass Window of an Observation Deck at Blue Hour

The reflection-free shots above of Fukuoka skyline (Japan, top), Shanghai skyline (China, center) and Ho Chi Minh City skyline (Vietnam, bottom) were shot through glass windows of Fukuoka Tower, Shanghai World Financial Center Observatory and Bitexco Financial Tower respectively – following the methods described in this tutorial.

Bring a mini-tripod

In order to shoot at blue hour, a tripod is essential whether you’re shooting indoors or outdoors. But some observation decks don’t allow tripods because they are seen as a hindrance for other visitors. In that case, you may try to bring in a mini-tripod like a Gorillapod, as it’s unlikely to disturb other non-photography visitors.

Even if tripods are allowed, you may as well bring a mini tripod just in case, as it comes in handy when there is no suitable space to set up a regular tripod.

Gorillapod - Tips for Shooting Through a Glass Window of an Observation Deck at Blue Hour

Wipe the glass with a cloth

Glass windows of an observation deck aren’t always clean. Make sure to keep a cloth in your camera bag so that you can wipe an area to shoot through if it’s dirty. Obviously, you can’t wipe the other side of the window, though, so choose an area that has no stains, etc.

How to eliminate reflections off the window

This is the biggest challenge when taking photos through a glass window. The window works much like a mirror and it’s hard to completely prevent reflections (e.g. such as yourself, room lights) from showing up.

Typical tips to follow are shooting in close and as straight as possible to the glass (i.e. leaving a little gap between the glass and the lens so as not to let indoor lights creep in) and using a polarizing filter which helps cut reflections to some extent. Aside from these tips, I’d recommend the following “tools”.

Reflections - Tips for Shooting Through the Glass Window of an Observation Deck at Blue Hour

Ho Chi Minh City skyline (Vietnam) shot through the window of Bitexco Financial Tower. I tried my best by getting the lens really close to the window (almost touching it) and using a polarizing filter, but the room interior and stray lights still got reflected in the glass.

Using a DIY blackout curtain

This might be an old-school method, but I recently came across a photographer doing this on the observation deck of Shanghai World Financial Center (see below). Not advisable to use such a large curtain, though, as it blocks the view for other visitors and you’ll run the risk of being asked to leave by floor staff.

Blackout curtain Tips for Shooting Through the Glass Window of an Observation Deck at Blue Hour

Using a black jacket

I used to rely on this method and it worked relatively well. Set up a tripod very close to the window, and cover the whole rig (camera and tripod) with a black jacket to create a closed-in area around the camera so that no indoor lights get inside the jacket. Make sure to use a “black” jacket to reduce reflections, as a lighter-colored jacket does more harm than good and causes even more reflections.

Using black neck gaiter

This used to be my favourite method, as it doesn’t really catch the unwanted attention of other visitors (compared to using the jacket, etc.). The concept here is the same as using a jacket. To block any stray lights from getting in, wrap the black neck gaiter (neck warmer or scarf) around the lens and push the whole setup (camera and tripod) onto the window to completely shade the front element of the lens.

Jacket neck gaiter - Tips for Shooting Through the Glass Window of an Observation Deck at Blue Hour

Using a black jacket (left) and a black neck gaiter (right) to shade the front element of the lens and cut reflections from the window.

Using a lenskirt

A lenskirt is a tool specifically created to cut out reflections. This is what I’ve been using for the past few years with great success. By attaching a lenskirt to the front of your lens and the pushing suction cups onto the window, it shades the front element of the lens. This helps cut reflections from the window, leaving no chance for any stray light to get in.

With a black neck gaiter, I always had to make sure not to have vignetting (dark corners) by checking through the viewfinder (due to the edges of the neck gaiter getting too close to the lens). But the window-facing end of a lenskirt opens up like a softbox, so there is no worry of any edge vignetting being introduced.

Lenskirt - Tips for Shooting Through the Glass Window of an Observation Deck at Blue Hour

Conclusion

I hope these tips help you take reflection-free cityscape photos through glass windows of an observation deck on your next visit.

Lastly, you may wonder why I didn’t mention a rubber lens hood (which is said to work well for shooting through glass). I’ve tried it before but found it prone to vignetting, especially at a wide angle like 18mm or wider. And, when shooting cityscape photos from high above like an observation deck, you’re very likely to shoot wide, therefore I’ve excluded it from the list.

If you have any other tips or experiences using these suggested tools in this post, please share them in the comments below.

The post Tips for Shooting Cityscapes Through a Window at Blue Hour by Joey J appeared first on Digital Photography School.


Digital Photography School

 
Comments Off on Tips for Shooting Cityscapes Through a Window at Blue Hour

Posted in Photography


How to Make Your Own DIY Light Box with Tape, Paper and a Window

01 Sep

Photographers are pretty savvy when it comes to saving money. This DIY  light box is a surprisingly simple method for photographing small, translucent objects like flower petals.

Remember holding sheets of paper against a window to trace out a design? This process is similar in technique. The sheet of baking paper will act as a diffuser, spreading light evenly through a translucent object so it can be photographed in detail. Using a well-lit sheet of paper also isolates the subject from the background with a nice, even, white backdrop. Plus, you get to take great photos without leaving the comfort of your own home. So really, it’s win-win!

Make Your Own DIY Light Box

Supplies you will need

  • Camera
  • Tripod
  • Macro lens or extension tubes
  • A well-lit glass window or door
  • Butcher’s paper
  • Clear sticky tape
  • Glass cleaner or rubbing alcohol
  • Eucalyptus oil (for removing any remaining sticky tape from the glass surface once you have finished shooting)
  • Small transparent objects to photograph (I like using flowers)

Picking a location

Before you start, you’ll need to locate a light source. While the butcher’s paper will serve as a background for your image, you’ll need a strong, even amount of light to illuminate the subject.

Depending on the time of day, you might have to try different windows around your house.  The position of the sun will dictate the strength of the light penetrating the butcher’s paper. Choose a window that is unimpeded by exterior blinds or trees if possible.

Make Your Own DIY Light Box

Capturing the intricate detail of organic materials like leaves is made much easier with the glow of light coming through the subject from behind.

Setting up

Once you’ve settled on a well-lit window, you’ll need to prepare the glass. Wipe a small amount of rubbing alcohol or glass cleaner over the window and pat down with a cloth. This will minimize any particles that may impede light from coming through. It will also allow the sticky tape to adhere to the glass more effectively. Make sure that the glass surface is completely dry, however, or the tape and butcher’s paper will become soggy and unusable.

Take your piece of butcher’s paper and hold it against the window. The reason I use butcher’s paper is because I’ve found that run-of-the-mill copy-paper disperses light in mottled and uneven patches, which looks poor in photographs. Butcher’s paper diffuses light more evenly and makes for a uniformly white background. You can use a piece as large as you like, just make sure there is enough paper to fill the viewfinder in your camera.

Make Your Own DIY Light Box

Not all paper is created equal. This is an example of the uneven, mottled light caused by a sheet of standard A4 copy paper.

Fix your piece of butcher’s paper to the glass. I recommend using clear sticky tape rather than blue-tack or colored tape because it may show up in your photographs and can wrinkle the paper. Once you have fixed the paper flush with the glass, you can begin adding your subjects.

Carefully stick your objects to the butcher’s paper with small amounts of clear sticky tape. This can be tricky on a vertical surface, so having lightweight, translucent subject matter like flowers work best. I also like to sit on a chair for this part, to avoid a backache.

Make Your Own DIY Light Box

Fix your subject matter to the butcher’s paper with bits of clear sticky tape.

Taking the shot

Once your subjects have been adequately adhered to your butcher’s paper, it’s time to get the camera out. Mount your camera on a tripod and position it so that the subject and the butcher’s paper fill your viewfinder. To capture the detail in your subject, a macro lens is ideal. I used my Kenko extension tubes to get a nice detailed shot. Of course, you could also arrange larger subjects or patterns on the butcher’s paper, focusing on pattern and light rather than macro detail.

Set your camera to Aperture priority mode (Av on Canon and A on Nikon) and adjust the aperture to allow for the desired depth of field. Remember, to maintain focus throughout the whole image, use a smaller aperture like f/22. However, this may be limited depending on the lens you use.

For the sharpest detail, using a low ISO count is also a good idea. Although this will cause your camera to automatically increase the shutter speed, your tripod will minimize camera shake, especially if you view your composition using with the LCD screen and Live View rather than the viewfinder.

Make Your Own DIY Light Box

Conclusion

Once you start photographing, you’ll notice the diffused light enveloping and illuminating your subjects. With the abundance of the soft light, you’ll discover that detail is much easier to capture and view. Using this butcher’s paper method eliminates pesky shadows, allowing the subject to lift off the background with striking contrast and intricacy.

Try photographing all sorts of flowers, fruits, leaves and other transparent materials and see your subjects in a whole new light!

Make Your Own DIY Light Box

Make Your Own DIY Light Box

Make Your Own DIY Light Box

Make Your Own DIY Light Box

Make Your Own DIY Light Box

Make Your Own DIY Light Box

Make Your Own DIY Light Box

The post How to Make Your Own DIY Light Box with Tape, Paper and a Window by Megan Kennedy appeared first on Digital Photography School.


Digital Photography School

 
Comments Off on How to Make Your Own DIY Light Box with Tape, Paper and a Window

Posted in Photography


Window Shades: Contextual Street Art Frames View of Greek Cityscape

04 Apr

[ By WebUrbanist in Art & Street Art & Graffiti. ]

shades

A turn of phrase meets art in this mural made to look like a face, with glass-framed eyes reflecting the world outside.

shades-at-night

Graffiti interventionist Achilles likes to put art in context, using walls and spaces as backdrops for layered works that wouldn’t work quite the same way anywhere else.

streetartsurprise

angles

twistedart

Many of his site-specific works play with perspective and create visual surprises by tucking elements onto different surfaces to create reveals as the viewer approaches.

Compared to his complex works, his artist bio is short and to the point: “Achilles lives and creates in Athens, Greece. He loves street art, graffiti and painting. He works as a freelancer creating murals, portraits, paintings, illustrations etc.”

Share on Facebook


[ By WebUrbanist in Art & Street Art & Graffiti. ]

[ WebUrbanist | Archives | Galleries | Privacy | TOS ]


WebUrbanist

 
Comments Off on Window Shades: Contextual Street Art Frames View of Greek Cityscape

Posted in Creativity


Malta’s Azure Window, a photographer favorite, collapses in storm

09 Mar
Photo by Berit Watkin. Used under CC license 2.0

The Azure Window rock formation, familiar to photographers and Game of Thrones fans, collapsed into the sea in gale force winds early Wednesday.

Authorities say that the collapse was unavoidable, and no man-made intervention could have saved it. Part of the stack supporting the formation’s ‘bridge’ collapsed in 2012, and in 2016 officials imposed a fine for walking on the arch.

The loss of the rock formation is being mourned today by both locals and visitors who had photographed it in the past.

Have you photographed the Azure Window? Do you have memories of visiting it to share? Let us know in the comments.

Articles: Digital Photography Review (dpreview.com)

 
Comments Off on Malta’s Azure Window, a photographer favorite, collapses in storm

Posted in Uncategorized


Modern Babylon: Hanging Plants Serve as Green Walls & Window Shades

19 Feb

[ By WebUrbanist in Architecture & Houses & Residential. ]

green-screen-wall

A single-story house in Vietnam echos an ancient world wonder, the Hanging Gardens of Babylon, but on a domestic scale and with minimalist contemporary design sensibilities and a functional purpose.

green-wall-design

green-wall-interior

Created by MIA Design Studio, the home is both open to its surroundings but also shielded by a veil of greenery reaching up to the rooftop above.

green-house-pools

green-kitchen

green-space-exterior

“The boundary between the interior and exterior is being diminished, letting man sense the fluctuations of nature. Space is opened up but maintains the privacy of the individuals. This is the daunting problem of living in a metropolitan area with cramped space and pollution.”

green-floor-plan

green-bedroom

green-deck

green-hallway-creepers

The green screen is a theme carried between three distinct volumes of the house, lining a connective hallway that joins disparate living, sleeping and working spaces. A series of outdoor gardens between the interior areas and perimeter wall create a natural sanctuary for the residents, providing access to a personal forest within the a bustling built environment.

Share on Facebook


[ By WebUrbanist in Architecture & Houses & Residential. ]

[ WebUrbanist | Archives | Galleries | Privacy | TOS ]


WebUrbanist

 
Comments Off on Modern Babylon: Hanging Plants Serve as Green Walls & Window Shades

Posted in Creativity