RSS
 

Posts Tagged ‘Well’

Spider Holster launches updated Hand Strap and Lens Collar Plate, as well as two new products

24 Jan

Spider Holster, the company best known for its camera-carrying accessories, has launched four new products, including updated versions of its SpiderPro Hand Strap and its Lens Collar Plate. All four products are available from the company’s website now, making it easier to carry around a camera, attach it to tripods and tote around all of your photography accessories.

Most notable among the new products is the company’s new SpiderPro Hand Strap v2, a new version of the camera-carrying strap already offered by Spider Holster. This strap can be used with mirrorless and DSLR cameras, this time featuring Nylon cores for slowly conforming to the shape of the user’s hand.

As well, the updated version can be installed more quickly using a three-snap attachment feature, plus there’s a new Graphite version of the strap made from synthetic Hypalon fiber with a carbon fiber finish. This, Spider Holster explains, is an alternative for customers who don’t want to purchase the leather version. The model is available now for $ 70.

Joining the updated Hand Strap is the new Lens Collar Plate v2, an updated model that can be used to holster a telephoto lens with a tripod collar to the company’s SpiderPro Single and Dual camera-carrying products. The updated version of this product is Arca-Swiss compatible for use with tripods, features a built-in 1/4″-20 thread, built-in hex wrench, as well as a pair of Spider pins and a Spider Tether Bail. The model is available now for $ 55.

Spider Holster has also launched the new Spider Light Z Plate specifically for the Nikon Z6 and Z7 cameras, a model that can be used or without the FTZ Mount Adapter. The Z Plate can be used with any Arca-Swiss tripod in addition to the holster, plus it allows access to the camera’s battery door. The Spider Light Z Plate is currently available to preorder for $ 32.

Finally, Spider Holster has also launched its new SpiderMonkey Ultimate Kit, a bundle that features the entire SpiderMonkey product line, including the SMv2 Tab, Studio Assistant, Rain Cover, rotating and non-rotating Action Grip, Utility Pouch, Backpack Adapter, Bag Strap Clamp and more. With these accessories, users can easily clip a variety of camera gear to belts, backpack straps and bags.

The SpiderMonkey Ultimate Kit is available now in Essentials and Ultimate bundle options for $ 55 and $ 75, respectively.

Articles: Digital Photography Review (dpreview.com)

 
Comments Off on Spider Holster launches updated Hand Strap and Lens Collar Plate, as well as two new products

Posted in Uncategorized


How to Make Well Exposed Photos Every Time – Part Three – Post-Processing for Exposure Optimization

26 Apr

The post How to Make Well Exposed Photos Every Time – Part Three – Post-Processing for Exposure Optimization appeared first on Digital Photography School. It was authored by Kevin Landwer-Johan.

Digital photography allows us an incredible scope to work on our computers to enhance and manipulate images. Optimizing your exposures during post-processing can make a dull, flat-looking photograph into a much more vibrant and interesting one.

How to Make Well Exposed Photos Every TimeMarket Guy

© Kevin Landwer-Johan

My approach to post-processing most of the time is to make my photos look as they did when I captured them or with some variation to the background tone. Because our eyes see more dynamic range than our cameras, this means I am working to balance my exposure and the way the light looks in the photo.

RAW or Jpg?

If your photos are saved only as jpg’s, your camera will have made certain tweaks to them already. It may have added some sharpening, color balance, contrast tweaks and possibly manipulated them in other ways. Jpg images as designed to look good straight out of your camera and may require little or no post-processing.

If you do decide to work on your jpg files, you will face limitations because of the file quality. As your camera saves jpg files, it compresses them and discards some of the information from the photos. Jpgs are technically lower quality which means they do not stand up to as much post-processing as RAW files do.

RAW files contain all the information your camera captured when you pressed the shutter release. They do not look great when you first see them because the camera has not altered them at all during the capturing and saving process.

To make a RAW file look good you must make some adjustments manually or use a preset or Action to make them for you. The technical quality of a RAW file is superior because there is no data lost from what your camera recorded. You have a greater capacity to be able to manipulate these files without losing quality.

How to Make Well Exposed Photos Every Time Temple and Big Sky

© Kevin Landwer-Johan

Choose your best photos

From each series of photographs you make I hope that you will have a number of exposure options to choose from when you sit down at your computer. Picking the best images to work on is the first part of post-processing.

Naturally, you’ll be wanting to pay most attention to the main subject in your photo. Is it exposed the way you want it to be? Can you see that there’s sufficient detail in those areas of your composition?

In some cases, such as when you’ve made a silhouette or are using low-key lighting and high contrast, you may have little or no detail in your subject. This is okay if that’s what you want.

However, if exposing for detail was your intention, and there’s not enough in your photo, look at the pictures where you used different exposure settings.

Your background exposure is also important. Does it enhance and support your main subject? Is it too bright or too dark? Again, look to see if there is detail. When there’s no detail, because of overexposure or underexposure, it will be more difficult to manipulate these areas.

How to Make Well Exposed Photos Every Time Attractive Young Photographer

© Kevin Landwer-Johan

Make use of the histogram

Your histogram gives you information about the tonal values in your images. It shows you where the most detail is and if you have lost detail in the bright or dark parts of your compositions.

If your histogram is bunched up to the left or the right of the chart, with the graphic touching the top, this means there will be no detail recorded in those areas.

If you can see a histogram bunched to the right and hitting the top, you will have lost detail in the highlights. If it’s bunched to the left and hitting the top, you have lost detail in the dark areas.

If your main subject is within this range and you wanted it to contain detail, you will need to choose a photo with a different exposure setting to work on.

How to Make Well Exposed Photos Every Time Hill Tribe Girl

© Kevin Landwer-Johan

Using presets or manual manipulation

Lightroom and Photoshop come with presets and Actions. These can be used to help balance your exposure. You can also download many more or make and save your own. These tools can enhance and speed up your post-processing workflow.

I often chose one of a variety of presets as I begin to post process a photograph. Rarely do I apply a preset without then tweaking it further. Every exposure you make is different, so to get your photos looking their best some manual manipulation is usually best.

Working your highlights and shadows

Having been careful to expose your main subject well, you may already be happy with its tone value. However, some parts of your composition may still need tweaking to get them looking the way you want.

How to Make Well Exposed Photos Every Time Happy Hat Wearer

© Kevin Landwer-Johan

Your intention is the most important. How do you want your photograph to look?

Here are two examples of different manipulations made to the same RAW file.

Example one: Dark background

I wanted to make the background darker so the roses would stand out. Using a preset I made in Lightroom, I then made further manual adjustments. I controlled the Blacks, Dehaze, Contrast, and Shadows sliders.

When making this kind of adjustment to manipulate the background of your image, pay attention to your main subject also. These sliders make universal changes to your photos so affect your main subject as well.

With a light-toned main subject and a predominantly dark background, the changes I made did not have much effect on the roses.

How to Make Well Exposed Photos Every Time Lightroom Dark

I then opened the photo, with the Lightroom adjustments, in Photoshop. At this stage, I darkened the lightest part of the photo to lower the overall tone range.

There are many techniques you can darken or lighten specific areas of a photo. I prefer to use the Dodge and Burn tools set to a low exposure to do this. I also used the Patch tool to remove a few of the brighter areas in the background.

As a result, the background is darker, and the highlights on the rose are not so bright.

How to Make Well Exposed Photos Every Time

Example Two: Light Background

To render a lighter, softer look, I took the Dehaze slider towards the left, and the Shadows towards the right. I added a little more Black and some Contrast, otherwise the image looked too flat.

Next, using Photoshop, I tweaked the highlights a little so they were not so bright.

How to Make Well Exposed Photos Every Time Roses

In both of these examples, my main objective was to enhance the roses because they are my main subject.

The background tone is also important. Between the two examples, there is the most difference in the tone of the background. This has a large impact on the overall feel of the photo.

Conclusion

As with all post-processing, there are a variety of methods you can use to gain similar results. Here I have demonstrated a few techniques I am comfortable using.

Concentrating primarily on the tone of your main subject in relation to the background is a good place to start when post-processing. Once you have made adjustments you are satisfied with, you can then move on and make other changes to your photos if you wish.

Aim to expose your main subject the way you want at the time of making your photos. Doing so allows you more flexibility to make changes in post-production and not lose quality. If you are stuck working with a main subject that’s either underexposed or overexposed, you will be limited in how much you can achieve.

Experimentation is the best way to discover how you like to work with photo manipulation software. There is no right or wrong way to work with your photos so long as you achieve the result you want.

You may also like

  • How to Make Well Exposed Photos Every Time. Part 1 – Seeing the Light
  • How to Make Well Exposed Photos Every Time. Part Two: Managing Your Exposure


The post How to Make Well Exposed Photos Every Time – Part Three – Post-Processing for Exposure Optimization appeared first on Digital Photography School. It was authored by Kevin Landwer-Johan.


Digital Photography School

 
Comments Off on How to Make Well Exposed Photos Every Time – Part Three – Post-Processing for Exposure Optimization

Posted in Photography


How to Make Well Exposed Photos Every Time. Part Two: Managing Your Exposure

11 Apr

The post How to Make Well Exposed Photos Every Time. Part Two: Managing Your Exposure appeared first on Digital Photography School. It was authored by Kevin Landwer-Johan.

Part Two – Managing Your Exposure

This is the second article in a series of three discussing how to make well-exposed photographs. The first article covers subject choice, some common misconceptions about exposure and the photographer’s intention.

How to Make Well Exposed Photos Every Time Thai Dancer

© Kevin Landwer-Johan

Having identified your subject, managing your exposure then matters most. These things will influence how your photograph is exposed:

  • Point of view
  • Lens choice
  • Timing
  • Reading the light
  • Exposure settings

You’ll notice that I’ve placed ‘Exposure settings’ at the bottom of this list. This is because it’s the most obvious aspect of managing your exposure. I want you to consider how the other items on the list affect your exposure setting choices.

Point of view

Where you choose to take your photo from can significantly affect your exposure. Is the light behind you? Behind your subject? To one side?

By changing your position you can manage what you see in the background and how it impacts the amount of light entering your lens.

How to Make Well Exposed Photos Every Time Giant Soap Bubbles

© Kevin Landwer-Johan

In this photo, the reflection off the water makes up a large portion of the background. Had I not been careful with my exposure my subject may have been underexposed. In this photo, I compensated for the bright background by adding some fill flash.

How to Make Well Exposed Photos Every Time Giant Soap Bubbles

© Kevin Landwer-Johan

Changing my point of view so I no longer included the lake in the background meant I could expose my subject well. The reflected light off the water surface no longer affected my exposure. In this photo, I did not need to use my flash as there was no strong backlight to compensate for.

Lens choice

Composition is partly governed by your choice of lens. Using a telephoto lens will include less background. In doing this, you can restrict light sources and bright areas of your composition more easily. With a wider lens, you are more likely to include more sky or other bright areas which can have some effect on your exposure.

How to Make Well Exposed Photos Every Time Rice Fields

© Kevin Landwer-Johan

Had I used a wider lens for my photo of these rice fields I would have included the setting sun in my composition. This would definitely have a strong impact on my exposure and the whole look and feel of my photo.

I could have eliminated the effect of the sun altogether by using a lens focal length that was slightly longer. I could have also tilted my camera down slightly, but the foreground was unattractive, and I like the sunburst.

Timing

The time you choose to make your photograph can also influence your exposure. It may mean waiting until the sun is in a different place in the sky for a landscape photo. Or you may have to calculate when to press your shutter release to avoid bright headlights of a passing car. This was the case when I photographed the image below.

How to Make Well Exposed Photos Every Time On the Iron Bridge

© Kevin Landwer-Johan

The timing for blue hour photos is particularly important. You must wait for the ambient light to balance with any other light source you have in your frame. This amount of time will vary depending on your proximity to the equator.

In Chiang Mai, Thailand, we have about ten minutes each evening to capture a rich blue sky with the electric lights included in the composition.

How to Make Well Exposed Photos Every Time Chiang Mai Iron Bridge

© Kevin Landwer-Johan

Reading the light

To be able to set your exposure you must use an exposure meter or let your camera make the calculations and settings for you.

Leaving this choice completely up to your camera is rarely best as your camera does not know what you are photographing. Your photos will potentially lack creativity.

Your camera has amazing artificial intelligence built into it, but it cannot see the way you see and discern what your main subject is. By leaving your camera settings so the meter is set to take an averaged reading and is on any auto or semi-auto mode, your camera is in control. You can use exposure compensation or set your camera manually to take control of your exposure.

One of the easiest ways to read the light is by using live view and looking at your monitor. Some cameras do not have this capability, so you need to consult your manual and do some testing to discover if you can use this method.

Checking your exposure with live view works when you have your camera set to manual mode. It’s easy to watch the light values on your monitor changes as you alter your aperture, shutter speed, and ISO. Using this method in conjunction with your histogram is recommended so you can check if there’s any clipping happening.

Using your exposure meter set so it takes a reading from the entire frame and then calculates an average exposure is okay when the light and tone is even.

When there’s any amount of contrast in the scene it’s good to take a spot meter reading directly from your subject. This will provide you with the specific information about the light reflecting off the most important part of your composition.

How to Make Well Exposed Photos Every Time Opening the Windows

© Kevin Landwer-Johan

For this photograph, I took a spot meter reading from the Buddhist nun, as I wanted her exposed well. Had I left my meter on the averaging mode it would have included the bright light outside and the dark interior into its calculations. This would most likely indicate a setting which would have rendered my main subject underexposed.

Exposure settings

Once you have made your exposure reading and ascertained how the light is affecting your composition, you need to set your exposure.

You may decide your subject will be well exposed by setting your aperture, shutter speed, and ISO so the meter reads zero. You may prefer to have it read overexposed or underexposed, depending on the tone value of your subject and your creative expression.

When your subject is very dark or very light, you may want to alter your exposure settings to compensate. When you take a spot meter reading the camera is calibrated to see the thing as being middle gray. This means a black or a white subject will both appear gray in your photo if your meter is reading zero.

You must decide the tone you want your main subject to be. Do you want a clearly exposed subject? Will it look better if it appears brighter than it really is? Do you want a silhouette?

For this photo of pink orchid flowers, I chose to overexpose from the reading my spot meter was giving me. I did this to produce a softer feeling in the image.

How to Make Well Exposed Photos Every Time Pink Flowers

© Kevin Landwer-Johan

Had I been making the photograph to document the flower and its color accurately, I would not have overexposed it. My intent was not to make a technically accurate representation of the flower.

If technical accuracy is what I wanted I would have changed my point of view to avoid the backlighting. I would have set my exposure so the color and tone rendered correctly to how the flower looked to my eyes.

Try it out and see for yourself

Find a white or black subject to photograph. Make a spot meter reading and set your exposure so that the meter is at zero. Take a photo.

Now, for a black subject, change your setting so the spot metering indicates it is two stops underexposed. For a white subject make your settings so it’s two stops overexposed.

Which photograph is most appealing? The ‘correctly’ exposed photo, or the under or overexposed photo?

How to Make Well Exposed Photos Every Time Laughing Lady

© Kevin Landwer-Johan

Conclusion

Experimentation is always good when lighting and subject material are challenging. If you’re not 100% certain you have a perfect exposure, (I never am,) make a series of photos whenever you can.

Tweak your aperture and/or shutter speed settings between each exposure. Don’t make huge shifts in these settings, but just enough so you have a few options to look at when it comes to post-process them.

I’d love you to leave your comments below letting me know if this article has helped you understand exposure better.

The next article in this series will cover post-processing techniques which will enhance your exposure choices.

The post How to Make Well Exposed Photos Every Time. Part Two: Managing Your Exposure appeared first on Digital Photography School. It was authored by Kevin Landwer-Johan.


Digital Photography School

 
Comments Off on How to Make Well Exposed Photos Every Time. Part Two: Managing Your Exposure

Posted in Photography


How to Make Well Exposed Photos Every Time. Part 1 – Seeing the Light

03 Apr

The post How to Make Well Exposed Photos Every Time. Part 1 – Seeing the Light appeared first on Digital Photography School. It was authored by Kevin Landwer-Johan.

Part One – Seeing the Light

Opinions about what a correctly exposed photograph is must be about as numerous as what people choose to take pictures of. Some opinions are more common than others.

‘Every photograph must contain an even range of tone with no details lost in the highlight or shadow areas.’ This is the one I encounter most frequently. It’s probably been learned from technical books and academics.

Durian How to Make Well Exposed Photos Every Time

© Kevin Landwer-Johan

Performing a quick Google search on this topic brings up the Canon Australia website with this:

“The act of having ‘correct’ exposure means your combination of settings between aperture, shutter speed, and ISO speed have produced a perfectly exposed image. When nothing is blown out (highlights) or lost in shadow in an image, it has achieved correct exposure.”

I’m not including this quote to get at Canon users or Aussies, (even though I am a Nikon user and a Kiwi,) but because it represents a purely technical approach to exposure choice.

How to Make Well Exposed Photos Every Time Flower and Moss

© Kevin Landwer-Johan

How can creative expression be judged as correct?

Photography, at its best, is a creative expression of how we perceive what we see. Our world view is unique. Each of us has the ability to interpret and convey our experience through the photographs we capture.

Freedom to expose our photos so some parts of our compositions have no recorded detail is a natural part of this art form. If our minds are boxed in by technical restraints such as are expressed on the Canon Australia website, our expression is inhibited.

I’m not suggesting we disregard technical quality – this would be like throwing the baby out with the bathwater. I am recommending you reach beyond purely technical restraints to expose your photos so that they are more expressive of what they are about, not just what they are of.

Conforming to the opinion that photographs are best when no details get lost due to exposure choice can provide documentation of what you are photographing. This approach to taking pictures will not often infuse your photographs with much life, emotion, or energy, apart from what your subject may naturally provide.

Histogram bells taste like Vanilla ice cream

Vanilla ice cream – enjoyable sometimes – but plain nonetheless. You are likely to get bored with it if that’s all you eat. It’s not the most exciting flavor at the ice cream parlor.

A bell-shaped histogram indicates your camera has recorded a lot of mid-range tones and little or no extreme dark or light ones.

Striving for a bell-shaped histogram is not going to produce the most flavorsome photographs. At times you’ll make a great image that’s got a bell-shaped histogram, but not often.

I believe it’s a common myth that the ideal histogram is bell-shaped.


Even Exposure Buddha Statue How to Make Well Exposed Photos Every Time

You can see that the histogram for this image is reasonably balanced. There are no spikes to the left or right. This indicates we will see detail in the darkest and brightest parts of the composition.

I took the photo mid-afternoon on an overcast day. Because the light was soft and even, and the tones in my composition are all fairly neutral, I have obtained a ‘correct’ exposure.

How to Make Well Exposed Photos Every Time Contrast-Buddha-Statue

Subscribing to the ideal of the bell shape, you might look at this histogram and think the photo is extremely underexposed. You might even consider deleting such an image based on this information alone.

It is the same statue photographed on a sunny day in the mid-afternoon. It’s a much more appealing photograph than the one made on the overcast afternoon.

It was my intention to lose shadow detail. I wanted to isolate the statue from the dull background and add some drama.

Exposure choices are as personal as ice cream preferences

How to Make Well Exposed Photos Every Time Chocolate Ice Cream

© Kevin Landwer-Johan

Seeking to only create photos with an even exposure throughout the tone range is like choosing to eat just vanilla ice cream and always ignoring all the other flavors.

Great photographs express what the photographer sees and experiences. Sometimes they are technically correct, many times they aren’t. It all comes back to the intent of the photographer.

Choosing to let most of your composition fall into darkness is your choice. If you want to use the shadow areas to enhance your subject, then do it. If light streaming into your lens from behind your subject creates softness and depth of feeling, let it happen.

Don’t just focus on the technical details. You will usually end up with photos containing little or no feeling.

Before you bring your camera up to your eye, you need to see the light. Consider the brightest parts of a scene. Are they important? Do you need to show detail in them to convey what you want to with your photo?

Likewise for the dark areas of your photo – if there are a lot of distracting elements in the shadow areas – let them be buried in the darkness.

How to Make Well Exposed Photos Every Time Woman Tourist with an Elephant

© Kevin Landwer-Johan

Behind the woman and elephant was a large, open building casting a helpful shadow over its messy interior. By positioning myself so I could only see the shaded area behind my subjects, I knew I could isolate them. I set my exposure for the woman’s face, as it’s the most important part of my composition.

The fact that the background is dark and contains no detail helps make my photo stronger.

Understanding light and tone will help you make more interesting exposures. Knowing how your camera evaluates and records light and tone is equally as important. How to manage your exposure is the topic of the next article in this series.

What’s the most important element in your composition?

Recognizing your key subject is an important early decision in taking a photo. Most often it will be your first.

This will be what you focus on and what you want to expose well, (usually). If your subject has a wide tonal range – say a bride in a white dress and a groom in a black suit – be careful. Your camera will not be able to render detail both in the dress and the suit because the tones are extremely different.

Likewise, if part of your subject is in bright sun and part is in the shade, you will need to choose your exposure carefully. The contrast created by sunlight and shade is also extreme.

Discerning your primary subject helps you compose everything in your frame around it. Exposing it well helps make it the center of attention in your photograph.

How to Make Well Exposed Photos Every Time Fancy Kaftan

© Kevin Landwer-Johan

What mood do you want to capture or create?

To me, the answer to this question is more important to focus on than trying to obtain a full tonal range in my photographs.

The type of light you’re photographing in will influence the feeling in your photographs. So will your exposure choice. Is the light bright and hard, or soft and gentle? Should you set your exposure so you can see all the detail in the shadows or chose to let them become very dark and contain little or no detail?

Letting your camera make these choices for you, by not controlling your exposure, your photos may become flat and somewhat lifeless. By taking control and exposing your main subject well you can infuse story, drama, and imagination.

How to Make Well Exposed Photos Every Time Karen Grandpa

© Kevin Landwer-Johan

I have a mantra of sorts. Look. Think. Click.

Look at what you want to photograph. See what is before you. Your subject, it’s surroundings and the background. The light.

Think about how you want to portray your subject. What is your intention?

How much or how little do you want to include? What will fill your frame?

What quality is the light and how will it affect your photo?

Where will you stand or position yourself?

When will be the best time to take your photo?

Which exposure settings will you choose to best suit your intention?

Click. This should only happen once you have thought these things through.

How to Make Well Exposed Photos Every Time Chedi

© Kevin Landwer-Johan

It may seem a whole lot to do before taking a photograph, but this is what makes the difference between a snapshot and an image you may want to have framed and hang on your wall.

In the next article in this series, I will cover how to manage your camera settings to match your intent.

The post How to Make Well Exposed Photos Every Time. Part 1 – Seeing the Light appeared first on Digital Photography School. It was authored by Kevin Landwer-Johan.


Digital Photography School

 
Comments Off on How to Make Well Exposed Photos Every Time. Part 1 – Seeing the Light

Posted in Photography


SLR Magic brings six MicroPrime lenses to Fujifilm X mount, adds a 12mm as well

15 Mar

Cinema lens manufacturer SLR Magic has announced it will offer all of its existing MicroPrime range in the Fujifilm X mount. Designed for full frame sensors, the lenses will attract a 1.5x angle of view shift when fitted on the APS-C Fujifilm X cameras, but the addition of a new 12mm T2.8 aims to provide a good wide angle so Fujifilm users don’t miss out.

While the other six lenses in the MicroPrime range have been available for some time in the Sony E mount, the 12mm is a completely new lens and is designed only for APS-C sensors. All the lenses in the range have the same external design and mostly weigh the same, so switching from one to another is relatively easy when a rig is in use. They have an 82mm filter thread and use the same 0.8 MOD gears.

The inclusion of the Fujifilm X mount is almost certainly a result of the recent attempts by Fujifilm to attract videographers with the advanced movie features of its X-H1 and X-T3 cameras.

The lens line up will consist of:

  • 12mm T2.8
  • 15mm T3.5
  • 18mm T2.8
  • 25mm T1.5
  • 35mm T1.3
  • 50mm T1.2
  • 75mm T1.5

The six previously-existing models will cost $ 599, while the 12mm will cost $ 499. For more information visit the SLR Magic website.

Articles: Digital Photography Review (dpreview.com)

 
Comments Off on SLR Magic brings six MicroPrime lenses to Fujifilm X mount, adds a 12mm as well

Posted in Uncategorized


Photokina 2018: Fujifilm interview – ‘we’ll never go full-frame’

23 Oct
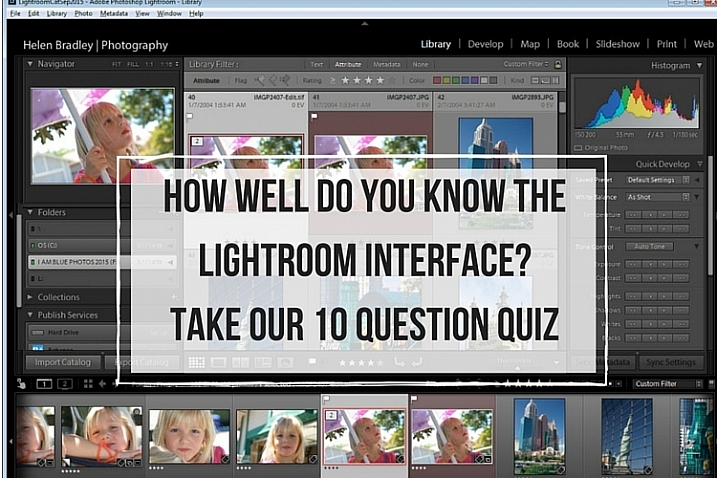
Toshihisa Iida, General Manager of Fujifilm’s Optical Device and Electronic Imaging Products Division pictured at the Photokina trade show in Cologne, Germany last month.

At this year’s Photokina show in Cologne, Germany we spoke to senior executives from several major camera and lens manufacturers. Among them was Toshihisa Iida of Fujifilm, who told us about the future of his company’s medium-format lineup, the challenges of 100MP and why Fujifilm will never make a full-frame camera.


Photokina is proving to be an important show for Fujifilm!

Yes. Photokina 2010 was the X100 development announcement, 2012 was the first-generation mirrorless – 2014 I’ve forgotten! [in fact it was the announcement of the X100T and X30] and 2016 was of course the GFX 50S.

Now that all of the legacy DSLR makers except Ricoh have full-frame mirrorless systems, will Fujifilm ever enter the full-frame market?

No, never. Because we don’t have that legacy – luckily or unluckily. We don’t see any point in Fujifilm entering that market, particularly since we have good APS-C and medium format systems. If we entered full-frame [our systems] would just start cannibalizing each other. We’re happy to stay with two completely independent systems.

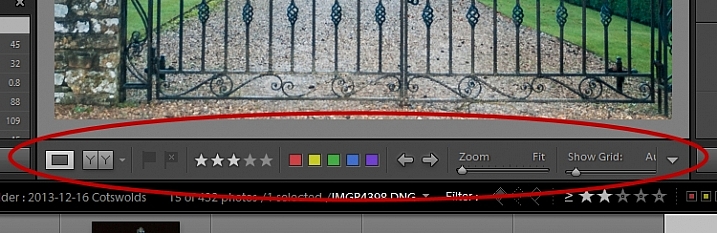
Fujifilm’s new GFX 50R is a rangefinder-style medium format camera which uses the same 50MP sensor as its direct predecessor the GFX 50S.

Do you see many of your users upgrading from X to GFX?

Not quite yet. Because they’re totally different systems. We started creating our legacy based on the X100. Usability, colors [etc.] and I hope that in near future more X Series customers will step up to GFX.

Can you describe the thinking behind the creation of the 50R?

Shortly after we introduced the 50S we started receiving requests from customers, who remembered the old medium format film cameras. Immediately after we released the 50S they were asking ‘when is a rangefinder style 50S coming?.

Is this a camera you expect to be used more like a field camera? Like the old rangefinders?

Yes. All controls must be reachable with one hand, that was our concept for usability. We wanted the camera to be more suited to street, reportage and portrait photography.

The forthcoming 100MP camera is more SLR style, with a detachable viewfinder, more similar to the 50S, but with an integrated battery grip for greater battery capacity. The sensor and the image stabilization system need more power.

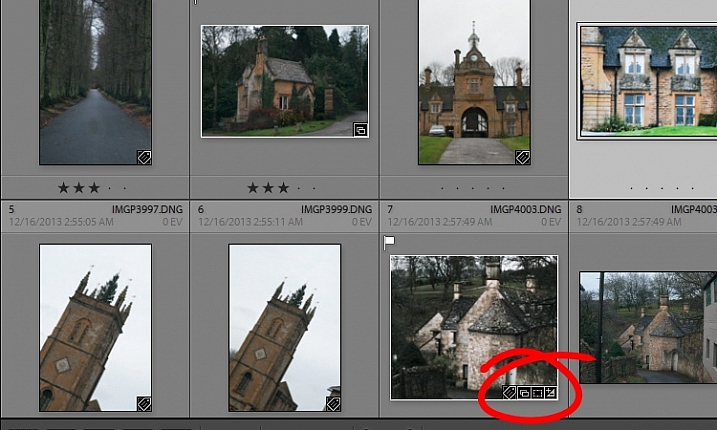
The upcoming 100MP GFX will feature an integrated battery grip and in-body stabilization. Fujifilm also promises a superior electronic viewfinder experience and beefed-up video capabilities.

Was a 100MP camera always in the works?

Yes, it’s why we designed our GF lenses to support 100MP, when that resolution [eventually] became available. We’ve talked about that openly.

You’ve mentioned the need for more battery capacity, what other changes did you face when designing a 100MP camera?

The biggest challenge was image stabilization. The sensor is so sensitive that even the smallest vibration is picked up [in the image]. So we knew we needed in-body stabilization. And you can imagine that it’s quite challenging to stabilize such a big sensor.

Is the system adapted from the IBIS system in the X-H1?

We drew on our experience from the X-H1, yes but it’s more challenging with the larger sensor size.

Will the viewfinder experience of the 100MP camera be better to the current GFX 50S and 50R?

It should be a lot better, yes, because the readout speed of the new sensor is a lot quicker. The sensor and the processor itself are both upgraded. The processor is much more powerful.

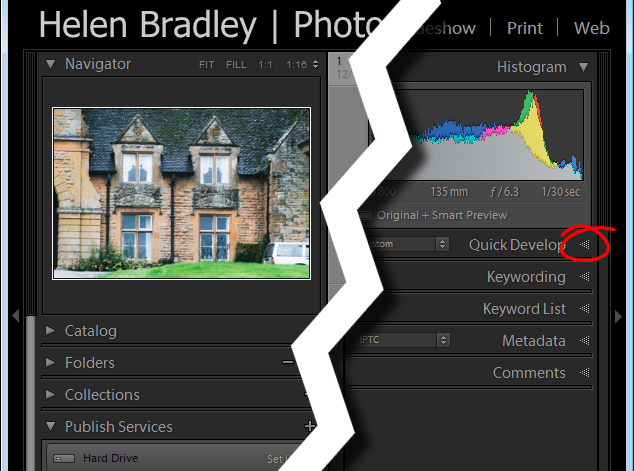
The recently-announced Fujifilm X-T3 is a powerful 26MP APS-C camera, which packs impressive still and video-oriented features.

Fujifilm was a little slow to introduce video features, but the current generation are very strong video cameras. What’s your video strategy for future cameras?

The forthcoming 100MP camera will be the first 4K/30p GFX camera, which is the first step. It will be interesting to see what kind of quality we can get from the new sensor. With the X Series we have a plan, for example to extend recording time, and make the menus more usable for still and video shooting. We have more to do, more speed, 4K/60p [etc.] We would really like to attract videographers to the GFX cameras as well.

Do you think that you might create Fujinon cine lenses for GFX in the future?

Let’s wait and see. The first step is 100MP, and then we’ll see how it goes. Of course, developing such lenses is probably technically possible, it’s just a matter of prioritization.

Filmmakers are creative people, always looking for something more

How do you plan to market the 100MP medium format to videographers? Videographers don’t typically think about medium format.

Just today [after the 100MP announcement at the Photokina press conference] I started receiving a lot of questions from videographers. Larger formats are becoming a trend for videography. Filmmakers are creative people, always looking for something more.

100MP and 4K/30p represent a huge amount of data – is SD media still appropriate?

I think that SD media and HDMI output are enough for now.

Tamron’s FE-mount 28-70mm F2.8 was the first third-party attempt at a native Sony FE mount lens. Could Fujifilm open up its XF and GF mounts to other lens developers?

Do you welcome third-party lens manufacturers that want to create lenses for XF and GF?

They’re not open standards as yet, but of course our customers want choice. We’re always considering what would benefit our customers, and more lenses are generally beneficial for customers.

Should we expect to see more smaller, compact lenses for GF mount, like the forthcoming 50mm pancake?

Yes, in the future we’d like to expand our lineup of compact lenses for GF. We need small lenses for the smaller camera, to get the right balance. We’re always thinking about the whole system.

Maybe we need to start from scratch when it comes to future cameras aimed at smartphone upgraders

The competitive marketplace is getting quite crowded. Which competitive products do you take most seriously?

We’re always watching the major brands, to see what they’re doing, but at the same time smartphones. The quality and functionality – we have to watch that segment very carefully, especially considering our entry-level mirrorless cameras.

How will you address the challenge from smartphones?

The first thing is to do more research into what smartphone customers want from cameras. Usability, shooting options and so on. Maybe we need to start from scratch when it comes to future cameras aimed at smartphone [upgraders].

Our biggest potential challenge is from smartphones, not competitor cameras.

Do you see opportunities for more Instax incorporation into your traditional camera lineups?

Yes, Instax are already becoming digital cameras. Maybe we should think about interchangeable lens Instax. One of the biggest features for mirrorless cameras are interchangeable lenses, so Instax is one of our opportunities.

The Pentax Q range (a Q7 is pictured here) was an intriguing but relatively short-lived attempt at an ultra-compact mirrorless interchangeable lens system. As most manufacturers move toward larger cameras and (especially) lenses, the days of such pocketable alternatives might be over.

Do you think that there could be a future for small format interchangeable lens cameras like the Pentax Q, now?

With that product, the sensor size was too small. The image quality was not strong enough to really compete against smartphones. We need a decent sensor size and high quality lens. So again the question is how to balance size, weight and quality.

Camera bodies can be small regardless of sensor size. The big difference is the lens. The size of the lens [is directly related to] sensor format.

In the past we’ve spoken about software corrections for some lenses. Do you see a future where your high-quality lenses could be made smaller using software?

We always prioritize optical quality first, minimizing software correction. That’s our policy at the moment, and I don’t think it will change. That’s why the APS-C format is important to us. We make the lenses as small as possible, without [a lot of] software correction.

What are the challenges of designing fast focusing large-aperture lenses?

A brighter lens means that each element is heavier. So we need to build in more powerful focus actuators, but there’s limited space. So it’s always a tradeoff of lens brightness, focus speed, and how heavy the lens is.

Designed for the more compact GFX 50R, Fujifilm’s forthcoming 50mm F3.5 offers a near-pancake form factor, much smaller than most of the company’s medium-format GF lens lineup.

Now that you’re thinking ahead to high resolution video capture in the GFX series, what impact does this have on lens design?

It’s challenging – how to minimize the weight of focusing units. It’s a task for the lens design team. Maybe they’ll use more aspherical elements, for example. There are technologies which we can use, but it’s a challenge.

Is there potential for Fujifilm to create dedicated video cameras?

Potentially, yes. We don’t have any concrete plans, but we need to understand the requirements of videographers, and how their requests when it comes to usability and menus are different from stills photographers. Especially for stills, operation is more dial-driven, but for video it’s totally different.


Editor’s note: Barnaby Britton

As Mr. Iida mentioned, for the past several years Photokina has been an important show for Fujifilm, serving as an opportunity to showcase its major releases in front of a global audience. Photokina 2018 was no different, with the announcement of two major new cameras – a rangefinder-style GFX 50R and the development of a forthcoming 100MP medium-format model, coming next year.

Both announcements probably serve as tacit answers to the question of whether or not Fujifilm will ever create a full-frame camera, but “no, never” is about as conclusive a response as we’d ever expect to get. A more typical response (of the kind that we get repeatedly whenever we talk to senior executives) is more along the lines of ‘we need to study the market, and we’re not ruling anything out’. The fact that Mr. Iida was so definitive is unusual, but reassuring. Fujifilm has an excellent opportunity to differentiate with medium-format in a way that it couldn’t expect to do with full-frame, especially now that Canon, Nikon and Panasonic have joined the fray.

Fujifilm’s cameras might be getting bigger, but Mr Iida recognizes a need for smaller lenses

The forthcoming 100MP GFX won’t be cheap by full-frame standards, but with features like built-in IBIS and 4K/30p video, it promises to set new technical benchmarks for large-sensor imaging when it is released next year.

Fujifilm’s cameras might be getting bigger, but Mr. Iida recognizes a need for smaller lenses, especially with the somewhat more compact rangefinder-style GFX 50R. A range of compact F3.5-ish primes for GFX would help make the system somewhat more portable, as well as potentially more attractive to first-time medium-format buyers.

We expect to see more – and more powerful – ‘hybrid’ cameras from Fujifilm

Still imaging is only part of the story, of course. In recent generations Fujifilm has made impressive efforts to improve its products’ video capabilities, to the point where the X-H1 and more recent X-T3 are among our favorite cameras for 4K videography. Assuming that it reads out all pixels for 4K video, the forthcoming 100MP medium-format model could actually prove very disruptive for professional filmmaking, thanks to the wide dynamic range of medium format sensors compared to full-frame and super 35 formats.

Could Fujifilm use its long experience of making broadcast and cine lenses to create a dedicated video camera? Mr. Iida isn’t ruling it out, and it’s an intriguing thought. In the short term though, we expect to see more – and more powerful – ‘hybrid’ cameras from Fujifilm, and that’s still an exciting prospect.

Articles: Digital Photography Review (dpreview.com)

 
Comments Off on Photokina 2018: Fujifilm interview – ‘we’ll never go full-frame’

Posted in Uncategorized


OnePlus 5 performs well in DxOMark Mobile test, misses top spot by three points

07 Jul

The engineers at DxO Labs have put the brand new OnePlus 5 through the DxOMark Mobile testing process, and the phone did not disappoint.

With an overall score of 87 points, the Chinese manufacturer’s flagship device has delivered a respectable performance on par with well-liked phones like Huawei’s Leica-branded P10 and Sony’s Xperia XZ. This also puts it only three points behind the top-ranked HTC U11, and one point better than Apple’s ever-popular iPhone 7.

DxOMark only tested the OnePlus 5 16MP main camera with F1.7 aperture, not the 20MP/F2.6 secondary 2x tele-module. The camera achieves a photo sub-score of 87 points, delivering good results in both bright and low-light situations. The testers were particularly impressed with the vivid color rendition, accurate white balance, good detail and the fast and smooth autofocus system.

Moving on to video, In the default 1080p/30fps video mode, the OnePlus offers accurate exposure and white balance in all conditions. The testers also liked the quick transition in changing light conditions, the accurate autofocus and the effective stabilization system. This earned the OnePlus a video sub-score of 86 points.

We are currently working on our own review of the OnePlus 5. Until then, you can read DxOMark’s full test report here.

Articles: Digital Photography Review (dpreview.com)

 
Comments Off on OnePlus 5 performs well in DxOMark Mobile test, misses top spot by three points

Posted in Uncategorized


Create a Portfolio That Shows the Photographer as Well as the Photographs

13 Feb

portfolio-review

When it comes to telling their own story in images, photographers often struggle. While their photos and galleries may be memorable and unique their websites and portfolios are too frequently dull, derivative and, to a buyer who sees one slideshow after another, instantly forgettable. Instead of showing who they are, the websites become a collection of what they’ve shot, a series of images with no connection to the person who took them or the photographer the buyer will be booking.

According to one expert, it’s only when photographers see their websites and their portfolios not as marketing devices intended to show their skills and range but as autobiographies — as an opportunity to tell their own stories and show who they are — that they stand out and win jobs.

“The best portfolios, to me, are materially self-portraits regardless of the subject matter,” says Allegra Wilde. “This is not about a romanticizing the suffering or narcissistic artist. The kind of imagery I am talking about is much less likely to be forgotten by the viewer, or in the case of the pros, the buyer.”

For Wilde, who started her career selling ad space at Workbook before becoming the company’s Director of Talent and Agent Branding, a portfolio (and now a photographer’s website) should flow. The presentation should have a rhythm, match the work and, most importantly, tell the story of the photographer.

It Takes a Hero to Be a Successful Photographer

That’s not something that all photographers want to do — or think of doing as they create a site to pitch for work. Building a website that doesn’t just show pictures but shows who you are means putting yourself as well as your images on display. The personal projects become more important as they reveal the questions you address in your images, the aesthetic that attracts you, the messages you want your photos to communicate and the way you want them to speak. Buyers are invited to judge the photographer and their interests as easily as they judge the quality of their work. It’s not a display that makes all photographers comfortable.

“The most successful photographers (or any other artists for that matter), always take some kind of leap into discomfort,” says Wilde. “Usually this level of discomfort is rooted in their own personal ‘exposure,’ or fear that no one will like their images or hire them. These heroes of photography, (yes, I call them ‘heroes,’ because it takes enormous courage to do this) make images from a very naïve place, usually self-reflective and quite emotionally ‘naked.’”

After operating a couple of private online forums — one for photography and illustration agents; the other for ad agency photo editors and buyers — Wilde now runs Eyeist, her own photography review service. The company employs a team of photographers, buyers and photography business experts to examine photographers’ websites and portfolios, and recommend improvements. Photographers can register and upload images for free then book a review when they’re ready. They’ll be asked for “tons of info” about their images, their aims for the review and their development as a photographer before they select (or ask for) a reviewer and choose the kind of review they want. The fees range from $ 100 for a basic review consisting of an audio commentary critiquing up to 30 images to $ 350 for help with editing and sequencing a series of images so that it showcases the scope and storyline of a project. So far the company has provided around 200 reviews for photographers who range from students, emergent photographers and enthusiasts to full-time professionals.

The reviewers look at whether the words the photographer is using to describe his or her images actually match the images they’re showing. Often, says Wilde, the two things differ so the reviewer will focus first on repairing that disconnect. They’ll then start thinking about suggesting ways in which the photographer can create images that help them achieve their goals, change those goals or address their presentations and marketing.

Reviewers Reignite a Photographer’s Passion

The result should be not just a plan that a photographer can follow to improve their appearance, but a renewed interest in creating images that have something to say.

“It wasn’t enough to give the photographer a road map for improvement. You have to ignite (or re-ignite) their passion about their own work,” says Wilde. “That way, they have a much better internal sense of how to make progress and become much more open to creative ideas that they might not have entertained before.”

None of these recommendations, says Wilde, compare to the sort of congratulatory comments that you’ll find placed by friends or family at the bottom of a Flickr set or a Facebook album. Those comments might make you feel good but they won’t point out the flaws that are preventing you from winning work.

Overall, Eyeist’s reviewers tend to find two mistakes in photographers’ presentations. The first is the tendency of photographers to aim at a particular market or follow a popular style in the hope that joining the crowd will bring success. In fact, says, Wilde, it just brings them more competition. And the second is not pushing their images hard enough or spreading them widely enough so that both the photographer and the photographs connect with the right buyers.

“I know this sounds crazy in this day and age of photo sharing, social and business networking with photographs, but many photographers either undersell their work by not marketing it enough, or, by overselling it — by first dumbing down the work (making it more generic to follow the marketplace), and/or by constantly promoting and posting their images and assignments without any personal context,” says Wilde. “This makes it hard for the viewer, and especially the buyer, to ‘invest’ in the work, and to engage with the photographer personally as a possible collaborator.”

At a time when social media has made branding personal, photographers are going to have to learn to step out from behind their cameras and put themselves on display. They don’t have to shoot self-portraits but the way they show their work has to be about them as much as about the subjects of their images.


Photopreneur – Make Money Selling Your Photos

 
Comments Off on Create a Portfolio That Shows the Photographer as Well as the Photographs

Posted in Equipment


Well Wheeled: 12 Luxury Bike Accessories for the Discerning Cyclist

18 Oct

[ By SA Rogers in Design & Products & Packaging. ]

bike-life-velo-sock-2

Ride your bike in style with crocheted skirt guards, leather beer carriers, hand-carved saddles and picnic sets that cost more than your car. These luxurious bicycle accessories will make sure you’re ready for drinks at the park or a fashion shoot with Vogue while also outfitted in top-of-the-line practical gear worthy of even the most serious cyclists.

DIY Built-In Bike Bar

bike-life-built-in-bar

This DIY mini bar is built right into the unused section of a bike’s frame, packed full of coasters, cups, bar tools and mixers with a lid that folds down to become a tiny triangular table. It’s a pretty clever idea for picnics – just don’t drink and bike. Want one of your own? You’ll have to make it yourself, since it’s so particular to the individual shape of your bicycle.

Leather Growler & Six Pack Carriers

bike-life-six-pack

growler-carrier

If beer is more your (bike) speed, there are options for that, too – like a fancy lather carrier that holds either a six-pack or an entire growler and mounts to your saddle or frame. The full-grain leather growler coozie by Cicada Leather Company fits most 64-ounce glass growlers, and Walnut Studio’s ‘Bicycle Beer Combo’ comes with a ‘frame cinch’ design, which can be used to carry anything with a handle on the top tube of your bike.

Crocheted Skirt Guard

bike-life-skirt-guard

Why sacrifice your fashion sense while biking? Not only does this crocheted add-on make your bike look fancy, it enables you to wear skirts and dresses without worrying about them getting caught in your spokes. Made by Knits for Life, it comes in two sizes and snaps onto the fender with included clips.

World’s Most Expensive Bicycle Saddle

bike-life-crown-saddle

bike-life-crown-saddle-2

If you can’t afford the whole Fendi shebang, but still want to drop a giant wad of cash on your ride, replace your saddle with one of three designs by Crown Saddles – the Graf Ludwig, the Konig Friedrich or the Herzog Eberhart. The priciest saddles in the world, with the Herzog boasting a price tag of €1554 Euros (around $ 1700 USD), the saddles are made of lightweight carbon fiber and Kevlar Rowling with airbrush finishing.

Next Page – Click Below to Read More:
Bike Life 12 Luxurious Accessories For The Discerning Cyclist

Share on Facebook


[ By SA Rogers in Design & Products & Packaging. ]

[ WebUrbanist | Archives | Galleries | Privacy | TOS ]


WebUrbanist

 
Comments Off on Well Wheeled: 12 Luxury Bike Accessories for the Discerning Cyclist

Posted in Creativity


How well do you know the Lightroom interface? Take this quiz and find out

03 Jan

lightroom interface quiz lead image

When you’re new to Lightroom there are lots of things about the Lightroom interface that contribute to its steep learning curve. Most Lightroom users can tell you a story or two of being caught by items appearing, or disappearing, without warning. With experience these are minor inconveniences, but when you are new to Lightroom, they can be overwhelming. So, just how much do you know about the Lightroom interface? Take this quiz and find out:

Question #1

What is this and how do you get it back if it disappears?
Lightroom Interface Quiz - image for question 1

Answer:

That is the Toolbar, and you can display or hide it by pressing the letter T on your keyboard. You can also choose View > Hide Toolbar or View > Show Toolbar depending on whether it is currently visible or not. There is a toolbar in every module in Lightroom.

Question #2

When you used Lightroom recently, you recall seeing small indicators like this in the bottom right corner of some of your images. What are they and how do you get them back if they’re not showing in grid view?

Lightroom Interface Quiz - image for question 2

Answer:

These are Thumbnail Badges, and they indicate whether or not an image has been cropped, has develop presets, keywords added, and so on. In the Library module pressing the letter J will toggle through a number of options for your grid view, two of which include thumbnail badges.

Question #3

Most panels show filled in triangles like the one on the left (below), but one of the panels has a triangles like the one on the right (also below). Why is it different?

Lightroom interface quiz - image for question 3

Answer:

The second panel on the right is set to what is called Solo Mode. When this option is enabled, and you click to open any of the panels, all other panels will close automatically (essentially leaving only one opened at a time). The Navigator and the Histogram are exceptions to this rule and they operate independently of Solo Mode. To enable or disable Solo Mode, right click on the name of any panel (the actual word not the triangle) and choose Solo Mode from the options given (see below).

Lightroom interface quiz - image for question 3

Question #4

This is the Develop module and the Basic panel is missing. What has happened and how do you get it back?

Lightroom interface quiz - image for question 4

Answer:

Any panel can be enabled or disabled in Lightroom. If you’re missing a panel, right click another panel in that same sidebar to display the panel list. Any panel name without a checkmark isn’t visible, so to make it visible, just click the panel name.

Lightroom interface quiz - image for question 4

Question #5

This is the list of Lightroom modules. A module is missing, what is it and how do you get it back?

Lightroom interface quiz - image for question 5

Answer:

The Develop module is missing. You get it back the same way as you would a missing panel, right click any of the module names to show a list of modules. Any that do not have checkmarks beside them are not visible. Select that one to display it.

Lightroom interface quiz - image for question 5

Question #6

There used to be a panel here in Lightroom just above the thumbnails in grid view in the Library module. It’s disappeared. What is it, and how would you get it back?

Lightroom interface quiz - image for question 6

Answer:

This is the Filter bar, and you can display or hide it by pressing the Backslash key (\). You can also display or hide it by choosing View > Show Filter Bar.

Lightroom interface quiz - image for question 6

Question #7

Here just above the filmstrip you recall that at one stage you saw Star, Flag and Color options, but they now seem to be missing. How do you get them back?

Lightroom interface quiz - image for question 7

Answer:

Click the word Filter and the filters will reappear. Click Filter again and they will disappear.

Lightroom interface quiz - image for question 7

Question #8

What is this called and how can you get rid of it or choose what information is showing?

Lightroom interface quiz - image for question 8

Answer:

This is the Loupe Info Overlay and you can display and hide it by pressing the I key on your keyboard. There are three states for this: Info Overlay 1, Info Overlay 2, and turning it off entirely. To edit what information is displayed click CMD+J (Control+J on a PC) or go to:  View > View Options.

Question #9

This is the right hand corner of the Lightroom screen and the controls for Maximize, Minimize and Close are all missing, as are all the Lightroom menus on the left of the window. How do you get them back?

Lightroom interface quiz - image for question 9

Answer:

To redisplay the Lightroom menu and the Windows controls press Shift + F. This is a toggle switch which displays and hides full screen mode. There are three states for full screen mode so press Shift + F repeatedly until the Lightroom menu and the Window controls reappear.

Question #10

Here, in the Develop module, you don’t see any stars on the toolbar when you are viewing this image at full size. The stars only appear on the toolbar when you are in Grid view. Where did they go and how can you get them back?

Lightroom interface quiz - image for question 10

Answer:

The toolbar in the Develop module has two states, one for the Grid View, and one for the Loupe (single image) View. To display and hide the various options on either toolbar, switch to that view, and click the arrow in the far right of the toolbar to display the options available in that view. Click any unchecked option to display it on that toolbar, likewise you can click any checked options that you want to hide.

Lightroom interface quiz - image for question 10

If you got 10 out of 10 on this quiz, well done! You have a good understanding of the basics of the Lightroom interface.

If you missed any of these questions, hopefully you’ve learned something about using Lightroom that you did not know before.

googletag.cmd.push(function() {
tablet_slots.push( googletag.defineSlot( “/1005424/_dPSv4_tab-all-article-bottom_(300×250)”, [300, 250], “pb-ad-78623” ).addService( googletag.pubads() ) ); } );

googletag.cmd.push(function() {
mobile_slots.push( googletag.defineSlot( “/1005424/_dPSv4_mob-all-article-bottom_(300×250)”, [300, 250], “pb-ad-78158” ).addService( googletag.pubads() ) ); } );

The post How well do you know the Lightroom interface? Take this quiz and find out by Helen Bradley appeared first on Digital Photography School.


Digital Photography School

 
Comments Off on How well do you know the Lightroom interface? Take this quiz and find out

Posted in Photography