RSS
 

Posts Tagged ‘weather’

Tips for Portrait Photography in Overcast Weather [video]

25 Jan

The post Tips for Portrait Photography in Overcast Weather appeared first on Digital Photography School. It was authored by Caz Nowaczyk.

In this video by Julia Trotti, you’ll learn tips for portrait photography in overcast weather that can give you more even, soft light on your models.

Overcast weather can be a great time to do portrait photography because the light is soft and doesn’t create as many of the harsh shadows that bright midday sunlight creates.

If you are doing a shoot with a model and the weather is overcast, keep in mind the following tips:

1. Make the most of it by using locations you normally wouldn’t

Keep in mind, depending on the type of overcast weather it is, you may still get some shadows if it is a bright overcast day.

If you find there is not quite enough light getting to your model’s eyes, ask them to bring their chin up a little to capture the light on their eyes.

Bear in mind that the direction your model is facing also has an effect on the light and contrast to the background.

Shoot in a few directions at the start as test shots to decide which is the best angle for light.

When photographing on overcast days, you may want to find a location that has a pop of color so that your images are not flat. Green locations such as gardens and forests work well. If in a location that is not as vibrant in color, consider dressing your model in colorful clothes.

2. Be mindful of including the sky in your photos

When the sky is dark and overcast, it can add great drama. However, if it is a bright overcast day, the sky can look blown out. In this case, use varied composition and camera angles to eliminate distracting over-blown white sky (unless your purpose is to have high contrast between your model and background).

3. Keep an eye on your camera settings

When overcast, your scene may be quite a bit darker, and your camera settings need to reflect that. Also, depending on your location, you may need to tweak your camera settings too.

If you want to capture sharp hair in windy conditions, use a faster shutter speed to avoid motion blur on your models’ hair. If you want to show the effect of some slight motion, use a slower shutter speed.

You may also find the following articles helpful:

6 Portrait Lighting Patterns Every Photographer Should Know

13 Tips for Improving Outdoor Portraits

10 Ways to Take Stunning Portraits

How to Create Awesome Portrait Lighting with a Paper Bag an Elastic Band and a Chocolate Donut

How to Pose and Angle the Body for Better Portraits

The post Tips for Portrait Photography in Overcast Weather appeared first on Digital Photography School. It was authored by Caz Nowaczyk.


Digital Photography School

 
Comments Off on Tips for Portrait Photography in Overcast Weather [video]

Posted in Photography


7 Tips for Beautiful Photos in Icy Cold Weather

26 Nov

Winter is a beautiful season to take photos. In order to capture the beauty that winter offers you’ll have to overcome cold temperatures for both you and your gear.

Here are seven tips that will help you protect your gear and take beautiful photos during the winter season.

Remember that exciting feeling you had as a kid when the first snow came? If you’ve become a grumpy grown up when it comes to winter, challenge yourself to recapture the wonder of winter this year!

1. If You Hate the Cold, Stay Inside!

When you think of winter photos you might imagine being bundled up outside in the howling cold trying to avoid frostbite while taking photos. I’ve certainly been in that situation a time or two!

Maybe the thought of crazy winter weather keeps you from ever stepping outside to take photos during winter months. But who says you have to go outdoors to take nice winter photos?

Before stepping outdoors, think about what you can accomplish inside.

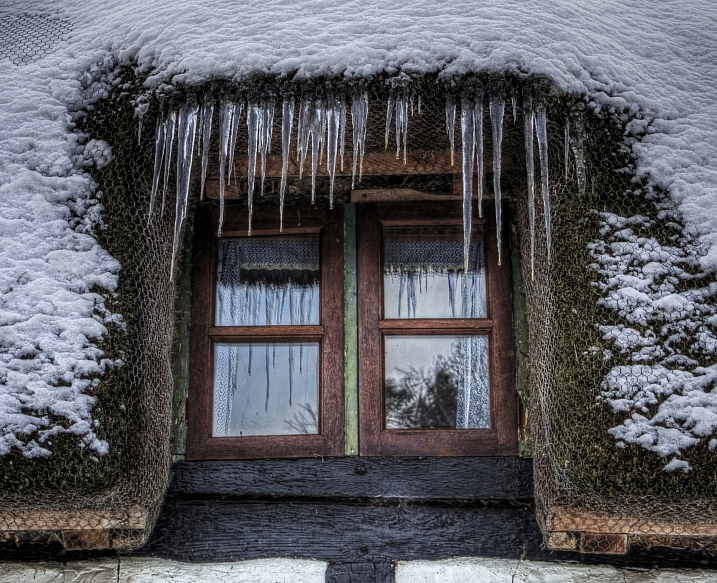
A few years ago I spent the whole winter indoors studying. I loved the way the icicles looked hanging from our house. Rather than take my camera outdoors, I photographed the icicles from inside my house.

Ever since I was a kid I’ve always had a bedroom that faces the sunrise. I love waking up to golden hour.

These are the icicles during the afternoon.

These are the icicles at sunset. In Ontario, Canada, sunsets often have deep and vibrant colors.

These icicles are being lit by the cool light of the full moon.

2. Preparing Your Batteries

Now suppose you do want to head outdoors to take winter photos; you had better be prepared.

Make sure your batteries are fully charged (including your spare ones). Batteries tend to drain faster in the cold, so find a warm pocket to keep them in. A pocket should allow the batteries to be up against your body; perhaps an inner chest pocket. Also, try keeping a hand warmer or baked potato in the pocket!

While you’re waiting for your batteries to charge, enjoy a hot cup of tea! Steam is a lot of fun to photograph and works best when it is backlit.

3. Metering for the Snow

Most people use some sort of auto setting on their camera such as ‘landscape’ or ‘portrait’ mode. You may even be using aperture or shutter priority. With all of these settings, your camera uses its internal meter to calculate the right exposure or brightness for your photo.

This can be a problem.

When the landscape is covered in bright white snow, your camera will want to darken the exposure. This means that you’ll snap a photo and the snow will turn our looking very gray. The camera doesn’t realize that you want the snow to appear bright white in your photo. Of course, it doesn’t even know it’s looking at snow!

There are two ways to fix this. The first is to use full manual mode so that you have control over the exposure, not your camera.

If you’re not comfortable using manual mode yet, then try using exposure compensation. Set your camera to aperture priority, then use exposure compensation to increase the exposure by a full stop. Keep making adjustments until you’ve got it just right. Consult your camera manual on how to adjust exposure compensation.

Prior to using exposure compensation, I used to have to brighten all my winter photos with Lightroom. Notice how gray the snow is in the photo on the left.

Even though you can brighten your photos later with an editing program, it’s far better to get the exposure correct the moment you take the photo.

4. Look for Contrast

Once you’ve got the hang of exposure and metering it’s time to make some creative photos.

The first thing I look for in a snowy landscape is contrast. Since the snow is bright white, I look for dark objects that will stand out in contrast to the snow.

Contrast is what will help your photo to ‘pop’ and give it more dimension.

In a landscape, this might be trees, buildings, animals or people.

The dark trees in the background help the shape of the snow-covered hill to stand out. The boy sliding down the hill really pops too.

5. Think in Black and White

You’re already looking for high contrast scenes. Bright white snow together with dark objects create a perfect high contrast black and white photo.

Seeing our photos in black and white allows us to appreciate the lines and texture in the photo without being distracted by colors.

The bright snow is contrasted by the dark trees.

There are two options to get a black and white photo. You can change your camera settings to photograph in black in white. Or, you can photograph in JPEG or RAW mode and convert the photos to black and white later.

I recommend using RAW mode and set your camera to black and white. This way your RAW photo will retain its color even though it appears black and white on your camera. Using RAW mode offers you the chance to see your photos in black and white as you take them, but still have the option to keep them in color when you look at them later on your computer.

A silhouette is a perfect choice for a high contrast black and white photo.

6. Slow Shutter Speed

I love to be out in snow storms watching the wind whip the snowflakes around. The constant motion of the snowflakes will allow you to get creative with your shutter speed.

You can set your shutter speed to freeze the movement of the snowflakes, but you can also slow your shutter speed down and capture the movement of the snowflakes.

You can’t see the wind with your eyes, but you can see how it blows the snowflakes around. When you slow down your shutter speed, you’ll capture the blurred movement of the flakes.

You can slow your shutter speed down just a little bit and capture some slight motion blur.

You can slow the shutter speed down to about 1/30 of a second to capture even more motion blur. Just make sure that both your camera and your subject are held very still (consider a tripod).

I recommend using shutter priority. Slow down your shutter speed until you achieve the desired amount of blur in your photo. Remember the third tip I gave you about metering for the bright snow? If you’re having trouble getting the right exposure then try manual mode or exposure compensation.

7. Protect Your Camera Before You Come Inside

People who wear eyeglasses know how annoying it is to come inside from the cold. As soon as they step indoors, their glasses fog up! This is called condensation. It’s moisture from the warm air collecting on a cold surface.

This will happen to your camera too. When you bring it inside from the cold, moisture will collect on it, getting into all the tiny little parts of your camera. Naturally, this can be a problem for the long-term health of your camera.

Here’s what you can do to bring your cold camera into the house without having to worry about condensation:

While you’re still outside, put your camera into a large heavy-duty airtight bag. Seal the bag so that no moisture can get in. Now when you bring your camera into the house no moisture will get into your camera. Allow your camera to return to room temperature before taking it out of the bag. When you do take it out, no moisture will collect on it!

This airtight bag will keep all the condensation off my camera until it returns to room temperature.

Beautiful Photos in Icy Cold Weather

Whether you’re taking winter photos from the warmth of your cozy home, or you’re going to brave the winter chill, remember these simple tips:

  • Charge your batteries and keep them warm.
  • Get perfectly exposed photos through manual mode or exposure compensation.
  • Make your winter photos look creative by finding contrast, converting them to black and white, or using a slow shutter speed.
  • Keep your camera safe from moisture by sealing it in an airtight bag before coming back inside.
  • Be ready for your next adventure by recharging your batteries as soon as they are warm!

The post 7 Tips for Beautiful Photos in Icy Cold Weather appeared first on Digital Photography School.


Digital Photography School

 
Comments Off on 7 Tips for Beautiful Photos in Icy Cold Weather

Posted in Photography


Lensrentals tears down the Sony a7R III in search of better weather sealing

21 Feb

$ (document).ready(function() { SampleGalleryV2({“containerId”:”embeddedSampleGallery_8395811675″,”galleryId”:”8395811675″,”isEmbeddedWidget”:true,”selectedImageIndex”:0,”isMobile”:false}) });

Our good friend Roger Cicala over at Lensrentals finally got around to tearing down the Sony a7R III, to see if Sony was being honest when it claimed the newest a7R was much better weather sealed than its predecessor. The results? Well, it’s a “good news, bad news” situation. Yes, Sony was being truthful… but it screwed up in one major place.

You can see the full teardown over on the Lensrentals blog—Roger tears the thing all the way down, even giving us a great look a the IBIS system and how far the sensor can travel—but the TL;DR version goes something like this:

Sony weather sealed most of this camera very well, much better than its predecessor. BUT, for some reason, Sony left the bottom of this camera extremely vulnerable to water. You can see just how vulnerable in the gallery above. Or, if you prefer words, here’s Roger’s conclusion:

Sony spoke truly. Except for the bottom this camera has thorough and extensive weather sealing, as good as any camera I’ve seen. (Before you Pentax guys start, I have not taken apart a Pentax so it may be completely sealed in a super glue matrix for all I know.)

That being said, the bottom of the camera is not protected worth a damn. If you’re out in a sprinkle or shower, this probably doesn’t matter; water hits the top first. But if you’re in severe weather, near surf, or might set your camera down where someone might spill something, you need to be aware of that.

To read the full conclusion, scroll through the entire teardown, and see just how many rubber gaskets and foam pieces Sony added to the a7RIII to keep it safe from inclement weather, head over to the Lensrentals blog.

Articles: Digital Photography Review (dpreview.com)

 
Comments Off on Lensrentals tears down the Sony a7R III in search of better weather sealing

Posted in Uncategorized


5 Creative Indoor Portrait Locations for When the Weather is Blustery

16 Feb

What if I told you that you can find some interesting indoor locations and take photos for free? In this article, I will show you five remarkable indoor portrait locations that you can seek out for your winter shoots.

Winter time is a huge bummer for us portrait photographers. Harsh winds make us (and our models) question our sanity when we step outside for a photoshoot. Sure, we can rent studio space but this can be expensive. Also, let’s be honest, many studio spaces just look bland and uninspiring. Let’s see what else is available.

Editor’s note/disclaimer: The suggestions made in this article do not reflect the views of dPS and are solely the author’s recommendations and opinions. We suggest that you ALWAYS get permission when shooting at an indoor location that is private property (i.e. anywhere other than your subject’s home or yours). Please be aware of the laws in your area regarding photography in private locations, and follow them so you do not find yourself in trouble with the law. 

1. LIBRARIES

5 Creative Indoor Portrait Locations for When the Weather is Blustery - library

Libraries are an excellent place to shoot portraits. Tall shelves of books and impressive architecture provide a variety of wonderful backgrounds.

Seek out public libraries and university libraries that are open to the public. I’ve taken portraits of model friends at the Boston Public Library, Boston College, and MIT.

Some libraries have strict policies about photography, so if you’re unsure just ask a staff member. In many places, “Can I take some photos of my friend in here?” is all it takes to get permission.

2. CONVENIENCE STORES

Convenience stores are one of the easiest places to get permission to shoot portraits. Just walk into the store and politely ask the cashier if you can take some photos of your friend inside. That’s how I got these photos:


When shooting in a convenience store, be aware that the aisles are typically narrow. I recommend bringing a wide-angle lens, such as a 35mm, to allow you to fully capture the setting.

3. UNIVERSITY BUILDINGS

Many universities have academic buildings that are open to the public, which makes them a good option to take photos indoors. Empty classrooms are a personal favorite.

university - 5 Creative Indoor Portrait Locations for When the Weather is Blustery

university - 5 Creative Indoor Portrait Locations for When the Weather is Blustery

I want to emphasize that it’s very important to have respect for the space and its owners. In most instances, the worst case scenario is pretty mild – being asked to leave. If you are asked to leave a property, simply leave without making a fuss. In my experience, it’s not common to get kicked out of places for simply taking photos.

If you’re nervous about confrontation, then ask for permission in advance. Trust me, if you’re polite and transparent, most people will be willing to accommodate your photography (given that you’re not doing it for commercial use or taking photos of their patrons or guests).

4. GROCERY STORES

Filled with colorful vegetables and bright lights, grocery stores are a goldmine for portrait photography. You can capture a wide variety of different scenes reminiscent of everyday life. Have your model interact with different items in the store and use them as props.


Plan to shoot at off-peak hours, such as the middle of a weekday, to avoid throngs of shoppers photo-bombing your pictures. The layout of different grocery stores can vary widely. Some have wide, spacious aisles while others are more densely packed and narrow. Be sure to bring the right lens to properly capture the environment.

It’s useful to scout out the location in advance if you can.

5. LAUNDROMATS

Laundromats are great places to put a different spin on your portraits. If you live in a city, chances are there are plenty of laundromats. If you don’t where to find any near you, start with a simple Google search. Look for self-service laundromats, since these usually don’t have any on-site staff.

It’s rare that laundromats are completely empty, so get used to shooting around other people. When you ignore the side-eyed glances from people drying their socks, then you can get photos like this:

laundromat - 5 Creative Indoor Portrait Locations for When the Weather is Blustery

laundromat - 5 Creative Indoor Portrait Locations for When the Weather is Blustery

Conclusion

Again, it’s important to be respectful of your environment and the people there who are just going about their business.

You don’t need to go to a public park or shoot in a studio to take great portraits. When you think outside the box, then the world can be your photography playground.

What’s are some of your favorite indoor portrait locations? Let me know in the comments section below.

The post 5 Creative Indoor Portrait Locations for When the Weather is Blustery by Dan Bullman appeared first on Digital Photography School.


Digital Photography School

 
Comments Off on 5 Creative Indoor Portrait Locations for When the Weather is Blustery

Posted in Photography


‘Water Torture Test’ compares Canon, Nikon, Sony and Olympus weather sealing

10 Jan

As part of their Camera of the Year comparison between the Nikon D850 and the Sony a7R III, Imaging Resource decided to test the cameras’ weather sealing with their very own “water torture test.” And just to spice things up a bit, they threw in the Canon 5D Mark IV and Olympus OM-D E-M1 Mark II for good measure.

All four cameras were subjected to a “brief, moderately heavy rain shower and misty conditions,” and despite what you may think about all top-tier cameras being more alike than different on the weather sealing front, not all four bodies coped well. You can watch the test above or visit Imaging Resource for an in-depth report on their weather sealing tests, but if you want the TL;DR (or DW), it goes something like this:

  • The Canon 5D Mark IV and Olympus OM-D E-M1 Mark II both passed without so much as a stutter. No water getting anywhere it shouldn’t have.
  • The Nikon D850 sprung a small leak into the viewfinder unless the Nikon BS-3 hot shoe cover was used. Everything else stayed dry.
  • The Sony a7R III performed the worst by far, leaking a significant amount of water into the battery compartment (seemingly from above), and malfunctioning entirely during IR’s 15-minute ‘heavy mist’ test.

Of course, one should be careful making sweeping generalizations based on testing one copy of each camera, but if this test is indicative of all Sony a7R III’s weather sealing, Sony might want to take note of IR’s results as they go about designing the Mark IV.

Check out the in-depth review for more details on how each of the four models performed.

Articles: Digital Photography Review (dpreview.com)

 
Comments Off on ‘Water Torture Test’ compares Canon, Nikon, Sony and Olympus weather sealing

Posted in Uncategorized


5 Tips for How to Photograph in Any Kind of Weather

23 Nov

If you live anywhere in the northern hemisphere, you must have realized by now that fall is over and winter is slowly but surely creeping up on us. The days are getting shorter, the leaves are changing color (or gone) and here in Chicago, the rain is your constant companion until it gets replaced by snow!

Now if you are primarily an outdoor natural light photographer, you quickly understand that one of the most challenging aspects of your work is the fact that you are so dependent on the weather. You have very little control over it in spite of what the weather man says!

Photographing landscapes in any weather - fog

The weather can change almost instantly and ruin some of the best-laid plans for photography excursions and photoshoots. One of the best things you can do is to be prepared to photograph in any kind of weather. With these few simple tips and prep-work, you can continue working in the natural outdoor light as opposed to indoor studio light.

#1 – Full Sun / Bright Light

The sun in all its glory is a beautiful light source and can make any subject pop. Regarded by some as the ideal photographing conditions, bright sun can create a scenario where you have beautiful light and the ability to experiment with shadows.

Sure, some people may think that bright light is bad for portraits, but it all comes down to how you use the light. A great tip for photographing in the bright midday sun is taking pictures in open shade. This is when you position your subject in a shady part of the frame that’s closer to the light. You can also use a reflector if needed to bounce light from the sun onto the subject.

Add a fill light

You can also choose to use a flash to light your subject. In a pinch, use a natural reflector like a bright sidewalk or light color building to do the same if a flash or reflector is not handy. When you are photographing landscapes, it is likely that the whole scene is evenly fit. Here you can try exposing for the whole scene or even underexpose a tad in order to not blow out the sky and retain some detail in the clouds.

Of course, if you are photographing in raw these edits can be done in post-processing also.

Photographing portraits in any weather - full sun

This image was taken at the brightest time of day during a visit to the Coliseum in Rome. There was no open shade and I just couldn’t place the subject in any other spot because it was so crowded. Plus the intent of this image was to showcase my daughter in Rome for her class project that was all about ancient Rome. So this is the best I could do given my limitations. You can see the shadows on her face and on her shoulder!

Photographing landscapes in any weather - bright sun

I wanted to capture the essence of the Tuscan countryside – rolling hills, vineyards and tiny villages. There was no real shade or even too many clouds in the sky so I just took this wide angle shot to showcase the expanse of the countryside and the hills that make up the beauty of Tuscany.

#2 – Cloudy / Overcast skies

Photographers love overcast skies. Here the clouds act as a large natural diffuser and spread the light from the sun evenly all over the surface area. Overcast days are known for their diffused light. For some photographers, these are ideal conditions for shooting portraits as your subject will be evenly lit and there are no undesirable shadows or harsh lighting. If you find this type of light too flat and lacking dimension, you can always add an external flash to add some drama to your images.

Photographing in any weather - cloudy skies

The day was cloudy and overcast with rain predicted in the forecast for this family photo shoot. I had to add some warmth in post-production because everyone was looking a little washed out. The positive to the overcast sky is that there were no harsh shadows to deal with.

If you’re shooting landscapes in this type of weather, you will soon realize that a gray sky doesn’t add much to the scene. This is not to say that these types of images are bad. I try and photograph architecture shots with some creative negative space when dealing with overcast skies. I find that this sort of weather is great for bringing focus to the subject alone without any distraction from a blue sky and puffy clouds.

If you want to add some drama to a landscape shot during overcast conditions, perhaps you can wait for some dark, stormy could to roll on in and capture the weather-related drama in your landscape shot.

Photographing landscapes in any weather - cloudy skies

It had just rained in Vrindhavan, India and the dark clouds were slowly moving out. The day was overcast and since I did not have too much time at the banks of the river, I chose to showcase the temple with a reflection in the water to add some interest and drama.

#3 – Rain

A rainy day presents its own challenge in terms of keeping expensive gear and your subject dry and comfortable. You can always use an umbrella to protect your gear and as a creative prop in your portrait shots by simply using it as part of the shoot. As an alternative, look for areas that are shielded from the rain, such as alleyways, tree canopies, building overhangs, and other such elements.

Try taking a wide-angle shot that takes in the area, subject, and the atmosphere to tell your story and make it a little bit more interesting. The biggest challenge you face is the need to protect your gear as well as be creative in your shots. There are many options out there to protect your gear but sometimes just a simple grocery bag over the camera will do the trick!

Photographing landscapes in any weather - rain

Driving through Theodore National Park just after the rain rendered the landscape such a vibrant array of green and yellow.

Photographing portraits in any weather - rain

Photographing in the rain or snow for that matter presents another challenge in that the rain/snow may cause your autofocus to change mid-shoot. A good tip would be to focus on the subject and then lock it. Also, try using a lens hood so no rain/snow falls on the actual lens surface. My feathered friend was either having a bath in the rain or waiting patiently for me to leave so he could get back to his hunting! I lost focus a couple of time but then used the focus lock (or you can use back button focus) and the lens hood to eliminate that problem.

Photographing portraits in any weather - rain

I absolutely love photographing these birds and luckily for me, they come often to the pond behind my house. My lens was well protected but I got drenched during this shoot.

#4 – Fog

I don’t know about you, but the fog is probably my favorite kind of weather in which to photograph. I love the way fog adds an element of mystique and interest without doing much. In technical terms, on a foggy day, the water particles in the air redirect the light rays, spreading them out more evenly. This almost acts like a giant softbox along the area in the fog giving you beautiful diffused light.

Experiment in the fog to find the camera settings that best suit your needs but I have found that foggy conditions require longer exposures than normal since you are essentially dealing with overall less light. You can use a tripod to help reduce any camera shake. Keep in mind that like snow, fog is reflective, and it can fool your camera’s meter into thinking that there’s more light in the scene there actually is. Use exposure compensation just as you would when shooting a snowy landscape and even overexpose by a few stops if needed.

Other considerations

Again, if you photograph in RAW you can always edit to taste in post-processing. But I have found that when your image is underexposed, increasing the exposure in post-production adds noise in the shadows.

Another thing to note is that on foggy days finding focus might be an issue because everything around you is hazy and not quite clear. Here you can use manual focusing if your camera is having trouble focusing on the subject among all the fog.

Photographing landscapes in any weather - fog

Fog adds just the right kind of magic to any landscape in my opinion. I have been known to stop the car, stand in the middle of the road to document landscapes such as these….don’t judge!

bad weather - fog

The best kind of fog is when you have a deserted beach, sea stacks and tiny humans having fun exploring the tidal pools!

#5 – Snow

If you’re taking pictures as it’s snowing, be sure to cover your camera as it is essentially the same as shooting in rain. If you are out and about after it has snowed, keep in mind that the road conditions and walkways can be treacherous.

I have slipped and fallen a couple of times in the snow with my gear and it always makes me very nervous. The worse was when I fell in Yellowstone National Park right before attending a Winter Landscapes workshop. My wide angle lens suffered some damage and I was unable to use it during the class because let’s face it, Yellowstone is in the middle of nowhere so no chance of an urgent repair!

Another thing to ensure is adequate protection for yourself from the elements. Being outside in the snow can get quite uncomfortable especially if you are outdoors for an extended period of time. Make sure you cover your extremities from overexposure to the elements. Hand warmers and foot warmers are great for keeping fingers and toes warm and cozy when out photographing in the cold.

Also, keep in mind that camera batteries tend to drain faster in colder weather, so ensure that you have fully charged spare batteries handy. From a technical standpoint, snow is a very reflective surface, so ensure that your camera is metering effectively and not blowing out the snow if it is part of your frame.

Photographing portraits in any weather - snow

My biggest tip for photographing in the snow – wear layers and thermals. Then the sky is the limit in terms of the amount of fun you can have! I tend to underexpose just a tiny bit so that I don’t lose all detail in the snow.

Conclusion

I hope you have realized by now that mastering photography in any weather conditions really boils down to being prepared and knowing exactly what to expect. Go out and practice in each of these situations so that you know all the things that you need to be aware of. Then the next time the weather gods decide to have a little fun at your expense, you will be well prepared.

Do you have any other tips to help master photography in any weather, feel free to let the community know in the comments section below.

The post 5 Tips for How to Photograph in Any Kind of Weather by Karthika Gupta appeared first on Digital Photography School.


Digital Photography School

 
Comments Off on 5 Tips for How to Photograph in Any Kind of Weather

Posted in Photography


This is what happens when a ‘weather sealed’ camera takes a dip in salt water

09 Nov

$ (document).ready(function() { SampleGalleryV2({“containerId”:”embeddedSampleGallery_3338148904″,”galleryId”:”3338148904″,”isEmbeddedWidget”:true,”standalone”:false,”selectedImageIndex”:0,”startInCommentsView”:false,”isMobile”:false}) });

It shouldn’t need saying, but weather resistant, weather sealed and environmentally sealed do not mean waterproof. A cursory glance at your warranty should make this clear: no matter how good a reputation your brand has, if it isn’t covered by the warranty, you’re in ‘at your own risk’ territory.

Roger Cicala’s latest blog post over at Lens Rentals shows the damage that can occur when a nominally weather sealed camera gets wet—both the damage and the detective work made clearer by the fact that this particular camera took a dip in salt water. Cicala follows the path of the corrosion throughout the camera and explains why an encounter with seawater may render your camera not just non-functioning, but completely irreparable.

As is so often the case with Cicala’s ‘big picture’ blog posts, don’t get too hung up on the specific model he’s dissecting. As he points out in the comments, he’s written off some of every brand from salt-water damage.

Check out some of the pictures from this particularly painful teardown at the top, and then click the big blue button below to see the full post on Lens Rentals.

Teardown of a corroded camera

As an aside, this is the main of reasons we can’t test manufacturer claims in this area. Partly, of course, it’s because we have to return all the cameras to the manufacturers; but another aspect is that, like lens copy variation, camera failure is probabilistic: you’d need to test lots of cameras to know whether the model you’re testing is flawed or if you were just unlucky with your sample.

Cicala gets the kind of insight that the rest of us simply can’t get—he gets to see a much larger data set based on what the company rents and what it then has to repair—but even he doesn’t claim to have a solid answer to which brand is best. Just something to bear in mind the next time you’re thinking of sharing that ‘extreme torture test’ video of your brand’s flagship.

Articles: Digital Photography Review (dpreview.com)

 
Comments Off on This is what happens when a ‘weather sealed’ camera takes a dip in salt water

Posted in Uncategorized


10 Things to Photograph Indoors When There’s Bad Weather Outside

07 Apr

No matter where in the world you live, there are some seasons that are more conducive to outdoor photography than others. That said, bad weather is no excuse to stop learning about photography! Here are 10 beginning photography exercises to try the next time you’re cooped up indoors due to bad weather. Each exercise includes a subject theme, discussion about the type of skills you’ll practice with that particular subject, as well as some questions and/or ideas to walk through in order for you to really take your understanding to the next level.

1. Flowers

bad weather

Pick up an inexpensive bouquet of flowers the next time you’re at the grocery store and bring it home. Pop the flowers in a vase, and start shooting!

If you choose a bouquet with a range of colors (including white flowers if possible), you’ll be able to practice properly exposing your images across the dynamic range. Photographing flowers is also a great opportunity to play around with different apertures. If you’re currently shooting in Auto, pop your camera over into Aperture Priority mode, and give things a try. How does changing from f/2.0 to f/5.6 affect the image? Which look do you prefer?

2. Candles and/or a Fireplace
bad weather

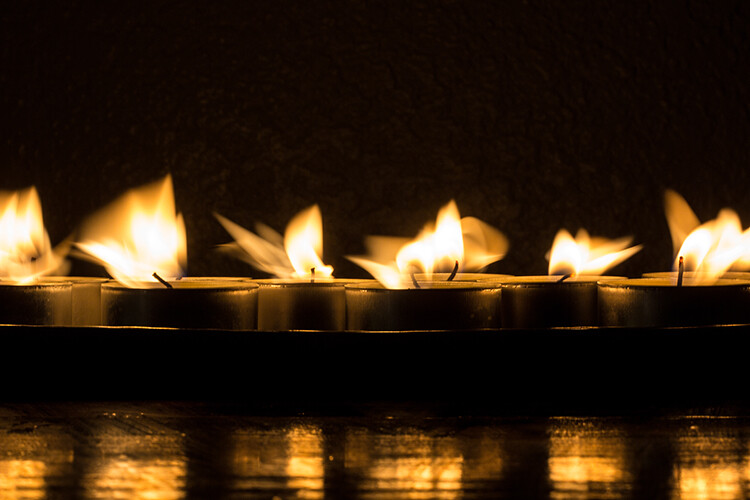
There are a few different benefits to spending some time photographing a flame. Whether you’re photographing a collection of candles or a fireplace, try experimenting with different exposure lengths in Shutter Priority mode. Try both long and short exposure times, and also be sure to note how the shutter speed affects the overall exposure of your image. Does a longer shutter time translate to a lighter or a darker overall image? How could you balance out a longer shutter opening without overexposing the entire image?

Another benefit to photographing flames is that it also makes you consider composition in a way that many subjects do not, especially in terms of reflections. Try putting a mirror or other shiny surface underneath a candle and photographing it. How does the reflection of the flame affect the overall image? Do you want to include the reflection in your image, or do you prefer to crop it out?

3. Oil and Water

This simple project packs a big punch!

bad weather

Equipment and supplies

A macro lens will help you out tremendously here, but if you don’t have one, extension tubes are also a great option. This image was taken with a $ 15 set of extension tubes and a 50mm lens. Basically, all you need is a clear glass dish, two cups, colorful paper, water, and olive oil.

Setup

First, take your colorful paper, and set it on a table or counter. Then take your two cups and set them on top of the paper, several inches away from each other. Next, take your glass dish and set it on top of the cups, so that it’s elevated off of the colorful paper. Add a little water, then a little olive oil, and be ready to photograph the bubbles that appear. You may want to spend some time experimenting with photographing the glass dish at differing heights above the paper underneath. Experiment with different types of colorful paper; scrapbook paper is a great resource for this. Try differing amounts of oil and water, and see how those small changes affect your image.

This is a great opportunity to experiment with macro-like photography in a way that has a pretty big impact. If you are using extension tubes rather than a macro lens, keep in mind that your extension tubes may or may not work with your camera’s autofocus. If you’re having trouble getting the bubbles to come into focus, you may need to focus manually (try the LiveView focus technique).

4. Food

bad weather

Photographing food is a great opportunity to play around with styling, as well as post-processing. It’s my humble opinion that much of your direction in terms of styling and processing will come from the food itself. In this case, I had a rustic loaf of bread that was covered in different seeds. It reminded me of rustic, communal dinners, and so I wrapped it in a tea-towel and stuck it directly on my table (something that happens with fair frequency to loaves that have just come out of the oven around here). I also knew from the get-go that I’d apply a more matte post-processing technique than I usually use in portraits in order to echo the rustic feel of the bread.

On the other hand, what approach would you take to styling and photographing a sleek cheesecake? Or a classic fruit salad? This short little exercise allows you to push yourself in terms of styling and post-processing, trying out skills and techniques that you may not typically use, as well as spending some time thinking about what types of styling and post-processing would best represent the subject.

5. Window Silhouettes

bad weather

I don’t know about where you live, but around here it can often be rainy and sunny at the same time. If you find yourself faced with similar weather, it’s a great opportunity to try doing a window silhouette.

Window silhouettes are a great exercise if you are learning photography because it will help you understand how your camera sees light. If your camera is on auto, and you focus directly on your subject, what does your camera try to do? If you move your focal point off of your subject, what does your camera “see” then? Does it affect the focus of your image? What happens if you try out the different metering modes? Does one seem to be more effective than the others in creating a silhouette?

6. Food Coloring and Water

bad weather

Grab a tall glass or vase, fill it with water, and then drop a couple of drops of food coloring into it.

This is a simple and colorful way to examine both shutter speed and light. Try using a short shutter speed. What does the image look like? Try using a long shutter speed. How is that image different?

In addition, try shooting with all different types of light. The transparency of the water is a great opportunity to practice capturing backlit images.

7. Interiors

bad weather

You don’t need to have perfectly clean or perfectly decorated rooms in order to gain valuable experience and knowledge from photographing them. Just a pick a room and go for it.

Experiment with light sources. How does the final image look when you use only natural light? What happens when you use only overhead and/or floor lights with the curtains closed? How does the image look when you use a combination of natural light and accent lighting? Think both in terms of exposure, and also the color balance of the image. Which look do you personally prefer?

8. Books

bad weather

I’m a huge bookworm, so it’s no surprise that I really enjoy photographing books in all sorts of scenarios. I love the texture of the pages, I love the different colored spines. I love basically everything about books!

Photographing books is also a great way to learn about aperture. Pick any book, and crack it open. Look for a short passage that you enjoy. Set your camera to Aperture Priority mode, and start with the lowest number you’re able to select (f/4 or f/2.8 for example). Set your focal point to your desired passage, and shoot. How much of the image is in focus?

Now set your aperture to one or two numbers higher than your first setting. How much of the image is in focus this time? Continue shooting up and down your available aperture range, noticing how the image changes as you do so. When might you want to use an image with only a sentence or two in focus? When might you want an image that included more of the book in focus?

9. Pets
bad weather pets

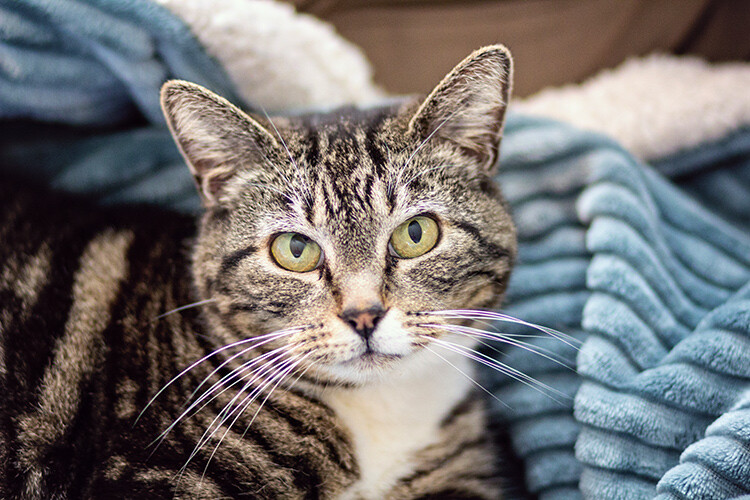
Photographing a pet can often present many of the same challenges that you might experience when photographing children. Certainly, this will depend greatly on the type of animal you have as well as their temperament, but it holds true for our cat.

She moves quickly and is often not super interested or cooperative when I’m attempting to photograph her. So, trying to photograph our cat is a good opportunity to practice shooting candidly, as well as waiting patiently for just the right moment. Our cat is obviously never going to walk right in front of me, sit, and smile for a photo. Instead, it’s my responsibility to sit on the couch with my camera, waiting patiently. When she decides to come over and investigate, I’ll be waiting and ready. (Read: 9 Tips for Taking Better Photos of Cats) 

10. Craft Supplies

bad weather

Craft supplies are a great tool for photographic exercises because they’re usually a good source of color. Play around with color and group items randomly. Then group similar colors together.

Next, pick one single item or color to focus on. Photograph it alone, as well as grouped with the others. Is the image stronger with only one color or with many? Do you prefer the colors to be randomized, or grouped together?

Conclusion

Have you tried any of these approaches? What other ideas do you have for bad weather, indoor photography exercises that would help beginners understand an element of photography better?

The post 10 Things to Photograph Indoors When There’s Bad Weather Outside by Meredith Clark appeared first on Digital Photography School.


Digital Photography School

 
Comments Off on 10 Things to Photograph Indoors When There’s Bad Weather Outside

Posted in Photography


24 Frozen Images of Some Cold Winter Weather

29 Jan

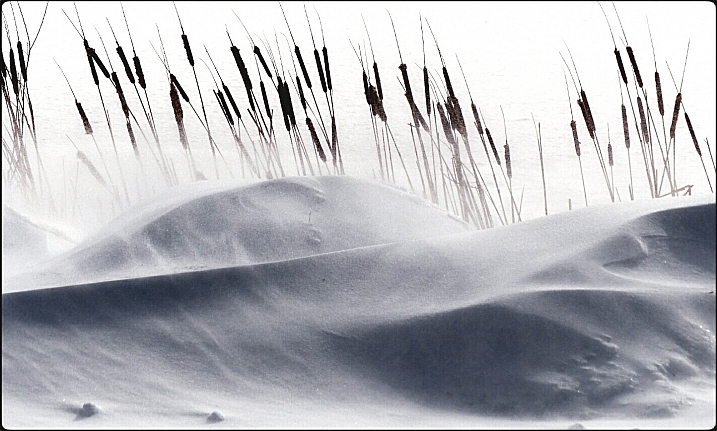
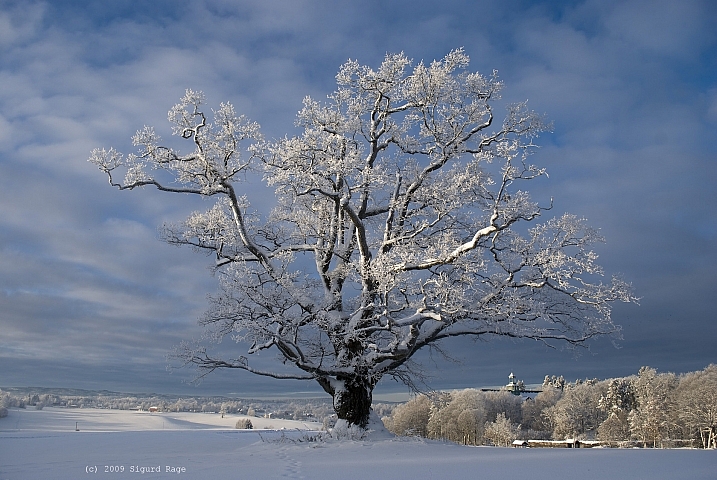
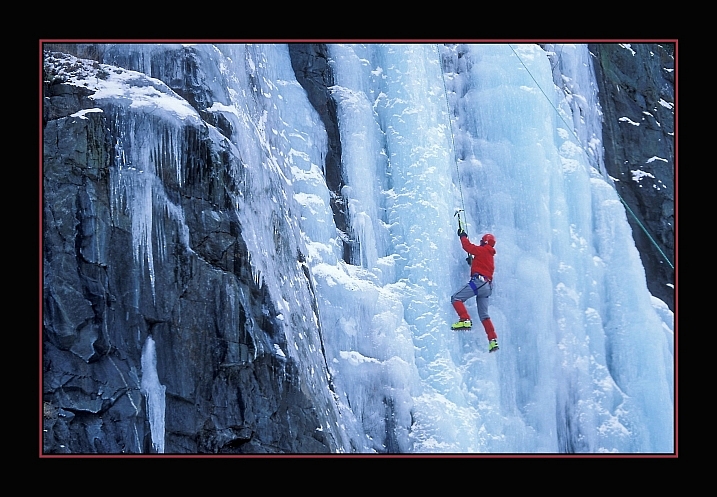
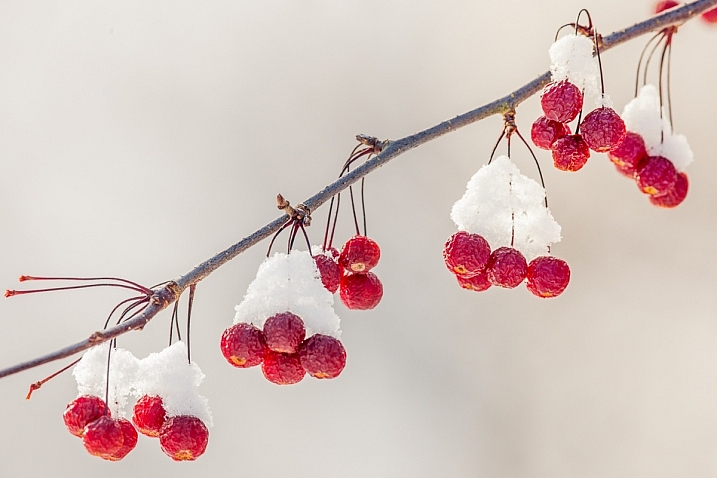
Here in the northern hemisphere part of the world, it is winter. That means two things – cold and snow. But that doesn’t stop some people (nor should it stop you) from doing photography.

Let’s have a look at some frozen images of some cold winter scenes.

By Howard Ignatius

By Neil Howard

By Dan (catching up)

By smilla4

By Ken Mattison

By Sigurd Rage

By Roger S. Hart

By Barbara Friedman

By Julie Falk

By chuddlesworth

By USFWS Mountain-Prairie

By Jack Skipworth

By ShinyPhotoScotland

By B Gilmour.

By Tupulak

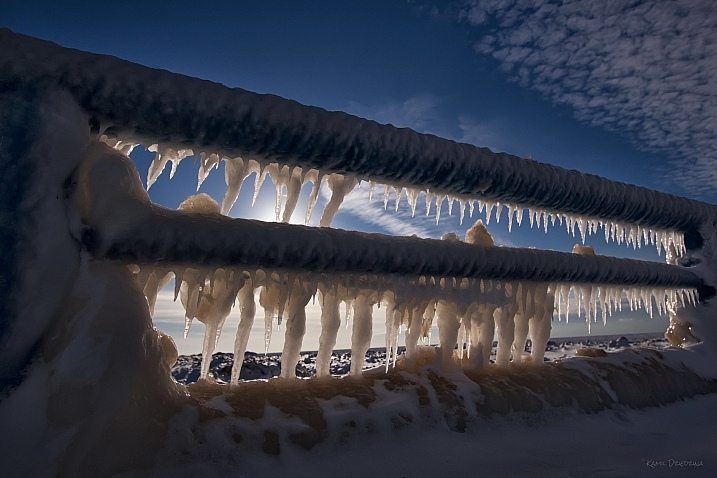
By Kamil Dziedzina

By MJI Photos (Mary J. I.)

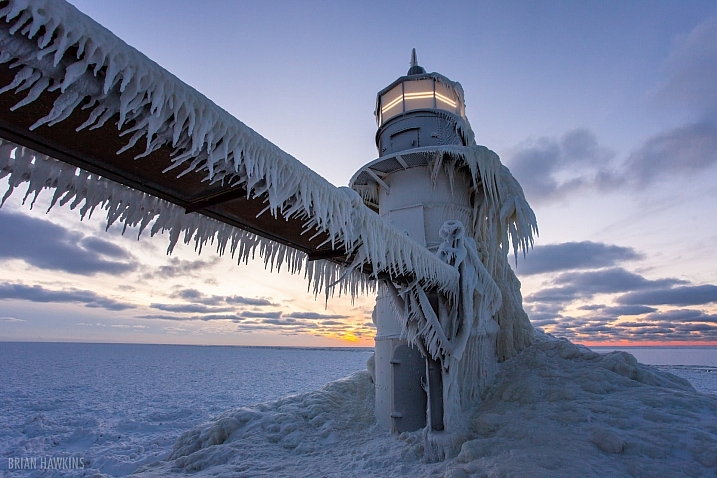
By Brian Hawkins

By Melinda Shelton

By Simon Doggett

By Nicolas Raymond

By ellenm1

By Gonzalo Baeza

By ravas51

googletag.cmd.push(function() {
tablet_slots.push( googletag.defineSlot( “/1005424/_dPSv4_tab-all-article-bottom_(300×250)”, [300, 250], “pb-ad-78623” ).addService( googletag.pubads() ) ); } );

googletag.cmd.push(function() {
mobile_slots.push( googletag.defineSlot( “/1005424/_dPSv4_mob-all-article-bottom_(300×250)”, [300, 250], “pb-ad-78158” ).addService( googletag.pubads() ) ); } );

The post 24 Frozen Images of Some Cold Winter Weather by Darlene Hildebrandt appeared first on Digital Photography School.


Digital Photography School

 
Comments Off on 24 Frozen Images of Some Cold Winter Weather

Posted in Photography


Pulse: Extreme weather in black and white

04 Jan

Mike Olbinski has captured some pretty amazing footage over the past year; you may remember this video that we posted back in October and this one from July. Needless to say, he had a busy 2016. For his latest project, he decided to do something a bit different by presenting the entire 4K time-lapse film in black and white.

This type of treatment definitely comes with its own set of challenges, but we think it showcases the drama and unpredictability of thunderstorms in a refreshing way. Make sure to enjoy this one in HD with volume turned up and the lights turned down.  

Song by Tony Anderson: “The Way Home” (Licensed through The Music Bed)

Articles: Digital Photography Review (dpreview.com)

 
Comments Off on Pulse: Extreme weather in black and white

Posted in Uncategorized