RSS
 

Posts Tagged ‘Warm’

Capture One Latitude style packs bring warm and cold color presets

10 Jul

Phase One has launched its new Latitude style series, the latest addition to the company’s Capture One Style Packs product launched last year. The Latitude presets are offered in two different packs: Latitude | Deep Forest and Latitude | Sunbound. The new series was inspired by “some of the world’s greatest destinations,” Phase One said in its announcement.

Both Latitude style packs contain eight presets, each with original, bright, and dark variations, for a total of 24 styles per pack. The “Sunbound” pack focuses on adding warmth to images, and the “Deep Forest” pack focuses on cold colors.

“The Styles are built to enhance curves, saturation and tonal adjustments,” says Phase One Software VP Jan Hyldebrandt-Larsen,”without affecting key capture parameters such as exposure and white balance.”

Each Latitude pack is priced at $ 39 USD, but a limited-time discount offers both together for $ 59 USD until July 27. Buyers must run Capture One version 10.1.2 or newer to install the style packs. The latest version of the software, Capture One 11, is offered through Phase One’s online store for $ 180 USD (single-user license).

Via: Phase One

Articles: Digital Photography Review (dpreview.com)

 
Comments Off on Capture One Latitude style packs bring warm and cold color presets

Posted in Uncategorized


Weekly Photography Challenge – Warm Fuzzies

06 Feb

Earlier today I shared a collection of images that represent cuddly.

A good hug, a snuggly puppy or kitten, a father with his newborn son – all things that give us warm fuzzies inside.

Wei-Hang Chua

By Wei-Hang Chua

Weekly photography challenge – warm fuzzies

So your challenge this week is, you guessed it, photograph something that either is warm and fuzzy, or gives you that feeling. So that could be many different things:

  • Your bedroom slippers
  • A favorite sweater
  • A pet
  • Parent and baby
  • Kids hugging
  • Someone doing a good deed

You get the idea.

Etolane

By Etolane

Gloson Teh

By Gloson Teh

Richard Walker

By Richard Walker

Thomas Hawk

By Thomas Hawk

Bunches And Bits {Karina}

By Bunches and Bits {Karina}

Phil Dolby

By Phil Dolby

Kate

By Kate

Flickpicpete (Thanks For 1 Million  Views)

By Flickpicpete (Thanks for 1 million+ views)

Share your images below:

Simply upload your shot into the comment field (look for the little camera icon in the Disqus comments section) and they’ll get embedded for us all to see or if you’d prefer upload them to your favourite photo sharing site and leave the link to them. Show me your best images in this week’s challenge. Sometimes it takes a while for an image to appear so be patient and try not to post the same image twice.

googletag.cmd.push(function() {
tablet_slots.push( googletag.defineSlot( “/1005424/_dPSv4_tab-all-article-bottom_(300×250)”, [300, 250], “pb-ad-78623” ).addService( googletag.pubads() ) ); } );

googletag.cmd.push(function() {
mobile_slots.push( googletag.defineSlot( “/1005424/_dPSv4_mob-all-article-bottom_(300×250)”, [300, 250], “pb-ad-78158” ).addService( googletag.pubads() ) ); } );

The post Weekly Photography Challenge – Warm Fuzzies by Darlene Hildebrandt appeared first on Digital Photography School.


Digital Photography School

 
Comments Off on Weekly Photography Challenge – Warm Fuzzies

Posted in Photography


9 Tips for Adding a Warm Sun Flare to Your Image

21 Oct

Photography, as an art form, is simply the capture of light on either a sensitive physical medium or, in more recent times, an electronic sensor.

What makes a photograph unique and attractive to the eyes is the distribution of that light. Shadows, highlights, and varying levels of warmth and tone evoke emotion when viewing them, emotionally investing you to the picture you’re viewing.

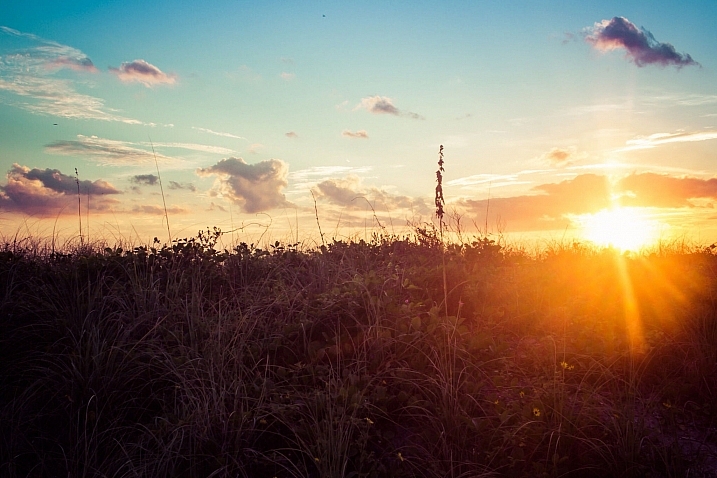
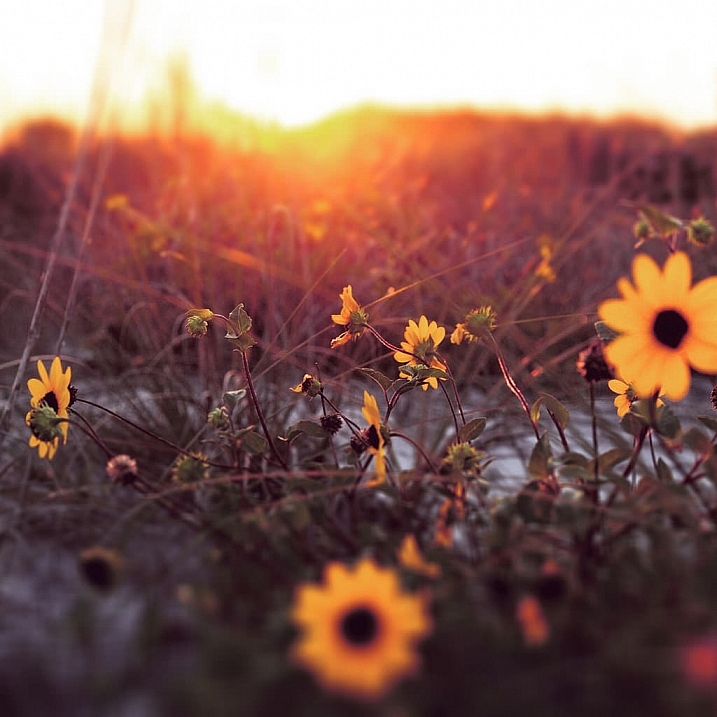
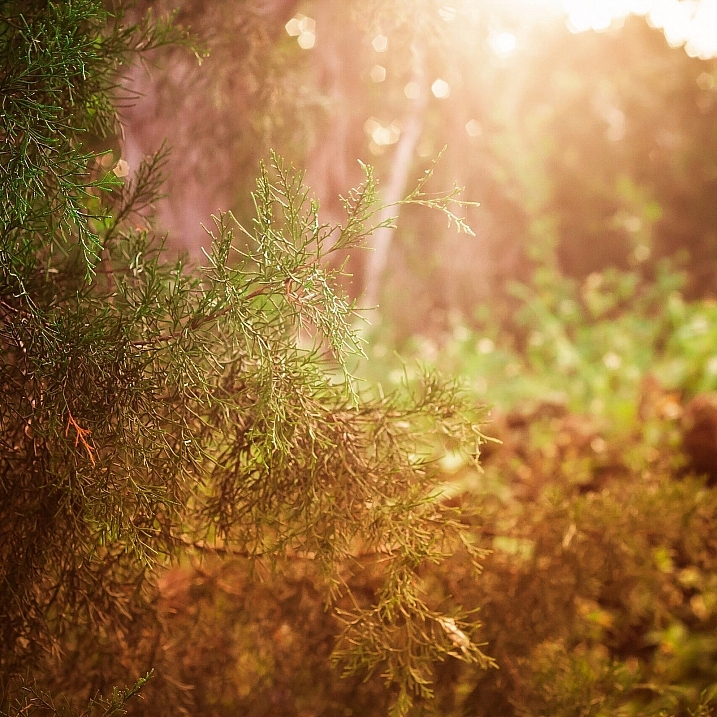
One of the most dramatic instances of light that can occur in a photo is flare, and more specifically, a sun flare. You’ve no doubt seen spectacular images with beams of light radiating through the photo, giving you a wonderful sense of warmth and brilliance.
21474625629_1dd03156ae_k

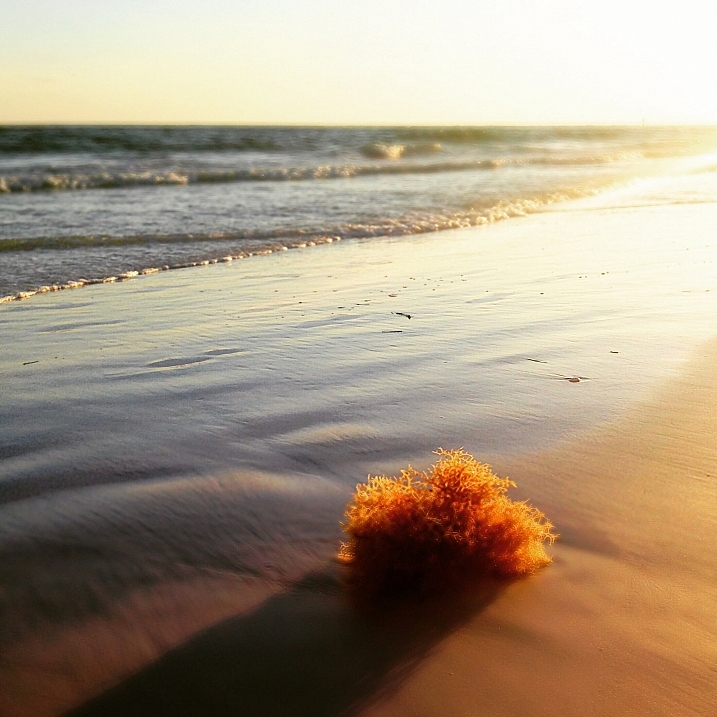
I remember about three years back, a friend asked me to how to produce the warm flares that were visible in many of my photographs. I tried to explain, but realized I really didn’t know the exact combination of properties that worked. I just knew the sunlight coming through a camera lens at the right angle created a beautiful artifact, and that I was able to achieve it pretty consistently in my beach, landscape, and nature shots taken at sunset.

Over time, I learned the details of what it takes to incorporate this effect, and how to use it to my advantage to get a warm, dreamy feel that amps up the viewer’s connection with the photo. This is what I’d like to share with you, as it’s one of the easiest ways to inject emotion into your photography.

In this article, we’ll cover what flare is, what artistic and aesthetic benefits you can derive from it, and finally, how to produce and use it effectively in your photography.

What is sun flare?

Lens flare, as described in its most basic form, is the result of a bright light source entering the lens and producing artifacts, shapes, and effects in the resulting image.

Technically, lens flare and sun flare are different entities, but for the purpose of this article, we’ll treat them the same. We will be talking about the effect created in-camera by having bright sun as a light source in, or near, the edge of the frame.
21629871846_47b2c9c4fa_b

On many occasions this is an unwanted effect. For this reason a lens hood is often used to prevent flare, when bright light shines on the lens opening from outside the frame. Flare often reduces cleanliness and clarity in a scene that requires it, such as with architectural or commercial photography.

But flaring has a beautiful side as well, as you know. Some of us strive for the warmth and haziness that flared light from the sun can provide. Environmental portraiture is an example of an area that utilizes this effect. So how can we create and use flare to our advantage?
21036819798_41e380f648_h

Creating the flare

1. Don’t try this on a cloudy day

The main requirement to create flare is of course, the sun. If you’re shooting on an overcast day and there isn’t any sun poking through, you won’t be able to create a flare.

2. A low angle is best

Although you can create flare at any time during the day, it’s much easier, and much more dramatic, to shoot the sun when its low on the horizon – in other words, at sunrise or sunset, during the golden hours.

This is because you’ll need the sun in the frame, or just outside the frame, and this will usually coincide with your subject positioning.
21469116409_265a1699e2_k

3. Drop the lens hood and pick your lens

If you’re using a lens hood, remove it. Lens hoods are intended to reduce glare and flare from light sources outside the frame, which is exactly opposite of what you’re looking for in this case..

To amplify the chances of getting a good flare, try using a zoom lens, as opposed to a prime. The additional spaces and mechanical parts inside the zoom give the sunlight more room to bounce around and do its thing.

4. Shoot in Manual Mode

This particular discipline is based on the principle that the slightest change in orientation, composition, or aperture can make a pretty big difference in the end result. Shooting manually will allow you to have finer control over these factors and make things much easier for you.

Shooting with Live View can help even more, as you’ll be able to monitor changes in your scene in real time.

5. Settings: Aperture and more

You can use any aperture you wish when creating flare effects, but the look will differ depending on what setting you choose. At smaller apertures (f/11 and smaller), any visible part of the light source will create more of a starburst effect, while a larger aperture (f/8 and larger) will diffuse and disperse the effect, and you’ll end up with a much smoother distribution of the light.

Shutter speed also affects the final result, as more light streams into the lens when using slower speeds; therefore, you’ll have more of a flaring effect.
20950860109_026cca9525_o

6. Focus first

The large amount of light coming into your sensor will affect the autofocus on your camera if you’re using it. So, focus on your subject first by blocking the sun somehow, whether it be your hand, a reflector or a piece of cardboard. Then, once you’ve focused (and lock it or use back button focus), you can shoot normally knowing you are focused correctly for the given distance.

7. Don’t forget to light your subject

If you’re photographing a portrait, don’t forget the negative effect the flare can have on the proper lighting of the face and body. If you find the subject’s face, or other important areas, are washed out too much from the high light levels, use a reflector or other methods of fill light to compensate, and ensure your subject is well illuminated.

Alright, let’s get to shooting!

8. Method one:  In the frame

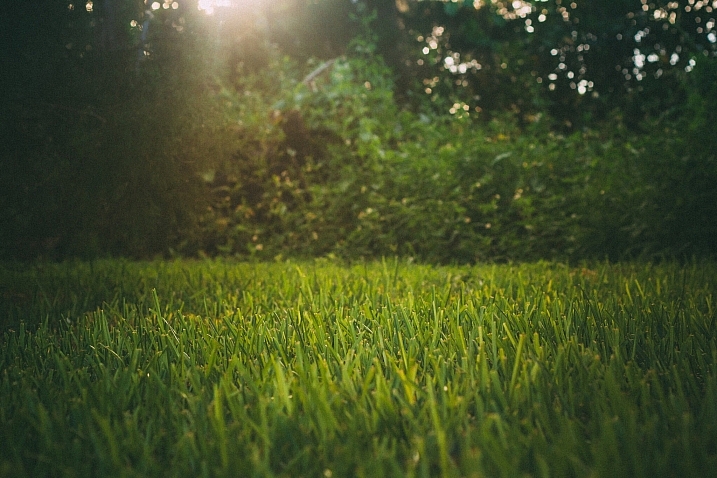
There are two primary methods of creating the flare effect. The first is by having the sun actually within the frame of the image. Naturally, just having it centered and completely uncovered will result in a washed out photo. You’ll want to have something to partially block the light, so that a flare can be achieved without washing out the subject of your photo. Trees, a distant treeline or building, and your subject can all provide enough cover to produce the desired effect.
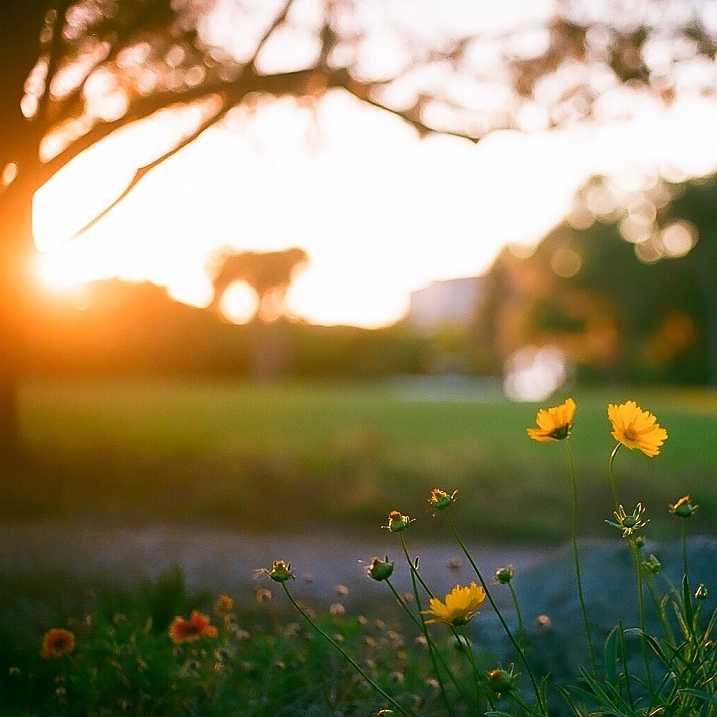
16777527017_5540bf7379_b

Take care not to capture too much light. Sometimes the resulting flare can be so pronounced that your image is completely washed out. Shoot several frames, and check the amount of flare you’re getting. If it’s too much, compose the sun a little more out of frame (or more hidden) to reduce the effect.

9. Method two: out of the frame

For an even more pronounced and diffused flare, you can compose your image with the sun partially, or completely out of frame. Usually the best results come from having the sun just outside the camera’s view. Experiment with position to find the correct angle and amount of flare necessary for the shot you’re after.

This method produces more a diffused and smooth flare, especially in the early morning and late evening hours, when the sun is very low on the horizon.
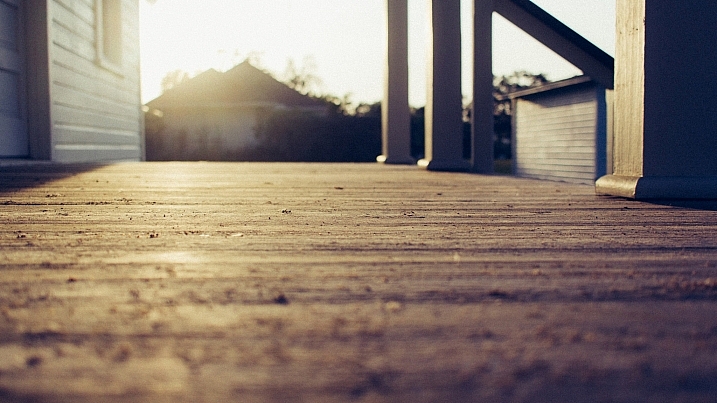
16642785747_fd851ca392_k

That’s it! 

Adding a nice looking sun flare to your image really isn’t tough at all. Following a few rules is all you have to do, and like everything else in our wonderful world of photography, the result is always subjective. Add a little, add a lot, all that matters is that you’re happy with the final image! There’s no wrong way to do it.

So get out there and get your flare on! Of course, we’d love to see some examples of what you can do with this effect, let’s see your best shots!

googletag.cmd.push(function() {
tablet_slots.push( googletag.defineSlot( “/1005424/_dPSv4_tab-all-article-bottom_(300×250)”, [300, 250], “pb-ad-78623” ).addService( googletag.pubads() ) ); } );

googletag.cmd.push(function() {
mobile_slots.push( googletag.defineSlot( “/1005424/_dPSv4_mob-all-article-bottom_(300×250)”, [300, 250], “pb-ad-78158” ).addService( googletag.pubads() ) ); } );

The post 9 Tips for Adding a Warm Sun Flare to Your Image by Tim Gilbreath appeared first on Digital Photography School.


Digital Photography School

 
Comments Off on 9 Tips for Adding a Warm Sun Flare to Your Image

Posted in Photography


Film ist so warm

27 Jan

Ein Beitrag von: Benedetta Falugi

Die Fotografie habe ich eher beläufig entdeckt, als ich Fotos für einen Möbelverkauf machte, um meiner Mutter mit ihrem Antiquitäten-Laden zu helfen. Als mir meine neugefundene Leidenschaft klar wurde, machte ich mich auf eine persönliche Suche. Besonders an meinen Lieblingsorten und bei den Menschen, die dort leben.

Ich liebe es, auf Film zu fotografieren und meine persönlichen Projekte sind allesamt analog. Film ist so warm und meiner eigenen Sensibilität sehr ähnlich. Außerdem finde es gut, dass ich meine Fotos nicht nachbearbeiten muss.

Seit zwei Jahren versuche ich, die Fotografie zu meinem Beruf zu machen. Was nicht wirklich einfach ist, wegen der durch Italien fegenden Wirtschaftskrise. Ich versuche aber, dranzubleiben.

© Benedetta Falugi

© Benedetta Falugi

© Benedetta Falugi

© Benedetta Falugi

© Benedetta Falugi

© Benedetta Falugi

© Benedetta Falugi

© Benedetta Falugi

© Benedetta Falugi

© Benedetta Falugi

Leider erlebe ich meine Leidenschaft mit Höhen und Tiefen, kreativen Momenten, zeitweise Gedankenlosigkeit, Krisen und Faulheit – was sich nicht gut anfühlt. Aber ich nehme an, dass ich damit nicht allein bin.

Mein Ziel ist es, rigoroser zu sein in den Dingen, die ich tue. Weiter will ich Veränderungen, wieder forschen und nicht steckenbleiben in den Dingen, die ich gut kann, sondern viel mehr experimentieren.

Dieser Artikel wurde von Martin Gommel aus dem Englischen ins Deutsche übersetzt.


kwerfeldein – Fotografie Magazin

 
Comments Off on Film ist so warm

Posted in Equipment


Warm Your Big Flash at the Source with Glass Shells

09 Apr

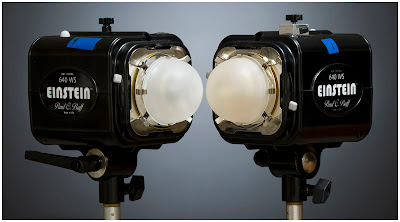
Remember when we talked about gelling your light mods, and how some almost aren't worth the trouble?

If you frequently light people with large soft boxes, you can choose to warm your light up right at the source. Read more »


Strobist

 
Comments Off on Warm Your Big Flash at the Source with Glass Shells

Posted in Photography


Create a Warm, Sunset Mood Image in Lightroom 4

22 Jan

Introduction

This tutorial is a demonstration of the SLR Lounge Lightroom 4 Preset System. With over 200 presets, the LR4 Preset System has been critically acclaimed as the most powerful and intuitive preset system available for Lightroom 4. DPS users can get 10% off by using the DPS10 coupon code upon checkout. Click the link above to learn more/purchase.

Overview

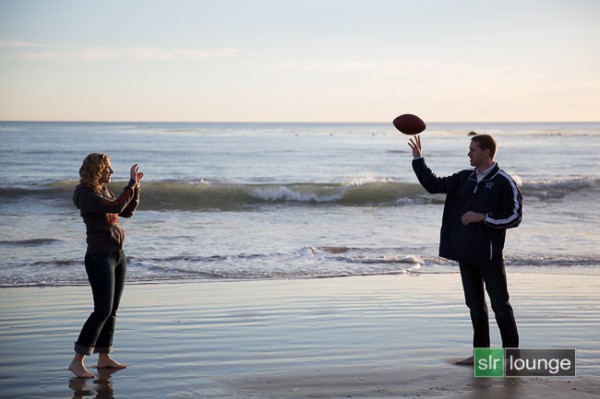
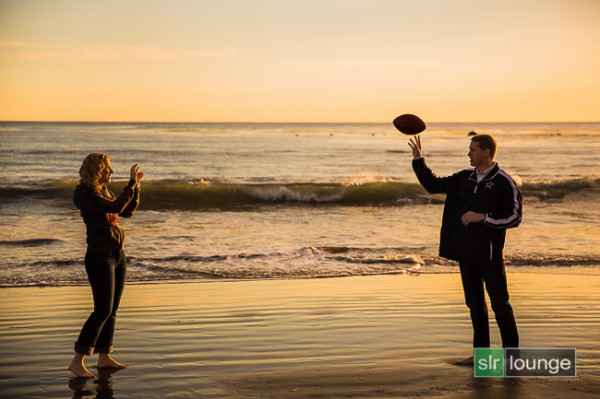
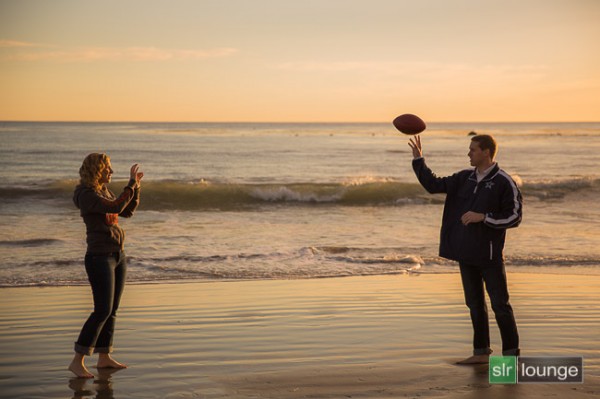
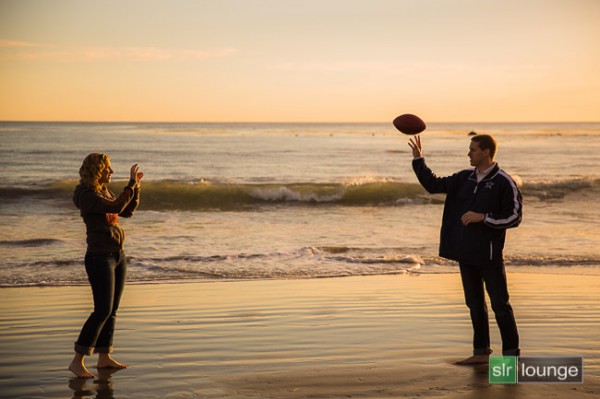
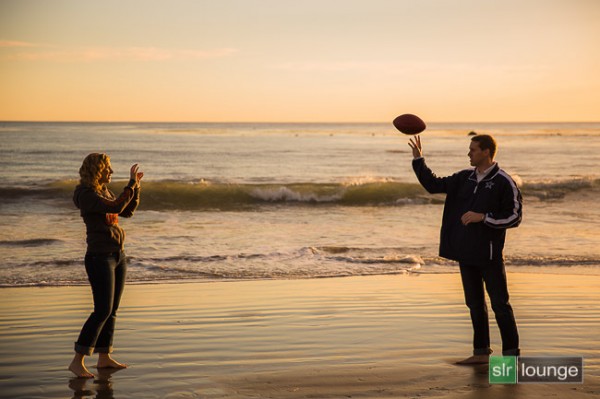
In this Lightroom 4 tutorial, we will show you how to create a warm, sunset-toned look in Lightroom 4. It is a great look that can be applied to a late afternoon outdoor images. I particularly dig this look on shots like this one at the beach. We will also correct for uneven exposure across the image that is caused by the directional lighting of the sun.

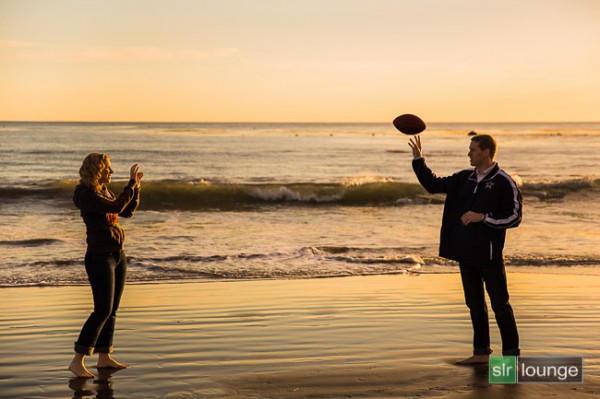
Before and After Image

Before

After

Lightroom 4 Preset System Mixology

If you own the SLR Lounge Lightroom 4 Preset System, this effect can be achieved in 3 clicks as shown below. If you don’t own the preset system, please skip to Step 1 to learn how to do it manually.

Lightroom 4 Presets

00 MY MIXOLOGY – 10 SOFT PORTRAITS > 16 SP HDR Light
01 BASE ADJUST – 00 EXPOSURE > 04 Darken -0.5
01 BASE ADJUST – 40 SHADOWS BLACKS > 42 Heavy Brighten (+30, +60)

Warm up Temperature and increase the Magenta in Tint to your liking. To see all the tweaks and adjustments applied, please continue on.

Step 1. Applying our Basic Adjustments

This image from a recent engagement session was shot around 4pm late in December on one of our many SoCal beaches ;) . Although it was late afternoon, there were not a lot warm tones in the atmosphere, and the photo lacked dynamic range.

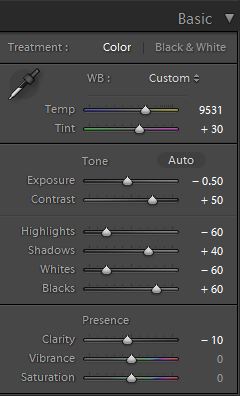
So in the Basic Adjustment Panel, let’s warm up the image by raising the Temperature to between 8000K to 10,000K. Additionally, we want to add some Magenta Tint in order to keep the image from looking too green. Without the pink/red tones that will be added from boosting Magenta tones, we end up with an image lacking the rich warmth we desire. This is the one of the advantages of shooting in RAW, you can change the color temperature of the image at will.

The background environment is also a little too bright and flat, and since we want a moodier shot, let’s lower the exposure by -0.50 stop and increase contrast by +50.

Next, let’s expand the dynamic range of the image by decreasing the Highlights and Whites by -60 while lifting the Shadows and Blacks by +40 and +60 respectively.

Finally, bring down the Clarity by -10. We will reintroduce Clarity with an adjustment brush to everything but the couple’s face, hair, hand, and feet.

The Basic Adjustment Panel and the image should look similar to below.

Step 2. Adding Additional Contrast via Curves

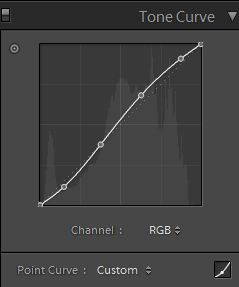
In addition to adding Contrast in the Basic Panel, let’s add a slight contrast-boosting “S” curve that pulls down the shadows a bit and boosts the highlights up a bit.

Step 3. Sharpening and Noise Reduction

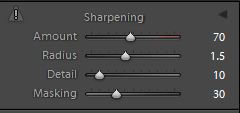
Normally, if you are using the SLR Lounge Preset System, standard Sharpening amounts are automatically applied. Here is what we typically apply to our image:

03b Sharpening

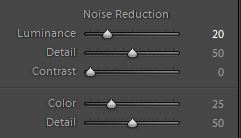
Because we boosted the dynamic range and pulled up the shadows, we do need to apply some Noise Reduction. We use this setting for Noise Reduction:

03c Noise Reduction

03 Sharpening and Noise Reduction

Step 4. Opening up the Borders with Vignetting

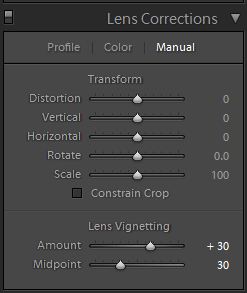
Finally, the brightness is not that even along the edges of the frame, so let’s add some Lens Vignetting at +30 Amount and +30 Midpoint to even out edge-to-edge brightness.

04b Lens Correction

Here is how your image should look like after applying all of these adjustments.

04 Lens Correction

That is it for the global adjustments, we are now going to use the adjustment brushes and graduated filter to add more clarity and contrast to the environment, as well as work on evening out the overall exposure.

Step 5. Using Adjustment Brushes for the Sky and the Ground

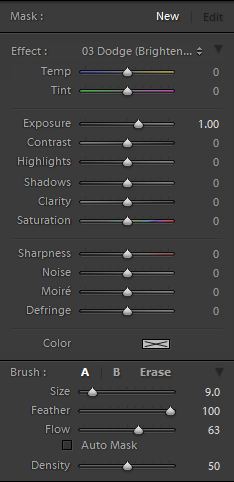
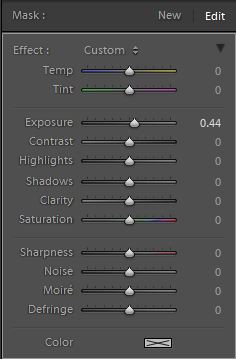
In the Lightroom 4 Preset System, there is an adjustment brush called the “Sky | Cloud | Ocean” that we apply to the sky, cloud, and ocean. The purpose of this brush is to increase the contrast and clarity. Additionally, this adjustment brush also increases saturation.

Here are the settings for this adjustment brush:

05b Sky Cloud Ocean from SLR Lounge Lightroom 4 Preset System

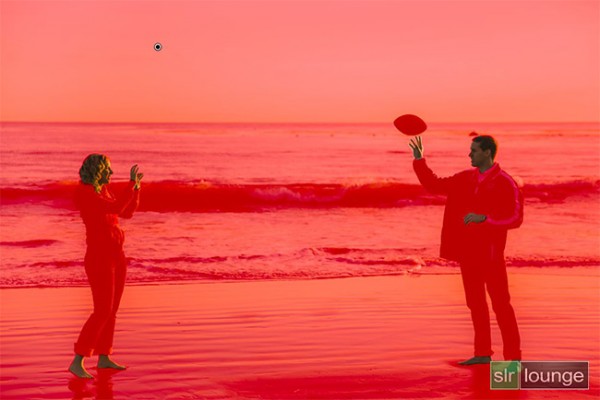
We want to apply this brush to the entire scene except for the couple’s exposed skin. The quickest way to accomplish this is to fill the entire scene with the brush, then use Erase brush at the bottom of the Brush Panel to remove the effect from their face, hair, hands, and feet.

Hold Alt (Opt on OSX) while in the active brush to switch to the Erase brush.

Because there is a lot of contrast between the subjects and their surroundings, you can use the Auto Mask to allow Lightroom to mask around the individuals.

To make it easier to see what part of the image is being affected by the adjustment brush, press “O” on the keyboard to toggle the Mask Overlay. The adjustment brush is applied on any part of the image that is overlaid in red.

05c Adjustment-Brush

Once you are finished applying this adjustment brush, press “O” again to hide the overlay. Your image should have a punchier look that similar to the deep shadows of the setting sun.

05 Adjustment Brush

Step 6. Using an Graduated Filter to Even Out Exposure on Left Side

At 4pm, the winter sun had already started its decent to the horizon, which meant that light was beginning to fade quickly. Because the sun is lighting the scene from the far right, the left side of the image was a tad underexposed in comparison to the right side. We want to correct for this subtly, so we will be using a Graduated Filter to slightly brighten the left side of the frame.

One final adjustment I would like to make to this image is just to remove the rock in the water that is just behind and above the male subjects head. But, given the size and position of the rock, this will best be done in Photoshop.

06b Graduated Filter

Final Before and After Images

Finally, here are the before and after images comparing the original image to the new image with the warm, sunset mood look.

Original

Warm, Sunset Mood Image

The Lightroom 4 Preset System

The SLR Lounge Lightroom 4 Preset System is designed to enable users to achieve virtually any look and effect within 3-5 simple clicks. From basic color correction, vintage fades, black & white effects, tilt-shift effects, faux HDR, retouching, detail enhancing, and so much more. The sky is the limit with what has been dubbed the most powerful and intuitive preset system available. Click the link above to learn more/purchase.

You can also purchase the LR4 Preset System as part of the 30 hour 3 DVD Lightroom 4 Workshop Collection set, containing every bit of education and tools needed to run a Lightroom 4 based photography studio.

Post originally from: Digital Photography Tips.

Check out our more Photography Tips at Photography Tips for Beginners, Portrait Photography Tips and Wedding Photography Tips.

Create a Warm, Sunset Mood Image in Lightroom 4


Digital Photography School

 
Comments Off on Create a Warm, Sunset Mood Image in Lightroom 4

Posted in Photography