RSS
 

Posts Tagged ‘vital’

8 Vital Tips To Crop Your Photos For Stronger Compositions

29 Jun

The post 8 Vital Tips To Crop Your Photos For Stronger Compositions appeared first on Digital Photography School. It was authored by Kav Dadfar.

Tips to crop your photos better

Even the best photos can be ruined if they are not cropped properly. It’s easy to get carried away with cropping since you can take away more and more of what may seem like a useless portion of the image. This can quickly lead to cropping way too much. Or, the opposite can happen if you are worried that you’re taking away too much. Believe it or not, sometimes even the professionals need tips to crop their photos better. So here are 8 tips to crop your photos better so that you can avoid making mistakes.

 Tips-To-Crop-Your-Photos
f/2.8 – ISO 160 – 1/100 sec

1. Tell the complete story

If you’re taking a photo of two people
playing catch, you would never dream of cropping out one of the people or the
ball. The photo would no longer make any sense!

Take the subjects into consideration when
cropping out elements. Are they interacting with anything in the frame that
would change the context of the subject’s actions if removed? This is a
surefire way of knowing whether or not you are cropping too much from the
image.

 Tips-To-Crop-Your-Photos
f/8 – ISO 100 – 1/100 sec

2. Remove partial elements

There may be something in your frame that isn’t fully in view, like an elbow or a stray tree branch. Without the entire element in the frame, sometimes these partials can be distracting from the subject and should probably be cropped out.

Just like your image is trying to tell a complete story, you don’t want any unnecessary details distracting the viewer from what you are trying to get across in the image. Photobombs are funny, but only in the right context, so consider removing that random person in the background that you didn’t intend to be there in the first place.

 Tips-To-Crop-Your-Photos
The cropped image on the right removes the distracting elements.

3. Keep the subject at eye level

A portrait becomes much more engaging when the subject seems like they are at a more natural eye level. Concerning portraits, this may actually be one of the more important tips to crop your photos.

Cropping too tightly on the subject will
create a close-up shot that seems unnatural and even uncomfortable to look at. Keep
things in proportion by allowing the subject’s eyes to stay at a more natural
level in the frame.

Additionally, your subject will seem to want a little breathing room. When cropping at eye level, make sure that you are giving the frame enough space so that their gaze doesn’t seem interrupted by the edge of the frame.

 Tips-To-Crop-Your-Photos
f/3.5 – ISO 100 – 1/100 sec

4. Centering the subject is not a requirement

Just like you’re trying to tell the entire story by keeping important elements within the frame, that might also play into your composition as well. Apply the rule of thirds (or other compositional rules) to help you determine where your subject should rest within the frame. This will help you lay out other elements in frame as well, making sure that you don’t accidentally cut something out or when you don’t realize that you have centered your subject.

In fact, when cropping appropriately, you can even fix any composition problems that you might not have considered when snapping the image in the first place.

 Tips-To-Crop-Your-Photos
Using the rule of thirds, you can ensure you crop your images better.

5. Try to avoid cropping limbs

While it may be a good idea to crop out part of your subject, try to avoid cutting off the limb of your subject. Cropping limbs creates an eerie effect and shows that you hadn’t considered your framing when taking the shot. Similarly, you wouldn’t want to cut off any piece of your subject that doesn’t make sense, like half of their ear or the tip of their nose.

6. Crop out the errors

You might think that a true photo would include leaving the image as it stands, mistakes and all. However, cropping properly can mean that you cut off portions of an image that distract from the subject or are just simply wrong.

For example, maybe you have accidentally captured your camera strap in your shot. Would you really want to leave that in?

So one of the best tips to crop your photos is to remove anything that wasn’t your intention to include. Of course, ideally, you should spot these errors when taking the photo, but if you didn’t, and you can crop to correct, then you should.

Havana Cuba
f/8 – ISO 100 – 1/250 sec

7. Crop consistently

If you’re shooting a series of portraits, landscapes, or anything else of the same subject, then it’s important that you crop all of the photos in the series consistently. The series is supposed to be a coherent, consistent set of photos aesthetically, which means the composition and cropping should all work together as a set.

Without uniformity, when the photos are looked at in a group, if they are not composed and cropped consistently, then it is going to have a jarring effect. For scenario shots, like a landscape, keep the rule of thirds of the Golden Triangle rule in mind as well to help with consistency.

 Tips-To-Crop-Your-Photos

8. Cropping doesn’t always have to be right-angles

The majority of the time, cropping will involve right-angles to give you square and rectangle shapes. However, there is no hard rule that says this is the way it has to be. To wrap up these tips to crop your photos, you can also be creative and crop an image as an oval, hexagon, or any other shape that may lend itself better to the image.

Depending on the subject, the composition, and how you want your final image to look, cropping in various other shapes than right-angles may look intriguing.

Conclusion

Sometimes the difference between a good photo and a great photo comes down to the way you crop it. The great thing about digital photography is you can adjust photos without fear because you can always return to the original by using software like Lightroom. So experiment with your cropping, and you may see a big improvement in your photography. Also, share your before and after results in the comments section!

The post 8 Vital Tips To Crop Your Photos For Stronger Compositions appeared first on Digital Photography School. It was authored by Kav Dadfar.


Digital Photography School

 
Comments Off on 8 Vital Tips To Crop Your Photos For Stronger Compositions

Posted in Photography


Tripod Buying Guide – 6 Vital Features to Look For

08 Jun

The post Tripod Buying Guide – 6 Vital Features to Look For appeared first on Digital Photography School. It was authored by Suzi Pratt.

dps-tripod-buying-guide

A tripod is one of the first accessories people like to buy when they get a new camera. But there are hundreds of thousands of tripods out there, all with different features and price points. How do you go about choosing the best tripod for you? This tripod buying guide will highlight 6 features to consider before purchasing a new tripod.

Best tripod for beginners
Canon 5D Mark III with Canon 100mm f/2.8 – 1/160 sec, f/7.1, ISO 400

Why use a tripod?

There are a couple of reasons why you might need a tripod in the first place.

First, you should use a tripod if you plan to shoot slow shutter speeds or high f-stops (apertures). Conditions like this are typically real estate, interior, architectural, and landscape photography, where you need your scene to be as sharp as possible, often in low light conditions.

You should also use a tripod when shooting bracketed photos for compositing or HDR in post-production, or when taking selfies or group photos that you want to be a part of.

There are certainly more reasons to consider using a tripod, but hopefully, these give you good examples to start thinking about.

Waterfall tripod photo
Fujifilm X-T3 with Carl Zeiss Touit 12mm f2.8 WITHOUT Tripod – 1/75 sec, f/2.8, ISO 2500
Waterfall tripod photo
Fujifilm X-T3 with Zeiss 12mm WITH Tripod – 0.8 sec, f/9, ISO 400

1. Payload (or load capacity)

The very first feature to consider when researching tripods is its payload or maximum load capacity. In other words, how much weight is it able to support? The payload is typically found in the product description of each tripod. To come up with this number, consider the heaviest and largest camera setup that you plan to use on the tripod. Camera and lens weights can easily be found via a Google search or examining their respective product descriptions.

For example, my Sony A7rIII camera body alone weighs 23.2 oz (657 grams). My heaviest lens, the Sony 70-200mm f/2.8 weighs 52.16 oz (1480 grams). So together, my heaviest camera setup would be 75.36 ounces (2137 grams). That means I should find a tripod with a payload of at least that amount.

It is also important to look at the payload of the tripod head or the piece that attaches your camera to the tripod legs. Some tripods come with a head included, or you can replace it with a head that you buy separately. Many tripod heads have their own payloads specified, so be sure to consider that number as well.

Best tripod for beginners
MeFoto Roadtrip travel tripod. Canon 5D Mark III with Canon 100mm f/2.8 – 1/160 sec, f/7.1, ISO 400

2. Tripod minimum and maximum height

All tripods have a minimum and maximum height expressed in their product descriptions. Some tripods can get ultra-tall, others can get ultra-low to the ground. Think about what kind of subjects you will be photographing, and the optimal height you would want your tripod to be.

If you are tall or plan to shoot tall subjects, aim to get the tallest tripod you can find. However, if you shoot subjects that are lower to the ground, you may want to consider tripods with a low minimum height. There are even new tripods like the upcoming Peak Design Travel Tripod designed to get extremely low, down to 5.5 inches.

Best tripod for beginners
Manfrotto 055 tripod. Canon 5D Mark III with Canon 100mm f/2.8 – 1/160 sec, f/7.1, ISO 400

3. How stable is the tripod?

The next quality to consider is how stable the tripod is. First, consider the payload or weight capacity mentioned above – this will give you a good idea of whether the tripod can support your camera and lens combination. But there are other features that can enhance tripod stability.

Some tripods come with retractable or removable spikes in the tripod feet. These provide extra stability by sticking into the dirt or soft ground if you happen to be shooting outside.

Tripods can also come with a retractable hook in the center column of the tripod, allowing you to hang weight to stabilize the tripod. Attaching a heavy sandbag to the hook is often the optimal option, but you can also get creative by using other items like a heavy water bottle or even your camera bag.

Best tripod for beginners
MeFoto Roadtrip Travel Tripod.
Canon 5D Mark III with Canon 100mm f/2.8 – 1/160 sec, f/7.1, ISO 400
Best tripod for beginners
Legs of the Manfrotto 055 tripod.
Canon 5D Mark III with Canon 100mm f/2.8 – 1/160 sec, f/7.1, ISO 400

4. How easy is it to carry the tripod?

If you plan to travel a lot with your tripod, or use it on the go, it’s important to consider the overall weight and folded length of the tripod. If you opt for a heavy, large tripod, you might get optimal stability, but you will likely struggle to carry that tripod around.

Consider the material the tripod is made from. Most tripods are made of aluminum (cheaper, but heavier) or carbon fiber (lightweight, but more expensive). Many tripod models are available in either construction material, so think about your budget and how important the weight saving is to you.

Also, look at the overall ease of folding the tripod up. Most tripod legs are three sections meaning they get taller with each section you open, but some can be two sections or even five sections. The more leg sections you have to deploy equates to a longer time to set up and put away. Along the lines of tripod legs, look at the mechanism they use to deploy. Most tripods use a twist-lock mechanism, which can get confusing about which direction locks or unlocks the legs. Meanwhile, other tripods have a simple clip lock that is much easier to unlock and lock.

5. Tripod head quality?

Some tripods come with a tripod head, and others require that you buy it separately. In some cases, you may even want to buy your own tripod head if you have a preference in the best type to use.

A ball head is the most common type of tripod head, allowing for 360-degree rotation to position the camera where you want it. However, many ball heads, especially cheap or low-quality ones, will slip over time and be less stable. Thus, it may be worth buying a high-end ball head or looking at another type of head to use on your tripod.

Examples include the Manfrotto 3-Way (my favorite), or a pistol grip tripod head. Pretty much every large tripod allows you to replace the tripod head with one of your choosing.

Best tripod for beginners
Standard Arca Swiss type tripod ball head.
Canon 5D Mark III with Canon 100mm f/2.8 – 1/160 sec, f/7.1, ISO 400

The final piece of the tripod head to consider is the tripod plate or the piece that mounts directly to your camera. Arca-Swiss type plates are among the most common and universal, but they often come with the need to use an Allen wrench to tighten the plate to your camera.

On the other hand, there are other tripod plates such as those made by Manfrotto or Joby that includes a twist screw that you can easily secure without the need for an extra tool.

6. Extra features?

The last things to consider are any extra features or bells and whistles that come with the tripod. Here are a few examples to look out for:

Tripod to monopod conversion

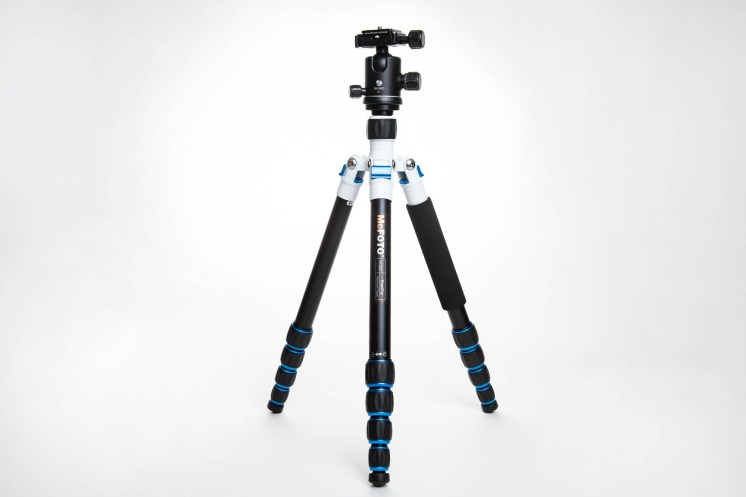
Some tripods such as those made by MeFoto, allow you to easily convert the tripod into a monopod by simply removing one leg and attaching it to the center column. This is a handy feature if you anticipate needing a monopod.

Tripods with a column that can be positioned at 90 degrees

If you have the need to shoot with a 90-degree column, look for a tripod that offers this feature. My Manfrotto 055 has this feature and it comes in very handy for product or flat lay photography.

Built-in bubble leveler

While many cameras have a built-in leveler, it always helps to have a physical bubble leveler to make sure your camera is straight. Some tripods have bubble levelers built-into the tripod head or the center column of the tripod.

Carrying case

Some tripods come with a carrying case to aid in transportation, and others require the carrying case to be purchased separately.

Best tripod for beginners
Manfrotto 3-Way tripod head.
Canon 5D Mark III with Canon 100mm f/2.8 – 1/160 sec, f/2.8, ISO 2000

In conclusion

There are a plethora of tripods out there and it is not an easy task to find the right one for you. Ultimately, this tripod buying guide is intended to help you think of all of the situations in which you plan to use a tripod and encourage you to carefully research all six features above. And while there are plenty of cheap tripods out there, consider investing in a high-quality tripod to begin with. Your camera equipment is expensive, and you don’t want to risk dropping or damaging it due to placing it on a cheap tripod.

Video

The post Tripod Buying Guide – 6 Vital Features to Look For appeared first on Digital Photography School. It was authored by Suzi Pratt.


Digital Photography School

 
Comments Off on Tripod Buying Guide – 6 Vital Features to Look For

Posted in Photography


Florian Ledoux’s ‘I Am Vital’ is a short film fit for Earth Day

23 Apr

Florian Ledoux is an award-winning photographer and filmmaker. His work documents the effects of climate change. DPReview featured some of his images, captured while traveling with the Arctic Arts Project, earlier this year. 2 months ago, his second short film ‘I Am Vital’ was released. It presents a timely message for today’s 50th annual Earth Day celebration.
‘Like all my work, and my previous documentary, ‘I Am Fragile,’ the beauty, power, and fragility of these polar regions inspire me,’ Ledoux explains to DPReview when asked about his inspiration behind the film. ‘I feel so many emotions when I find myself in the remote Arctic, co-existing in harmony with the wildlife that calls it home.’

‘I Am Vital’ was filmed across Greenland, Antarctica, Nunavut, Svalbard and Iceland over the course of 3 years. Its purpose is to remind viewers of the important role water plays in our ecosystems. Preventing glaciers and ice sheets, which hold almost 70% of the world’s water supply, from melting away is crucial for maintaining sea levels. 2019 was the second-hottest year in recorded history. Antarctica hit a peak temperature of 18ºC (64.9F), according to a reading from an Argentinian research station thermometer.
‘The main body of my work is still photography but over the last few years I have developed video skills. This allows me to use footage that creates an emotional atmosphere in my films. My aim is to connect people a little bit more with this part (Arctic) of the world,’ explains Ledoux about his choice to start filming up close, from an aerial perspective, with a combination of DJI Inspire, Phantom 4 Pro and Mavic 2 Pro drones. ‘The choice of an ultra short documentary is to keep people focused on the message that is clear and direct for a very short time mixed with powerful images,’ he tells us.
‘I believe in and aspire to share a new perspective of our incredibly resilient, yet fragile planet beyond what we’ve already seen through traditional photography. I hope my work allows viewers to observe our Mother Earth and wildlife from new angles and approaches never before possible,’ he concludes. ‘It is my goal to present a new way of learning about the great white North. It is more than time to act and I want my work to positively impact conservation and result in new and expanded Marine Conservation Areas.’

Articles: Digital Photography Review (dpreview.com)

 
Comments Off on Florian Ledoux’s ‘I Am Vital’ is a short film fit for Earth Day

Posted in Uncategorized


Vital Tips to Capture Fast-Action Photos

23 Feb

The post Vital Tips to Capture Fast-Action Photos appeared first on Digital Photography School. It was authored by Simon Ringsmuth.

capture-fast-action-photos-tips

Whether you’re photographing cars racing down the track, athletes running across a field, or your kids playing in the yard, it can seem impossible to get tack-sharp photos of fast action. If you have ever struggled to capture fast-action photos, you’re not alone. Lots of people deal with the same issue!

Fortunately, it’s not as difficult as it seems. With a few simple tweaks to your photography process, you can get great action photos in no time at all.

girls-running-forest

Nikon D750, 112mm, f/4, 1/350 second, ISO 500

A major element of action photography involves knowing where to position yourself and what to look for.

In addition to that, there are some critical camera functions you need to understand and know how to control if you want to get the kinds of shots you see in sports magazines. Mastering a few shooting techniques will help you get the kind of fast-action photos you’ve always wanted.

Taking a picture is pretty simple. You press the shutter button, your camera initiates autofocus, and then it takes the picture. A quick beep-beep might sound once focus is acquired, or you might see a dot or square light up in the viewfinder of your camera. That works great for still subjects, but if you want to capture fast-action photos, you’re going to need to adjust your settings.

capture-fast-action-photos-soccer

Nikon D750, 140mm, f/2.8, 1/1500 second, ISO 100

Use the right autofocus mode

Understanding how to use autofocus to capture fast-action photos is one of the first and most important steps you can take.

Autofocus first came to prominence in 1985 on the Minolta Maxxum 7000 camera. Ever since then, it has continued to evolve. Now, modern cameras have a host of ways to configure and control this basic feature.

Every camera has a variety of autofocus modes. They go by different names depending on the manufacturer, but, in general, you can expect the following on any given camera.

  • Focus-and-lock: Once focus is acquired, it will not change until you take a picture or re-focus.
  • Continuous focus: Your camera will constantly adjust focus as your subject moves.
  • Manual. Not recommended for most fast action. It can be good if you know exactly where your subject will be at a specific point in time, but in general, it’s best to use autofocus.

Your camera will also have a few settings for how it computes autofocus. Names will vary but they will be something like the following.

  • Full auto: Your camera decides what to focus on without any input from you.
  • Expanded AF or Group: You use multiple focus points to keep the subject in focus instead of just a single dot or square.
  • Tracking: You set a focus point and your camera will maintain focus continuously until you take a picture. You will see the focus point move around as your camera adjusts to keep the subject in focus.
tubing-lake

Nikon D7100, 200mm, f/3.3, 1/1500 second, ISO 100

To capture fast-action photos, you will need to use one of the final two modes and make sure you set your camera to continuous autofocus. There is so much unpredictability with action shots that you want to use all the smarts and capabilities of your camera to help you out.

Tracking modes are particularly useful on newer cameras since the algorithms used to lock on subjects and track them are very advanced.

If your camera has a tracking option, I recommend using that, but Expanded or Group modes work well too. They give you a little more freedom and wiggle room compared to relying on one single autofocus point.

Back Button Focus

Back button focus is more of a technique than a camera setting. While it’s going to feel really weird at first, it will make your life a lot easier when capturing action photos.

Instead of using the shutter button to focus your camera, you use a button on the back of your camera.

Back button focus might seem counterintuitive since it feels like autofocus would go hand-in-hand with clicking the shutter button. There are some good reasons to use back button focus, though, especially when it comes to capturing fast-action photos.

When you set your camera to continuous autofocus and use the shutter button to engage autofocus, it can be difficult to keep the button half-pressed while following your subject around. Back button focus lets you track your subject continuously with a firm press of your thumb.

Then whenever the decisive moment hits, you press the shutter button to get the perfect shot. Or you can start snapping pictures well before the moment arrives and continuing to maintain focus with your thumb.

capture-fast-action-photos-tubing

Nikon D7100, 200mm, f/2.8, 1/1500 second, ISO 100

Almost every camera can do back button focus, but you will need to change a few menu settings to enable it. Do an online search for your exact camera along with the words “back button focus,” and you should find the information you need.

It took me about a week to train my mind to use back button focus, but now I use it all the time, even on casual everyday photos.

It works so well once you get used to it!

Embrace Auto-ISO

When shooting action photos, the most important thing is to get images that are tack sharp. A well-composed shot won’t mean anything if your subject is blurry (unless, of course, you are trying to capture motion blur), so that means you need to use a fast shutter. And that often means embracing higher ISO values, especially when shooting indoors where there isn’t nearly as much light as outside.

Fortunately, Auto-ISO can take the guesswork out of your action shots.

You can set a minimum shutter speed and a maximum ISO value and let your camera take care of the rest. Most modern cameras look great up to ISO 6400, and many can go well beyond that while still maintaining enough color and detail to be usable.

Image: Nikon D750, 80mm, f/4, 1/500 second, ISO 2000. A fast shutter speed might be overkill for peo...

Nikon D750, 80mm, f/4, 1/500 second, ISO 2000. A fast shutter speed might be overkill for people just walking, but I wanted to be absolutely sure they were tack sharp. Auto-ISO chose a value of 2000 which was perfectly acceptable.

My Auto-ISO settings for action are minimum shutter speed of 1/500 second (or 1/1000 second if my subjects are moving really fast) and maximum ISO value of 6400. You will need to experiment to find out what your comfort level is and what settings you prefer.

Shoot in Aperture Priority

This tip piggybacks on the last one, though just like back button focus, it might seem counterintuitive.

If you need a fast shutter speed to capture fast-action photos, why not shoot in Shutter Priority? Because Aperture Priority and Auto-ISO let you get the best of both worlds.

Using this technique, you can worry a lot less about getting a properly exposed shutter, free of motion blur. That way, you can concentrate on composing your shot while your camera does the rest.

tubing-snow

Nikon D750, 35mm, f/4, 1/1000 second, ISO 100

When you shoot in Aperture Priority with Auto-ISO, you can set the aperture that gives you the right depth of field. That means you don’t have to think about other elements of exposure because your camera is going to stay within the shutter and ISO parameters you set.

If you know you are in a low-light situation, you can increase the aperture size or dial in a higher ISO value for Auto-ISO.

I shoot in Aperture Priority so I can control the depth of field while making sure I always get a tack-sharp photo. That’s because I know my shutter speed will never go below 1/500 second.

If you have never tried this when shooting action photos, you might be surprised at how well it works!

capture-fast-action-photos-soccer-multiple-kids

Nikon D750, 200mm, f/2.8, 1/1000 second, ISO 100. I used a large aperture to make the kids in the background blurry and focus the viewer on the child in the middle. My camera figured out the ISO and shutter speed based on my Auto-ISO parameters.

Adjust your viewpoint

When shooting any style of photos, you need to make sure you compose the scene in your camera from the proper point of view. That might mean kneeling, sitting, or even lying on the ground.

Sometimes you might find yourself sitting on top of a ladder or in the bed of a truck to get a higher vantage point. The goal, especially with action shots, is to take your pictures in such a way that they are dynamic, interesting, and help put your viewers in the middle of the scene.

capture-fast-action-photos-frisbee

Nikon D7100, 200mm, f/2.8, 1/350 second, ISO 100. I shot this so it looks like the disc is coming right towards the viewer.

When shooting fast-action photos, you can’t always control your surroundings, and in that case, you might need to move around.

There might be physical barriers like guardrails, fences, or other people in your way. One solution is to sit there and settle for whatever happens. However, a good action shooter will move around until they find the vantage point that works best for the shot. (Within reason, of course. Be polite about it, and certainly don’t do anything illegal!)

Image: Nikon D750, 105mm, f/4, 1/1000 second, ISO 200. I should have scooted over to get that table...

Nikon D750, 105mm, f/4, 1/1000 second, ISO 200. I should have scooted over to get that table out of the foreground. A simple adjustment on my part would have made for a better image.

One factor you can’t control when taking fast-action photos outdoors is light and weather.

It might be cloudy or sunny, windy or calm, rainy or clear, and there’s nothing you can do to change it.

What you can do is adjust your viewpoint accordingly to get the best shots. Position yourself such that your subjects aren’t backlit, and make sure to have protective gear for your camera if the weather is bad.

Take a lot of photos!

What’s the best-kept secret for capturing fast-action photos? Take a ton of pictures! 

When you see a perfectly-composed shot of your favorite athlete on the cover of a magazine, there are a thousand similar images sitting unused on a hard drive that weren’t good enough. 

If you want one great photo, you need to be willing to take a lot of mediocre photos and sort through to find the keepers.

All cameras can shoot in high-speed bursts. This is critical for action photos since you never know which picture will be just the right one. 

Often the only limitation is the size of your camera’s internal buffer or the rate at which your camera transfers images can to a memory card.

capture-fast-action-photos-scooter

Nikon D500, 200mm, f/2.8, 1/1500 second, ISO 100. The 10fps burst rate on my camera made this image possible. I shot about 30 images but this was the best one.

You will need to check your camera manual or do some online searching to find out how to enable burst mode on your camera. Just don’t think you can take a few pictures and get the perfect shot.

Professional action photographers will take thousands of pictures of a single game or event, and only a handful will be published.

The same holds true for you: if you want to get great action photos, you need to take a lot of photos.

What are some of your tips and techniques to capture fast-action photos?

Are there things that have worked for you that you would like to share with others?

Leave your thoughts in the comments below. And if you have some examples of action shots you would like to share, make sure to include them too!

The post Vital Tips to Capture Fast-Action Photos appeared first on Digital Photography School. It was authored by Simon Ringsmuth.


Digital Photography School

 
Comments Off on Vital Tips to Capture Fast-Action Photos

Posted in Photography


6 Vital Things to Look for When Photographing Landscapes

03 Feb

The post 6 Vital Things to Look for When Photographing Landscapes appeared first on Digital Photography School. It was authored by Jeremy Flint.

vital-things-photographing-landscapes

Photographing landscapes is a hugely enjoyable pursuit that you can undertake all throughout the year. Landscapes are all around us, and being among them and capturing their beauty is a great way to immerse yourself in nature. Landscape photography can also be a fun way to practice your photography outdoors and learn about your camera in the fresh air. Here are six things to consider when photographing landscapes to elevate your images.

1. Dramatic light

One of the best times to be outdoors with the camera photographing landscapes is when the light is adding ambiance to the land.

Dramatic light can appear in all weathers.

You might expect dramatic light only to appear when the sun is shining. This is simply not the case. A predominantly overcast sky can yield impressive light for landscape photography. When the clouds disperse, the sun can unveil magical light as it paints and radiates the landscape.

It is often these fleeting moments of light that make the scenery more outstanding.

Another great moment for dramatic light is after a storm or rain shower when the bad weather clears and breathtaking light replaces it, or the final rays of light following a sunset.

vital-things-photographing-landscapes

Fujifilm Finepix F700, 12.9mm, 1/300 sec, f/3.6, ISO 200, Normal Program, Pattern Metering. © Jeremy Flint

2. Changes in the season

You can enjoy the beauty of the landscape throughout the year. Have you ever thought about how a local panorama changes with the seasons throughout the summer, autumn, winter, and spring? The changes each season brings can be brilliant for photographing landscapes. 

Next time you visit and capture your favorite local scenic view, re-visit during a different time of the year and see how the landscape transforms in an alternative season.

The beautiful vibrant greens of summer are usually followed by the crisp and golden leaves and foliage of autumn when a palette of colors unfolds from shades of red and orange to hues of yellow. 

In spring and summer, photographing landscapes can be a superb time to capture flowers in bloom or more minimalist looking images when the trees are bare and striking in winter. 

Also, consider using a wide-angle lens to capture a greater perspective.

vital-things-photographing-landscapes

Canon 5D Mk II, EF 17-40mm f4L USM, 19mm, 1/4 sec, f/11, ISO 100, Manual Mode, Pattern Metering. © Jeremy Flint

3. Changes in the landscape

Our dynamic landscapes continue to change due to human activity and natural processes, shaping our diverse and wonderful landscapes.

Farming has a big influence on our land and can be great for photography. Arable farming (the growing of crops and cereals) and pastoral farming (the rearing and production of animals such as pigs, sheep, beef and dairy cattle) can make great subjects for photography.

As fields get plowed, seeds also get planted. When different crops grow every year, including wheat and barley in the UK, for example, these changing landscapes provide wonderful photo opportunities.

You can also photograph grazing animals in the landscape.

4. Varying weathers

Changes in the weather can be unpredictable and can occur at a moment’s notice. One minute it can be sunny, and the next minute it can be raining. Although you cannot control the weather, you can alter what you shoot. So get creative when photographing landscapes in varying weathers and make the most of anything it throws at you.

Bad weather can provide exciting chances to improve your photos. For example, snow can transform a landscape into a striking minimalist scene.

If the skies are overcast or it is raining, either head to a river for your photography or venture into woodlands where there is more cover for taking pictures.

vital-things-photographing-landscapes

Canon 5DSr, 16-35mm f2.8L III USM, 18mm, 15 sec, f/11, ISO 100, Manual Mode, Pattern Metering. © Jeremy Flint

The weather can influence a landscape with its changing patterns of light. As the sun and clouds come and go, shoot the diversity of the scene as it develops.

5. Atmospheric conditions

Atmospheric conditions can really help to lift your landscape images. A hint of mist can make an uninteresting scene look moody and interesting. Mist swirling around a group of trees or encircling a building can look spectacular, especially in the right light.

You can use fog to create mystical-looking images too.

Image: © Jeremy Flint

© Jeremy Flint

6. Interesting elements

The final suggestion to shoot quality landscapes is to add an extra element of interest in your shots. You can go for a tree, water, people, or even parts of the landscape, such as a fence or gate.

Experiment with different compositions and come up with a view you like. The extra element will help give scale to your pictures and bring out another interesting side to the scenery.

Image: Canon 5DSr, 16-35mm f2.8L III USM, 18mm, 1/30 sec, f/11, ISO 100, Manual Mode, Pattern Meteri...

Canon 5DSr, 16-35mm f2.8L III USM, 18mm, 1/30 sec, f/11, ISO 100, Manual Mode, Pattern Metering. © Jeremy Flint

Conclusion

In summary, changes in the weather can be both subtle and extreme, creating incredible moments to capture the landscape. Consider things such as showers, sun, cloud cover or clear skies when photographing landscapes.

Also, look for the seasonal changes in crops and take advantage of dramatic light as it casts its rays over a magical view.

Mist and fog can be the icing on the cake for landscape photography as they add an element of drama and can lift your images from great to spectacular. Also, include a person or building in your landscape shots for interest and scale.

Do you have any other tips for photographing landscapes? Perhaps you’d like to share some of you landscape shots with us? If so, please do so in the comments!


The post 6 Vital Things to Look for When Photographing Landscapes appeared first on Digital Photography School. It was authored by Jeremy Flint.


Digital Photography School

 
Comments Off on 6 Vital Things to Look for When Photographing Landscapes

Posted in Photography


7 Vital Tips to Improve Your Candid Street Photography

21 Jan

If people watching is in your nature, you owe it to yourself to try some street photography. It can be addicting, and the fleeting moments you can capture will be one of a kind. It is a genre of photography similar to fishing. The more you enjoy the process, and the more you cast your reel out there (is this correct fishing terminology?), the more you will catch.

Time and experience trump everything due to the difficulty, and while perseverance is the only way to do street photography well, there are some important tips and strategies that can set you off in the right direction. Here are some of my favorites.

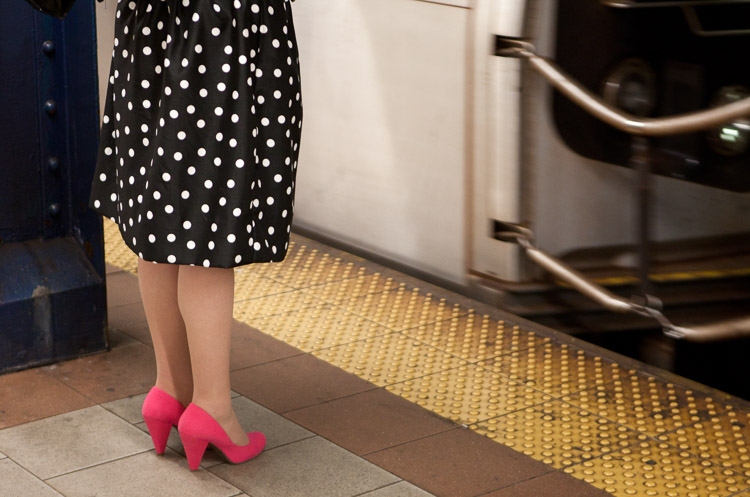
7 Vital Tips to Improve Your Candid Street Photography Polka Dots and Pink Shoes, Subway, 2012.

1. Travel light and with minimal gear

Many of you will have a DSLR and a mid-range zoom lens. While it is fine to shoot street photography with this equipment and many do (and even more start out this way), lightening your load will make a huge difference. You will have more energy, your coordination will be better, and you will be faster and more willing to explore. You will also be able to photograph in situations where you would not want to bring a large camera.

Not only are micro-4/3rds and mirrorless camera systems lighter, but they look less intimidating to the people you are photographing. If you have a DSLR, consider using a 35 or 50mm prime, or a pancake lens for these reasons. Fortunately, you do not need the fastest versions of these lenses, so it will not be quite as expensive. A 35mm f/2 is usually about half the size of a 35mm f/1.4, and Canon’s 50mm f/1.8 is both small and only $ 125.

7 Vital Tips to Improve Your Candid Street Photography Greene Street, New York Street Photography

Prime lenses

Prime lenses will restrict you to a specific focal length, but this limitation can actually be quite freeing. By sticking to a focal length such as 35mm or 50mm (the two favorite lenses for most street photographers), you will learn to see how the lens sees.

You may miss out on certain moments by not having a zoom, but at the same time, you will be able to capture more quality images within the ideal distance for the lens that you are using. You will be quicker and more spontaneous with your camera. You will even start to think more about your perspective and framing without having the luxury of the zoom, and as the old saying goes, you will begin to zoom with your feet.

2. Raise your ISO

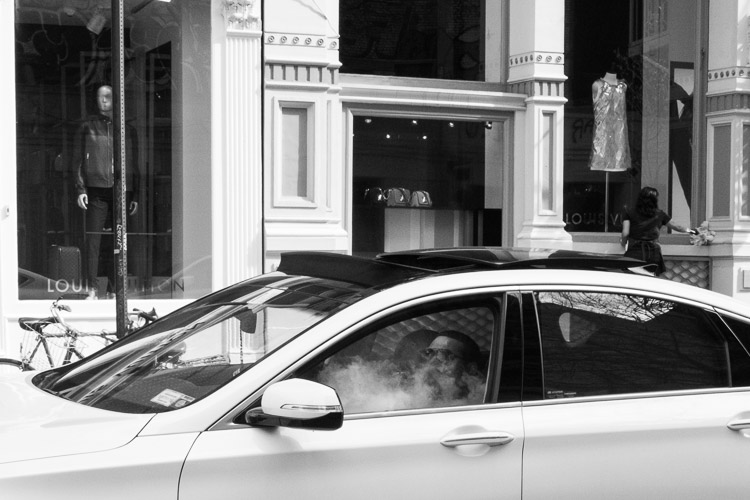
7 Vital Tips to Improve Your Candid Street Photography SoHo, New York Street Photography

It used to be taught that you always needed to use as low an ISO as possible. This is because the early digital cameras were terrible at high ISOs, particularly over 400. Luckily, new digital cameras blow the old ones out of the water in terms of high ISO ability. You can now shoot at ISOs of 1600 and 3200 with beautiful looking grain/noise, but the stigma of using high ISOs still exists.

For street photography, I will typically shoot at ISO 400 in sunlight, 800 in light shade, 1600 in dark shade, 3200 at dusk, and 6400 at night. With an entry level or less advanced camera, I would go down one stop in ISO, i.e. ISO 200 in sunlight and up to 3200 at night.

Benefits of high ISO

This gives us a huge advantage. Being able to raise our ISOs this high not only allows us to shoot handheld in dark situations, but it also allows us to simultaneously shoot with a faster shutter speed to freeze motion and a small aperture to maximize the depth of field.

Some photographers prefer a shallow depth of field, but in the fast moving world of candid photography, I prefer a large depth of field for a few reasons. First, if you miss the focus on your subject, they can still turn out sharp. If you are photographing at f/2.8 on the other hand, your image will be ruined if you miss the focus. Next, since context is very important in street photography, if you have multiple subjects at different depths or important background elements, it will allow everything in the frame to be relatively sharp.

I prefer to shoot at 1/250th of a second to guarantee that there is no motion blur in my subjects, although I will go to 1/160th or 1/125th in the darkest of situations. In bright light, I will shoot at 1/320th or 1/400th of a second. A high ISO is what allows me to shoot with these speeds, no matter what the lighting is like.

3. Pick a spot and wait

7 Vital Tips to Improve Your Candid Street Photography Broadway, New York Street Photography

Street photography and going for a walk go hand in hand. Sometimes you just want to take your camera and explore on a nice day. However, by constantly walking, you might be doing yourself a disservice. Instead, try to find some promising locations on the way and linger there for a while as you wait for something to happen.

Picking one spot does a few things. First, it allows you to combine a good location with an interesting moment. If you find a quality location and just take a quick photo and move on, you’re killing so much of the potential. By waiting, you give yourself more time for that magical moment to happen. It’s when the right location merges with the interesting moment, that a great photograph appears.

It’s when the right location merges with the interesting moment, that a great photograph appears.

You will also be faster at noticing your surroundings and quicker with your camera because you will be focused on looking around instead of walking. In addition, people will be coming into your scene and entering your space instead of you entering their space, so it makes the whole practice of street photography easier and less confrontational.

Camera snap

A small but important tip that goes hand in hand with this idea has to do with the camera snap. The camera snap is the quick, instinctive removal of the camera from their eye that photographers do immediately after clicking the shutter. It is the motion that tips your subjects off to the fact that you just took a photo.

By picking a spot and waiting for a subject, you can be as candid as possible. Just put the camera to your eye, take the image, and keep it there as the subject leaves your scene. This will make it seems like you were just photographing the background and waiting for them to get out of the way.

4. Know what to say if someone stops you

7 Vital Tips to Improve Your Candid Street Photography

No matter how you approach it, there is an inherent creep factor to street photography. Some of your subjects will understand and be flattered, while others will think you are the weirdest person on the planet. If you like to photograph your surroundings and culture, people are a big part of that. Including them in what you capture can be a big part of telling the story of your surroundings, and there is nothing wrong with it.

While tough situations are rare, particularly if you handle yourself in the right way, knowing what to say ahead of time is very important. If someone asks if you took their photo, own up to it and tell them what you were doing. Talk to them and explain why you found them interesting. This will flatter some people, but others will still not understand. I always keep a business card with me and offer to send the photograph if someone emails me for one.

Keep your cool

Always keep a smile on your face. If someone seems angry for any reason, there is no need to get defensive or angry back. You don’t have to explain that it’s in your legal right (depending on where you are photographing of course) unless it comes to that. That’s not the best thing to bring up right away because it can make people even angrier.

Instead, figure out how to diffuse the situation and tell them that you did not mean to make them uncomfortable. I’ve offered to delete a couple of photos over the years when I felt it was necessary. The ability to diffuse a situation is very important, even though I have only had one or two uncomfortable situations over a 15 year period of frequent shooting.

5. It’s not just about people

7 Vital Tips to Improve Your Candid Street Photography

It is a common thought that street photography is only about capturing people walking down the street, on a beach, or in public. That’s just not the case. Street photography is about candid photography of life and culture. While that can and should include people sometimes, other times it can be about nearly anything else. Capture daily scenes and backgrounds that you find to be interesting.

They can be weird images. Capture something unique. You do not always have to take the prettiest or most epically beautiful photograph. Capture something that makes someone think or that throws them off balance. Capture images for yourself, and ones that you know some people will not understand or like right away. It is not your job to please everyone. It’s your job to take a good photograph.

Be spontaneous and go for it

Be spontaneous. With other forms of photography, you can be a perfectionist about every detail. While it is also important to think this way for street photography, so many of these decisions are made in a split second. Let yourself go and be spontaneous with what you capture. Whenever you feel there is potential for a strong image, even if you aren’t sure, go for it. Many will fail, but some of those moments will end up being the best photos you have ever taken.

Go somewhere that you think will make it tough to capture an interesting photograph. Sometimes you will find that you will be able to capture unique content in areas that others would think of as quiet or boring. There are good photographs everywhere and the best photographers have a way of finding them anywhere.

6. Group your photos while editing

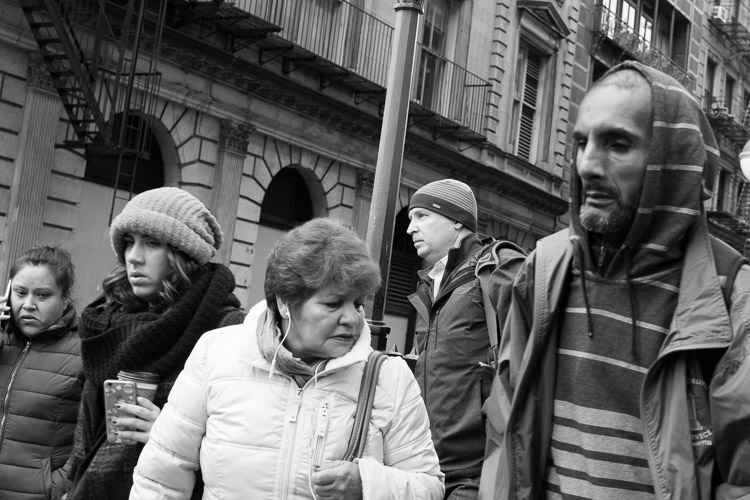
7 Vital Tips to Improve Your Candid Street Photography - Three Men, Gucci, New York Street Photography

This is not a tip that all street photographers adhere to. Some like each of their photographs to live on their own. However, many prefer to group their work by feeling, ideas, or themes. For some, the book is the ultimate form of display for street photography.

Group your photos based on feel and sequence them into a loosely based narrative of some sort. Come back often and add to and take away from it. Over time, you will notice that ideas will grow organically. It will help inform you about what to capture when you are out there. These ideas will develop as you grow as a photographer.

Before you think about putting together a book, purchase a simple cork board for your office wall and fill it with 4×6 and 5×7 images. Constantly print and replace them to create a cohesive wall of images. It is a lot of fun and a great way to view your work and your progress.

7. Explore the work of other photographers

7 Vital Tips to Improve Your Candid Street Photography

This is such a simple tip but it is immensely important. In your free time, look up the work of all types of street photographers and study their portfolios. Explore the content, the technique, and the styles that you like. Watch videos of these photographers in action to see how they approach the street. Go to gallery shows and look at real life prints to train your eye. This will give you a range of ideas for what to capture the next time you are out shooting.

The fascinating thing about street photography is that while the content is the same for all of us, what we each come back with is completely different. Studying the styles of different photographers will help inform what is possible for you to create.

It is inspiring and fun to do. Start a photography book collection or even purchase a couple prints for your walls. The more you surround yourself with it, the better you will become, the more ideas you will have, and the more inspired you will be.

Some photographers to start out with are Henri Cartier-Bresson, Garry Winogrand, Robert Frank, Helen Levitt, Lee Friedlander, William Eggleston, Walker Evans, Daido Moriyama, Martin Parr, Elliot Erwitt, Joel Meyerowitz, Mary Ellen Mark, Bruce Davidson, Saul Leiter, Trent Parke, Alex Webb, Vivian Maier, and Bruce Gilden.

Conclusion

Now go out there and have some fun. The biggest tip is that the more time you spend shooting, the better images you will come back with. So shoot with some regularity and do it in the way that you find the most fun so you will continue to practice.


If you’d like to learn more about Street Photography, then please check out my ebook The Essentials of Street Photography.

googletag.cmd.push(function() {
tablet_slots.push( googletag.defineSlot( “/1005424/_dPSv4_tab-all-article-bottom_(300×250)”, [300, 250], “pb-ad-78623” ).addService( googletag.pubads() ) ); } );

googletag.cmd.push(function() {
mobile_slots.push( googletag.defineSlot( “/1005424/_dPSv4_mob-all-article-bottom_(300×250)”, [300, 250], “pb-ad-78158” ).addService( googletag.pubads() ) ); } );

The post 7 Vital Tips to Improve Your Candid Street Photography by James Maher appeared first on Digital Photography School.


Digital Photography School

 
Comments Off on 7 Vital Tips to Improve Your Candid Street Photography

Posted in Photography


Vital Tips for Photographing and Editing Interiors

15 Feb

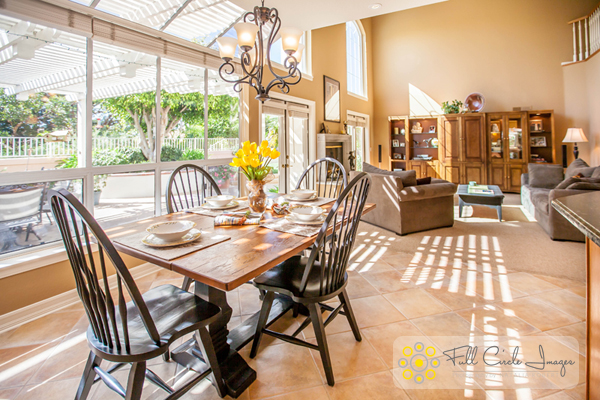
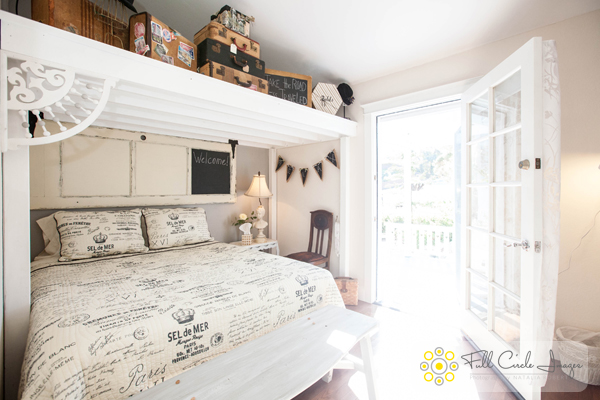
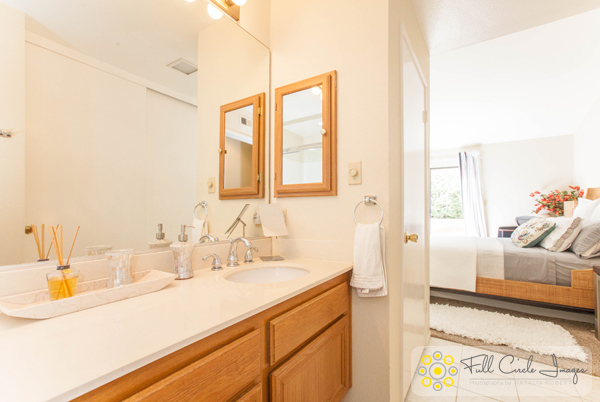
Shooting interiors can be tricky. Spaces tend to either look cold and empty, or warm and inviting. While we always strive to capture what the eye sees, the complexity of the human eye will never be matched by the lens of any camera. Still, there are things you can do before, during, and after shooting an interior space that will go a long way in improving your chances of ending up with stellar photos.

Not sure where to start for improving your architectural photos? Here are my favorite tips for photographing interiors, plus some tricks for touching them up with Adobe Lightroom.

Interiors1

How to Shoot Your Best Interior Photos

Grab your favorite camera and use these tips for snapping more professional-looking photos every time.

1. Prepare the space

Set the stage by taking the time to de-clutter and open up the space. Clear all flat surfaces and floor areas. Open all blinds and curtains. Clean any dirty dishes in the sink and put them away. Be sure to clean the space much more so than you would for yourself. We get used to clutter and become blind to it, but a bit of clutter in a photo goes a very long way.

2. Add warmth and life with personal touches

The space should feel lived-in and inviting, like the kind of place you can imagine yourself spending your days.

You can create those feelings in your photos, by adding personal touches. Set the dining table for two and place a vase of fresh flowers in the center. Transform an empty breakfast nook into a great spot to lounge by adding a newspaper, coffee cup, and a plate or bowl of light (and pretty) snacks. Hang a fluffy bathrobe on a hook next to the bathtub.

When it comes to decorations or color palettes, you want to either fill the space with personality to play up the uniqueness of it, or keep everything neutral with pops of bright color.

Interiors2

3. Fill the room with light

All interior lights MUST be on. While they’re not necessarily helpful in actually lighting the space, they help to create the ambiance. The absence of interior lights will give the space a cold, empty feel.

When using flash, never directly point it into the space. Instead, bounce it off the ceiling or walls, depending on what the space offers. If you can help it, always use flash as a source to fill in shadows, rather than as a main source. That said, if there is enough ambient light (which is your ultimate goal), skip using flash altogether.

Also, play with the strength of your flash. For my Canon, I like to slightly overexpose by about 1/3 of a stop and push the flash to about +2/3 in ETTL mode. Each camera can be different, so don’t be shy about experimenting with what works best with yours.

For outdoor shots, consider setting your flash to manual mode and using it as the fill light. I tend to set mine at 1/16th of full strength, but again, experiment with what works with your camera’s setting and your personal preference.

4. Shoot low

Keep verticals as truly vertical as possible by shooting from a slightly lower camera angle. If you’re going for a graphic composition, watch your horizontals as well. It’s quite easy to fix these issues in Lightroom during your final edit (see more in the first editing tip below).

5. Strike a balance

When composing your shot, focus the viewer’s attention on where you want it to go. Consider using staged items to add depth and interest in the foreground. Try blurring the background to make foreground objects really pop. Avoid flat looking photos by contrasting different elements in the foreground, middle-ground and background. Remember to aim for balance, not distraction.

Using the background to show a connecting room is also a great way to give the viewer a sense of space. This will add interest and make the viewer feel like they can visualize walking through the home.

Interiors3

How to Edit Your Interior Photos

Import your photos to Lightroom and follow these basic editing steps to create more powerful images. Tip: You can also use Photoshop for many of the steps laid out below.

1. Straighten out the lines

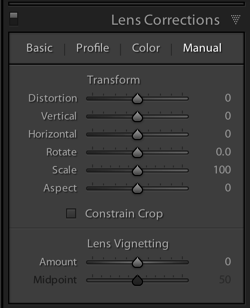
Doing this will instantly polish up your photos. If you shot at a height of roughly five feet from the floor and kept the camera level, the amount of straightening you have to correct should be minimal. In Lightroom, you can find this tool under Lens Correction under the Manual section (tab).

2. Fill in and even out the light

Screen Shot 2015 02 10 at 2 01 28 PM

Before doing any adjustment to brightness or exposure, be sure to correct any lens vignetting that may have happened. This is when the corners of the image are a bit darker, and is a common effect in wide lenses. You can find the slider for this setting in Lightroom under Lens Correction, Manual, then Vignetting.

Once your corners are corrected, use the Adjustment Brush to correct the exposure in bright or dark areas. This is your time to “dodge and burn.” I find that erring on the side of overexposure actually has a more natural feel to the space. I recommend pushing the overall exposure up slowly, then when it feels too bright, start pulling back.

You can also lighten dark areas slightly with the shadows slider in the top (Basic panel) section. However, be careful not to lighten so much that you bring out grain (noise) or that the image looks fake.

3. Perform color corrections

Adjust the overall temperature as needed. You’re aiming for warmth, not yellow. Also, bump up the Vibrance a bit instead of messing with the saturation. Oversaturating can quickly make a photo look too fake, while Vibrance is a more subtle tool that helps give the color a little extra kick. Again, playing with the sliders on these settings, and seeing what your eye is comfortable with, will go a long way toward honing color-correcting skills.

Interiors4

4. Adjust the clarity and sharpness

Push the Clarity slider up (to the right) slowly. Clarity is a great way to polish up a photo without going overboard on contrast; plus, it gives the photo an overall crisp look. Depending on the image, you may want to simultaneously play with darkening the blacks a bit, too.

Lightroom has two great presets built-in for sharpening: faces and scenic. I use scenic for architectural mages because it sharpens a bit more than the preset for faces. It’s a subtle, but vital, touch.

5. Clean up with spot removal and cloning

Use the Spot Brush tool to remove any dust spots or other anomalies that may have gotten onto the photo. You will see two options in Lightroom for the brush: Clone and Heal. Healing is a great option when correcting small spots, as it will have a softer blend to it. Next, use the Cloning tool to remove any glares or reflections of you in the photo. You can also use it to remove address numbers, if requested.

While I typically use Lightroom for editing photos, my personal preference for cloning is Photoshop’s stamp tool. It seems to allow for more control over the brush itself, therefore making it easier to clone in a way that looks natural.

How do you shoot and edit interior spaces? Share your tips and photos in the comments section below.

googletag.cmd.push(function() {
tablet_slots.push( googletag.defineSlot( “/1005424/_dPSv4_tab-all-article-bottom_(300×250)”, [300, 250], “pb-ad-78623” ).addService( googletag.pubads() ) ); } );

googletag.cmd.push(function() {
mobile_slots.push( googletag.defineSlot( “/1005424/_dPSv4_mob-all-article-bottom_(300×250)”, [300, 250], “pb-ad-78158” ).addService( googletag.pubads() ) ); } );

The post Vital Tips for Photographing and Editing Interiors by Natalia Robert appeared first on Digital Photography School.


Digital Photography School

 
Comments Off on Vital Tips for Photographing and Editing Interiors

Posted in Photography


James Nachtwey: TED Prize wish: Share a vital story with the world

08 May

www.ted.com Accepting his 2007 TED Prize, war photographer James Nachtwey shows his lifes work and asks TED to help him continue telling the story with innovative, exciting uses of news photography in the digital era.TEDTalks is a daily video podcast of the best talks and performances from the TED Conference, where the world’s leading thinkers and doers are invited to give the talk of their lives in 18 minutes — including speakers such as Jill Bolte Taylor, Sir Ken Robinson, Hans Rosling, Al Gore and Arthur Benjamin. TED stands for Technology, Entertainment, and Design, and TEDTalks cover these topics as well as science, business, politics and the arts. Watch the Top 10 TEDTalks on TED.com, at http