RSS
 

Posts Tagged ‘Urban’

6 Tips For Capturing Better Urban Landscapes

27 Jun

The post 6 Tips For Capturing Better Urban Landscapes appeared first on Digital Photography School. It was authored by Kav Dadfar.

Tips for Better Urban Landscapes

As you continue your quest to enhance your photography skillset, you should look to broaden your horizons by exploring various disciplines. In this article, we’re going to look more closely at how to capture better urban landscapes.

Better-urban-landscape
f/8 – ISO 100 – 1/250 sec

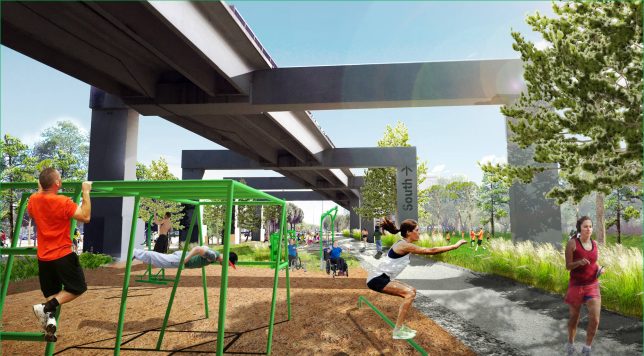
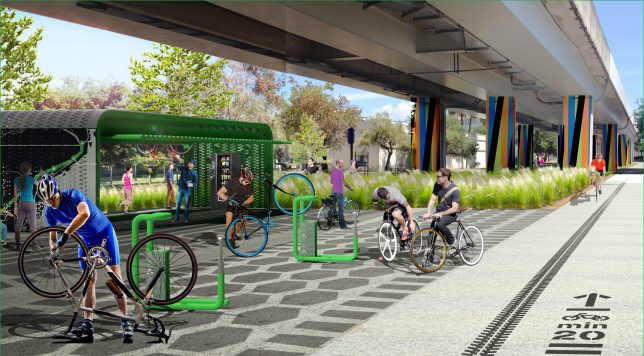
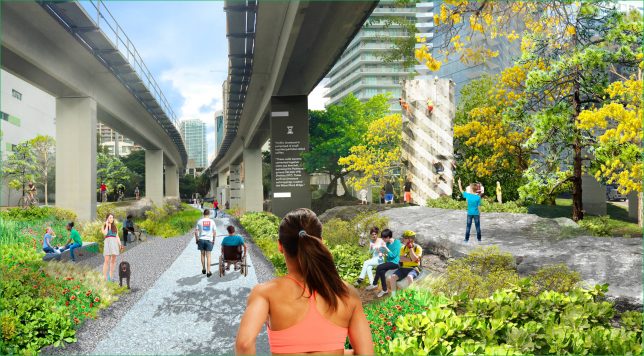
This discipline is all about bringing an urban environment to life in your photos. Shots of people living, moving, and working combined with an urban landscape can make for wonderful photos. It’s challenging even for experienced photographers. But you’ll find new ways of expressing yourself and capturing your surroundings, as well as immortalizing a piece of your growing environment.

But how do you best capture engaging images in an urban landscape? Here are six tips for capturing better urban landscapes.

Better-urban-landscape
f/8 – ISO 100 – 1/320 sec

1. Get to the streets

Whilst there’s nothing to say that you can’t take urban landscape shots from viewpoints in a city, if you want to capture exceptional urban photography then you should be right there alongside it. Get off your balcony and put yourself right onto the street in the middle of life as it unfolds.

To photograph better urban landscapes, try to find scenes where you can capture the combination of the urban landscape and people. A tight shot on two people talking isn’t necessarily what you’re looking for here. This is more street photography than urban landscapes. So you need to introduce some elements of the urban arena into your composition.

Better-urban-landscape-london
f/6.3 – ISO 250 – 1/160 sec

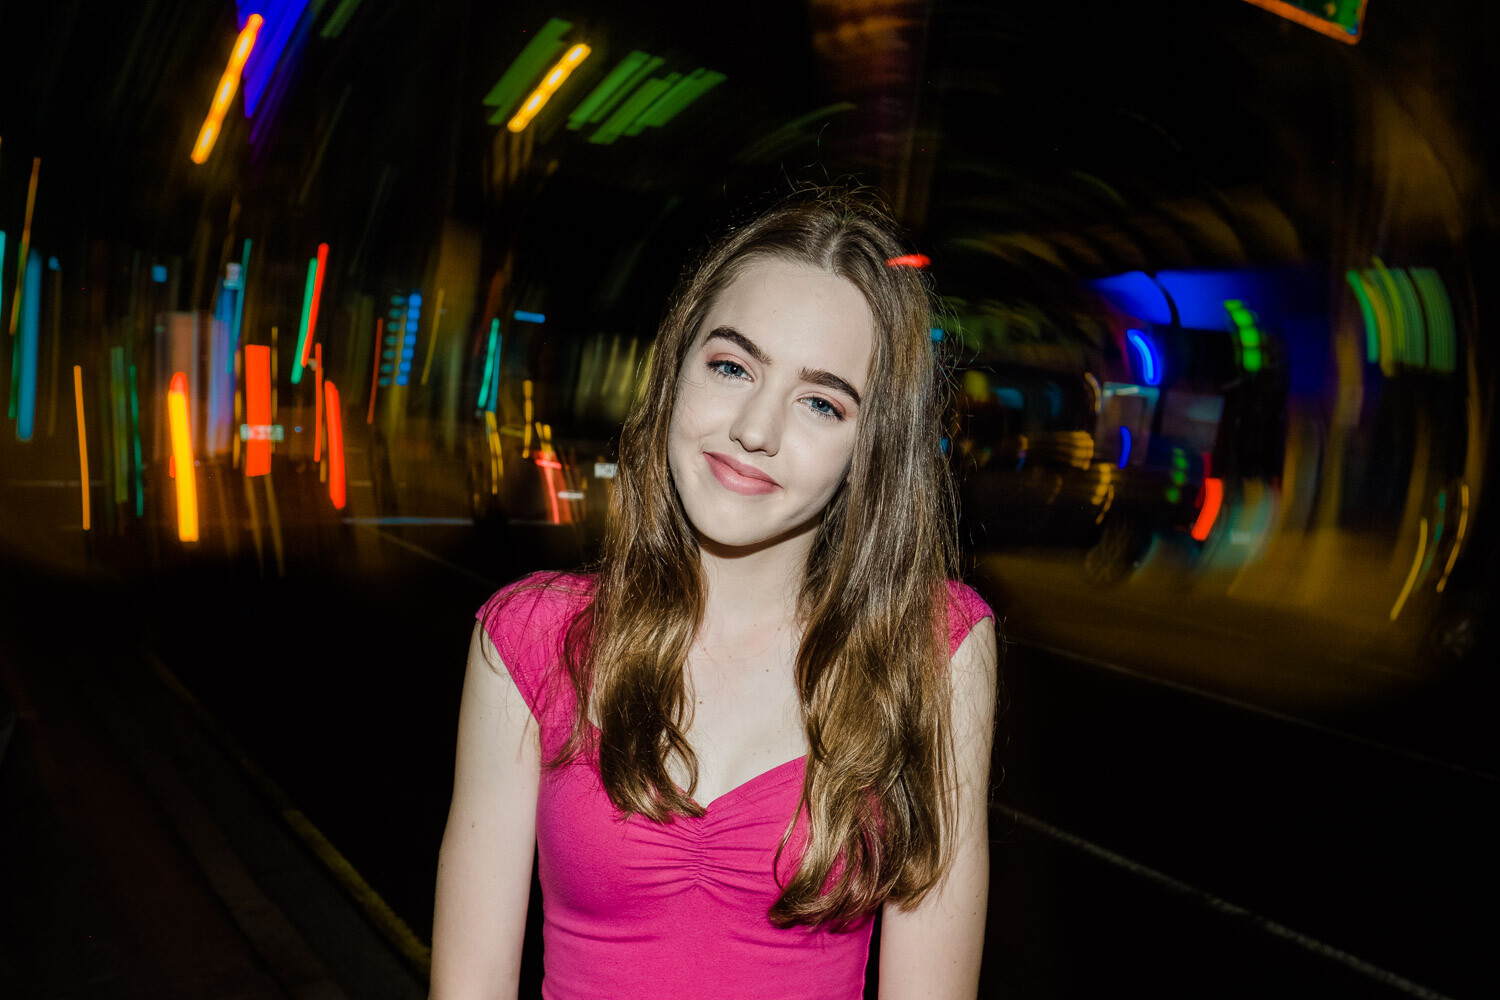
2. Play around with shutter speed

By lengthening your exposure setting, you can create a very dynamic image. Admittedly, this may go against having a live subject (like a person or animal), since they will probably be moving quite a lot. However, if you can, taking a wide shot of the urban landscape with a long exposure can create some interesting effects through movement.

The streaked clouds overhead can give a sense of movement to your still landscape. It’s a nice trick for capturing better urban landscapes if you’re just looking to get an image of the scene itself instead of active subjects.

At night, this also can create light trails from vehicles. Their tail and headlights will streak in the image, creating an amazing photo that captures the hectic expression of any urban setting.

Better-urban-landscape
f/13 – ISO 100 – 4 sec

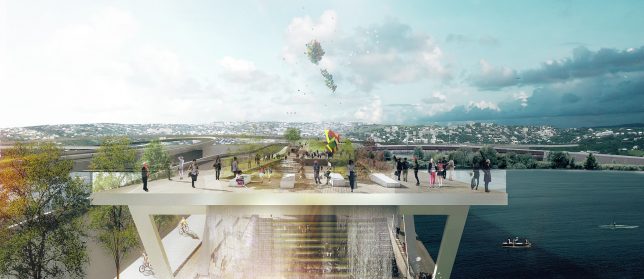
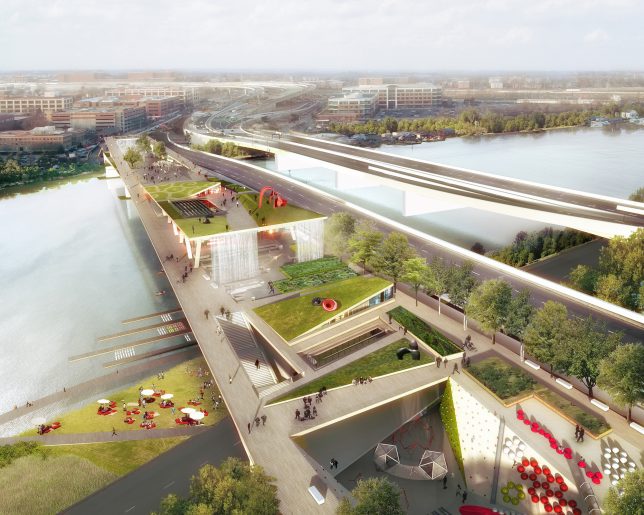
3. Find interesting buildings

What’s really cool about urban photography is that it’s just as much about the manmade elements as it is people. If you’re shooting in a city setting, then there are likely many interesting buildings, sculptures, parks, and other manmade elements throughout to capture.

Do a little research and learn about why
the interesting buildings were built in the first place. By being just as
selective with your history as you are your visuals, you can create a story
using photography in an urban setting.

For example, if you’ve chosen a wonderful gothic church as the background for your scene, what is unique about that church’s history? It may look amazing, but what else is behind the building, historically-speaking? You might dig up something really interesting that’s going to help shape your photo sessions. It could be key elements in the architecture or historically important locations around the church. Or you may just find interesting viewpoints and angles for better urban landscapes of the church.

Better-urban-landscape
f/6.3 – ISO 100 – 1/250 sec

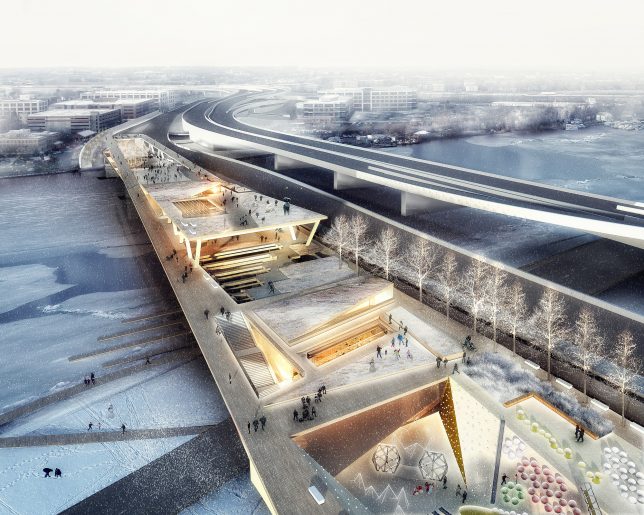
4. Come back during different seasons

Another tip for capturing better urban landscapes is to come back during different seasons. It’s easy to forget what an urban setting can look like during a different season. If you’re standing in the middle of a skatepark during the height of summer, and it’s very active with teenagers riding on every surface, you aren’t necessarily thinking about what the same scene would look like covered in snow.

However, you could make some really
intriguing juxtaposing images if you returned to the same scene during a
different season later in the year.

If you have the ability to travel to a location more than once a year, then you should consider taking advantage of that luxury. The lighting, skyline, and general feeling can all change dramatically, allowing you to capture great images that you might not have even considered previously.

Better-nighttime-urban-landscape
f/13 – ISO 250 – 15 sec

5. Use the terrain

When you compose your shot, consider the golden triangle rule or the rule of thirds. You can also look to align your subjects with leading lines generated by the terrain; perhaps a bridge, trees, a street, or a mural.

Elements throughout your frame can guide the eye toward your subject naturally, or they can pull it away just as easily. Be aware of how you’re composing your shot and consider using the elements to better align your focal point for better urban landscapes.

urban-landscape
f/8 – ISO 800 – 0.6 sec

6. Night versus day

An urban setting can really come alive at night. The shadows cast by daylight are now blending into the surroundings, and your lens will pick up way more than you thought possible.

Daylight photography can capture active scenes natural to that time, and the same can be said for nighttime photography. Aside from general lighting differences, the time of day also helps create an atmosphere in your image that you can’t replicate any other way.

If you can, just like visiting the scene during different times of the year, try and come back to see how the urban setting changes between night and day. Some differences may be subtle, but others will weave new visions for your camera to capture.

Better-urban-landscape-photography
f/11 – ISO 200 – 20 sec

Conclusion

The wonderful thing about this type of photography is that often it’s accessible for lots of people. Most people live within or near urban environments. So there will be ample opportunity to practice capturing better urban landscapes. Use the tips above and you will be on your way for improving your photography in this genre.

Do you have any other tips for capturing better urban landscapes that you’d like to share? Do you have some images you’d like to share? Please do so in the comments section!

The post 6 Tips For Capturing Better Urban Landscapes appeared first on Digital Photography School. It was authored by Kav Dadfar.


Digital Photography School

 
Comments Off on 6 Tips For Capturing Better Urban Landscapes

Posted in Photography


17 Tips for Shooting Better Urban Portraits

11 Nov

The post 17 Tips for Shooting Better Urban Portraits appeared first on Digital Photography School. It was authored by Matt Murray.

tips-for-shooting-better-urban-portraits

Are you interested in doing an urban portrait shoot, but you’re not sure where to start? An outdoor shoot in your local town or city is a great way to be more creative, think on your feet, and come away with some unique images that you can’t get from a shoot in a studio or your local park. However, If you’ve never done one before, you may be a little daunted. In this guide, I run you through my top tips for shooting better urban portraits.

One way to make sure your talent is relaxed at the start of the shoot is by asking them to smile and getting some fun shots to kick things off.

1. Have a vision for the images you want to shoot

Begin with the end in mind. Create a mood board of urban portraits using a free tool such as Pinterest. These could either be your images or inspirational images from other photographers. Keep these in mind as you plan your shoot, as this is the standard you’ll be aiming for.

2. Location scouting

Before you plan your shoot, get an idea of the type of urban landscapes in your area. What kind of images could you take here? How could the buildings and street scenes feature in your photographs as a point of interest or as a background texture?

Every town and city has its unique charms – from heritage buildings to seaside piers to abandoned shopping centers. Find what’s interesting about your area and use it.

You can find out more about what I look for when scouting locations in my previous dPS article, How to Choose Urban Landscapes for Portrait Photography.

tips-for-shooting-better-urban-portraits

There’s always something of interest to shoot. Open up to the creative possibilities in your town.

3. Find talent for your shoot

The easiest way to find someone for a shoot is by asking family or friends. This way, the pressure is off, as you have someone familiar to work with that you can test your ideas on. Make sure you ask someone that is not too shy or self-conscious, though; after all, it will involve posing for photographs in a public location.

If you’re ready to test your urban portrait skills with a model, organize a TFP (time for print) shoot. These have been around since the pre-digital days, when photographers, models, and make-up artists would collaborate and give their time for free in exchange for physical prints of images taken during the shoot. These days, images from TFP shoots are usually digital files shared over the internet.

Finding people to work with should be relatively easy. Most cities have photographer and model groups on Facebook. Type the name of your area with the words model or photographer and see what comes up. If you have no luck, you can also ask in general photography groups if anyone knows of a TFP-style group you could join.

Image: In this image, I have lit Alyssa with a video light. Fujifilm X-T3 with a 35mm f1.4 lens.

In this image, I have lit Alyssa with a video light. Fujifilm X-T3 with a 35mm f1.4 lens.

4. Ask for expressions of interest

Once you’ve joined a local Facebook group, have a scan of the posts and see if it’s the kind of community you wish to work with. If you feel comfortable, it’s time to post your expression of interest.

Create a post introducing yourself and calling for expressions of interest in a TFP urban portrait shoot. Link to examples of your work and your Instagram.

Let people know specific details about the shoot. This includes the approximate location, proposed days and times, and the types of shots you’re looking to get. You can also link to or share images from your mood board on the post to set an expectation of the kind of shots you’ll take. If you use images on the mood board that are not yours, make sure you credit the photographer and explicitly state whose work it is.

Finally, ask people to comment on the post or send you a private message, expressing their interest. Also, ask them to link to their Instagram or portfolio.

tips-for-shooting-better-urban-portraits

Safety is important on any shoot – never put yourself or your talent in danger to get a shot. I took this image with the model on the footpath.

5. Arrange details for the shoot

After you’ve chosen whom you’d like to work with, organize the shoot. Agree on the day, time, and location. Prepare to negotiate regarding which day you can shoot, but not on the time. Always choose the time of day that you know will work best for photography. For me, that’s about an hour before dusk as this provides opportunities for natural light and after-dark images.

If the model is under 18, check that their parent or guardian is coming along and that they will be able to sign a model release form.

Ask your model what they’re planning to wear for the shoot. Quite often, they will ask for your advice or provide you with options. Explain that it would be ideal to have two or three different looks. Some people will prefer to have completely different outfits for the first and second half of the shoot (if there is somewhere to change). For others, it means bringing along some fun accessories like glasses, sunglasses, a hat or jacket.

If you’re arranging a shoot a week or two in advance, don’t forget to stay in touch with your model. Remind them a day or two before the shoot.

tips-for-shooting-better-urban-portraits

Sunglasses can be very handy on a shoot – especially when there are neon signs! Anneke, Brisbane. Fujifilm X-T3 with a 56mm f1.2 lens.

6. Have a plan

Think back to your location scouting. Have a list of 8-10 places where you’d like to shoot that are within walking distance of each other. Draw a map in your notebook and plan your route and the types of shots at each place. Typically, I only shoot in 6-8 locations, but I like having a couple of options up my sleeve in case some don’t work out.

Finally, don’t be afraid to throw your plan out the window if a better opportunity presents itself.

17 Tips for Shooting Better Urban Portraits

7. Plan your kit

It’s tempting to take as much kit as you can carry on an urban portrait shoot. However, strike a happy medium between taking enough kit to give you options without having to hire a Sherpa to carry your gear.

I typically take two camera bodies (Fujifilm X-T3 and X-T2) with prime lenses, with a third lens in my bag. My lenses of choice are usually the Fujinon 16mm f1.4 for wide-angle and environmental portraits, and either the 35mm f1.4 or the 56mm f1.2 lenses for portrait work. With the APS-C crop factor, these work out to 24mm, 52.5mm, and 84mm equivalent lenses in full-frame terms.

Although I love zoom lenses for family portrait shoots, I only take fast prime lenses on urban portrait shoots.

Double-check all your camera settings when you pack your gear. Things I check are:

  1. I’ve selected the same JPG film simulation on both cameras,
  2. I have the same auto ISO settings,
  3. JPG + RAW is selected in the image quality settings.
  4. There are spare formatted SD cards and spare batteries in my bag
  5. I have model release forms and a pen.

8. Get to know whom you’re photographing

Make sure you turn up early – you won’t make a good impression if your talent is waiting for you and wondering if you are going to turn up or not. Get to know your model and their chaperone. Everyone can be a bit nervous at the start of a shoot, so have a good chat with them before you even think about pulling out a camera.

9. On the shoot

Remember, on these kinds of shoots, you don’t need quantity, you need quality. I aim to get a dozen images I’m really happy with. This means potentially shooting in a different way than you usually would. Take your time with directing the model and getting the composition right before taking the shot.

Make sure you get a variety of shots – close-ups, full length, looking to the camera, looking away. Also, remember to get some different looks by using any accessories the model has brought with them.

tips-for-shooting-better-urban-portraits

Make sure you get a variety of shots – not just close-ups.

10. Be prepared to direct the model

Directing talent is a skill you will need to learn – especially with younger up-and-coming models with limited experience. There’s no need to be worried if you have no experience doing this yourself. Get yourself the 67 PORTRAIT POSES (PRINTABLE) Guide from DPS to have on your phone (or print them), or have a stash of urban portrait images, ready to flick through to give your talent some ideas on how to pose.

17 Tips for Shooting Better Urban Portraits

11. Check your ISO and shutter speed

As the day moves into night, keep a check on your ISO and make sure you have usable shutter speeds above 1/80th of a second. The most annoying mistake I’ve made on these shoots is looking at the back of the LCD screen, thinking that I’ve captured a sharp image, only to see that the image wasn’t as sharp as I thought on my computer screen later on.

12. Limit any negative self-talk

Negative self-talk can affect us all. If you had an idea for an image, but it doesn’t work out on the shoot, move on and forget about it. Many images are still there for the taking.

13. Carry your own lighting options

For the first half of an urban portrait shoot, I rely on natural or ambient light. As darkness envelopes the urban landscape, I look to my own lighting options.

The first option I usually take is a speedlight flash that I can use on-camera, or trigger remotely. Typically, the light from these types of flashes can be harsh, so you may like to use a light modifier such as a mini softbox.

The second type of lighting that I use on my urban portrait shoots are small LED video lights. These are fantastic, and I love using them. Again, you can use one through a light modifier for a softer effect.

Image: Using an on-camera flash can lead to some creative effects.

Using an on-camera flash can lead to some creative effects.

14. Safety

Safety should be your number one priority on a shoot like this. Identify any hazards before the shoot and brief your model. The last thing you want is someone getting hurt. Be aware of your surroundings at all times. If you get a bad vibe from an area, it’s best to move on.

Never leave any of your bags on the ground unattended. A few moments of inattention is all an opportunistic thief needs.

15. Legal

Always operate your shoots legally. Research if you need any permits to shoot in your city, look into public liability insurance, and have model releases signed before the shoot.

16. Limit the shoot time

Keep the shoot between 60 and 90 minutes; you’ll be amazed at how fast this will go. It’s better to have it run shorter and end on a high than run it longer with everyone exhausted. For younger models, keep it to under 60 minutes.

tips-for-shooting-better-urban-portraits

Keep the shoot length to under an hour for younger people – modeling is very tiring!

17. Editing your images

I always try and get it right in-camera, with only minor edits made to images afterward. One decision you may have to make is how much you want to clean up the image in post. In the example below, there were a lot of cigarette butts on the ground. I decided to remove these in Photoshop to make a cleaner image.

17 Tips for Shooting Better Urban Portraits

tips-for-shooting-better-urban-portraits

In this image, I removed all the cigarette butts and other debris from the road as I felt it detracted from the image. Sasha, Brisbane, Fujifilm X100F lit by a Godox flash.

Conclusion

Urban portrait shoots are a lot of fun and can stretch your creativity as a photographer. They help you to think on your feet and overcome challenges. If you’ve never done one before, there’s no need to feel daunted. Do your research and planning, and it will all fall into place.

If you have any questions or comments about planning an urban shoot, let us know below.

The post 17 Tips for Shooting Better Urban Portraits appeared first on Digital Photography School. It was authored by Matt Murray.


Digital Photography School

 
Comments Off on 17 Tips for Shooting Better Urban Portraits

Posted in Photography


Best Fujifilm X-Series Kit for Urban Portraits

05 Nov

The post Best Fujifilm X-Series Kit for Urban Portraits appeared first on Digital Photography School. It was authored by Matt Murray.

best-fujifilm-x-series-kits-urban-portraits

With a range of feature-packed cameras that are fun to use, and a line of stunning lenses, a Fujifilm X-Series kit is the ideal companion for urban portrait shoots.

I have been shooting with the X-Series for four years and love the system and the results I get from it. However, with so many good options available, one problem you may have is choosing a lens or kit to shoot with!

In this guide, I discuss what you need to consider when choosing a lens for a shoot, and a list of my favorite Fujifilm lenses for shooting urban portraits.

Advantages of using a Fujifilm X-Series Kit

There are a few key advantages that the Fujifilm X-Series has for urban portrait shoots. Being a mirrorless system, it’s generally smaller and lighter than DSLR kits. In practice, though, my camera bag probably isn’t much lighter because I usually fill it with more of the excellent Fujinon lenses.

Image: Fujifilm’s X-Series is ideal for urban portrait shoots for so many reasons.

Fujifilm’s X-Series is ideal for urban portrait shoots for so many reasons.

Excellent ergonomics and usability is a hallmark of the system. I love that I can change aperture on the lens instead of via a menu – in fact, I could never move back to a system where I have to change aperture via a menu now. The camera bodies feature shutter speed and ISO dials on top of the camera, so you have all the elements of the exposure triangle at your fingertips without a menu in sight.

Live view is another feature I couldn’t live without – it’s amazing seeing what your exposure will look like before pressing the shutter button. This is particularly useful in low light situations that you often encounter in urban shoots. Another dial on top of the camera is exposure compensation – you can easily adjust the exposure as you look through the viewfinder, which is perfect for the way I shoot.

best-fujifilm-x-series-kits-urban-portraits

Using live view on my Fujifilm X-T3, I could see exactly what adding extra exposure compensation would do when photographing Anne.

Another big advantage of Fujifilm cameras is their stunning color rendition – the best of any digital camera manufacturer. Fujifilm has used their decades of knowledge to produce JPG simulations that bear the names of class film emulsions: Provia, Astia, and Velvia, to name three.

The images in this article are JPGs (Provia simulation) with only small edits made in Adobe Lightroom. You can, of course, shoot in RAW alongside JPG and add your own looks or presets in post-production.

Camera bodies

I prefer to take two camera bodies with me on my shoots: the Fujifilm X-T3 and X-T2.

You can pretty much substitute any of the excellent X-Series lineups into your urban portrait kit, from the X-T series I use to the X-Pro line and the X-E line. I’ve even shot urban portraits with the X100 line of fixed-lens compact cameras.

If you only have one camera body, that is workable – you just need to be careful if you plan on changing lenses in urban environments to minimize the possibility of dust ending up on your sensor. The last thing you want on your mind during a shoot is the feeling of dread that you just let a whole lot of dust bunnies inside your camera.

Image: Choosing a lens for an urban portrait shoot is a balancing act between a focal length that fl...

Choosing a lens for an urban portrait shoot is a balancing act between a focal length that flatters your subject, but still allows you to be close. This image of Bailey was taken with a Fujinon 23mm f1.4 lens.

Lenses for urban portraits

The Fujifilm X-Series boasts a stunning range of superb lenses, with more being added every year. Fujifilm regularly updates a lens road map to let photographers know what new additions are coming. Portrait shooters have many fast primes available to them, as well as weather-resistant primes and a fantastic range of zoom lenses.

When choosing a lens for a shoot, I consider the following things:

Focal length

How flattering is this focal length for portrait photography? The images should flatter your client or model and make them look amazing.

Working distance

What’s the practical working distance of your lens? Ideally, for urban portraits, it’s good to have a lens choice that flatters your client for portraits, but without you being too far away. For me, this rules out some options such as the Fujinon XF 90mm F2 R LM WR lens.

best-fujifilm-x-series-kits-urban-portraits

In low light, I often find myself shooting at, or close to, the maximum aperture of the lens (the smallest number). In this image of Natasha, I was using the Fujinon 56mm f1.2 lens at f1.6.

Maximum aperture

The maximum aperture of the lens determines how wide it can open. The smaller the number, the ‘faster’ the lens is, allowing you to take images at high shutter speeds in lower light. ‘Slower’ lenses will not be able to shoot at the same shutter speeds unless you crank up the ISO, which can affect image quality.

During the middle of the day, this may not be important, but with less light after the sun goes down, fast lenses are important for sharp images and to keep the ISO lower. The X-series lineup has a range of very fast prime lenses with many maximum apertures at F1.4 and even F1.2.

Weather resistance

If planning a shoot in the rain or snow, a weather-resistant lens and body are a must. This is generally something I don’t need to think about – if it does start raining during a shoot, I usually move to an undercover location. Usually, clients don’t want their hair, makeup, and outfits ruined by a downpour.

Listed below are my choices for urban portrait lenses.

Fujinon XF 35mm F1.4 R

best-fujifilm-x-series-kits-urban-portraits

I love this lens – there is real magic to it. It’s my number one choice for urban portraits. The XF 35mm F1.4 is the closest Fujifilm has to the full-frame equivalent angle of view of 50mm – a classic focal length used by photographers for decades.

One of the three original lenses in the X-Series lineup, it has a fast maximum aperture of F1.4, making it perfect for images with a shallow depth of field and night shooting.

Featuring stunning optics and pleasing bokeh, this lens gives you a relatively short working distance for portraits. Best of all, it’s a lot cheaper than most of the other lenses in this guide.

best-fujifilm-x-series-kits-urban-portraits

I love this shot – so much fun! Alyssa in a phone booth, Brisbane, Australia.

best-fujifilm-x-series-kits-urban-portraits

The 35mm F1.4 lens has a magic quality. I love that the lens is flattering for clients, yet it allows you to get quite close to them while shooting.

Fujinon XF 16mm F1.4 R WR

best-fujifilm-x-series-kits-urban-portraits

The next choice on my list is arguably one of the best lenses Fujifilm has ever produced – the stunning Fujinon XF 16mm F1.4 lens.

With a full-frame equivalent of 24mm, you may think this is an odd choice for a portrait session, but it’s a perfect lens for wide-angle environmental shots. With a minimum focus distance of just 15cm, this lens is the perfect option when working in confined spaces.

The excellent build quality of the lens is also matched by its stunning optics. Although any distortion is corrected in-body by the camera, you still need to be careful when shooting with it. Place your model or client towards the center of the frame for the best results.

Image: Sasha sitting on beer kegs in a Brisbane laneway. There wasn’t much room in the laneway...

Sasha sitting on beer kegs in a Brisbane laneway. There wasn’t much room in the laneway, so the 16mm F1.4 was a perfect choice for this shot.

Image: The short working distance and wide angle-of-view enabled me to take this image of Natasha in...

The short working distance and wide angle-of-view enabled me to take this image of Natasha in front of some metal shutters.


Fujinon XF 56mm F1.2 R

best-fujifilm-x-series-kits-urban-portraits

The XF 56mm F1.2 R lens is perhaps the jewel in the crown of the X-Series lineup. Stunning image quality and beautiful bokeh make it a winner in anyone’s book.

This is the lens that all Fujifilm portrait photographers either have in their kit or on their wishlist. With a full-frame equivalent of around 85mm, it is substantially lighter than full-frame equivalent lenses for DSLRs. It boasts a super-fast F1.2 maximum aperture, is tack sharp, and has the most pleasing bokeh in the X-Series lineup.

For portrait work, this lens is fantastic. Just bear in mind that in urban environments, it’s not always a suitable choice, as you need a greater working distance when using this lens.

best-fujifilm-x-series-kits-urban-portraits

Sasha in Brisbane, Australia. I love how sharp she looks in this frame, and how the out-of-focus lights have rendered in the background.

Image: Natasha in a laneway, Brisbane. With a bit more working distance, full-length portraits are a...

Natasha in a laneway, Brisbane. With a bit more working distance, full-length portraits are also possible with this lens.


Fujinon XF 60mm F2.4 R Macro

Best Fujifilm X-Series Kit for Urban Portraits

Perhaps the most underrated lens in the entire Fujifilm line up, the XF 60mm F2.4 R Macro, was another of the original three lenses released for the system. It had a reputation for being slow to focus, but improvements to the firmware for this lens have made a big difference. I have no hesitation in using it on shoots.

Although it has the word macro in its name, the lens can only shoot at a 1:2 magnification ratio. (Generally, a 1:1 magnification ratio is regarded as true macro.) With a maximum aperture of F2.4, it’s not as fast as other lenses in this article, but the lens still provides excellent image quality and has a very good bang for your buck.

Image: Alyssa at dusk, Brisbane. The XF 60mm F2.4 is an excellent option if the XF56mm F1.2 is out o...

Alyssa at dusk, Brisbane. The XF 60mm F2.4 is an excellent option if the XF56mm F1.2 is out of your budget.


best-fujifilm-x-series-kits-urban-portraits

Alyssa in Brisbane. The XF 60mm F2.4 is stunningly sharp.


Fujinon XF 23mm F1.4 R

Best Fujifilm X-Series Kit for Urban Portraits

The Fujinon XF 23mm F1.4 R is another lens often mentioned as the best in the X-Series lineup. With the 1.5 crop factor, it’s Fujifilm’s closest lens to the traditional full-frame 35mm angle of view. This angle of view makes it perhaps the most versatile lens in the lineup for any given range of shooting scenarios – a big plus.

Another fast lens with a maximum aperture of F1.4, the lens is optically stunning and produces sharp images and beautiful bokeh.

Although I love this lens, I often leave it at home and take along the XF 16mm 1.4 and the XF 35mm 1.4 instead. However, it still deserves a place in this guide as it’s an excellent choice for urban portrait shoots.

Image: Bailey, Cleveland, Australia. The XF 23mm F1.4 lens is super-sharp and produces beautiful bok...

Bailey, Cleveland, Australia. The XF 23mm F1.4 lens is super-sharp and produces beautiful bokeh.

best-fujifilm-x-series-kits-urban-portraits

Bailey, Raby Bay Harbour, Australia. It was quite dark when I took this shot, but with a higher ISO and some exposure compensation, Bailey looks fantastic – as do the pretty lights in the background.


Conclusion

The Fujifilm X-Series lineup is ideal for shooting urban portraits. The range features a range of compact, feature-packed camera bodies, along with optically stunning fast prime lenses.

Although you could invest some serious money in this system, there are many excellent value-for-money options, including the X-E line of camera bodies, as well as the X-T30 and the X-T20. In terms of lens choices, two of the original X-Series lineup – the XF 35mm F1.4 and XF 60mm F2.4 lenses – represent excellent value for money, blowing the competitor’s budget lenses out of the water in terms of quality.

If you have a bigger budget, also consider the X-T3, the new X-Pro 3, and the excellent XF 16mm F1.4, XF 23 1.4, and XF 56mm 1.2 lenses.

I’ve been using the system for four years and love the images the system produces straight out of the camera, thanks to the magic of Fujifilm’s JPG film simulations. The beautiful rendering of colors makes post-processing work a breeze.

What Fujifilm X-Series camera bodies and lenses do you use for urban portrait shoots? Let us know in the comments below.


The post Best Fujifilm X-Series Kit for Urban Portraits appeared first on Digital Photography School. It was authored by Matt Murray.


Digital Photography School

 
Comments Off on Best Fujifilm X-Series Kit for Urban Portraits

Posted in Photography


How to Choose Urban Landscapes for Portrait Photography

10 Oct

The post How to Choose Urban Landscapes for Portrait Photography appeared first on Digital Photography School. It was authored by Matt Murray.

dps-urban-landscapes-for-portrait-photography

Are you bored of doing portrait shoots in the studio or the local park? Try mixing things up with an urban portrait shoot. The city streets, the buildings, the laneways – this is your cinematic backdrop. All you need is a little bit of planning and a lot of imagination. If you’ve never done a shoot like this before, you might be wondering how to choose locations. In this article, I will run you through my process of choosing urban landscapes for portrait photography. 

urban-landscapes-for-portrait-shoots

Bailey in a window, Brisbane. I took this shot with some off-camera flash outside my local library. Fujifilm X-T3 with a 23mm f1.4 lens.

An urban portrait shoot in my city? No way!

You may think that your city or your town has nothing of interest, but it does. You just have to look with a fresh perspective. Sometimes I’ll be on a photo walk with another photographer, and they don’t seem to see the potential that their town has to offer. “Wow, look at that doorway!” I’ll say. With a puzzled face, they reply, “It’s just a doorway!” 

No, it’s not just a doorway – it’s a potential scene in your next urban portrait shoot. 

Image: Sasha, Brisbane. I used these old street lamps as an element in the shoot. Fujifilm X-T3 with...

Sasha, Brisbane. I used these old street lamps as an element in the shoot. Fujifilm X-T3 with a 56mm f1.2 lens.

Every town or city I’ve ever been to has its charms and a unique look: from modern glass and steel skyscrapers to historic buildings to run-down industrial areas. There are so many aspects of urban locations that you could include in your shoots: laneways, street art, doorways, neon signs, steel shutters, and traffic trails, just to name a few. 

There’s also the unique way that light falls in urban environments: harsh beams of light that fall between buildings, beautiful soft light that you find in doorways and under bridges, and in Brisbane, dazzling light reflecting off skyscrapers. The possibilities are endless.

The best time for an urban portrait shoot

The best time for an urban portrait shoot is whenever you and your client or model are both available. Regardless of the light, the weather, or the locations. The success of the photoshoot is ultimately in your hands. 

My favorite time for doing urban portrait shoots is just before dusk. This allows you to get a good mix of golden hour photos with sunlight, blue hour photos as the city lights come into play and nighttime shots with artificial light. 

urban-landscapes-for-portrait-shoots

Alyssa in an industrial alleyway, Brisbane. Fujifilm X-T3 with a 60mm f2.4 lens.

Location scouting

I usually run portrait shoots for around 90-minutes, allowing me to shoot in 6-8 locations. 

It’s best to do your location scouting at the same time of day that your shoot will take place. This is so you can look at the light, see how it falls, and plan accordingly. In practice, though, I usually end up doing my scouting during the day. 

Before I arrange the shoot, I take some time to wander about the city to find 8-10 locations close together. The reason I look for more places than I’ll need is to be flexible on the shoot. Cars or trucks can block alleyways, big crowds could move through the area at the time of the shoot, or the lighting could be all wrong. There’s a whole lot of things that could make the location unsuitable when you arrive at the scene.

Although it’s tempting to plan to shoot in two locations at opposite ends of town, unless you have easy access to transport on the day of the shoot, it will be impractical. Photoshoots can be tiring for everyone, so asking your client or model to walk several city blocks and back again to shoot in one location may not be the best idea. 

What to take during location scouting

When you’re scouting for locations, have a notepad and pen ready along with your smartphone. When you see somewhere that you like, take a photo on your phone for reference and jot down some notes. I always draw a map of the city streets in my notebook. Then I plot the locations on it and plan a direction for the shoot.

What I’m looking for during my walk is a cool urban location in which to place the client or model. Some locations will leap out at you, and you will know that you should take some photos there. Others may not reveal their charm until later when the lights are low. 

Image: Natasha, Brisbane. I like the very subtle reflection in the polished stone wall behind her. F...

Natasha, Brisbane. I like the very subtle reflection in the polished stone wall behind her. Fujifilm X-T3 with 56mm f1.2 lens

As you’re wandering around, there’s a couple of things you need to keep in mind:

Imagination

What is this place going to look like at dusk or nighttime? Remember that for many shots, you will be shooting with a wide-open aperture, or close to wide open, so many of the details in the background will be blurred. 

Potential risks

It may look cool, but is this place dangerous in any way? Think of how you will place the model or client in this scene – are there any risks that you need to be mindful of? Is there a lot of traffic? Is it a dangerous neighborhood? You should consider all of this when you’re planning, as safety should be your top priority for these shoots.

Below are some of my go-to shots when I plan an urban photoshoot. I took all of these within a few blocks of each other in central Brisbane, Australia. 

Neon lights

Neon shots are a favorite with the Instagram crowd, and it’s easy to see why. They are so much fun and a great image idea to have up your sleeve.

Neon signs are something that, quite honestly, I never usually notice. However, as soon as you start looking for them, you’ll be amazed at how many your town has.

urban-landscapes-for-portrait-shoots

Alyssa, Brisbane. This neon light is outside a takeaway shop in central Brisbane. I was attracted to the three different colors the sign had.

Beer kegs outside a pub

As soon as I saw these beer kegs in a laneway outside a pub, I knew I wanted to incorporate them in a shoot. I’ve used them as both a background element and also as a prop for models to sit on.

In this shot of Anne, I struck gold. By chance, it was one of the busiest days for pubs in the year – Melbourne Cup Day. There were a few dozen kegs in a laneway all stacked on one another. I lit this shot with an LED video light.

urban-landscapes-for-portrait-shoots

Anne in front of beer kegs, Brisbane. I love the shape, color, and reflection of the kegs in the background. Fujifilm X-T3 with an 8-16mm f2.8 lens lit with an LED video light.

Laneways

Many Australian cities are blessed with alleyways. In many ways, they are the perfect place for photoshoots. Expect atmospheric lighting, an industrial look, street art – and best of all – little traffic. While Melbourne may be the laneways capital of Australia, Brisbane has many too.

Image: Natasha in a laneway, Brisbane. I like the color and bokeh that some tiny blue fairy lights p...

Natasha in a laneway, Brisbane. I like the color and bokeh that some tiny blue fairy lights provided in this shot. Fujifilm X-T3 with a 56mm f1.2 lens.

Telephone booth

This is a really fun place to use for some shots – if you can still find one these days. You may also have to take some time to explain to younger clients or models on how to use a public payphone!

urban-landscapes-for-portrait-shoots

Alyssa in a phone booth in Brisbane. Fujifilm X-T3 with a 35mm f1.4 lens.

Reflections

Reflections are a go-to image idea for urban portrait shoots. Many buildings provide you with glass or reflective surfaces.

Image: Anne looking into a mirrored surface, Brisbane. Fujifilm X-T2 with a 56mm f1.2 lens.

Anne looking into a mirrored surface, Brisbane. Fujifilm X-T2 with a 56mm f1.2 lens.

Old signage

I love history and nostalgia, but sadly there isn’t much left in my city. One day I noticed this sign and thought I’d love to do some shots here.

Image: Sasha in front of a sign, Brisbane. Fujifilm X-T3 with a 16mm f1.4 lens.

Sasha in front of a sign, Brisbane. Fujifilm X-T3 with a 16mm f1.4 lens.

Take your next portrait shoot to the streets

Urban portrait shoots can be a lot of fun. If you’ve never done one before, I hope that this guide has inspired you to look around your city for urban landscapes for portrait photography.

For your first time, you can always ask a friend to be your model if you want to try things out and see how the images look. Practice makes perfect.

Remember, safety is a very important factor in a shoot like this – both for your client or model and for yourself.

Urban shoots have helped me grow as a photographer. I feel more creative, I see possibilities for images in the mundane, and they’ve also helped me to think on my feet and improvise. ­­­­

So what are you waiting for? An endless array of scenes is right on your doorstep. Take your next portrait shoot to the streets.

Do you have any other tips for scouting urban landscapes for portrait photography? Share with us in the comments!

The post How to Choose Urban Landscapes for Portrait Photography appeared first on Digital Photography School. It was authored by Matt Murray.


Digital Photography School

 
Comments Off on How to Choose Urban Landscapes for Portrait Photography

Posted in Photography


Leica’s latest special edition is an ‘urban camouflage’ Leica CL with a matching strap

20 Jun

Leica has teamed up with French-Italian photographer and art collector, Jean Pigozzi to release a special-edition version of its Leica CL camera system.

The camera, officially named the Leica CL ‘Urban Jungle by Jean Pigozzi,’ features the same internals as the standard Leica CL, including the 24.2-megapixel APS-C CMOS sensor and Maestro II image processor. The outside, however, features an urban camouflage print on its black leather wrap, a custom grey rope camera strap, and the words ‘URBAN JUNGLE’ etched alongside Pigozzi’s signature on the rear of the camera underneath the LCD display.

The special edition kit also comes paired with the Leica Elmarit-TL 18mm F2.8 ASPH lens, which is neatly tucked alongside the camera body and custom strap in ‘an elegant presentation box.’ This is Leica’s second collaboration with Pigozzi, the first being the Leica Sofort ‘Limoland’ camera released in 2017.

Only 150 Leica CL ‘Urban Jungle by Jean Pigozzi’ will be made and shipping will start June 25, 2019. You can get your hands on a kit at Leica Stores and Boutiques for $ 3,950. Alternatively, you can buy the standard black Leica CL kit, get yourself a silver Sharpie, scribble a little bit on the leather wrapping and save yourself approximately $ 750.

Press release:

Leica Releases Limited Edition Camera Inspired by the Aesthetic of the Concrete Jungle

The LEICA CL “URBAN JUNGLE by JEAN PIGOZZI” pairs unparalleled imaging quality with a unique camouflage design

June 19, 2019 – The visually-captivating LEICA CL “URBAN JUNGLE by JEAN PIGOZZI” is the newest special edition release of the Leica CL compact system camera presented by Leica Camera. Created in collaboration with French-Italian photographer, entrepreneur and art collector Jean Pigozzi, this eye-catching camera features a striking urban camouflage pattern on its leather covering, with an accompanying gray rope strap. Just as the Leica CL strikes a balance between traditional controls and contemporary design, Pigozzi’s thoughtful design language takes the functional pattern of camouflage and elevates it with a high-fashion and ultramodern aesthetic.

“With this design,” Pigozzi shares, “I wanted to do something completely different and create something is unique from all the other cameras around. To bring the urban aesthetic to life, I tried to visualize the structures of a big city like New York to replicate what I define as an ‘Urban Jungle.”

The LEICA CL “URBAN JUNGLE by JEAN PIGOZZI” sports the same top-level performance, intuitive handling and exceptional image quality as the standard production Leica CL. A few highlights include the built-in EyeRes® electronic viewfinder that enables users to preview the final image before the picture is taken, high-resolution image quality that performs exceptionally well in low light, and a supremely fast and accurate autofocus; all of which are packaged efficiently into a compact system camera that travels effortlessly to any urban jungle the world over. The special edition set is complete with a Leica Elmarit-TL 18 mm f/2.8 ASPH. lens, lovingly packaged together with the camera in an elegant presentation box. With a focal length ideal for everyday travel and street photography, the Elmarit-TL lens helps this set bring the urban spirit to life.

Pigozzi’s latest design is his sophomore collaboration with Leica Camera, following the Leica Sofort “Limoland” by Jean Pigozzi in 2017, which sported vibrant, colorful graphics of “Mr Limo,” the logo of Pigozzi’s LimoLand fashion label.

The LEICA CL “URBAN JUNGLE by JEAN PIGOZZI” is limited to 150 sets worldwide and will be on sale for $ 3,950 beginning June 25, exclusively available at Leica Stores and Boutiques.

Articles: Digital Photography Review (dpreview.com)

 
Comments Off on Leica’s latest special edition is an ‘urban camouflage’ Leica CL with a matching strap

Posted in Uncategorized


How to Turn Day to Night Using Photoshop for Urban Landscapes

19 May

The post How to Turn Day to Night Using Photoshop for Urban Landscapes appeared first on Digital Photography School. It was authored by Ana Mireles.

Have you ever wished you’d photographed something at night? You may not have had the time, knowledge, or gear to do it, but you still regret not getting that shot.

In some cases you may be able to return at night and have another go. But if you can’t, you can quickly turn day to night with Photoshop.

In this article I’ll show you how you to turn your daytime urban scene into a nighttime one using layers and masks. I’ll also give you a few tips on the details you should take care of for a more realistic effect.

But first I want to explain the idea behind this technique so you can apply it to all kinds of photography.

The blue night and the yellow light

You may have noticed that different lights have different colors. Sunsets are redder and warmer than the sunlight at noon. The table lamp from your bedroom is more yellow than the fluorescent light of an office building. And so on.

This is called the color temperature, and is measured in Kelvin degrees. (You can see it in full in this color temperature scale.) And you can take advantage of it to simulate night time by colorizing your image accordingly.

Make it night

First, you need to change the white daylight into a dark blue that corresponds to the night light by adding a blue layer. You can do this in various ways, although I find the easiest way it to select Layer -> New Adjustment Layer -> Color Lookup… from the menu and clicking OK.

From the Properties panel, open the top drop-down menu and choose any option that gives you a blue tone such as Moonlight, Foggy night, or Night from Day.

If you’re more experienced, and want to to have full control, you can work with a RAW file. At the top of the adjustment panel of the ACR window is a slider where you can adjust the color temperature. You can also enter the Kelvin degrees value you want directly according to the scale I mentioned before.

Turn the lights up

Next, create another layer that’s yellow or amber. If you’re using Adjustment Layers, remember to duplicate of the original first and then add the color one on top of it. If you’re sticking with the Color Lookup adjustment layer style choose Edgy Amber or Candlelight. Once you have it, merge the adjustment layer with the copy you created from the original.

If you’re doing it from ACR, don’t just duplicate your layer. Use the Create a New Smart Object via Copy option instead, or the first layer will go yellow too. You can find this option by right-clicking the layer and choosing it from the menu. Then double-click on the thumbnail to open ACR again and drag the slider to the yellow side.

You now need to add a mask to this yellow layer. You can do this by clicking on the Layer mask button on the bottom of the panel. Once you’ve created it, click Invert in the properties panel. We do it this way because the white mask will show all the content and the black one will block all of it. (To learn more about it, check out Getting Started with Layer Masks in Photoshop – a Beginners Tutorial.) For now you’ll want it all covered so you can paint only what you need to in the next step.

The yellow corresponds to the tungsten light from light bulbs, which you can use to paint lamp posts, windows and any other source of light that might be available during night time. Identify these sources and, using the Brush tool, start painting in the Layer Mask with the brush set to white.

For windows, I find it easier to paint the entire rectangle and then paint out the divisions with the black brush.

This also works for any corrections or detailed work. If you paint something by accident, change the color of the brush to black and paint back over it to cover it again. This is why we’re using masks. The work is non-destructive, and you can easily go back and forth.

The Giveaways

It’s up to you how much work you want to put into the transformation. But keep in mind that the more details you do, the more realistic the effect looks.

For example, the lamp will shed some light onto the wall where it’s hanging, so you’ll want to illuminate that part as well. With the same Brush tool you were using, diminish the opacity from the Options Bar and paint the wall where the light would be hitting. Keep diminishing the opacity as you get further away from the light source.

Another big giveaway is reflective surfaces because light would reflect onto them. In this example, the water in the canals needs to have reflected light. But it may also be needed for cars or puddles, so keep an eye on your scene and paint those as well.

There you have it: from day to night using nothing more than  layers and masks.

I hope you enjoyed this technique. I recommend you go out and do some night photography so you can learn how light, tones and colors behave. The more you understand it, the better you will be able to replicate it in post-production.

If you need some help getting started, check out The Ultimate Guide to Night Photography.

And to get some inspiration for your next digitally created night scenes, here are two great articles:

  • Creating Moods with the Kelvin Scale
  • After Dark – 22 Night Photography Images.

The post How to Turn Day to Night Using Photoshop for Urban Landscapes appeared first on Digital Photography School. It was authored by Ana Mireles.


Digital Photography School

 
Comments Off on How to Turn Day to Night Using Photoshop for Urban Landscapes

Posted in Photography


How to Achieve Cool Urban Cityscapes

14 May

The post How to Achieve Cool Urban Cityscapes appeared first on Digital Photography School. It was authored by Mark C Hughes.

Cool Urban Landscapes through post-processing

Creating an emotional response

How you present your images can really affect one’s emotional response to them. Certain styles of image lend themselves to stylistic changes because they can create a specific emotional response when the viewer sees them. For example, film-based black and white images, when done well, present a sense of timelessness and can make things seem more serious. Similarly, high dynamic range images (HDR), when done well, can add “pop” to landscape photography. One particular style of image that lends itself to stylized treatments through post-processing is urban landscapes. Particularly if you are trying to make an already interesting image look more appealing based upon the lighting already present.

Crushed black and blown highlights on a street scene

Gritting and moody

Similar to black and white images, a high-contrast, selectively saturated look works well to create urban landscapes with a gritty and moody feel.

Using filters for effect

Nowadays, smartphone and some consumer cameras, have a great deal of pre-packaged stylistic treatments available that you can apply to photographs to try to evoke an emotional response. Someone, somewhere, has spent a great deal of time creating those filters to make your images feel as though they are from a different time or place.

For example, the classic 1970s snapshot look is full of color shifts and light leaks. They were common at that time because of the use of unstable film stocks and cheap cameras. Digital cameras don’t suffer the same issues that were present at that time. So, to simulate these conditions, adding light leaks and color shifts can make images feel vintage. There are many filters out there – each with their own effects.

Lit up Las Vegas

Make your own filters

To put the idea of emotional response to images in context, think about a familiar treatment that you are probably already aware of: black and white images. These photographs are rarely just images with the color drained. Good black and white images are contrast-rich with deep blacks and bright whites. The grey middle ground of many images can lose their impact when drained of color. Many black and white films had specific response curves that created the contrast-rich images. So now, with digitally-captured images that are black and white, they can appear a little sterile and plain. Adding high-contrast effects and grain to simulate film black and white tends to create an emotional response and mood.

To improve as a photographer, most people start, at some point, to try to take a more artistic approach to their images. Many newer photographers may start with simple prepackaged filters and presets, and apply them to their images. Currently, there is no end to the filters available in pretty much any photo sharing application and many cameras. From terms like “cool,” “50s,” “vintage,” and “grunge,” all these filters are stylizing the image for an emotional effect. Instagram was built on filters. People are very used to stylized images.

Old Montreal

Creating your own style

Becoming a better photographer involves the deliberate use of styles to create your desired effect. You may find there are particular filters you gravitate towards; styles that evoke an emotional response you like.

This is the beginning of finding your own style of image making. As you advance, you might explore manipulating images with Adobe Lightroom, Adobe Photoshop, Skylum Luminar or some similar program.

When you get to the point where you are working with and creating your own filters, you create your style. You can start by playing with filters or dissect other photographer’s images that you really like to see if you can recreate that style.

Surprisingly, creating set styles in many photo imaging software packages is quite easy. It allows you to recreate your style and apply it repeatedly to multiple images.

Notre Dame in Montreal

Create your filter

Let’s consider the urban, gritty look for urban landscapes.

Here are two treatments of the same image, split for comparison. On the right is the Straight Out Of the Camera (SOOC) jpeg and on the right is the treatment with the blacks crushed, highlights blown, oranges highlighted and an almost selective color approach.

It is easy to create for yourself with whatever tweaks you like to create a style for yourself.

Comparison of straight out of the camera to the final product

A word of warning is necessary at this point. When you start stylizing your images with intentionally weird effects, you may generate some negative comments from people who don’t like the look you create. This does not mean you have failed to create something interesting. However, it means you have generated an emotional response to your image by someone who doesn’t care for that look.

Remember that some people find that they can only validate their work by diminishing others. Whereas, most find growth in encouraging others to take risks with their art. A true artist picks their vision and follows it. Sometimes it can be a bumpy road if you are only expecting validation from others.

It is important at some time for you to consider yourself an artist and not just a recorder of images.

All art is about creating an emotional response. Beyond capturing a moment, it is how that moment makes you feel. Emotional responses can be positive or negative.

Atwater Market in Montreal

It turns out this crushed-blacks, blown highlights, contrasty, desaturated, and the almost selective color look isn’t that tough to create for yourself. However, for this particular effect, you may do some damage to your photos by intentionally making some parts too black and other parts too bright.

So let’s look at the images I think work for this type of treatment. Shots typically taken at dusk/night, with artificial illumination present, add interesting artistic character for the urban landscapes shot.

Use a Raw Image Processor or Lightroom

I use Adobe Camera Raw to do most of the edits to these images, but you can use Lightroom or any image processing software to create a similar style. My suggestion is you modify and tweak it to your liking to get the desired effect.  The tools are similar, but just in different places. Also, even though I process these images with a raw converter, you don’t have to use a RAW image (although that is always the best starting point) and can use a JPEG or DNG file.  The treatment will look very similar.

To start, open your image with the raw converter.

Opening up the Raw Processor


With your raw converter, you have access to many parameters that act globally on your image.

Change the sliders as shown on the panel below.

Specifically, you want to make sure you have the desired white balance (it may be fine from what your camera selected, or you may want to resample).  You want to up the Contrast hard, more than you probably have done previously to make those hard edges at the light and dark parts of your image. You then do two things that seem contrary – you are going to pull the details out of the shadows (increase the Shadow slider) and make the Blacks blacker (crushing the blacks).

Finally, boosting the Clarity increases the midtone contrasts, boosting the Vibrance boosts the midtone colors and toning down the Saturation prevents them from looking too candy-colored.

Here’s my panel for example:


Adjustments for the effect

Once you have made a look that you like the effect of, you can make this a repeatable look by creating a user preset.

Switch to the presets tab and then make a new preset.

You will be prompted to add a preset name. Pick something relevant to your style and save it. Next time you pull up an image (or multiple images) in your raw processor, you can simply highlight them all and apply the presets at once.

How to save the effect

A lot of these settings may cause parts of your image to clip. The crushed blacks mean that much of the detail in the blacks disappear. The boosted colors lead to clipped highlights. However, in the end, that’s okay because that is the desired effect.

Here’s a Pro-Tip: All those presets you can buy for Lightroom and Photoshop essentially do a version of this. You can create those presets if you have the time and the inclination to do it yourself. By doing it yourself, you create an image style that appeals to you.

Edmonton Skyline

Conclusion

Art is about evoking an emotion. Sometimes photographers try too hard to make an image that looks too lifelike and loses emotional impact. You can create urban landscape images that are moody and gritty by making them dark with blasted colors and blown highlights. It also opens doors to other types of manipulations used for images warranting other types of emotional reactions.

Old building in the Westmount area of Montreal


The post How to Achieve Cool Urban Cityscapes appeared first on Digital Photography School. It was authored by Mark C Hughes.


Digital Photography School

 
Comments Off on How to Achieve Cool Urban Cityscapes

Posted in Photography


How to safely operate a drone in urban areas

16 Mar
Photo by Kara Murphy

Just a few weeks ago, a drone crashed through a window on the 27th floor of a building in Chicago. Last year, a tourist was apprehended for flying in downtown Manhattan, in the heart of New York City, where UAV operations are strictly prohibited. The month before, a remote pilot avoided disaster when his DJI Phantom 3 drone plummeted 36 stories from where it was inspecting a crack that formed on a window of San Francisco’s Millennium Tower. It crashed on the sidewalk, missing pedestrians by inches.

When operated properly, drones are capable of capturing angles and gathering critical data in areas that helicopters and small planes can’t access. Launching a drone in crowded spaces poses two key potential risks: signal loss caused by magnetic field interference, and drifting caused by wind tunnels lurking between high-rise buildings.

In the US*, drones can be flown in cities, where it is legal under 14 CFR Part 107 rules, which allow the operator to fly more than 400 ft. AGL (above ground level) as long as the drone remains within 400 ft. of a building, or with the proper Certificate of Waiver or Authorization (COA) from the FAA. However, doing so requires the remote pilot-in-command to conduct a thorough risk assessment, identify potential hazards, and establish a set of emergency procedures to ensure the safest outcome possible.

Calibrate the compass before heading downtown

The most foolproof way to prevent a fly-away, and ensure location accuracy during flight, is to calibrate your drone’s compass. Locate an open field, roughly 15km (10 miles) away from where a flight in a heavily-congested area is planned; avoid parking structures with metal guardrails and cell phone towers, and remove watches and metal jewelry as even the slightest bit of magnetic interference will disrupt this critical procedure.

Always make sure to calibrate your drone’s compass before flying in congested or urban environments.

Photo by Kara Murphy

Once at the calibration site, follow the procedure for calibrating your drone’s compass. With minimal interference it will account for magnetic declination, which will allow it to operate with a higher degree of accuracy.

Make sure multiple flight modes are enabled

Most consumer-grade drones are equipped with intelligent flight modes and stabilization systems to ensure smooth, steady flights. On DJI drones there are three main flight modes — P-Mode (Position), A-Mode (Attitude), and S-Mode (Sport) — that can be accessed directly using the remote control. Both Position and Sport Mode rely on GPS and Glonass to hold the drone’s position in the air.

While most flights can be conducted in Position Mode, as it allows the drone to hover in place and easily return home, there will be times when signal interference is severe. Attitude, or ATTI Mode, which retains altitude but causes the drone to drift with the wind, is the only option for flying where signals are compromised. And, since part 107 rules allow a pilot to operate up to 400 feet (120 meters) above the topmost part of a structure, encountering strong winds is inevitable.

DJI controllers feature a hardware toggle to quickly switch between Position, Attitude, and Sport modes.

Note: although GPS is disabled in ATTI mode, the GPS module still locates the drone in the background, meaning that someone can’t use ATTI mode to circumvent restricted flight zones.

Switching from P-Mode to A-Mode is as simple as a flip of the switch on the controller. This shortcut can be accessed when Multiple Flight Modes are enabled in the DJI Go App. If the drone can no longer operate in Position or Sport Mode, it will automatically default to ATTI Mode. It’s always preferable to initiate this transition instead of being taken by surprise when the drone activates ATTI Mode on its own.

Practice flying in ATTI mode

As a general rule, you should never fly between tall buildings with GPS enabled. Numerous signals between buildings cause interference and create a substantial margin of error in the compass, setting the drone off course. The worst case scenario a pilot can encounter when flying in a congested area is relying on Position Mode, which stabilizes the drone and makes controlling it practically effortless, only to have the drone default to ATTI mode when the signal is inevitably lost.

Attitude, or ATTI Mode, is the only option for flying where signals are compromised.

Guiding a drone that drifts with the wind is difficult and requires hours of preparation. Practicing in a large, open field with few trees and obstacles is the best method for learning how to maintain control of a drone when it won’t automatically hover in place. The first time ATTI mode is activated, the drone will immediately drift, and it startles even the most seasoned pilots. Don’t be caught off guard, learn how to handle the drone so it can be expertly guided on its intended path.

Identify the Minimum Obstacle Clearance Altitude

When flying near tall structures, a drone may lose its connection or run critically low on battery power earlier than expected. The Return to Home feature will automatically activate and, assuming the compass is calibrated properly, the drone will fly back to the remote pilot.

Creating a safe flight path requires a pilot to identify the height of the tallest structure in the area, and then add a margin of roughly 3m (10 ft) to ensure the drone clears every last obstacle. The Minimum Obstacle Clearance Altitude (MOCA) can be determined several ways.

Identifying the height of the tallest building is imperative to ensuring you don’t collide during any part of your flight.

Photo by Kara Murphy

I personally looked up the information online for a group of buildings I was photographing in San Francisco. Contacting a building manager is another option. For smaller, lesser-known structures where information isn’t readily available, flying with the gimbal pitch set to level, and elevating to the point where the obstacle crosses the horizon is another method for determining MOCA.

Creating a safe flight path requires a pilot to identify the height of the tallest structure in the area.

Enabling obstacle avoidance sensors is an additional recommended precautionary measure. However, sensors can’t always identify reflections or shiny surfaces. This is why establishing MOCA and setting the Return to Home Altitude accordingly is imperative.

Attach prop guards

Prop guards are an effective tool for preventing a crash should a drone bump into a wall. They aren’t 100 percent foolproof, which is why the above steps need to be taken, but it helps to have them in place. They add weight to the aircraft, which will deplete battery life at a slightly faster rate, and practicing with them attached so you can make necessary adjustments is highly recommended. Depending on the model of the drone, obstacle avoidance systems may be disabled with the use of prop guards.

Keep the drone within close range

A complex job that requires navigating a congested area needs to be supported by a visual observer to help keep watch of the drone and maintain visual line of sight. Typically, flying a maximum distance of 500m (1600 ft) from your location is acceptable, however, in a crowded area, it’s preferable to keep the drone within closer proximity; 150-250m (approx. 500-800 ft) is ideal if you’re flying at an altitude that exceeds 120m (400 ft).

Before heading into an area with tall buildings and narrow corridors, practice flying in ATTI Mode in a wide open, nearby park.

Photo by Dale Baskin

Launch in Position Mode until the drone has cleared the pilot, crew, and any major nearby obstacles, such as a bridge or traffic light, that might impact the flight in its initial stages. Alternate to ATTI mode and continue ascension. When the drone drone returns, and is in close enough range, switch back to Position Mode to facilitate a sturdy landing.

The take away

Drones save time, money, and effort when operated properly, and can be very useful for things like building or tower inspections. Learning how to safely conduct flights in challenging environments is essential if you plan to fly in congested areas like a city center. Taking the time to do so provides an extra layer of safety, and if you’re flying for your business, gives you a potential leg up on the competition.

As pilots, it’s our responsibility to be prepared in order to keep the skies – and our urban areas – safe. And really, you don’t want to be that person who shows up on the news for not doing so.


*Rules and regulations vary by country. Make sure you know, and follow, the regulations for your particular location.

Articles: Digital Photography Review (dpreview.com)

 
Comments Off on How to safely operate a drone in urban areas

Posted in Uncategorized


How to Use Framing in an Urban Environment

20 Nov

Photographers have long developed different classifications to pair with the design and execution of a photograph – lines, shape, texture, light, framing, contrast, just to name a few. For example, leading lines appeal to a viewer’s natural tenancy to trace line into a photograph. Sharp lines are used to grab attention and organic lines create a peaceful atmosphere.

Other composition techniques like the Rule of Thirds require a photographer to mentally break down an image to evaluate balance. Low and high perspective alter the way a viewer sees the world and symmetrical/asymmetrical elements highlights the quirky beauty of life. The technique we’ll have a quick look in this article, demonstrates the power of framing, especially in an urban environment.

How to Use Framing in an Urban Environment

What is framing?

Framing in photography creates a self-contained image, like a photo-within-a-photo effect. As photographers, we are used to seeing the world through the frame of a viewfinder. We constantly evaluate what we’ll keep in an image and what we’ll exclude. We deliberately apply perspective, aim, zoom and positioning techniques to construct our photographs – sometimes without even noticing.

By cradling the subject in a balance of space and line, a frame is created, not dissimilar to the photo frames you’d find on your shelf at home.  Essentially, you are crafting a frame within a frame to deliberately bring focus to a subject, adding narrative and the unique experience of voyeurism that photography affords.

How to Use Framing in an Urban Environment

How do I frame a photograph?

For such an effective technique, framing has plenty to offer. It makes use of strong design skills, adding an extra layer to an image to create more depth.  Framing can also be used to obscure more mundane areas of a scene, boosting the efficacy of a photograph when viewed by others.

Composing an image by making use of framing is fairly straightforward. Start out searching for windows and doors as they are the most abundant frames in an urban environment. You’ll find that windows and doors, when photographed, contain their own little ecosystem within the one image. This is great for capitalizing on both content and narrative, almost like reading a window in a comic strip!

Frame shapes

Square or rectangular frames are probably the first things that leap to mind when someone considers framing. Doorways and windows are a great way for emphasizing a subject or depth, but they are not the only options and framing is not limited to squares or rectangles.

The image below proves how versatile the urban environment can be for artificial framing. The image was taken from the floor of a train station, lens pointed to the floor above. The darkness of the building structure is silhouetted against the blue sky, forming a crescent shape. The frame draws attention to the contrast of the architecture against the sky but also cradles the form of a human passing by.

How to Use Framing in an Urban Environment

How to Use Framing in an Urban Environment

This photo was taken by chance in a late night shopping district. The framing of the man emphasizes his presence but also isolates him from the rest of the landscape.

How to Use Framing in an Urban Environment

For this image, I aimed to align a gap in the cage with the cat’s face. The slight distortion caused by the lens draws the center square closer to the viewer’s eye. Framing isn’t always a split-second discovery, taking the time to assess a situation and respond creatively can be just as effective as shooting from the hip.

How to Use Framing in an Urban Environment

Shattered windows in rundown urban landscapes offer beautifully detailed landscapes complemented by an informed framing technique.

Keep it real

Framing can be really effective for highlighting specific areas of a photograph. However, it’s important to keep in mind that not every photograph needs framing. Some images are much more effective when they stand alone. Like most photography, you need to be versatile and trust your instincts.

While lining up a perfect shot through a fence can be effective, make sure to be aware of your surroundings too. Don’t focus so heavily on framing that you sacrifice other photographic opportunities. You don’t need to force a frame on an image, so don’t overthink it. You want natural images that are enhanced by a frame, not poor images that require a frame to garner interest.

Just stay open to the idea of framing and gather enough experience to recognize a framing opportunity when one presents itself. This way, opportunities tend to reveal themselves rather than you having to force them out of hiding.

How to Use Framing in an Urban Environment

How to Use Framing in an Urban Environment

The branches of these trees act as a natural frame, sectioning up the image to draw attraction to the cute little bunnies within.

The post How to Use Framing in an Urban Environment by Megan Kennedy appeared first on Digital Photography School.


Digital Photography School

 
Comments Off on How to Use Framing in an Urban Environment

Posted in Photography


Rail to Trail: 12 U.S. Park Projects Reclaiming Urban Infrastructure

10 Oct

[ By SA Rogers in Destinations & Sights & Travel. ]

A whole lot of valuable land in America’s densest urban centers is occupied by the disused and often toxic remnants of neglected infrastructure, industrial complexes and other blight that could be green space instead. Taking inspiration from New York City’s High Line, an elevated linear park along a former New York Central Railroad spur, many cities are transforming urban riverbanks, viaducts, underpasses, freeway structures and even the tops of tunnels into parks, bike paths, pedestrian routes and other public amenities.

11th Street Bridge Park, Washington DC by OMA and OLIN

An aging freeway structure over the Anacostia River in Washington D.C. is set to become the 11th Street Bridge Park, with officials announcing in October 2017 that a design by OMA + OLIN has been chosen. Each ‘lane’ of the bridge is pulled upward toward the middle, crossing each other to form an X shape; the space underneath these overhangs will host a performance area, cafe, plazas and other public functions.

Lowline, New York City, New York by James Ramsey and Daniel Barasch

Complementing New York City’s famous High Line park, a 1.45-mile greenway built on a former New York Central Railroad spur, the subterranean ‘Lowline’ has been given a green light. Set to be the world’s first underground park, it will be tucked into a former trolley terminal in Manhattan’s Lower East Side, with a design by James Ramsey and Daniel Barasch. “The transformation of an old, forgotten trolley terminal into a dynamic cultural space designed for a 21st century city is truly a New York story,” says Barasch. “We know with input from the community and the city, we can make the Lowline a unique, inspiring space that everyone can enjoy.”

The 606, Chicago, Illinois by Collins Engineering, Michael Van Valkenburgh Associates, Frances Whitehead

Chicago converted its abandoned Bloomingdale Rail Line into a 2.7 mile linear park called the 606 (named for the zip code prefix shared by everyone in the city.) The greenway connects four separate neighborhoods and includes a park and trail system with elevated trails for bikers, runners and walkers as well as event spaces and lots of greenery. The project was designed by the firm Frances Whitehead, which approached it as a ‘living work of art,’ demonstrating the vital role that arts play in the fabric of the city.

The Underline, Miami, Florida by James Corner Field Operations

Down in Miami, a stretch beneath an elevated rail line could become ‘The Underline,’ a new public park by James Corner Field Operations, one of the studios behind the High Line in NYC. The 10-mile-long park and urban trail would sit beneath the city’s MetroRail, following an existing bike path called the M-Path, but widening it and adding a parallel pedestrian path that winds through various ecosystems of native plants and habitats for birds and butterflies. Spaces for arts and recreation would be scattered along the way, like pop-up structures and a bike tune-up station.

Next Page – Click Below to Read More:
Rail To Trail 12 U S Park Projects Reclaiming Urban Infrastructure

Share on Facebook


[ By SA Rogers in Destinations & Sights & Travel. ]

[ WebUrbanist | Archives | Galleries | Privacy | TOS ]


WebUrbanist

 
Comments Off on Rail to Trail: 12 U.S. Park Projects Reclaiming Urban Infrastructure

Posted in Creativity