Post-processing is one of the most important steps in the image making process. It is in fact one of the most powerful tools to make your vision come true. The camera does not see the way you see your world and it is your responsibility to translate your vision into reality in post-processing.
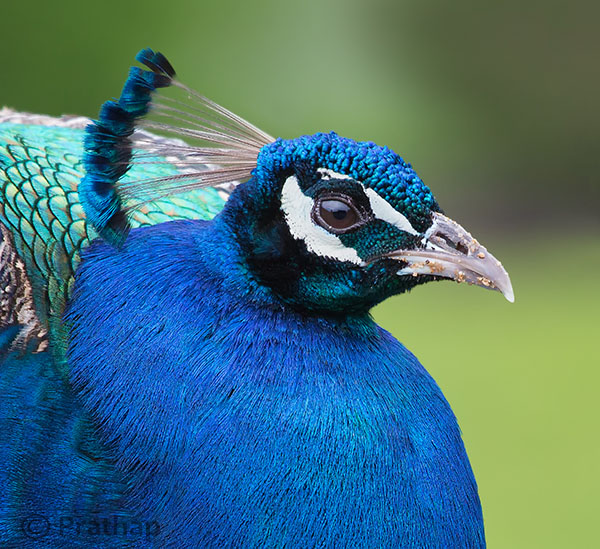
You can achieve most artistic results in post-processing that are simply not possible in reality. But, being a bird photographer you do not often get a chance to post-process your bird photographs artistically. Why?
Since the viewer would have seen the bird in reality, it is easier to compare to what is presented in a photograph. Bird photography is generally about showing the bird and its natural beauty not enhancing it artistically to achieve something else!
It is very similar to taking photograph of a person. Do you want to show the person as they are, or do you want to make them look someone else?
Does this mean, you have to just keep it real?
Not necessarily. But any enhancement in post-processing to make a bird or its features look beautiful has to be done with lot more care than if it was a landscape photograph for instance.
Remember that the mistakes will be caught easily!
Below I am listing the five post-processing mistakes that you, as a bird photographer, should avoid because they are unforgiving.
Committing any of these mistakes may ruin your bird photograph, and you definitely do not want to ruin your hours and days of effort in getting that one photograph you love. Do you?
Mistake #1: It’s cropped too tight
There is an ongoing debate about whether to crop or to get everything perfect in field. Though it is desirable to compose in the field, cropping in the post becomes necessary many a times in bird photography because of several factors like:
- Not enough time to compose the fast action that unfolds in split seconds
- Not enough focal length to fill the frame
- Not enough time to compose an image especially in case of birds in flight
If you can improve the composition, then go ahead and crop the image. But too often, I see lot of bird photographers crop it too tight which makes the bird suffocate in the frame and the image look cramped.
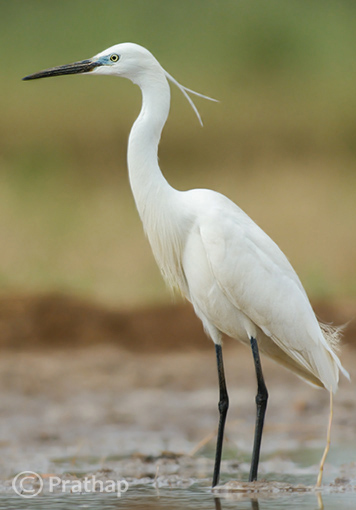
The little Egret in this photograph looks suffocated because there is no breathing space in front to look into, and no space to move which makes it look cramped.
|
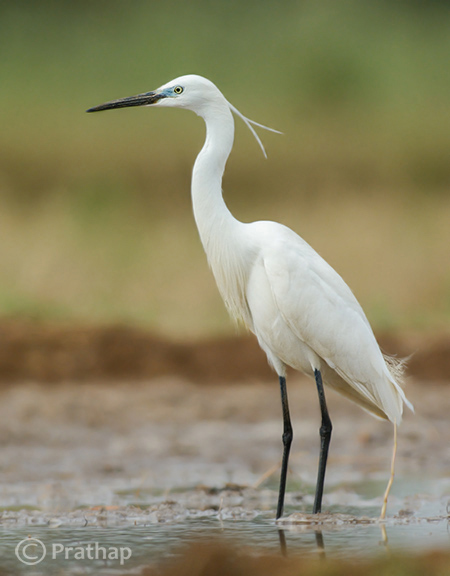
Notice how a little bit more space around the bird gives him room to look into and move. It is more pleasing to our eyes also.
|
Quick Tip: Use the Rule of Thirds as a guideline.
Mistake #2: It’s unrealistic
The clarity slider in Adobe Lightroom is such a lethal weapon that is hard to replicate even with Adobe Photoshop. It enhances the local contrast in an image, which is one of the most important aspects of processing. Too much local contrast makes an image looks unrealistic as it tends to sharpen.
The soft and smooth feeling of the smallest details in feathers of the bird starts to look very unrealistic.
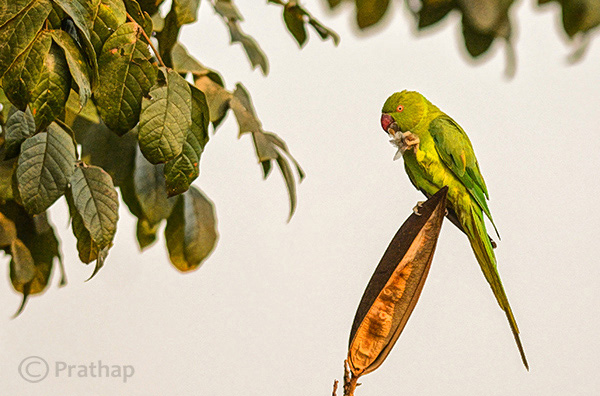
Notice how unrealistic the Parakeet looks in the above image. Even the leaves look like plastic.
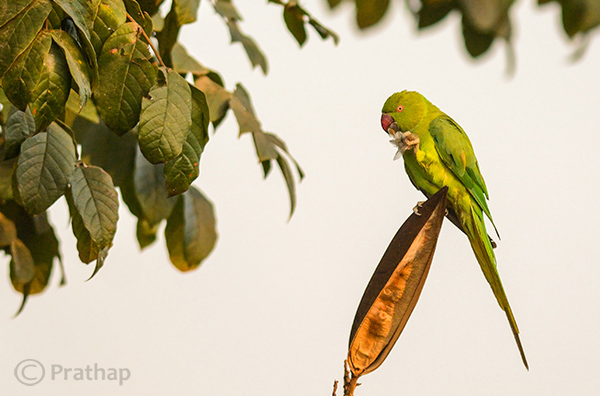
Just enough local contrast (usually Clarity of +20 to +30) will bring out all the details in the bird.
Quick Tip: Instead of using your mouse to pull the Clarity slider, use keyboard arrows and watch the changes as you bump up the clarity. Restrict to the smaller numbers like +10 to +30.
Mistake #3: Everything is overly colorful
Over-saturated images are everywhere!
Birds are definitely colorful subjects and that is the reason we are all attracted to them. But are they so colorful?
Too much saturation looks overcooked. If you try to increase the contrast as a last step in your post-processing workflow (which is usually recommended), then it will also increase the saturation.
Note that Saturation slider increases the overall saturation of the image making everything in the image colorful. Do you really want everything in the image looking colorful? Do you want to emphasize the bird or the background?
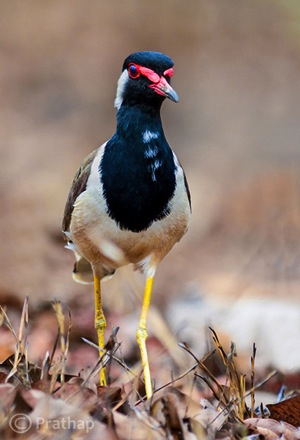
Everything in the above photograph of a Red-Wattled Lapwing is colorful. It is way too colorful.
|
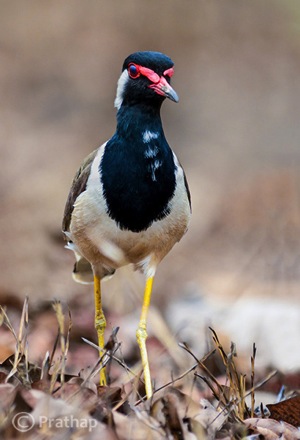
In the above photograph I have selectively increased the Saturation only for the bird in Adobe Photoshop.
|
Quick Tip: Use selective coloring. Saturate only the colors or object that are very important. Use the HSL panel or the adjustment brush to apply the color.
Mistake #4: The bird looks like a wax statue
Have you seen a wax statue of a bird in a shop? You can also see them on the web. Excessive noise reduction will give a plastic or wax statue look to your bird photographs.
While it is important to reduce the noise because most often we have to bump up the ISO to 400 or 800 to freeze the action, it is also important to understand what the Noise Reduction filter does. It The smoothes out the edges, by smoothening out the minute and important details of the image and the bird.
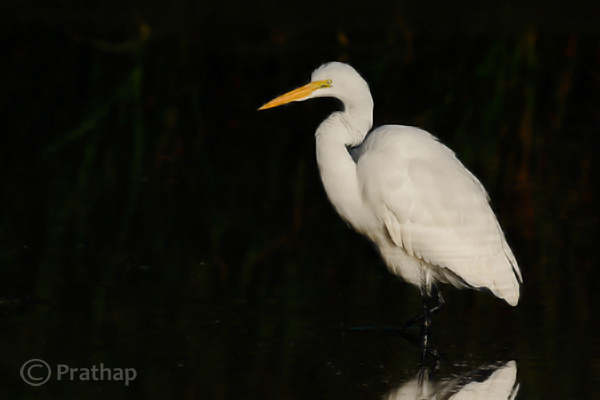
The above image of a Great Egret has a waxy look because of the excessive noise reduction applied to the entire image. Remember that the water looses texture due to excessive noise reduction giving it an artificial look.
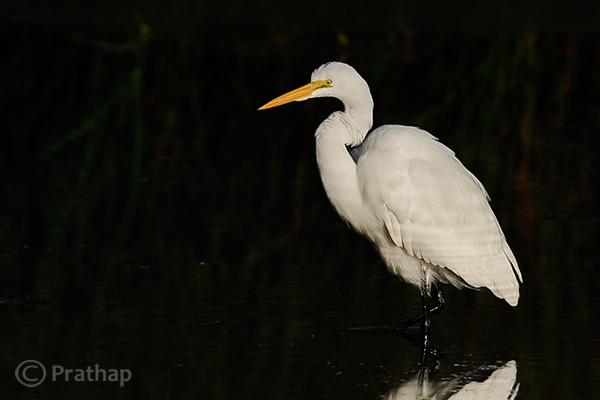
By reducing the noise only in the out-of-focus or low detailed or shadow regions of the image, it will help to keep the details intact.
Quick Tip: Reduce the noise only in the smooth areas (like the background) since noise is generally not visible in the high detailed areas (like the bird’s body).
Mistake #5: Too much is bad
Too much is bad in anything that we do. Pushing any post-processing slider too far will yield a bad image. But the most important one that is noticeable with many bird photographs, is that it is over-sharpened. No matter how good your post processing skills are, if you make this one mistake, there is no way out.
Over-sharpening kills a photograph. Period.
It is better to keep it little less sharp than to go too far and be overly sharp.

The features of the Brahminy Kite are way sharper than what they should be. Also check out the halo around the bird formed due to sharpening on the overall image.
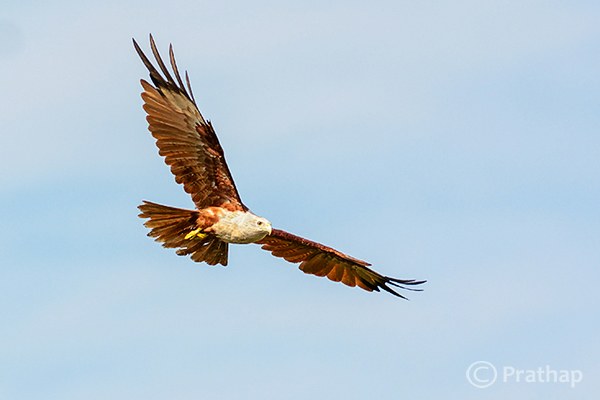
Quick Tip: Apply sharpening only to the bird but not to the background.
Final words
These are some of the major mistakes that should be avoided. Because they are unforgiving and can potentially ruin your best photographs. The best way to avoid these mistakes is to keep a small checklist to see if you have committed any and correct them immediately. With practice, you will easily avoid all of them.
Now, it’s your time to tell me the mistakes that you think should be avoided. What mistakes have you made in post-processing? Feel free to add your opinion on this subject but please make sure it is productive and helpful to all our readers.
The post 5 Unforgiving Post-Processing Mistakes Every Bird Photographer Must Avoid by Prathap DK appeared first on Digital Photography School.

Digital Photography School






You must be logged in to post a comment.