Before we even get started I should make clear that this is to be used as a last resort effort to save a photograph that can’t possibly be retaken any time soon, not something we should make a habit out of. We all know that the best way to save an underexposed photograph is to simply pay attention to the histogram while taking photos and if it’s pushed all the way to the left adjust our settings and reshoot.
Of course with that said, there are cases where it’s impossible to reshoot, or we just forgot to check our settings and get home to realize everything is underexposed and in that case we can do one of two things – toss the photo in the trash or try and save it.
Today I’m going to show you…
I’d like to mention upfront that to be able to achieve these kinds of results you really must be photographing in the RAW format – no ifs, ands or buts about it! If you need a bit of clarification as to why RAW is important you can read all about the RAW format here.
Let’s Save An Underexposed Photo
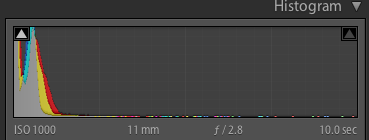
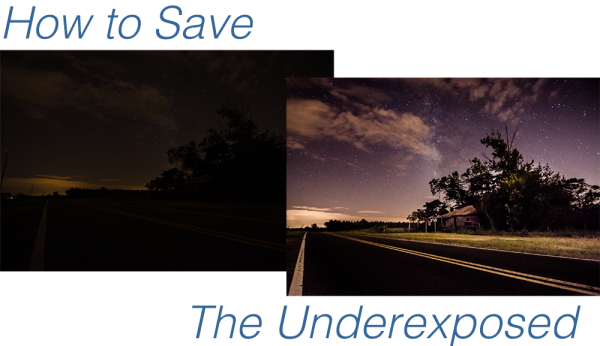
If you do get home and your histogram looks the one to the right than you’ve got an underexposed photograph in serious need of some help. It probably looks very similar to the before image above with just peaks of light in the very brightest parts of the photograph.
Before you give up hope and assume that your shoot is a complete failure there are a few things you can do to try and salvage the underexposed photographs that you’ve taken.
I’m going to be presenting you with three techniques that you can use to get the most out of what you have. However it is important to note that every photograph is different and will present its own unique set of challenges. These three ideas will give you something to try in the event that you do get home and find your photographs have taken a turn for the dark side, but they might not be able to bring them back, sometimes they truly are too far gone.
For this tutorial I’m using a fairly serious example, in most cases I would hope that you won’t have nearly as bad a situation as I have for you today, so let’s get started!
#1 – Save what you can get rid of what you can’t
This might not be the best way to go about things, but it certainly is the easiest way to get something out of nothing.
By simply adjusting the basic settings a bit to expose for the sky in the photograph I create a simple silhouette of the trees and leave it at that. The final step was to clone out the little bits of the run down shack that were peaking out asking for attention, but not adding to the photograph.
Definitely not the best option for this photo, but it is an option worth considering when you are processing your own photos – sometimes you really don’t have to save everything – it might not be what you had intended the shot to be, but that doesn’t mean it’s a complete loss.
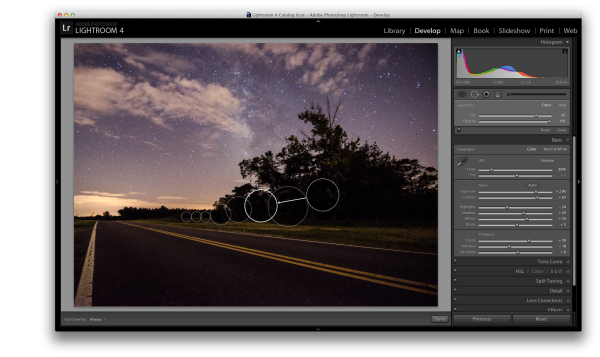
Expose for what you have clone out what you can’t save.
#2 – Use Graduated Filters and Adjustment Brushes Until You Can’t Use Them Anymore
For this second attempt at saving this image I did a lot of the same processing as I did on the first one to get the sky the way I wanted it. Once I got to that point instead of simply giving up and cloning out the run down shack I decided to add a graduated filter and some adjustment brushes to try and save the foreground.
As you can see with just a few modifications I was able to really bring out the hut and add some light to the grass as well as some much needed contrast to the road. This became the after image scene above.
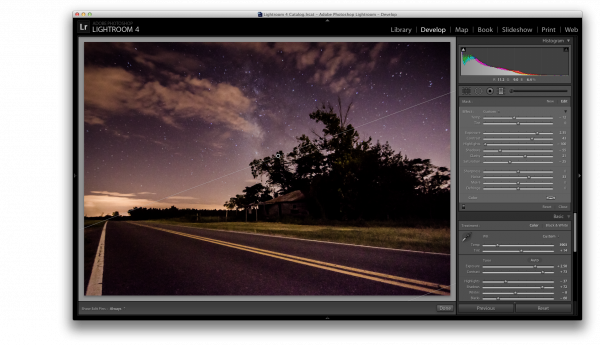
Use a graduated filter to bring light back into the foreground.
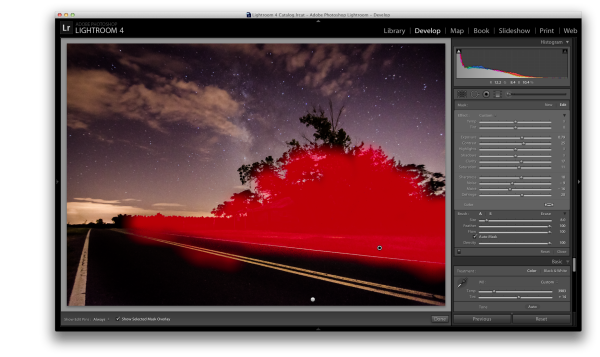
Add light to the grass and hut with one adjustment brush
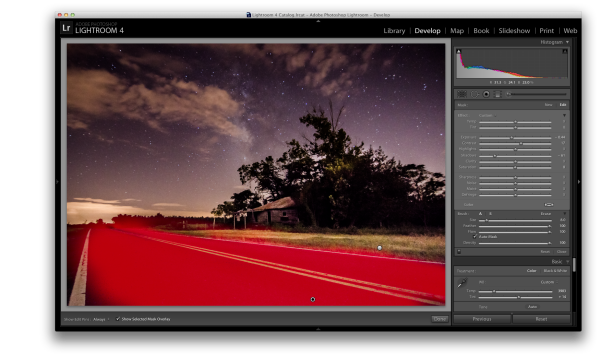
Darken the road to add contrast and remove some noise with a second adjustment brush.
#3 – Convert to Black and White
If we have a really bad case of underexposure, as I do in this photograph, noise will become a problem. As you recover data from the darkest of the shadows you will find that there just isn’t any data there to recover and you’ll end up with pixelated noise in those regions. This is especially true if you were already shooting at a higher ISO.
In cases like this sometimes the only solution left to do is convert to black and white. By converting the image to black and white you essentially are able to hide the color noise leaving only the luminance noise in the photograph. While it’s still not ideal, it can be a useable alternative if you have no other options.
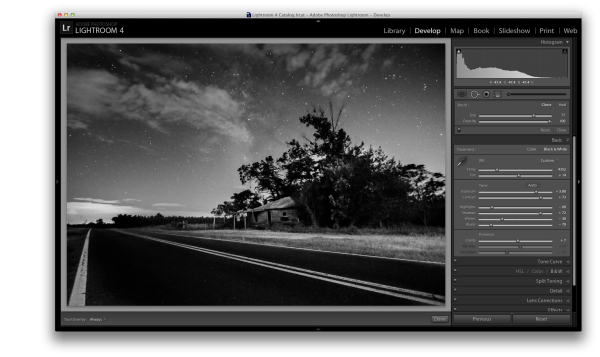
Convert the image to black and white to minimize the effect of noise
For those who enjoy videos this photograph’s edit was part of a weekly series I run on YouTube called Let’s Edit you can watch the video of that episode below.
Post originally from: Digital Photography Tips.
Check out our more Photography Tips at Photography Tips for Beginners, Portrait Photography Tips and Wedding Photography Tips.
How To Save An Underexposed Photo Using Lightroom
The post How To Save An Underexposed Photo Using Lightroom by John Davenport appeared first on Digital Photography School.

Digital Photography School


You must be logged in to post a comment.