RSS
 

Posts Tagged ‘Towards’

PolarPro’s new buyback program gives you credit towards a new filter when you trade in an old one

20 Jun

Earlier this year, PolarPro stepped up its filter game and brought its expertise to the world of DSLR and mirrorless cameras with its QuartzLine filters.

As a follow-up to its latest filter lineup, PolarPro has launched a buyback program that will let you get a certain amount of credit towards a new filter if you return an old one – even if it’s not theirs.

Here’s how it works. For any 37mm or 46mm filter you send in, you’ll be given a $ 20 credit towards a new PolarPro filter. For 67mm, 77mm and 82mm filter sizes, you’ll be given $ 40 in PolarPro credit. You will receive one credit for each filter you send in. Once you’ve agreed to the PolarPro terms for the return, you’ll be given a discount code to use with your PolarPro purchase.

This is the dialog box you’ll see when asked to agree to the terms of the buyback program.

Once your purchase is made, PolarPro will send you an email with a prepaid label to send in your old filter(s). Simply package them up and ship them off within 14 days of receiving your new QuartzLine filter and you’re good to go. You can even use the box they shipped you your new filter in. PolarPro notes that any filters sent in will be recycled or repurposed.

To find out more information and get started with your trade-in, head on over to PolarPro’s buyback page.

Read our original article about QuartzLine filters (April 2018)

Articles: Digital Photography Review (dpreview.com)

 
Comments Off on PolarPro’s new buyback program gives you credit towards a new filter when you trade in an old one

Posted in Uncategorized


Tips for Shooting Landscape Photography Towards the Sun

21 Feb

Avoid photographing towards the sun is one of the most common tips you’ll hear for landscape photography. In fact, it’s a tip that I’ve shared previously myself.

While it’s not without a reason that’s it’s a well-known tip, it might not be as relevant today as it was several years ago. Today’s sensors and post-processing opportunities are much more forgiving and what once was a bad idea can now be an opportunity.

In this article, I’ll show you how including the sun in the frame can enhance the atmosphere and add an extra dimension to your images as well as sharing my best tips for doing so.

Why you should include the sun in your images

I’m sure that many of you are ready to jump straight into the comment section right now and tell me how much of a bad idea it is to shoot towards the sun. But give me a minute to explain a few reasons why it’s something you might want to consider doing with your landscape photography.

Tips for Shooting Landscape Photography Towards the Sun

The greatest benefit of adding the sun in the frame is that it adds depth to the image. Take the image above as an example. Remove the sun and the image becomes flat and much less interesting. With the sun included, the image comes to life and drags you into it.

Tips for Shooting Landscape Photography Towards the Sun

Compositionally it can also be beneficial. Of course, this depends on where you place the sun. In the example above, the bright sun serves as a focal point. Naturally, the viewer’s eye is guided along the cliffs and up towards the bright area.

Keep in mind that our eyes are naturally attracted to the brighter parts of the image.

Another benefit of shooting towards the sun is that you often get beautiful shadows striking towards you. This serves as additional leading lines and benefits the composition.

Tips for including the sun in your images

Now, there’s one thing I need to make clear; including the sun in an image won’t always be beneficial. There are certain conditions or methods you should take advantage of for this to work. Here are some tips.

The time of day matters

While there are exceptions, the best images come when the sun is low on the horizon. The sun then creates a soft glow and gives a nicely balanced light.

Tips for Shooting Landscape Photography Towards the Sun

During midday when the sun is positioned higher in the sky, the light is harsh and less pleasing to the eyes. Generally, this is something you want to avoid.

Consider the sun’s placement within the frame

I’ll start by saying this, there’s no one single correct spot to place the sun within your image. Sometimes it’s beneficial to place it in the center, while other times it’s better to place it on the side.

This is where trial and error, and experience come into play.

Tips for Shooting Landscape Photography Towards the Sun

In the image above, I chose to place the sun at the very edge of the frame. Partly obscured by the clouds, it doesn’t take too much attention but instead, you’re drawn to the beautiful light hitting the landscape.

If you are familiar with semi-advanced post-processing techniques, you might be aware of a processing style called light bleed. This is a technique that involves heavy dodging and enhancing/creating a light source that strikes through the image. However, this is an effect you’re able to get in-camera as well by placing the sun at the corner or edge of your frame.

Tips for Shooting Landscape Photography Towards the Sun

Other times, you want to place the sun in the center of the image. In the image above, placing the sun in the center adds a light source that your eyes naturally go toward. Had I instead placed the sun to the side, this image would be less balanced.

Obscure the sun

In my opinion, one of the most efficient ways of including the sun in your image is by partly obscuring it. Combining that with a narrow aperture, you get a nice sun-star or sunburst.

Tips for Shooting Landscape Photography Towards the Sun

Use a Graduated ND Filter

Since the sun is so much brighter than the surrounding landscape, it can be hard to capture a well-exposed image when including it in the frame. By using a Graduated ND Filter you’re able to darken the sky in your image – meaning that you can capture a well-balanced image even with the sun in the frame.

Unfortunately, a Graduated ND Filter is not always ideal. Since the transition between darkened and transparent parts of the filter is a straight line, it can create some unwanted effects if you’re photographing a scene where something is projecting above the horizon.

Graduated ND Filters are better to use when the horizon is flat, such as the image below:

Tips for Shooting Landscape Photography Towards the Sun

… Or bracket multiple exposures

Another more flexible method of capturing well-balanced images with the sun included is to bracket multiple exposures and blend them in a photo editor. This is the better choice when the sun is at the highest position in the sky, as the contrast is even greater.

For the image below, I captured three images; one exposed for the landscape, one exposed for the sky and one even darker to balance out the brightest parts.

Tips for Shooting Landscape Photography Towards the Sun

Your turn

Hopefully, I’ve been able to convince you that shooting towards the sun isn’t a complete no-no anymore. Have you captured any images that are shot towards the sun for your landscape photography? I would love to see them in a comment below!

The post Tips for Shooting Landscape Photography Towards the Sun by Christian Hoiberg appeared first on Digital Photography School.


Digital Photography School

 
Comments Off on Tips for Shooting Landscape Photography Towards the Sun

Posted in Photography


Adobe will release the last update to Lightroom 6 ‘towards the end of the year’

27 Oct

The countdown to the end of Lightroom as a standalone product is officially ticking, and the deadline is drawing near. Earlier today, Adobe released a fresh compatibility update for Lightroom 6, but in addition to adding support for cameras like the Nikon D850 and Fuji X-E3, Adobe also answered a burning question in the release notes: Is this the last upgrade of Lightroom perpetual product?

The answer, it seems, is no… but that last upgrade will arrive “towards the end of the year.” Here is Adobe’s answer in full:

As we align our investments in the direction of supporting our subscription-based products, the last version of Lightroom 6 will be coming out towards the end of the year. If there is a camera not supported in Lightroom 6, you can use the DNG converter before importing your images into Lightroom 6.

Once that final upgrade goes live, Lightroom 6 will become an ‘unsupported’ product, and if you intend to keep using Adobe Photoshop Lightroom you’ll either have to subscribe to CC or deal with the less-than-ideal workflow described above… while you can. It might not take too many operating system upgrades before unsupported LR6 breaks entirely.

Not everybody is happy about this state of affairs… as Senior Reviewer Richard Butler pointed out last week:

RIP Lightroom 6: Death by Subscription Model

Articles: Digital Photography Review (dpreview.com)

 
Comments Off on Adobe will release the last update to Lightroom 6 ‘towards the end of the year’

Posted in Uncategorized


Sony ‘trade up’ program gets you $500 plus trade-in value towards a new a9

15 Aug

Switching brands is a painful and expensive process, but a new “trade up” promotion from Sony is trying to take a little bit of the sting away. For a limited time, people interested in stepping up to a Sony a7 II, Sony a7S II, Sony a7R II, or Sony a9 can get several hundreds of dollars in credit + trade-in value when they hand over their working DSLR or mirrorless camera.

These kinds of trade-in programs are not uncommon in the photo world, but we’re more accustomed to seeing them from brands like Hasselblad and Leica, where the price tag for upgrading from one model to the next is so high that a significant discount for trading in your older camera is a serious boon.

Sony’s promotion isn’t quite as intense, but trading in an eligible DSLR or mirrorless will snag you $ 500 + trade-in value towards a new a9, $ 300 + trade-in value towards an a7R II and a7S II, and $ 100 + trade-in value towards a new a7 II. What’s more, these discounts are being offered in parallel with instant-rebates of up to $ 200 on the same cameras.

If you’re looking for an a9, there is a (long) list of eligible cameras that will earn you that $ 500 bonus; however, if you’re interested in an a7 II, a7S II, or a7R II, “any working digital interchangeable lens camera” is acceptable. To learn more or take advantage of the program, read the press release below or head over to the trade up website at this link.

The ‘trade up’ promotion runs from August 13th through September 30th.

Press Release

Sony Rolls Out Exciting New Nationwide “? TRADE UP” Retail Event

Program offers up to $ 500 bonus offer on trade-in DSLR or mirrorless cameras toward purchase of Sony full-frame cameras, lenses and accessories

San Diego, August 14, 2017, Sony Electronics, a worldwide leader in digital imaging, today announced a new nationwide “? Trade Up” retail event with up to $ 500 bonus offer on top of the trade-in value of a working DSLR or mirrorless camera. The bonus offer can be applied to the purchase of several full-frame Sony cameras including the flagship ?9 as well as the ?7R II, ?7S II and ?7 II models. A variety of ? full-frame lenses and ? accessories are also eligible.

The trade-in and trade-up summertime bonus deal runs now through September 30, 2017, and runs in parallel with instant rebates of up to $ 200 on the same eligible products. Sony is also offering limited time 24-month interest free financing at participating retailers on select Sony imaging products. Combine all offers to maximum savings.

All eligible trade-in products must be in working condition. See below for a list of eligible trade-in products and requirements for eligibility. Customers are restricted to one bonus offer per item they trade-in at participating Sony Authorized Dealers.

Sony ?9 bonus offer of $ 500 on eligible trade-in products

  • Eligible products include the Canon 6D, Canon 6D II, Canon 5D Mark II, Canon 5D Mark III, Canon 5Ds, Canon 5Ds R, Canon 5D Mark IV, Canon 1D Mark IV, Canon 1DX, Canon 1DX II, Nikon D600, Nikon D610, Nikon D800, Nikon D800E, Nikon D810, Nikon D810A, Nikon D750, Nikon D3, Nikon D3s, Nikon D4, Nikon D4s, Nikon D5, Leica M9, Leica M9P, Leica Monochrom, Leica M246, Leica M240, Leica M10, Leica SL, Leica M262, Sony ?7, Sony ?7R, Sony ?7S, Sony ?7 II, Sony ?7S II, Sony ?7R II, Sony?900, Sony ?850, Sony ?99, and Sony ?99 II

Sony ?7 series bonus offers and eligible trade-in products:

  • Sony ?7R ll Full-Frame Mirrorless Camera: Bonus offer of $ 300 on any working digital interchangeable-lens camera
  • Sony ?7S ll Full-Frame Mirrorless Camera: Bonus offer of $ 300 on any working digital interchangeable-lens camera
  • Sony ?7 ll Full-Frame Mirrorless Camera: Bonus offer of $ 100 on any working digital interchangeable-lens camera

FOR MORE INFORMATION: For more information on this promotion, please visit https://alphauniverse.com/tradeup.

Articles: Digital Photography Review (dpreview.com)

 
Comments Off on Sony ‘trade up’ program gets you $500 plus trade-in value towards a new a9

Posted in Uncategorized


The Trend Towards Authenticity

21 Nov

A Guest Post by Rebecca Lily

A trend commonly has two definitions. The first is a “fashion, style or vogue”. In photography, we see certain cyclical trends that are alike to the fashion industry, for example. What was stylish 25 years ago becomes chic again at some point, a retro revival is born and introduces the cycle all over again. It usually takes a few daring individuals – namely, early adopters or trendsetters – to re-introduce what’s deemed “retro” to the modern world. They become the benchmark that the masses will follow.
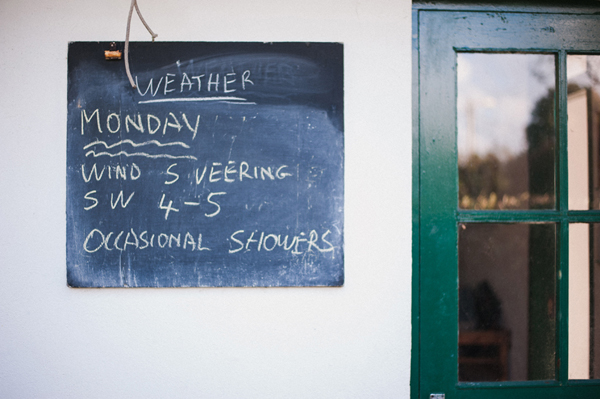
Nikon D700 + Nikkor 50mm 1.8G. Edit: Rebecca Lily Pro Lightroom 4 preset Nautica

A good example of this “fashion trend” in photography is the revival of retro film cameras. Film is “hip” again, and so are cameras like the Diana, Polaroid and Holga. This trend seems to be especially embraced by Generation Y (the generation beginning in the early 1980‘s) who have grown up in a digital age – and mainly due to heavy social online activity, take twice as many pictures as the average U.S. household.

For many of these trend adopters, it’s about rejecting modern (and ordinary-looking) digital equipment, opting instead for an old analog film camera that’s unfussy, not to mention unique and eye-catching. For others, it’s about the resultant retro look of the photographs, which is in style at the moment. One evidence of this are the massively popular smartphone apps like Hipstamatic and Instagram, which emulate a retro film camera effect for modern phone snapshots.

There is a second definition for the word trend, which is described as “a general course or direction”. This is what I refer to when I talk about the trend towards authenticity, which I have observed taking place gradually over the last few years. I believe there is a general movement in photography away from overdone, fake, glossy, polished and plastic, and towards natural, simple, unpretentious, relatable and real.
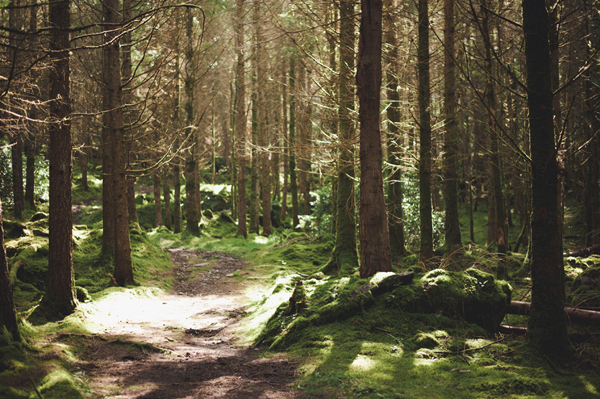
Nikon D700 + Nikkor 50mm 1.8G. Edit: Rebecca Lily Pro Lightroom 4 preset Color Me Dramatic

It’s not the same as retro-hype. It’s not like the film revival. It’s different because it goes deeper than what equipment or medium you’re shooting with; it’s about mindset. Its implications are much further-reaching because it is shaping society’s values, expectations and norms.

How has this trend towards authenticity affected the world of photography?

1. People look less fake

There is a current movement against the extreme Photoshopping techniques of the fashion industry. What used to be commonly acceptable practice of “retouching” is now being termed “fake”, “over-enthused” or “plastic”, where models’ physiques are so altered that they are not at all realistic anymore.

A very public media backlash has occurred, especially in the last year, where the public begins to verbalize their discomfort over excessive Photoshop alterations and demand change. An example of this: in early July 2012, ‘Seventeen’ Magazine pledged not to digitally alter body sizes or face shapes of young women in their editorial pages – because of eighth-grade Julia Bluhm’s campaign which went viral and resulted in more than 80,000 signatures from around the world.

Like Julia, many people are realizing the importance of natural, authentic role models for men and women alike. Coinciding with the public’s growing awareness in this regard, many celebrities have supported this movement and started appearing in photo shoots without makeup, and some are requiring published photographs of themselves to be un-Photoshopped. It’s all part of the trend towards natural – towards real – towards authenticity. Plastic over-smoothed skin and unattainable Barbie-like physiques are going out of style. Real photographs of real people start to be embraced.

Canon 5D + Canon 50mm 1.8. Edit: Rebecca Lily Pro Lightroom 4 preset Luminous.

2. Subject matter looks more organic

If you pick up a copy of Kinfolk Magazine, you’ll find a style of photography has emerged which celebrates the rudimentary, the casual and unpretentious. Despite the fact that most of Kinfolk’s images are set up (like the majority of images of interiors and tablescapes), the overall style that is presented as aesthetic in their photographs is something much different than what we used to see in House Beautiful magazine. Mismatched table linens and wildflowers in a rusty tin can are now a hip look, rather than gleaming china, polished silver and elaborate flower arrangements. Popular blogs like 3191 Miles also embody this simplistic, organic homey style, where interiors look lived-in and familiar rather than like elegant, stuffy museums. A stained tea towel next to a morning coffee invokes a cozy feel of home, as does fingerprints on a window or wine glass, or flour scattered over a worn kitchen counter. At one time we might have cloned these things out and made them “perfect”. Now, “perfect” becomes unnecessary, and the everyday – from the common to the rustic – is beautiful and comforting. We love to see relatable images, and to be inspired to find beauty in our own homes, no matter how simply they are furnished.

Nikon D700 + Nikkor 50mm 1.8G. Edit: Rebecca Lily Pro Lightroom 4 preset Midsummer

3. Colors look more Natural

As the the trend towards authenticity continues to grow, so does the trend towards softer, more natural colors and delicate highlights and shadows – much more like what we actually see with our eyes. Many of us begin to notice over-saturated colors, fake skin tones, blown-out highlights and harsh contrasts in post work – where it simply doesn’t look at all real anymore. It’s typical now to see comments like “Over-Photoshopped” or “over-processed” simply because people are now more aware of what overdone post-processing looks like. After awhile some of us grow in our awareness that what we were doing before in our post work was simply too much.

Of course there will be those who argue with this and say that photography is art and post-processing is artistic expression. Regardless of how individual photographers choose to express their style, the predominant trend is moving away from these more extreme looks and towards something more true-to-life.

Here’s an example with my own work:

Original image (SOOC):

Canon 5D + Canon 24-70mm 2.8L

My post-processing 2.5 years ago:

Canon 5D + Canon 24-70mm 2.8L

My current post-processing:
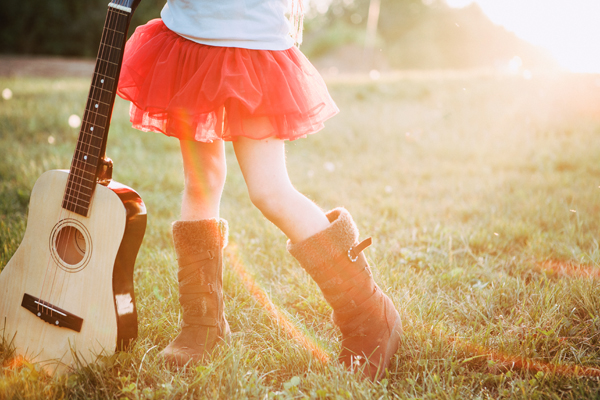
Canon 5D + Canon 24-70mm 2.8L. Edit: Rebecca Lily Pro Lightroom 4 preset California

As you can see, my own personal editing has undergone a big change. The current post-process is still bright and whimsical, but the colors look nevertheless very natural when compared to the SOOC. One thing that is important to keep in mind is that SOOC does not necessarily equal “natural colors”. Camera manufacturers have their own color palettes, and many times these colors are simply not true to life. Case in point: my Nikon, as much as I love it, gives me too much yellow. Yes, it is possible to get close to true-to-life colors if you calibrate your camera (which many pro photographers do), but my personal goal in post-processing is not to get SOOC’s with realistic colors. It’s to recreate the look and feel of what I originally saw, in an aesthetic, natural-looking and pleasing way.

Nikon D700 + Nikkor 24-70mm 2.8G. Edit: Rebecca Lily Pro Lightroom 4 preset Elixir

If you incorporate tools like Photoshop actions, Lightroom presets or ACR presets for editing, there are a few products out there that are designed for natural, timeless, aesthetic colors. But they are difficult to find. Most vendors have not caught up with the times yet and are still offering products that are simply outdated.

The majority of professional photographers do not want drastic effects, loss of detail or heavy alteration of original tones. They aren’t interested in a cotton candy color palette. They want subtle and versatile products that enhance their colors, produce delicate, detailed highlights and shadows and naturally beautify skin tones, but in a way that looks authentic and aesthetic – not fake. This is especially important for wedding and portrait work.

As a designer of post processing tools such as Lightroom presets and Photoshop actions, I work with the continuous feedback of many professional clients and pay special attention to the growing requirements for this type of product. Especially among fine art wedding and portrait photographers, there is a strong demand for subtle and natural looking, film inspired colors – and the ability to cohesively apply a consistent look to an entire photography session. This reflects the growing movement towards authenticity.
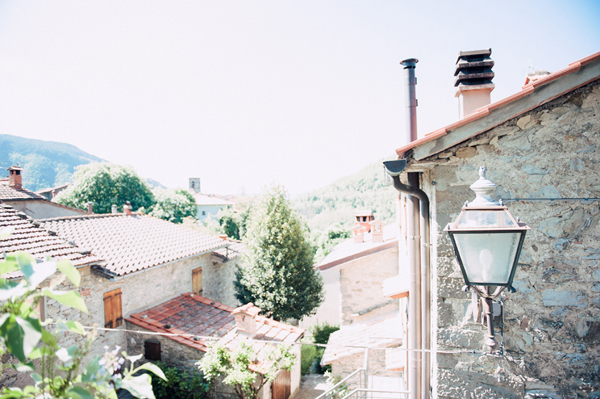
Nikon D700 + Nikkor 24-70mm 2.8G. Edit: Rebecca Lily Pro Lightroom 4 preset California

So where does this trend lead us in the world of photography? Someplace better, I believe. As the trend towards authenticity evolves, it inevitably changes the mindset of society for the better. This is part of the influence that we have as photographers, and part of our responsibility. I am always delighted to see wedding and portrait photographers that spend more time learning how to capture a person’s real, natural beauty with good light and a flattering angle – rather than liquifying and plasticizing them in Photoshop. How we as photographers approach our subjects tells a story to the world – and to ourselves – about what we perceive as beautiful and acceptable, and sets a standard to those who are watching us.

I am hopeful when I stand on my tiptoes and look ahead to where the photography industry is going. I see this trend developing into a new and better way of thinking, of seeing. Publications begin to celebrate the everyday and the common in favor of the glossy. Models begin to look like real people. Homes begin to look lived-in rather than like museums. Nature begins to look like nature and not like Super Mario-world. Authenticity begins to shine.

And it’s about time.
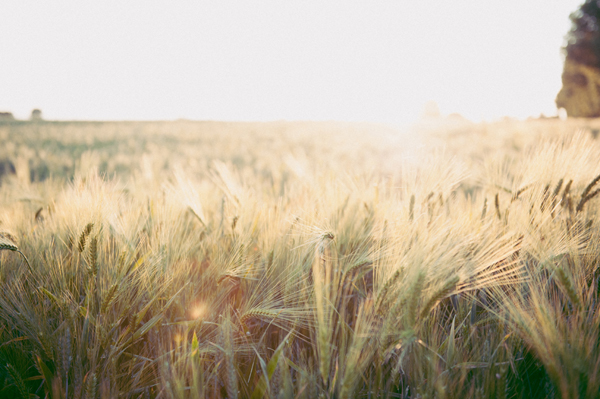
Nikon D700 + Nikkor 24-70mm 2.8G. Edit: Rebecca Lily Pro Lightroom 4 preset Retro Curve

Rebecca Lily is a professional destination wedding and commercial photographer under Bondshots, which she founded with her husband, Johnny Patience. She is also a designer of professional post processing tools such as Lightroom presets and Photoshop actions. Rebecca’s work and products have been featured both online and in print.

Post originally from: Digital Photography Tips.

Check out our more Photography Tips at Photography Tips for Beginners, Portrait Photography Tips and Wedding Photography Tips.

The Trend Towards Authenticity


Digital Photography School

 
Comments Off on The Trend Towards Authenticity

Posted in Photography