RSS
 

Posts Tagged ‘together’

How Joe Biden’s drone light show came together — and what it could mean for the industry

12 Nov
A composite of two of the formations seen in the drone show Saturday, following the announcement that Joe Biden was projected to become the next president of the United States.

This past Saturday, major news outlets announced former Vice President Joe Biden and his running mate and senator Kamala Harris as the projected winners of the 2020 presidential election. Biden and Harris addressed the world later that evening with speeches that concluded with a drone and fireworks light show.

The drone show especially excited many in the rapidly-growing industry, after years of negative media coverage and concerns about overregulation. Numerous unconfirmed sightings of drones near airports and aircraft, in addition to rulemaking proposed for Remote ID, reportedly set to be decided by year’s end, are a clear indicator that drones continue to be controversial.

That’s why it’s such a big deal that a formation of drones was used on Saturday night, so close to two people about to become among the most powerful (and most closely-guarded) in the world. After a bit of sleuthing, we were able to confirm that the company responsible for the light show was Verge Aero, based in Pennsylvania.

‘This event is certainly a first on many fronts,’ Nils Thorjussen, Verge Aero’s CEO, tells DPReview. ‘While I’m unable discuss the event in detail, there were many unique challenges we’ve never faced before, as you can imagine.’

Drone light shows have been around for several years, but they don’t come cheap. It takes anywhere from fifty to tens of thousands of drones to form illuminated shapes in the sky, and when the cost of setup, plus travel and accommodation for a staff of trained professionals is factored in, they’re typically very expensive.

Mass light shows with hundreds of drones might be beyond the means of most of us, but, says Thorjussen, ‘we’re developing the tools to make drone light shows more accessible.’

He predicts that ‘soon enough, as with other technologies in the past, they’ll become more affordable and mainstream.’ Good news for an industry that all too often is on the wrong side of the headlines.

To learn more about all the components that go into a drone light show, head over to Verge Aero’s blog.

Articles: Digital Photography Review (dpreview.com)

 
Comments Off on How Joe Biden’s drone light show came together — and what it could mean for the industry

Posted in Uncategorized


Fujifilm interview: ‘We will get through this crisis together’

15 Apr
Toshihisa Iida, General Manager of Fujifilm’s Optical Device and Electronic Imaging Products Division pictured at the Photokina trade show in Cologne, Germany in 2018.

With CP+ canceled and international travel off the agenda for the time being, we’re doing things the old-fashioned way: by telephone. Recently we caught up with Fujifilm’s Toshi Iida, to talk about the X-T4, X100V and, of course, the ongoing impact of the coronavirus epidemic on Fujifilm and the camera industry as a whole.

The following interview has been lightly edited for clarity and flow.


How are things going in Tokyo?

We’re not in complete lockdown, we’re still able to work in the office together but this week activities in Tokyo have been restricted. At the moment we’re all safe.

You’ve been dealing with the COVID-19 situation now for more than two months – what impact has it had on your operations?

There are three or four aspects to the situation. Firstly on the manufacturing side. Our China factory is our main factory for camera manufacture. [In February] the Chinese government extended the new year holiday, so we couldn’t restart manufacturing until the 10th of February, of course at limited scale. We’re catching up, and […] at the moment we’re almost back to full-scale operations at the factory. Of course, we’re working with the strict health management processes set down by the [Chinese] government.

So that’s the good news: we have the [manufacturing] volume for the X-T4, so we’re confident we can launch the camera officially at the end of April.

The next thing is logistics and sales. As you know, the situation in the US and in Europe is getting more serious every day, and this is affecting our warehouses and logistical operations. And also sales operations, because many stores are shut down. So we’ve seen a sudden drop in demand, which was inevitable. On the service side, we can continue to offer after-sales service in both the US and in Europe, for the moment.

Where will this crisis leave Fujifilm as a whole?

Fujifilm is very diversified. Our medical and healthcare business is the biggest part of our company. The drug Avigan [currently being investigated for use in treating COVID-19] was developed by Fujifilm’s pharmaceutical division. This current moment is certainly difficult for the imaging part of our business, but I think we are in a good position to weather the present situation.

It’s important when talking about business not to forget about people’s health

Of course it’s important when talking about business not to forget about people’s health and safety. We may not be able to predict when this crisis will be over, or when things will return to normal. But eventually we will get through this together, and hopefully demand for our products will come back strong.

For now, our R&D plan is unchanged. We’ll launch the X-T4 at the end of April and move on to the next project. We’ll keep on focusing on making better projects, and developing better technology.

What kind of impact will the cancelation of the Olympic Games have on Japan this year?

It will have a huge impact on the entire Japanese economy. Many people were invested in the games happening this year, so it is a big loss. On the imaging side, obviously the broadcasting and TV coverage is all canceled, and that has impacted our broadcasting business. Broadcasting lenses are one of our key products, and we’ve seen a lot of orders being postponed or canceled.

Fujifilm’s main factory building near Sendai, in Japan. Fujifilm has been making digital cameras in this facility for a long time (we first visited it way back in 2002). After being badly damaged in the 2011 earthquake, it was reopened in 2018.

Do you think this will prove more serious than the impact of the 2011 earthquake and tsunami?

Yes, definitely. The earthquake and tsunami were [limited to] Japan. Of course the logistics of the supply chain were affected, but it didn’t last for a long time. At that time we’d just introduced the original X100, and within two weeks our manufacturing was back to normal. There was a flood in Thailand in 2011, too, which also affected the supply chain, but it only affected [customer] demand in Thailand itself.

COVID-19 is affecting everything, worldwide.

Why did you opt for a totally new model name with the X-T4, rather than making it a variant of the very similar X-T3?

We did have that discussion, and one idea from our team was that we should call it the X-T3 ‘S’. But considering the changes we made in the X-T4, except for the sensor and the processor it’s completely different. New shutter, new IBIS unit, new battery. So we felt that overall it’s different enough from the X-T3 to be called ‘X-T4’.

The IBIS unit for the GFX100, shown alongside a 100 Yen coin, for scale (for reference, a 100 Yen coin is about the same size as a US quarter, or a British 10p piece). Experience gained in the development of this IBIS unit helped Fujifilm’s engineers create the small, lightweight IBIS mechanism used in the new X-T4.

How is the X-T4’s IBIS different to that of the X-H1?

The IBIS unit is completely redesigned. New parts, fewer parts, and it’s more powerful. The components and the structure are completely different. In terms of size, it’s about 30% smaller, and 20% lighter than the mechanism in the X-H1.

Experience with the X-H1 and the GFX100 helped our R&D team. Without the X-H1 we couldn’t have made the new IBIS unit in the X-T4, and it’s the same with the GFX100. Without that experience and knowledge we couldn’t have developed it.

Now that the X-T4 exists, with its advanced 4K features and IBIS, how will the XH line develop?

We’ll keep the X-H line, alongside the X-T series. I can’t share our precise plans, but we will continue to develop that line in future, and we will introduce innovations into that series.

Will the X-H line continue to be video-centric, in the same way as the X-H1 when it was originally released?

Possibly. I can’t give details, but the concept will be very different to the X-T series.

The X-H1 was Fujifilm’s video-centric model when it was first released, but has since been leapfrogged by subsequent XT-series models. Mr. Iida tells us that the XH line will continue to be developed, which hints at even more powerful video features to come.

Will the X-T3 be updated via firmware to bring its autofocus into line with the X-T4?

It’s technically possible, because they have the same sensor and the same processor. But it depends on prioritization on the firmware development side. We have many other projects, but in the future we would like to do that for our X-T3 customers.

Will the X-T3 continue to exist alongside the X-T4 in the lineup?

Yes. The X-T3 has been on the market for more than a year, but it has a good sensor, and a good processor. It will continue to be available alongside the X-T4.

The X-100V just started shipping, but do you have a sense of how it’s been received?

The reception has been very good. Because it was launched in February, the initial shipment volume was very limited. In early February we were still under restrictions on the production side. So we had to decide to launch the silver version only, with the black version later. We are still back-ordered. All of the feedback has been very positive.

The X100V features a new lens and several ergonomic changes compared to previous X100-series cameras.

Was it important to you that the X100V offers such advanced 4K video features?

Everybody knows that for the X100 series, the primary use-case is still photography. We know that not many people are shooting video on the X100 series. But with the X100V we really want even still photographers to enjoy the 4K movie experience. We’re proud of the improvements we’ve made to the quality, and we really want to encourage our customers to try it. And we also want to make the camera future-proof.

Video is not as important in the X100V as the X-T4, but still, it’s nice to have.

Speaking of video, the GFX100 has been on the market now for almost a year. How has it performed?

In terms of sales numbers I can tell you that it’s about 50% more than we originally anticipated. So very positive. We’ve been back-ordered, but we’re finally catching up. So sales numbers have been very good, and all of the feedback, especially around the IBIS and autofocus, it’s all been positive.

What kind of photographers have been buying it?

As we predicted, it’s been fashion, commercial and landscape photographers, but now we’re getting interest from more industrial photographers, for example for aerial and archival purposes. It’s been interesting.

The GFX100 is obviously a very capable video camera. How many of your customers are using it for filmmaking?

We know some filmmakers are now evaluating the system. As for how many customers are shooting video on the GFX100, we don’t know. But I hope that people are using it for video.

Fujifilm’s new ‘Premista’ line of cine lenses is designed for larger than full-frame imaging circle. These new lenses could become an option for GFX-series video shooters, via an adapter.

Is there potential for a range of Fujinon cine lenses for GF?

We just extended our line of Premista cine glass, which covers an imaging area slightly larger than full-frame. It’s a Vistavision image circle. It may be possible to convert these lenses to the GF mount with an adapter.

The GF line is now three years old – can you tell us how the cameras will evolve into the future?

We have the three styles – the 50R, the more rangefinder style, the 50S, the more SLR-style, and the 100, which is integrated. We really want to keep that kind of differentiation [in the lineup]. That’s the way we’d like to go.

Do you think there’s any potential for a fixed-lens X100-style GF camera?

At the moment we have no plans for a camera like that. We really want to focus on interchangeable lenses. A fixed lens design would mean that we would have to allocate a dedicated lens development team to that kind of camera. So at the moment our priority is to expand the GF lens lineup.

What are your priorities when it comes to expanding the GF lens line?

Our biggest priority is introducing the 80mm F1.7 lens to the lineup. We’re really focused on that kind of lens. But in the future, we’ll continue to listen to what our customers request.

Fujifilm’s GFX range now includes three lines – ‘S’, ‘R’ (shown here) and ‘100’. Mr. Iida tells us that all three will continue to evolve.

What kind of changes or improvements do your GFX 50S and 50R customers want in the next generation of their cameras?

Everybody loves the image quality, the resolution and dynamic range, and compared to traditional medium format cameras they’re easier to use, and easier to carry around. That’s been a lot of the feedback. What they really want us to improve is autofocus speed.

Will future developments address that requirement?

It’s at the top of the list of things we want to address. We will continue to focus on how to improve the autofocus.

Do you see a major difference in where certain types of products sell most, around the world?

When it comes to mid-range and high-end cameras, the sales are pretty even. The US, Europe, and Japan – it’s almost an even spread. Our medium-format market is also pretty even, but there’s a very strong demand for GFX in China. One exception is entry-level models, like the X-A7 and XT-200. Asia is our major region for those cameras.

Has the situation in China affected your sales of GF products?

Yes, because in February all the shops closed. But about 80% of the stores have since reopened. Online sales have remained stable. I don’t know how, but the online channel has been pretty solid.

What are you doing to encourage the growth of a third-party video accessory ecosystem around your imaging products?

Our customers need compatibility with third-party accessories, like gimbals, drones, things like that. We’ve opened pretty much all of our specifications to third-party manufacturers.

So do you actively speak to companies like DJI, Rode, and so on?

Yes, we’re very proactive about talking to them.

Do you plan on opening the X-mount up to third-party lens manufacturers?

Yes. Kenko Tokina actually already announced three lenses for X-mount, with autofocus. Many customers want more lenses, and we want to satisfy that need.

I know last year you were gathering feedback from users on how to refresh the first generation of XF lenses. Can you give us an update?

We are fully aware of the need to refresh our older lenses. At the moment our roadmap does not contain any ‘Mark II’ products but we will be working on new versions of many of our ‘key’ lenses. In some cases we may need a new optical design, or maybe just a mechanical redesign.

How will the XF lens range develop? Will we see more lenses like the XC 35mm F2?

First we need to see how customers react to the XC 35mm F2. If it’s positive, maybe we can consider more lenses of this type. It’s too early to tell at the moment.


Editors’ note: Barnaby Britton

When I spoke to Mr. Iida, it was a few days before Japan declared a state of emergency over the COVID-19 epidemic, when offices in Tokyo were still open and life in the city was still more or less normal. That was a little over a week ago. A lot has changed in the short time since our conversation, which only serves to underline the seriousness of the current crisis.

Beyond the most immediate and important concerns (the global shutdown, and loss of human lives being chief among them) this is of course the last thing that the photo industry needs. Compared to the 2011 earthquake in Japan, and the flooding in Thailand that took place in the same year, the economic impact caused by COVID-19 is likely to be far more serious. It’s already having a profound effect.

Because it’s so diversified, Fujifilm is in a pretty good position compared to some companies

According to Mr. Iida, because it’s so diversified, Fujifilm is in a pretty good position compared to some companies, and the immediate impact of the Chinese shutdown seems to have passed. Less certain – and potentially far more impactful – is the devastating effect on longer-term sales caused by economic disruption in the US, Europe and parts of Asia. If, as seems highly likely, we’re pitched into another global recession, what happens next – after the virus – is anyone’s guess.

For now, Mr. Iida assures us that Fujifilm’s R&D planning remains on track. This is just one of several encouraging messages from our interview. Others include a strong hint at future firmware for the X-T3, and autofocus improvements in the GF lineup. Speaking of which, it looks like the current trifurcation of the GFX line will continue, with the ‘100’ series remaining distinct as an ‘integral’ solution, while the ‘R’ line will maintain the compact, rangefinder-style approach embodied in the GFX 50R.

The X-H line will continue to be developed, and the ‘concept’ of future products will be distinct from the X-T series

Another product line that looks set to continue is X-H. Despite the X-H1’s video capabilities being leapfrogged by the new X-T4, Mr. Iida told me that the X-H line will continue to be developed, and the ‘concept’ of future products will be distinct from the X-T series. It’s unclear exactly what that will look like, but for filmmakers I’m sure this will be welcome news.

It’s also encouraging to hear that Fujifilm is continuing to communicate ‘proactively’ with third-party manufacturers about supporting its products for video. A big part of how Panasonic and Sony have managed to make such major inroads with filmmakers is the ecosystem of accessories which exists around their cameras, and it seems that Fujifilm understands the importance of such support.

The news that Tokina’s upcoming XF-mount lenses will offer autofocus (a detail missing in the press release for those products) is also very positive. This means that Fujifilm is making its mount protocols available for licensing from third-parties which (theoretically) opens up the possibility of compatible optics from the likes of Sigma and Tamron, at some point in the future.

Read more in-depth interviews

Articles: Digital Photography Review (dpreview.com)

 
Comments Off on Fujifilm interview: ‘We will get through this crisis together’

Posted in Uncategorized


How to Use Photoshop and Capture One Pro Together

11 Mar

The post How to Use Photoshop and Capture One Pro Together appeared first on Digital Photography School. It was authored by Darina Kopcok.

using-photoshop-and-capture-one-together

Capture One Pro is a RAW processor with incredible performance and functionality, but it doesn’t completely replace Photoshop.

In order to get the most out of your RAW file, you might want to do as much of your post-processing as possible in Capture One (COP). However, you’ll still need Photoshop for retouching.

COP offers fantastic color management and adjustment tools, but Photoshop allows you to work on the individual pixels in a file via cleaning techniques, cloning, and layers. Photoshop also allows you to create composites.

The process of using Photoshop and Capture One together has been automated since version 10, just like it is between Lightroom and Photoshop.

Instead of having to manually open an exported file into Photoshop and then reimport it back into the Catalog or Session, your file can quickly and easily make a “round-trip”, starting in Capture One.

How to Use Photoshop and Capture One Pro Together

How do Capture One Pro and Photoshop differ?

There is a lot of conversation around which program is better – Capture One or Photoshop?  But there’s not much point in comparing the two programs in this way because they’re very different. They’re meant to do different things, as Lightroom and Photoshop are also meant to do different things.

Photoshop is the standard for image manipulation across various disciplines, such as graphic design, graphic art, and, of course, photography. It’s a powerful program for retouching, composting, creating website mockups, and adding effects to images.

On the other hand, Capture One is a RAW editor and asset management tool, such as Lightroom and Camera RAW. It is made by Phase One, manufacturers of medium format cameras.

Because Photoshop and Capture One have their strengths in different areas, you’ll get the most functionality out of using them together. Some photographers and retouchers prefer to focus on Photoshop alone, which is certainly a viable choice. However, there are benefits to using Capture One as an additional software program. It has powerful masking, layer, and color tools.

One of these benefits of using Capture One is the advanced tethering capabilities that the software offers.

If you’re a studio photographer, or otherwise find shooting tethered to a computer indispensable to your workflow, you’ll find Capture One outstanding in this regard.

It allows you to use Live View, artwork overlays, and also offers stability and lightning speed. Capture One technology uses direct access to the camera, which enables Live View and advanced controls. Other tethering programs copy files such as camera proprietary programs save the captures to an SD card and call it “tethered capture.” However, it’s actually a “file copy.”

The steps for using Capture One and Photoshop together

Your photo can make a “round trip” in Capture One and Photoshop.

You can open the image in Photoshop via Capture One, retouch it, and then send it back to Capture One. Lightroom and Photoshop work in tandem the same way.

With Capture One, you can finalize your image within the program and send it to an external editor, like Photoshop.

Capture One is an asset manager, so you’ll probably want to put it back alongside your original file in the Catalog or Session where it’s stored.

You can then refine it further, or create Variants (like Virtual Copies) in black & white, color grading, etc. if you choose.

To initiate the round-trip process, follow these steps:

1. Start with the Basic Tab:

Right-click on the image itself or on the thumbnail. This will initiate a dropdown menu. Choose >Edit With. This will bring up a Dialog Box.

Do not choose >Open With. This function is just for opening up the image in another program, while >Edit With will create a new file and place it next to the RAW file.

How to Use Photoshop and Capture One Pro Together

If you don’t see Photoshop as an option in the dropdown, just click on >Other and navigate to Photoshop in your applications and click on it.

Photoshop and Capture One

In the Dialog box, choose >PSD and your desired bit depth – 8-bit or 16-bit.

How to Use Photoshop and Capture One Pro Together

Choose the desired color profile – sRGB for web use only, or Adobe RGB.

Choose 100% for Scale to the image is full-sized. 

2. Under the Adjustment Tab:

Choose to ignore crop, if desired.

Add additional sharpening if you want to do so at this stage.

How to Use Photoshop and Capture One Pro Together

3. Under the Metadata tab:

Check off any metadata parameters you want included in the file.

How to Use Photoshop and Capture One Pro Together

Click on >Edit Variants. The image will open up in Photoshop.

“Edit Variants” refers to a single file, instead of batch processing.

Once your image is open in Photoshop, do your retouching as you normally would.

When you’re ready to take your image back into Capture One, close the file and hit >Save.

Note that Maximize Compatibility must be checked to work properly.

How to Use Photoshop and Capture One Pro Together

Now when you go back to Capture One, you’ll see your PSD file in the filmstrip.

From here, you can make new variants, which work similarly to Lightroom Virtual Copies. You can convert your image to black & white or make variations with different color grading, such as warmer or cooler shadows. This can be handy for showing a client some variations on your work to find out what they would prefer.

How to Use Photoshop and Capture One Pro Together

Conclusion

Users of Lightroom are often hesitant about making the switch to Capture One or other RAW processors outside of the Adobe suite because of the learning curve associated with a new piece of software. They also worry about having to alter a workflow they may have spent years refining.

If this describes you, never fear. As you can see, your images can make the round trip through Capture One and Photoshop just as seamlessly as they do using Lightroom.

And If this is one of the major reasons you’ve been holding off on a change, you may want to download the free 30-day trial to Capture One and test it for yourself. The best RAW processor is the one that is best for your needs.

Have you tried using Photoshop and Capture One together? What are your experiences and thoughts on it? Share them with us in the comments!

The post How to Use Photoshop and Capture One Pro Together appeared first on Digital Photography School. It was authored by Darina Kopcok.


Digital Photography School

 
Comments Off on How to Use Photoshop and Capture One Pro Together

Posted in Photography


Do’s and Don’ts of Putting Together a Photography Portfolio

30 Jul

The post Do’s and Don’ts of Putting Together a Photography Portfolio appeared first on Digital Photography School. It was authored by Ana Mireles.

Are you having trouble landing a job? Do you keep showing your work but are not getting any clients? Maybe it’s time to review your photography portfolio. Whether you’re doing a digital or printed portfolio, here are some do’s and don’ts to improve the way you present your photography.

Travel photography example portfolio

Putting together a portfolio

It doesn’t matter what kind of photographer you are, a good portfolio is the most important tool you have to secure a job. The first thing to understand is that putting together a bunch of nice pictures isn’t enough. Your photography portfolio should be a sample of your work that showcases your technical abilities as well as your personal style.

Flower and nature portfolio

DON’T put watermarks

Let’s face it, if someone wants to steal your photograph, they will find a way to do so. A watermark can be cropped or deleted. Instead, it will make it more difficult for the viewer to appreciate your image. Also, watermarks give an amateurish look to your portfolio as a whole. See at the difference:

putting-together-a-portfolio

Watermarks can ruin a photo and don’t really protect your rights

To legally protect your images, you can have them copyrighted. To get familiar with this concept, read ImageRights – Finding and Pursuing Copyright Infringement. Another safety measure is to never publish or hand out high-resolution images. For this, I recommend my previous article on How to Understand Pixels, Resolution, and Resize your Images in Photoshop Correctly.

DON’T stick to one portfolio

Another big mistake is to collect all of your best photos and display them in one portfolio. You may think this shows quality, as they are a “best-of,” but it can make you look like a master of none. It is also a waste of time for your client. They want to see relevant examples that show how you would do their job, not how good you may be at other things.

You can specialize in different kind of photography

Take these two photos, for example – they don’t even look good together. And let’s face it, someone who needs a food photographer, doesn’t really care about how I can photograph a street fair and vice-versa. If you’re not convinced about limiting your practice, have a look at these 5 Things to Consider Before Deciding to Specialize or Not in Your Photography.

DO feature what you’re selling

I was talking before about the importance of having different portfolios. This means that each one should display a different specialty that you offer. It’s always important to be coherent and properly organize your work. For example, a portrait portfolio shouldn’t just include any kind of photography that features people. Let me illustrate this:

Different kinds of photography. Photography specialization

Take the two photos above, the one on the left comes from a photo-shoot I did for the press kit of a theater play. The one on the right is a behind-the-scenes job I was doing for a short movie. If I’m preparing a portfolio for a movie or theater producer I can include both. If I’m preparing a portrait portfolio then I shouldn’t include the one on the right.

DO ask for help

It’s always helpful to ask for opinions once you’ve shortlisted the images you want to use. If you can reach out to a colleague or an expert it would be great, but if you don’t, at least ask a friend. Often we have an emotional attachment to a photo we took that is actually not great. An external point of view can help you sort out your best images.

putting-together-a-photography-portfolio

Try putting two similar images from the same subject and asking them which one they prefer. A friend can also help you decide if you are putting too many or too few images in your portfolio. Keep in mind that you should never include something that is not good enough just to reach a certain number. Also, don’t overdo it – editors are busy people and have many portfolios to review.

Conclusion

To sum up, there is no specific formula for putting together a photography portfolio that is great, but I hope you found these tips useful and time-saving. DO remember that the most important thing is for you to have a strong body of work.

If you still need to work on that, here are some great readings to help you out:

  • How To Build A Portfolio Without Clients.
  • 6 Easy Photography Techniques to Diversify Your Portfolio.
  • How to Use a Photography Project to Build Your Portfolio.


putting-together-a-photography-portfolio

The post Do’s and Don’ts of Putting Together a Photography Portfolio appeared first on Digital Photography School. It was authored by Ana Mireles.


Digital Photography School

 
Comments Off on Do’s and Don’ts of Putting Together a Photography Portfolio

Posted in Photography


How to Use Shutter Speed and Aperture Together When Using Manual Mode

18 Oct

When you’re just starting out as a photographer, one of the biggest challenges can be using the correct shutter speed and aperture values. Shooting a correctly exposed photo in manual mode is an amazing feeling. But unless you know the relationship between shutter speed and aperture it may not happen very often.

In this article I’ll talk about how to use the shutter speed and aperture values efficiently to get properly exposed photos.

Note: To get full control of your camera’s shutter speed and aperture values you need to put it in Manual Mode.

What happens when you adjust the aperture value

When you increase the aperture value the aperture opening inside the lens gets smaller, reducing the amount of light that can enter the camera. Similarly, when you decrease the aperture value the opening gets bigger, allowing more more light to enter the camera.

Here’s an example to help you understand how changing the aperture value affects the shutter speed.

Let’s say you’re using a 24-70mm f/2.8 lens with a default aperture value of f/8. At a shutter speed of 1/200th of a second your camera will give you the correct exposure.

EXIF: f/8, 1/200th sec, ISO 100

Now you want a shallower depth of field (more blur effect), so you reduce the aperture value to f/2.8. Because you’ve reduced the aperture value by three stops, the aperture opening is now letting three stops more of light into the camera. The result? An overexposed image.

If you reduce the aperture value, you must increase the shutter speed by the same number of f-stops to compensate. Similarly, if you increase the aperture value, you must slow down the shutter speed by the same number of f-stops.

In this example, you’ve reduced the aperture value by three stops. So to get the correct exposure at f/2.8 you must increase the shutter speed by three stops to 1/1600th of a second.

EXIF: f/2.8, 1/1600th sec, ISO 100

Another example might be if you’re shooting a landscape. This time you want a deep depth of field, so you choose an aperture value of f/16. You’ve increased the aperture value by two stops (from f/8 to f/16), so you’re letting two stops less of light inside the camera. At a shutter speed of 1/200th sec this give you an underexposed photo.

Underexposed image at f/16, 1/200th sec, ISO 100

To get the correct exposure, you need to slow down the shutter speed by two stops to 1/50th of a second. With the aperture value two stops higher (f/16) and the shutter speed two stops lower (1/50th sec) your photo will be perfectly exposed just as it was at f/8 and 1/200th sec.

What happens when you adjust the shutter speed

When you increase the shutter speed the camera shutter opens and closes more quickly, reducing the amount of light that enters the camera. Similarly, when you reduce the shutter speed more light enters the camera.

Starting with the same base camera setting as before (f/8 at 1/200th sec), let’s see how changing the shutter speed affects the aperture value.

Let’s say you’re a wildlife photography, and you want to take photos of a flying bird. To avoid any blurring you’d need to increase to 1/800 sec. You’ve increased the shutter speed by two stops, and so you have two stops less of light entering the camera sensor. At f/8 this would give you an underexposed image.

Because you’ve increase the shutter speed by two stops to 1/800th sec, you must also reduce the aperture value by two stops to f/4 to get the same correct exposure you had at the f/8 and 1/200th of a second you started with.

Or perhaps you intentionally want to capture a panning shot, and s reduce the shutter speed to 1/50 sec to get the effect you want. Reducing the shutter speed by four stops (from 1/800 sec to 1/50 sec) means you’re letting in four stops more of light into the camera. And at f/8, that would give you an overexposed image.

To get the correct exposure you’d need to increase the aperture value by four stops to f/32.

By remembering these examples when you’re shooting in manual mode, you should end up with far more photos that are correctly exposed.

The post How to Use Shutter Speed and Aperture Together When Using Manual Mode appeared first on Digital Photography School.


Digital Photography School

 
Comments Off on How to Use Shutter Speed and Aperture Together When Using Manual Mode

Posted in Photography


Simplified DIY: New Tool-Free IKEA Furniture Snaps Together in Minutes

15 Mar

[ By WebUrbanist in Design & Furniture & Decor. ]

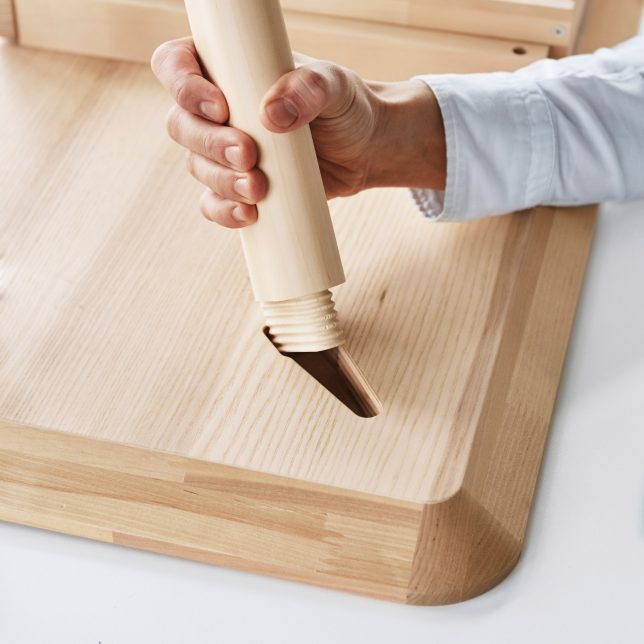
wedge joint

Buying a piece of IKEA furniture is generally a bit of a gamble in terms of potential complexity, but these clever joints are designed to radically simplify and speed up the process across the board.

The so-called “wedge dowel” makes it possible to put together wood products without bolts or screws, hex keys or screwdrivers. The ribbed connector and associated slot lets large objects remain flat-packed for shipping then fit together for long-term durability (without any glue or loss in structural integrity).

furniture set

Historically, some IKEA items have come pre-assembled but at a size that makes them hard to transport. Other smaller items can pack flat but demand a dizzying array of little parts and associated tools. This single joint is letting the company replace dozens of metal fittings for certain sizable items.

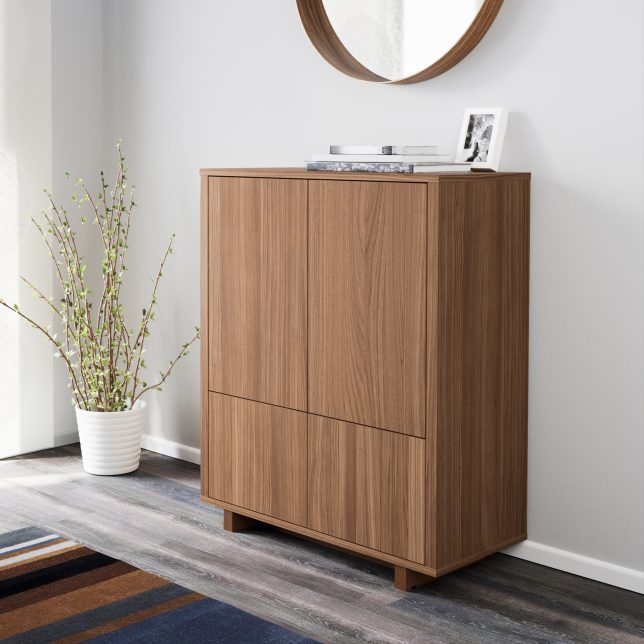
stockholm cabinet

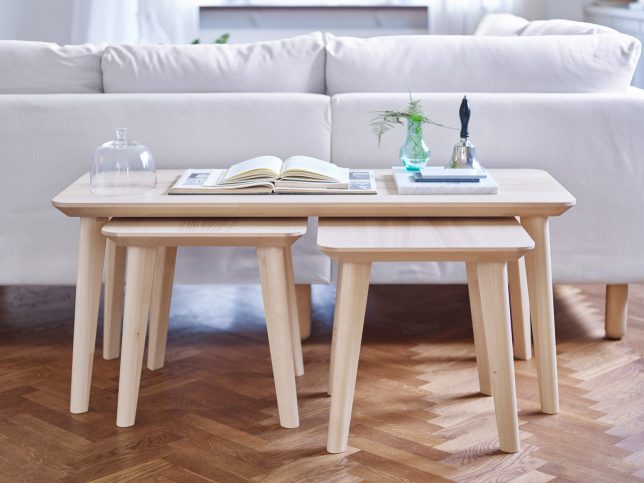
The company first started using the dowel system in its Stockholm cabinet series (above) as a test, but now plans to roll it out across its furniture lines, moving next to the Lisabo table. What used to take a half hour can now be connected with these wedge joints in three minutes.

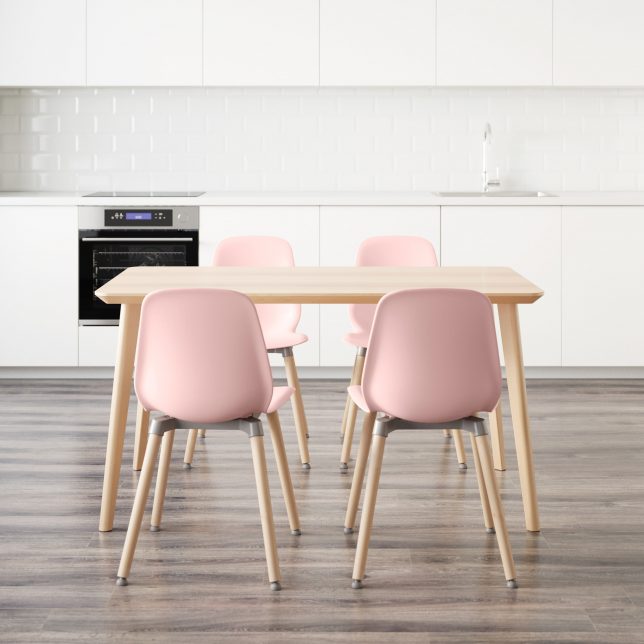
dining set

And it is not just a function of assembly: these joints make it easier to take things apart again, making them particularly useful in a day and age where people move frequently for work and other reasons. Some of their furniture lines are expected to adopt the wedge joint entirely.

Share on Facebook


[ By WebUrbanist in Design & Furniture & Decor. ]

[ WebUrbanist | Archives | Galleries | Privacy | TOS ]


WebUrbanist

 
Comments Off on Simplified DIY: New Tool-Free IKEA Furniture Snaps Together in Minutes

Posted in Creativity


Cut Grass: Sutured Landscape Installation Stitches Open Lawn Back Together

27 Nov

[ By WebUrbanist in Art & Installation & Sound. ]

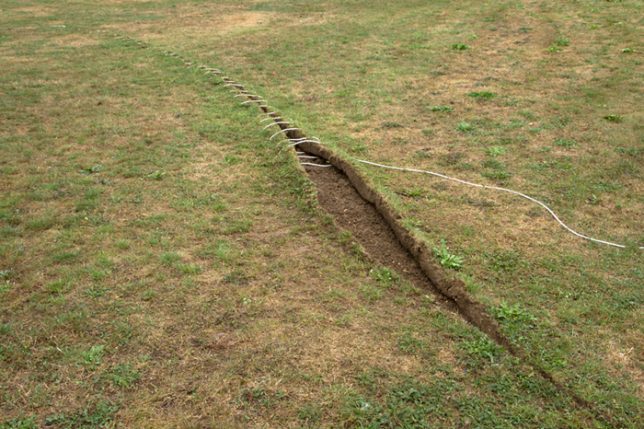
ground-stitching-art

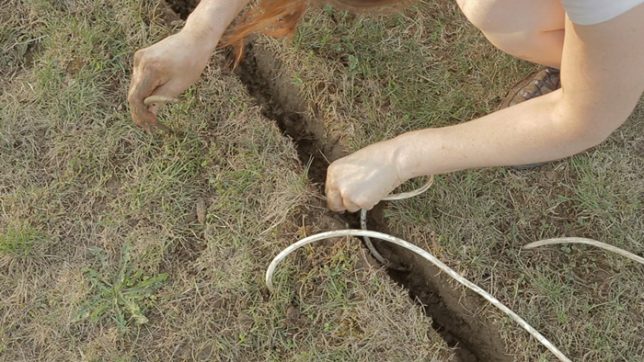
Ground Operation is a conceptually simple earthwork: an incision made in a grassy landscape is pealed back then stitched back together, much like an open wound after an injury or surgery.

earthwork-stitching-ground

French artist Estelle Chrétien sliced open the ground then wrapped electrical cables through it like shoelaces, either in the process of being tied or becoming undone (a mystery left for the observer to unravel, as it were). Her use of cabling is also very intentional, meant to raise questions about what we put into the Earth and how we use it — a surfacing of the secret infrastructure that lurks below.

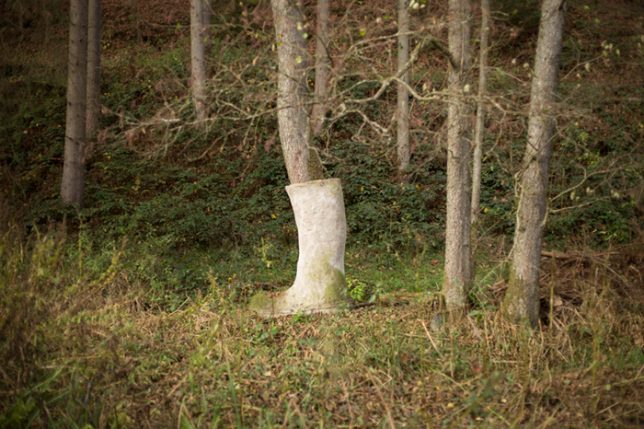
boot-on-tree

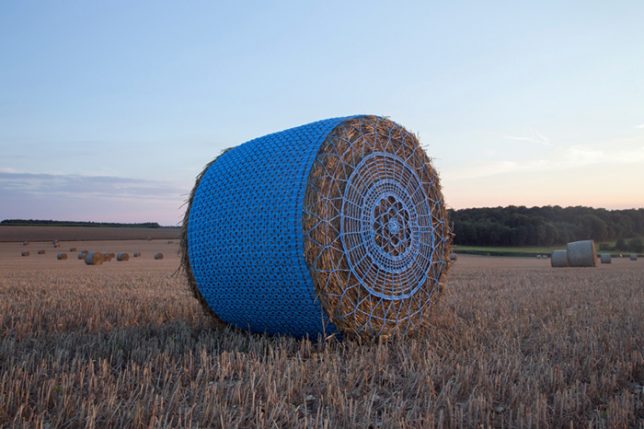
Similar techniques, themes and materials can be found in other works by the same artist, who has wrapped hay bales in crocheted covers and put boots on trees.

crocheted-hay-bale

“While in Portugal, I learned how to crochet, and I had this piece of blue agricultural baler twine in a box and the idea of [making a hay bale wrap] came to me,” she says. “When I went back to France, I made it and put it in a field just before farmers stored their bales. I liked working in the middle of a barley field, but most of the work was made at home, so I decided to work outside with my hands more often after that.”

Share on Facebook


[ By WebUrbanist in Art & Installation & Sound. ]

[ WebUrbanist | Archives | Galleries | Privacy | TOS ]


WebUrbanist

 
Comments Off on Cut Grass: Sutured Landscape Installation Stitches Open Lawn Back Together

Posted in Creativity


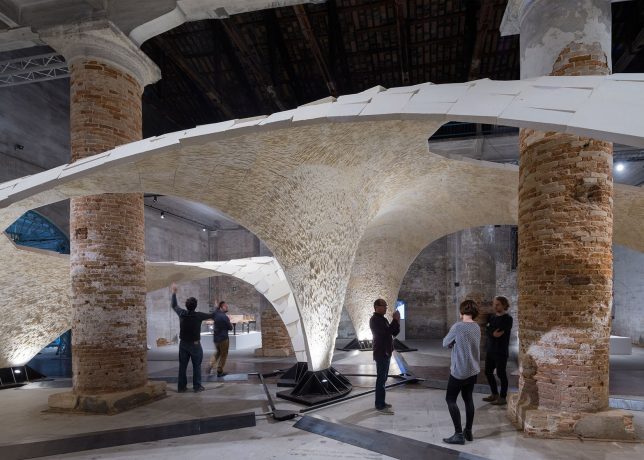
Armadillo Vault: Delicate Stone Canopy Held Together by Compression

02 Jun

[ By SA Rogers in Architecture & Public & Institutional. ]

stone canopy 1

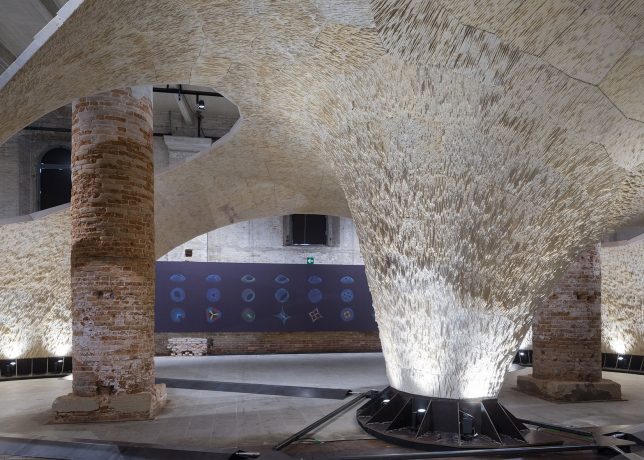
Not a drop of glue or any other adhesive holds together the delicate, 2-inch-thick limestone tiles that make up this airy canopy, which billows into the vaulted ceilings of the Arsenale di Venezia at the 15th annual Venice Architecture Biennale. Conceived by Block Research Group and presented by ETH Zurich, the ‘Armadillo Vault’ is a temporary custom-built installation showing off the surprising versatility of an unyielding material that’s been an architectural mainstay for millennia. Compression keeps all 399 individually-cut, unreinforced stones in place as they stretch across the cavernous space.

stone canopy 2

stone canopy 3

The centerpiece of an installation entitled ‘Beyond Bending – Learning from the past to design a better future,’ the Armadillo Vault aims to show the world that digital design and fabrication methods can go hand in hand with humble, ancient building materials like earth and stone. Other components on display include four innovative vaulted floor systems and a series of graphical force diagrams showing how the stones fit together.

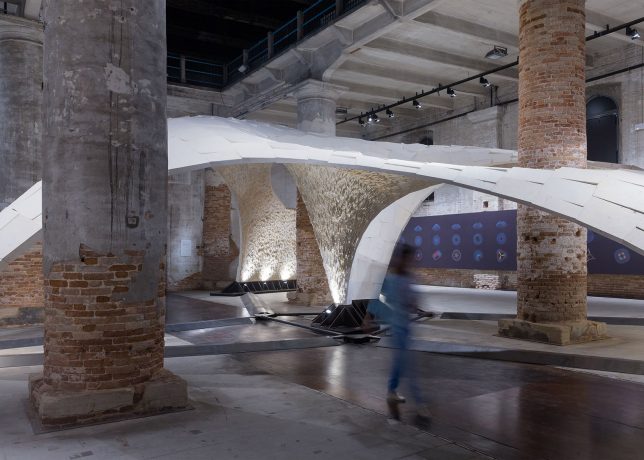
stone canopy 4

stone canopy 5

Spanning over 52 feet through the Arsenale, the canopy was initially manufactured and assembled in Texas before being disassembled and shipped to Venice, with master stonemasons tasked with setting it into place on-site over a period of two weeks. The precision of the puzzle-like assembly to hold up all that weight with very few supports is a result of mathematically analyzing the structure to control compressive forces.

stone canopy 6


Check out how the structure was designed and installed in this video from Block Research Group, including computer models that show off the tessellation and Voussoir Geometry used to design the tile assembly.

Share on Facebook


[ By SA Rogers in Architecture & Public & Institutional. ]

[ WebUrbanist | Archives | Galleries | Privacy | TOS ]


WebUrbanist

 
Comments Off on Armadillo Vault: Delicate Stone Canopy Held Together by Compression

Posted in Creativity


Drawn Together: The Evolution of Architectural Scale Figures

18 May

[ By WebUrbanist in Art & Drawing & Digital. ]

architectural selfies

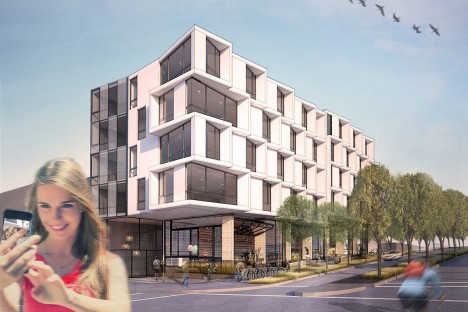
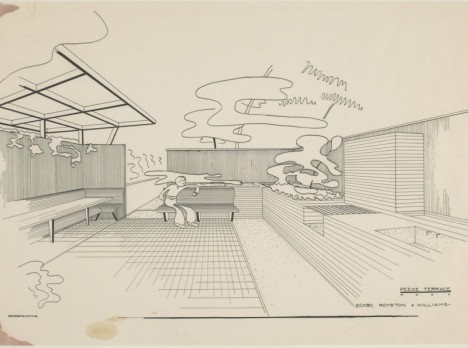
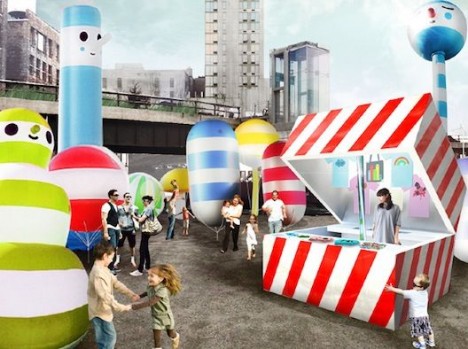
As they evolved, illustrated figures in architecture (sometimes called ‘scalies‘) have grown to have more personality, color and life, serving as more than a means to measure relative distances, heights and widths in renderings.

architectural scalies figure void

abstract scales

Historically, architectural drawings rarely featured people and, when they did, these were simplified constructs, often just outlines or silhouettes, designed simply to give the viewer a sense of scale.

scalies from gizmodo

scalies

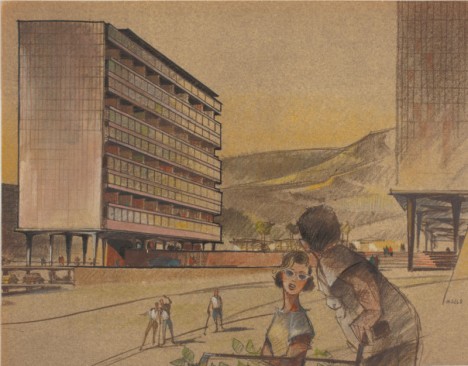
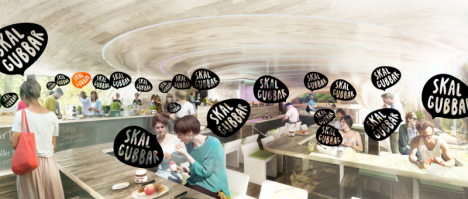
Over time, start to see figures sitting in furniture, holding books (or recently: mobile devices), groups interacting and other strategies to bring these two-dimensional people to life, and the architectural scenes they inhabit along with them.

scalies in new rednerings

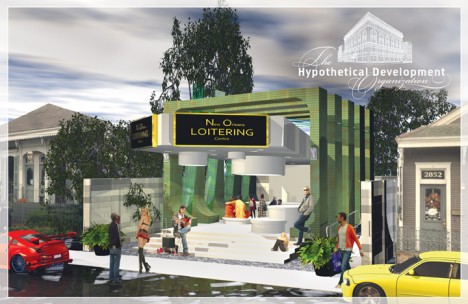
Their evolution is not accidental: scalies are often used with very explicit aims, from trying to give people a sense of the use that will take place in a finished building or space to conveying a broader vision of its popularity. Developers, for instance, may want to sell investors on how well their project will do financially, and thus pack drawings with figures to create that impression.

loitering scalies

On the flip side, architectural students may take things to opposite extremes, setting lewd, crude or generally absurd scenes for shock value and collegial entertainment.

scalies package

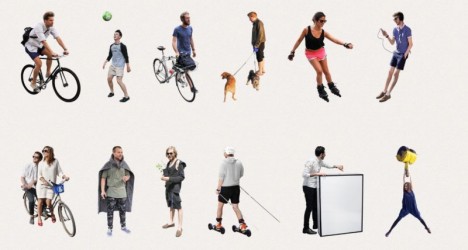
While some architects simply photo-edit their own scalies out of various images, there are professional makers as well, who take pictures against green screens and sell them in bundles, like “100 Business People” or “100 Casual People.” With the rise of 3D modeling, some companies are starting to capture and sell three-dimensional figures as well.

scalies in extreme environmen ts

sad keanu architecture rendering

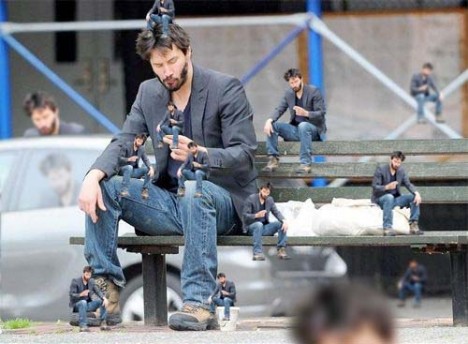
Increasingly, other ‘support’ objects have coming into play, from cars to carried accessories. Some designers go out of their way to make scalies stand out, using scantily-clad models, impossible characters (like dinosaurs) or famous figures (like a sad Keanu).

scalies example

Taking the larger view, scalies show us a great deal about times, places and cultural norms; in the mid-1900s, you find men golfing and women in kitchens, dressed (of course) in period attire. Today is no different, but we notice the cultural cues less since these are now our times and places (Images via Gizmodo, Curbed, The New York Times and DesignObserver).

Share on Facebook


[ By WebUrbanist in Art & Drawing & Digital. ]

[ WebUrbanist | Archives | Galleries | Privacy | TOS ]


WebUrbanist

 
Comments Off on Drawn Together: The Evolution of Architectural Scale Figures

Posted in Creativity


Better together: A photographer’s trip to Southeast Asia with a limbless man

31 Jan

$ (document).ready(function() { SampleGalleryV2({“containerId”:”embeddedSampleGallery_8749851343″,”galleryId”:”8749851343″,”isEmbeddedWidget”:true,”selectedImageIndex”:0,”startInCommentsView”:false,”isMobile”:false}) });

‘If I Can…’ is the motto Chris Koch lives by. Born without arms and legs, the Canadian travels as a motivational speaker, challenging his audiences to live their lives to their greatest potential and push beyond difficulties. Portrait and wedding photographer Anna Tenne happened to meet Chris before he gave a presentation in her town of Coonabarabran, Australia. When Chris mentioned to her it was a lifelong goal to visit Southeast Asia, a spark ignited and eventually inspired the two fast friends to pack their bags and head for Thailand.

Tenne’s aim was to help Chris spread his message while she photographed the journey. But what she didn’t expect, as she tells Resource Travel, was how much the trip would teach and inspire her. Chris’ contagious smile is evident in her photos, and the positive impact he has on the people he meets is plain to see. Take a look at some of her photos here and head to Resource Travel to read the full story.

Articles: Digital Photography Review (dpreview.com)

 
Comments Off on Better together: A photographer’s trip to Southeast Asia with a limbless man

Posted in Uncategorized