RSS
 

Posts Tagged ‘Thoughts’

My Thoughts on the SmugMug Flickr Acquisition

21 Apr

Disclosure: I know people and am friends with people who work at both SmugMug and Flickr.

Earlier today we learned that the photo sharing site Flickr has been acquired by the photo sharing site SmugMug. Terms of the acquisition were not disclosed. Flickr was purchased by Yahoo back in the early days of the internet in 2005 for probably somewhere around $ 40 million (give or take $ 10 million). Yahoo managed Flickr for many years, but more recently Yahoo’s core holdings were sold off last year to Verizon. Verizon folded Flickr into a new division called Oath which was made up of various Yahoo and AOL assets (another Verizon acquisition) run by ex-Google executive Tim Armstrong. Now Verizon/Oath has sold Flickr to SmugMug.

As They Pulled You Out Of The Oxygen Tent You Asked For The Latest Party
Flickr Fiesta party celebrating Yahoo acquisition in 2005 at Yahoo Campus.
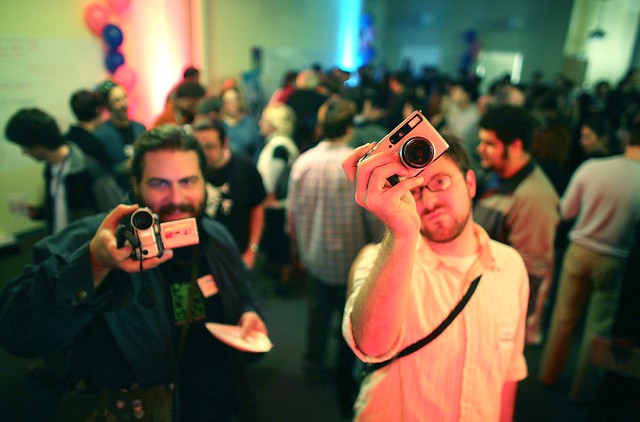
Flickr Turns 2 (12)
Flickr Turns 2 Party, San Francisco, 2006.

As someone who joined Flickr back in 2003 pre-Yahoo and has been on the site pretty much daily since then, I thought I’d share my own thoughts on what this acquisition might mean for Flickr users and the larger Flickr community.

First off, I have to say that I think that today’s news is *very* good for Flickr users and the Flickr community. While time will tell how this acquisition goes, I have much more faith in SmugMug running Flickr than I do Verizon.

Before getting into the particulars about why I think this is a good fit, I think you have to take a general look at the types of companies Yahoo/Verizon/Oath were/are and the type of company SmugMug is. Yahoo/Verizon/Oath like Google and Facebook are largely advertising companies. These companies offer you free content and use your personal data to advertise at you. One of the things that I always liked about Flickr was that advertising was largely secondary to paid subscription accounts. Sure, Flickr had a free account, but at least as it was initially designed, the free account (which limited you to only seeing your last 200 photos) was really more of a trial for the real thing, Flickr Pro, for which you paid a subscription.

SmugMug has always been a profitable paid photo sharing service. They’ve never had a free option. This has served them well and has kept them profitable. At the same time it is hard to get people to pay for things on the internet so this in some ways limited their user growth compared to Flickr and other services offering a free option.

My own view is that I think people are waking up to the fact that “free” on the internet doesn’t really mean exactly free. The age old adage of if you are not paying for the product, you are the product is becoming clearer and clearer, even to the point of Mark Zuckerberg having to head on up to Capitol Hill and try to explain how all this social media stuff works to Senators and Congress.

Now, does this mean that SmugMug is going to kill the free Flickr account? Absolutely not. But I do think that they might try to nudge people in the direction of paid Pro — which I also think is smart and ultimately more sustainable than simply giving everyone a free terabyte. I LOVE that I have a complete ad free experience for my own use of Flickr AND also for the users who browse my pages of photos. I will happily continue paying for it indefinitely (assuming Flickr continues grandfathering my unlimited storage Pro account). I also think that SmugMug will likely be much better for Flickr from a privacy standpoint as well without having to worry about how to sell off our private information because we pay.

Ivan Makarov, SmugMug HQ
Ivan Makarov, one of my early Flickr contacts (now SmugMug’s VP of Finance) posing in front of a giant wall print at SmugMug’s Mountain View office.

In buying Flickr SmugMug more than anything is buying a community. I think that they are going to be very careful not to disrupt this community and look for ways to grow it thoughtfully. Having known the MacAskills (the family that owns SmugMug) for many years, one thing I can say for certain is that they LOVE photography and photographers. If you ever get a chance to visit their offices in Mountain View do it. What you will find is wall after wall covered with the biggest prints you have ever seen in your life. These are people who are passionate about photography, not advertising.
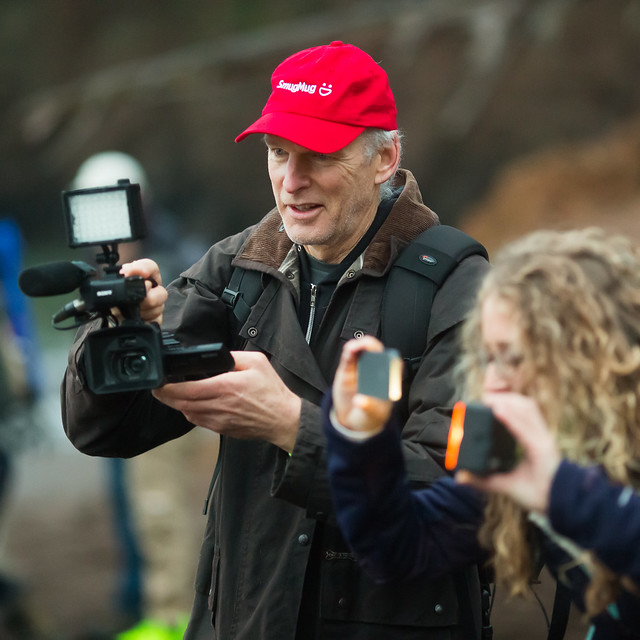
Baldy Behind the Camera
Chris “Baldy” MacAskill on a SmugMug photowalk in 2013
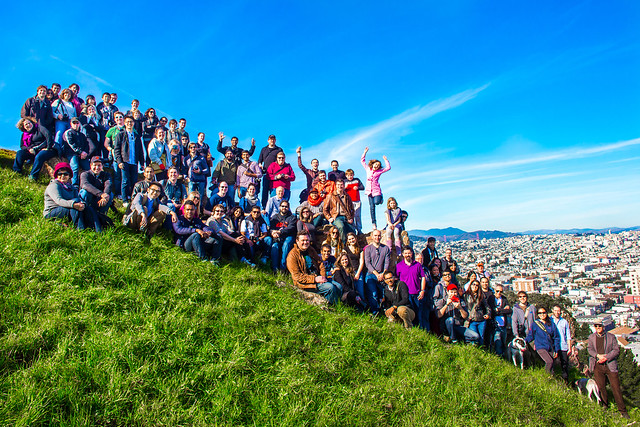
Flickr Over San Francisco
Flickr Photowalk, Bernal Hill, 2013

For SmugMug I think what is probably most exciting is that they are getting a very large community of photographers by purchasing Flickr. I think that this will allow them to do even more with community, photowalks, meetups, etc. They will need to make sure Flickr is profitable (and it will be) but they will have a much larger group to build a bigger and stronger community with. While Google+ sort of became a place for the photographic community for a bit, before Google largely abandoned it, there really is not a good place for a larger community of photographers today and I think with the acquisition of Flickr, SmugMug hopes that it can build this and I think they have a pretty good chance at doing it.

I think the other thing that SmugMug owning Flickr will do is that it will allow them to be much more nimble in terms of hacking on and developing the site. Big organizations (like Yahoo and Verizon) have layers of bureaucracy that sometimes make things difficult to get done. Small organizations, by contrast, can move much more quickly. While I don’t expect any immediate changes to Flickr, I think that going forward it will improve more rapidly. I also think it’s great that from what I can tell the entire team at Flickr is being retained.

Mostly what I’ve seen online since the acquisition was announced earlier today has been a positive response. Flickr co-Founders Stewart Butterfield and Caterina Fake have posted positive tweets on the acquisition as well.

As far as I can tell from looking at the new SmugMug/Flickr TOS everything looks pretty much for things to be business as usual at Flickr for the immediate future.

SmugMug and Flickr will be run as two different sites/properties.

Since Flickr is one of the few sites on the web that allows moderated adult content, I did wonder how SmugMug would treat that — at least per the current TOS it looks like that is going to be handled as it always has been at Flickr. Make sure you moderate your adult content, keeping it away from the kids, and it’s allowed.

If you want to read more in depth at what this might mean for Flickr users going forward I’d point you to a thread in the Flickr Help Forum where more details are provided and where the community is currently reacting to today’s news.

A big congrats to both the Flickr and SmugMug teams. I’m looking forward to being an active user on Flickr for many years ahead and am looking forward to all the ways you will continue to improve both sites.

You can find me on Flickr here.


Thomas Hawk Digital Connection

 
Comments Off on My Thoughts on the SmugMug Flickr Acquisition

Posted in Photography


Thoughts and Field Test of the Rokinon 12mm f/2.0 Wide-Angle Lens

05 Mar

If you’re a mirrorless camera shooter on the market for a fast wide-angle lens, look no further than the Rokinon 12mm f/2.0 lens. While this lens is indeed manufactured by a third party gear company, Samyang of Korea, don’t let brand names fool you. This unique little lens gives you an ultra wide point of view and is relatively inexpensive.

Read on for more!

Rokinon 12mm f/2.0 lens details

Introduced in 2014, the Rokinon 12mm f/2.0 lens is special because it is designed specifically for mirrorless cameras. With its maximum f/2.0 aperture, it is noted as the fasted 12mm lens for APS-C (crop) sensor cameras. At this time, the Rokinon 12mm f/2.0 comes in either black or silver from about $ 299-399.00. Lens mounts exist for the following mirrorless cameras:

Thoughts and Field Test of the Rokinon 12mm f/2.0 Lens

  • Sony E-mount
  • Fuji X-mount
  • Canon M
  • Samsung NX
  • Micro four thirds (Olympus and Panasonic)

The Rokinon 12mm f/2.0 is an APS-C lens, meaning it was designed to provide a 35mm (full frame) equivalent focal length of 18mm. Although specifically designed for crop sensors, this lens can be used on full frame sensor and micro 4/3 cameras, but with a different effective focal length.

The only catch is that this is a Manual Focus only lens, but that isn’t necessarily a bad thing. More on the lens focusing below.

NOTE: Check your manual – for some camera models you may need to set it to “Fire Without Lens” as is the case with Fuji X cameras. As the camera and lens do not talk, the camera needs to know it’s okay to take a photo.

Lens build

Considering this is a relatively inexpensive lens, it’s no surprise that much of its build is plastic. The aperture ring, manual focusing ring, and 67mm filter ring are all made of plastic. Thankfully, the lens mount is metallic. Despite being made mostly of plastic, the lens has a really solid feel and it weighs in at 0.47 lbs (215 g).

Thoughts and Field Test of the Rokinon 12mm f/2.0 Wide-Angle Lens

Image quality

This lens performs surprisingly well for its size and price. The center of the Rokinon 12mm is very sharp at f/2.0, peaking at around f/5.6. While the corners can at times be rather soft at f/2.0, they are quite sharp at f/4.0.

Vignetting, or light falloff, is visible when shooting at just about any aperture, but it is especially strong when shooting at f/2.0. Despite being an ultra wide angle lens, there is very little distortion in the images.

When to use this lens

Given its 12mm focal length and fast f/2.0 aperture, the Rokinon 12mm is best suited for real estate, architecture, and landscape photography. Perhaps the most popular reason why photographers buy this lens is to shoot the stars. That was my reason for purchasing it, and so far it has not disappointed.

Thoughts and Field Test of the Rokinon 12mm f/2.0 Wide-Angle Lens

Manual Focusing Tips

Probably the biggest challenge about shooting with the Rokinon 12mm f/2.0 is getting used to shooting with its manual focus settings. Personally, this was both the very first third-party lens, and the very first manual focus lens I’ve ever purchased.

If you’ve used Rokinon lenses or manual focus lenses, then all of these observations may not apply. But if you’re also new to Rokinon and manual focusing, you’ll probably relate to these challenges.

1. Practice, practice, practice

The Rokinon 12mm has two plastic rings that you must toggle in order to set your own aperture and focus. Both rings rotate pretty smoothly. There’s no way to control aperture or focus via your camera body, and this can be a big adjustment for some people.

The best way to overcome this challenge is practice. You’ll get used to it, eventually.

2. Turn on Focus Peaking

Thoughts and Field Test of the Rokinon 12mm f/2.0 Wide-Angle Lens

Focus peaking in action on the Sony a6300

While manual focusing a lens might sound intimidating, many mirrorless cameras are equipped with features that help you out tremendously. One such feature is focus peaking.

This focusing aid can be viewed when shooting in Live View or with an electronic viewfinder. When enabled, focus peaking places colored highlights on the in-focus edges of your image. It is a huge help to making sure your manual focus lens is focused on the right places.

3. Use the Focus Magnifier

Thoughts and Field Test of the Rokinon 12mm f/2.0 Wide-Angle Lens

Another way to ensure accurate focus with a manual focus lens is to enable your camera’s focus magnification system if it exists for your model. For Sony cameras, this feature is called Focus Magnifier, and it enables you to magnify your screen four times. This helps you really nail your focus.

In Conclusion

Rokinon 12mm wide angle lens

Overall, the Rokinon 12mm f/2.0 wide-angle is a compact, relatively cheap lens that is a great addition to any mirrorless shooter’s gear kit. It delivers superb photos without adding too much bulk or breaking the bank.

Sample Photos

Rokinon 12mm wide angle lens

Rokinon 12mm wide angle lens

Rokinon 12mm wide angle lens

Rokinon 12mm wide angle lens

The post Thoughts and Field Test of the Rokinon 12mm f/2.0 Wide-Angle Lens by Suzi Pratt appeared first on Digital Photography School.


Digital Photography School

 
Comments Off on Thoughts and Field Test of the Rokinon 12mm f/2.0 Wide-Angle Lens

Posted in Photography


Thoughts on YouTube TV

04 Feb

YouTubeTV

I’m currently on day 3 of my 7-day free trial with YouTube TV and I’m very torn about what to do and if I should continue it or not. I think that the only way to justify the $ 35/month charge is if I actually use it to cut the cord with Comcast for my TV content.

Pros

1. I *LOVE* that YouTube TV is now available on Apple TV. This is my biggest beef with Comcast. Because Comcast wants to sell you dumb cable boxes at $ 10/month on all your TVs, they make using Apple TV very difficult. Not only does Comcast not have a TV app for Apple TV (even though they falsely advertise watch TV anywhere at anytime) but they make you reauthenticate over and over again on all the individual content apps from people like CNN, CNBC, HBO, Showtime, etc. Having to reauthenticate over and over and over again is a huge pain. At present I’ve got 7 Apple TVs in my home and it would be nice to watch live tv on every one of them.

2. I could get rid of the ugly Comcast box that sits in my living room and I would also no longer need to toggle between inputs on that TV when using it. I would be able to get rid of one more remote control.

3. I would save money (I think?) I’m not so sure on this one just yet. I’m currently paying Comcast around $ 328/month for their triple play service. When I called them about cancelling TV they said they’d still charge me $ 65 for highspeed internet (up to 250MB) another $ 50 for unlimited usage, another $ 99 for the upgrade to 1 gig service (which has never really been at 1 gig, usually at 500MB to 800MB at best), and another $ 44 for phone with long distance (I’ve wanted to cancel the house phone for years but can’t sell this idea to the wife yet). So that’s $ 258/month before all the fees and extras, so $ 70 less — but once you add in all those miscelaneous fees and Showtime and HBO, I might be pretty much already at where I’m at today in terms of cost. I need to get the fine tip pencil out and do the exact math, but I’m not sure the savings would be as much as I’d hope for. I wish Google Fiber or somebody else would offer service in my area (Oakland, CA) in order to compete with Comcast, but at present it seems that Comcast is the only high speed provider in my area. ATT Uverse offers service but at only 50MB that speed is too slow for me.

4. Skipping commercials with the app on AppleTV using YouTubeTV seems easier than skipping them with the Comcast remote.

5. I like the YouTube TV interface better than the Comcast interface. I like that I don’t have a bunch of stupid channels getting in my way in the guide. Comcast won’t let you hide channels in the guide and it’s always seemed dumb to me that I’m constantly having to navigate around shopping channels, foreign language channels, unsubscribed pay channels, etc, that I’ll never use. While I haven’t used the app on my phone or laptop much I suspect that Google’s nice clean interface is better there too.

6. I like that YouTubeTV offers me an unlimited DVR.

7. YouTubeTV has the Warriors which I’d want on my TV package here in the Bay Area.

8. Up to 6 people in my family can use it and with four kids our family has exactly 6.

9. I feel much more favorably towards Google than Comcast generally speaking. Google seems to care more about their users than Comcast does and if given the choice I’d rather my money go to Google than Comcast. I’d love to be able to stick it to Comcast.

Cons

1. The biggest con (and frankly probably a deal breaker for me) is that I’ve read that YouTube TV will replace your DVR’d shows after a few days with on demand versions that don’t let you skip commercials on that version. Other than live sports, CNBC and some live news, I simply refuse to watch commercials. If this is true and my DVR’d content only lasted a few days per show, this would unfortunately probably kill the deal for me. I haven’t confirmed this myself yet, but I’ve read this in other places and in comments on blogs about YouTube TV.

2. I think YouTube TV broadcasts in 720p. AppleTV now has 4k capability. I’m blown away at how good some of Netflix 4k content looks and sounds on my 4k TV. I’m not sure what Comcast broadcasts in but on some of the content it feels like the Comcast version still looks a little better than the YouTubeTV version.

3. While YouTube TV does have a pretty strong lineup (all the major networks, strong sports, AMC, FX, etc.) it is missing CNN. I’m a little bit of a cable news junkie and would worry only being able to watch Fox News each night might move me too far to the right. Of course since every single night these days over and over again CNN is just Trump/Russia on repeat, I might not miss it so much after all. ?

There are some other minor channels like TNT, Spike, etc. that I could live without but which are nice to have from time to time. Comcast has way more networks (most that I never watch, but once in a blue moon I just might).

4. YouTube TV still doesn’t exempt you from ads on YouTube. YouTube has a paid service called YouTube Red that lets you skip ads on YouTube. It sort of feels to me like this should be bundled in for free when you are paying $ 35/month.

5. I think I like Comcast’s voice controls better. If I say “CNBC” into my Comcast remote it just smartly tunes the TV to CNBC. With the Apple TV it seems like even when in YouTube TV if I try and use Siri on the remote it doesn’t limit it to YouTube TV. And when I say CNBC into my Apple TV it launches the CNBC app which stupidly takes me to a menu page rather than to CNBC where I want to watch live. From the menu screen I then have to navigate to watch CNBC live.

Anyways, these are my initial thoughts. I’ll probably cancel YouTube TV before the 7-day trial ends unless someone else can convince me I shouldn’t. Appreciate anyone else’s thoughts on the new service vs. Comcast.


Thomas Hawk Digital Connection

 
Comments Off on Thoughts on YouTube TV

Posted in Photography


Field Test and Thoughts: Tamron 24-70mm F/2.8 Di VC USD G2 Lens

15 Nov

Ask any experienced photographer what his or her all around go-to lens is, and odds are high that the response will be the 24-70mm f/2.8. Not only does it cover a useful range, but the fast aperture makes it ideal for shooting in low lighting conditions when you don’t have a prime lens handy. The long-standing problem with this lens? It is notoriously pricey. Enter the new Tamron 24-70mm f/2.8 G2 lens!

Tamron 24-70mm

Along with Sigma, Tamron has been upping its lens game recently by offering high-quality budget versions of popular lenses. In fact, the original Tamron 24-70mm f/2.8 lens (Model A007) was first announced in February 2012 and has been on the market for awhile. This year, a highly anticipated second version was released. Here’s what the specs are and what I think after comparing it to my Canon 24-70mm f/2.8 II.

Tamron 24-70mm

The Specs

The official name of this lens is a mouthful: Tamron SP 24-70mm F/2.8 Di VC USD G2 (Model A032). Let’s dissect some of that terminology.

SP is Tamron’s version of high-end lenses, similar to the Sigma Art series. The Tamron SP 24-70mm joins a handful of mostly prime lenses with this designation. Di stands for Digitally integrated, meaning the lens will perform well on full-frame and APS-C format cameras. VC refers to Vibration Control, which Tamron says is much improved in this new lens, offering around 5-stops of compensation, a big boost over its predecessor. USD stands for Ultrasonic Silent Drive, which is reasonably quiet. Finally, G2 is short for Generation 2; this, along with the model number, differentiates this lens from the original.

This lens is available in both Canon and Nikon DSLR mounts.

Tamron 24-70mm

Price

First of all, let’s talk about price. The original Tamron 24-70mm f/2.8 was announced in 2012 with a price of $ 1,300. Somehow, version II came out several years later with the even lower price of $ 1,199.00. Compare that to the current prices of the Canon ($ 1,699)and Nikon ($ 2,397) versions. Price-wise, it even beats out the Sigma version ($ 1,299). While Tamron’s version is still pricey, it’s the least expensive option on the market. That’s good news for photographers on a budget.

Lens Hood

This feature was so good it deserves its own heading.

Like most lenses, the Tamron 24-70mm f/2.8 G2 comes with a lens hood. Unlike most other lenses, the hood is solidly built and snaps into place very tightly. Once the hood is on, there’s almost no way that it will accidentally fall off as it inevitably does when shooting with other lenses.

Tamron 24-70mm

Build Quality

Following in the tradition of other Tamron SP lenses, the 24-70mm f/2.8 G2 is very solidly built. Its outer barrel is made mostly of metal instead of plastic and has moisture resistant construction. As a trade-off for the lens’ solid build, it is pretty big and bulky at nearly 11 cm (4.3″) long and 900 grams (approx. 2 lbs) in weight. That’s 75 grams (2.6 oz) heavier than the original! As a result, this lens might be tough to balance on small, lightweight camera bodies. During this test, the lens was paired with a Canon 5D Mark III, where it felt reasonably well-balanced.

Lens Switches

There are several switches located on the sides of the lens. One is an AF/MF switch making it easy to go from Autofocus to Manual focus. Nearby is the Vibration Control (VC) switch. Whether you choose to turn VC on or off depending on what you’re shooting, but it definitely helps with handheld shots.

The final switch is unique to Tamron zoom lenses: a Lock switch that holds the lens at 24mm, preventing it from extending. I have this unintended lens extension problem (it’s called zoom creep) with my Canon 24-70mm f/2.8 II (probably from prolonged use) and would love to see this feature on every zoom lens.

Tamron 24-70mm

Image Quality

Tamron’s SP lenses come with a special coating that significantly reduces ghosting or lens flare. In the case of the 24-70mm f/2.8, there was little evidence of flare when shooting into the sun or into bright light.

Tamron 24-70mm

When shooting wide open at f/2.8, there’s noticeable light fall-off in the corners of the image. It’s hard to get rid of the vignette without using an f-stop of f/5.6 or smaller.

Tamron 24-70mm

Shot wide open at f/2.8, there is a noticeable edge vignette on the corners of the image.

Tamron 24-70mm

Shot at f/11. Little to no vignette.

Image sharpness was comparable to what you would get from a 24-70mm f/2.8 of another brand. Shooting handheld wide open at low shutter speeds produced a reasonably sharp image with the Vibration Compensation activated.

Tamron 24-70mm

Shot handheld at 1/15th shutter speed and f/2.8.

Below, the lens was used in a controlled studio environment with off-camera flash, thus reducing camera shake and noise. The resulting images are sharp with nice coloring.

Tamron 24-70mm

Food Photography Tamron 24-70

Some users have reported distortion from shots taken at the 24mm focal length. When shooting interiors, I did notice a bit of distortion on the edges, but it’s nothing that can’t be fixed in post-processing if you really wanted to.

Tamron 24-70mm f/2.8

Tamron 24-70mm f/2.8

In Conclusion

If you’re on the hunt for a great 24-70mm lens, the Tamron 24-70mm f/2.8 G2 is a great option. It produces great image quality with a solid build, and most importantly, it won’t break the bank.

Do you own a 24-70mm lens? Would you try Tamron’s version? Or do you prefer to stick with your camera’s name brand lenses? Tell us about your experience below.

The post Field Test and Thoughts: Tamron 24-70mm F/2.8 Di VC USD G2 Lens by Suzi Pratt appeared first on Digital Photography School.


Digital Photography School

 
Comments Off on Field Test and Thoughts: Tamron 24-70mm F/2.8 Di VC USD G2 Lens

Posted in Photography


The New Canon 6D Mark II – Hands-On Previews and Thoughts

04 Aug

Recently Canon announced the release of their update to the 6D, its popular full frame camera body, with the Canon 6D Mark II. It’s getting some mixed reviews – let’s see what these reviewers thought:

PhotoRec TV – too many deal breakers?

Things many consider this camera to be lacking include:

  • No 4K video capability
  • No headphone jack (but there is one for a microphone)
  • Flash sync speed of only 1/180th of a second
  • Only one memory card slot

Pros:

  • Finally a fully reticulating/tilting (touch) screen on a full frame camera
  • A full frame Canon body that includes WiFi and Bluetooth finally (and GPS)

digiDIRECT – hands on first impressions

Some points from this review:

  • Improved battery life
  • Body has improved weather sealing
  • New 26.2 megapixel sensor
  • Increased low light performance (native ISO up to 40,000)
  • 45 cross-type autofocus points (over 11 on the original 6D)
  • Dual pixel focus
  • A burst rate of 6.5 fps (compared to the 6D which does 4.5 fps)
  • This camera is aimed more towards still photographers, not those doing video because of some thing it lacks (no 4K video, no headphone jack)
  • It does, however, have a new time-lapse feature

Thorough overview of the 6D Mark II by Tony Northrup

In this video, Tony goes over most of the new features of the Canon 6D Mark II as compared to other camera bodies in the Canon line-up and other brands. See what he thinks are the pros and cons of this new Canon.

Ready to buy the 6D Mark II?

If you feel this is the camera for you – they are supposed to be available by the end of July, order yours on Amazon now.

Have you tried it out, is it on your wish list? Share your thoughts on the Canon 6D Mark II below.

The post The New Canon 6D Mark II – Hands-On Previews and Thoughts by Darlene Hildebrandt appeared first on Digital Photography School.


Digital Photography School

 
Comments Off on The New Canon 6D Mark II – Hands-On Previews and Thoughts

Posted in Photography


Thoughts and Field Test of the Sigma 12-24mm F4 DG HSM Art Lens

31 May

In November 2016, Sigma introduced the world to its widest zoom lens offering to date: the Sigma 12-24mm f/4 DG HSM Art lens. This is actually Sigma’s third version of the 12-24mm DG (full frame) lens, but it is the first to have the “Art” designation and a constant aperture. Previous lens versions share the same focal length but differ in maximum aperture, weight, size, and price.

Priced at $ 1,600, this isn’t the cheapest lens, but it is a steal compared to Canon’s EF 11-24mm f/4L USM, which runs just under $ 2,700. Here are some more details on the Sigma 12-24mm lens and reasons why it may or may not be for you.

Sigma 12-24mm Art Lens

Thoughts and Field Test of the Sigma 12-24mm F4 DG HSM Art Lens

Sigma 12-24mm mounted on a Canon 6D.

Specs of the Sigma 12-24mm

  • 12-24mm focal length
  • Maximum aperture of f/4
  • Minimum focusing of 0.24 m (9.45″)
  • Available in Canon EF, Nikon F (FX) and Sigma mounts
  • Ring-type hypersonic motor
  • Item dimensions of 3.3 x 4.7 x 3.3 inches
  • Item weight of 1.5 lbs
  • Weather sealing, dust and splash proof
  • Comes with a solid lens cap and a zippered carrying case with shoulder strap
Sigma 12-24mm Art Lens

A phenomenal lens for architecture and interiors. Shot at 12mm.

Pros of the Sigma 12-24mm

Solid build quality

The build quality of the Sigma 12-24mm is impeccable. Constructed mostly of metal and glass, this is a solid and rather heavy lens. It takes up quite a bit of space in your bag and can make it difficult to travel with (more on that below). On the plus side, I would expect it to hold up well over time. Also, it is dust and splash proof as well as being weather sealed.

Thoughts and Field Test of the Sigma 12-24mm F4 DG HSM Art Lens

Excellent distortion control

Ultra-wide angle lenses often suffer from distortion, where straight lines may appear more curved, and proportions may seem off. This can often be corrected in post-processing. Shots that were taken with my previous wide-angle lens, the Canon 16-35mm f/2.8, often needed quite a bit of Photoshop post-processing to straighten lines and correct distortion. The Sigma 12-24mm, however, does an outstanding job of keeping photo subjects pretty free of distortion, no matter what focal length you’re using.

Sigma 12-24mm Art Lens

Interior image shot at 12mm.

Sigma 12-24mm Art Lens

Same photo subject from above, but shot from a slightly closer angle at 24mm.

Things to consider

Not for everyday shooting situations

Shooting with an ultra-wide angle lens takes a certain eye for composition. Not everything will photograph well at 12mm due to perspective distortion. People, for example, may end up with body parts that appear much larger or longer than they should be when they are photographed at wide focal lengths. Thus, it’s important to manage your expectations with a wide-angle lens and realize that not everything will photograph well with it. Generally speaking, ultra-wide angle lenses suit the needs of architecture and landscape photographers. Portrait and product photographers, not so much.

Thoughts and Field Test of the Sigma 12-24mm F4 DG HSM Art Lens

Not a great image due to poor composition and distortion of shooting at 12mm.

Sigma 12-24mm Art Lens

With better composition and positioning, 12mm can work in certain situations, like landscape or cityscape photos.

Curved front lens element

The Sigma 12-24mm f/4 has a bulbous, curved front lens element that makes it impossible to use standard, threaded filters. This might be a hindrance to landscape photographers needing to use circular polarizers and neutral density filters, or the average photographer who likes to stick a UV filter on for added lens protection. There are other filter solutions such as slip-in rear gel filters, but those can be quite large and cumbersome to deal with.

Heavy lens

While a solid lens is great in terms of being reliably built, the weight and bulk of this lens are undeniable. Combined with the aforementioned con of not being able to add a protective filter to the glass, the Sigma 12-24mm becomes very unfriendly as a travel lens. If you do travel with it, you’d need to be extremely careful to avoid damaging the glass.

Thoughts and Field Test of the Sigma 12-24mm F4 DG HSM Art Lens

Other Lens Options

Since this is the third iteration of Sigma’s 12-24mm lens, there are two previous models to consider if you are looking for alternatives.

  • Sigma 12-24mm f/4.5-5.6 EX DG HSM lens (version 1)
  • Sigma 12-24mm f/4.5-5.6 DG II HSM lens (version 2)

This Sigma lens is also going up against the Canon EF 11-24mm f/4L USM lens ($ 2699), the Nikon 14-24mm f/2.8G ($ 1899), and Tamron 15-30mm f/2.8 ($ 1199). Focal lengths, apertures, and prices all vary, so it really depends on which features are most important to you.

In Conclusion

In terms of image quality, I found the Sigma 12-24mm to be incredible for shooting architecture and interiors in particular. However, its weight and fragile, bulbous lens make it tricky to travel with.

Would you pull the trigger on investing in this lens? Let me know in the comments below!

The post Thoughts and Field Test of the Sigma 12-24mm F4 DG HSM Art Lens by Suzi Pratt appeared first on Digital Photography School.


Digital Photography School

 
Comments Off on Thoughts and Field Test of the Sigma 12-24mm F4 DG HSM Art Lens

Posted in Photography


Wider than wide: A landscape photographer’s thoughts on the Canon 11-24mm

06 May
The Canon EF 11-24mm F4L USM is a super wideangle zoom lens for Canon’s full-frame DSLRs, which can also be adapted for use on Sony Alpha a7 and a9-series full-frame mirrorless cameras.

Even though I’ve been writing for DPReview for over 4 years, I’ve never written any equipment reviews. And why should I? There are far better equipment experts, technical fanatics, pixel-peepers (I mean that in a good way!) and gear enthusiasts out there than me. My fields of expertise are different, and my writing consists mostly of photographic vision, composition, the philosophical aspects of photography and so on. I intend to stick to this line of writing, and for the most part, I’m happy to leave the equipment reviews to the experts.

That said, after shooting with the Canon 11-24mm F4L for a few months, it has proven to be such a game-changer that it has altered how I think about composition. And in a more general sense, it has changed my ability to take control over what is included in an image, and how these elements are arranged.

Goðafoss, Iceland at 13mm. The extra width allowed me to get closer to the edge and get a wider view while keeping all the elements I needed in the image, framing the waterfall, with enough space around them to avoid a crowded feel.

Canon EOS 5D Mark IV, Canon 11-24mm F4L
Nisi Filters 180mm ND + GND
F14, 13sec, ISO100

This will not be your regular gear review. I won’t be discussing sharpness (although trust me that this lens is very sharp), chromatic aberrations or barrel distortion. I will only be talking about composition, which is, in my opinion, the single most important ingredient to a successful photograph. I will present some images and explain what about the 11-24mm made them possible. I’ll also talk a bit about the downsides of this lens and the solutions to the problems it presents. 

So why? Why does a landscape photographer need an 11-24mm? Isn’t it just too darn wide? Is 11mm worth the size and the monstrous weight? Is it worth the hefty price tag? I have to admit that before shooting with it, I was in serious doubt. I was sure I’d leave it in the bag most of the time, taking it only on rare occasions when 16mm wasn’t wide enough. I thought that 16mm would be wide enough for 90% of my images, after all, I’ve been producing satisfactory shots until now – what good could a wider lens be?

I knew that when going wider, background subjects shrink significantly in size, which can hurt the composition. Moreover, in cases where 16mm wasn’t enough, I had a 14mm F2.8 which was excellent for night photography and for shooting in confined spaces. 

It turns out that I was wrong. The extra width proved to be extremely useful, much more than I had imagined. It allowed me to have much more control, to include more sky when I wanted to, to get closer to the foreground, to reveal more detail and create a greater sense of depth and more dramatic imagery. Let’s look at some examples.

An ice cave in Breiðamerkurjökull glacier, Iceland. Getting this composition in one shot with a narrower lens would have been impossible.

Canon EOS 5D Mark IV, Canon 11-24mm F4L
Focus stacked from 3 images at 11mm, F13, 15sec, ISO800.

The ice cave pictured above was magnificent, but it was also very cramped. I couldn’t walk upright in most of the spots I shot, and this stream was very small. The ice-crusted rock in the middle was tiny, and its details were so beautiful, I needed to get close in order to expose their intricacies. On the other hand, I needed to frame the different elements well, and in a balanced way that makes visual sense.

The cave’s ceiling is extremely important, since it’s the only subject of the frame which is part of the glacier, which basically IS the ice cave. It also contains wonderful melting patterns, and black, volcanic earth which gives extra texture and detail. 
On the bottom of the frame, there are two important elements: the ice-crusted rock in the middle of the stream, which is most definitely the centerpiece, but equally importantly the ice crusted banks on the bottom right. These serve to create the frame to the blurred water and to compositionally counterbalance the rock and the left-running stream.

In addition to the compositional aspect, I strongly feel that including all these elements serves to give the viewer a better sense of being in this incredible cave. This might be the strongest advantage of utilizing such a wide angle of view.

Without a super wide lens, I could still have included all of these elements. I could have achieved this in one of several ways.

Firstly, I could have moved back a little. This would indeed allow me to include all the different desired elements in the frame, but going backward would change the perspective significantly, shrinking the most important elements in the process, namely the ice crusted rock and the stream itself. That would hurt the composition a great deal.

Alternatively, I could have shot a panorama, using a tilt/shift lens or by moving the camera and lens. This would make the job much, much harder, since (a) it would require multiple stitching in addition to the already-challenging focus stacking and (b) shooting so close to the stream meant I constantly needed to wipe the lens dry, and the extra shooting time would mean much more wiping, Photoshop work and general headache.

The 11-24mm allowed me to shoot this as close to the rock as I needed to, in order to include all the detail I wanted to show while still framing the shot as I desired, all with only three shots to focus stack. I simply wouldn’t have been able to do that before I bought this lens. 

Let’s see another example from my Arctic trip earlier this year.

The amazing black and white sand patterns of Skagsanden Beach, Lofoten, Arctic Norway.

Canon EOS 5D Mark IV, Canon 11-24mm F4L
Nisi Filters 180mm ND + GND
Stacked from 4 images at 11mm, 0.8 sec, F13, ISO100

Again, this image would’ve been almost impossible without the 11-24mm, which allowed me to get very close and personal with the tree-like sand patterns, while being wide enough to shrink the background and include the whole mountain range in the frame. 

The Lofoten Islands are full of fjords with towering mountains rising out of them. Some mountains are so close to a water body, it’s extremely hard to include the entire thing in the frame without a truly wide lens. This is even more so when trying to include reflections.

Mount Stortinden reflecting in the calm Flakstad Fjord, Lofoten. I was standing about 1 km from this 850m tall mountain. Being so close, I couldn’t have included both the mountain and the reflection with a 16mm. It was easily done, however, with the 11-24mm.

Canon EOS 5D Mark IV, Canon 11-24mm F4L
Nisi Filters 180mm ND + GND
11mm, F11, 0.5 sec, ISO100

Last but not least, the 11-24 is an almost perfect tool for night photography. The maximum aperture of F4 is a limit, but then again, it’s easier having the foreground in focus at F4, plus the monstrous angle of view allows one to expose marginally longer without getting the stars or Northern Lights blurred.

Let’s see an example from an incredible night of Aurora in Lofoten. The super wide angle allowed me to include a huge chunk of the sky, showing the wonderful patterns and lines in addition to the mountains and the moving waves. I could also expose for 8 seconds, which is considered a bit long for this kind of strong Auroral activity. To be honest, the lights blew up a few seconds before I took this shot, and I should’ve exposed for less time, but the amount of blur is not a big issue and the Aurora is still well defined.

Beautiful Aurora in Skagsanden Beach, Lofoten, Arctic Norway.
Canon EOS 5D Mark IV
Canon 11-24mm F4L
11mm, F4, 8sec, ISO1600

Here are a few more examples of Aurora shot with the 11-24mm.

Stacked from 2 images at 11mm, F4, 8sec, ISO3200 Stacked from 2 images at 11mm, F4, 13sec, ISO3200
11mm, F4, 5sec, ISO1600 11mm, F4, 8sec, ISO3200

I hope you’re convinced of this lens’ advantages. What about the downsides?
For me, the greatest disadvantage is the inability to fit regular filters in front of the huge front element. I’m used to popping my 100mm system out of the bag and putting it in front of any lens. Not this one.

The only solution I currently know of which covers the whole width of this monster is the Nisi Filters 180mm system (proper disclosure: Nisi gave me the holder and some filters to try out). These filters are not cheap, but they are well made and have superb optical quality. The problem is that together with the mounting system, they are big and heavy, and don’t allow a photographer to be as spontaneous as with a 100mm system. I still like the system very much and I’ve achieved good images with it. If you’re into using filters with the 11-24, I highly recommend it.

As to the size, weight and price – simply put, it is what it is. If you need this type of lens, or if you can extract any type of value out of it, there is not much choice, is there? You need to weigh the advantages and the disadvantages and make up your own mind. You can also leave the lens at home if it’s not really necessary or if the weight is too much for a specific project (for example, on my recent Patagonia hiking trip, I chose not to lug it around due to the weight, and opted for the lighter 16-35mm). In my opinion, the answer is clear: if you’re an avid landscape photographer, don’t wait – get this lens, you won’t regret it.


Erez Marom is a professional nature photographer, photography guide and traveler based in Israel. You can follow Erez’s work on Instagram, Facebook and 500px, and subscribe to his mailing list for updates.

If you’d like to experience and shoot some of the most fascinating landscapes on earth with Erez as your guide, you’re welcome to take a look at his unique photography workshops around the world:

Land of Ice – Southern Iceland
Winter Paradise – Northern Iceland
Northern Spirits – The Lofoten Islands
Giants of the Andes and Fitz Roy Hiking Annex – Patagonia
Tales of Arctic Nights – Greenland
Saga of the Seas and The Far Reaches Annex – The Faroe Islands
Desert Storm – Namibia

Selected Articles by Erez Marom:

  • Parallelism in Landscape Photography
  • Behind the Shot: Dark Matter
  • Mountain Magic: Shooting in the Lofoten Islands
  • Behind the Shot: Nautilus
  • Behind the Shot: Lost in Space
  • Behind the Shot: Spot the Shark
  • Quick Look: The Art of the Unforeground
  • Whatever it Doesn’t Take
  • Winds of Change: Shooting changing landscapes
  • On the Importance of Naming Images
  • On Causality in Landscape Photography

Articles: Digital Photography Review (dpreview.com)

 
Comments Off on Wider than wide: A landscape photographer’s thoughts on the Canon 11-24mm

Posted in Uncategorized


MagMod and MagBeam Speedlight Modifiers – Thoughts and Field Test

07 Apr

MagMod made their debut on the photography scene in 2013 with their original speedlight flash modifiers. Recently, they debuted their latest lighting product for photographers, the MagBeam. Functioning as a fresnel lens for your flash, the MagBeam provides a creative boost by easily adding a blast of color or patterns to your images. This article will highlight some of MagMod’s newest products with a special emphasis on the new MagBeam.

What is MagMod?

MagMod (short for MagnetMod) is a company which offers a series of compact, super durable flash modifiers that easily attach to your speedlight flash via ultra strong magnets. The magnets make it super simple to switch out modifiers, or even add color gels without having to pause and interrupt your photo shoot for too long. We first introduced this unique speedlight modifier in a MagMod review awhile back (read it to learn more about the MagGrip, MagGrid, and MagGels).

Since that initial review, MagMod has expanded its product line to include the products below (the MagSphere, MagSnoot, MagBouce, and MagGrip). All of them have a built-in slot for easily adding color-correcting gels.

MagMod and MagBeam Speedlight Modifiers - Thoughts and Field Test

Basic MagMod kit with MagSphere, MagSnoot, MagBouce, MagGrip, and color gels.

MagSphere

MagSphere is an omnidirectional modifier that transforms your speedlight’s harsh flash into a bare-bulb light source by increasing the size of your flash over 250%. Use it like a small bounce card or on-camera diffuser.

The MagSphere

MagMod and MagBeam Speedlight Modifiers - Thoughts and Field Test

Food photo, taken with the MagSphere.

MagBounce

Made from a large piece of silicone, the MagBounce increases the size of your flash by 300%. It delivers incredibly soft light and is akin to having a small softbox that is super easy to setup.

MagMod and MagBeam Speedlight Modifiers - Thoughts and Field Test

A portrait, taken with the MagBounce.

MagSnoot

This unique, collapsible snoot can easily be expanded or contracted to deliver a focused beam of light. MagSnoot is perfect for using as a hair light or highlight in product or portrait photography.

MagMod and MagBeam Speedlight Modifiers - Thoughts and Field Test

Left to right: MagSnoot (collapsed), MagBounce, MagSphere.

MagBeam

If you’ve ever wanted to project a variable spotlight pattern as a photography supplement or background, MagBeam has you covered. This compact system gives you a portable Fresnel spotlight that produces an even light with soft edges and a soft shadow. Since this product is a little more complex that the above-mentioned modifiers, we’ll be doing a deeper dive into its features.

Two main uses of the MagBeam

MagBeam can be paired with one of two different lenses that produce very distinct effects. The MagBeam Tele Lens is used to project a focused beam of light, similar to a spotlight. It also gives you two to three extra stops of usable light. This is handy for wildlife photographers to light subjects in the distance. You might also use this Tele Lens to get a tight, concentrated, beam of light for creative portrait or product photography.

The other option is a MagBeam Wide Lens. Use it in conjunction with custom-made metal disks known as MagMasks and you can create projected light patterns for creative backgrounds or lighting effects. You can also stick MagMod color gels into the MagBeam to add a blast of color.

MagMod and MagBeam Speedlight Modifiers - Thoughts and Field Test

MagMod and MagBeam Speedlight Modifiers - Thoughts and Field Test

Taken with MagBeam, wide fresnel lens, MagMask, and creative color gels.

What’s in the MagBeam Kit box?

The MagBeam can be purchased in several different ways, but the most comprehensive way is to order the whole MagBeam Kit. It comes with the MagBeam itself, a tele lens, wide lens, and MagMask Standard Set. You can add on extra MagMasks as accessories, and load up on colored artistic and creative gels as optional accessories.

MagMod and MagBeam Speedlight Modifiers - Thoughts and Field Test

What’s in the box of the MagBeam kit.

MagBeam in Practice

The MagBeam itself is like a bigger, wider version of the MagSnoot. It’s made of black silicone and can be easily collapsed or extended. When collapsed, the MagBeam is super compact and easy to stick in your camera bag. Using the MagBeam is simple. All you have to do is attach the magnetic end to your speedlight flash via a MagGrip (NOTE: this is not included with the MagBeam you need to buy it separately), then stick a plastic fresnel lens on the wide end.

MagMod and MagBeam Speedlight Modifiers - Thoughts and Field Test

Collapsed MagBeam with a patterned MagMask and red color gel attached on one end. The wide fresnel lens is on the other end.

Speaking of the two Fresnel lenses, they look identical but are actually quite technical, so you must use them correctly to get the right effect. As an example, the wide fresnel lens must be used when the MagBeam is fully collapsed in order to use the included MagMasks (described in detail below) to create a light pattern. It’s not complicated, but you might have to do some experimenting and read some manuals before jumping right in.

Pratt_MagMod MagBeam Review_001

Things to Consider

There is only one possible thing to consider about the MagMod before investing in this system. MagMod magnets that attach to your flash are impressively strong. Once you attach the modifier, it certainly isn’t going to fall off by accident. But sometimes the magnets are a little too strong. I often have to use two hands to carefully pull the MagMod modifiers off to avoid accidentally breaking my flash. I also have to make sure the MagMod units aren’t too close to other magnetic items in my camera bag otherwise, they’ll stick together.

NOTE: If you have any concerns about using magnets next to your electronic equipment this video should answer your concerns. Items they do say to keep away from magnets include: 

  • Older spinning hard drives
  • Credit cards and bank cards
  • Older televisions
  • Speakers
  • Most importantly, pacemakers!

In Conclusion

Overall, I love the MagMod system and always have it in my on-the-go photography kit. In particular, I’ve been using the MagSphere for event photography and the MagBounce as a replacement to my Westcott Rapidbox softbox for food and portrait photography. In both cases, I appreciate how compact the modifiers are. They’re so convenient that I can stash them in my camera bag and simply pull them out whenever I need them.

While the MagBeam took a little more trial and error to figure out, I’ve also been using the wide fresnel lens and gobos to add a splash of color and creativity to my product and food shots.

If you shoot a lot with speedlights and are looking for compact and flexible lighting modifiers to add to your kit, I highly recommend the MagMod system!

The post MagMod and MagBeam Speedlight Modifiers – Thoughts and Field Test by Suzi Pratt appeared first on Digital Photography School.


Digital Photography School

 
Comments Off on MagMod and MagBeam Speedlight Modifiers – Thoughts and Field Test

Posted in Photography


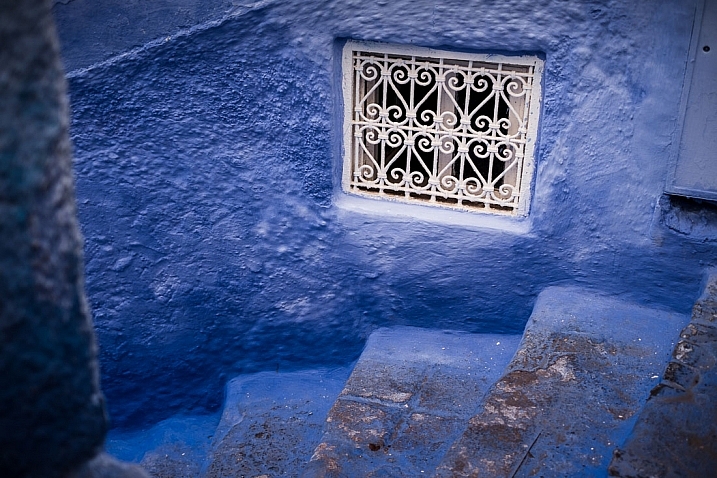
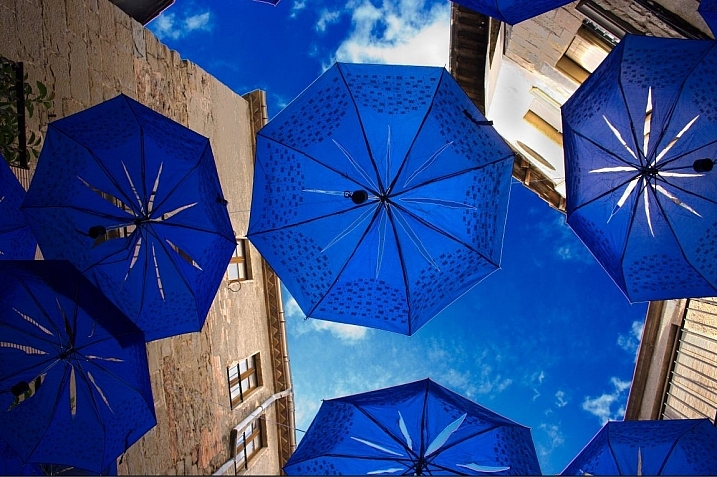
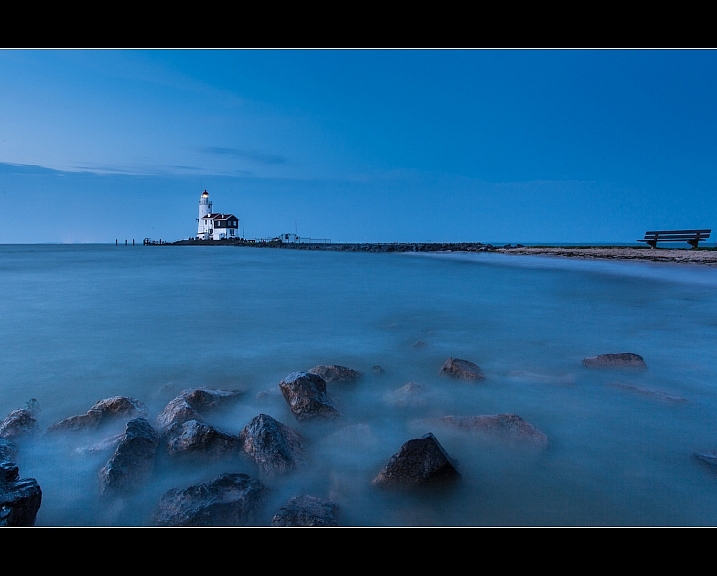
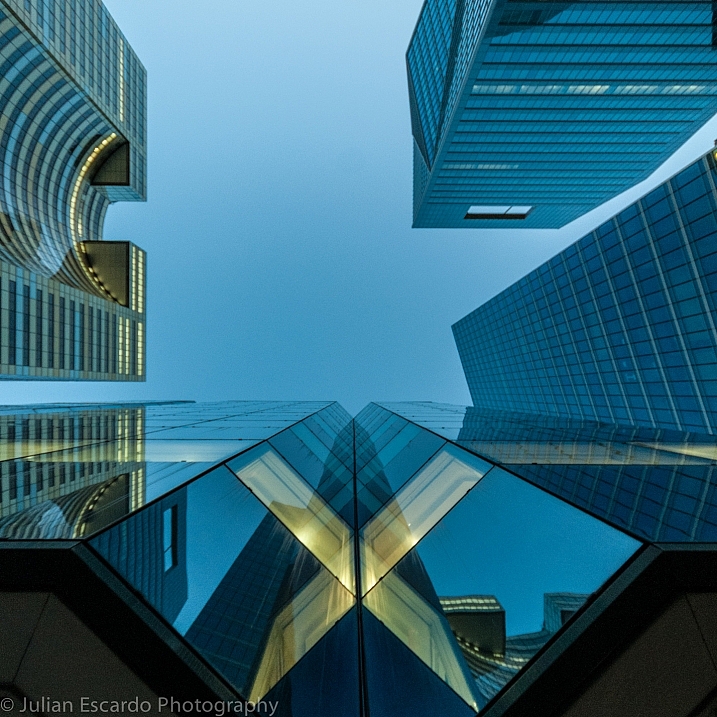
18 Tranquil Images of Blue to Cool Your Thoughts

30 Sep

Different colors evoke different emotions and have a different feeling to them. Warm colors like red, orange and yellow feel alive and vibrant. Cool colors like purple, green and blue feel calming and relaxing.

Here is an image collection of various different photographers use of the color blue. View each and see how they make you feel. Do these blue images have a calming effect on you? I feel more relaxed just looking them.

I’ll start off with three of my images from the “blue” city of Chefchaouen in Morocco.

morocco-2016-0610-1100px

morocco-2016-0649-1100px

morocco-2016-0678-1100px

Andy

By Andy

Nick Klein

By Nick Klein

Matt Bradley

By Matt Bradley

Xavier

By Xavier

Pablo Fernández

By Pablo Fernández

Maarten Takens

By Maarten Takens

Alain Tremblay

By alain tremblay

Julian E...

By Julian E…

Martin Fisch

By Martin Fisch

Geir Tønnessen

By geir tønnessen

Modes Rodríguez

By Modes Rodríguez

Mirai Takahashi

By Mirai Takahashi

Genji Arakaki

By Genji Arakaki

Hansel And Regrettal

By Hansel and Regrettal

Davide D'Amico

By Davide D’Amico

googletag.cmd.push(function() {
tablet_slots.push( googletag.defineSlot( “/1005424/_dPSv4_tab-all-article-bottom_(300×250)”, [300, 250], “pb-ad-78623” ).addService( googletag.pubads() ) ); } );

googletag.cmd.push(function() {
mobile_slots.push( googletag.defineSlot( “/1005424/_dPSv4_mob-all-article-bottom_(300×250)”, [300, 250], “pb-ad-78158” ).addService( googletag.pubads() ) ); } );

The post 18 Tranquil Images of Blue to Cool Your Thoughts by Darlene Hildebrandt appeared first on Digital Photography School.


Digital Photography School

 
Comments Off on 18 Tranquil Images of Blue to Cool Your Thoughts

Posted in Photography


Sony a6300 Mirrorless Camera – Thoughts and Field Test

29 Jun

Sony has spent recent years charging full steam ahead into the full-frame mirrorless camera market. But they have also managed to satisfy the desires of APS-C shooters, mainly through their widely-popular a6000 mid-range mirrorless camera. In March 2016, just two years after the debut of the a6000, Sony released the a6300 with improved features, that still retain many of the characteristics of the older model.

To be clear, Sony doesn’t intend for the a6300 to be a replacement for the a6000, meaning the older camera is still in production and can be purchased at a very attractive price point (around $ 549.00 for the body only).

Sony a6300 Mirrorless Camera

My Camera Background

Before diving into this review, I want to clarify my digital camera experiences to make my perspective more apparent. The Sony a6300 is the very first mirrorless camera I’ve owned, besides my very brief experiment with the a6000 for comparison purposes. Until recently, I’ve shot almost exclusively with Canon DSLRs, namely the 5D Mark III and 6D. As a result, many of the a6300’s features such as its pop-out LCD screen and electronic viewfinder might seem like standard features to other mirrorless shooters, but for a Canon DSLR user like myself, these are newfound novelties that turned my world upside down. With that being said, let’s move on to the a6300’s specs.

Key Features of the Sony a6300

Sony a6300 Mirrorless Camera

The main improvement with the Sony a6300 is a newly developed sensor with a pixel count of 24MP (same as the a6000) that is packed with a whopping 425 phase-detection AF points, which is significantly higher than the a6000’s 179 AF points. According to Sony, the a6300 has the greatest number of phase-detection points to date, on an interchangeable-lens camera ,and makes the a6300 the camera with the world’s fastest autofocus.

Video is another aspect that Sony upgraded on the a6300, with the inclusion of 4k video recording capabilities, the addition of a mic socket, and the ability to record time code. Besides the autofocus and video systems, the a6300 sees an OLED 2.36M-dot viewfinder, an improvement from the a6000’s OLED 1.44M-dot viewfinder. Battery life is also slightly improved at 400 shots versus 360 shots.

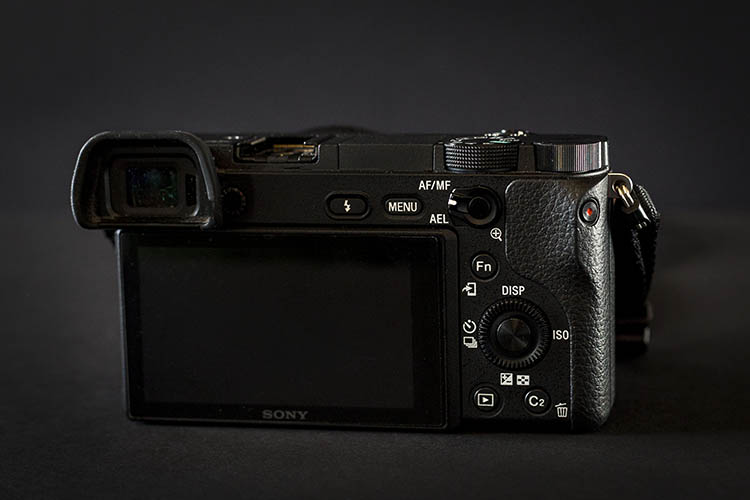
Physically, the a6300 is only 2 ounces heavier than its predecessor, although it feels much more solid with its weather-sealed magnesium alloy build, that was lacking on the a6000. An AEL button with an AF/MF switch has also been conveniently added to the back of the camera, which sports and action shooters should find handy. Other than these few additions, the Sony a6300 doesn’t look or feel much different than the a6000.

Overall, these added features of the a6300 clearly appeal to shooters looking to focus on action, sports, and video.

Sony a6300 Mirrorless Camera

Sample action shot with a Sony 16-50mm f/3.5-5.6 kit lens.

Pros of the a6300

While discussing the pros and cons of the a6300, it should be noted that many of the same features are also available on the a6000.

Extremely compact

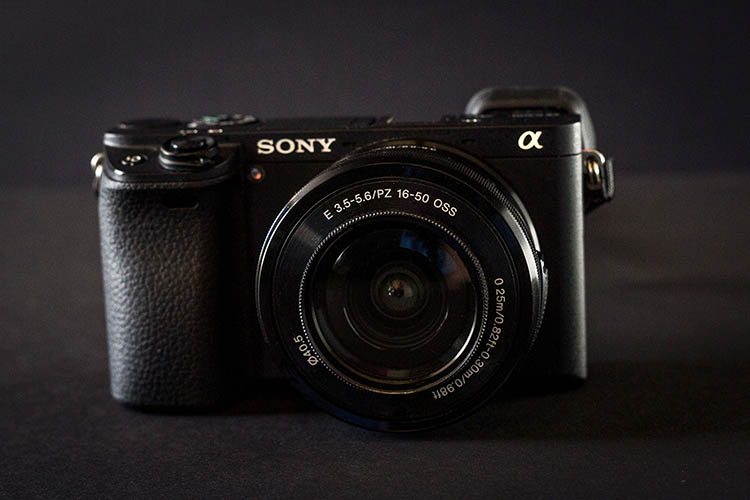
As a DSLR shooter, the a6300’s compact size was particularly appealing. While testing the Sony a6300, I used both the kit 16-50mm f/3.5-5.6 retractable zoom lens, and the Sony 20mm f/2.0 pancake lens, and was amazed that both were incredibly lightweight and basically the same size. There is of course, the trade-off of both lenses being made of plastic and not feeling as robust as say a Fujifilm lens, but they both perform very well and weigh close to nothing. Pairing either lens with the a6300 makes for a very compact, low-profile camera system that is perfect for travel.

Sony a6300 Mirrorless Camera

An informal food photo taken at a restaurant table moments before consumption. Shot with a Sony 20mm f/2.8.

Silent Shutter

While many DSLRs offer a Silent Shutter that is still quite noisy, the a6300’s silent shutter feature makes the camera so quiet you wouldn’t even know a photo was being taken. It’s a great feature for undercover or candid photography moments when you truly want no sound associated with taking a photo. With that said, non-silent shooting on the a63000 produces a very crisp shutter snap, especially when firing away at the camera’s highest shutter speed of 11 frames per second.

Panoramic shooting feature that actually works (most of the time)

After consistently trying, and failing, to take advantage of panoramic shooting on a variety of devices from point and shoots to cell phone cameras, I was beginning to think that on-the-go panoramic shooting was a myth, until I tried it with the a6300. Unlike other devices, the a6300 will shoot and stitch together a near-perfect horizontal or vertical panorama even when your manual panning isn’t spot on. There were a few times when the camera insisted that I wasn’t panning straight enough to make a clear pano shot, but most of the time even my wobbly panning techniques were good enough for the a6300 to make sense of.

Sony a6300 Mirrorless Camera

Sample panorama shot with a Sony 16-50mm f/3.5-5.6 kit lens.

Focus Modes + Face Recognition

Easily two of the best features of the a6300 are the Face Registration and Eye AF (autofocus) features, which do pretty much what their names imply. Activating Face Registration allows you to program the a6300 to recognize and prioritize up to eight faces. This feature is incredibly handy when shooting a crowd of people, and the a6300’s accuracy of picking out the correct face is astounding. Eye AF works very similarly, but without the need to register (program them in) the eyes. Simply enable Eye AF on the a6300 and the camera will automatically search for your subject’s eyes and track them using continuous autofocus. This feature is so spot-on that the a6300 will even lock onto artistic renderings of eyes, such as a painted portrait.

Sony a6300 Mirrorless Camera

Sample portrait shot with a Sony 20mm f/2.8 lens.

Quick Wi-Fi connection

Like most newer digital cameras today, the a6300 has Wi-Fi and NFC, to connect with smartphones and tablets for remote camera shooting, and wireless image transfer via Sony’s PlayMemories Mobile app. Setting up Wi-Fi on the camera is very quick and intuitive, and Sony’s accompanying app also includes an array of other options that can further enhance your shooting experience, such as time-lapse and multiple exposure apps, among many others.

Built-in flexible flash

Sony a6300 flash

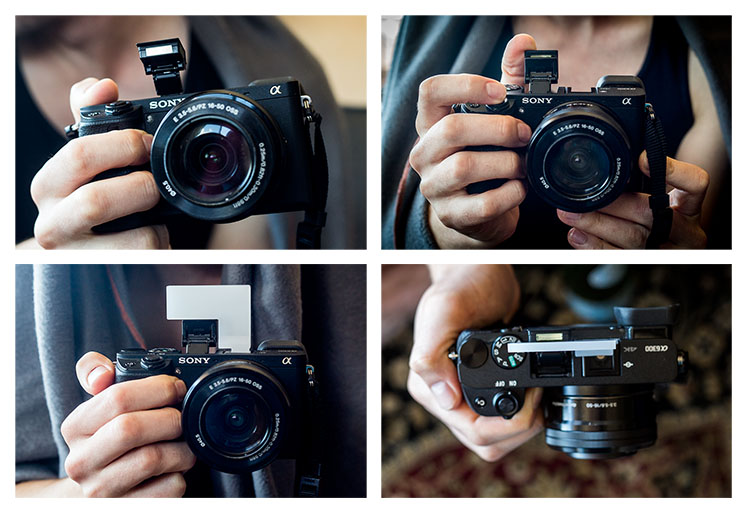
Thankfully, Sony kept one of the a6000’s best features on the a6300: a built-in pop-up flash. Extremely compact and flexible, the little flash can bend 45 degrees to tilt upwards, allowing for bouncing the flash off the ceiling.  Next to the pop-up flash is a hot shoe mount that can fire Canon or Nikon Speedlight flashes when used with an adapter.

One accessory that can help fully utilize the pop-up flash are plastic bounce cards which attach to the a6300 via the hot-shoe mount, and hold the flash in an upright position.

Sony a6300 Mirrorless Camera

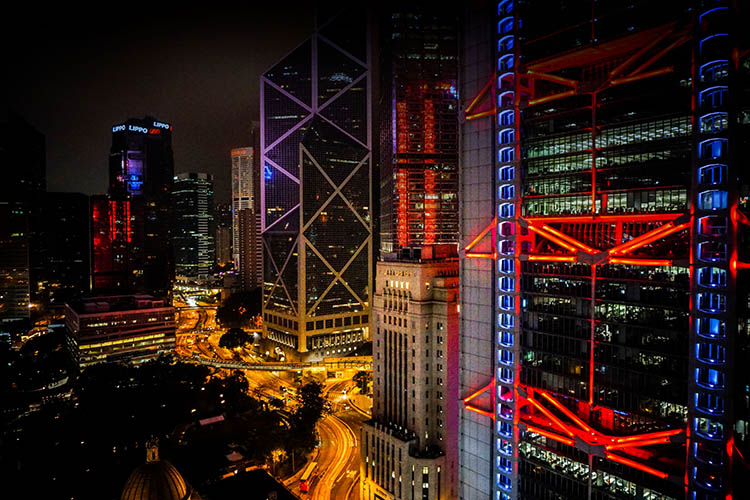
Sample night shot with a Sony 20mm f/2.8 lens.

Sony Lens Options

Currently, there are over 70 Sony lenses that you can purchase to go along with your new a6300 body. Options range from compact, low-priced primes and larger, higher-priced zoom lenses. Cheaper prime options include the 16mm f/2.8, 20mm f/2.8, 28mm f/2, 30mm f/3.5 macro, 35mm f/1.8, and 50mm f/1.8, all ranging in price from $ 249.99-$ 449.99. Wide-range zoom lenses, without a fixed f-stop, are also somewhat affordable, such as the 18-200mm f/3.5-6.3 ($ 749.99) or the 24-240mm f/3.5-6.3 ($ 998.99)

Sony 18-200mm f/3.5-6.3 ($ 749.99)

However, Sony’s higher-quality lenses are much higher in price, which may be difficult to swallow if you’re converting from a DSLR kit. Larger, high-quality Sony primes such as the 24mm f/2 and 35mm f/1.4, prices are upwards of $ 1,200.00 and more. The same is true for Sony’s versions of traditional DSLR lenses such as the 16-35mm f/2.8 ($ 2,248.99), 24-70mm f/2.8 ($ 2,098.00), and 70-200mm f/2.8 ($ 2,999.99). If you’re a DSLR shooter with an array of lenses, you can always invest in a converter to use your DSLR lenses with your Sony camera body, but at the expense of slower autofocus.

When you purchase either the Sony a6000 or a6300, you have the option of buying it body-only, or with a 16-55mm f/3.5-5.6 E-mount retractable zoom kit lens, which is valued at approximately $ 260.99 if purchased separately. For its size, range, and overall performance, the kit lens, plus a Sony prime lens, aren’t a bad starter combination, especially if you’re looking to keep your gear compact and lightweight, and aren’t quite ready to invest in higher-priced Sony E-mount lenses yet.

ISO Performance

Sony opted to improve the a6300’s high-ISO performance by including a native ISO range of 100-25,600 with the possibility of extending that ISO to 51,200. While the ability to shoot at higher ISO is great in theory, I found that ISO 6400 was the highest I could comfortably push the a6300 in darker environments, without sacrificing too much image quality. Even my RAW photos shot at ISO 6400 were a little too grainy for my taste, no matter how much noise-reduction I did in post-processing.

Sony a6300 high ISO2

Cons of the a6300

Sony’s bloated camera menu

A common complaint among Sony shooters, that I have to agree with, is that the camera menu is very difficult to navigate. It truly seems like Sony outfitted the a6300 with so many features, and tried to stuff them all into a menu, that it can take weeks for new Sony shooters to get used to using the camera.

This could be easily solved if Sony allowed users to customize the menu a bit more, so that frequently-used features can be quickly accessed. As it stands, Sony only allows assigning custom functions to the camera’s physical buttons, and there aren’t nearly enough of those.

With that being said, the trick to making sense of Sony’s menus is to customize as much of the camera’s settings as possible. Presently, I’ve customized the buttons and settings on the a6300 set to shoot almost identically to the way I shoot with my Canon 5D Mark III, making it easier to switch from one system to another.

Sony a6300 Mirrorless Camera

Sample action shot with a Sony 16-50mm f/3.5-5.6 kit lens.

LCD screen sometimes blanks out

When it comes to the a6300’s LCD screen, I was grateful for its pop-out rotating feature, something that has been sorely lacking on Canon DSLRs. Some other reviewers complained about the a6300 lacking a touch screen LCD, but again, this is something I’ve never had on a camera, so the fact that it’s missing doesn’t bother me.

One feature of the a6300’s LCD that was troublesome, was its occasional blackouts, which usually occurred right after rotating the screen. Oftentimes, the only way to get the LCD working again was to turn the camera off and on. With that said, using the electronic viewfinder (EVF) always worked without fail, even when the LCD blanked out.

Over to you

Do you already shoot with the Sony a6300, or are you considering making the move? What do you love about it, or what hesitations remain? Let me know your thoughts in the comments below.

googletag.cmd.push(function() {
tablet_slots.push( googletag.defineSlot( “/1005424/_dPSv4_tab-all-article-bottom_(300×250)”, [300, 250], “pb-ad-78623” ).addService( googletag.pubads() ) ); } );

googletag.cmd.push(function() {
mobile_slots.push( googletag.defineSlot( “/1005424/_dPSv4_mob-all-article-bottom_(300×250)”, [300, 250], “pb-ad-78158” ).addService( googletag.pubads() ) ); } );

The post Sony a6300 Mirrorless Camera – Thoughts and Field Test by Suzi Pratt appeared first on Digital Photography School.


Digital Photography School

 
Comments Off on Sony a6300 Mirrorless Camera – Thoughts and Field Test

Posted in Photography