RSS
 

Posts Tagged ‘There’s’

Photokina 2018: Sigma interview – ‘There’s no magic to it, we just try to be unique’

14 Oct
Katuto Yamaki, CEO of Sigma, pictured at this year’s Photokina trade show in Cologne Germany, last month.

We spoke to several senior executives last month in Germany at the Photokina trade show. Among them was Sigma CEO Kazuto Yamaki, who shared his thoughts on the photography marketplace in general, and the just-announced L-mount alliance. The following interview has been edited for clarity and flow.


How did the L-mount alliance come about?

I don’t remember exactly when but I think it was two or three years ago. At that time we’d already decided to make a full frame mirrorless camera featuring Foveon technology. We were planning to develop our own short flange back mirrorless system. Actually we already had a design. I don’t remember the exact spec but I think the flange back was about the same [as the L mount], about 20mm, and a similar mount diameter.

And around that time, Panasonic approached us and proposed that we work on it jointly. At around that same time, Panasonic approached Leica, and finally the three companies came together – I think it was about two years ago. And then we agreed to join the L mount system and we discontinued the development of our own original mount system.

Panasonic’s forthcoming Lumix S1R will be a professional-grade full-frame mirrorless camera built around the L-mount. One of the biggest announcements at this year’s Photokina was the alliance between Leica, Sigma and Panasonic – the first fruits of which are expected in spring of next year.

Was there anything about the L mount from a technical point of view that made it particularly attractive?

I would say it’s a well-balanced mount. The flange back is short enough without being too short, and the diameter isn’t too big. It’s a good balance. If the diameter is too big, sometimes it’s difficult to make the camera bodies compact. And if we make a slow lens, like an F2.8 prime or an F3.4-5.6 zoom lens, with a wide diameter mount the shape of the lens will be like this [indicates a funnel shape, tapering from a wide mount to a narrow front element] where the front is slimmer than the back. That doesn’t look great, in my opinion. So the L mount is a well-balanced mount size. 20mm is not too short.

Do you have a timeframe for your own L mount lenses?

I need to check with our engineers, but probably we’ll start shipping our first L mount lenses sometime in the middle of next year.

Will they be L mount versions of your existing designs, or will they be entirely new designs?

Both. We already have the 14 lenses for Sony E-mount, so we’ll make L mount versions of those lenses, and they’ll start shipping next year. We’ll also start shipping brand new L mount lenses.

Canon’s new EOS R debuts the RF mount, which will eventually replace EF as Canon’s main interchangeable lens mount. Alongside the camera, Canon launched a brace of excellent new RF mount L-series lenses, optimized for mirrorless.

Are you in communication with Canon and Nikon around their new mounts?

Around the new systems? No, not at all. We have a great interest in the two new systems but right now I have no plans.

In the past, there could be problems when Canon and Nikon might release new cameras, with slightly changed software, and third-party lenses would stop working properly. Is that a worrying possibility for you?

I can’t deny the potential risks of a similar problem in the future. However, I think such possibilities are significantly lower than before. To be honest, our firmware in the past was not so robust, therefore, we experienced some issues in the compatibility. However, the situation today is quite different.

We’ve worked hard to make the current firmware very robust, and we will continuously enhance the strength of our firmware. Even if we see some minor issues, we’ll upgrade our firmware to make our lenses work perfectly using our USB Dock.

Did Sigma have any influence into the design of the new Panasonic S1/R?

No. Actually, I personally had no idea about the new camera. So at the press conference [at Photokina] I saw the camera for the first time. We do not exchange information [between Sigma, Panasonic and Leica] about our roadmap for products for the new system. It’s a matter of compliance [with antitrust legislation]. We simply cannot do that.

With the announcement of the L-mount alliance, Sigma has confirmed that it will discontinue development of its own SD-series APS-C format cameras, in favor of a new full-frame system built around the L mount.

Now that you’re working on a new full-frame L-mount camera, does this mean that you’ll cease production of your SA mount mirrorless cameras?

We will continue to manufacture and sell our existing SA mount cameras, but we won’t develop any new SA mount cameras in the future.

Will you continue to make lenses in the SA mount?

Yes, as long as we manufacturer lenses for DSLRs, we’ll continue to make lenses in the SA mount. There are still SA mount camera users out there in the world.

Do you expect that the market for M43 lenses will be reduced, following Panasonic’s entry into the full-frame market?

I don’t know, and I might not be the best person to comment, but I’ve seen many journalists using M4/3 system cameras here in Photokina. In my opinion, M4/3 is a great system if you need compactness.

Today we have some second-generation employees and even some third-generation employees.

How will Sigma continue to differentiate its products in the future, from other third-party lens manufacturers?

I don’t believe there’s any magic to it, but we try to be unique and different to other companies. We just invest in the technology, and in the factory, and we improve communication with our customers. We will do everything that we can do, to differentiate from other manufacturers. Also, we have very loyal employees. They’ve worked for us a long time. Today we have some second-generation employees and even some third-generation employees.

It’s different for example from the semiconductor business. When it comes to lenses, the experience and the know-how of the employees makes a big difference. With lenses it’s analog-based technology, where experienced workers are key. And that’s why we [don’t want to] move our factory. If our factory moved, we’d lose our experienced workers.

Sigma’s new 40mm F1.4 Art has been designed as a ‘reference’ prime lens for the Global Vision series, and offers excellent performance, albeit in a relatively large, heavy form factor.

Check out our full gallery of samples here

Why did you decide to create a 40mm Art-series lens?

40mm is a very popular focal length for videographers, so there was a demand from the cine market. Also there were some requests from our own users. Our first DP2 camera was a 40mm equivalent focal length.

Do you have any predictions for the proportion of your lenses that you expect to sell in mirrorless mounts versus DSLR mounts, in the future?

Within three or four years I expect our mirrorless mount lens sales to be much bigger than for DSLR. Maybe 70% to 30%.

What is your opinion of Canon and Nikon’s new lenses for the RF and Z mounts?

I’ve been very impressed by Canon’s new lenses for RF. The 50mm F1.2 and 28-70mm F2. Very impressed – and a little jealous! They’re possible due to the wide diameter and short flange back. Otherwise such lenses would be very difficult or impossible. Having the larger elements at the rear of the optical system makes it easier to achieve good performance at large apertures.

Software can’t create detail, only good optics can do that.

One thing that is an option in mirrorless cameras and not DSLRs is in-camera lens corrections. When you’re designing new lenses for mirrorless do you include software correction into your planning?

Until just a few years ago I was quite negative about software corrections. Software can’t create detail, only good optics can do that. But today, sensors have more resolution, and the correction algorithms are much better than in the past. So I think software correction is a good tool, when it comes to achieving good image quality. That’s why we started to support Canon EOS DSLRs’ lens correction. Software lens correction is a useful tool, but it’s not a good idea to rely on it too much.

How do you prioritize development of which system you’ll develop lenses for?

It’s basically done based on demand. But for example even if demand for our SA mount lenses is very small, we’ll still prioritize it because that’s our own system. Moving forward, now that we have the L mount, we’ll give that priority.

The new ‘S’ class Sigma 70-200mm F2.8 features ten low-dispersion glass elements including nine FLD elements which have very similar properties to fluorite. The FLD elements are indicated in yellow, in this schematic.

The new 70-200mm F2.8 is classified as ‘Sport’. How would an ‘Art’ version of this lens be different?

It’s a sort of a mid-point between Sport and Art. But it’s Art-class glass. This lens uses nine FLD glass elements. FLD glass has almost the exact same optical characteristics as fluorite. To be honest, Canon and Nikon’s 70-200mm F2.8 lenses already represent the highest optical quality for this type of lens. We believe that we can [still] improve on that but the difference is not huge. It’s hard to differentiate just by optical performance.

Are there future technologies that would allow you to take the next step, and move performance forward?

I think so, for example FLD. We didn’t have that before. This is Hoya glass, and we worked together to develop this new glass material, which helps achieve better performance. If a careful photographer checks the amount of longitudinal chromatic aberration and bilateral chromatic aberration, we believe they’ll see this lens is better. But if they just check resolution, they may not see a difference [compared to Canon and Nikon’s current 70-200mm F2.8].

Sigma now supports several mounts, plus the L mount, plus potentially Canon RF and Nikon Z in the future. How will you grow the company to accommodate this scaling-up without losing Sigma’s identity?

I will admit that is quite challenging. But obviously the volume of lenses produced per mount will be reduced, because I don’t think the market will grow like it has in the past. That means we have to produce more kinds of products per month. Which could cause us to lose efficiency, and ultimately drive up production cost. This is very challenging for us. We need to create a new production system to keep our efficiency up, even if we manufacture more products per month.

Kazuto Yamaki, pictured at Sigma’s main assembly plant in Aizu, Japan, during our visit to the site in 2014.

Read our complete factory tour

If we used external suppliers it would be easy – we’d just reduce our purchases from those suppliers, but we do almost everything by ourselves. We’re continuously increasing the size of our factory, and even right now we’re planning to build another facility [at our main site in Aizu] and we’ll continuously invest in new manufacturing over the next few years.

After I took over my father’s business, over the past six years we’ve built new three buildings at Aizu. This will continue.

Will you run out of space?

Yes, this is a problem! Usually manufacturers choose flat ground for their factories, but my father liked to build in the middle of the mountains. His dream was to become a company like Carl Zeiss, and they have a factory in the hills. He thought that flat ground was boring! It’s very challenging.


Editors’ note: Barnaby Britton

In 2018, Sigma is a company in flux. Since the launch of the Global Vision lineup in 2012, Sigma has gone from focusing primarily on just two DSLR lens mounts (plus lower-volume production of Some Sony A, Pentax PK and Sigma SA-compatible lenses) to soon supporting eight, excluding PK but including the L-mount, which will effectively replace the older SA mount in Sigma’s own forthcoming full-frame camera lineup.

That’s a of a lot of work for any company, let alone a relatively small manufacturer but if CEO Kazuto Yamaki is daunted by the prospect, he doesn’t show it. His main concern, expressed in this interview and in previous conversations, seems to be making sure that as it evolves and grows, Sigma doesn’t lose its identity along the way.

In order to maintain efficiency and keep costs manageable, Sigma will need to develop new manufacturing processes

Sigma’s Global Vision lenses are popular for two main reasons: they’re very good, and they’re excellent value for money. Doubling the number of lens mounts that it supports is not an automatic win for Sigma, or even necessarily for its customers. As Mr. Yamaki points out, increasing the number of products in the company’s lineup does not mean that total sales will increase by the same proportion.

In order to maintain efficiency and keep costs manageable, Sigma will need to develop new manufacturing processes – something that Mr. Yamaki freely admits. Add to that the challenge of creating a brand new lineup of full-frame cameras, and the next few years at Aizu promise to be very busy.

Yamaki is confident in his products, proud of his engineers, and trusts their ability to tool up for the new mirrorless mounts

As usual, Mr. Yamaki’s responses to our questions at Photokina were candid and thoughtful. He’s confident in his products, proud of his engineers, and trusts their ability to tool up for the new mirrorless mounts. Despite the challenges ahead he’s genuinely excited by the possibilities presented by Canon and Nikon’s entry into the full-frame mirrorless market, not only for Sigma but for the industry as a whole. We’ve noted before that while many senior executives seem to prefer pretending that competitors don’t exist, Mr. Yamaki’s respect – and praise – of his competitor’s products is unusual.

In return, Sigma’s CEO is widely liked by his peers in the industry. The recently announced L-mount alliance with Panasonic and Leica would quite possibly never have happened if it weren’t for the close relationship between Mr. Yamaki and Panasonic’s Yosuke Yamane. Leica’s majority shareholder Dr. Andreas Kaufmann, in turn, has praised Mr. Yamaki’s leadership of Sigma, which remains a family-owned company.

In Mr. Yamaki’s own words: ‘There’s no magic to it – we just try to be unique’.

Articles: Digital Photography Review (dpreview.com)

 
Comments Off on Photokina 2018: Sigma interview – ‘There’s no magic to it, we just try to be unique’

Posted in Uncategorized


Camera app developer says there’s no ‘beauty filter’ being applied on the iPhone XS, XS Max

03 Oct

Yesterday we learned that at least a handful of iPhone XS and XS Max users are unhappy with their new devices’ front camera image quality, with some early adopters reporting over-excessive skin smoothening and beautification effects when taking self-portraits.

Software developer Sebastiaan de With, the man behind the Halide camera app, has had a closer look at the new iPhone models’ camera processing and says there isn’t any beautification applied to the front camera images. Instead, he says, it’s Apple’s new approach to image processing that can result in soft textures and smoothening.

Both the front and rear cameras in the iPhone XS and XS Max are applying computational photography methods, merging multiple frames into one to optimize image quality across the image. Frames are captured at different exposures, with the image processor picking the best elements of each frame and combining them into the final image output.

In his blog post de Wit says that this method results in a “whole new look” that’s quite different from previous iPhone cameras. The frame merging reduces the brightness of the bright areas and the darkness of the shadow areas, resulting in textures with lower levels of contrast. All the detail is still there but the viewer perceives those areas as softer and less sharp. This is also why the skin in selfie images looks softer.

Additionally, the new iPhone models are applying more aggressive noise reduction — something Apple was already known for going heavy on in the past. This is necessary because the iPhone XS tends to user faster shutter speeds and higher ISO values than previous versions, presumably to keep motion blur to a minimum. Getting rid of the noise inevitably also eliminates some fine detail.

The reduction in detail is particularly true for the front camera where a smaller image sensor comes with higher noise levels to start with. On the plus side, dynamic range is increased which is particularly useful for high-contrast scenes, where highlight-clipping is reduced and more shadow detail visible.

De With also says all these software parameters can be tweaked by Apple. So, if it turns out the “new look” isn’t too popular with consumers the Apple engineers could pretty easily revert to a more “traditional” look via a software update.

De With’s Halide app will soon receive a new Smart RAW feature that “deactivates” Apple’s Smart HDR algorithm to reduce noise reduction and reveal more image detail and fine textures. For more information head over to Sebastiaan’s complete article on the Halide blog.

Articles: Digital Photography Review (dpreview.com)

 
Comments Off on Camera app developer says there’s no ‘beauty filter’ being applied on the iPhone XS, XS Max

Posted in Uncategorized


Video: There’s no such thing as lens compression, it’s just perspective distortion

24 May

We’ve been saying for years that the term “lens compression” is misleading, but Lee Morris over at Fstoppers has put together a useful video that explains exactly why this is the case, and demonstrates it with two easy-to-understand examples.

The main issue with the term “lens compression” is that the distortion the term refers to has nothing to do with the lens itself. The issue is simply perspective distortion, caused by the distance between your camera and your subject, as well as the distance between your camera and the background.

Put another way: if your subject is 1 meter away (or feet: it doesn’t really matter), and your background is 50 meters away, moving back 1 meter will double the distance between you and your subject, while barely changing the distance between you and the background—the perspective on your subject changes drastically, while the perspective on your background barely shifts at all.

This diagram, from the FStoppers video, shows why changing your perspective appears to compress the background… When you double the distance to your subject you halve its size, but you’ve barely moved in relation to the background, so it remains roughly the same size in your image.

To show this concept in action, Morris uses two examples. First, he shows you how you can get the exact same perspective using a 24mm lens that you can with a 400mm lens by simply cropping the wide-angle shot. Then, he does the opposite, creating the same perspective as a 15mm shot by stitching multiple shots taken at 70mm.

Of course, that doesn’t mean you should go throw out all of your lenses and just pick one focal length to either crop or stitch with. Physical limitations apply: like how much room you have to back up, how much resolution you’re willing to sacrifice by cropping, and how much sanity you have to spare if you’re trying to create a 15mm shot by taking a thousand shots with an 800mm lens.

The demonstration is just that: a demonstration of a concept that is often misunderstood because of the language we use to describe it. The compression you get using a long lens isn’t a result of the lens, so much as the distance between your subject, your background, and the camera.

Articles: Digital Photography Review (dpreview.com)

 
Comments Off on Video: There’s no such thing as lens compression, it’s just perspective distortion

Posted in Uncategorized


Instagram test lets users re-share content, but there’s a way to disable it

10 Feb

Instagram has confirmed that it is testing a feature for sharing publicly available content posted by other users. In a statement to TechCrunch, Instagram explained that the company regularly tests new ways for users to “share any moment” with their friends. The feature, which some people are referring to as “regram,” allows for public content to be shared within a user’s Instagram Story.

The sharing feature is only available to a small percentage of users at this time. Instagram didn’t provide any sort of time frame for when the feature may launch for all users, nor whether that is certain to happen. However, it seems likely that the feature will see a wider launch due to all users already having the ability to disable re-shares.

Photographers can prevent users from re-sharing their content by opening their Instagram profile, then tapping the menu icon. Within the app’s menu, a new setting option is listed that reads “Allow Others to Reshare” alongside a toggle switch. Toggling the switch off will disable other users’ ability to re-share content posted by that account.

Via: The Verge

Articles: Digital Photography Review (dpreview.com)

 
Comments Off on Instagram test lets users re-share content, but there’s a way to disable it

Posted in Uncategorized


There’s no right way to be a photographer, and no right way to shoot (or not shoot) an eclipse

28 Aug
Photo by Allison Johnson

After speaking with a bone-a-fide eclipse expert a few months ago, I’ve been a proponent of not taking photos of the solar eclipse. So, on the morning of August 21st, 2017, I was on my way to the office with no plans to take pictures. I happened to have the Nikon D810 and AF-P 70-300mm at my side, but that was only because I’d been shooting with it over the weekend and planned to bring it to the office and pass it off to someone else.

My grand plan for the morning included mooching my colleague Jeff Keller’s eclipse glasses and safely viewing the event from our building. This scheme was almost waylaid when I was initially turned away from the at-capacity roof deck by an actual bouncer. But I persisted, and by that I mean I just hung around for a few minutes, and eventually made it outside into the utter spectacle when someone else left.

Equally as good as the show in the sky was the show on the ground

As it turned out Jeff actually had glasses to spare, because he is good at planning ahead, so I found myself with a coveted spot on the deck and a pair of eclipse glasses just as the show was getting good. But I was surprised to find that equally as good as the show in the sky was the show on the ground.

There’s something that happens to your face when you put on these glasses and look at the moon in front of the sun. I felt it happen to my face, and I saw it on countless other faces Monday morning. Your mouth opens in awe. You smile, or laugh, or just stare.

Photo by Allison Johnson

I watched, and eventually started photographing my fellow eclipse-viewers. And though I hadn’t expected to take any photos at all, I found myself really enjoying capturing the reactions around me. Not one person put on those glasses and looked bored or unimpressed. Staring at the moon eclipsing the sun turns out to be a great equalizer, because it makes us all feel like little kids again. In fact, Wenmei can verify this, because she took photos of actual kids.

Photo by Wenmei Hill. Also, two of these children.

My lackadaisical approach to the whole thing was just one of a range of ways DPR staffers captured the eclipse. My colleague Dale Baskin planned for the big day months in advance. He traveled south to Oregon, where he’d staked out a place for himself in the path of totality. He’s an experienced night sky photographer and had a mostly set-it-and-forget it rig in place, so he photographed the whole enchilada and even managed to enjoy it too.

And then there’s Rishi. Never one to back down from a scientific challenge, he Frankensteined a rig that he was mostly certain would not fry his camera’s sensor. It worked, and his sensor is still intact.

Photo by Rishi Sanyal

Stacking filters and doing math seems like entirely too much trouble to me, but if I’ve learned anything working at DPReview it’s this: that’s just how some people enjoy photography. It’s different from how I enjoy photography, but that’s okay – each is valid.

Really, the “don’t photograph the eclipse” advice wasn’t directed at every photographer. It was meant for people like me: hobbyists who might be tempted to try and capture the event at the expense of their own enjoyment of it.

There’s no one right way to be a photographer, and there’s no one right way to enjoy an eclipse

The more precise advice would have been, “Enjoy the eclipse,” and for many people, that means photographing it: scouting a location, acquiring the right filter, picking a lens, getting in place and coming away with a once-in-a-lifetime shot. And it wouldn’t really matter whether that eclipse shot looks more or less like everyone else’s: what matters is that they did it and enjoyed the process. That means something different to me than it does to Dale or Rishi.

As a baseball fan with little interest in advanced stats, the sentiment I often hear that “there’s no one right way to be a fan” makes a lot of sense to me. For some people, enjoying the game means understanding how to calculate a player’s slugging percentage. I’m content just baselessly speculating whether Nelson Cruz will hit a 400-foot home run in his next at bat. To each their own.

Just as there’s no right way to be a fan, I believe there’s no one right way to be a photographer, and no one right way to enjoy an eclipse. It really is too good of a thing to miss, however you take it in.

Articles: Digital Photography Review (dpreview.com)

 
Comments Off on There’s no right way to be a photographer, and no right way to shoot (or not shoot) an eclipse

Posted in Uncategorized


There’s no ‘right way’ to use Instagram as a professional

22 Jun

Okay so it might not be super minimalist….it might not fit the feed… but rules are meant to be broken right?! ???

A post shared by Jennifer Moher (@jennifermoher) on

I don’t view my Instagram feed very seriously. I put some ‘work’ photos on there that I’m proud of, both from reviewing cameras and my freelance work. I definitely don’t do a very good job of curating – people who are interested in both motorcycles and cats would probably like my feed, but I’m not sure how much overlap there really is for those audiences.

So for those who are full-time, working professional photographers who need to hustle clients for a paycheck, how does Instagram fit in? Rangefinder Magazine asked five photographers about their posting philosophies, and got five pretty different results.

Jennifer Moher likes to show people that she’s more than just a wedding photographer, so while her feed has a pretty consistent visual aesthetic, there’s a lot of her personal life on there, with everything from hikes to coffee cups. Caroline Briggs, on the other hand, says ‘a random snap of my coffee cup would be too jarring and off-topic,’ and therefore keeps her personal and professional photography in two separate accounts.

Are you on Instagram? How does it fit into your photographic world? Let us know in the comments, and head on over to Rangefinder for the full writeup.

Via: Rangefinder

Articles: Digital Photography Review (dpreview.com)

 
Comments Off on There’s no ‘right way’ to use Instagram as a professional

Posted in Uncategorized


10 Things to Photograph Indoors When There’s Bad Weather Outside

07 Apr

No matter where in the world you live, there are some seasons that are more conducive to outdoor photography than others. That said, bad weather is no excuse to stop learning about photography! Here are 10 beginning photography exercises to try the next time you’re cooped up indoors due to bad weather. Each exercise includes a subject theme, discussion about the type of skills you’ll practice with that particular subject, as well as some questions and/or ideas to walk through in order for you to really take your understanding to the next level.

1. Flowers

bad weather

Pick up an inexpensive bouquet of flowers the next time you’re at the grocery store and bring it home. Pop the flowers in a vase, and start shooting!

If you choose a bouquet with a range of colors (including white flowers if possible), you’ll be able to practice properly exposing your images across the dynamic range. Photographing flowers is also a great opportunity to play around with different apertures. If you’re currently shooting in Auto, pop your camera over into Aperture Priority mode, and give things a try. How does changing from f/2.0 to f/5.6 affect the image? Which look do you prefer?

2. Candles and/or a Fireplace

bad weather

There are a few different benefits to spending some time photographing a flame. Whether you’re photographing a collection of candles or a fireplace, try experimenting with different exposure lengths in Shutter Priority mode. Try both long and short exposure times, and also be sure to note how the shutter speed affects the overall exposure of your image. Does a longer shutter time translate to a lighter or a darker overall image? How could you balance out a longer shutter opening without overexposing the entire image?

Another benefit to photographing flames is that it also makes you consider composition in a way that many subjects do not, especially in terms of reflections. Try putting a mirror or other shiny surface underneath a candle and photographing it. How does the reflection of the flame affect the overall image? Do you want to include the reflection in your image, or do you prefer to crop it out?

3. Oil and Water

This simple project packs a big punch!

bad weather

Equipment and supplies

A macro lens will help you out tremendously here, but if you don’t have one, extension tubes are also a great option. This image was taken with a $ 15 set of extension tubes and a 50mm lens. Basically, all you need is a clear glass dish, two cups, colorful paper, water, and olive oil.

Setup

First, take your colorful paper, and set it on a table or counter. Then take your two cups and set them on top of the paper, several inches away from each other. Next, take your glass dish and set it on top of the cups, so that it’s elevated off of the colorful paper. Add a little water, then a little olive oil, and be ready to photograph the bubbles that appear. You may want to spend some time experimenting with photographing the glass dish at differing heights above the paper underneath. Experiment with different types of colorful paper; scrapbook paper is a great resource for this. Try differing amounts of oil and water, and see how those small changes affect your image.

This is a great opportunity to experiment with macro-like photography in a way that has a pretty big impact. If you are using extension tubes rather than a macro lens, keep in mind that your extension tubes may or may not work with your camera’s autofocus. If you’re having trouble getting the bubbles to come into focus, you may need to focus manually (try the LiveView focus technique).

4. Food

bad weather

Photographing food is a great opportunity to play around with styling, as well as post-processing. It’s my humble opinion that much of your direction in terms of styling and processing will come from the food itself. In this case, I had a rustic loaf of bread that was covered in different seeds. It reminded me of rustic, communal dinners, and so I wrapped it in a tea-towel and stuck it directly on my table (something that happens with fair frequency to loaves that have just come out of the oven around here). I also knew from the get-go that I’d apply a more matte post-processing technique than I usually use in portraits in order to echo the rustic feel of the bread.

On the other hand, what approach would you take to styling and photographing a sleek cheesecake? Or a classic fruit salad? This short little exercise allows you to push yourself in terms of styling and post-processing, trying out skills and techniques that you may not typically use, as well as spending some time thinking about what types of styling and post-processing would best represent the subject.

5. Window Silhouettes

bad weather

I don’t know about where you live, but around here it can often be rainy and sunny at the same time. If you find yourself faced with similar weather, it’s a great opportunity to try doing a window silhouette.

Window silhouettes are a great exercise if you are learning photography because it will help you understand how your camera sees light. If your camera is on auto, and you focus directly on your subject, what does your camera try to do? If you move your focal point off of your subject, what does your camera “see” then? Does it affect the focus of your image? What happens if you try out the different metering modes? Does one seem to be more effective than the others in creating a silhouette?

6. Food Coloring and Water

bad weather

Grab a tall glass or vase, fill it with water, and then drop a couple of drops of food coloring into it.

This is a simple and colorful way to examine both shutter speed and light. Try using a short shutter speed. What does the image look like? Try using a long shutter speed. How is that image different?

In addition, try shooting with all different types of light. The transparency of the water is a great opportunity to practice capturing backlit images.

7. Interiors

bad weather

You don’t need to have perfectly clean or perfectly decorated rooms in order to gain valuable experience and knowledge from photographing them. Just a pick a room and go for it.

Experiment with light sources. How does the final image look when you use only natural light? What happens when you use only overhead and/or floor lights with the curtains closed? How does the image look when you use a combination of natural light and accent lighting? Think both in terms of exposure, and also the color balance of the image. Which look do you personally prefer?

8. Books

bad weather

I’m a huge bookworm, so it’s no surprise that I really enjoy photographing books in all sorts of scenarios. I love the texture of the pages, I love the different colored spines. I love basically everything about books!

Photographing books is also a great way to learn about aperture. Pick any book, and crack it open. Look for a short passage that you enjoy. Set your camera to Aperture Priority mode, and start with the lowest number you’re able to select (f/4 or f/2.8 for example). Set your focal point to your desired passage, and shoot. How much of the image is in focus?

Now set your aperture to one or two numbers higher than your first setting. How much of the image is in focus this time? Continue shooting up and down your available aperture range, noticing how the image changes as you do so. When might you want to use an image with only a sentence or two in focus? When might you want an image that included more of the book in focus?

9. Pets

bad weather pets

Photographing a pet can often present many of the same challenges that you might experience when photographing children. Certainly, this will depend greatly on the type of animal you have as well as their temperament, but it holds true for our cat.

She moves quickly and is often not super interested or cooperative when I’m attempting to photograph her. So, trying to photograph our cat is a good opportunity to practice shooting candidly, as well as waiting patiently for just the right moment. Our cat is obviously never going to walk right in front of me, sit, and smile for a photo. Instead, it’s my responsibility to sit on the couch with my camera, waiting patiently. When she decides to come over and investigate, I’ll be waiting and ready. (Read: 9 Tips for Taking Better Photos of Cats) 
10. Craft Supplies

bad weather

Craft supplies are a great tool for photographic exercises because they’re usually a good source of color. Play around with color and group items randomly. Then group similar colors together.

Next, pick one single item or color to focus on. Photograph it alone, as well as grouped with the others. Is the image stronger with only one color or with many? Do you prefer the colors to be randomized, or grouped together?

Conclusion

Have you tried any of these approaches? What other ideas do you have for bad weather, indoor photography exercises that would help beginners understand an element of photography better?

The post 10 Things to Photograph Indoors When There’s Bad Weather Outside by Meredith Clark appeared first on Digital Photography School.


Digital Photography School

 
Comments Off on 10 Things to Photograph Indoors When There’s Bad Weather Outside

Posted in Photography


There’s no key like low key

31 Jan

Ein Beitrag von: Christian Meermann

In der Regel gilt für Fotografen die Regel, dass für ein gutes Foto möglichst gutes Licht gebraucht wird, am besten noch durch Lampen, Blitzgeräte und Reflektoren kontrolliert und gesteuert. Mich interessiert aber oft der diametral entgegengesetzte Zugang: Ich frage mich, mit wie wenig Licht ein Bild auskommen kann.

© Christian Meermann

Dark is beautiful

Wie dunkel darf ein Bild sein, bevor es als zu dunkel empfunden wird? Trotzdem ist das, was ich betreibe, nicht wirklich Low-Light- oder Low-Key-Fotografie im traditionellen Sinne. Die unbearbeiteten Originalfotos meiner Bilder sehen – was die Belichtung angeht – meistens wie ganz normale Fotos aus.

Die Umwandlung in ein Low-Key-Bild geschieht vollständig bei der Nachbearbeitung am Rechner. Der Hintergrund wird oft völlig schwarz und auch ansonsten dominieren die dunklen Töne. Aber: Ich versuche bei allem Hang zur Dunkelheit stets, wenigstens einen kleinen Teil sehr hell zu belassen. Andernfalls ist schnell der Punkt erreicht, an dem ein Bild zu dunkel erscheint.

© Christian Meermann

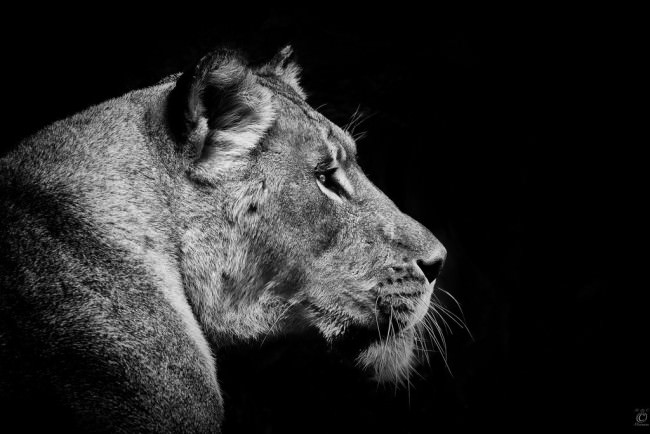
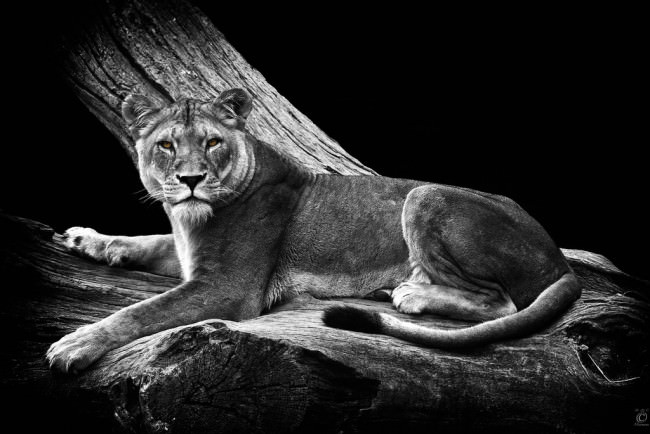
Lioness

Dieses Foto ist in der Zoom Erlebniswelt in Gelsenkirchen aufgenommen worden. Das Originalbild ist von mäßiger Qualität, was durch die dicke Glasscheibe bedingt ist, die mich von der Löwin trennte – zum Glück.

Das Tier hatte gerade etwas bemerkt und deshalb von seinem Knochen abgelassen, der wohl seine Mahlzeit für den Tag war. Es schaute und regte sich nicht. Aber dann sah es irgendetwas besonders Interessantes. Der Körper spannte sich ein wenig, der Kopf senkte sich ein wenig und die Löwin wirkte ungemein fokussiert – so, wie es nur Raubkatzen sein können. In diesem Moment drückte ich ab.

Dieses Bild ist mein erstes schwarzweißes Tierportrait vor schwarzem Hintergrund. Die Idee, hier überhaupt in schwarzweiß umzuwandeln, war ursprünglich aus dem Wunsch geboren, dadurch die ziemlich ekligen Blutreste am Maul der Löwin verschwinden zu lassen. Ich hatte noc keine Ahnung, wie faszinierend das Fell der Löwin ohne Farbe aussehen würde.

Die Idee, den Hintergrund zu schwärzen, entstand aus dem Wunsch, den Knochen zu entfernen, der vom unteren Bildrand aus ins Bild lugte. Das Schwärzen des Hintergrundes erledigte ich damals mit Kontrollpunkten in Nik Silver Efex sowie mit einem einem ganz weichen Nachbelichten-Pinsel in Apple Aperture.

Auf diese Weise blieben die Haare beim Schwärzen erhalten. Um eine völlige Schwärzung des Hintergrundes zu erreichen, musste ich den Pinsel mehrfach anwenden. Dieses Verfahren ist zwar je nach Motiv ziemlich viel Arbeit, jedoch bietet es eine ziemlich genaue Kontrolle, besonders, wenn man den Pinsel nur auf die dunkle Töne anwendet.

Diese Form der Nachbearbeitung eignet sich hervorragend dazu, Fellstrukturen nicht nur hervorzuheben, sondern überhaupt erst als interessantes Motiv sichtbar zu machen. Mal ehrlich: Wer achtet beim Originalfoto schon auf das Fell? Ich jedenfalls nicht. Außerdem wird der intensive Blick des Tieres hervorgehoben. Auf diese Wiese wird aus einem eigentlich ziemlich langweiligen und belanglosen Profilfoto ein spannendes Tierportrait.

© Christian Meermann© Christian Meermann

Minimalismus – Stepping Down

Echte Künstler haben schon vor dem Beginn der Arbeit eine Vorstellung davon, wie das fertige Produkt am Ende aussehen soll. Previsualization nennt man das auf Englisch. Bei der Tierfotografie ist dies fast immer ausgeschlossen. Wer kann schon sagen, was ein Tier als Nächstes macht – wohin es sich dreht, wie es schaut, ob es noch etwas länger stillhält.

Als Tierfotograf nimmt man, was man bekommen kann und ist dabei nicht wählerisch. Was aus den Fotos wird, entscheidet sich oft erst bei der Nachbearbeitung am Rechner, nicht zuletzt auch deshalb, weil sich beim Fotografieren im Zoo oft gar nicht abschätzen lässt, inwiefern sich die zahlreichen Störfaktoren, die Zoos so mit sich bringen, überhaupt entfernen oder ausgleichen lassen.

© Christian Meermann

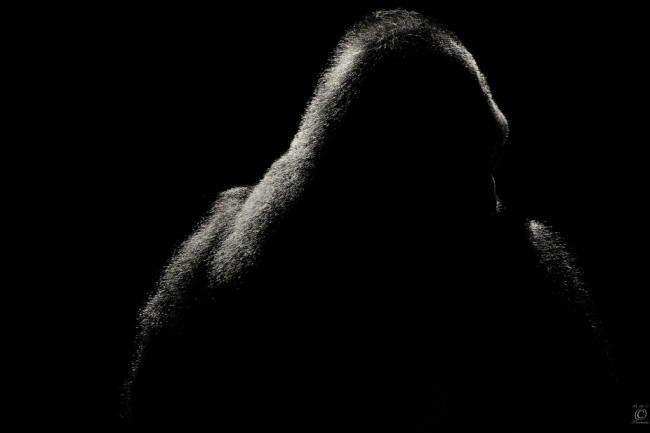
Dieses Foto ist eines der ganz wenigen, bei denen ich schon beim Abdrücken wusste, wie es aussehen sollte. Die Glasscheibe war sehr blind bzw. schmutzig und würde viele Details verschlucken. Die Sonne stand sehr ungünstig und schien außerdem sehr grell, so dass sie sehr helle Glanzlichter auf dem Fell des Gorillas erzeugte. Außerdem hatte sich der Gorilla von mir abgewandt.

Aber weil es mir schon beim Fotografieren dieses Mal nur auf die Umrisse des Tieres ankam, drückte ich trotzdem ab. Ursprünglich war der Arbeitstitel des Fotos beim Abdrücken „A Shoulder To Cry/Lean on“. Nachdem das Bild fertig war, sah mir der Gorilla aber eher aus wie ein geschlagener Boxer, der den Ring verlässt, oder wie ein abgewählter Politiker, der sich, nunmehr bedeutungslos, von seinem Publikum abwendet.

So taufte ich das Bild letztlich „Stepping Down“ und benutzte es auf Flickr, um auf die Bedrohung der Tiere in der freien Wildbahn durch den Menschen aufmerksam zu machen. Es war außerdem das erste in einer kleinen Serie weiterer Stepping-Down-Fotos, die andere, ebenfalls bedrohte Tiere in Posen zeigt, in denen sie besiegt, geschlagen, mut- und kraftlos aussehen.

© Christian Meermann© Christian Meermann

Simuliertes Licht – Watusi On Black

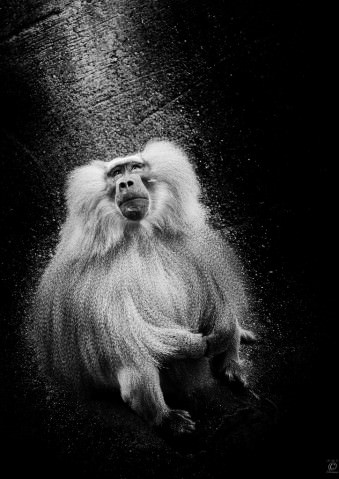
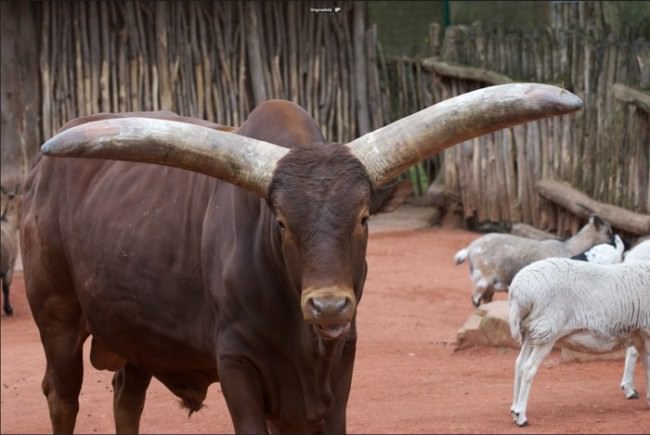
Um Tierportraits interessanter zu machen, muss man sie manchmal ein wenig aufpeppen – zum Beispiel, indem man bei der Nachbearbeitung eine Beleuchtungssituation nachempfindet, die eigentlich gar nicht gegeben war. Auf diese Weise löst man auch ein ganz anderes Problem, das sich durch die völlige Schwärzung des Hintergrundes ergibt: Scharf freigestellte Umrisse vor schwarzem Hintergrund wirken oft eher unrealistisch, wie ausgeschnitten und aufgeklebt. Als Beispiel für einen solchen Fall mag das Foto „Watusi On Black“ dienen. Hier zunächst das unbearbeitete Original:?

© Christian Meermann

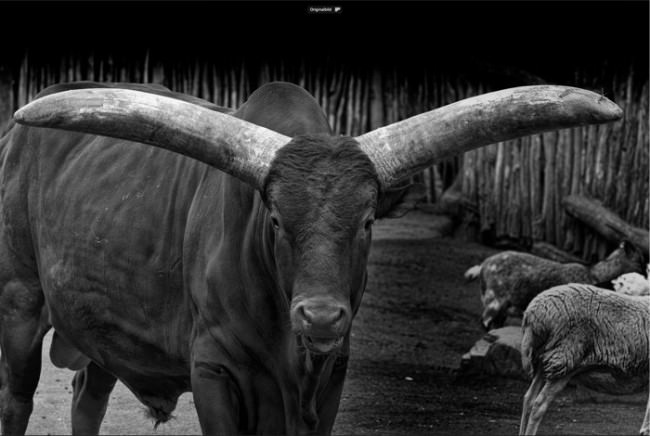
Im nächsten Schritt übergab ich das Bild an Silver Efex Pro für die Umwandlung nach schwarzweiß und die anfängliche Abdunkelung des Hintergrundes.

© Christian Meermann

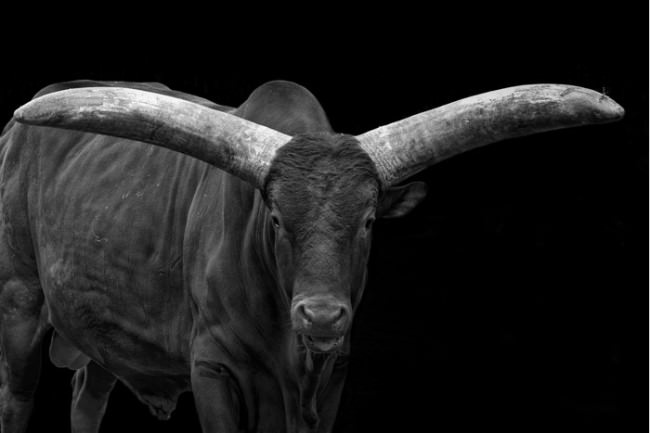
Danach benutzte ich den Nachbelichten- sowie den Kurven-Pinsel in Apple Aperture für die vollständige Schwärzung des Hintergrundes. ?

© Christian Meermann

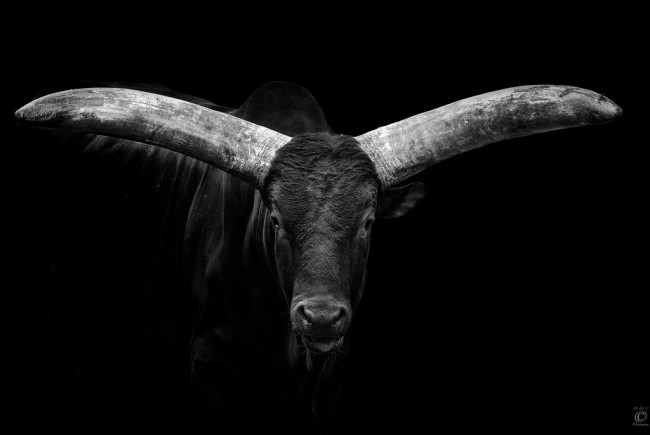
Dieses Bild ging nun wieder an Silver Efex, das mittels seiner Kontrollpunkttechnologie unvergleichlich weiche Übergange von vollständig schwarzen zu belichteten Bereichen schaffen kann. Durch das Hinzufügen von Schattenbereichen wurde hier eine Belichtungssituation geschaffen, die das Bild gleich deutlich realistischer und interessanter wirken lässt:

© Christian Meermann

A Spoonfull of Colour

Ich bin ein ausgesprochener Anhänger des Colour Keying, auch wenn mir klar ist, dass viele Fotografen eine fast schon dogmatisch anmutende Ablehnung gegenüber dieser Technik hegen. Dies mag daran liegen, dass sie allzu oft auf ziemlich grässliche Weise missbraucht worden ist.

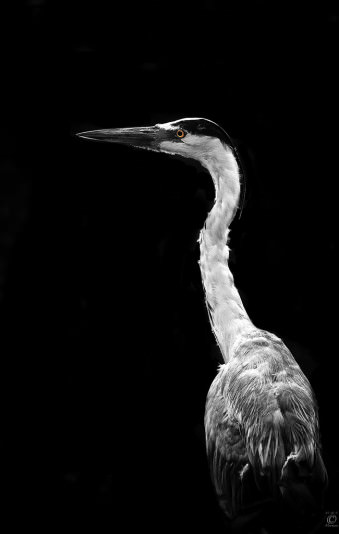
Im richtigen Maß – und vor allen Dingen: subtil – eingesetzt, kann ein farbiger Akzent ein Schwarzweißbild ungemein aufwerten. Bei monochromen Tierportraits sind es zumeist die Augen, die ein wenig Farbe sehr gut vertragen und zwar besonders dann, wenn diese Augen den Betrachter gezielt anschauen, also quasi ein Blickkontakt besteht.

Dafür hier drei Beispiele ohne weitere Kommentare, wohl aber mit der Absicht, eine legitime und faszinierende Ausdrucksform der Fotobearbeitung vor ihrer unverdienten Ächtung zu bewahren.

© Christian Meermann

© Christian Meermann

© Christian Meermann

There’s no key like low key.
Dark is beautiful.

Diese beiden Sätze sind mir ein Motto bei meiner fotografischen Arbeit. In Zukunft möchte ich mir irgendwann ein Makroobjektiv anschaffen und mich in diesem Gebiet versuchen. Fast allen meinen Tierfotos ist ohnehin gemein, dass sie möglichst „nah ran“ wollen.

Der Schritt zur Makrofotografie liegt demnach auf der Hand. Die meisten Blüten- und Insektenmakros im Netz sind allerbestens ausgeleuchtet. Es gibt also noch allerhand zu tun, wenn es darum geht, die dunkle Seite dieses Genres zu erforschen.

Im Sommer werde ich eine Woche lang den Hadrian’s Wall entlang wandern und dabei hoffentlich ein paar schöne Landschaftsaufnahmen mitnehmen können. Ohne die Gelegenheiten schon jetzt zu kennen, die sich auf diesem Weg vielleicht auftun, ist jetzt schon eines sicher: Es werden sicher auch einige Low-Key-Schwarzweißfotos dabei sein.

Die beiden Sätze sind aber auch ein Plädoyer an andere FotografInnen, sich der Dunkelheit anzunähern und sie als kreatives Betätigungsfeld zu erkunden.


kwerfeldein – Fotografie Magazin

 
Comments Off on There’s no key like low key

Posted in Equipment


What to do When there’s Nothing to Shoot

09 Mar

A Guest Contribution by Draycat

There are always days when you want to take photographs but you feel that there is nothing to shoot. Here are a few ideas for days like that.

1. Go to the Zoo

a shot from my local zoo

a shot from my local zoo

The key here is to get out of your house and go somewhere where there will be something to shoot. This could be a zoo, a park, or even a local market. What you need to do is to decide a place and give yourself an assignment to help you to focus. In a park it could be that you focus on shooting abstract images of swings and slides or try some outdoor macro shots of insects and flowers.

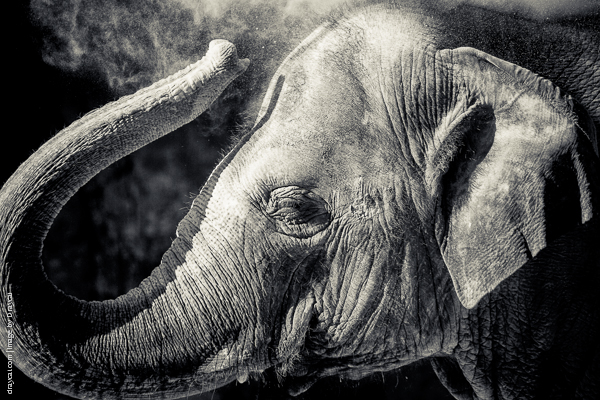
In a local market you could shoot images of the produce as if you were shooting for a local newspaper food section. I recently took a trip to a zoo and set myself the task of photographing the animals so they didn’t look like they were in a zoo. This helped me to consider how best to shoot them. You will also often have a few restrictions to overcome, which can help you to develop your problem-solving skills. For example, when I was shooting the elephants the compound was surrounded by a fence which consisted of thick metal ropes; as a result I had to shoot between the gaps which limited what I could do. As a result I decided to use a long zoom and shoot the elephants a lot more close up, which resulted in some interesting images.

2. Eat a Biscuit

Don't be afraid to experiment

Don’t be afraid to experiment

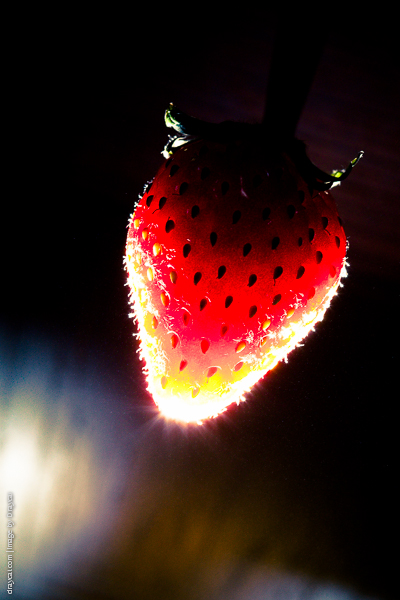
Food photography can often be a lot of fun and is very easy to do in your house. It’s not even necessary to photograph a whole meal; you can photograph some ingredients, or even something as simple as a biscuit or a strawberry. Don’t be afraid to experiment – play around with lighting, angles, distance and even focal lengths. Here is an example using a strawberry – I started off by shooting it in a traditional way, but then started messing around with my flash.

3. Pick up some Paperclips

be creative and shoot something different

be creative and shoot something different

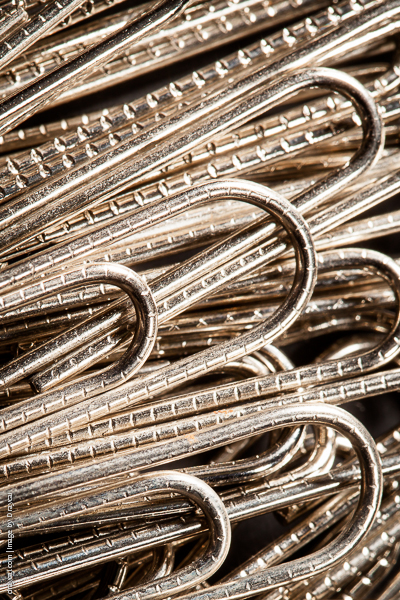
We are used to seeing macro images of insects and flowers, but if you have a macro lens why not try and shoot something else; something as simple as a group of paperclips can make an interesting image, so be creative and don’t be afraid to shoot more unusual or even mundane things.

4. Hit the Streets

Street photography is not just about people

Street photography is not just about people

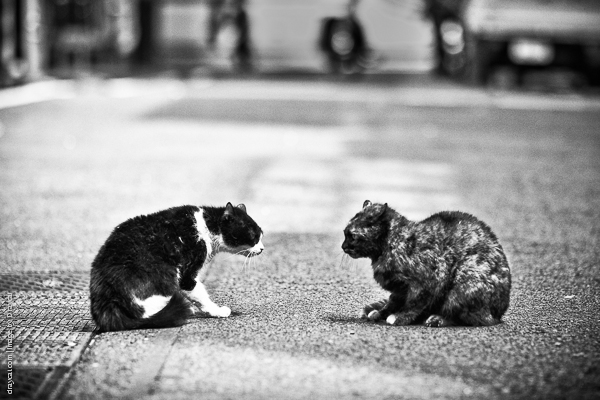
Street photography is a great thing to do if you like to shoot people; it will also help you to build confidence. When I first started shooting street it was a nerve-wracking experience, but after the first couple of times I began to develop more confidence. It also helps you to improve your photographer’s eye as you begin to look for stronger images. I took literally 100′s of pictures of people using their mobile phones when I started because it was easy, but eventually I realised that it doesn’t make for strong images. After that my eye really developed.

5. Go see a Friend

A portrait of a friend

A portrait of a friend

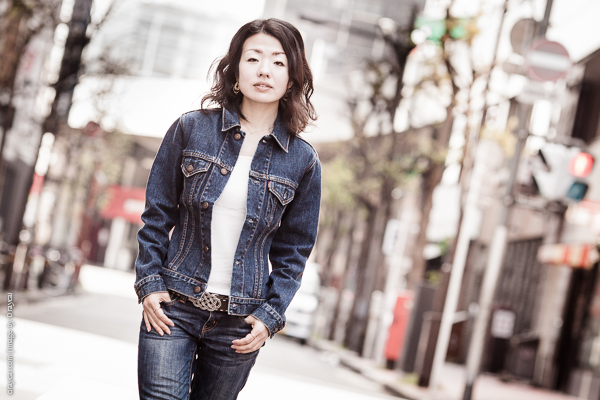
Friends can be a great source of photography practice. Either invite a friend around or go to their house with your camera and shoot their portrait. Friends will generally be supportive, and will also be happy if they can get a nice picture to use on things like social media. I always used it as a chance to catch up with them and have a beer too. Photographing my friends was basically how I got into portrait photography, and I still do it now to practice new styles or lighting when I need to.

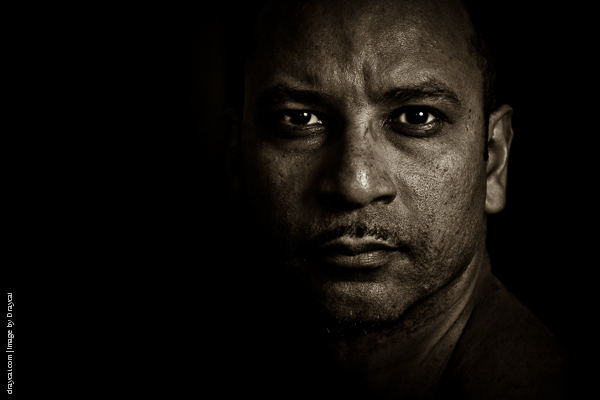
6. Shoot Yourself

self portrait

If your friend can’t make it then you always have one model that you can rely on – yourself. Self portraits can be fun and interesting. Again don’t be afraid to experiment, it’s good to try something new. Play around with lighting, focal lengths, angles, even locations. Remember as well that a self portrait doesn’t have to be your face; you can focus in on a part of your body, such as your eyes, hands or feet.

7. Grab a Beer

As much fun after the shoot as during it!

As much fun after the shoot as during it!

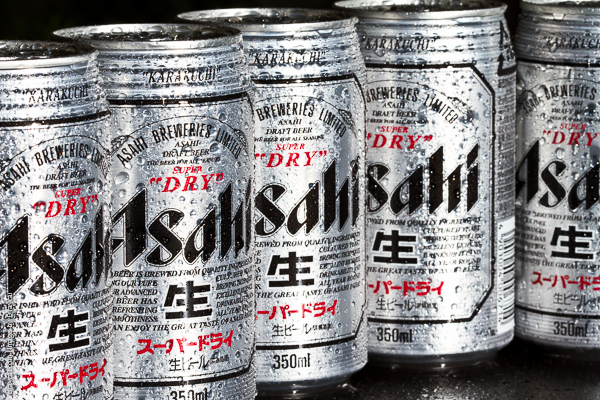
Product photography is a good way to develop creativity. Just look around your house and you’ll see lots of products. Choose one and shoot it. Play around especially with different angles and lighting if you can. You could even imagine that you have a brief from a company to shoot for a particular magazine, so that you have to shoot in a style that will appeal to the readers. Shooting beer was always one of my favourites…for obvious reasons!

8. Practice your technical skills

The best photographers know their equipment back to front so that they can react quickly. It also means that they can spend more time thinking about the image itself, rather than considering what exposure they should be shooting at, because the technical side of things has become instinctive. It’s good to practice so that it can work the same way for you. Examples of things that you could do are:

Exposure guessing – try to guess the exposure of a scene without using the camera’s light meter. Put the settings into the camera and take a shot, and then see how close you were. Practice in many different lighting situations.

Get to know the buttons on your camera – close or cover your eyes and try to set particular exposures and change settings. This will help you to be able to make changes quickly in the future when you need to.

Play with focal lengths – shoot the same object at different focal lengths and compare the images. This will help you to know how different lenses capture things differently so that you have a better idea of what focal length to use for each situation.

These are just a few ideas to start you off, but the key thing is to be creative and not just limit yourself to things you’ve done before. Happy shooting!

Draycat is British photographer, teacher and writer currently based in Tokyo, Japan. See more from him at his Website on Twitter on Facebook and on Youtube.

Post originally from: Digital Photography Tips.

Check out our more Photography Tips at Photography Tips for Beginners, Portrait Photography Tips and Wedding Photography Tips.

What to do When there’s Nothing to Shoot


Digital Photography School

 
Comments Off on What to do When there’s Nothing to Shoot

Posted in Photography


Now There’s a Face

24 Dec

Awww, why do all the creepy men who take photos of underage girls have to be taken? Gidget is hanging out at the beach, with her tongue out of course, when a fashion photographer named Peter spots her. It’s not long before the Gidge is his muse. Watch hundreds of free full-length streaming movies and TV shows on www.crackle.com Tags Gidget tv sally fields field don porter surfer beach surfing series lynette winter pete duel betty conner you really like me summer fun sitcom sixties 60’s minisode creepy photographer watch free streaming television video