RSS
 

Posts Tagged ‘Than’

Better Than Before: 10 Unwanted Structures Transformed for New Uses

02 Mar

[ By SA Rogers in Architecture & Houses & Residential. ]

time capsule factory

Creative conversion projects transform old disused structures like factories, churches, grain silos, cisterns and slaughterhouses for new purposes, helping them avoid demolition. Often abandoned yet still bearing historic, aesthetic and functional value, these buildings become the basis for unusual homes, offices, spas and museums.

La Fabrica: Cement Factory Turned Private Residence, Barcelona, Spain

time capsule factory 2

time capsule factory 3

time capsule factory 4

time capsule factory 5

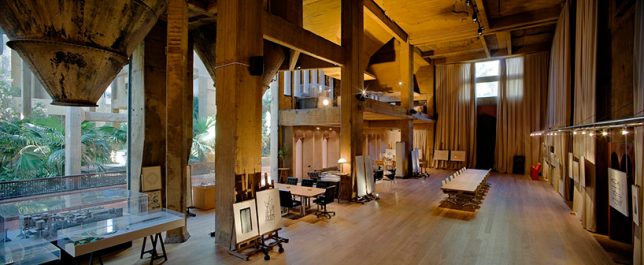
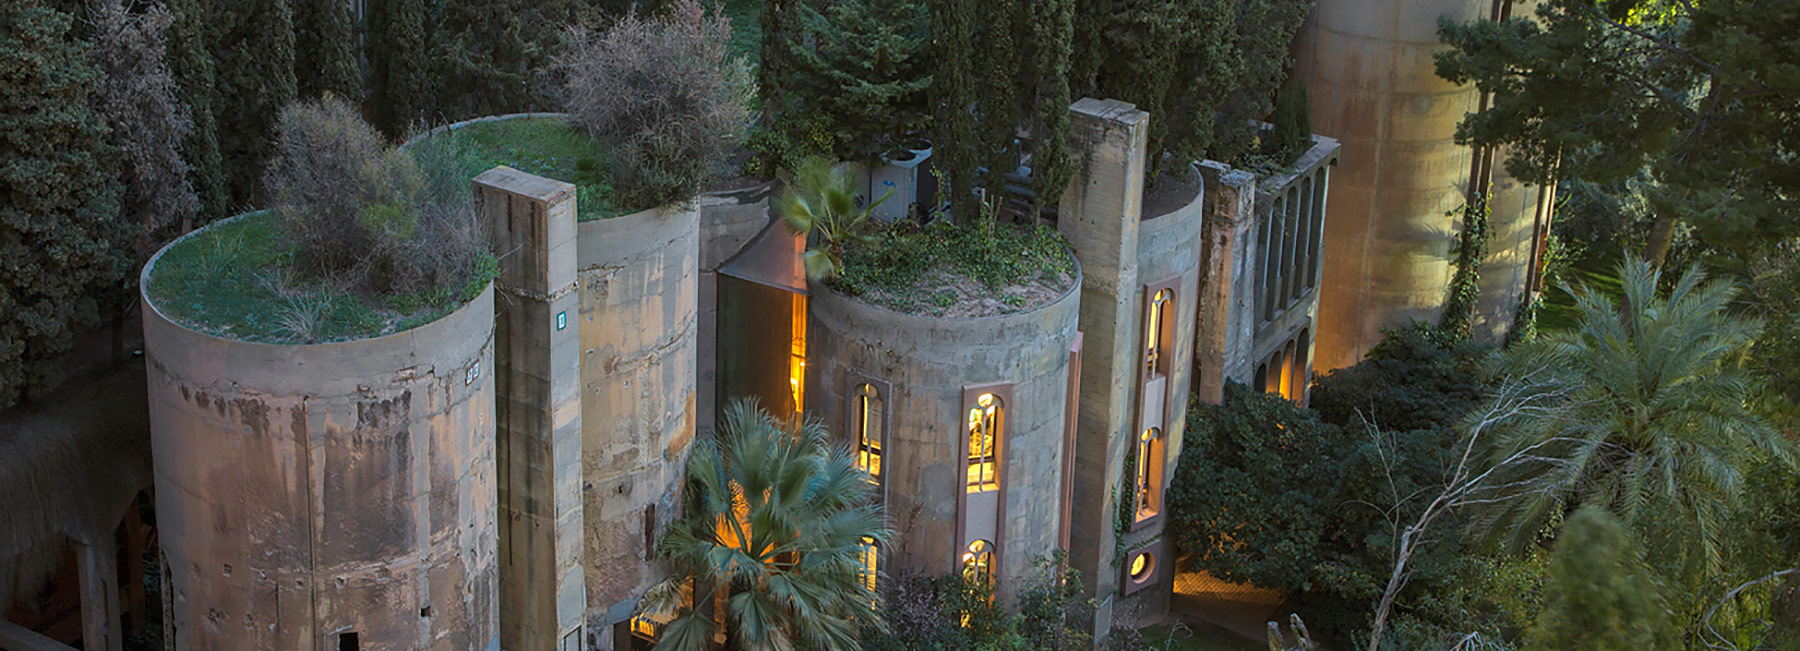
A sprawling cement factory in Barcelona, built in the post-World War I era and containing structures in all sorts of interesting shapes, has become architect Ricardo Bofill’s home and studio. Bofill transformed the complex by demolishing strategic areas to create voids for open-plan spaces interspersed with gardens. Years after he began, the home is covered in greenery in a way that seems chaotic at first, as if nature is taking the formerly abandoned space over whether it was converted or not. But a closer look reveals planned rooftop gardens atop cylindrical silos, palm trees and lush ivy. Many elements of the original structures were preserved as interesting architectural details.

Military Bunker Turned Wine Museum, China

china bunker to wine museum

bunker to wine museum 2

bunker to wine museum 3

bunker to wine museum 4

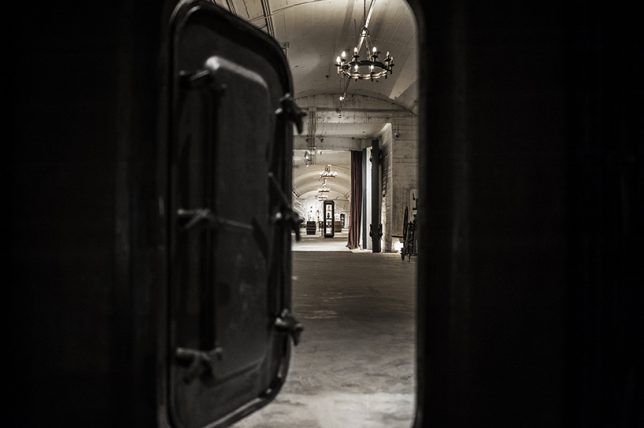
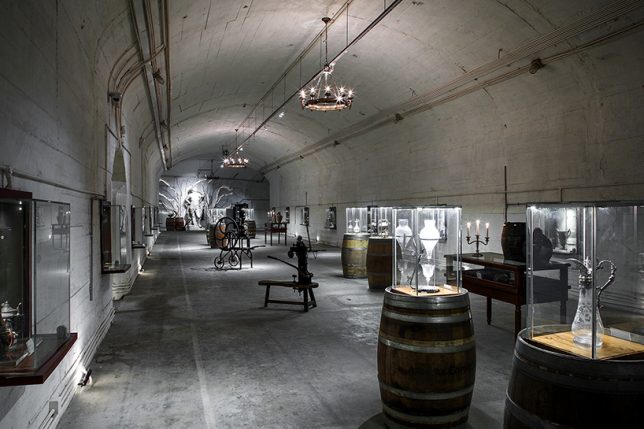
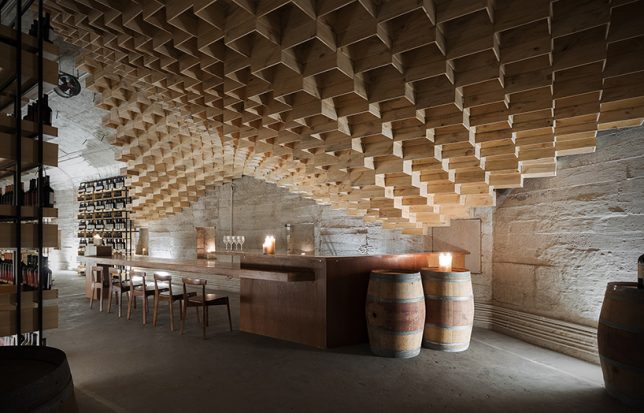
An old military bunker 1.5 hours outside Shanghai is now an unusual industrial-style winery, transformed by China-based wine lifestyle and consulting firm Shanghai Godolphin. Built inside a Chenshan Mountain cave over 80 years ago, the structure was once used to store artillery and anti-aircraft machine guns. Today, organic installations of wooden wine boxes almost seem to have populated the space naturally, like bees building their honeycomb in an abandoned vehicle.

Underground Crypt to Spa, France

crypt to spa 2

crypt to spa 3

crypt to spa

crypt to spa 4

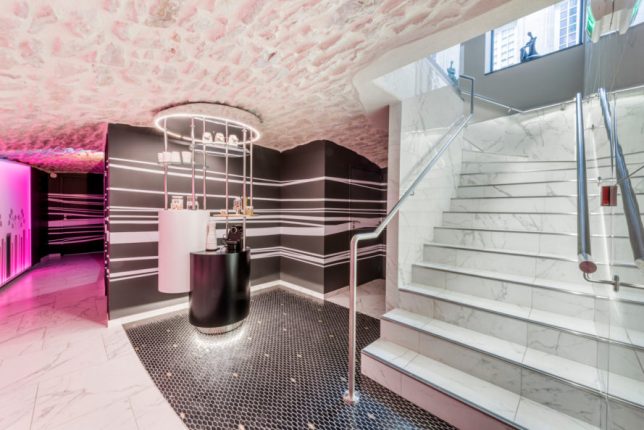
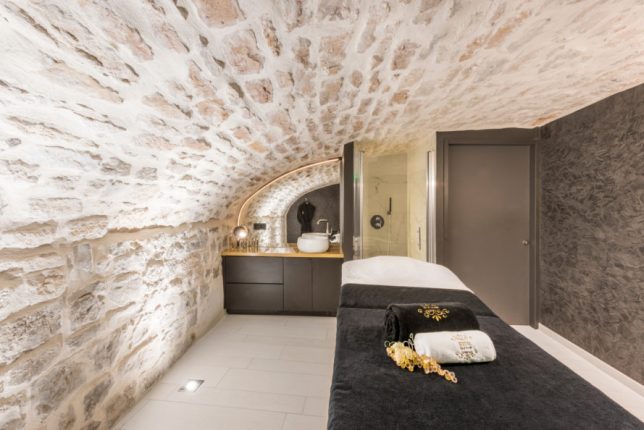
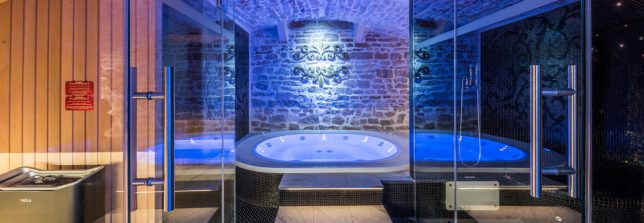
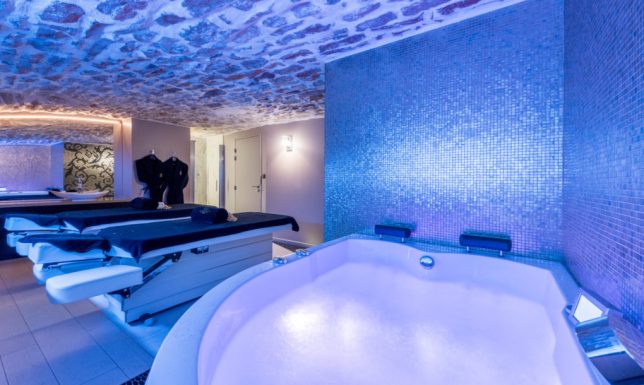
Hundreds of years ago, this subterranean space near Saint Pierre’s Church in eastern France was likely used as a crypt. Now, the underground facility serves as the luxurious Atrium Spa & Beauté, transformed by Italian designer Alberto Apostoli into a series of soothing rooms full of tubs and massage tables.

Abandoned 1920s Bank to Co-Working Space, Montreal

bank to coworking space

bank to coworking space 2

bank to coworking space 3

bank to coworking space 4

How would you like to go do your daily work or write your novel in a gorgeous historic space instead of your local Starbucks? Architect Henri Cleinge oversaw the conversion of an opulent former 1920s bank into co-working space ‘Crew,’ inserting plenty of tables and private pods beneath the dramatic vaulted ceilings of the 12,000-square-meter space.

Water Cistern to Private Home, Madrid

water cistern home

water cistern home 2

water cistern home 3

A two-level water cistern site near Madrid is now a stunning sculptural home after an adaptive renovation by Valdivieso Arquitectos. This is one example of a conversion that uses the original structures as a guide, but mostly leaves them behind, the final product showing few signs of what the home used to be. Yet the shapes of that cistern determined the unusual curves of the residence, including the glazed wall looking onto a courtyard.

Next Page – Click Below to Read More:
Better Than Before 10 Unwanted Structures Transformed For New Uses

Share on Facebook


[ By SA Rogers in Architecture & Houses & Residential. ]

[ WebUrbanist | Archives | Galleries | Privacy | TOS ]


WebUrbanist

 
Comments Off on Better Than Before: 10 Unwanted Structures Transformed for New Uses

Posted in Creativity


Apple selling more Plus models than ever

31 Jan

Apple’s financial results, which will be released tomorrow, show that in Q4 2016 Apple has sold more iPhone 7 Plus units than any of the preceding Plus models in previous years. The Plus model has a larger screen, more RAM and a bigger battery than its standard counterpart but we’d suspect the iPhone 7 Plus dual-camera with its 2x optical zoom factor and portrait mode has a lot to do with consumers increasingly opting for the more expensive iPhone variant. Overall 24 million iPhone 7 Plus units have been sold which is a 55% increase compared to the 15.5 million iPhone 6s Plus in Q4 2016. This represents 40% of all iPhone 7 sales.

This is also the first time that users in China bought more Plus devices than standard iPhones. 52% of iPhone buyers opted for the dual-camera model. With the previous iPhone 6s generation only 40% decided to go with the larger version. 

Despite good news for the iPhone 7 Plus, overall the iPhone has been struggling in the fourth quarter of 2016. According to analysts Cowen & Co, the Apple results show that consumers are less willing to upgrade their device than before and rumors about a 10 year anniversary iPhone model in 2017 made some users skip the 2016 model. Like all mobile manufacturers, Apple is under constant pressure to innovate. At least in terms of imaging the 7 Plus dual-cam looked like a step into the right directions. Let’s hope Apple can follow up on it 2017.

Articles: Digital Photography Review (dpreview.com)

 
Comments Off on Apple selling more Plus models than ever

Posted in Uncategorized


Harder than it looks: LensRentals gets inside the Canon EOS 5D IV

10 Sep

LensRentals gets inside the Canon EOS 5D IV

Canon’s new EOS 5D IV is a formidable bit of hardware, boasting a 30MP full-frame sensor and 4K video. Our friend Roger Cicala over at LensRentals.com has taken one apart to see how it works. His verdict? It’s harder to disassemble than you might expect…

LensRentals gets inside the Canon EOS 5D IV

Lensrentals.com, 2016

We love it when LensRentals takes cameras to bits for two reasons. First, we’ve always wanted to see what these things look like on the inside, and second, it’s not the kind of thing that our friends at the major camera manufacturers would ever let us do. 

The screwdrive-happy nerds at LensRentals enjoy opening up Canon cameras particularly, it seems, because in Roger’s words ‘the engineering is always nicely laid out and usually pretty’. Ok then. 

LensRentals gets inside the Canon EOS 5D IV

Lensrentals.com, 2016

The 5D IV, however, seems not to be a typical Canon camera in that it proved very difficult to get into. According to the crew at LensRentals, ‘Until now Canon cameras have all been pretty straightforward in their disassembly: you take out screws, that part of the case comes off, repeat for another part of the case’. 

With the 5D IV, on the other hand… ‘to take off any part of the shell, other than the back assembly, you have to take off most of the shell because Canon has added lots of plastic pegs and latches to the various parts of the shell, making it much more interlocking than in previous cameras’. 

LensRentals gets inside the Canon EOS 5D IV

Lensrentals.com, 2016

Part of the reason for the additional latches could be to improve the durability and weather-sealing of the camera, which as you’d hope features ‘lots of foamed seals along doors and joints’

This view shows the inside of the 5D IV’s rear shell. According to Roger, ‘Inside it looks very much like other Canon back covers. There are aluminum shields over the button panel and LCD. The flexes running to and fro over the LCD are more complex than other Canons because of the extra processing for the touch screen.’

LensRentals gets inside the Canon EOS 5D IV

Lensrentals.com, 2016

This is the main LCD flex, which is unusually large. In Roger’s words ‘almost a circuit board’. 

LensRentals gets inside the Canon EOS 5D IV

Lensrentals.com, 2016

From the back, Roger found a couple of interesting things, looking at the EOS 5D IV: ‘First, there are more flexes connecting to the main PCB than most other models. Second, we were very pleased to see a thick, stiff, sheet of rubber covering the back of the PCB’.

LensRentals gets inside the Canon EOS 5D IV

Lensrentals.com, 2016

The EOS 5D IV benefits from the redesigned mirror assembly we first saw in the EOS 5DS/R, and here’s the mirror motor, tucked away to the left of the lensmount.

LensRentals gets inside the Canon EOS 5D IV

Lensrentals.com, 2016

Here’s the EOS 5D IV’s top assembly. And this is as far as Roger is prepared to go, because ‘we’ve learned from long, painful experience not to take these apart unless we absolutely need to. In general, if something is wrong with the top assembly, you just replace the top assembly’. 

LensRentals gets inside the Canon EOS 5D IV

Lensrentals.com, 2016

This is the EOS 5D IV’s main PCB. Unusual, because ‘there are a lot, a whole lot, of flexes connected to the board from every direction. They are thicker and more complex than previous cameras and a lot end up in thick ‘press in’ connectors instead of simple flex cables.’

LensRentals gets inside the Canon EOS 5D IV

Lensrentals.com, 2016

‘Underneath where the PCB was we now see the circuit board of the image sensor, and to the right of that the CF card assembly’.

LensRentals gets inside the Canon EOS 5D IV

Lensrentals.com, 2016

What did Roger and his team learn from taking the EOS 5D IV apart? 

  • ‘The weather sealing on the Canon 5d Mark IV appears pretty robust’
  • The multiple pins, clips and screws that hold the camera together might improve weather-resistance but make it ‘kind of a pain to get into’.
  • The extra technology inside the EOS 5D IV mean that ‘there are more chips, and more and heavier connectors moving electrons from board to board than even the Canon 5Ds cameras have’.
  • ‘there’s more air inside this camera than we’re used to seeing. […] In other words, this camera probably could have been a bit smaller but Canon wanted to keep the form factor the same.’
  • ‘Construction is at least as robust as the recent 5 series releases and better than the Canon 5D III’.

You can read the full tear-down, with Roger’s usual detailed analysis and plenty of additional images at LensRentals.com.

Articles: Digital Photography Review (dpreview.com)

 
Comments Off on Harder than it looks: LensRentals gets inside the Canon EOS 5D IV

Posted in Uncategorized


Go Big or Go Home: Athletes are Larger Than Life in Rio Art Installation

04 Aug

[ By SA Rogers in Art & Street Art & Graffiti. ]

JR main

Athletes have arrived in Rio for the Olympics on a massive scale in the form of two monumental photographic installations supported by construction scaffolding, one looking like he’s about to back flip over an entire building. French artist JR brings his signature black-and-white style to the streets for a dramatic addition to his ‘Inside Out Project,’ a global series bringing real people and their personal stories to public spaces through art.

JR street art rio 1

The athletes depicted aren’t household names – in fact, they’re not even Olympic athletes who will be physically present in Rio for the Games. The first, installed on the roof of a large residential complex, represents Mohamed Younes Idress of Sudan. “He lives and trains in Cologne, Germany,” says JR. “He missed out on the qualifications for the 2016 Rio Olympics but he is there some how.”

JR street art rio 3

The second figure appears to be that of a diver about to leap into the adjacent ocean. This installation rises from a rocky jetty overlooking the water in the Barra neighborhood. JR says he’s been working on this new technique, with the images supported by metal beams, for almost a year.

JR louvre

JR inside out 2

JR inside out 3

We previously featured JR’s large-scale work of urban camouflage outside the Louvre in Paris, where a black-and-white photographic installation made the museum’s iconic 11,000-square-foot pyramid by I.M. Pei seem to disappear. Other ‘Inside Out Project’ installations have included massive paste-ups inside Paris’ Pantheon building as well as covering a mass area of the ground in New York City’s Times Square.

Share on Facebook


[ By SA Rogers in Art & Street Art & Graffiti. ]

[ WebUrbanist | Archives | Galleries | Privacy | TOS ]


WebUrbanist

 
Comments Off on Go Big or Go Home: Athletes are Larger Than Life in Rio Art Installation

Posted in Creativity


New glassless ‘metalens’ is 100,000X thinner than conventional optics

07 Jun

A team at Harvard University has designed a ‘metalens’, around 100,000 times thinner than an equivalent glass lens. Constructed from titanium dioxide ‘nanofins’, the lens is a mere 600 nanometers thick, and can focus features smaller than the wavelength of the light it is imaging, thanks to its very high numerical aperture that allows it to focus light into a spot smaller than the wavelength of light being imaged. Senior author Federico Capasso and his fellow researchers successfully imaged structures 400nm in size, which is on the order of the bluest light in the visible spectrum. That suggests the tech is essentially diffraction-limited: resolving small structures as well as one ever theoretically could using visible light.

An electron microscopic view of the titanium dioxide metamaterial lens, created by engineers at Harvard University. These TiO2 towers are only 600nm in length, yet can image features traditional microscopes require lenses 6cm in length – 100,000 longer – to image. And apparently do so 30% better.

John A. Paulson School of Engineering and Applied Sciences/Harvard University

This is the first planar lens that works in the visible spectrum. The nanofins (shown above) are constructed using similar lithographic processes used to fabricate computer chips, and mounted on a thin layer of transparent quartz. The fins are made of titanium dioxide because it is clear, and interacts strongly with visible light. Each fin is angled and positioned so that the ensemble effectively bends light just as the curved surface of a lens would. Different focus can be achieved simply by changing the size, spacing and orientation of the pillars – it’s just a matter of doing the computer simulations and calculations to dial in the proper design. Different materials can be used to target different wavelengths of light: previously, the team has used silicon to focus infrared light, for example.

The practical potential of lenses made from these so-called ‘metamaterials’ are almost infinite, considering the drastic reductions in size and weight that the technology makes possible. A planar surface saves considerable space and volume compared to the typical curved surfaces traditional lenses necessitate. Furthermore, the non-reliance on a perfectly curved spherical or aspherical surface means images can be relatively aberration-free. And the nanostructures themselves can be manufactured with incredible precision, and in a cost-effective way as well, due to the compatibility with traditional microprocessor chip foundries.

Currently, these lenses can’t handle full-color imaging because of the very narrow band of wavelengths that can currently be imaged with any particular TiO2 arrangement. However, the team hopes to broaden the wavelengths over which the technology works in the future. This might allow for small yet very high numerical aperture, aberration-free imaging in cameras and cell phones.

But even without spectral broadening advances, the potential applications are very exciting. Obvious applications include microscopy and medical instruments, where structures larger than the wavelength of light are more the exception than the rule. But another potentially huge application is display technology – particularly virtual/augmented reality and wearable optics in general, where the size and weight of today’s headsets is a major obstacle to mass adoption. Display technology actually utilizes narrow wavelength R, G, and B primaries, mixing them in just the right ratios to trick your eye/brain into perceiving the intended color. Small, flat lenses that can focus these primary colors with very high precision, aberration-free, might just open up a world of high-resolution and practical VR devices.

Source: phys.org

Articles: Digital Photography Review (dpreview.com)

 
Comments Off on New glassless ‘metalens’ is 100,000X thinner than conventional optics

Posted in Uncategorized


Back in Stock, and Better than Ever

27 May

These gizmos were too popular for their own good, and they ran right out.

Whelp, they’re back, for now, so order ‘em up quick before they fly off our (internet) shelves.

Turn your phone into a light meter, create a photo print masterpiece, eat your favorite camera and more. There’s a reason these gadgets are so well-loved.

(…)
Read the rest of Back in Stock, and Better than Ever (0 words)


© laurel for Photojojo, 2016. |
Permalink |
No comment |
Add to
del.icio.us

Post tags:


Photojojo

 
Comments Off on Back in Stock, and Better than Ever

Posted in Equipment


Souped Up: 12 Larger Than Life Campbell’s Soup Cans

23 May

[ By Steve in Design & Graphics & Branding. ]

campbell-soup-can-1dd
The red & white Campbell’s Soup can has been a huge pop culture (and occasionally pop art) icon for decades. HOW huge, you might ask? THIS huge…

campbell-soup-can-1f

campbell-soup-can-1b

campbell-soup-can-1e

The classic Campbell’s Soup can has been around a LONG time. Look closely at the gold medallion superimposed onto the divide between red and white: as stated, it was awarded to the company at the 1900 Paris International Exposition. More recently (1962 to be exact), pop artist Andy Warhol immortalized the by-then familiar can in one of his best-known paintings.

campbell-soup-can-1g

campbell-soup-can-1c

In 1981 Warhol visited Colorado State University in Fort Collins, which was holding an exhibition of his work in the art building. The acclaimed artist signed one of three huge replica Campbell’s Soup cans mounted outside the University Center for the Arts. In the summer of 2013, the restored signed can was unveiled at its new location at the UCA.

Soup Can-tonese

Giant Campbell's soup can, subway, Admiralty station, Hong Kong.

Campbell’s Soup cans can look a little different in other parts of the world – take Hong Kong, for instance. The jumbo can above, snapped in the city’s Admiralty subway station, depicts a flavor one wouldn’t expect in such a region.

Campbell’s Coop

campbell-soup-can-3a

campbell-soup-can-3b

Californians Steve & Chris White employed a little creativity and a lot of red & white paint when designing their one-of-a-kind Campbell’s Chicken Soup Chicken Coop. The pair adapted a hexagonal dog pergola (whatever that is) to suit the needs of their chickens, who thankfully can’t read.

Bigger in Texas

campbell-soup-can-4a

You’ll find this jumbo Campbell’s Soup can storage tank at Johnson’s Ranch in Uncertain, Texas. The oddly-named east Texas town only has about 150 residents, all of whom could presumably be fed for days if the tank really held tomato soup. Speaking of which, “The public restrooms at JOHNSON’S have been updated and improved.” Good to know!

Next Page – Click Below to Read More:
Souped Up 12 Larger Than Life Campbells Soup Cans

Share on Facebook


[ By Steve in Design & Graphics & Branding. ]

[ WebUrbanist | Archives | Galleries | Privacy | TOS ]


WebUrbanist

 
Comments Off on Souped Up: 12 Larger Than Life Campbell’s Soup Cans

Posted in Creativity


Choosing the Right Camera Bag – and Why You May Need More than One

22 May

You’ve just bought yourself a new camera, or perhaps a new lens. Now you find yourself wanting to get a new bag for new purchases – after all, a good bag will protect your equipment, and can serve as an ideal place to store your photography gear when not in use.

camera bags

These are some of my bags. The two end ones are both roller bags. From left to right: ThinkTank Roller Derby; ThinkTank Airport Accelerator; ThinkTank Airport Security.

However, choosing a camera bag that’s right for you may not be as straight forward as it seems, but it is something that some thought should be given to. Choosing the right bag can make photography more enjoyable for you, as it can help carrying your equipment easier and more comfortable.

The days of buying the generic shoulder bag are gone! Now we are spoilt for choice with offerings of backpacks, shoulder bags, sling bags, belt packs, roller bags; the list goes on. But which one is right for you? Which one is the best fit for you and your equipment needs?

1. Camera Bag Size

This is my largest camera bag. I use this bag when I need to carry more equipment than normal.

This is my largest bag. I use this bag when I need to carry more equipment than normal.

How much equipment do you have, and will you want to carry all, or only some of it with you? This will help you decide on which size bag you need to look at. Also, think ahead; will you be buying more equipment such as additional lenses or camera bodies? Will you be adding a flash system, etc.?

All of these will obviously increase the size of your kit, and influence the size of the bag you purchase if you wish to use the bag for all of your stuff. But, do bare in mind that the more kit you carry with you, the heavier the bag will be. Also do be aware that if you use a pro-sized or gripped body, some bags may not fit your camera as the bag is not deep enough to accommodate such sizes. Generally, bag manufacturers will give a list of what can fit into a bag, and list so you can see if pro-sized or gripped DSLRs are suited to that particular bag.

2. Camea Bag Style – The Personal Part

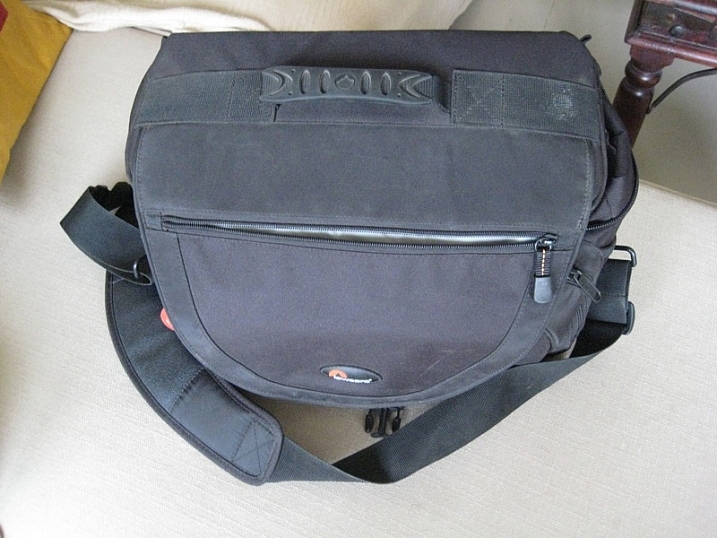
camera bag backpack

Choosing the size of your bag is relatively easy. It’s choosing the style of bag that I think is the most challenging, and this is where most people can get a little stuck. There are just so many choices available, it really does come down to personal choice.

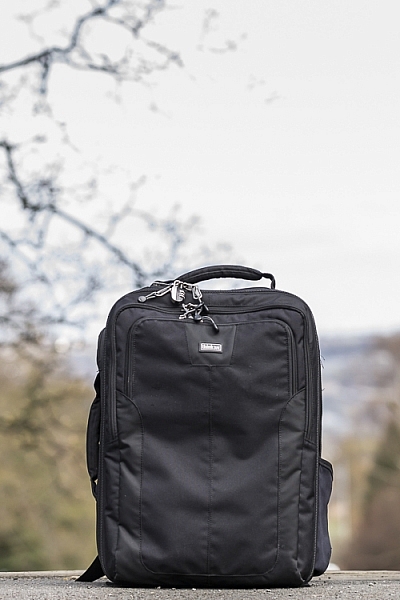
I take my backpack, the ThinkTank Airport Accelerator (left), to nearly every job I do. I use this bag to carry my laptop, laptop accessories (charger, internet hub, card reader, etc.) and any other bits and pieces I may need such as wet weather gear. If I need it, I also put my modular set (not pictured) inside this bag to use on site.

You may prefer to use a shoulder bag, where the next person may prefer to have a backpack. It’s important to consider just how much equipment you want to carry around in your bag, as this can influence the style of bag you end up purchasing. Below is a small table with a short list of pros and cons to each style of bag.

Let’s have a look at some of the pros and cons of the following bag types:

Backpacks

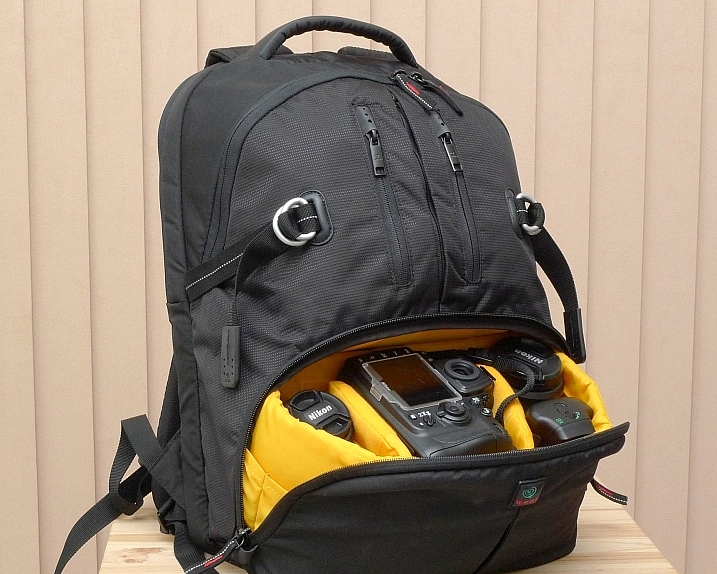
Backpack style camera bag

By ????? KhE ?

Pros:

  • Completely frees your hands, enabling you to use your phone, change lenses, etc.
  • Varying levels of carrying capacity.
  • Weight is moved from one shoulder (on a shoulder bag) to both shoulders, and your lower back.
  • Can be more comfortable that other options.
  • Can be ideal for storing equipment when not in use.

Cons:

  • Can be slow to access your equipment and/or change lenses etc
  • Bags can have the ability to carry too much equipment and become too heavy
  • Can become uncomfortable with sustained activities; especially in warmer climates

Roller Bags

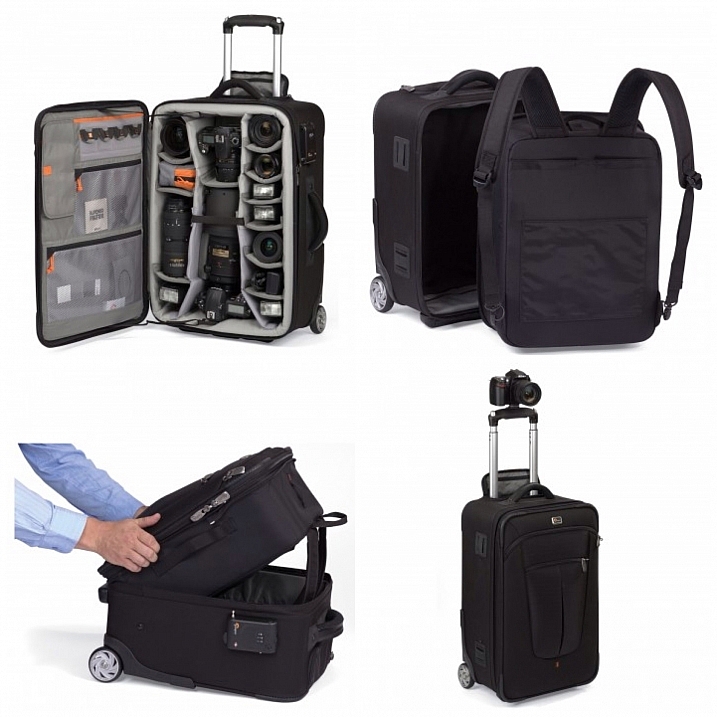
Roller bag style camera bag

By See-ming Lee

Pros:

  • Can carry the largest volume of equipment easily.
  • Easy to transport equipment, as you are not required to carry anything; simply roll the bag along.
  • Perfect for keeping all of your gear in one bag, and storing equipment when not in use.

Cons:

  • Not well suited if you require more mobility whilst out photographing.
  • Require somewhere secure to be left when no longer needed on a shoot.

Modular Systems

modular camera bag system

Image courtesy Lowepro

Pros:

  • Ideal for photographers who want maximum mobility.
  • Smal pouches that attach via a belt sit on your waist, thereby removing the weight off your back and shoulders, and transferring it to your hips.
  • Ideal for carrying extra pieces of equipment without the need for a bag on your back.

Cons:

  • Not ideal for transportation as the pouches to not offer enough protection.
  • Each pouch has a very limited carrying capacity, so not suited to carry all of your equipment.
  • Not suited for storing equipment as each pouch can only hold a very limited number of items.

Sling Bags

Pros:

  • A hybrid of backpack and shoulder bag; these bags sit on your back via a single strap.
  • Can be more comfortable for prolonged use than a shoulder bag.
  • Quickly and easily access your equipment without take the bag off.
  • Perfect for storing smaller amounts of equipment.

Cons:

  • Generally have a lower carrying capacity than other bag styles.

Shoulder Bags

Thomas Wanhoff

By Thomas Wanhoff

Pros:

  • Easy access to equipment as it’s by your side.
  • Can look more casual, allowing you to blend in easier.
  • Varying levels of carrying capacity to suite your equipment.
  • Can be great to store equipment when not in use.

Cons:

  • Weight of equipment is on one shoulder and can cause discomfort.
  • Not ideal if you have larger lenses (greater than ~200mm for example).

3. Active or Passive Bag Concept

Personally, over the years I have used pretty much every style of bag around from backpacks, sling bags, shoulder bags, to roller bags and modular belt systems; you name it and I’ve most likely used it at some stage!

What I have learned from this experience is that one style of bag is no better than the next and that what works on one adventure, won’t necessarily work as well on another. I have also learned that generally, one bag will not fit every situation. This brings us to an interesting concept that I have called Active Bag and Passive Bag.

An Active Bag is a one that allows you to easily carry equipment with you and be more mobile; one that can go with you all the time. The styles of bag that are suited to this are: backpacks, sling bags, modular systems and shoulder bags.

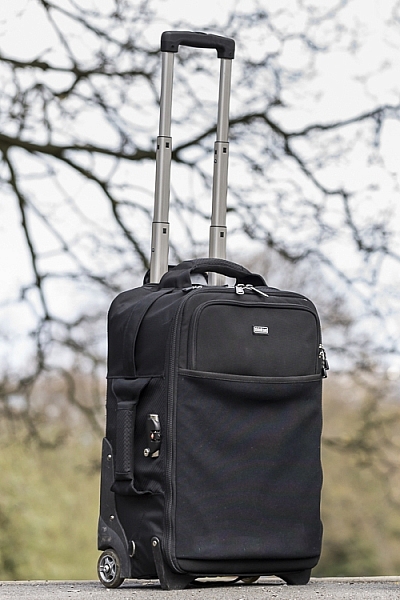
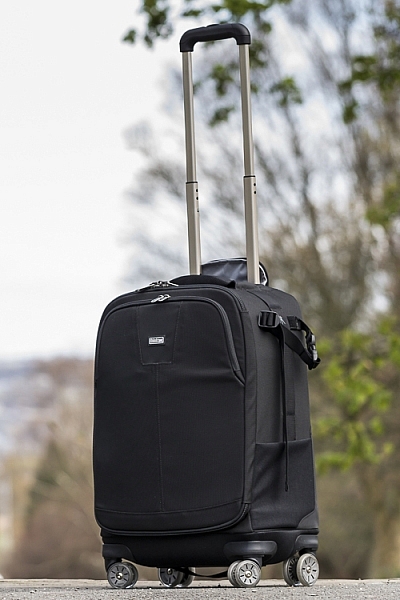
This roller bag - the ThinkTank Roller Derby - is the bag that I take to pretty much every job I have. It's small enough to easily fit in the car, yet carries everything that I need on a job.

This roller bag – the ThinkTank Roller Derby – is the bag that I take to pretty much every job I have. It’s small enough to easily fit in the car, yet carries everything that I need on a job.

Passive Bags are great at transporting all your equipment to and from your shooting location and even providing a great storage solution for storing your kit whilst it’s not being used. But these bags are not ideal for the photographer who is constantly on the move. What I have found to work best is having a combination of both Active and Passive Bags with me. I use my roller bag to transport my kit to my shooting location and it provides great protection during the transport phase – not to mention a great portable desk to sit my laptop on! I then compliment this by using an Active Bag, usually a modular belt system or backpack, to carry the extra lens and flashes that I may need.

I already have two cameras over my shoulders, each with a lens, so the bags I have are there to carry what I cannot hold in my hands, or do not need right at that moment. It is a little more expensive, yes, but the benefits are great. This is something worth considering if you’re find yourself in a similar situation where you want/need to carry a larger amount of equipment, but do not need that bag once you are at your location.

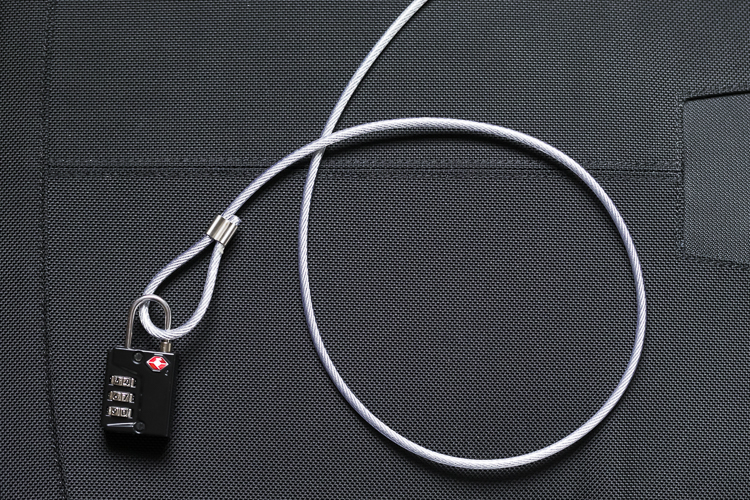
Cable Lock

Some manufacturers also include a cable that is made in to the bag. This is ideal to lock the bag to an immovable object; perfect for Passive type bags.

4. Bag Quality

So you’ve decided on the size and style of bag you wish to purchase; but please do not overlook quality. You’ve spent a small fortune on your equipment, and the last thing you should do it cut corners on what protects it.

A good camera bag should have nicely padded, removable inserts inside. The removable inserts will allow you to customize the bag to best suit your equipment, and the padding will provide greater protection and help prevent your equipment from crashing into each other.

Generally, the first thing to fail in a camera bag are the zippers, so looking for a good feeling zipper (especially for the main camera compartment) is very important. A poor quality zipper can unexpectedly fail, and potentially cause your equipment to fall out and break.

You also want your bag to last, so make sure the exterior fabrics used are tough and wear resistant. Personally, I use ThinkTank Photo products and to be honest, I cannot fault them at all. They’re extremely well made and have withstood everything that I have thrown at them.

Zipper

A close up of the zipper on the main camera compartment on one of my bags. The zippers used on this bag are YKK Fuse zippers.

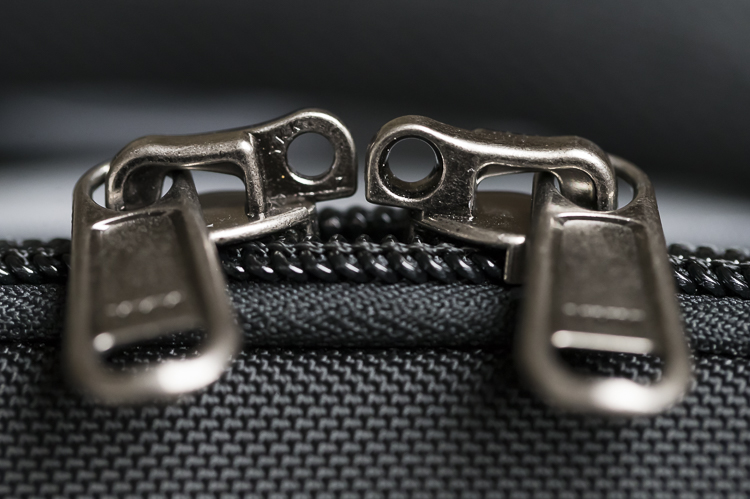
Lockable Zipper

Some bags also offer zippers that are lockable; ideal for that little bit of extra security.

Conclusion

Whilst this is an introduction into buying a bag for your camera, by no means is this exhaustive and you will still need to do a little research before you make a purchase. But, this article should offer some guidance on which bag may be right for you. You will find that most of your decisions will be based upon your own requirements. I would highly recommend you go in to a store, and bring your kit with you to try the various bags to help you find the best one.

I’d love to hear if you have anything else you want to add and offer some advice based on your own experiences. What kind of bags do you have?

googletag.cmd.push(function() {
tablet_slots.push( googletag.defineSlot( “/1005424/_dPSv4_tab-all-article-bottom_(300×250)”, [300, 250], “pb-ad-78623” ).addService( googletag.pubads() ) ); } );

googletag.cmd.push(function() {
mobile_slots.push( googletag.defineSlot( “/1005424/_dPSv4_mob-all-article-bottom_(300×250)”, [300, 250], “pb-ad-78158” ).addService( googletag.pubads() ) ); } );

The post Choosing the Right Camera Bag – and Why You May Need More than One by Daniel Smith appeared first on Digital Photography School.


Digital Photography School

 
Comments Off on Choosing the Right Camera Bag – and Why You May Need More than One

Posted in Photography


Stronger than Concrete: New Glass Bricks Support Dutch Facade

22 Apr

[ By WebUrbanist in Architecture & Offices & Commercial. ]

glass brick facade

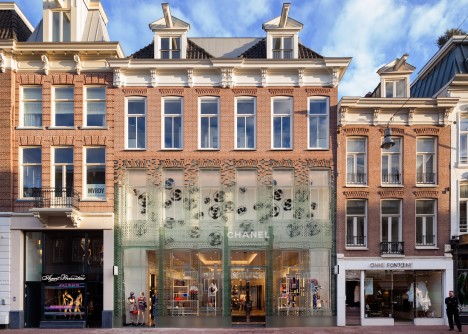
A new type of see-through glass brick used in this Dutch building facade aims to bridge traditional brick with transparency; the assembled bricks have been tested and shown to be as strong as concrete, able to support heavy loads in compression like its opaque competitor.

glass brick assembly

Architecture firm MVRDV applied this new technology to the front of a Chanel shop in Amsterdam that was damaged behind repair, allowing for a see-through storefront that still references local historic brick while using fully-recyclable glass.

glass brick detail

The bricks themselves are held in place with likewise see-through glue and help support the remaining terracotta brickwork on the floor above into which they visually transition. The structurally-sound result stands out against the street, but also lets additional light into the interior of the building.

glass brick details

glass brick in context

This new approach to brick can help mediate between the desire for solidity and openness, providing a cheap alternative to both masonry and glass construction traditions. The construction process was as much a laboratory experiment as an architectural process, involving teams from around the world in different disciplines.

glass brick view

Researchers from Delft University of Technology, engineers at ABT and contractors at Wessels Zeist joined forces to develop and test structural solutions and fabrication techniques, ultimately leading to the development of this new type of brick. The bricks were then cast by a glass company Venice and joined using glue from Delo Industrial Adhesives in Germany. (Photos by Daria Scagliola and Stijn Brakkee).

Share on Facebook


[ By WebUrbanist in Architecture & Offices & Commercial. ]

[ WebUrbanist | Archives | Galleries | Privacy | TOS ]


WebUrbanist

 
Comments Off on Stronger than Concrete: New Glass Bricks Support Dutch Facade

Posted in Creativity


3 Reasons Why Mirrorless Cameras are Better than Digital SLRs for Focusing

30 Mar

Mirrorless cameras and focusing

A lot has been written about the drawbacks of autofocus performance from mirrorless cameras. Most of this focuses on the tracking of moving subjects – an area where the phase detection autofocus found in digital SLRs is still superior (although the gap is closing).

But when it comes to focusing on still subjects, the mirrorless camera is a better tool. Surprised? If you’ve never used a mirrorless camera, you may be. Let’s take a look at the reasons why.

1. Phase detection versus contrast detect autofocus

Mirrorless cameras have a different autofocus system than digital SLRs.

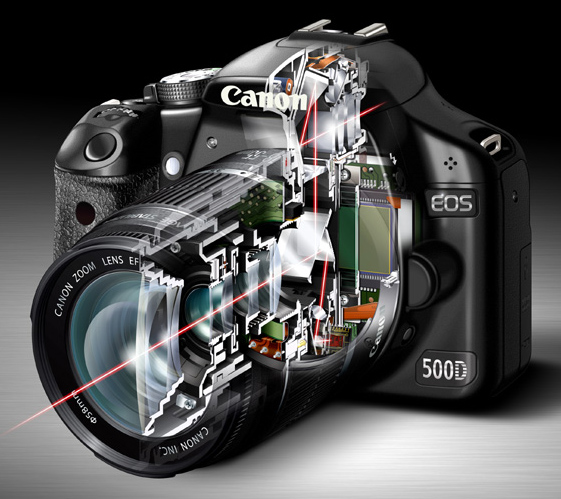
In a digital SLR most of the light coming through the lens is reflected up by the mirror, into the pentaprism and through the viewfinder. A small part is deflected downwards to a dedicated autofocus sensor. It uses a system called phase detection autofocus to calculate the camera to subject distance, and tell the lens where to focus.
Mirrorless cameras and focusing

The red lines in this diagram show the path that light takes through an SLR camera with the mirror in the down position. Most of the light is reflected into the pentaprism and the viewfinder. Part of it is reflected downwards towards the autofocus sensor.

The advantage of phase detection autofocus is that it’s fast (generally speaking – but it also depends on which camera you have) and very good at tracking moving subjects. It’s the best system anyone has managed to come up with for an SLR camera.

However, phase detection autofocus has a significant weakness – lack of accuracy.

There are two main reasons for this. The first is that most digital SLRs have a combination of cross-type and single line autofocus points. Cross-type autofocus points are the most accurate, and should always be used when focus is critical (for example, when using a prime lens at its widest aperture), otherwise the camera may not focus where it is supposed to. Your camera’s manual will tell you which of its AF points are cross-type.

Whenever you use a non cross-type autofocus point, you cannot rely on the camera to focus accurately. This is fine when using small apertures, which give you plenty of margin for error, but not when focus and accuracy is critical.

The second reason is to do with camera and lens calibration. Even when you use a cross-type autofocus point your camera may not focus exactly where it is supposed to. For accurate focus, every part of your camera setup – from the autofocus sensor, to lens and autofocus motors that tell the lens where to focus – must be working in perfect harmony. It only takes a small degree of misalignment to throw the accuracy of the system out.

Most of the time you won’t notice, because there is sufficient depth-of-field to make the focusing inaccuracies irrelevant. But if you use a wide aperture, especially with a telephoto lens, then depth-of-field is measured in millimetres, and accurate focus is essential.

For example, if you are taking a portrait then it is conventional to focus on the model’s eyes. If you miss focus, and her eyes are soft, then people will notice and the portrait will lose its impact.

Mirrorless cameras and focusing

I made this portrait with an EOS 5D Mark II and 85mm lens set to f1.8. With this camera it is necessary to measure and calibrate the autofocus system to ensure accurate focus at wide apertures.

Most mid-range and high-end digital SLRs have a feature that allows you to measure and compensate for inaccurate focusing. Manufacturers have different names for this – Canon and Sony use the term Autofocus micro-adjustment, Nikon calls it Autofocus fine tune, Pentax uses the term Autofocus adjustment and Olympus Autofocus focus adjust. It’s bit of a long winded process – you have to test your lenses by focusing on a ruler, or a purpose made scale, to see if the focus is accurate, and make adjustments if it isn’t.

You can also get your camera and lenses calibrated at a service centre. This is the only way to calibrate an SLR camera that doesn’t have the above feature built-in.

That was bit of a long explanation, but crucial if you are to understand why phase detection autofocus is not as accurate as it should be.

How are mirrorless cameras different?

So, how do mirrorless cameras differ? As they don’t have a mirror, there is no way of deflecting light to a dedicated autofocus sensor. The solution is to take a reading from the sensor. The camera looks at the point on the sensor which is meant to be in focus, and adjusts the lens until maximum contrast is achieved. This is called contrast detect autofocus.

This system is slower, because the camera has to move the lens first one way, then the other, to find the sharpest point. But, it is much more accurate (for still subjects).

With a mirrorless camera autofocus micro-adjustment is redundant. You don’t need it, and you will never have to measure or calibrate the camera’s autofocus system. It also doesn’t matter which autofocus point you use, as they all work equally well. That is why, for still subjects, autofocus in mirrorless cameras is superior to that of digital SLRs.

Mirrorless cameras and focusing

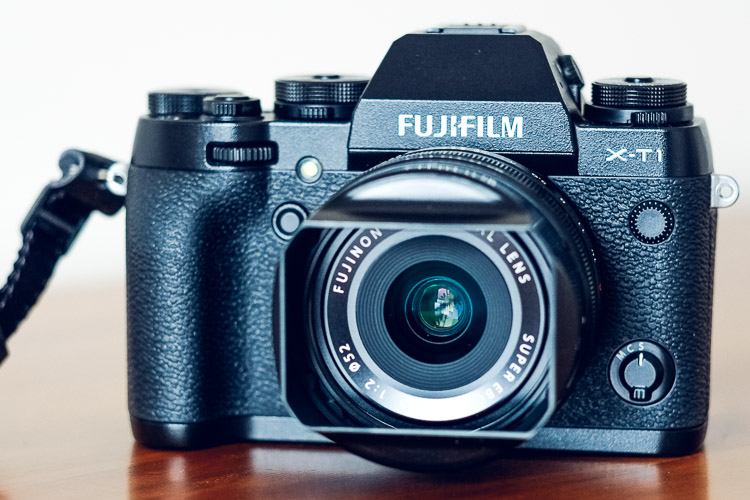
I made this portrait with a 56mm lens at f/1.2 with my Fujifilm X-T1 mirrorless camera. With this camera it is easy to focus on the model’s eye. There is no need to calibrate the camera’s autofocus system.

2. Manual focusing

Mirrorless cameras are also a better tool for utilizing manual focus lenses.

Modern digital SLRs are not designed to be helpful with manual focus lenses. The split prism focusing screens of the past are gone, and assistance is limited to a light that comes in the viewfinder when the subject underneath the selected AF point comes into focus.

Mirrorless cameras are different. They have a tool called focus peaking, which is specifically designed to help you manually focus a lens. The camera highlights the parts of the scene that are in focus, so that you can see which areas are sharp. You can also magnify the image at the touch of the button, making it even easier to see whether the subject is sharply focused.

This feature works best when using lenses at wide apertures. Both tools take advantage of the camera’s electronic viewfinder, a feature that most digital SLRs don’t have.

Mirrorless cameras and focusing

This mock up shows how focus peaking works. I made the portrait with a Helios 58mm manual focus lens at its widest aperture setting of f/2. The red lines indicate how focus peaking shows you what is in focus.

3. Hyperfocal distance

Fujifilm cameras have another tool that will be of interest to landscape photographers as it helps you instantly find the hyperfocal distance without referring to tables or smartphone apps.

The viewfinder has a depth-of-field scale that shows you the point you are focused on and the area in focus on either side, according to the selected aperture. If you move the focusing ring until the depth-of-field scale touches the infinity mark at one end, you have found the hyperfocal distance point. It’s quick and easy.

To be honest, I don’t know if this feature is available in any brand of mirrorless camera other than Fujifilm. I’d be grateful if Sony/Olympus/Panasonic, etc., owners would let us know.
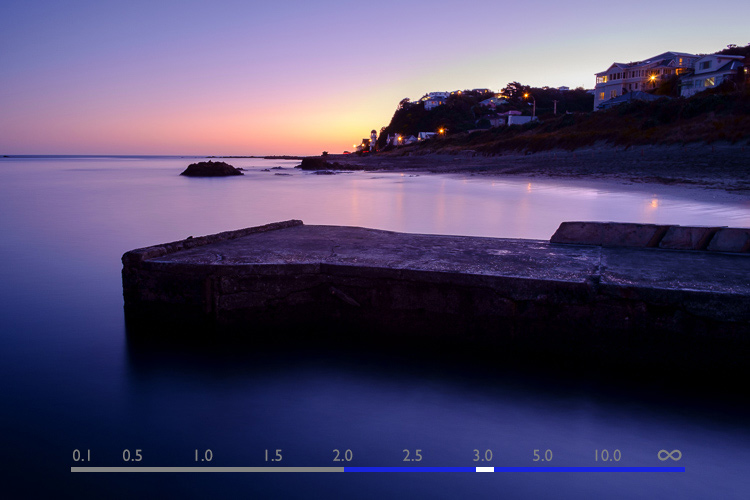
Mirrorless cameras and focusing

This diagram shows how the depth-of-field scale works. The bar shows the point the lens is focused on (white), and how much of the scene is in focus (blue). The lens is focused on the hyperfocal point in this made-up example.

Since buying my first Fujifilm camera a little over 18 months ago, I’ve been pleasantly surprised by what a great tool mirrorless cameras are for photography. They are much better than my old digital SLR for focusing on still subjects, or for using manual focus lenses.

The difference is so great that I predict that one day most photographers will use mirrorless cameras, and digital SLRs will be a niche item built for photographing sports and wildlife.

But what do you think? Please share your thoughts, or ask any questions about focusing, in the comments below.


Mastering Lenses

If you want to know more about lenses and autofocus check out my ebook Mastering Lenses: A Photographer’s Guide to Creating Beautiful Photos With Any Lens.

googletag.cmd.push(function() {
tablet_slots.push( googletag.defineSlot( “/1005424/_dPSv4_tab-all-article-bottom_(300×250)”, [300, 250], “pb-ad-78623” ).addService( googletag.pubads() ) ); } );

googletag.cmd.push(function() {
mobile_slots.push( googletag.defineSlot( “/1005424/_dPSv4_mob-all-article-bottom_(300×250)”, [300, 250], “pb-ad-78158” ).addService( googletag.pubads() ) ); } );

The post 3 Reasons Why Mirrorless Cameras are Better than Digital SLRs for Focusing by Andrew S. Gibson appeared first on Digital Photography School.


Digital Photography School
 
Comments Off on 3 Reasons Why Mirrorless Cameras are Better than Digital SLRs for Focusing

Posted in Photography