RSS
 

Posts Tagged ‘Tethered’

How to Backup Your Photos While Shooting Tethered so You Never Lose Them

01 Aug

The post How to Backup Your Photos While Shooting Tethered so You Never Lose Them appeared first on Digital Photography School. It was authored by Darina Kopcok.

Whether you’re working with clients or shoot as a lone ranger, you need to back up your work. As the saying goes, when it comes to hard drives, it’s not a matter of if they will fail, but when they will fail.

Working with image files requires a lot of power and is very taxing for your computer. This increases the chance of hard drive failure. You need to have a system of backing up your images that works for you. This is also important to backup your photos while shooting tethered.

how-to-backup-your-photos-while-shooting-tethered-3

Backup your photos while shooting tethered

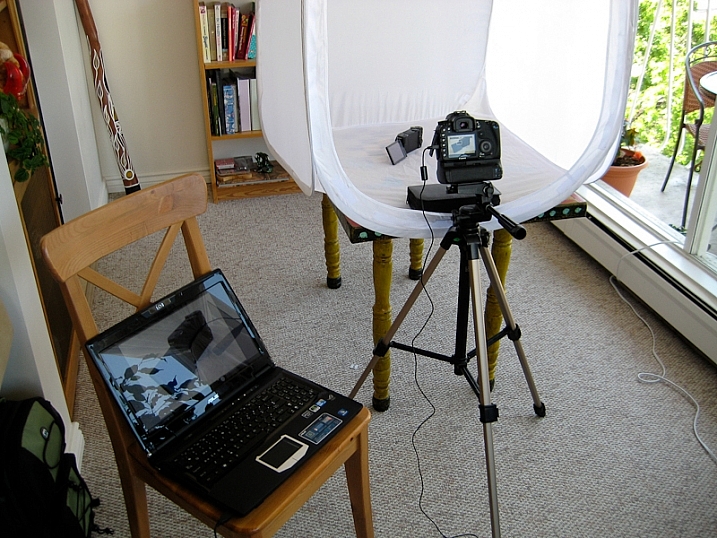
There are various programs that allow you to connect your camera to a laptop or desktop computer via a USB cable. This allows you to view a larger and more accurate version of your image on the computer screen. Tethering is crucial in genres like food and still life photography, but also very useful in other niches, like studio portrait photography.

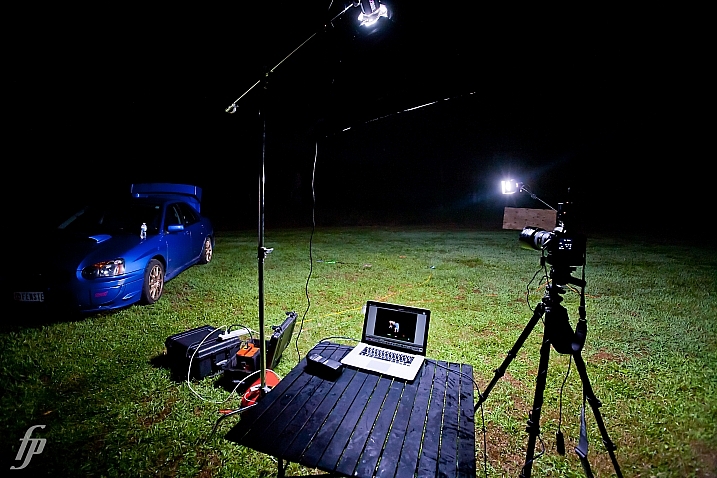
When shooting tethered while on location, an efficient workflow around the backup process will make your life a lot easier and ensure that you have several copies of your image files should an unforeseen incident occur.

If you’re like me and shoot tethered to a laptop but edit on a desktop, you already have the bonus of an extra copy of your images, since you’re using two computers.

If you transfer the images from the laptop to desktop via a detachable external hard drive, there is your third copy. However, if you use a card reader or transfer your images from your camera via a USB cable, you should have at least one more hard copy of your images. Also, what if something happens to your laptop while you’re on a shoot? Remember, it’s a question of when.

Do you use Lightroom as your tethering program of choice? You then have the option of saving your images to your SD cards as you take them. However, Capture One Pro doesn’t offer this option. This makes image capture instant, but it doesn’t give you an extra sense of security by providing additional copies of the images you’ve shot.

You cannot just set up Lightroom or COP to save to two places. You need file synchronization software to make sure that your work is being backed up while you’re shooting tethered. 

Types of backups

There are two types of backup: specific project backup and overall data backup. You need to concern yourself with both.

While you’re shooting, you need to back up every single file. You also need to do a backup of your whole computer. You should create backups on external hard drives and also in a cloud-based system. Don’t simply rely on cloud solutions for your backups.

Storing photos in the cloud basically outsources the storage of your photos. The data in the cloud is not necessarily safe or under your control. Risks with cloud storage are having your data hacked and deleted, being locked out of your account, or having it be closed if you make late payments. Also, these types of online services can suddenly shut down or otherwise cease to exist. 

A word about digital data

The problem with digital data is that storage formats change over time. You might keep your photos “safe,” but they’ll be useless to you if you can’t read or open them. 

Operating systems, software and file formats keep changing, so just because you can see a file on your computer doesn’t mean you can actually load it.

One example is the attempts to replace the standard .jpg file format with JPEG 2000, PNG (Portable Network Graphics) and several others. JPG is fine for now, but you can never say never because this sort of thing actually happens all the time as technology changes.

A word about disk drives

Hard drives are great for storing images because they are relatively inexpensive, they provide fast access to data, and it’s very easy to copy one hard drive to another. 

However, backup drives are not an all-in-one perfect solution. Your data is at risk of being stolen or destroyed by fire, flood or some other disaster.

Also, the data is vulnerable to malicious software and human error.

You can accidentally delete a folder, or make mistakes when copying files. If your PC is infected by malware, it will usually encrypt files on external hard drives as well.

I personally have had several hard drives fail. One time I had a hard drive and a laptop fail at the same time! Some hard drives fail after several years of use, while others fail after only a few months. There is no way of knowing when the case may be.

Therefore, you can’t store your photos on a single drive. A minimum of two is recommended. I have backups on a couple of 1TB external, portable hard drives, as well as on two 4TB hard drives that are plugged into my desktop computer. 

You should keep one of your backups off-site, like at a relative’s home or even in a bank safety deposit box. 

how-to-backup-your-photos-while-shooting-tethered-2

How to back up while shooting tethered

Chronosync is one backup software that I recommend you use while shooting tethered if you use a Mac. If you’re a PC user, check out Bvckup.

Goodsync can be used with either system.

This type of software allows you to look at a given folder and copy everything to another folder on a separate hard drive. For example, you might want to shoot images on your laptop and have them sync to an external portable hard drive. Or you may want to use two separate portable hard drives. Basically what you’re doing is telling it what folder to look at and make an exact duplicate of it to another drive.

You can set it on a schedule or have it running in the background. Setting it on a schedule is great if you always have a hard drive plugged into your laptop.

Here is an example of how to do it with Chronosync.

1. Open up the application and choose, Create a New Synchronizer Document

How to Backup Your Photos While Shooting Tethered so You Never Lose Them

2. Decide what drives you want to synchronize by selecting >Choose from the Source Target and Destination Target menus accordingly. It will give you several choices of how you might want to back up from the dropdown menu under >Operation.
My recommendation is that you choose >Backup Synchronize Bidirectional. This will ensure that everything that is on one drive will also appear on the other.

How to Backup Your Photos While Shooting Tethered so You Never Lose Them

3. Click on >Synchronize in the top left-hand corner. It may take a few minutes for the synchronization to take place. Once it’s complete you’ll see the message below.

How to Backup Your Photos While Shooting Tethered so You Never Lose Them

It’s as simple as that. With synchronization software like Chronosync, you’ll ensure that all your files and folders are backed up for a very low price.

Other backup software

Many large companies offer photo storage services including Amazon, Google, Microsoft (OneDrive), and Apple (iCloud). However, this can be expensive if you need a lot of storage. With some, downloading large files is cumbersome and data such as file names and EXIF Data may not be preserved. Some services don’t preserve your photos as you uploaded them, and others just don’t work very well (Time Machine, I’m looking at you).

Here are some other paid-for options that are worth a look:

FoldersSynchronizer – a popular program for Mac OS which synchronizes backup files, folders, and disks.

Super Duper – great for disk backups on a Mac. It allows you to create a bootable clone of your disk which you can easily copy from one hard disk to another. This makes moving from one computer to another during an upgrade virtually painless.

Smug Mug – an all-in-one solution that allows photographers to display and sell their images, with unlimited uploads.

Backblaze – a cloud-based backup system that will continually back up your data while your computer is on. Use to restore data after a drive failure.

How to Backup Your Photos While Shooting Tethered so You Never Lose Them

To sum up

To ensure that you have all your bases covered when backing up your files, you should backup specific shoots as well as regularly do backups of your whole computer(s).

Have a couple of backups on hard drives, as well as a cloud-based backup.

When shooting tethered, I recommend backing up your images manually as you’re shooting, one at a time, to ensure that each image exists in at least two places at that time. Once you’re finished shooting, back up your portable hard drive to another one, preferably a larger, more robust hard drive where you store a copy of all your image folders.


how-to-backup-your-photos-while-shooting-tethered

The post How to Backup Your Photos While Shooting Tethered so You Never Lose Them appeared first on Digital Photography School. It was authored by Darina Kopcok.


Digital Photography School

 
Comments Off on How to Backup Your Photos While Shooting Tethered so You Never Lose Them

Posted in Photography


PhotoDirector 10 released with AI styles, new layer features, and tethered shooting

18 Oct

CyberLink has released PhotoDirector 10, the newest version of its PhotoDirector image editing and design software. The latest installment brings a number of new features, including tethered shooting and an AI Style Engine. CyberLink has also made a number of improvements to layer editing.

PhotoDirector 10 brings users workflow improvements, according to CyberLink, that are designed for “advanced photographers.” The inclusion of tethered shooting enables users to directly connect a camera to their PC, shoot images, and instantly preview them on the computer.

The newest upgrade also brings Soft Proofing for previewing a printer’s tone and color rendering, as well as improvements to layer editing. The latter change includes the ability to add empty layers to projects, use clipping masks, and group layers together.

Other features include the addition of integrated Express Layer Templates, additional template packs that can be purchased through CyberLink Store, AI Style Packs that use deep learning to be “more than just photo filters,” one-clicked keystone correction, advanced layer text editing, adjustment layers, and content-aware editing for moving, removing, and copying image elements.

PhotoDirector 10 is available now from CyberLink’s website for $ 99.99 USD for new customers, or starting at $ 69.99 USD as an upgrade for existing customers.

Articles: Digital Photography Review (dpreview.com)

 
Comments Off on PhotoDirector 10 released with AI styles, new layer features, and tethered shooting

Posted in Uncategorized


Major ON1 Photo RAW update adds tethered shooting, better noise reduction and more

10 Mar

ON1 just released a major update to its photo editing software ON1 Photo RAW. The update, version 2018.1, brings with it a host of feature upgrades, including: better auto-alignment for the HDR mode, improved high ISO noise reduction, and more detailed image sharpening. The update also includes a new tethered shooting function for certain Nikon and Canon DSLRs, as well as a new import utility that allows metadata to be added as images are sucked in from the camera.

Video files can now be seen in the browser, and new sort features allows user to browse imported images in a number of ways, such as by file type, date, file name or rating. Users can also batch rename groups of images, and a date-and-time editing function lets you adjust the recorded moment an image was shot.

Finally, the company has also made some changes to the way images are debayered to improve the amount of micro detail preserved in the final render.

ON1 says its priorities are image quality and processing/handling performance:

“Version 2018.1 isn’t just about the new features, although there are many powerful new additions,” says ON1 Director of Product Dan Harlacher. “Image quality and performance are the top priorities in every update, and we are very excited for our customers to experience these improvements for themselves in this update.”

New users can take advantage of a free trial, or purchase the software in its entirely (usually $ 120) for a special limited-time price of $ 80. If you’re already using Photo Raw 2018, the new version is free.

For more information, visit the ON1 website.

Press Release

ON1 Photo RAW 2018.1 – New Update Available

Portland, OR – March 1, 2018 – ON1, Inc. is pleased to announce the immediate availability of the new ON1 Photo RAW 2018.1, the first major free update to Photo RAW 2018. Version 2018.1 includes image quality enhancements, performance improvements, and key features to optimize the photographer’s workflow.

“Version 2018.1 isn’t just about the new features, although there are many powerful new additions. We’ve been very focused on image quality and the results customers get from using ON1 Photo RAW. Image quality and performance are the top priorities in every update, and we are very excited for our customers to experience these improvements for themselves in this update,” says Dan Harlacher, Director of Product at ON1.

New Improvements

  • Debayering – The algorithms have been improved to increase the amount of micro detail while reducing aliasing, yielding photos that are noticeably crisper with less color artifacts.
  • HDR – HDR alignment and deghosting have improved, yielding sharper results with less ghosting, noise, and color fringe. Users now have the ability to select which frame is used for deghosting and can also adjust the amount of motion visible in water and clouds.
  • Faster Cataloging – The thumbnail and preview generation of images is now faster. Searching photos has also been improved.
  • Noise Reduction – Improvements to reduce large noise from very high ISOs. Automatic hot-pixel removal has been added, and green and purple color aberration reduction has improved.
  • Sharpening – The sharpening algorithms have been improved to enhance micro details and provide sharper initial results.
  • Panorama – The panorama merge dialog now does a better job with vertical panoramas as well as really large ones. It can now stitch together up to 25 photos at a time. Blending of photos to compensate for differences in exposure and white balance have been improved.
  • Preview Quality – The preview window has been improved to more accurately reflect the details and sharpness in photos at different zoom levels.

New Features

  • Import – Get photos from your camera to your computer, choose where you want the photos to go, assign metadata, and more.
  • Tethered Shooting – Get your photos to your computer instantly and apply import settings. Currently supports Canon and Nikon.
  • Soft Proofing – Simulate what your photo will look like when it’s printed.
  • Metadata Templates – Add metadata to a group of photos using presets. This allows you to choose and save only the information you want applied to your photos.
  • Video Browsing & Organizing – Now supports viewing video files so you can organize those as well. Copy, move, name, add metadata, and more.
  • Custom Sorting – This option in Browse allows you to put your photos in any order you choose.
  • Batch Rename – Rename all of your photos in a batch to add unique information to filenames.
  • Edit Capture Date – Adjust date and time on your photos so they match the actual date and time they were taken.
  • Auto Advance – Automatically switch to the next photo during the culling process when rating or tagging photos.
  • Additional Camera & Lens Support — Added support for several new cameras and many new lenses. See the full list here.

About ON1 Photo RAW

ON1 Photo RAW 2018.1 is the only photo editor designed by photographers for photographers. ON1’s unique community-driven development approach via The Photo RAW Project gives customers a voice in how it’s designed, allowing users to submit ideas and vote on new features. With fast photo management, hundreds of customizable photo effects, powerful masking tools, HDR, panos, layers, and other Lightroom and Photoshop-like features, Photo RAW 2018.1 is the ultimate all-in-one photo editor and raw processor with no subscription.

Craig Keudell, CEO of ON1 says “Our vision for Photo RAW has always been that it would the fastest, most flexible, and easiest-to-use raw processor and photo editor on the market. A single photography centric photo editor with powerful Lightroom® and Photoshop®-like features photographers can own and enjoy for many years. Photo RAW has come a long way in a short time and we are both excited and very busy building new exciting technologies for our next update.”

ON1 Photo RAW 2018.1 isn’t just for raw files. Supported file formats include JPEG, TIF, PSD, PSB, PNG, and DNG are supported and benefit from the speed, performance, and abundance of editing tools in the app. Photo RAW 2018.1 continues to work seamlessly within current photography workflows. The app integrates as a plug-in for Adobe® Lightroom® Classic CC and Photoshop® CC and further builds its case as a complete standalone photo editor or alternative to the Adobe Photography Plan. Version 2018.1 also integrates with the major cloud services to allow for uploading, managing, and editing photos across multiple computers. This allows users to sync photos and their edits across multiple computers or in a studio setting.

Price and Availability

ON1 Photo RAW 2018.1 is available now for an introductory price of $ 79.99 for a limited time (Reg: $ 119.99). A free and fully functional 30-day trial is also available on the ON1 website. A single purchase of ON1 Photo RAW 2018.1 will include both Mac and Windows installers and activation for up to five computers. It comes with a 30-day money-back guarantee, world-class customer support, hundreds of free video tutorials, and free ON1 Loyalty Rewards every month.

For More Information

* ON1 Photo RAW 2018.1 Introductory Special
* Free 30-Day Trial
* The Photo RAW Project
* About ON1

Articles: Digital Photography Review (dpreview.com)

 
Comments Off on Major ON1 Photo RAW update adds tethered shooting, better noise reduction and more

Posted in Uncategorized


New Leica SL firmware improves tethered shooting, SL 50mm F1.4 goes on sale

14 Dec

German photo brand Leica has announced new firmware for its full frame SL mirrorless camera, making it fully compatible with the latest version of the company’s tethered shooting and remote control applications. Firmware 2.2 bolsters the camera’s ability to operate with both Leica Image Shuttle 3.5 for Mac and Windows, as well as Tethered Plug-in 1.1.0 for Mac. Image Shuttle is the company’s application for controlling the camera remotely, while Tethered Plug-in allows images to be drawn directly into Adobe’s Lightroom when connected via a USB cable.

The firmware also removes the restriction on long shutter speeds for those using 6-bit M lenses with the M-Adapter T/SL, as well as some mystery improvements to the camera that are not specified.

The company has also today released the Summilux-SL 50mm F1.4 ASPH for sale. Announced alongside the SL itself the lens should offer a very slightly more compact alternative to the 24-90mm F2.8-4 and 90-280mm F2.8-4 zoom lenses the company has released so far. It costs $ 5295/£4080.

For more information visit the Leica website.

Press release:

Firmware update 2.2 for Leica SL with improved support for Leica Image Shuttle software and Leica Summilux-SL 50mm f/1.4 ASPH. lens – available today

Leica Camera has released Firmware Update 2.2 for the Leica SL mirrorless system camera, improving support for the Mac versions of Leica Image Shuttle 3.5 and Tethered Plug-in 1.1.0., as well as supporting the new Microsoft Windows version of Leica Image Shuttle 3.5.

Registered Leica SL owners can download the new software and firmware updates from the Leica Owners’ Area (https://owners.leica-camera.com) or take their camera to their local Leica Store or Leica Customer Care in the UK for a complimentary installation.

Leica Image Shuttle 3.5 improves workflow efficiency for tethered shooting with the Leica SL and allows the camera to be controlled from a computer via a USB 3.0 cable connection. All relevant exposure parameters such as shutter speed, aperture, ISO value and autofocus can be set and controlled from the computer, and exposures can be displayed directly on a large monitor screen for assessment.

The Leica Tethered Plug-in 1.1.0 (for Mac) – also available as a download from the Leica Owners’ Area – establishes a direct connection between the Leica SL and Adobe Photoshop Lightroom 6 / CC for Mac via USB cable. The camera’s shutter release can be activated from the plug-in and the images captured can be displayed directly in Adobe Photoshop Lightroom 6 / CC (for Mac), making the workflow even faster and more reliable. The corresponding firmware update is required for the use of Leica Image Shuttle and the Leica Tethered Plug-in.

Firmware update 2.2 also removes the shutter speed limitation when shooting with 6-bit coded Leica M-Lenses, while further optimising the performance of the Leica SL system.

Available from today, the Leica Summilux-SL 50mm f/1.4 ASPH. is the first prime lens for the Leica SL-System and sets a new standard in its class. Its large maximum aperture makes this high-performance lens ideal for photography in challenging lighting conditions, and enables the use of shallow depth of focus as a creative tool. Furthermore, the fast, precise and reliable autofocusing ensures that photographers can concentrate fully on composition and creativity. The lens’ combination of resolving power and soft bokeh in unsharp areas clearly isolates subjects from their background, particularly when shooting at maximum aperture.

For additional product specifications, please visit: Leica Summilux-SL 50mm f/1.4 ASPH.

Articles: Digital Photography Review (dpreview.com)

 
Comments Off on New Leica SL firmware improves tethered shooting, SL 50mm F1.4 goes on sale

Posted in Uncategorized


Fujifilm X-T2 tethered shooting firmware arrives, also adds button lock

30 Nov

Fujifilm has released its much anticipated new firmware for the X-T2 that enables tethered shooting with the forthcoming Tethered Shooting Plug-in Pro application, but has added a number of other fixes and a new feature.

Fujifilm X-T2 users will now be able to set up a function button to lock all the body buttons of the camera so that they don’t get pressed by accident during shooting. Users can determine which button they want to use for this purpose via the custom settings menu.

As with previous updates for the X-T1 and X-Pro2 this new firmware fixes an AF reliability issue when using the longer end of the XF 18-135mm F3.5-5.6 R LM OIS WR and a problem that meant that Nissin’s i40 flash unit wouldn’t fire.

Further fixes include issues around exposure in very specific conditions, connectivity and the high speed burst mode when used with flash.

For more information see the Fujifilm website.

Manufacturer’s release notes

X-T2 Camera Body Firmware Update Ver.1.10

Detail of the update

The firmware update Ver.1.10 from Ver.1.00 incorporates the following issues:

1.Tether shooting is available by USB connection.

One of the application software below is required to use the tether shooting function.

  • Tether Shooting Plug-in PRO for Adobe® Photoshop® Lightroom® Ver.1.3 or newer *1
  • Tether Shooting Plug-in for Adobe® Photoshop® Lightroom® Ver.1.3 or newer *2
  • Tethered Shooting Software HS-V5 Ver.1.3 or newer *3

[How to set the PC shooting]
Before connecting your camera to a computer, set the PC SHOOT MODE of the CONNECTION SETTING in the SET UP menu to USB AUTO.
*If the USB AUTO is selected, the camera mode will automatically change to tether shooting mode when the camera is connected to a computer via a USB cable.
*If the USB FIXED is selected, the camera always work as tether shooting mode. Therefore, the camera doesn’t work as normal shooting mode when the USB cable is not connected.

*1: “FUJIFILM Tether Shooting Plug-in PRO” will be available from Adobe Add-ons website.
The launch of the Mac version is scheduled for release around the end of November 2016, and the Windows version is scheduled for release around the beginning of December 2016.
*Separately, you need to purchase Adobe® Photoshop® Lightroom® 6 / CC.

*2:”FUJIFILM Tether Shooting Plug-in” is available from Adobe Add-ons website. X-T2 will be supported with Ver.1.3 upgrade.
For Mac
For Windows
*Separately, you need to purchase Adobe® Photoshop® Lightroom® 6 / CC.

*3: You need to purchase the HS-V5 and download the latest version from the site below to upgrade it.

  • Tethered Shooting Software HS-V5 for Windows® Updater
  • Tether shooting function of X-T2 will be supported with HS-V5 Ver.1.3 or later.
  • Tethered Capture Plug-in for Adobe® Photoshop® Lightroom® Ver.1.3, which will enable the tether shooting function of X-T2, will be available for free download to those customers who purchased HS-V5.
  • Tethered Capture Plug-in for Adobe® Photoshop® Lightroom® Ver.1.3

2. Lock function during shooting mode is added. The update will let users prevent from the unexpected dial/button operation.

[How to set]
First, select the function you wish to lock in BUTTON/DIAL SETTING>LOCK>FUNCTION SELECTION” in the Setup Menu. And then, select the function in BUTTON/DIAL SETTING>LOCK>LOCK SETTING>SELECTED FUNCTION” in the Setup Menu.

*Select “ALL FUNCTION” to lock all the buttons and dials. This lock function can be allocated to a function button.

3. The shutter speed will be displayed in a preview image with the setting of SHUTTER AE OFF, ISO AUTO and Aperture-Priority.

4. The phenomenon is fixed that overexposure could happen with the setting of AF-C mode, AF-C PRIORITY SELECTION and FACE DETECTION ON.

5. The phenomenon is fixed that AF function doesn’t work well in the tele-photo area with XF18-135mmF3.5-5.6 R LM OIS WR.

6. The phenomenon is fixed that hung-up could happen when carrying out SELECT FROM NETWORK LIST of MANUAL SETUP in PC AUTO SAVE SETTING.

7. The phenomena is fixed that CH HIGH SPEED BURST (continuous high speed) doesn’t work well with fixed exposure and fixed amount of flash luminescence (TTL-L or flash M mode) while used with FUJIFILM Shoe Mount Flash (excluding EF-X8)

8. The phenomenon is fixed that Flash i40 made by Nissin for FUJIFILM doesn’t fire.

Articles: Digital Photography Review (dpreview.com)

 
Comments Off on Fujifilm X-T2 tethered shooting firmware arrives, also adds button lock

Posted in Uncategorized


Fujifilm launches ‘Pro’ tethered shooting plug-in for Lightroom with live view and remote control

03 Nov

Fujifilm X-T2 owners will soon be able to shoot tethered to Adobe’s Lightroom image manipulation software application using a new plug-in that will be sold through the Adobe Add-ons website. Tether Shooting Plug-in Pro is an upgrade from the existing version of the company’s Tether Shooting plug-in that is now compatible with the X-T2 as well as the X-T1. The new version brings a Control Panel display that allows users to check their imported images more quickly and to preview the image in live view mode while at the same time being able to control the camera’s settings.

The plug-in features two shooting modes that allow the user to control settings at the camera or via the computer screen, with both modes allowing the captured images to be transferred directly to the computer by USB connection.

The X-T1 and X-T2 cameras both need the relevant firmware to be able to operate with the plug-in, and Fujifilm has announced that v1.10 for the X-T2 will be available on 8th November. This firmware also makes the camera compatible with the standard version of Tether Shooting Plug-in and Tethered Shooting Software HS-V5.

The camera firmware will be free to download, but the Tether Shooting Plug-in Pro will cost $ 79.

For more information visit the Fujifilm website.

Press release:

Tether Shooting Plug-in PRO for Adobe® Photoshop® Lightroom®

PC tethered shooting support for FUJIFILM X-T1/X-T2

FUJIFILM Corporation (President: Kenji Sukeno) is pleased to announce the launch of “Tether Shooting Plug-in PRO for Adobe® Photoshop® Lightroom®” to enable tethered shooting of FUJIFILM X-T1(hereafter X-T1) and FUJIFILM X-T2(hereafter X-T2)* to a compatible computer.

“Tether Shooting Plug-in PRO for Adobe® Photoshop® Lightroom®” is a tethering software plug-in that allows Lightroom users to connect X-T1 / X-T2 to a computer via USB cable for direct saving of captured images onto computer, and controlling the camera from the computer**.

“Tether Shooting Plug-in PRO for Adobe® Photoshop® Lightroom®” will be available from Adobe Add-ons website*** for US$ 79. The launch of the Mac OS X / macOS Sierra version*4 is scheduled for release around the beginning of November 2016, and the Windows version*5 is scheduled for release around the beginning of December 2016. The detail launch schedule will be informed on this page.

(1) Featuring the “Camera Mode” and “PC Mode” to control shooting on camera or from computer
In Camera Mode, the camera is held in hand or set up on a stand. The images taken will be transferred directly and saved onto computer for use in Lightroom. Adjustment of exposure and other shooting settings as well as the shutter release is carried out on the camera. In PC Mode, users can check the viewfinder image of a remotely-setup camera in the LIVE VIEW window, operate the camera and adjust its settings on the computer screen. The user can also take images and have them transferred directly and saved onto a computer for use in Lightroom. Adjustment of exposure and other shooting settings and the shutter releases are carried out from the connected computer.

(2) Featuring the “Control Panel” to check captured image and to control camera
In addition to the features of “Tether Shooting Plug-in for Adobe® Photoshop® Lightroom®” (standard version)*6, “Tether Shooting Plug-in PRO for Adobe® Photoshop® Lightroom®” has Control Panel which can check captured images and to control the camera. The Control Panel PREVIEW window allows users to check transferred images in quicker than before.

The Control Panel also allows users to check shooting angles with LIVE VIEW, to set shooting conditions from computer, to operate interval/bracketing shootings and to backup/restore all the camera settings*7.

* * X-T1 and X-T2 must be upgraded to the tethering-compatible firmware (X-T1: Ver. 3.10 or later, X-T2: Ver.1.10 or later). Internet connection is required for downloading compatible firmware.
* ** Adobe® Photoshop® Lightroom® 6 or CC is required.
* *** https://creative.adobe.com/addons/
* *4 The compatible OS is same as that of Lightroom. To use on macOS Sierra, Lightroom should be upgraded to 6.7 or later / CC 2015.7 or later.
* *5 The compatible OS is same as that of Lightroom.
* *6 The current version (Ver.1.2) of “Tether Shooting Plug-in for Adobe® Photoshop® Lightroom®” (standard version) is compatible only with X-T1. X-T2 will be supported with upgraded version (Ver.1.3) or later.
* *7 Backup/restore is only compatible with X-T2.

Articles: Digital Photography Review (dpreview.com)

 
Comments Off on Fujifilm launches ‘Pro’ tethered shooting plug-in for Lightroom with live view and remote control

Posted in Uncategorized


Step by Step Tutorial for How to Shoot Tethered

04 Oct

Tethered shooting is a photography technique that has been practiced by many professional photographers for years. In short, tethering allows you to connect your camera to a computer or tablet and almost instantly view your digital images on the device within seconds after it is captured. Due to expense and accessibility, tethered-shooting was generally reserved for photographers who do a lot of studio work and high-end commercial photo shoots. However, as tethering technology became significantly cheaper and easier to use, tethered shooting as been practiced by professionals and enthusiasts alike.

If you’ve ever been curious about tethered shooting, this article will give a brief overview of the process as well as some steps to easily get started.

Tyler Ingram

By Tyler Ingram

What is tethered shooting?

Tethered photography is the process of connecting your camera to a computer, tablet, or even a smartphone using either a cable or wireless app. After a successful connection between the devices, any new image captured by the camera is then passed directly to the computer and saved in a pre-designated folder. You’re then able to see the image fully displayed on the computer screen and even do some post-processing to the image.

Benefits of tethered shooting

The main benefit of tethered shooting is the ability to quickly preview the image on a large monitor within seconds of capturing it with your camera. This allows both you and a client to scrutinize your images on a big screen, allowing you to make adjustments to the photo shoot as it’s taking place. Depending on the tethering software you’re using, you might even be able to do quick edits to the photo on-site. Both you and the client can see exactly what’s being photographed and can make sure your visions for the shoot are in alignment. Overall, this type of collaboration should lead to a better result.

Photographer

By Photographer

Downsides of tethered shooting

The ability to almost instantly preview photos as they’re being captured does come with a few downsides.

First, either you or your client could get too caught up in little details while inspecting the photos, and this can stall a photo shoot. Thus, it’s important to set expectations with your client and be able to push forward without focusing too much on details. Second, tethering can suck the battery life out of both your camera and your connected computer. If your tethered photo shoot may take longer than an hour, you’ll want to have extra batteries on hand and be shooting near a wall socket in case you need to plug in. Lastly, tethering software can be notoriously finicky and is prone to not working for no apparent reason, so you’ll want to have a backup plan in case of an outage.

What you need for tethered shooting

The traditional and most reliable way to connect your camera to a computer or another device is by using a cable. There are a variety of different cables and ports available, so which cable you use will depend on your exact devices. Some DSLRs with built-in Wi-Fi even offer wireless tethering or remote shooting, but this is typically limited to being used on a tablet or mobile device only, not a laptop computer.

In this particular instance, we’ll assume the camera is a DSLR and the connected device a laptop computer, as this is a very common tethered shooting setup. In this case, you’ll need:

  • An extra long (ie. 15 feet) USB cable to connect your camera to your laptop
  • Tethering software, such as Adobe Lightroom or Canon EOS Utility 3
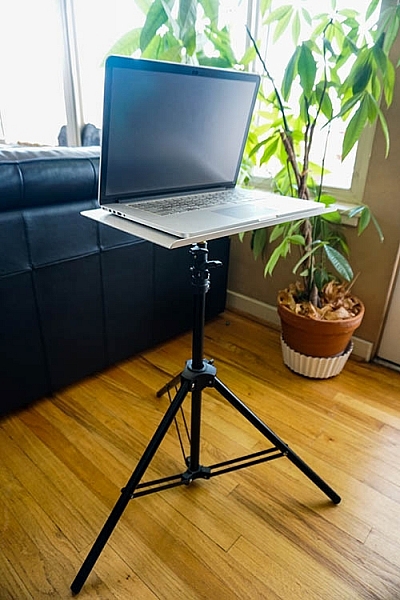
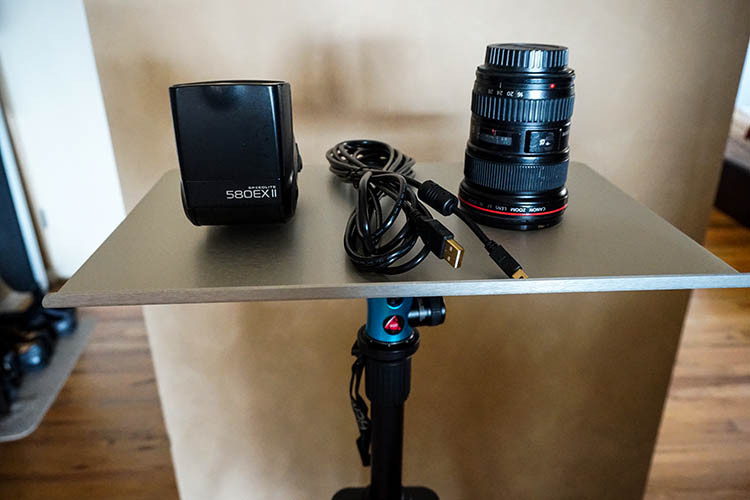
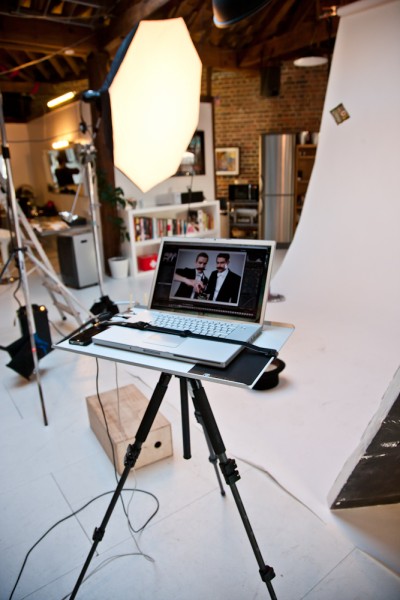
  • Optional – a portable table to hold your laptop such as Tether Tools’ Aero Table
  • Optional – a JerkStopper to prevent accidentally yanking your USB cable from your camera
Tether Table Aero for tethered shooting

Tether Table Aero is a lightweight, durable aluminum platform that attaches to almost any tripod or light stand, turning it into a handy utility table for holding a laptop or extra camera gear.

Tether Table Aero for tethered shooting

To be clear, there are many tethered shooting programs available, but this article will highlight two low-cost, simple methods in particular: Adobe Lightroom and EOS Utility 3.

Simple tethered shooting with Lightroom

The quickest and arguably the easiest way to start tethered shooting is by using Adobe Lightroom’s Tethered Capture feature. Follow these steps to set it up:

Step 1 – Connect the camera to the laptop

Connect your DSLR to your laptop with a USB cable. Then turn the camera on.

Step 2 – Start Tethered Capture in Lightroom

Open Lightroom and navigate to File > Tethered Capture > Start Tethered Capture

Step 3 – choose tethered settings

In the Tethered Capture Settings dialogue box, you have the option of choosing a Session Name (e.g., “Tethered Shooting Test,” specifying the photo names, choosing a destination for your photos, and adding metadata and keywords. Be sure to pay particular attention to where the photos will be saved so you can find them later. After setting your options, click OK.

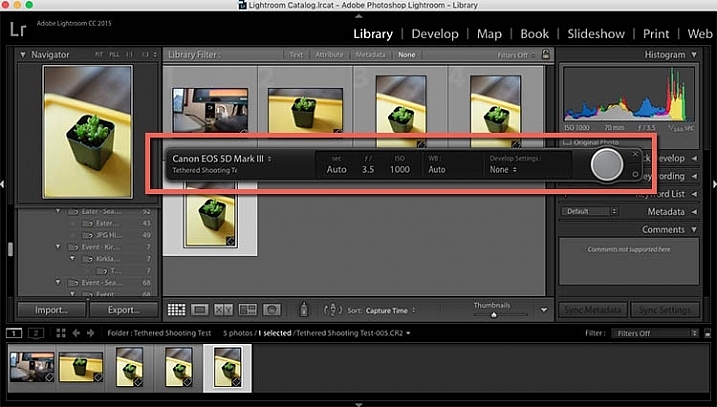
If all goes well, the screen below will pop up, giving you a narrow control panel (outlined in red below) for some light remote shooting options, and a Library in which photos captured via the tethered shooting connection will populate.

tethered-03b

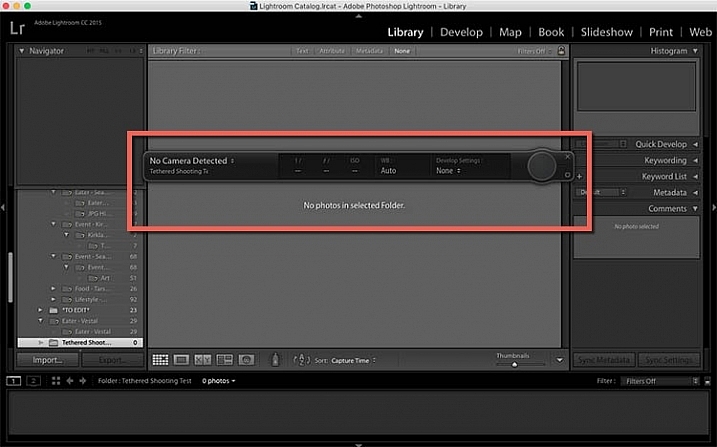
However, it’s not uncommon for Lightroom to have difficulty detecting the connected camera. If you follow the above steps and still see this screen below, try troubleshooting by first making sure your version of Lightroom and your camera’s firmware are both updated. Also, check compatibility to ensure your camera can tether capture with Lightroom. Note: there are third party plugins available for other non-compatible cameras such as the Fuji X-T1, do a search for your camera model and you may find a solution (Pentax here, Sony here.

Finally, try rotating through several different USB cables to make sure they’re working well. But if you’re looking for a more consistent way to tether shoot, check out the other option below.

tethered-04b


Reliable Tethered Shooting with EOS Utility 3

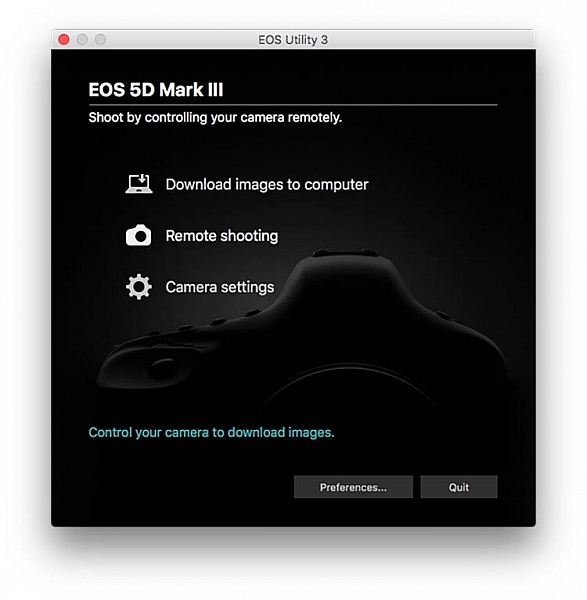
If you shoot with a Canon DSLR, whip out that CD that came with your camera and install the EOS Utility 3 onto your computer. When your Canon DSLR is connected to your computer, you’ll be able to use this program to control your camera remotely and shoot tethered. This method is much more reliable and consistent than using Lightroom’s tethered capture option.

Steps for using EOS Utility 3 for tethering:

  1. Start by downloading the EOS Utility 3 and opening it on your computer. Click on the “Remote shooting” option.Tethered shooting
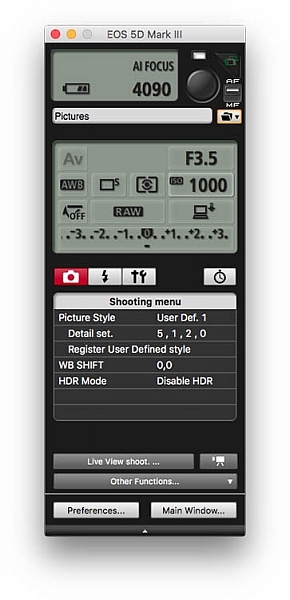
  2. Selecting that option will display the following interface. The display gives you the ability to alter some settings such as white balance or drive mode on your camera directly from this interface, but there are still some functions, such as lens zooming, that you’ll have to do manually.Tethered 05
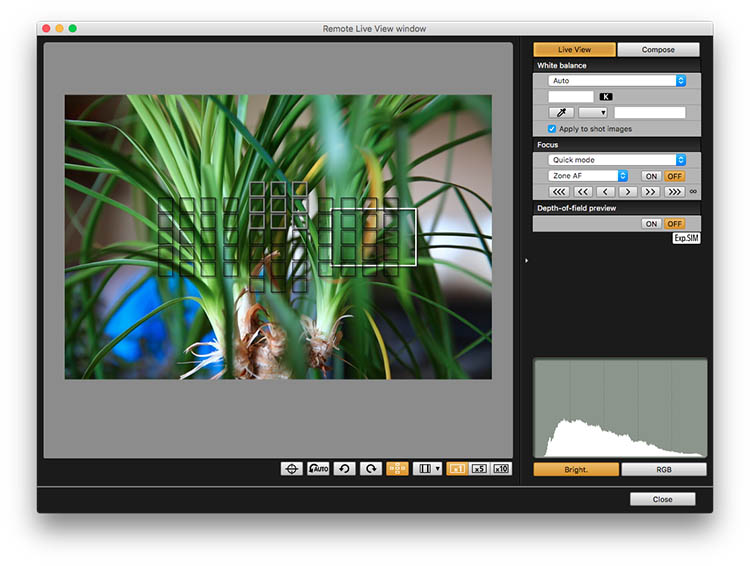
  3. While still in the Remote Shooting setting of EOS Utility 3, set your camera to Live View mode, and tethered shooting will be enabled. In this case, Live View will appear directly on your computer screen so you will see exactly what your camera sees. When you take a photo in tethered shooting mode, the captured photo will appear on your desktop.Tethered 09

Over to you

These are just two of many options available for tethered shooting. Do you frequently shoot tethered? If so, what types of programs do you use for reliable results? Please let us know your tethered shooting tips and tricks in the comments below.

googletag.cmd.push(function() {
tablet_slots.push( googletag.defineSlot( “/1005424/_dPSv4_tab-all-article-bottom_(300×250)”, [300, 250], “pb-ad-78623” ).addService( googletag.pubads() ) ); } );

googletag.cmd.push(function() {
mobile_slots.push( googletag.defineSlot( “/1005424/_dPSv4_mob-all-article-bottom_(300×250)”, [300, 250], “pb-ad-78158” ).addService( googletag.pubads() ) ); } );

The post Step by Step Tutorial for How to Shoot Tethered by Suzi Pratt appeared first on Digital Photography School.


Digital Photography School

 
Comments Off on Step by Step Tutorial for How to Shoot Tethered

Posted in Photography


Lightroom plug-in for Pentax 645Z tethered shooting now available

10 Dec

Ricoh has announced a software plug-in for Adobe Lightroom supporting tethered shooting with the Pentax 645Z medium-format camera. Creative Cloud Lightroom subscribers can also take advantage of integration with Lightroom Mobile, making it possible to comment on and adjust photos remotely via the cloud. The Pentax Tethered Capture Plug-In is available now from Ricoh.


Press release:

Ricoh Imaging Delivers Tethered Capture to its Acclaimed PENTAX 645Z Camera

Highly requested software plug-in to enhance the PENTAX 645Z’s in-studio photo-shooting with Adobe® Lightroom® capabilities available today

DENVER, December 9, 2015 – Ricoh Imaging Americas Corporation today announced the immediate availability of the highly anticipated PENTAX Tethered Capture Plug-In for use with Adobe® Lightroom®. The software plug-in enhances the tethered capture capabilities of the PENTAX 645Z medium-format camera by enabling files to easily be uploaded into Adobe Lightroom during a studio session, where they can readily be viewed, shared and edited.

Adobe Lightroom is the digital photo processing and editing software favored by many professional and advanced amateur photographers, making the use of the new PENTAX Tethered Capture software both cost effective and efficient as there is no additional software package to purchase and learn. In addition, with the new capabilities of Lightroom Mobile, uploaded images may be viewed and adjusted by a photographer’s colleagues or clients from any remote location, anywhere in the world.

“Since Lightroom is already the de-facto standard for many photographers to edit and develop their images, this new plug-in is especially welcome. It makes studio use of the PENTAX 645Z camera easier, more efficient and, ultimately, faster than ever,” said Chris Knight, a New York-based portrait photographer. “Using Lightroom, I am able to quickly share photos with my clients, who are even able to view and comment from remote locations.”

Since its launch in June 2014, the PENTAX 645Z camera has been embraced by a wide range of photographers. The PENTAX Tethered Capture Plug-In is being offered to further enhance the user experience, and is a free option that can be downloaded starting today at: http://www.ricohimaging.co.jp/english/support/download_digital.html

Main Features

  • The PENTAX 645Z camera supports industry-standard Adobe DNG (Digital Negative) RAW files, which ensures optimal image quality. The in-camera DNG file format effectively eliminates any RAW file incompatibility issues, thus allowing the photographer to confidently import DNG RAW files during a tethered session.
  • Adobe Lightroom Creative Cloud users can use Lightroom Mobile to connect to tethered sessions via cloud services to comment and adjust photographs and return those edits to the photographer from anywhere in the world.
  • Adobe Lightroom offers an exceptional cataloging system that allows photographers to capture and catalog tethered sessions with confidence.
  • The PENTAX Tethered Capture Plug-in for Adobe Lightroom is an easy-to-install, powerful and streamlined tethering solution that allows any photographer to manage their own workflow from capture to output.
  • Adobe Lightroom users can download and apply presets to any tethered capture session thus eliminating the need to process every raw file individually.

Articles: Digital Photography Review (dpreview.com)

 
Comments Off on Lightroom plug-in for Pentax 645Z tethered shooting now available

Posted in Uncategorized


Fujifilm adds film simulation to Raw File Converter EX 2.0 and tethered shooting for X-T1

06 Feb

Fujifilm is to release a new version of its Raw File Converter EX at the end of the month, bringing the film simulation modes used in its X-series cameras to the Silkypix-based desktop software package. Initially the new feature will be available for files shot with X-T1, X-A2, X100T, X30 and XQ2 cameras, but the company has said that other models will be included in a further update at a later time. Read more

Articles: Digital Photography Review (dpreview.com)

 
Comments Off on Fujifilm adds film simulation to Raw File Converter EX 2.0 and tethered shooting for X-T1

Posted in Uncategorized


TetherTools – Shooting Tethered and other Fun Things..

07 Jul

We had a look at the AERO from Tether Tools a while back (Read that review here) well, I’ve been in touch with the photographer who did that review for us, London based commercial photographer, Nathan Pask. He was on his way out to a shoot and did indeed have his Aero with him – Nathan snapped a couple of shots for me of the Aero in action and had this to say when asked “are you still using that Tether Table?” (I love a review that actually has a few months of use and a recap! Two weeks to get a proper feel for a product is a bit silly, really)

“Sure do mate. All the time! I get a lot of admirers ask about it. I like that its light. It does have a little bit of flex, but I have the big one because of the 17″ lappy so I guess that’s to be expected. I never feel like its going to topple though. So I mostly attach it to my carbon sticks and it becomes a really nice lightweight option when I’m on location particularly as myself or my Digi-op can easily pick it up and move to the next spot without too much fuss and the strap over the laptop keeps it pretty secure. Can’t recall ever having a scary moment that the table has been responsible for. It is quite expensive for what it is, but there isn’t a product I’ve seen that can compare, so they kinda have the market sewn up currently.”

Tether-Tools-Nathan-Pask-Photographer-London

Nathan Pask on a shoot using the Tether Tools Aero Master

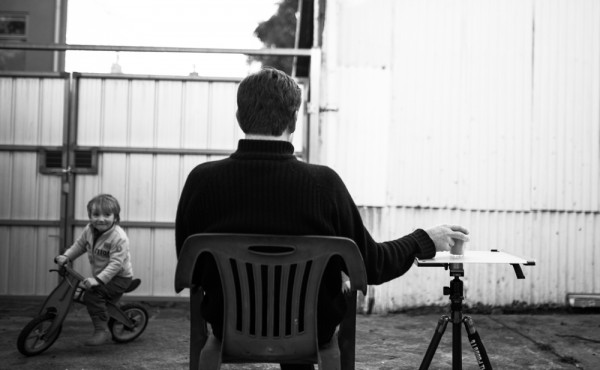
Since getting hold of my own Aero, I’ve been using her for a lot more than simply shooting tethered on a set or in the studio – the Tether Tools Aero has become a second desk space when I need a little more space – as you can see below, the option for pretty much anything else besides my frequent cups of coffee isn’t really an option. It takes me about 45 seconds to set up a tripod and my tether table to use as an extra desk.

simon_pollock_melbourne_based_photographer

Since our last look at Tether Tools, their quiver of gear has expanded to include a desk full of extra handy stuff that is set to make your life easier, from iPad holding gizmos to cup holders (I’m not even joking) – I wanted to bring some of it to your attention, perchance you’re struggling and these will bring a smile to your face and a bit of extra speed and security to your workflow. I went across to visit the terribly attractive team at Kayell in Melbourne and picked up the “essentials kit” it has Jerk Stopper and the super handy USB light in a little case, as well as a couple of the TetherPro cables – I got them in orange as, on a darker set, they’re “less easy” to trip over… (I’m a clutz ok..!)

For those of you still unfamiliar with exactly what tethering is, here… check this out!

I’m using the Aero Master and an Aero XDC to run my external “on location” disc underneath the Aero.. This way, as Mark mentioned in the video, I can shoot straight to my laptop and have a copy load into my external disk via folder actions. I also have the CF in the camera with a copy on should something go horribly wrong. Some other examples of where I’ve used my Aero – most of which you may find a little amusing – include a coffee table (yes, with a tablecloth over it) as a work desk to use my Macbook Air on when I’m sitting outside working while watching my 3 year old ride his bike around and around… I’ve used it on a 3LeggedThing “Keith” as a tabletop recipe book holder AND I’ve also used it as a flag to block light on a shoot. (I usually use a NastyFlag or similar if I’m simply shaping light to shoot a product, but hey – I needed something bigger!)

simon_pollock_tether_tools_3leggedthing_photographer

The bottom line I guess is that the Aero has sooo many other uses than simply being a great, portable tethering accessory and workbench.

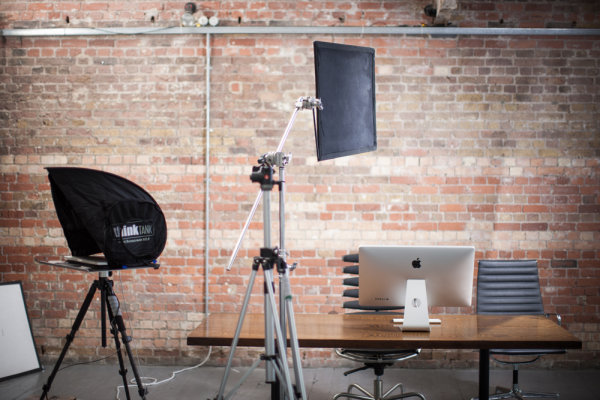
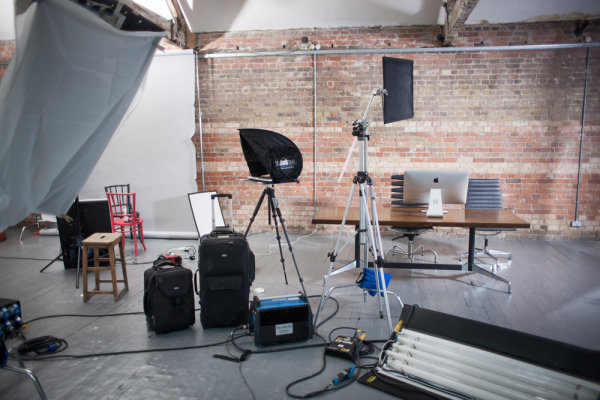
I’d like to close todays proceedings with a couple of actual photographs from the set Nathan was working on, you can see his Aero with a thinkTank Pixel Sunscreen on top, combining these two means you have a stable work surface and a non-glare option to make sure you’re shooting and getting exactly what you need. I agree that the Aero may not be for everyone, but if you’re a semi-pro or pro that is continually moving that annoying coffee table around to rest your laptop on, well, it may just be for you….

NN_IFX 0671

NN_IFX 0673

The Tether Tools Aero is a great bit of kit, though as Nathan mentioned, it is towards the pricier end of the scale, but I’d say for a working pro that does a lot of tethered work on location, the Aero is invaluable. (And my mum always said “buy well, buy once)

~Sime


Post originally from: Digital Photography Tips.

Check out our more Photography Tips at Photography Tips for Beginners, Portrait Photography Tips and Wedding Photography Tips.

TetherTools – Shooting Tethered and other Fun Things..


Digital Photography School

 
Comments Off on TetherTools – Shooting Tethered and other Fun Things..

Posted in Photography