RSS
 

Posts Tagged ‘Tablet’

Sleeves Are For Nerds: Geeky iPad, Tablet & eReader Covers

23 Apr

[ By Steve in Gadgets & Geekery & Technology. ]

Tablets, iPads and eReaders are so ubiquitous, nerdy owners are employing extreme acts of graphic personalization to imbue their devices with unique geek chic.

Faaaalkooorr!! Almost every child of the Eighties holds a special place in their heart for The NeverEnding Story. The 1984 film spawned a pair of sequels and a TV show, cementing its hold on once-youthful imaginations and imbuing all who watched with the urge to ride a giant flying dog – OK, “luckdragon”, whatever.

Fans of the endearingly clunky, West German-produced fantasy film have grown into jaded adults but as Falcor famously advised, “Never give up and good luck will find you.” Yeah, tell that to Artax. Anyway, you can look up that and more on your tablet, ideally if its encased by a NeverEnding Story iPad / Tablet / EReader / Kindle Cover. Note the faux Auryn medallion affixed to the cover. Hey, it’s better than Nothing.

Hit The Button, Frank

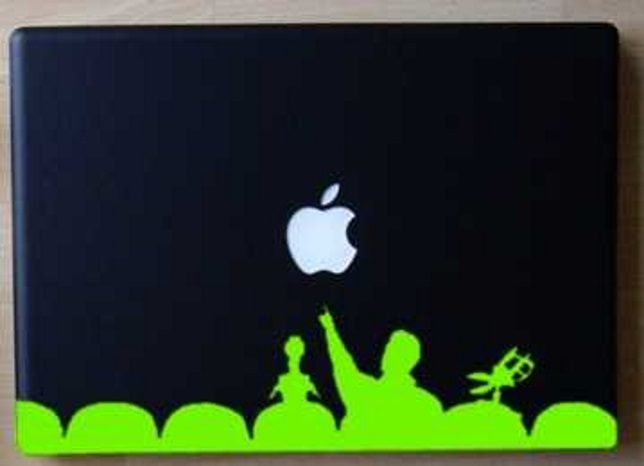
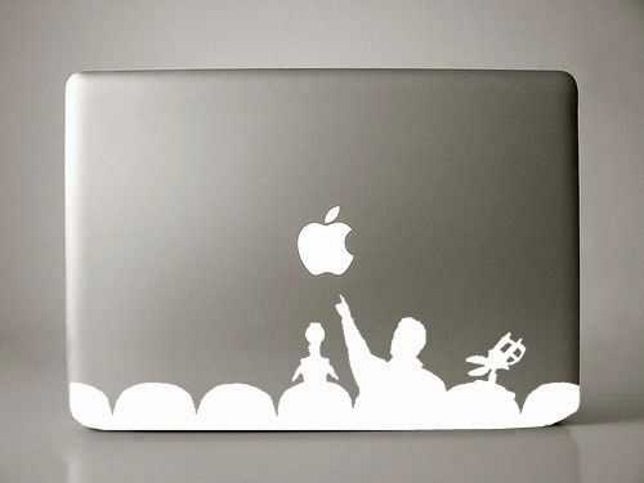
Designed ideally for an Apple product like a Macbook or iPad and size-customizable by the seller, this MST3K adhesive vinyl decal features the familiar – to those in the know – silhouettes of Tom Servo, Mike Nelson and Crow T Robot in full-on movie-riffing mode. Now that Mystery Science Theater 3000 has been revived for a new run on Netflix, your robot roll call is as timely as ever.

Ultimate Zelda

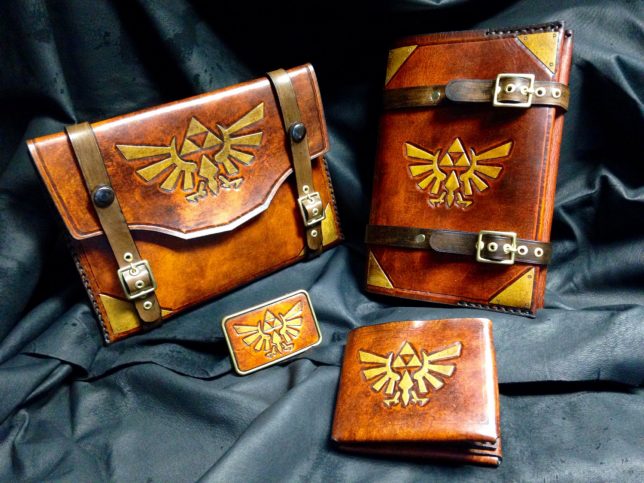
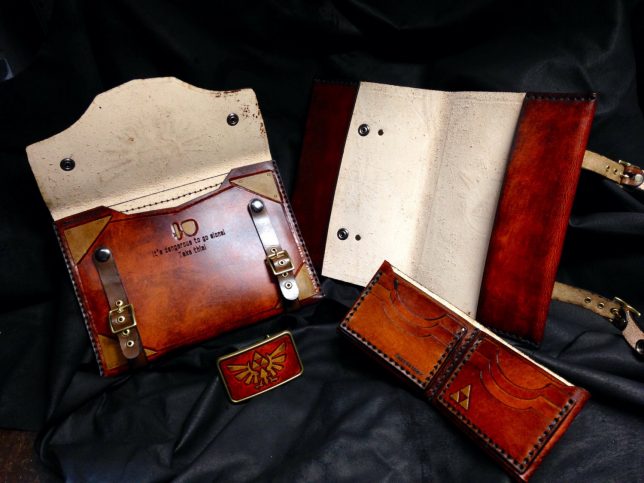
The Legend of Zelda is one of Nintendo’s most successful gaming franchises though considering it debuted way back in 1986, it’s had plenty of time to accrue legions of devoted fans. This “Ultimate Zelda Fan Package” from Etsy seller SkinzNhydez includes a Zelda book cover, Zelda wallet, Zelda iPad case, even a Zelda belt buckle. All you need now is a girlfriend named Zelda… oh, wait.

Time McFly’s

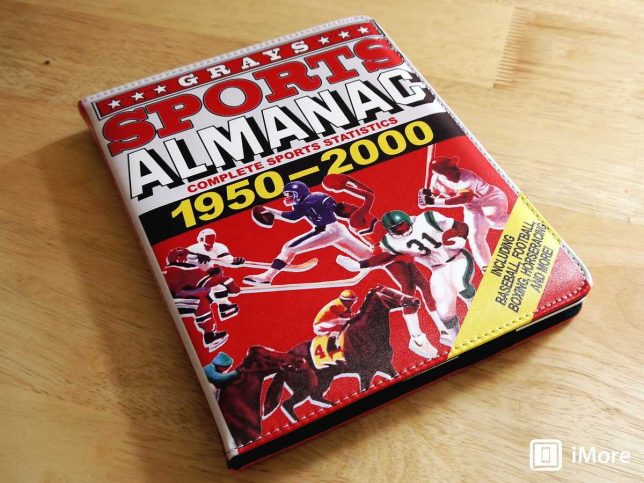
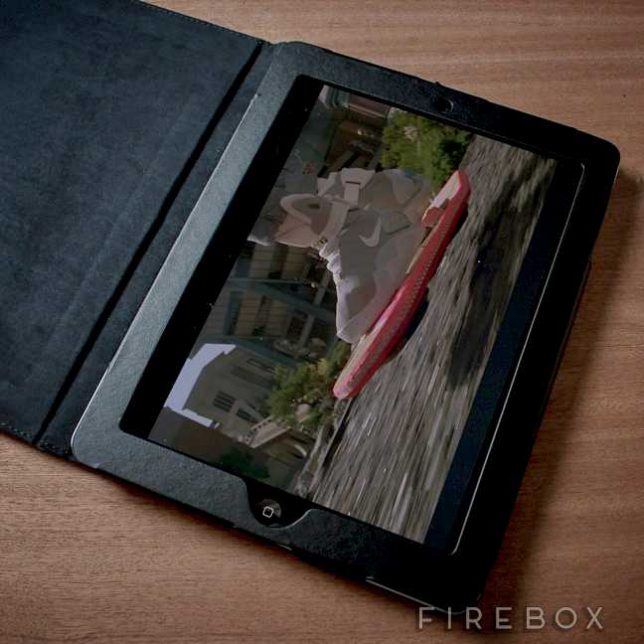
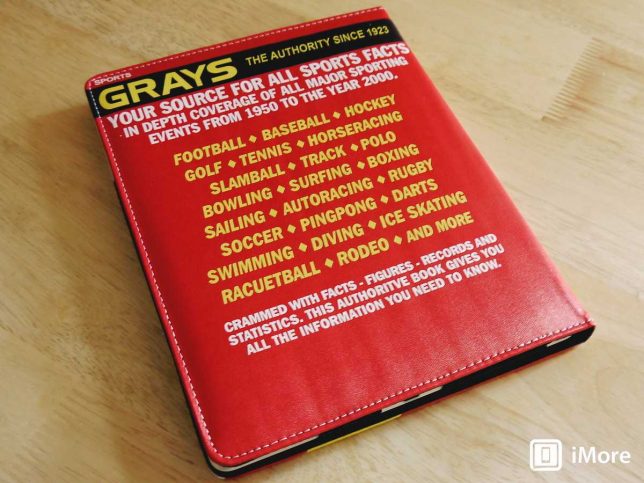
Channel your inner Biff Tannen with this Back To The Future 2 iPad case, featuring the cover of Gray’s Sports Almanac 1950-2000: the book that brought our heroes from BTTF2 so much Griff, er, grief.

Seller Firebox kindly advises potential purchasers that while “this book tells the future,” it’s “not to be used to create a series of paradoxes that destroy time.” Besides, since November 8th of 2016 we’ve already been living in the darkest timeline, amiright?

Next Page – Click Below to Read More:
Cover Ups Geeky Ipad Tablet Ereader Case Covers

Share on Facebook


[ By Steve in Gadgets & Geekery & Technology. ]

[ WebUrbanist | Archives | Galleries | Privacy | TOS ]


WebUrbanist

 
Comments Off on Sleeves Are For Nerds: Geeky iPad, Tablet & eReader Covers

Posted in Creativity


Wireless tethering on a budget: control your camera from your phone or tablet for $40

13 Jul

Wireless tethering is nothing new, but it’s not exactly a cheap proposition. Well, that’s changed, as Seattle-based photographer Alan Lawrence shows on his blog. For around $ 40, you can wirelessly control and transfer images from your camera to your phone or tablet.

In short, this DIY wireless tethering requires a TP-Link MR3040 Battery Powered 3G Wireless Router, some software, a USB cable, and some time. Lawrence says the router is similar-looking to the CamRanger, a device that offers tethering functionality out-of-the-box, but the router retails for under $ 30 compared to the CamRanger’s $ 299 MSRP.

Once you’ve got your hands on the router (and he does say you need a specific version, which is the one linked above), you’ll need a $ 9 app called DSLR Dashboard for Android, or QDSLR Dashboard for iOS. The last thing you’ll need is a compatible USB cable, and you’re almost in business.

The DSLR Dashboard website has a link to download new firmware for the router, and once you’ve updated that, all you have to do is connect to the wireless network you’ve set up and launch the app. You can control your camera from your device and download files instantly after you’ve taken them.

You can read all the nitty gritty details over on Alan Lawrence’s blog.

Articles: Digital Photography Review (dpreview.com)

 
Comments Off on Wireless tethering on a budget: control your camera from your phone or tablet for $40

Posted in Uncategorized


Samsung launches Galaxy TabPro S Windows tablet

07 Jan

Samsung has launched a new convertible tablet at CES which appears to be squarely aimed at Microsoft’s Surface Pro model. Like the Surface Pro, the Galaxy TabPro S runs Microsoft’s Windows 10 operating system and can be used with a keyboard cover that attaches via a pin connector. While on the Microsoft device the keyboard cover is an optional accessory, with the TabPro S it is included in the package. Read more

Articles: Digital Photography Review (dpreview.com)

 
Comments Off on Samsung launches Galaxy TabPro S Windows tablet

Posted in Uncategorized


Review of the Wacom Intuos Photo Pen and Touch Tablet

05 Dec
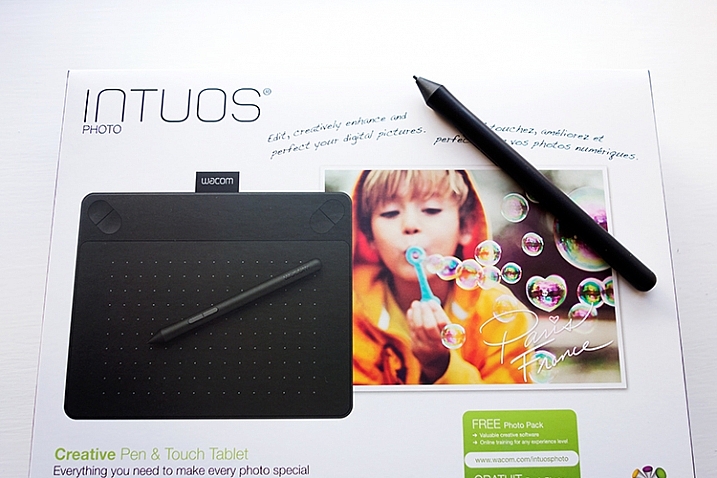
Intuos Photo Creative Pen and Touch Tablet

Intuos Photo Creative Pen and Touch Tablet

In this article I’ll review the Wacom Intuos Photo Creative Tablet Small. Wacom brought out this model, and three other similar ones, back in September 2015. The only difference is they come bundled with different software. Otherwise the specs are the same.

Can you benefit from using a tablet?

The short answer to this question is, yes. Do you actually need one? Possibly not. But, if your workflow demands a lot of retouching to your images, then you will indeed benefit from using a tablet. The pen (stylus) essentially replaces your mouse, and allows for more precise actions where pinpoint accuracy, especially pressure sensitivity, are indispensable.

I’ve being using a Wacom tablet for a number of years. Although, I will admit when I first got my Graphire4, I took it out of the box and thought, “Hmm that looks nice” and put it straight back into the box. Long story short, some time later, I was about to give it away when I decided I’ll give it another go. Initially, it did take a little bit of getting use to. Whereas now, I would find it difficult resorting back to a mouse for editing my images.

The Graphire4 served me well even though it had only 512 levels of pressure sensitivity. So it was time for an upgrade.
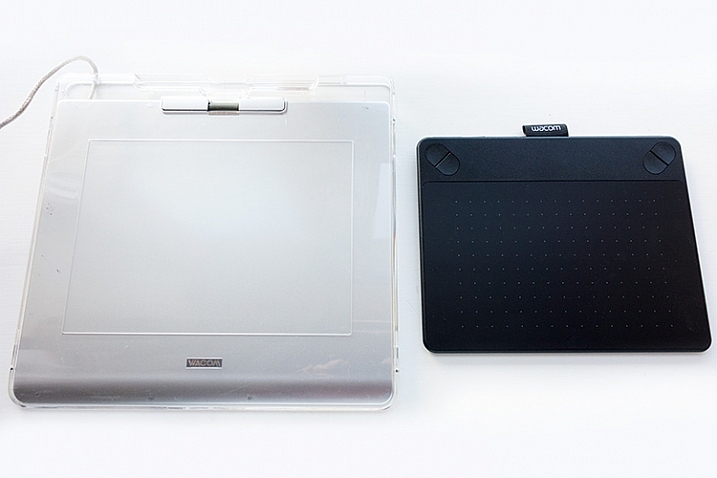
two-tablets-side-by-side

The Graphire4 tablet on the left versus the new Intuos Photo Small on the right

The new Intuos Photo has 1024 levels of pressure, which was immediately noticeable, and very responsive. It has four Express Keys (the Graphire4 had only two) which you can configure to whatever shortcuts you choose. There also two buttons on the stylus, which offer the same customization.
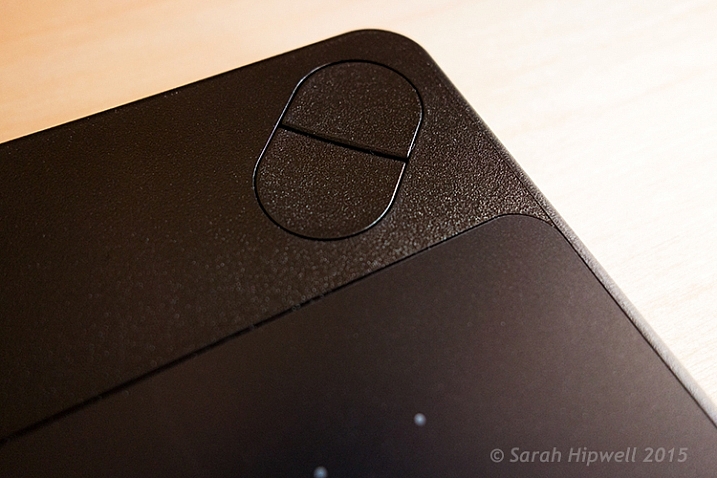
ExpressKey

There are 4 ExpressKeys on this tablet, two on the left and two on the right, which can be customized for shortcuts.

I didn’t notice any lag time when moving the stylus across the surface, and the pen feels so intuitive, just like a real pen. It’s is very responsive and doesn’t have that scratchy feel when using broad brush strokes, you might expect because the surface is matte.

Features and design

This tablet is small, slim, and lightweight, which makes it very portable. Although it is light, it does feel solid.
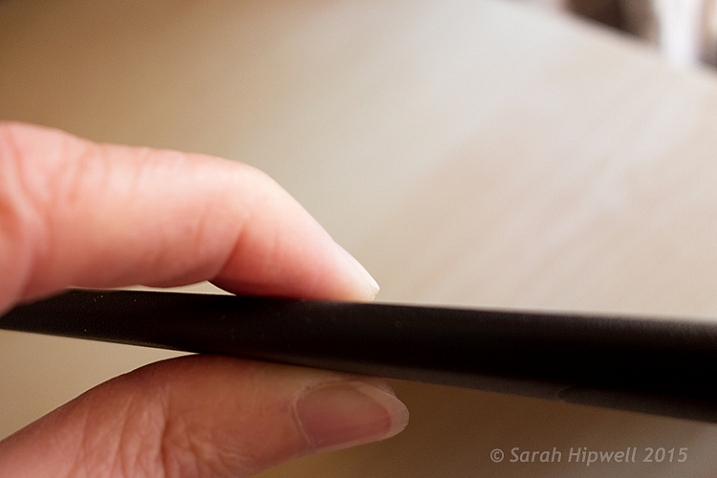
slim-tablet

I’m holding the Intuos Photo between my fingers to illustrate how slim it is.

It has multi-touch gestures, which operate in the same manner as a trackpad. I wouldn’t use this feature, as I use my keyboard for shortcuts, but it’s cool nonetheless. There is a switch at the back to turn this feature off. My hand would activate the zoom feature, which was distracting.

If you turn the tablet upside down and slip this portion of the base off, you will find slots for the Wireless bits to go. You have to purchase the Wireless Accessory Kit separately. You get four spare pen nibs tucked away neatly, saved for when you need them.
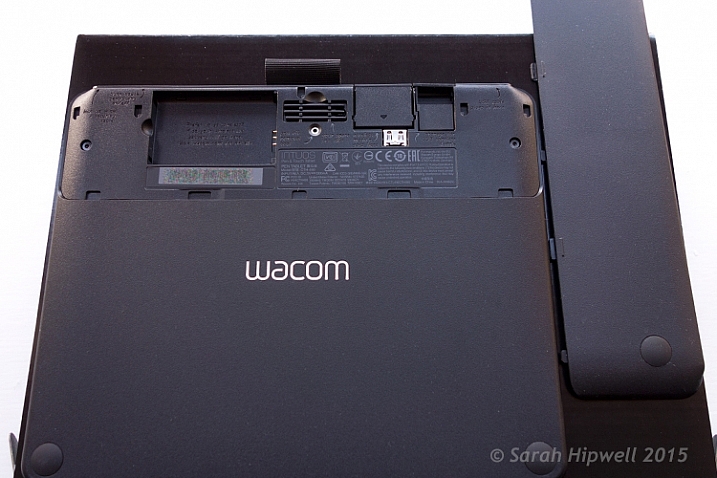
back-off

Back of the Intuos Photo where the Wireless kit goes (sold separately).

I did find the engraved instructions neat. It did appeal to my sense of aesthetics!
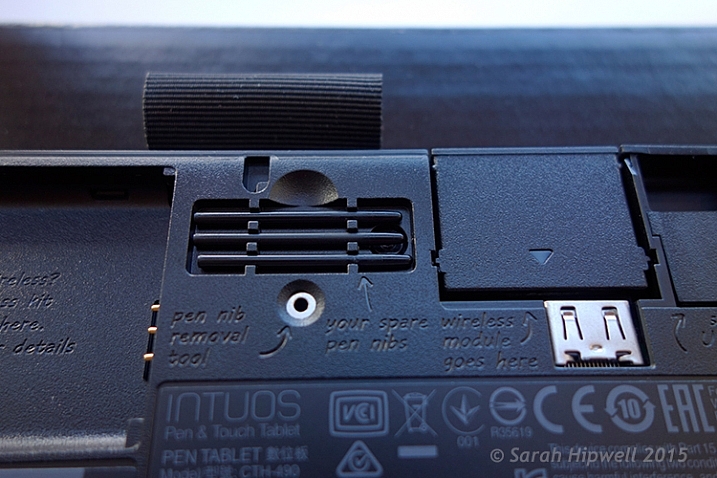
stylus-spare-nibs

Close up to show the four spare nibs for the pen (stylus). Notice the neat engraved instructions.

Size can matter!

Before I purchased the Intuos Photo Small, I wasn’t sure whether to choose this size (6 x 3.7 inches) or go for the medium size. The medium is called the Wacom Intuos Art Pen and Touch Tablet Medium (8.5 x 5.3 inch active area). The larger model retails at $ 199.95.

The price wasn’t just the only determining factor for me. I have a 24” monitor so I wasn’t sure if this size tablet would match the monitor? I’ve found no issue, the size is good for me. However, if I had a bigger monitor, I would probably have gone with the medium tablet. Another factor to consider is how much space do you have on your desk? The Intuos Photo is small and compact.

What software is included?

  • Macphun Creative Kit
  • Corel AfterShot Pro (Mac)

In order to get the software, a download key is printed on the inside of the box. I have downloaded the Macphun Creative Kit (Tonality Pro, Intensify Pro, Snapheal Pro, Noiseless Pro) but that’s as far as I got. I haven’t tested out the software yet.

My verdict

Wacom tablets are a leading brand. Their Intuos Pro range are expensive. However, the Pro range offer 2048 levels of pen pressure sensitivity, wireless connectivity, and other features. So this makes the Intuos Photo Small a really good deal for the price. I find the pressure sensitivity levels suffice for my workflow.

Another plus, if you suffer from RSI (Repetitive Stress Injury) issues, especially if you spend a considerable amount of time in front of your computer editing your images, I certainly find holding a pen preferable to gripping a mouse for any length of time.

To sum up, if you have a (much) older Wacom tablet, I would recommend the Intuos Photo as an upgrade. If you haven’t used a tablet before and are thinking of buying one. This model is a good place to start and it is competitively priced.

Cons (or maybe quirks)

This is more of an observation rather than a gripe. The USB cable supplied is 148cm (58 inches) in length! Not sure of the rationale behind this…maybe a ploy to get you to buy the Wireless Accessory Kit, which is sold separately.
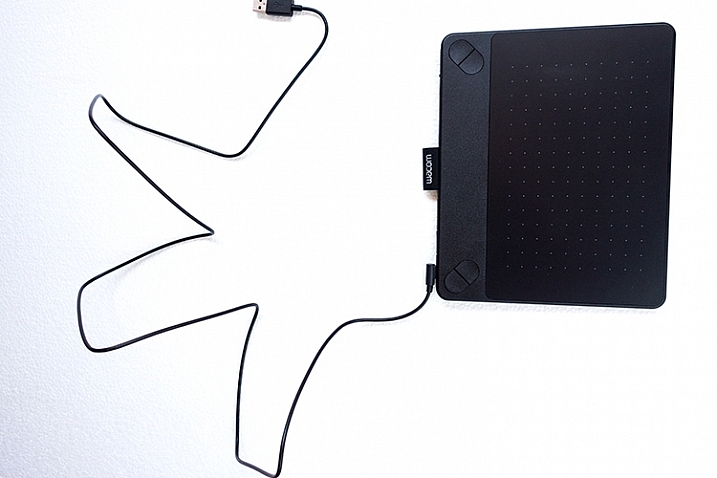
USB-cable-very-long

USB cable measuring 148cm(58 inches) in length.

The stylus is much lighter and slimmer compared to the chunkier and heavier model I was more use to. It does feel a little cheap.

I’ve found the pen inclined to roll between my thumb and fingers, so that at times, I had to keep rolling the pen around again to where the two buttons are at the side to access them. This was getting quite irritating. I feel a rubberised moulding would help in preventing the pen from rolling around. Similar to the rubber grip found on ordinary pens. So I came up with my own inexpensive solution to modify the pen.

DIY hack for the stylus

I bought these pen grips at a local stationary shop. I cut one in half and rolled it up until it reached just below the two buttons. This way, I can grip the pen better, and roll it more easily, so that the two buttons rest next to my thumb for easy access. The four in a pack came to less than $ 2USD.
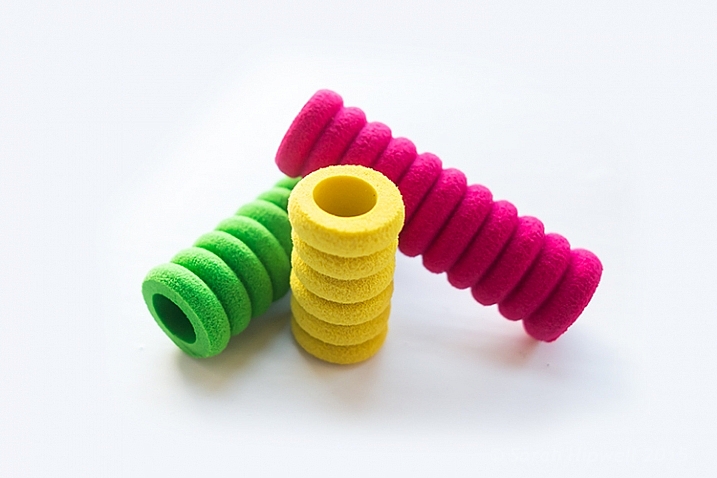
pen-grips

Ordinary biro pen grips that are sold in stationary shops.

DIY stylus holder hack

The Intuos Photo has a fabric sleeve to house the pen, which I presume is for when you’re transporting this tablet in your bag. The sleeve is tight fitting, so this is not practical for everyday use while sitting working at your desk. The tablet doesn’t come with a pen holder.

So, while I was in the same stationary shop to get my pen grips, I spied this pencil sharpener with eraser holder and thought that would make a great stylus holder. It was a perfect fit (see photo below). Again, this item cost less than $ 2! Just to add a little weight stability, I put fishing lead balls in the bottom part, only because I had them anyway.
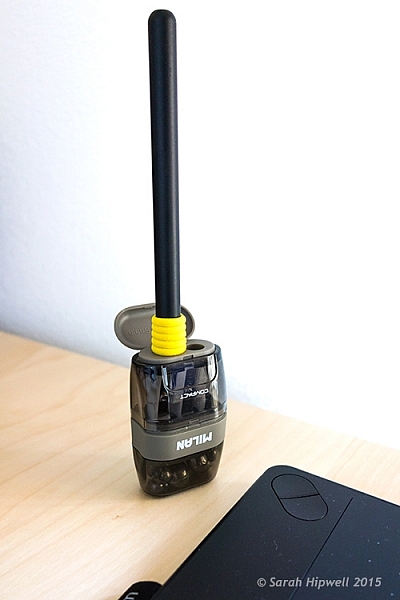
Stylus-hack-holder

DIY stylus holder hack from a pencil sharpener with an ordinary pen grip on the stylus.

Do you use a tablet or a mouse? Which is your preference for editing your photos? Share in the comments below.

googletag.cmd.push(function() {
tablet_slots.push( googletag.defineSlot( “/1005424/_dPSv4_tab-all-article-bottom_(300×250)”, [300, 250], “pb-ad-78623” ).addService( googletag.pubads() ) ); } );

googletag.cmd.push(function() {
mobile_slots.push( googletag.defineSlot( “/1005424/_dPSv4_mob-all-article-bottom_(300×250)”, [300, 250], “pb-ad-78158” ).addService( googletag.pubads() ) ); } );

The post Review of the Wacom Intuos Photo Pen and Touch Tablet by Sarah Hipwell appeared first on Digital Photography School.


Digital Photography School

 
Comments Off on Review of the Wacom Intuos Photo Pen and Touch Tablet

Posted in Photography


Samsung launches enormous 18.4-inch Galaxy View tablet

29 Oct

With smartphone screens growing larger and nearing what used to be tablet territory, it’s probably natural that the latter are increasing screen size as well. Apple launched the 12.9-inch iPad Pro in September and now Samsung, which already has the 12.2-inch Galaxy Tab Pro in its line-up, has gone one step further and launched the gigantic Galaxy View with an 18.4-inch display. Read more

Articles: Digital Photography Review (dpreview.com)

 
Comments Off on Samsung launches enormous 18.4-inch Galaxy View tablet

Posted in Uncategorized


Astropad Mini turns your iPhone into a graphics tablet

29 Aug

The makers of the Astropad iPad app have launched a version for the iPhone, aptly called Astropad Mini. Like the iPad version, the new app allows you to use your Apple device as a graphics tablet when working with imaging applications such as Adobe Photoshop or Lightroom using Astropad’s LIQUID technology for communication with the Mac. Read more

Articles: Digital Photography Review (dpreview.com)

 
Comments Off on Astropad Mini turns your iPhone into a graphics tablet

Posted in Uncategorized


How to Use Your Tablet or SmartPhone as a Light Source for Photography

23 Jul

In the early 90s I was just a kid, and I remember watching a VHS tape about photography lighting with the great Dean Collins. I was truly amazed with the way things were arranged in the studio and how he placed the light. This was magic to me, and Dean Collins was the magician.

I watched it over and over, trying to find the little tricks behind everything he was doing. Since that day, every time I see a picture, I try to understand how it was done and how the light was placed, the quality of the light, the reflections, and the shadows it casts. What I’ve learned along the way is that a lot of the commercial images you see are done with some really simple lighting setups, and not in the big studios with the big production sets that you might imagine.

The next image is an example.

01

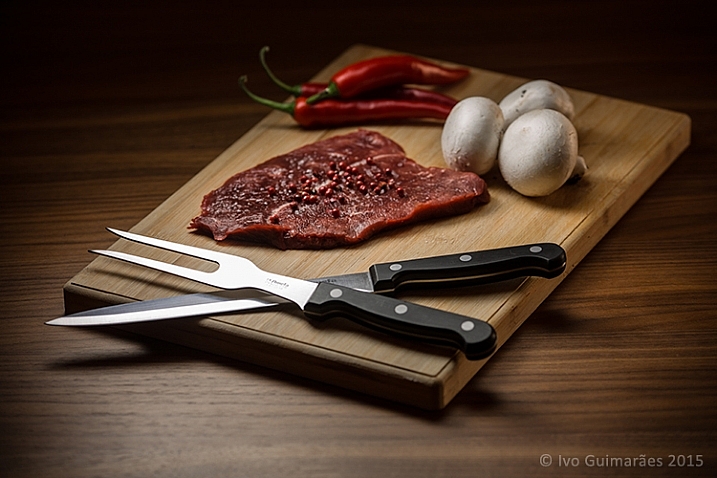
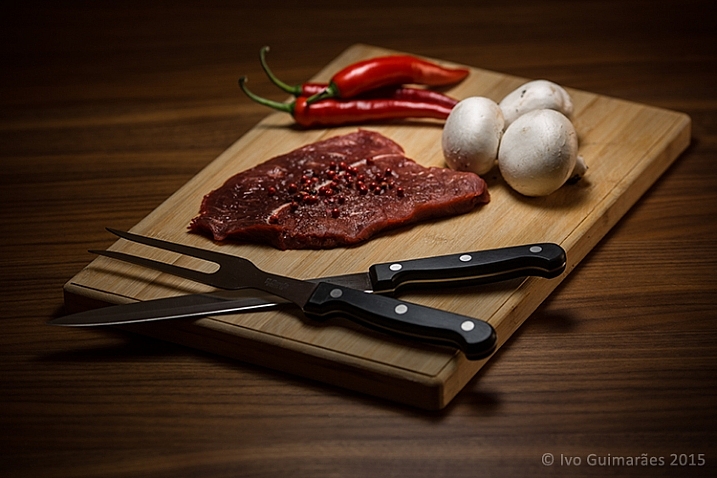
This image might look like a complicated and high-end lighting setup, but in fact, the only light sources used here were simply a tablet and a smartphone.

02

This is a typical light painting image, where the camera is placed on a tripod and the image shot at ISO 50, f/5.6 and a 4 second exposure time. I used the lowest ISO so I could make the image as clean and noiseless as possible. F/5.6 was the chosen aperture to give me the depth of field effect I was looking for, and after a couple of test shots, I realized that 4 seconds was the correct exposure time for the light I was using. It also gave me a comfortable time-frame in which I could move the light around and create the desired effect. An infrared remote shutter release was used to avoid touching the camera and keep it as steady as possible.

Light painting is a technique I use a lot in my work. I used to do it mostly with small lanterns and led light panels, but I realized that a tablet screen light and a smartphone camera led light are fantastic tools to use as light sources in this type of images. There are a few apps that can help to control what shows up on the screen, and transform your device into a mean light-painting machine, but you don’t really need them.

What I’ve done is to create my own masks in Photoshop which I have in my iPad Mini Retina’s camera roll to use when I need. Here are some examples of masks I’ve created.

03

These masks control the shape and colour on the screen, and the brightness can be easily controlled in the device’s screen definitions.

I took some readings with a colour meter. The iPad screen is around 5,500k and the iPhone camera LED light is around 6,500k, so it’s easy to adjust your camera to match the light source’s colour temperature or use different colours on the device’s monitor to create colour effects in the image.

The light from these screens is usually soft; you can make it even softer with some tracing paper in front of the screen and you can control the spread of light with some black card flags.

In this case I was holding the device by hand and moving it around, but you can buy cheap tablet and phone holders with ¼” thread connectors that can be mounted onto tripods, magic arms or even handles that make it easier to hold.

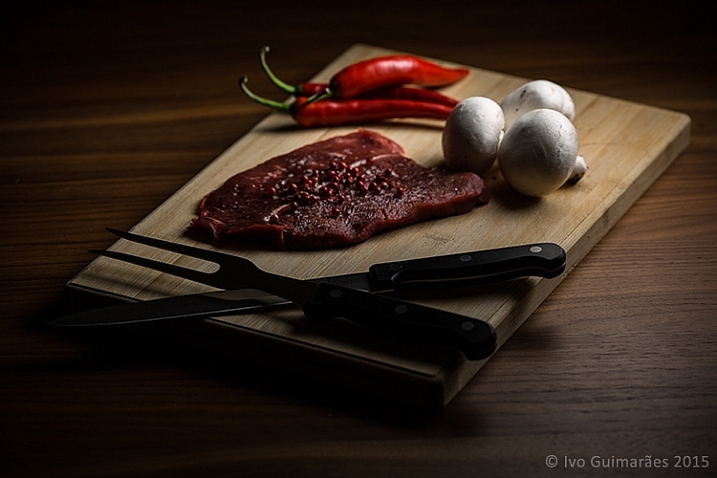
This particular image could have been done with only one exposure, but I decided to take it a bit further with a composition of three images with three different types of light.

04

04a

The first image (above) was created with perfect light on the knife and fork, with the iPad positioned at an angle, and with a white screen for a nice light reflection.

The second image (below) has the perfect light on the steak, chilies and mushrooms, with a circular faded mask on the iPad screen.

04b

The third image (below) gives a vignette effect and some dramatic light with the LED camera light of the iPhone which is a much harder (smaller) light and therefore casts harder shadows.

04c

Now it’s just a matter of composing the final image in Photoshop using the best that each of these images has to offer.

05

The idea here is to stack the three images and use layer masks to show the good light spots and hide the bad ones. Here is a closer look at the layers with associated masks for each one.

06

These lighting and composition techniques are not exactly new. This was done long before Photoshop and digital photography were around. Film with multiple exposures or darkroom masking techniques were used with similar effects a long time ago. Nowadays, things are just a lot easier with the digital advent, but the fact is that the basics and references are still there, and understanding this puts you on the right path to be a better photographer.

Have you tried this technique before? Give it a go and post any comments or questions you have below.

googletag.cmd.push(function() {
tablet_slots.push( googletag.defineSlot( “/1005424/_dPSv4_tab-all-article-bottom_(300×250)”, [300, 250], “pb-ad-78623” ).addService( googletag.pubads() ) ); } );

googletag.cmd.push(function() {
mobile_slots.push( googletag.defineSlot( “/1005424/_dPSv4_mob-all-article-bottom_(300×250)”, [300, 250], “pb-ad-78158” ).addService( googletag.pubads() ) ); } );

The post How to Use Your Tablet or SmartPhone as a Light Source for Photography by Ivo Guimaraes appeared first on Digital Photography School.


Digital Photography School
 
Comments Off on How to Use Your Tablet or SmartPhone as a Light Source for Photography

Posted in Photography


Microsoft announces Surface 3 tablet running full Windows

01 Apr

Microsoft has announced the latest model in its Surface line of tablets, the Surface 3. The big news here is that, unlike its predecessors which were running Windows RT, the new model comes with a full version of Windows 8.1. This means, like on the more expensive Surface Pro models, you can install and run any Windows application including Adobe Photoshop or Lightroom, making the Surface 3 a real alternative to a conventional PC. Read more

Articles: Digital Photography Review (dpreview.com)

 
Comments Off on Microsoft announces Surface 3 tablet running full Windows

Posted in Uncategorized


Astropad turns iPad into drawing tablet for Mac

19 Feb

Two former Apple engineers have just launched Astropad, an app for Apple’s iPad and Mac computer that turns the former into a drawing tablet for the latter. It works with most styluses, and allows use of applications like Photoshop for image retouching and editing with more precision. Read more

Articles: Digital Photography Review (dpreview.com)

 
Comments Off on Astropad turns iPad into drawing tablet for Mac

Posted in Uncategorized


Air Stylus turns your iPad into a graphics tablet

30 Jun

Avatron, the developer of Air Display, has today released a new iPad app. Air Stylus extends your computer screen to your iPad display and, in combination with a pressure-sensitive pen, turns the latter into a graphics tablet that works with a range of imaging applications including Adobe Photoshop and Apple’s Aperture. Read more

related news: Digital Photography Review (dpreview.com)

 
Comments Off on Air Stylus turns your iPad into a graphics tablet

Posted in Uncategorized