RSS
 

Posts Tagged ‘Switching’

10 Tips for Switching from Lightroom to Capture One Pro

12 Feb

The post 10 Tips for Switching from Lightroom to Capture One Pro appeared first on Digital Photography School. It was authored by Darina Kopcok.

switching-from-lightroom-to-capture-one-pro

Capture One Pro 20 was launched recently, with improvements to the Basic Color Editor, noise reduction, and other tools and features. It offers improved DNG support and has added functionality with several cameras. If you’ve been thinking of switching from Adobe Lightroom to Capture One Pro, now may be the time.

Capture One Pro color grading tools are unparalleled and the ability to work in Layers gives you more options in your workflow.

If you’re nervous about the learning curve associated with yet another piece of software, don’t worry – knowing Lightroom will give you a great foundation for learning Capture One Pro.

Switching from Lightroom to Capture One Pro

The two programs basically work the same in that they allow you to make edits non-destructively by saving them in a database and keeping track where the images are stored.

Here are ten tips that will help you when switching from Lightroom to Capture One Pro.

10 Tips for Switching from Lightroom to Capture One Pro

1. Import your Lightroom Catalog

The fact that you can migrate your Lightroom catalog into Capture One Pro is a great nudge to make the switch. It’s a simple process that involves only a few quick steps.

Migrating will not have an impact on your Lightroom catalog, and you can continue to use it as you normally would.

One thing to note is that while edits such as Exposure, Highlights, Shadows, White Balance and Rotation will be imported seamlessly, every single adjustment might not translate. This is often the case with some color settings.

For a step-by-step guide on how to migrate your Lightroom Catalog into COP, go here.

Capture )ne pro-Tips for Switching from Lightroom

2. Familiarize yourself with the Capture One interface

There is a big difference between the Lightroom and Capture One Pro interface.

While Lightroom has separate tabs for the various workspaces such as the Library and Develop modules, Capture One has an all-in-one workspace. Instead of jumping around from module to module for specific functions, all of the tools in Capture One (COP) are at your fingertips.

The various panels in COP are called Tools. They are organized under various Tabs.

10 Tips for Switching from Lightroom to Capture One Pro 10 Tips for Switching from Lightroom to Capture One Pro

One awesome feature is that you can actually mimic the Lightroom workspace until you familiarize yourself with the program and decide how you want your workspace to look.

To do this, simply go to Window->Workspace->Migration.

switching from Lightroom to Capture One Pro

3. Customize your tools

The key to getting the most out of Capture One Pro’s awesome functionality is to customize your tools. The tools in COP are highly customizable, which is another bonus to switching from Lightroom.

You can move the tools around and you can set up a Tab containing only the tools you regularly use.

For example, you can move your White Balance Tool to the Exposure panel, similar to how it’s set up in Lightroom.

Right-click on the Tab to add a tool or remove it. You can also float your tools by dragging them onto the image itself.

switching from lightroom to capture one pro

4. Catalogs and Sessions

Capture One offers two management systems:  Catalogs and Sessions. Both have their pros and cons.

As far as organization goes, a COP Catalog is similar to a Lightroom Catalog. Think of Sessions as being similar to Lightroom Collections, but with additional functionality.

Catalogs are most suitable for organizing large volumes of images, whereas Sessions are used for individual shoots.

Sessions provide a simple, folder-based workflow. They give you the ability to browse any folder on your computer without having to import images. Your adjustments are placed in a subfolder next to the images.

switching from Lightroom to Capture One Pro

Sessions are great for on-set workflow and tethered shooting, and are generally seen as the more efficient option. Sessions allow you to store all the files from a single project together.

Once you have migrated your Lightroom Catalog into COP, you can build and structure your photos into sessions if you choose.

When you create a new Session, Capture One creates five folders on your hard drive. It creates a main folder with the name of your session. This folder contains the following:

  • Capture: contains the RAW files
  • Output:  contains converted JPEGS, TIFFS, etc
  • Selects:  images you’ve marked as a “select”
  • Trash:  images you’ve deleted during capture.

Any images that you delete during your COP session will go into Trash, but won’t be deleted from your disk until you physically delete them from this folder.

I use both Catalogs and Sessions. My recommendation is to use Catalogs based on genre.

Or if you shoot only in one or two genres like I do, you might want to separate commercial work form editorial work, stock photography, or personal photos, for example. Create an organizational system that works for you.

5. Get to know the Color Editor

Many photographers who make the switch from Lightroom to Capture One Pro say that the color quality is unparalleled by any RAW editor out there, especially when it comes to natural-looking skin tones. In fact, it has its own editor for skin tones.

If you’re used to the HSL sliders in Lightroom, the color tools are an area that will feel very new to you and may require some getting used to.

Switching from Lightroom to Capture One Pro

Color Editor – Tool Icon

10 Tips for Switching from Lightroom to Capture One Pro

You can use the Color Editor with masks. It’s split into three tabs: Basic, Advanced, and Skin Tone.

The Basic Tab is divided into eight color ranges, represented by a color wheel, and one that encompasses the whole spectrum. Here you can use sliders that affect Hue, Saturation, and Lightness.

To work on a certain color, click on the Eyedropper Tool and then click on the color in your image you want to edit. Sliding vertically on the area will affect the Saturation. Sliding horizontally affects the Hue.

In my image below, I worked individually on the oranges without altering anything else. This comes in handy when you’re working on a photo with various hues of the same color, by helping you target only those colors you want to alter.

10 Tips for Switching from Lightroom to Capture One Pro

6. Practice working with Layers

One of the best features that Capture One Pro has to offer is the ability to work in Layers.

These layers are similar to the layers in Photoshop in that they work with masks, but they function like targeted adjustments in Lightroom.

Masks determine where on the layer your adjustments will be applied. You can create masks in multiple ways. For example, you can brush them in, just like with the Adjustment Brush in Lightroom.

Click on the brush and paint over the area you want to work on. By default, the area will be indicated in red. It will only show up when you’re painting unless you hit the shortcut “M” to keep it on permanently.

You can use the shortcut key “E” to erase any areas that you want to subtract.

You can make changes to exposure, contrast, clarity, saturation etc.

10 Tips for Switching from Lightroom to Capture One Pro

Be sure to name each layer when working with multiple layers to keep track of the various edits you’ve made to your image.

To do this double-click on the Layer name and type in a new name.

10 Tips for Switching from Lightroom to Capture One Pro

7. Play around with creating style

Are you used to working with Presets? Capture One Pro offers the same capability – another reason not to hesitate about switching from Lightroom.

What you know as a Preset in Lightroom is called a Style in Capture One Pro.

Capture One Pro also has “presets,” but they include only one Tool and are accessible from within that Tool. Styles contains several Tools to create a pre-determined look.

The same way you can purchase presets from various third-parties, you can also purchase Styles from Capture One Pro/Phase One.

To test out some free sample Styles, go to this link from Capture One Pro.

8. Copy your adjustments

You can copy your adjustments from one image to another, just like you can in Lightroom.

Go to the upper-right-hand corner of the interface and click on the arrow up icon.

Click the arrow down icon to paste them to your images.

switching from Lightroom to Capture One Pro

9. Try Process Recipes

Process Recipes are similar to Export presets, but you can select several at one time. Once you set them up, they can make your workflow a lot quicker and more efficient. No more tinkering with dialog boxes!

Each recipe includes the output file format information and location information. There are also options for watermarking, metadata, and sharpening, etc.

You can create a specific process recipe for images that you want to export for social media use, with lower resolution and optimal pixel dimensions for social sharing.

Or you can create a recipe for printing your images for your portfolio or for postcards to send as promotional pieces. You can even export multiple recipes at the same time by checking off their respective checkboxes.

You can find Process Recipes under the Output Tool Tab noted with green in the screenshot below.

switching from lightroom to Capture One Pro

Note that COP has created some Process recipes to get you started.

10 Tips for Switching from Lightroom to Capture One Pro

To create a new Process Recipe, click on the arrow in the lower right-hand side of the panel. Rename it with any name you like – for example, “Instagram.”

It will give you all the options for exporting the photo, as seen in the first picture, including the Output Location and Output Naming conventions.

10. Try shooting tethered

One of the best things about switching from Lightroom to Capture One Pro is the outstanding tethering ability.

Although Lightroom has improved its tethering capabilities in the last couple of years, it’s still buggy and has a tendency to crash. COP leads the way in tethering in the photographic industry with its instant tethered capture technology.

With tethered capture in Lightroom, your camera also goes to sleep when you’re not using it. This is a massive pain if you’re working in a studio with a client. COP stays open as long as you keep the tethering session open.

You can also use Live View and Layout Overlays. This is really handy if you’re shooting a magazine cover or product packaging where you have to work around the placement of text.

Lightroom doesn’t have Live View functionality unless it’s paired with camera proprietary software, such as Canon EOS Utility. Capture One Pro, on the other hand, allows you to use Live View with natural light or strobes at the click of a button.

Conclusion

Hopefully, these tips have given you a better idea of how easy it is to make the switch from Lightroom to Capture One pro.

Only you can decide which RAW editor is for you. However, with its reputation for color quality, all-in-one workspace, and tons of ways to keep you organized and make an efficient workflow, Capture One Pro is totally worth checking out.

You can try a 30-day free trial to help you decide.

The post 10 Tips for Switching from Lightroom to Capture One Pro appeared first on Digital Photography School. It was authored by Darina Kopcok.


Digital Photography School

 
Comments Off on 10 Tips for Switching from Lightroom to Capture One Pro

Posted in Photography


2 Years with the Sony A7R III – Was it Worth Switching from Canon DSLR ?

05 Jan

The post 2 Years with the Sony A7R III – Was it Worth Switching from Canon DSLR ? appeared first on Digital Photography School. It was authored by Suzi Pratt.

sony-or-canon

It’s been almost two years since I purchased the Sony A7R III mirrorless camera as a second body to my Canon 5D Mark III DSLR. Since then, I’ve used the two cameras side-by-side to shoot a wide variety of professional events, from concerts to food to corporate conventions. There have been pluses and minuses to using both systems simultaneously, which I thought I’d share for those of you considering the switch.

Canon versus Sony

Why go mirrorless?

Prior to the A7R III, I had been using the Sony a6300 and was thoroughly impressed with its autofocus capabilities and video features. On both fronts, this tiny camera seemed lightyears ahead of my DSLR, so I was curious about how much better Sony’s full-frame cameras could be. I was also expanding my photography business to include video services and needed a camera that could shoot in 4K video resolution, which the 5D Mark III could not do.

Why keep both systems?

So why keep the Canon DSLRs at all?

I have a large library of Canon L glass that I intended to use on the Sony via a lens adapter. This worked with mixed results, but long story short, lens adapting did not work with my style of photography (more on that below). Given the significantly higher prices of Sony lenses, it made more financial sense to keep the DSLR kit and simply purchase a couple of Sony lenses to use. In the end, here’s what my resulting camera kit looked like:

  • Canon 5D Mark III with 16-35mm f/2.8, 24-70mm f/2.8, 70-200mm f/2.8, plus various prime lenses.
  • Sony A7R III with 24-70mm f/4 and 55mm f/1.8.

*The overlapping 24-70mm lenses might seem like overkill, but there is such a HUGE size difference between the two.

Canon V Sony

What was worth it

1. Video features

The Sony A7R III and A7 III are packed with video features including the ability to shoot in 4K resolution, 120 fps slow motion, in-camera timelapse, and in-body-stabilization (IBIS), to name a few. Since this is a photography site, I won’t go on more about the video features. But the specs are more than what the newer Canon 5D Mark IV offers. So from a video perspective, the Sony A7R III was completely worth it.

2. Having an Electronic Viewfinder (EVF)

One of the ways mirrorless cameras differ from DSLRs is that they tend to have an electronic viewfinder (EVF), while DSLRs have optical viewfinders (OVF). An OVF shows you what the camera lens sees, while an EVF shows you what the camera sensor sees. An EVF shows you almost exactly what your final image will look like before you press the shutter button.

There are pros and cons to using an EVF over an OVF, and most people prefer one over the other. For me, the EVF is preferred mainly because it allows for composing and shooting still photos with the LCD – something that is still hard to do with a DSLR.

Shooting with a tilting LCD has been a complete gamechanger, allowing me to find creative compositions that I wouldn’t have been able to do with a DSLR.

3. A truly silent shutter

Another advantage of mirrorless cameras is that they can have truly silent shutters. For the effort that Canon makes to offer a “silent shutter” on its DSLRs, it’s still a jarring sound compared to a mirrorless camera’s silent shutter.

The only thing to note is that silent shutters on mirrorless cameras can produce banding in images where LED lights are present, so be wary of that.

Sony A7R III with Sony 55mm f/1.8

Sony A7R III with Sony 55mm f/1.8

4. Insane and Accurate Autofocus

My experience with the Sony a6300 taught me that Sony autofocus was truly on another level compared to DSLRs. That’s still true on the Sony A7R III. Not only do you have phase detection and contrast detection autofocus with 5 focus modes, but you also get Sony’s acclaimed face detection and eye autofocus.

To be fair, Canon has upped their autofocus game with dual pixel autofocus, something that isn’t on the Canon 5D Mark III and thus isn’t a feature I can compare. However, there are reports that a recent firmware update to Canon’s new EOS R includes “Sony-like eye autofocus,” so that much seems to have always been in Sony’s favor.

5. Rapidly developing lens library with lots of third-party options

Compared to the Canon and Nikon mirrorless camera systems, Sony, by far, has the biggest lens library for both its full-frame and mirrorless cameras. Even third-party brands like Sigma and Tamron have latched on, currently offering high-quality lens options at a fraction of Sony’s prices.

Better yet, lens adapters, such as the excellent Metabones V, allow you to pull from Canon’s EF and EF-S lens library as well. So when it comes to lens options, the Sony mirrorless is hard to beat.

Sony A7R III with Sony 24-70mm f/4

Sony A7R III with Sony 24-70mm f/4. Look at the height of that stage – I couldn’t get this shot without the tilting LCD.

What wasn’t worth it

1. Size and weight savings

The argument of switching to mirrorless cameras to have a smaller and lighter system compared to DSLRs isn’t completely true. Sure, the Sony A7R III is smaller and lighter than any of the Canon 5D cameras. However, the fast Sony lenses that I would need to replace my DSLR equivalents are just as heavy and bulky. When it comes to full-frame cameras and fast glass packed with features such as image stabilization (IS), there’s not much of a size and weight difference.

2. Adapting lenses isn’t for every scenario

There are some great lens adapters out there, such as the Metabones V that I was initially sold on. In practice, the lens adapter worked 90% of the time, which was okay when shooting things like food or portraits. But that 10% failure rate wasn’t acceptable for the fast-moving concerts and events when it could mean missing THE shot of the night.

If you choose to adapt lenses, give yourself ample time for testing to make sure it works for your photography style.

Canon 5D Mark III with 24-70mm f/2.8

Canon 5D Mark III with 24-70mm f/2.8

3. Realizing they aren’t completely dead yet

While many photography news sites publish headlines proclaiming the death of DSLRs, Nikon and Canon prove otherwise. Both camera brands are rumored to be releasing new DSLRs in 2020, and there’s even supposed to be a 5D Mark V on the way! So if you shoot with DSLRs, there’s no pressure to make the switch yet.

4. Canon could make a mirrorless camera comeback

Actually, this part could already be true if you look at Canon’s crop-sensor mirrorless camera line.

Even though Canon seemed late to the mirrorless camera party, they are making big gains with their popular EOS M-Series APS-C mirrorless cameras, and the EOS R full-frame cameras continue getting better.

They are also developing innovative RF lenses (have you seen the RF 70-200mm f/2.8?!) and allowing Canon shooters to use DSLR lenses via their own lens adapter. It’s questionable if they will be able to catch up to and surpass Sony’s cameras and ever-growing lens library, but it is a good thing to see Canon continue to innovate.

Canon 5D Mark III with 16-35mm f/2.8.

Canon 5D Mark III with 16-35mm f/2.8.

In conclusion

So two years later, do I regret adding the Sony A7R III to my kit? Absolutely not.

The photos and videos that I’ve captured and the overall elevated experience of shooting with this camera have been worth it. However, I’d be lying if I said I wasn’t quietly rooting for Canon and hoping that they beef up their full-frame mirrorless line. When they do, it might be worth making yet another switch.

Sony A7R III with 24-70mm f/4

Sony A7R III with 24-70mm f/4

Canon 5D Mark III with 16-35mm f/2.8

Canon 5D Mark III with 16-35mm f/2.8

The post 2 Years with the Sony A7R III – Was it Worth Switching from Canon DSLR ? appeared first on Digital Photography School. It was authored by Suzi Pratt.


Digital Photography School

 
Comments Off on 2 Years with the Sony A7R III – Was it Worth Switching from Canon DSLR ?

Posted in Photography


Why This Pro is (sort of) Switching from Canon to Sony

02 May

Throughout the internet, there are quite a few photographers trading in their DSLRs for shiny new mirrorless cameras. I never thought I’d join the crew switching from Canon to Sony, telling myself that it’s not the bells and whistles of brand new cameras that define a photographer’s abilities. That all changed when I took the plunge and ordered a Sony A7RIII.

After having it for about a month, I’ve fallen head over heels in love with this camera and use it almost as much as my Canon DSLRs. However, I’m not giving up on Canon yet. In this article, I’ll shed some light on why I’m straddling the Canon-Sony lines, and how my experience with Sony has been so far.

My History of Cameras

I’ll start off by admitting that I’ve never been much of a camera brand loyalist, to begin with. My first digital camera (I never shot film) was a Nikon D40. I played in the Nikon world for several years, eventually ending up with a Nikon D700, and host of accompanying Nikkor lenses.

In 2012, I traded in my Nikon gear for the Canon 5D Mark III and 6D, intending to dive into the video and filmmaking world. While that Canon has hardly been utilized for video, it has built my entire professional photography portfolio in the past 6 years. I haven’t bought a full-frame camera since then.

Why This Pro is (sort of) Switching from Canon to Sony

In 2015, I embarked on a month-long backpacking trip to Asia, which sparked my purchase of a Sony a6300. This dipped my toes into the Sony world, and although it took a lot of adjusting, I quickly fell in love with my little mirrorless camera.

It was much smaller than my DSLRs, image quality was on par, 4K video quality was exceptional, and the extra features such as face detect, eye autofocus, focus peaking, and more felt sci-fi compared to my Canons.

Fast forward to this year, when I’ve ramped up video production and am making as many videos as I am photos, and it just made sense to upgrade to the full-frame Sony A7RIII.

Why This Pro is (sort of) Switching from Canon to Sony - forest scene

What I Love About Sony Cameras

Eye Autofocus

You’ll never have another excuse for taking an out-of-focus portrait again when using a Sony camera. Their eye autofocus is fast, accurate, and very hard to live without once you’ve gotten used to it. Pair it with face detection, and you have the perfect camera for photographing anything with people in the scene.

A Truly Silent Shutter

When I first started shooting with the Sony a6300, I marveled at the silent shutter mode that helps you shoot candid shots much more stealthily. Canon has a Silent Shooting mode that is definitely quieter than normal, but hardly without noise. Sony silent shutters are truly silent, which can be very important while shooting in live performance venues or in areas where the extra noise is frowned upon.

Canon to Sony - Why This Pro is (sort of) Switching from Canon to Sony

Canon versus Sony side by side.

The Electronic Viewfinder (EVF)

Like most mirrorless cameras, the Sony A7rIII comes with an electronic viewfinder. Compared to DSLRs that use optical viewfinders (OVF) unless you’re shooting via live view, an EVF gives you a real-time preview of the image you’re capturing.

Generally speaking, I love the EVF for crafting and composing better images in-camera, but I do wish for the option to switch between EVF and OVF. This especially comes into play when photographing concerts with heavy LED lighting that can almost wash out the EVF and make it difficult to compose images.

Sony PlayMemories App

It’s far from perfect, but the Sony PlayMemories app and its ability to quickly transfer images from the camera to a smartphone via a QR code is genius. This approach is much easier and reliable than Canon’s Wi-Fi transfer system.

Sony also used to include PlayMemories apps that could be installed in-camera, such as a time-lapse feature. For unknown reasons, Sony removed these apps from the Sony A7rIII and A7III. Hopefully, they are restored in a future firmware update as these apps were incredibly handy.

Sony-Wifi QR code - Why This Pro is (sort of) Switching from Canon to Sony

The Camera Can be Powered Internally via USB

The ability to charge my camera by simply plugging it into a wall or external battery pack has been a lifesaver. This is handy not only if you happen to forget your external battery charger, but also for powering your camera through any extra-long photo (like time-lapse) or video sessions.

What I Miss from Canon Cameras

Ability to Shoot Smaller RAW Files

A feature I use quite frequently on my Canon cameras is the ability to shoot smaller RAW file sizes (M-RAW, S-RAW). This gives you all of the advantages of a RAW file but in a smaller file size.

Unfortunately, this is a feature that Sony cameras don’t offer. It would be especially helpful to have on the Sony A7RIII, whose uncompressed RAW files are 81.9 MB apiece. The only way to decrease this size is to shoot compressed RAW files (about 41.0 MB each) or shoot in JPG.

Needless to say, I’ve purchased two more external hard drives since I started shooting with the A7rIII.

Why This Pro is (sort of) Switching from Canon to Sony - night scene

Straightforward Features and Settings

Sony cameras, like Adobe Photoshop, are jam-packed with features. This can be either a blessing or a burden when you’re just trying to take a simple photo or video. More often than not, I find myself fumbling around with Sony’s menus and settings just to snap a quick photo.

Yes, you can customize buttons and menus to your liking. But it can get confusing when you have to choose between six focus modes and six focus areas at any given moment. In comparison, cameras like Canon DSLRs and even Fujifilm mirrorless cameras seem much simpler to operate.

Consistent Colors

Many photographers are quick to criticize the colors of Sony cameras, claiming that Canon has a much better color science. I tend to agree with the critics.

In general, photos taken with both my Sony a6300 and A7RIII have pretty good colors. But occasionally (usually when shooting indoors with artificial lighting), both cameras process colors oddly. This can usually be corrected in post-production, but compared to my Canon DSLRs that nail colors almost every time in a variety of conditions, this can be frustrating.

Why I’m Not Leaving Canon Just Yet

Canon gear - Why This Pro is (sort of) Switching from Canon to Sony

Even though I own two Sony cameras, I’m not fully giving up on Canon just yet. Here’s why.

Sony Lenses Aren’t Cheap

Across the board, Sony lenses tend to be several hundred dollars more expensive than their Canon equivalents. Even if I traded in or sold all of my Canon gear, it would take a significant investment to buy into the Sony G-Master line of lenses.

My compromise in the meantime has been a mixed bag. I sold half of my Canon lenses (mostly prime lenses that I never used anyway), purchased a few mid-range, all-purpose Sony lenses (i.e. the 24-105mm f/4), and invested in a Metabones V adapter (more on that below).

My Remaining Canon Gear is Hard to Sell

I’ve historically been very hard on my Canon DSLRs, and both show significant wear and tear. Trade-in and resell values for both of my DSLRs and remaining Canon lenses aren’t great. How many people do you see switching to Canon these days? In the meantime, I’m inclined to keep and use my Canon gear for now and wait and see what happens. After all…

A Canon Full-Frame Mirrorless Camera is Coming Soon

Photography news sites are abuzz that both Canon and Nikon may soon release full-frame mirrorless cameras. It’s hard to say how good these cameras will be, and if they will use EF and EF-S lenses, or a whole new lens mount. But I’m hanging on to the hope that Canon can get its act together and compete in the mirrorless world.

canon and sony cameras side by side - Why This Pro is (sort of) Switching from Canon to Sony

Canon body on the left, Sony body right.

Two Things Worth Mentioning

Sony Batteries Have Improved Greatly

Mirrorless cameras have long been criticized for poor battery life. This is certainly true for my a6300, which usually lasts for about 350-400 shots per battery.

However, Sony introduced the brand new NP-FZ100 battery to both the Sony A9, A7rIII and the A7III. More robust in build, this battery powers your camera for up to 530-650 shots or a little under 2 hours of video recording time.

In practice, I find that these new batteries last much longer and are almost on par with Canon DSLR batteries.

Sony-Canon Lens Mount Adapter Works – Sort of

Metabones V Adapter - Why This Pro is (sort of) Switching from Canon to Sony

There are several lens adapters which will let you mount Canon lenses to Sony cameras. The most popular adapters are the Sigma MC-11 Mount Converter ($ 199.00) and the Metabones V adapter ($ 399.00).

I’ve been using the Metabones V adapter to put my Canon lenses on the A7rIII and a6300. The adapter works most of the time with fast and accurate autofocus, and even eye autofocus works extremely well.

However, there are moments when my camera will simply freeze right after focusing on an object. This is easily corrected by simply switching the camera off and back on, but it seems to be a problem with the adapter. So far, this is the only real problem I’ve seen while using a lens adapter.

Canon lenses that work on my Sony cameras with the Metabones V adapter:

  • Canon 16-35mm f/2.8 II
  • Canon 24-70m f/2.8 II
  • Canon 70-200mm f/2.8 II
  • Canon 50mm f/1.8
  • Canon 35mm f/1.4
  • Canon 85mm f/1.8
  • Canon 100mm f/2.8 macro

In Conclusion

Canon to Sony

As a photographer charging into the world of videography, it made sense to start shifting away from Canon into the realm of Sony. Since getting the Sony A7rIII, I’ve seen a huge uptick in the quality of my videos and photos. However, I’m also hoping that Canon will soon release a competitive mirrorless camera that meets the video and photo needs of today’s creatives.

Have you made the switch to mirrorless cameras yet? If so which brand and model did you decide on and why? What’s your take?

The post Why This Pro is (sort of) Switching from Canon to Sony appeared first on Digital Photography School.


Digital Photography School

 
Comments Off on Why This Pro is (sort of) Switching from Canon to Sony

Posted in Photography


Switching from Lightroom to ACDSee Photo Studio: Making the Jump Easy

14 Dec

Let’s be honest – over the past couple of months, more than enough has been said about Adobe’s recent change in policy regarding how the latest versions (yes, all two of them) of Lightroom are to be purchased and used. Articles have been written, disappointment expressed in some volume, silver linings spotted where there seemed to be none.

There’s also a good chance that you have made up your mind regarding the change to do one of the following:

  • To stick with CC and Classic.
  • To start the fairly painful process of moving on to a different piece of software.
  • Or to put off the decision for as long as the already-purchased version of Lightroom supports RAW files from your camera.

From Lightroom to ACDSee Photo Studio: Making the Jump Easy

Thus, we are not here to discuss Adobe’s brilliant decisions or lack thereof. This article is meant for those who chose the second option. Specifically, for those, who have decided to switch from Lightroom to ACDSee Photo Studio Ultimate. Hopefully, the last article I wrote on ACDSee Photo Studio has helped you make up your mind whether or not this software is suitable for your needs. If it is, I will try to help make the transition as painless as possible.

An important disclaimer: as before, the license for this copy of ACDSee Photo Studio Ultimate has been provided by ACD Systems. Having said that, even though ACD Systems has asked me to write this article, it has not been dictated by the company in the slightest. My words are always my own, as are your reasons for switching or otherwise. More than that, ACD Systems never implied they expect anything but integrity.

Direct transfer from Lightroom

I am afraid I will have to start with some disappointment, so I will try to rip off the bandage as quickly as possible. As of today, there is absolutely no way to transfer editing data from Lightroom to any other post-processing software or vice versa. It’s the result of closed-standard tools and database format that each software developer uses – not even sharpening is equivalent, let alone tonal adjustments.

So, the progress you have made with Lightroom is bound to remain accessible via Lightroom only, at least as far as RAW files themselves are concerned. For all the convenience catalog systems provide, this is one of the downsides – switching to a new RAW converter can really be a hassle.

From Lightroom to ACDSee Photo Studio: Making the Jump Easy

It may not be possible to transfer edits from LR to ACDSee, but Photo Studio sure has a lot of tools to cover most post-processing tasks.

But if you are here, I am guessing you have decided to push through the process now rather than become even more tied-in with the system Adobe is sticking to, and have even more to deal with at a later date. One solution you are left with is exporting full-size JPEG images from your Lightroom Catalog for any future needs (uploads to social media or websites, for example). But should you ever need to tweak a setting or two, you will either have to go back to Lightroom, or start from zero using ACDSee or an alternative tool.

Mind you, this caveat is only really valid for two or three years at the most, since there is a good chance that after a couple of years your taste in post-processing – as well as your skill – will have changed noticeably. I know mine has. Still, it is something that you will need to accept as an unavoidable result of having been part of such a closed system.

It is my hope that, over time, software developers such as ACD Systems will work out a way to read Adobe’s (and other) databases and interpret adjustments in an equivalent manner so that none of the edits – at least not those most prominent – would be lost when switching.

Now that the bandage is off, let’s go through what can be achieved with Photo Studio Ultimate.

Importing Lightroom Catalog Data

As I have mentioned in the previous article, culling and adding metadata information is an enormous pain for me. I am sure I am not the only one who just wants to get on with post-processing. Having to assign ratings and keywords all over again for images that have been organized in Lightroom would be insufferable. It is an enormous relief that this is something ACDSee Photo Studio Ultimate can greatly help you with.

Photo Studio has the functionality to import ratings, color labels, keywords, and collections from any Lightroom Catalog, thus preserving the major image organizing-structure of your portfolio. The process of importing this data is very easy to initiate and requires minimal effort.

1. Find the Adobe Lightroom Database Import tool

While in Manage Mode, select the Tools menu at the very top of the screen. There, navigate to Database > Import > Lightroom Database, which is located at the very bottom of the Import submenu. This will open the Lightroom Database Import Guide.

From Lightroom to ACDSee Photo Studio: Making the Jump Easy

2. Select Data and Catalog to Import

As soon as you launch the Lightroom Database Importer, a dialog with a short introduction to the tool’s functionality will pop up. Click Next, and you will be given options to specify which database entries you want to be imported, as well as the location of the Lightroom Catalog itself.

From Lightroom to ACDSee Photo Studio: Making the Jump Easy

2.1 Ratings

This is the star-based filter assigned with numeric keys (1 through 5) in Lightroom. ACDSee does not have stars as such, but it provides a numeric rating that is equivalent for all intents and purposes. If you check this option, ACDSee will interpret the ratings you have assigned with Lightroom and apply the same values.

2.2 Labels

This specifically refers to color labels that both Lightroom and ACDSee support. Again, by default, the labels that ACDSee provides are exactly the same as those found in Lightroom, so files marked with a Red label in a Lightroom Catalog will be marked with the same color in ACDSee after the data from the Catalog is imported.

2.3 Collections

These are a bit more complicated than Labels and Ratings and not something Photo Studio promotes as a means to managing your files, at least not by default. But if you were using Collections in Lightroom to sort your images, ACDSee will readily take over.

Simply select the Panes menu and enable Collections there and a new navigational tab will become available. Located right next to the Folders tab in Manage mode, it will list all the Collections that the imported Catalogs contained, along with the images assigned to those Collections.

It has been a couple of years since I last used Collections in Lightroom, preferring to stick with simple filters now, but it is nice to know this option is available and neatly integrated.

From Lightroom to ACDSee Photo Studio: Making the Jump Easy

2.4 Keywords

These are perhaps self-explanatory. Any keywords that you applied in Lightroom to any given RAW file will be seen by ACDSee too. This is useful for when you want to find images of specific locations, events, or people, provided you specified those keywords in Lightroom in the first place. Obviously, if you have not, ACDSee offers enough image management tools to have you covered.

2.5 Location

ACDSee will navigate to the default Lightroom Catalog in the Pictures folder on your computer, so keep in mind you may need to change the location. There is no way to select several Catalogs at once, so if you have more than one (which is very likely), the Catalog Import process will need to be repeated once for each one.

From Lightroom to ACDSee Photo Studio: Making the Jump Easy

Make sure Lightroom is not running while attempting to Import a Catalog.

Depending on the size of the Catalog being imported and your computer hardware specifications, the process might take up to a few minutes to finish. In fact, it took ACDSee over 30 minutes to process my Catalog. More than enough time to take a break from work and have a cup of coffee (you will have to wait for the Import to finish before you can use Photo Studio for anything else).

Admittedly, the Catalog was quite large, with a year’s worth of RAW files, and stored on an external hard drive on top of that. And not the fastest sort either. Be that as it may, importing will certainly be quicker than having to apply the filters and ratings manually, and nowhere near as tedious.

From Lightroom to ACDSee Photo Studio: Making the Jump Easy

Once the process is finished, you will find (upon navigating to the corresponding folder) your RAW files to contain the same labels, ratings, and metadata entries as applied in Lightroom. Honestly, this is great. The only omission that I can think of is that ACDSee does not seem to take Flags into account, so any images you may have marked with Pick or Reject Flag in Lightroom will not have the filter imported.

Part of the reason is that ACDSee simply has no Reject Flag equivalent, even if marking a file with backslash key tags it in a similar fashion to how Pick Flag works in Lightroom. Something to improve upon perhaps.

From Lightroom to ACDSee Photo Studio: Making the Jump Easy

The ratings and labels Lightroom is showing…

From Lightroom to ACDSee Photo Studio: Making the Jump Easy

…are now transferred to ACDSee. And it gives you a good before-after glimpse too/

Plugins are added

Here is something that’s as unexpected as it is brilliant; ACDSee supports plugins designed for Adobe Photoshop. If you have been using Lightroom, this may be of relevance to you, too, as so many of these plugins are also meant for Adobe’s standalone RAW converter and image management software.

I have no idea how much work had to go into this little trick, but it is a massive attraction for anyone who is not fully satisfied with the extent of default ACDSee tools.

From Lightroom to ACDSee Photo Studio: Making the Jump Easy

Long time no see, Silver Efex. Fancy finding you here.

While I have not done any extensive testing – I rarely, if ever, use plugins anymore – I was able to verify this with one of the most well-regarded plugin packs by Nik Software (now owned by DxO after being nearly killed-off by Google). Color Efex worked like a charm. I encountered an occasional error here and there, but often to no direct effect on the functionality of the software or the plugin, so while annoying, it was rarely terminal.

I also tried a couple of plugins by Topaz some time ago and they worked without issue. The full list of officially supported tools can be found here.

From Lightroom to ACDSee Photo Studio: Making the Jump Easy

It is necessary to path the location of the already-installed plugins. To make sure ACDSee can locate the plugins correctly, first go to Edit mode. Then, select Options from the Tools menu at the top of the screen, or simply hit Alt + O. Once the Options panel is displayed, choose Edit Mode from the list on the left. There, you will be able to select the GPU that ACDSee will use to speed up processing, among other things.

What we need is the bottom-most field called Adobe Photoshop Plugin Paths. A couple of directories will be listed by default, but in some cases (as with Nik), they won’t be enough. You need to specify where the plugins are located. Since I am interested in using Nik Software, I added (click the Add button) a new path that leads to C:\Program Files\Nik Collection. The destination of your plugins might be different, so make sure you set the path correctly. Once you’re done, click OK.

From Lightroom to ACDSee Photo Studio: Making the Jump Easy

If the plugins are supported and the path has been specified accurately, you will find the plugins listed in the Photoshop Plugins section of the Tools menu (still in Edit Mode).

I won’t claim there is no chance of errors happening – after all, those plugins were never really intended for anything but Adobe. Yet the fact that they work so well despite that is an impressive and convenient achievement no matter how you look at it.

Just keep in mind that not everything might work as expected every single time, or it may take time for some plugins to be properly supported.

Final Words

Breaking and rearranging an established workflow is not a pleasant experience. Especially if the previous routine worked well and it is the company’s decisions, rather than the quality of the tool, that has become an issue. With that in mind, it is good to know that less-dominant software developers are going out of their way to show how welcoming they can be.

ACDSee Photo Studio Ultimate attempts to make the transition from Lightroom as simple and straightforward as possible, not only by offering a plethora of powerful (and often similar) post-processing tools but by also taking steps towards preserving any image organizing you may have already done with Lightroom.

It’s not perfect and there is certainly room for improvement (perhaps edit transfers are not as far-fetched as they might seem?), but what has been done is by no means a small feat and will save any new user hours of rating and filtering what has already been done before.

Whichever software you will find yourself choosing next (or sticking with), there is plenty for the giant developers to learn from such attention to detail.

Disclaimer: ACDsee is a paid partner of dPS

The post Switching from Lightroom to ACDSee Photo Studio: Making the Jump Easy by Romanas Naryškin appeared first on Digital Photography School.


Digital Photography School

 
Comments Off on Switching from Lightroom to ACDSee Photo Studio: Making the Jump Easy

Posted in Photography


Datacolor updates Spyder5 calibration software to add auto ambient light switching

30 Mar

Calibration company Datacolor has updated the Spyder5 software package that accompanies its Spyder5 monitor calibration devices for Pro and Elite customers. The update sees the packages renamed Spyder5Pro+ and SpyderElite+ to indicate that both now feature automatic ambient light switching and what the company calls 1-Click Calibration. The ambient light feature relies on the Spyder5 calibration device recognising that the lighting conditions in the monitor room have altered to trigger a different monitor profile. In previous versions users had to remember to make the adjustment manually.

The new 1-Click Calibration system is really a 1-click solution for monitors that have already been calibrated by the device before, and allows the re-calibration with a single click without having to go into the menu system. Both versions of the software also provide more in-depth control of saved profiles through an extra profile management tool.

The Elite package additionally offers a better soft-proofing workflow as well as Enhanced StudioMatch which helps users to calibrate multiple monitors so they all look the same.
For more information, including pricing for upgrades for each of the packages, see the Datacolor website.

Press release

Datacolor Announces Spyder5+ Software Upgrade with Enhanced Display Calibration Features

Datacolor®, a global leader in color management solutions, today announced the release of Spyder®5+, the next generation software expertly designed to build upon its popular color calibration tools for photographers, designers, videographers and imaging professionals.

“Spyder5 is already an amazing tool for getting the best color out of your display. With the Spyder5+ upgrade, Datacolor has added several really nice features that are an absolute no-brainer for the price,” said David Cardinal, professional photographer and Datacolor Friend with Vision. “I’ve been using the new capabilities and am really pleased with how much time they’ve saved me, as well as the additional productivity they’ve provided.”

The software upgrade is now available for all existing and new Spyder5 customers, with the option to purchase Spyder5PRO+ or Spyder5ELITE+. Spyder5+ adds unique features to the Spyder5 calibration tools by enhancing users’ digital color workflow, including:

* Automatic Room Light Switching ensures users’ monitor profile changes as the room light conditions shift, with no user interaction required
* 1-Click Calibration streamlines a user’s workflow with a single click to start the calibration without having to re-select saved settings
* Profile Management Tool gives users the ability to edit, remove, rename, locate, and activate each display profile for ultimate control and flexibility

Users who purchase the Spyder5ELITE+ upgrade will have access to all of the above features, in addition to:

* Spyder SoftProof improves “Screen-to-Output” matching with a new workflow to simulate how photos will look on any printer or device – including home printers, online or retail printers, and certain mobile/tablet devices
* Enhanced StudioMatch verifies precise monitor matching and takes the guess work out of making all connected displays look the same – including a new visual verification step that assists you by fine tuning your results

“We’re very excited to add this upgrade to our Spyder5 product line. This new software offers unique tools to ensure color management across all devices, so our customers can remain confident in their decision to choose Datacolor for their color calibration needs,” said Stefan Zrenner, Director Global Sales & Marketing Imaging, Datacolor. “With a competitive set of features, Spyder5+ is the perfect tool for creatives that rely on consistency in their work.”

New and existing Spyder5 customers wishing to purchase the Spyder5+ software add-on can find out more and buy via the Datacolor website. Upon software purchase, customers will receive a software serial number and a step-by-step guide for easy download.

Articles: Digital Photography Review (dpreview.com)

 
Comments Off on Datacolor updates Spyder5 calibration software to add auto ambient light switching

Posted in Uncategorized


Switching from LEE to NiSi Filters: Was it a Mistake?

17 Mar

Filters are rapidly becoming an essential piece of equipment in most photographer’s camera bag. However, as the demand grows so does the number of suppliers; Lee, NiSi, Formatt-Hitech, Wine Country Camera, and more.

Switching from LEE to NiSi Filters: Was it a Mistake?

Choosing the right filters isn’t as easy as it sounds. High-quality filters are rarely cheap and many of us can’t afford to spend hundreds of dollars on a product that doesn’t meet our expectations. The price of ND Filters varies from $ 10-200+ which means that you don’t need to buy the most expensive (even though the price in many cases does also reflect the quality).

About one year ago I was contacted by a Chinese brand named NiSi and invited to test their products. Initially, I was a bit skeptical as I knew little about them and I haven’t had a great experience with Chinese equipment previously (unfortunately). This is my experience with their filter system and filters one year later.

First Impression

The NiSi Filter System provides a positive impression straight out of the box. The filter holder is contained in a beautiful leather box, just like the filter pouch.

I won’t spend too much time talking about the packaging, as I believe the filter quality is more important. Still, it is worth mentioning that the presentation is beautiful and it looks exclusive right away. The only drawback to these beautiful leather boxes is that they are a bit large and they take up a lot of space in your backpack compared to smaller pouches such as LEE’s. However, if it takes too much space you can just remove the holder and leave the box at home.

NiSi Filters

The NiSi Filter Holder and Circular Polarizer Box

The Filter Holder

During the first couple of weeks using the NiSi Filters, I wasn’t quite sure whether I preferred their filter holder or the one made by LEE (which I had been using for more than two years). The NiSi holder is made of metal compared to LEE’s which is made of plastic, but it also seemed slightly less stable. Since the clips are so small I was afraid that the filter holder would fall off the adapter.

After having used the system for nearly one year, however, I’m no longer in any doubt that the NiSi holder is better. I’ve had no problems with neither the V5 Holder (standard for most lenses) or the larger holder for my Nikon 14-24mm.

NiSi Filters

NiSi Filters on my Nikon 16-35mm f/4

Also, the NiSi Filter Holder has one of my all-time favorite features. It has the possibility of having a Circular Polarizer behind the Graduated Neutral Density (GND) or ND Filters, and it is easily adjustable using a small wheel.

I’ve always found it hard to combine a Polarizer and Graduated or regular ND Filters. Either you need to screw the Polarizer on the lens and attach the holder outside, which usually results in vignetting. Or you need to purchase an adapter and a huge Polarizer to place in front of the lens (which also often leads to vignetting). NiSi has completely removed this problem and it’s never been easier to combine these filters. I’ll come back to the NiSi CPL in a bit.

It’s also worth mentioning that you are able to use other brands’ filters in the NiSi holder. I’ve tested with both Singh-Ray and LEE filters and it works perfectly fine, though it can be a little tight to insert them.

The Filters (ND, GND, CPL)

So, the filter holder proved to be of high quality but what about the actual filters?

NiSi filters

NiSi 6-Stop Neutral Density Filter on the Nikon 14-24mm Holder

When I evaluate filters there are two main things I look for; colorcast and quality of the glass. This was my biggest worry in the beginning since, as I mentioned, I was already pleased with my current system.

NiSi Neutral Density Filters

One of my biggest frustrations with the majority of filters I’ve tested so far is the color cast. Worst of them all, despite being a great filter otherwise, is LEE Filters. I had used LEE Filters for years and had gotten used to the heavy blue color cast. Even though it’s fairly quick to fix in Adobe Lightroom or Camera RAW, it feels unnecessary to repeat this step each time you bring out a six or 10-stop ND filter.

NiSi filter 10-stop ND

To the left: No filter – to the right: NiSi 10-stop ND filter.

Even though I initially had no intent of switching from LEE. But I would consider it if I found the color cast to be significantly less and the quality of the glass to be no less. My biggest surprise when taking the first image with my new NiSi 10-Stop ND Filter was that there was absolutely no color cast. Nothing. Nada. I honestly had to rub my eyes a few times to make sure I saw it correctly. No heavy blue color cast, no bright yellow. Nothing.

This is a big reason why today, more or less, I only have NiSi Filters in my camera bag.

Another benefit of the NiSi filters is that the filters are of glass, not resin. This makes them more durable, harder to scratch and (most importantly…) easier to clean! All the ND Filters (regardless of strength) have a soft foam/sponge on the back to avoid any light leaks. This is similar to LEE’s Big Stopper and Little Stopper but NiSi also has it on their lighter ND Filters.

NiSi Graduated Neutral Density Filters

The NiSi Graduated Neutral Density Filters have a slightly warmer color cast compared to LEE. However, the color cast is so little that it’s hardly worth mentioning. The same goes for LEE; the GND color cast is hardly noticeable at all.

Again, the NiSi filters are glass, not resin, which makes them harder to scratch and damage. This is great for outdoor photographers who often find themselves in less than ideal situations. After a year of using these filters regularly, I still haven’t got any scratches besides the few on the edges as a result of being placed in and out of the filter holder. These scratches aren’t visible on images, though, and are completely normal for any brand.

While I do like the NiSi GND Filters, my only issue is that the color cast of the 175mm (for my Nikon 14-24mm) is more visible than on the V5 holder. I only recently received this filter so I haven’t been able to do extensive tests on it yet. But at the first glance, it was a yellowish cast in the upper part of the filter.

NiSi Circular Polarizer

As I mentioned in the introduction, the NiSi Filter Holder has one of my all-time favorite features of a filter system; the possibility of placing a Circular Polarizer inside the holder.

Compared to most other brands, NiSi’s Circular Polarizer is extremely slim. I was actually surprised by how thin it was when I first saw it and, honestly, that gave me a negative first impression.

NiSi filters

NiSi Polariser inside the V5 Holder

Being able to insert the CPL within the holder and adjust it by turning a tiny wheel is a brilliant solution, though. Despite the fact that I felt like the filter was a bit too thin and perhaps not as high-quality as the other filters, it’s a more convenient solution than stacking a huge CPL outside of the other filters (and a more affordable option as well).

After testing the CPL for a while I concluded that the quality is in fact as good as my current B+W CPL and the color cast is, again, not a problem.

The biggest drawback is that you’re not able to use only the CPL without the Filter Holder. Since the CPL is placed in a special thread inside the holder you can’t place it on the lens without the holder. I often prefer to keep my CPL on the lens when walking around a city or going on a hike. This isn’t a good option with the NiSi CPL, unfortunately, so I still bring my B+W filter with me.

Besides the fact that it’s not as portable as other options the quality meets my demands. Therefore, I hope that they make an extra option where it’s easy to leave it on the lens at any given time.

Was it a mistake switching from LEE? 

It’s been almost a year since I got my first NiSi Filters now and every week I’m asked what I think about their filters and if it’s worth switching systems.

I think it’s important to state that I never considered switching from LEE and I was very satisfied with their filters and I still believe that they are among the best available on the market. However, I do not regret switching and I love using filters that have little-to-none color cast, while still being of a high quality.

The post Switching from LEE to NiSi Filters: Was it a Mistake? by Christian Hoiberg appeared first on Digital Photography School.


Digital Photography School

 
Comments Off on Switching from LEE to NiSi Filters: Was it a Mistake?

Posted in Photography


Manfrotto introduces Xume magnetic holder system to make switching filters easier

08 Feb

Accessory manufacturer Manfrotto has launched a new filter suite that features a magnetic adapter and filter holders that it says make fitting and removing filters quicker and easier. The new Xume system uses a magnetic adapter ring that screws into the front of the lens, while the filter itself screws into a metal filter holder. The two parts then connect securely when they are held close together and can be separated just by pulling them apart. The system removes the part of the attaching-a-filter process where the filter is screwed onto the front of the lens.

The filter holders and lens adapters are available now in eight sizes: 49mm, 52mm, 58mm, 62mm; 67mm, 72mm, 77mm and 82mm and are priced from $ 10.99 to $ 34.99.

For more information see the Manfrotto website.

Press release

Manfrotto Launches Innovative Lens Filter Suite

Providing precision and ease to capture every shot

Manfrotto, a leading global innovator and manufacturer of premium photo, video and lighting support products and accessories, has launched a new, groundbreaking Manfrotto Lens Filter Suite, a combination of Manfrotto’s successful high-quality lens filters and innovative Manfrotto XUME magnetic adapters.

The new Manfrotto Lens Filter Suite enables professional and amateur photographers and videographers to avoid the hassle and frustration of changing filters while subjects wander or light slips away. With the Manfrotto Filter Suite, photographers instantly and precisely connect the filter to their lens so that they never miss the perfect shot.

The Manfrotto Lens Filter Suite is comprised of a Manfrotto Lens Filter, a Manfrotto XUME Lens Adapter and Filter Holder plus an optional Cap (available only for 77mm diameter). It is the perfect choice for long exposures, wedding photography, macro, architectural photography, fine art photography – any style requiring the use of filters.

Manfrotto’s camera lens filters are built to the highest quality standards. They feature flawless multi-coating which minimizes reflection and maximizes light transmission, consistently delivering the effects photographers wish to achieve. Each filter is provided with a practical, reusable storage case, ensuring the highest level of protection off-camera. Depending on the model, Manfrotto filters feature reliable water-repellent, oil-repellent and anti-static characteristics.

  • UV filters block out UV light, preventing it from entering the lens, reducing blurring, haziness and blue casting.
  • Circular Polarizer filters enhance color, contrast and saturation as well as removing undesirable reflections from non-metallic surfaces.
  • Neutral Density filters help control exposure times by reducing the amount of light hitting the camera sensor without altering the color of the scene.
  • Protect filters provide maximum protection against scratches, oil and moisture, without affecting overall image quality.

Manfrotto XUME Adapters are the revolutionary magnetic solution which securely locks filters onto lenses, quickly and easily. Photography gear stays safe in-use with the filter magnetically secured to the lens. Manfrotto XUME accessories are safe for the lens’ focus mechanism, media cards, drives or other electronics.

Unique to the market, Manfrotto’s XUME Adapters:

  • Install in an instant.
  • Are secure; no moving parts and completely safe to use.
  • Have very low profile rings and are completely unobtrusive.

Manfrotto XUME Filter Holders and Manfrotto XUME Lens Adapters are now available nationwide in eight sizes: 49mm, 52mm, 58mm, 62mm; 67mm, 72mm, 77mm and 82mm. The Manfrotto XUME CAP is available only for the 77mm size. Manfrotto Filters range in price from $ 19.99 to $ 134.99 and Manfrotto Xume Adapters range in price from $ 10.99 to $ 34.99.

The Manfrotto Lens Filter Suite will be on display at WPPI in Las Vegas, Feb. 7–9, at the Manfrotto Distribution booth, No. 349.

Articles: Digital Photography Review (dpreview.com)

 
Comments Off on Manfrotto introduces Xume magnetic holder system to make switching filters easier

Posted in Uncategorized


5 Lessons Learned Switching from DSLR to Mirrorless for Travel Photography

23 Mar

Two months ago, after shooting for 10 years with Canon, I completely switched to Sony. It surprised some readers of my blog, as well as some fellow photographers. To address the issue, I published a detailed post on my blog with the reasons behind my switch. To save you time, I will summarize my reasoning, not only in one sentence but in one word: INNOVATION. I could see that, in the last two to three years, the main innovation was happening in the realm of mirrorless systems and I felt that Canon was simply an outside observer.

I considered the switch for a long time. I first waited because mirrorless systems were not up to DSLR standards to which I was accustomed. Then suddenly, about a year ago, all mirrorless manufacturers began releasing new camera models that could compete with any DSLR and, in some cases, even surpassed them.

SwitchingfromCanont Sony Photo 1

Big Sur, California – Sony A6000, Sony 10-18mm lens

That was when I decided to switch. But, it took another six to seven months to choose the right kit (camera and lenses) for my travel photography needs.

My initial choice was the Panasonic Lumix GX-7 which was the perfect camera for me feature-wise but I was not too crazy about the selection of high-end wide angle lenses.

My second choice was the full frame Sony A7 and, I almost pulled the trigger last fall. However, after holding it in my hands, the Sony A7II in combination with the newly released Zeiss 16-35mm lens was almost comparable to the DSLR in weight and size.

That was when my choice was made. Just before the Christmas holidays, I sold all of my Canon gear to prevent cold feet. Then, I ordered the Sony A6000, Sony 10-18mm f/4, and Zeiss 16-70mm f/4 in one shot. I paid $ 2000 in total. Sony lenses are always pricy but I found that the price of the complete kit was very reasonable.

SwitchingfromCanont Sony Photo 2

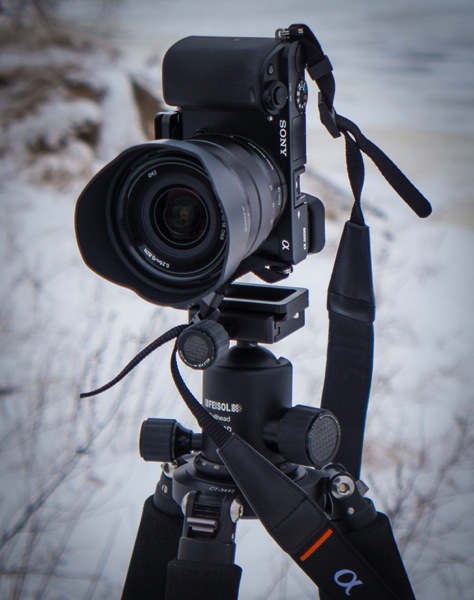
Sony A6000, Sony 10-18mm lens and Feisol Tournament Tripod

I just returned from my first photography trip of the year; I spent two weeks in Hawaii and Northern California where I exclusively shot with my brand new Sony gear.

Below are my thoughts after putting this new equipment through the real life test of travel photography. Please note, I only addressed the features of the camera which are important to me as travel photographer.

Lesson 1: Size does matter in travel photography

As a DSLR shooter, when preparing for a long and demanding sunrise/sunset hike, I always faced the same dilemma – what equipment to bring? Should I carry everything and look (and feel) like a Sherpa tackling Everest? Or should I hike light and risk missing important gear?

I do not have to compromise anymore as I can now put everything in a small camera bag and bring it with me. The Sony A6000 (344g) and the Sony 10-18mm (220g) weigh 564g (19.9oz) total. I still cannot believe that a high-quality wide angle zoom lens can weigh only 220g. I call it freedom.

Don’t get me wrong, the size and the weight were not the main reasons for my switch. I would never jeopardize quality for the sake of weight reduction but it was important consideration.

SwitchingfromCanont Sony Photo 3

San Francisco, California – Sony A6000 with Sony 10-18mm lens

Lesson 2: Electronic Viewfinder (EVF) – a new way of looking at the scene

Somehow, in many mirrorless reviews, the EVF is presented as a negative factor and is portrayed as somewhat of a disadvantage compared to the DSLR optical viewfinder. I do not agree with that conclusion. For me, the EVF is one of the main advantages of mirrorless cameras. Finally, when I look through the viewfinder I can see what the camera’s sensor sees.

It is a very new and refreshing experience with the EVF, when you can assess the depth of field of the scene before taking the picture.

Here’s a real life scenario. Earlier I was shooting using exposure compensation -2EV and I forgot to reset it to zero. Now, when looking through the EVF, I can see right away that the exposure is wrong because the EVF picture is too dark.

When I shoot wide at 10mm, I can even see barrel distortion which realistically represents the photo I am about to take.

I often use manual focusing when shooting landscapes, which was pretty much an impossible task with the DSLR in bright conditions because of the display screen glare. Now, not only can I easily use the manual focus in any condition, I can also take advantage of Focus Peaking, an amazing feature that highlights areas that are in focus with the bright color. There is no more guess work.

In one of the reviews, I read how awful and pixelated the EVF picture becomes in dark conditions. I can confirm that it looks pretty bad but it is good enough for composing the shot and beats the DSLR where all you can see is pitch black.

For me, the EVF simplifies the process of taking pictures and makes it more predictable.

SwitchingfromCanont Sony Photo 4

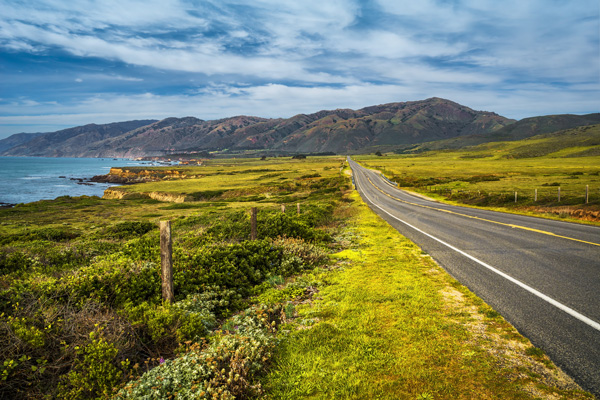
California State Route 1 – Sony A6000 with Zeiss 16-70mm lens

Lesson 3: I love the 24 megapixels sensor

During the silly megapixel war between major camera manufacturers, I decided for myself that 16Mpx was the right pixel count for my needs and I had no plans of upgrading only for that reason.

The Sony A6000 comes with 24Mpix, which I initially did not consider as an important upgrade. What I realized later, after starting to process photos, is that the 24Mpx sensor produces unbelievably clean and sharp images and, in combination with native quality lenses, it resolves an insane amount of detail. Photos look acceptable even at 100% magnification.

Although, I have to admit the higher pixel count is more taxing on my computer and I might need to upgrade it soon.

High ISO photography is not something that I do often when I travel and it was hard for me to assess low light performance of the sensor. But, what I can see based on family photos from the holidays is that ISO 3200 is still acceptable and excessive noise is easy to eliminate in Lightroom.

SwitchingfromCanont Sony Photo 5

Lanikai Beach O’ahu, Hawaii – Sony A6000 with Sony 10-18mm lens

Lesson 4: 11fps is a game changer

Sports photography is somewhat of a hobby for me. The only times when I shoot sports are when professional cycling peloton comes to Montreal every September and when my daughter is playing water polo. In order to test 11fps in combination with the fastest focusing system in the industry, I went to the beach in Hawaii to photograph surfers.

I switched from RAW to JPEG, set the camera to a continuous shooting mode and enabled Object Tracking. I was amazed not only with the new experience of shooting but with the results as well. Shooting at 11fps reminded me of filming the video and then going frame by frame in the editing software, selecting the best frames. There are no missing moments. The focus was spot on, in pretty much every frame.

I can see how the Sony A6000 can be a game changer for sports and wildlife photographers.

SwitchingfromCanont Sony Photo 6

Makapu’u Point O’ahu, Hawaii – Sony A6000 with Sony 10-18mm lens

Lesson 5: Not everything is perfect in paradise

Even though my initial experience of using the Sony A6000 is very positive, there are some shortcomings and annoyances I want to address.

Battery life:

According to Sony, you can take up to 360 shots on a single battery charge and I found this number to be pretty accurate. I even managed to take close to 390 shots when shooting in bracketing mode. It is not bad at all considering the small battery size and the EVF high power consumption. However, when you are accustomed to shooting 1500 shots on a single charge with the DSLR, the difference is very obvious. Now, I carry three spare batteries with me at all times and I have to remember to keep them charged.

Bracketing:

For some inexplicable reason you can shoot five bracketed shots at 0.7EV intervals only, which makes it completely useless. In extreme lighting conditions I have to shoot two sets of bracketed shots (-2, 0, +2), offsetting them manually using exposure compensation (-1 EV). This is very annoying.

No GPS tagging:

Even though the camera has decent wireless connectivity, the GPS tagging utilizing a mobile phone is missing.

Buffer writing lock:

When a camera transfers photos from the buffer to a memory card, the system is completely locked. You cannot even preview images during the transfer.

2-Second delay shortcoming:

You cannot trigger bracketed shots using the 2-second delay functionality. I had to buy, and carry around, an unnecessary extra piece of equipment: Wireless Shutter Release ($ 10).

SwitchingfromCanont Sony Photo 7

Sandy Beach, Hawaii – Sony A6000 with Sony 10-18mm lens

Conclusion

The switch from a Canon DSLR to the mirrorless Sony A6000 was less stressful and less painful than I expected. I believe that one of the main factors that made it possible was my purchase of native Sony lenses so I did not have to deal with the glass from other systems with the converters.

I am waiting for the widely rumored Sony A7000 which is supposed to be the successor of the Sony NEX-7. I hope Sony addressed the shortcomings of the A6000 and introduces new pro features like: weather sealing, built-in body stabilization, GPS tagging and advanced bracketing. I am definitely planning to get the new A7000 and keep the A6000 as a backup body.

googletag.cmd.push(function() {
tablet_slots.push( googletag.defineSlot( “/1005424/_dPSv4_tab-all-article-bottom_(300×250)”, [300, 250], “pb-ad-78623” ).addService( googletag.pubads() ) ); } );

googletag.cmd.push(function() {
mobile_slots.push( googletag.defineSlot( “/1005424/_dPSv4_mob-all-article-bottom_(300×250)”, [300, 250], “pb-ad-78158” ).addService( googletag.pubads() ) ); } );

The post 5 Lessons Learned Switching from DSLR to Mirrorless for Travel Photography by Viktor Elizarov appeared first on Digital Photography School.


Digital Photography School

 
Comments Off on 5 Lessons Learned Switching from DSLR to Mirrorless for Travel Photography

Posted in Photography


Switching a Speed Convertible from Shoulder Bag to Belt Pack

07 Jan

How to quickly switch a Speed Convertible from shoulder bag to belt pack. The Think Tank Photo Speed Convertible Series of shoulder bags feature a disappearing belt that is discreetly tucked into the sides of the bag. First and foremost a contoured shoulder bag, the Speed Convertibles keep photo gear readily accessible. The wide opening flip-top design hinges away from the body to rapidly work in and out of the bag.Fastening the flexible belt around the waist provides better stability while walking, especially when used in tandem with the included shoulder strap. The waist belt also features Modular rail sections for attaching Modular, Skin or Multimedia components to increase gear carrying capacity as needed. The three bags in the Speed Convertible series, Speed Demon V2.0, Speed Freak V2.0 and Speed Racer V2.0 offer photographers choice of the right bag size to suit their equipment and the adaptability for a variety of different assignments. For more information about the Speed Convertible Series and other Think Tank Photo products, please click on the links below: Speed Demon V2.0 www.thinktankphoto.com Speed Freak V2.0 www.thinktankphoto.com Speed Racer V2.0 www.thinktankphoto.com Think Tank Photo homepage www.thinktankphoto.com
Video Rating: 5 / 5

Just a short video. I joined a single team so expect to see a lot of hybriding videos now. lol. Gathering clips for a full length pk video. #wolf-pack