RSS
 

Posts Tagged ‘Supporting’

Supporting Your Off-Camera Flash – Tripods, Monopods or Light Stands?

31 Oct

I’ve generally been a natural light photographer. I understand natural light and love its variability. Normally it’s enough to get some beautiful photographs; many photographers stop here and go no further.

Constantly critical of my own photographs, I realized that I was at the mercy of natural light, searching and modifying, but rarely creating or directing. That’s why I chose to learn how to use flash those years ago. To get full control, it’s essential to put the flashes where you want them, and for this, you need to support them. This article will talk about the options available to you for holding your speedlights and off-camera flash.

Off Camera Flash

Off-camera flash

Human Light Stands

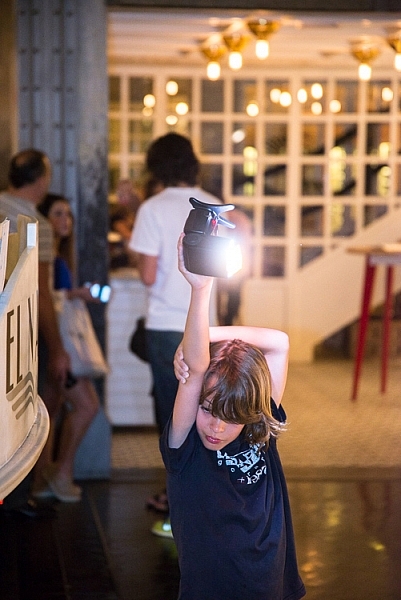
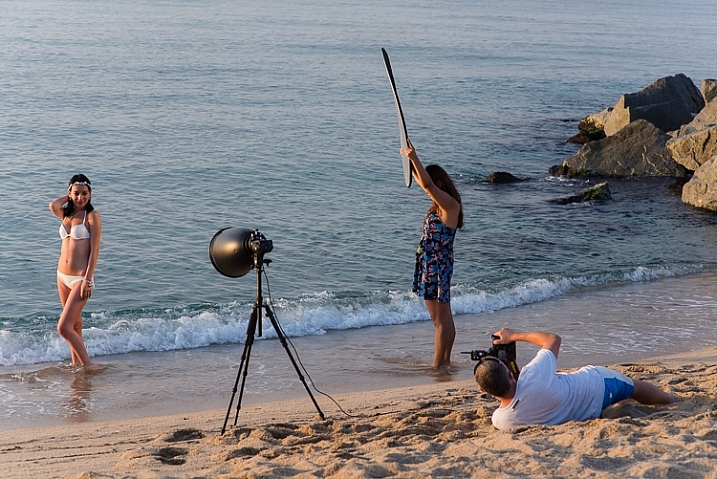
Using a human light stand is one of the easiest ways to support an off-camera flash and is often overlooked. If you can get someone to hold your flash, you get what’s effectively a voice activated light stand (VAL). It’s easier to change lighting setups this way, especially if your subject is moving. There’s also less hassle on windy days. That said, most people won’t know how to position the lighting modifier and it will tend to drift as you’re shooting. Another photographer or an experienced photography assistant will be very useful.
DSC_0472-2

Handheld

Hand holding is quite simply, having either you, or an assistant hold the flash. It’s perfectly possible to do this yourself if you feel comfortable taking pictures with one hand, and it gives you a lot of control. Or hand the flash to someone else and let them know where to point it.

Monopod Boom

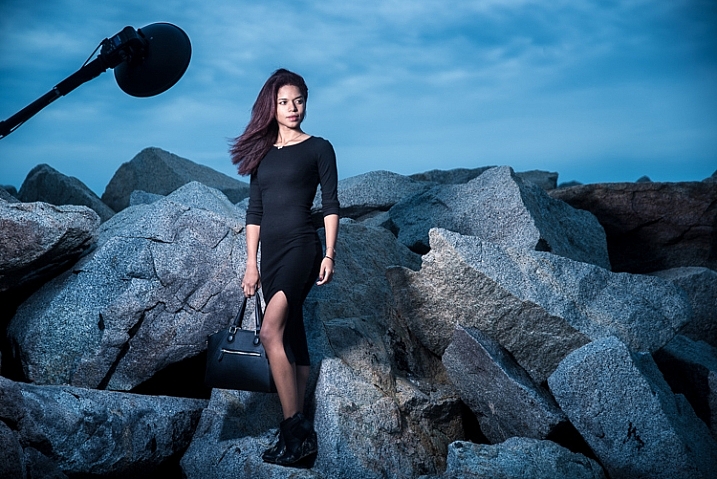
Again, you can do this yourself, and it helps if you have the monopod touching the ground because it means that your arm doesn’t feel as tired while holding a larger softbox or beauty dish. Or your photography assistant (or family member, friend, or passer-by) can boom, or hold the flash up, to light your subject from a higher angle. This gives you a lot of control and if you look at photographers like Annie Leibovitz and Joey L, you’ll see that their assistants are often using this approach.
DSC_5516-3

It can be heavy so make sure you pause for breaks. I use a long aluminium Benro monopod that allows me to attach a flash to either end. It’s cheaper than the Gitzo alternative, but do bear in mind that there seems to be no after-sales support. Carbon-fibre is lighter, but not essential.
off-camera-light-stand_4396

Off-camera flash

Tripods

I’ve been using my tripods to support my off-camera flashes for a long time. First because I already have them, and secondly because they are perfect for uneven ground. Generally they don’t get the flash high enough, but they are stable, especially if you weight them down by hanging a heavy camera bag from the center column.

Small, Lightweight Tripod

This is my go-to option when I’m travelling light and won’t have an assistant. The idea is that the tripod is so small and light, that I can wear it on my belt and largely forget about it. Of course it doubles as a tripod, which I’d normally want to have with me anyway. It’s flimsy by itself and needs to be weighted down with a camera bag. It’s also far too small for most purposes, so it needs to be up on tables and so, to get more height. But you’re more likely to actually carry it, so that’s a good thing. I use a 1kg Sirui tripod that I’m pretty happy with, especially for the price, with an equally small and light ball-head.
english-photographer-light-stand

Big, Heavy Tripod

As I began to use larger lighting modifiers, like huge octoboxes and parabolic umbrellas, I needed a heftier support for them. I happened to have an enormous old tripod which has been excellent. It weighs a lot by itself, and is definitely bulky, but is easily carried with its broad shoulder strap. It’s perfect for uneven ground, and can be made more stable by hanging the camera bag from it. I use one of Manfrotto’s largest tripods which gets the flash over my head (I’m 6’2″). It’s old, and very durable.
DSC_1979-2

Proper Light Stands

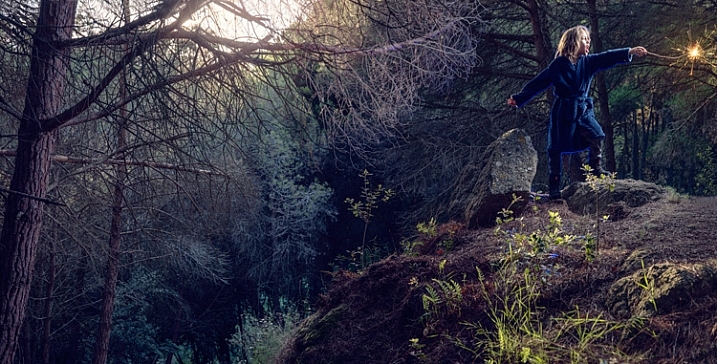
And then there are dedicated light stands, designed for the purpose of supporting off-camera flashes. I started using these when I wanted to get the flashes higher above the subjects. Some are light and flimsy, and others heavy and stable. Some stack together, and others are designed precisely for travel. They seem to break regularly in transit, or just being used on set. They do get the flashes high off the ground, but they don’t seem particularly stable because they’re tricky to weight down with the camera bag, and as soon as the ground is uneven, they’re a pain to use and won’t work on a steep slope.

Off Camera Flash

Supporting Larger Flash Modifiers

Light Stands

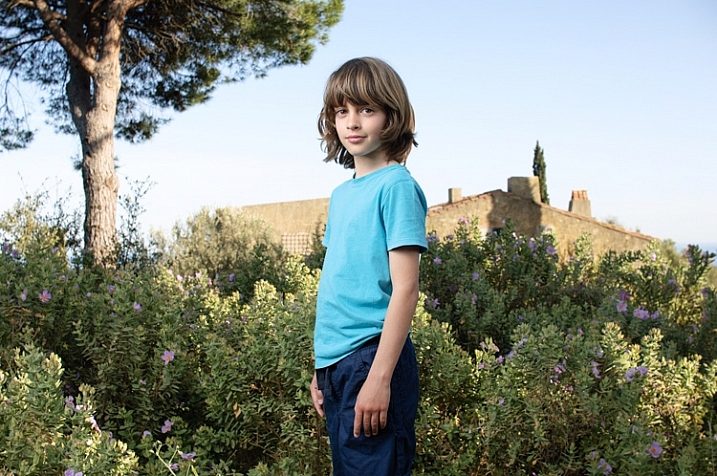
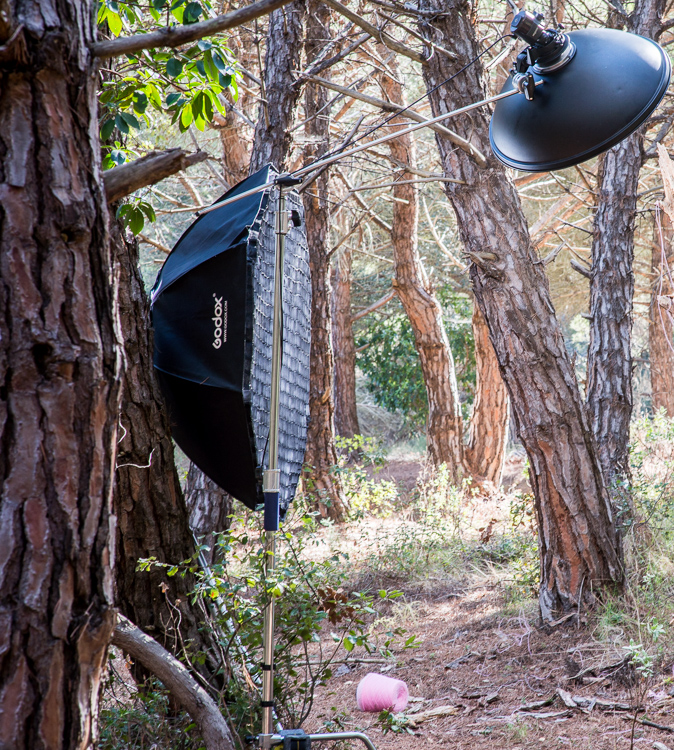
These come in several shapes and sizes. Generally all the legs open at the same angle so they only work on fairly flat ground. Smaller light stands meant for travelling are a good solution, though they can be flimsy. Larger light stands can get the flash very high off the camera. Balanced properly, they can be used with a boom pole to get the flash over your subject.


C (entury) Stand

My most recent acquisition, and now my go-to light stand unless I’m travelling light, is the C-Stand or Century Stand. It’s an old design from Hollywood film studios, and very well engineered. It weighs a lot which is inconvenient if you’re walking to your shooting location, but helpful because it means the stand is more stable in use. The legs are also made so that it’s very easy to weight them down using sand bags. I personally use a lead diving weight belt for ballast. Importantly, one of the legs can move along the central column, which means that you can use the stand on uneven ground and on stairs. It’s not quite as versatile on uneven ground as the huge tripod, but it’s much taller; up to 3 meters (9.8 feet). It’s cumbersome to pack because it’s an L-shape, but when it’s on location, it’s perfect. The included boom is very useful, and can handle hanging backdrops too. I use the C-Stand from Pixapro which is well made enough to outlast me. It’s designed to make it a pleasure to use. Though not a pleasure to carry!
DSC_5120

You can see the various light modifiers in the video below, as well as see them used on location.

Any questions, let me know in the comments below. Do you have any other creative solutions for holding off-camera flash?

googletag.cmd.push(function() {
tablet_slots.push( googletag.defineSlot( “/1005424/_dPSv4_tab-all-article-bottom_(300×250)”, [300, 250], “pb-ad-78623” ).addService( googletag.pubads() ) ); } );

googletag.cmd.push(function() {
mobile_slots.push( googletag.defineSlot( “/1005424/_dPSv4_mob-all-article-bottom_(300×250)”, [300, 250], “pb-ad-78158” ).addService( googletag.pubads() ) ); } );

The post Supporting Your Off-Camera Flash – Tripods, Monopods or Light Stands? by Ben Evans appeared first on Digital Photography School.

Digital Photography School

 
Comments Off on Supporting Your Off-Camera Flash – Tripods, Monopods or Light Stands?

Posted in Photography


Colorado proposes bill supporting photographers who record police

07 Apr

Colorado, U.S. state legislatures have introduced a new bill that, if signed into law, will prevent law enforcement officers from interfering with citizens who are photographing or recording police activity. It is House Bill 15-1290, and it comes at a time when Texas has proposed its own bill on the topic, but with a draconian slant: it penalizes citizens that film or photograph police actions within 15 feet of the incident. Read more

Articles: Digital Photography Review (dpreview.com)

 
Comments Off on Colorado proposes bill supporting photographers who record police

Posted in Uncategorized


500px now supporting Lytro ‘Living Pictures’, offering users $250 rebate on Illum

25 Jul

Photo sharing site 500px has announced that it is now supporting images uploaded in Lytro’s unique ‘Living Pictures’ format, and is offering its customers a $ 250 discount on the purchase of Lytro’s Illum camera (MSRP $ 1599). The Illum is available now for pre-order and is expected to start shipping within the next couple of weeks. Click through for more information.

Articles: Digital Photography Review (dpreview.com)

 
Comments Off on 500px now supporting Lytro ‘Living Pictures’, offering users $250 rebate on Illum

Posted in Uncategorized


4 Quick Tips to Notice the Supporting Cast of Your Landscape Scene

22 Aug

Recently I took a stroll through my photo archives as a way of bench-marking my progress as a photographer and something dawned on me – I’ve begun to overcome a very troublesome disorder for photographers known as Single Subject Blindness.

Single Subject Blindness

Have You Ever…

Come home from photographing something spectacular only to have ever photograph you upload be of that one spectacular subject? I mean there’s nothing wrong with this problem – after all you are still getting a photograph of one spectacular subject, but could you have gotten more? Done something else? Seen the scene differently?

So when you think back to some of your recent photo adventures – Have you ever photographed a dramatic sunset and walked away with photographs of only the sunset? Have you ever hiked deep into a forest to photograph a waterfall to walk away with only photographs of the waterfall itself? This is what I’m calling single subject blindness and it is something I’d like to mention today and talk about how I avoid it.

Thin Ice

There’s Nothing Wrong With Main Characters – But They Aren’t The Full Story

I do want to mention that there’s nothing wrong with capturing the main characters of your scene, the sunset, the waterfall, the expansive mountain range etc, but I do think that if that’s all you’re photographing when you go out on a shoot you’re missing a big part of the scene around you – the supporting cast!

I’ve done this myself for many years – I’ll get caught up in a scene and return to my computer to see what I’ve captured only to find every photo looks the same. Lately I’ve begun to catch myself doing it in the field and I’ve found a couple of ways to break the habit.

It’s not easy though – The thing is just like in the movies, a great book, or a dramatic play the main characters draw your attention, and keep it. The supporting cast is there to move the story along, but not necessarily be the story – however, they can make for very compelling and interesting subjects when isolated and taken separately. So while we can still photograph our main subjects I think it’s also important to find ways to steer our focus from the obvious subjects to those which are more subtle.

So How Do You Steer Your Focus?

There’s no denying that it’s hard to ignore the main character of your photo shoot – after all many times it’s the reason where there in the first place. If you want to have a chance to photograph the supporting cast of your scene you have to find the strength to divert your focus, even if only for a moment, from that main event. Here are four quick tips that I use to get myself noticing the smaller details of a scene – if you can think of more tricks leave them in the comments below!

Supporting Cast

4 Quick Tips to Notice the Supporting Cast of Your Scene

  1. Step back – It’s no secret that stepping back from you camera from time to time can be a huge benefit in improving your photography. It can help you see the entire scene as a whole, it can help you see different compositions of the subject you’re photograph, and yes it can even allow you to find and isolate the supporting cast of your scene which you might have otherwise missed with your eye glued to the viewfinder. 
  2. Close Your Eyes – Take a minute or two and close your eyes. I love doing this when I’m in the middle of no where, sometimes I’ll even spin myself in a couple circles and really try to disorientate myself (make sure you can find your way home before you try this though). The reason this works is because it causes you to really focus in on your location when you open your eyes to find your bearings. You’ll have a new view of your surroundings and this will help you see something that you didn’t notice before.
  3. Don’t Get Caught Up – I once woke up an hour before dawn in the middle of winter after a snow storm and drove to a frozen lake to photograph sunrise. I took nearly 150 shots during the 45 minutes I was there and ended up with one photograph – the one of the dock above. Of the photographs I took 95% of them looked exactly like the one above. I was cold, tired and very disappointed I didn’t make an effort to photograph other subjects during that shoot, but realized it wasn’t that I didn’t make an effort it was simply that I was caught up in photographing one subject instead of diverting my attention to other smaller details in the scene before me.
  4. Set an Alarm – If you know you’ll have a problem with number three try setting a timer. Allow yourself only a predetermined amount of time to get the shot you want from your main subject, and then once that time is up, spend the rest of your shoot looking for interesting supporting characters. This tip works wonders and it has a two fold effect – one due to the time crunch to capture the shot of your main subject you’ll find yourself working harder to get the shot you want in as short amount of time as possible, two it gets you looking for other interesting details in the scene you’re photographing.

Have You Ever Been Afflicted With Single Subject Blindness? What have You Done to Fix It?

I’d love to hear your own take on this and what you’ve done to avoid the problem in the comments below!

Post originally from: Digital Photography Tips.

Check out our more Photography Tips at Photography Tips for Beginners, Portrait Photography Tips and Wedding Photography Tips.

4 Quick Tips to Notice the Supporting Cast of Your Landscape Scene


Digital Photography School

 
Comments Off on 4 Quick Tips to Notice the Supporting Cast of Your Landscape Scene

Posted in Photography


Screen Capture – Screen Capture Supporting Editing Features, Text Capture

20 May

HyperSnap supports a wide variety of screen capture modes, image editing post-capture, and capturing text.

HyperSnap, a screen capture application for Windows, supports a variety of screen capture types including full screen, active window, free hand, and “Entire Page with Scrolling”, allowing you to capture an entire webpage including elements “below the fold” in a web browser such as Firefox.

“TextSnap” allows you to capture a window or region and convert the capture to text that is placed in the Windows Clipboard. A variety of drawing tools are available to edit captured screenshots, such as shapes, freehand draw, stamps, flood fill, and text. Several image effects can be used such as emboss, sharpen or blur, frame, and shear. Other features include uploading screen captures via FTP, sending captures via e-mail, printing all screen captures, and special features to capture screens from games….

Read more at MalekTips.
New Computer and Technology Help and Tips – MalekTips.Com

 
Comments Off on Screen Capture – Screen Capture Supporting Editing Features, Text Capture

Posted in Technology