Waterfalls, creeks and streams are something of a photographic specialty for me. Aside from the fact that there are thousands of them at my Vancouver Island Headquarters, they’re also really easy to photograph and often result in magical images that stand the test of time. Whether it’s a moss speckled trickle or a colossal roaring deluge, moving water seems to be irresistible to photographers and when it’s done well, can be utterly gorgeous. Let me share with you my top tips on how to shoot waterfalls, creeks and streams.
1 – Shoot in all weather
I’ll shoot in any kind of weather except for sideways rain. With waterfalls, creaks and streams I have a silly little motto ‘The Wetter the Better’. When everything is drenched you’ll find that your shadows are nicely saturated to deliver powerful blacks. I also prefer the look of wet leaves over dry ones because they looks so much more vibrant and rich.
Rainy or overcast days will also give you softer light with lower contrast, meaning you won’t usually need to bracket in order to capture the dynamic range. If you’re lucky enough to get a cold spell and things get icy you’ll find your local waterfall turns into an enchanted winter wonderland overnight, just watch your footing.

2 – Don’t always choose a slow shutter speed
Sure, it’s nice to get those silky water shots and capture the motion blur of moving water, but there are times when it’s nice to also capture a frozen moment of action. I’ll usually take two exposures with different shutter speeds and then blend them in Photoshop to create a good mixture of frozen and blurred motion. A four second shutter speed will usually be enough for silky water shots and you can achieve that easily with just a polarizer and a narrow aperture like f/16, unless your scene is in harsh, direct sunlight.
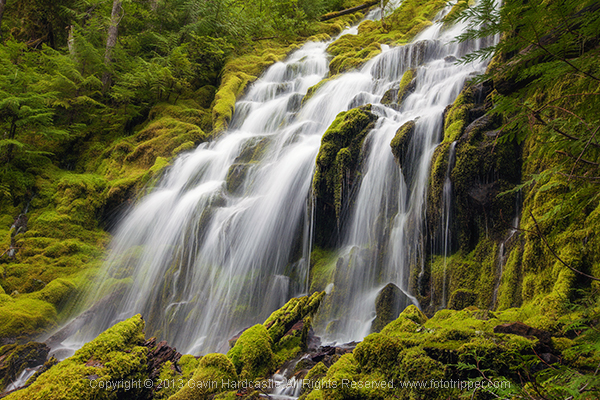
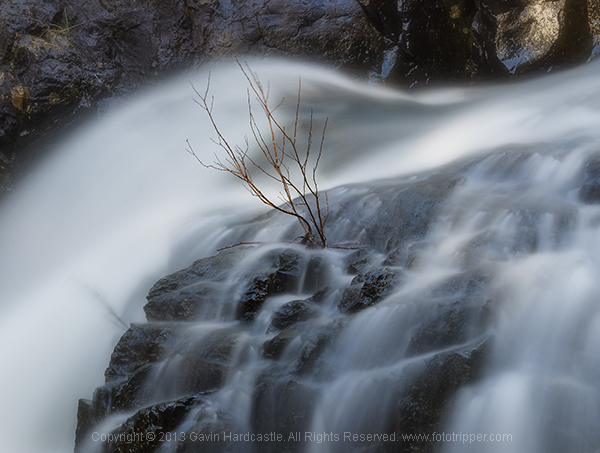
For a quicker exposure that has less motion blur I’ll try and keep the shutter speed under one second by using a slightly wider aperture of f/11 and rotating the polarizer to allow in more light. It’s rare that I’ll require the use of an ND filter. My shot below is a single exposure of about a half second during a rainy day. I tried longer exposures but preferred this one because you can still see some individual water drops in motion instead of just a mushy blur.
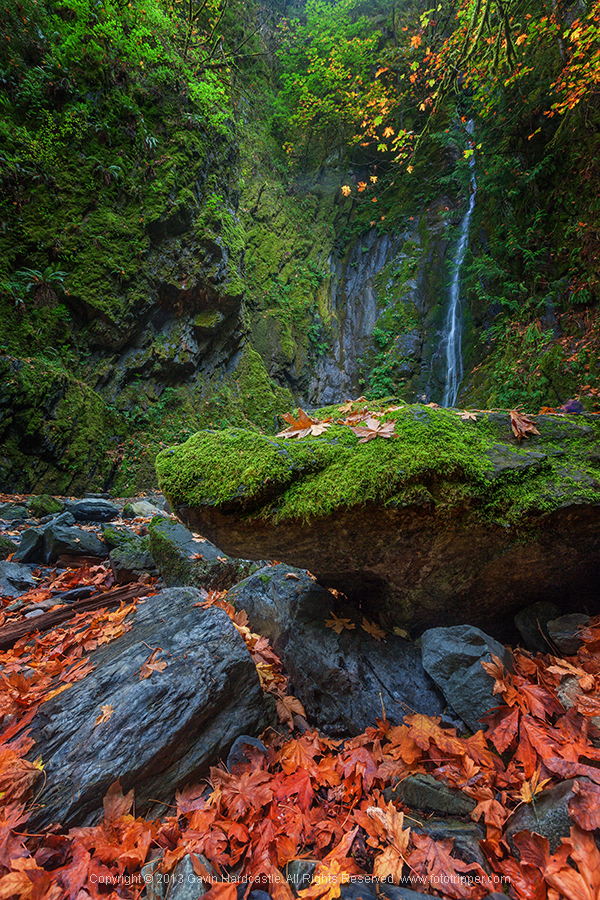
3 – Explore dark canyons
Don’t just explore those sun dappled streams that catch the light beautifully, that’s just too easy. Often it’s the darker, sun starved slot canyons that yield the most beautiful scenes. Armed with a study tripod you can shoot anything you want without caring about direct sunlight illuminating the scene. This opens up a new world of photo opportunities if you’re only used to shooting handheld.
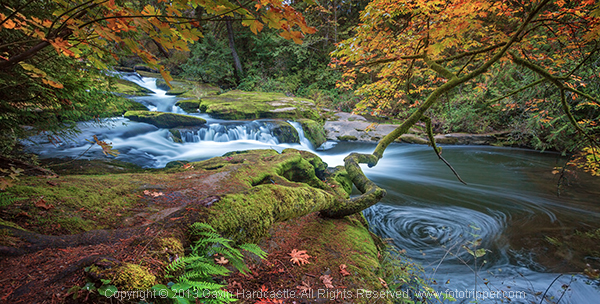
4 – Bubbles turn into spirals
Whenever you see a river that produces a current of bubbles on the surface of the water, you’re in for a treat. With a shutter speed of four to six seconds (depending on water speed) those bubbles will create beautiful spirals in your long exposures. Be careful not to slow things down too much though as a ten second shutter speed will probably blur the motion too much to capture any definition. Here’s an example I shot last fall in Nanaimo, Vancouver island.
5 – Slap that polarizer on
I know I harp on about this all the time as you’ve no doubt read in my ‘Why You Must Use a Polarizer‘ article, but it really does make a huge difference when you’re dealing with wet rocks and reflections caused by water. Your polarizer will allow you to use longer shutter speeds, reduce reflections and make your colours POP!
6 – Avoid the sky
Do you really need a white triangle at the top of your image? Didn’t think so. Almost all of my workshop students suffer from some compulsion that dictates all images must have sky. I think I did the same thing when I was starting out. By omitting the sky completely, you’ll create a more intimate scene that dedicates the entire frame to what matters most and eliminates the triangle of pointlessness.
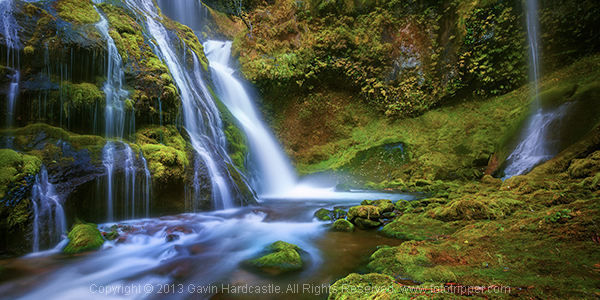
7 – Go abstract
This is where you will have an advantage if you don’t have a full frame sensor camera. Rather than trying to fit the entire scene into your frame, it often pays to hone in on a smaller area of a waterfall or creek which removes the viewers sense of scale and direction.
Instead of a river flowing over some rocks and tree stumps, you’ll create an abstract scene of natural beauty that hypnotizes the viewer with an atmospheric study in motion and colour. Just like removing the sky, omitting the top and bottom of a waterfall from our frame leaves room for imagination.
8 – Perfect the “shoot ‘n swipe” technique
I’m not going to lie to you, shooting waterfalls, creeks and streams WILL result in a wet lens. When dealing with the spray from waterfalls, you’ll need to practice and perfect the “Shoot ‘n Swipe” method that requires a measure of patience. To do this well you’ll need a ball head with just ONE position clamp. If you’re rocking one of those ‘many handled’ tripods that look more like a tower crane control panel, forget it. Here’s how it works.
- Compose your shot and dial in all your camera settings to capture the shot. By now your lens will be well coated in spray from the airborne water particles of your waterfall.
- With everything perfectly in place and all setup, unwind the ball heads position clamp and point your camera to the floor, being careful only to allow vertical movement.
- Using a good quality lens cloth, wipe the lens thoroughly to remove the spray. If you have a filter in place be sure to rub in the opposite direction to the filter thread of you’ll be picking that filter up off the floor.
- Once dried, unwind the position clamp on the ball head, lift up the camera back into its previous position for your composition, tighten the clamp and take the shot. You’ll only get a few seconds before you’ll be all fogged up again.
Repeat this procedure until you get a shot that doesn’t have a fogged or water splattered lens. You have now perfected the “Shoot ‘n Swipe” technique (Patent Pending)
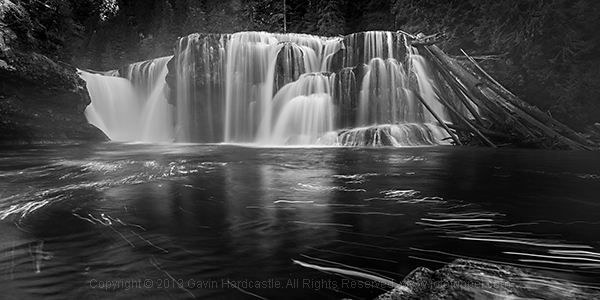
9 – Processing – go monochrome
Sometimes it’s nice to convert images of moving water to black and white because often they feature a lot of white. If you find that your waterfall, river or stream shot is lacking punch because of boring light and a lack of colour in the scene, try converting it to black and white then get freaky with the Curves slider in Adobe Camera Raw to pop the contrast. Nice.
So there you have it, all you need to get out there and capture some lovely images of waterfalls, creeks, rivers and streams. Get creative and don’t be afraid of wet weather, just be careful on those slippery rocks.
The post 9 Top Tips for Shooting Waterfalls, Creeks and Streams by Gavin Hardcastle appeared first on Digital Photography School.

Digital Photography School


You must be logged in to post a comment.