RSS
 

Posts Tagged ‘STORY’

Get the story behind the photograph

08 Apr

12894623965_c2d95f47ef_o.jpg

Most photographs – especially photojournalistic work – exist in a void with little insight from the photographer that captured the image and what they were trying to achieve. ‘The Image, Deconstructed’ looks to turn this around. The website provides interviews with photographers, asking them about their techniques, their gear, their preparation, and their mindsets when they photograph. Learn more

News: Digital Photography Review (dpreview.com)

 
Comments Off on Get the story behind the photograph

Posted in Uncategorized


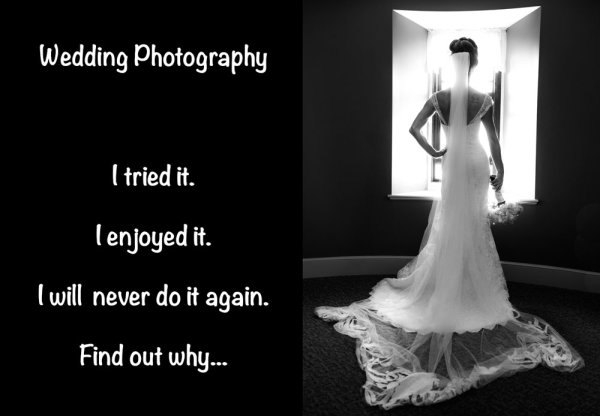
The Story of Photographing my First Wedding also Likely my Last

20 Mar

There’s really no question that wedding photography is one of the most common forms of professional photography and if you’ve recently become the owner of a DSLR odds are sooner or later someone you know might ask you to photograph their wedding. Though this might be a tempting offer, I want you to think long and hard before saying yes, because photographing a wedding is a lot more than pointing a camera and capturing the moments. To help drive home this point I’m telling a bit of a story today.

weddingalt

My story is about why, even though photographing this wedding was the best experience of my photography life, I more than likely won’t be photographing another wedding anytime soon.

I don’t want you to think that I’m here to tell you that it’s a bad idea to get into wedding photography, or even that my first (and last) time as a wedding photographer was a bad experience. Neither of these are the case – in fact I quite enjoyed photographing this wedding, but there are some things that I learned about myself which would make me hesitate if I were asked to do it again.

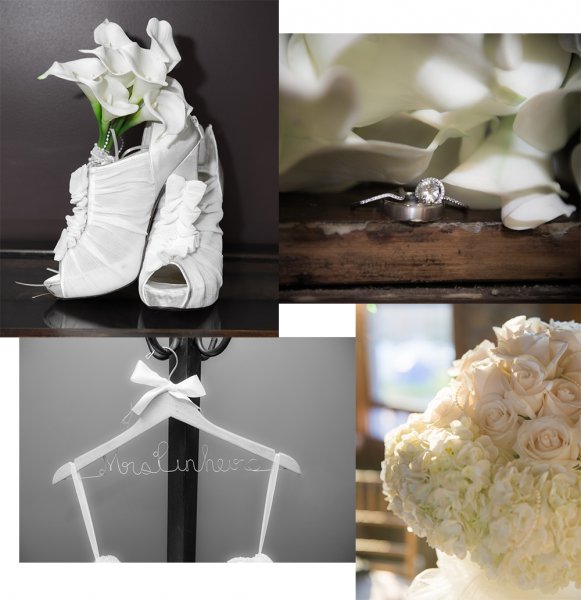
SneakPeak1

First some background

Like most new photographers these days I created a website, set up a Facebook page, and started sharing my photos on a daily basis. Over time I noticed that my page was growing with not only my immediate friends, but friends of friends, and even people I didn’t know – I guess you could say I started attracting a following.

After a couple of years of sharing landscape and wildlife shots from around the New England area, one of my sister’s friends reached out to me and asked if I’d photograph her wedding.

My first instinct was to say “I’m not a wedding photographer – why are you asking me?”. So I sort of brushed it off as a random thing, but she insisted that she liked my style and wanted to work with someone she knew and trusted. If there’s anything to my credit – I’ve always been a hard worker. So, as this post requires that I photograph a wedding, you probably won’t be surprised to hear that I eventually did commit to the job.

Months of preparation

And I mean months!

The bride-to-be was extremely organized and prepared, having everything booked months in advance – in fact – the photographer was one of her last jobs to tackle. After accepting the job I had nearly a full year to learn as much as I could about photographing weddings and that’s exactly what I did. This three part series here on dPS: Wedding Photography 101 (Part 1), Wedding Photography 101 (Part 2), Wedding Photography 101 (Part 3) should be on every prospective wedding photographer’s reading list. But a quick search for “wedding photography” on dPS will yield dozens of other great reads.

SneakPeak5

However, all the reading that I was doing, really couldn’t prepare me for the real thing. Emotions, stress, time crunch, uncontrollable problems, and anything else that you can pack into the ten hour day – you simply can’t read that, so I enlisted the help of a professional. I reached out to a local photographer, who worked closely with a friend of mine, and he was kind enough to allow me to shadow him, and even second shoot for him on a couple of occasions.

This experience gave me a huge boost of confidence going into the event, and I highly recommend reaching out to your own local wedding photographers prior to photographing a wedding on your own for the first time. The experience is priceless.

The final bit of preparation was gear related – I was being paid for this shoot and as a landscape/wildlife photographer my ultra-wide angle and telephoto zooms were not ideal for the task at hand. So I spent a little of the money that I was paid for the wedding to rent a second camera (you can never be too prepared) and a 24-70mm f/2.8 lens which would be my workhorse for the night.

The wedding was a success

Due to my preparation and my commitment to wanting to provide the best possible photographs that my ability would allow, I’d say the wedding was a success. The bride and groom got photos that they will enjoy for the rest of their lives and I learned more than I could ever have imagined in a very short amount of time.

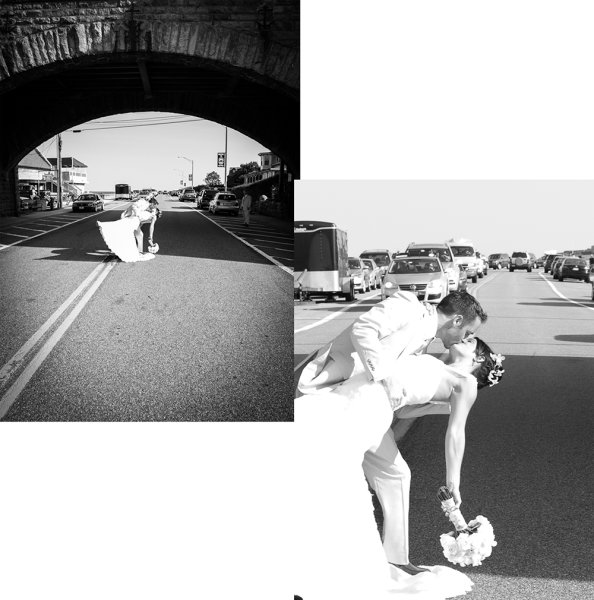
SneakPeak4

The day of the wedding I was at my wits end, running on pretty much pure adrenaline at that point. I had a list of ‘must have shots’ which I was able to check off throughout the day and night. It’s hard to imagine that the event lasted as long as it did, as it all went by so quickly, with barely a break for food or drink. All said and done, I left the reception after the last dance feeling confident that I had done the best that I could. So why never again?

Why I won’t photograph another wedding

There’s no question that this was a valuable experience. I learned more about myself as a photographer photographing this wedding than I had in the nearly 3 years of photographing landscapes, but I’d also learned that it wasn’t for me. I enjoy the peace and quite of nature and the ability to go back to the same location to fine tune the shot over a period of time and lighting conditions. Weddings are a one shot deal – you get the light you get – you get the weather you get, and you get one shot to make it happen.

You have to be a people person – something I am not. Going around to get various people that I didn’t know together for photographs was hard enough when there were actually a handful of people that I did know at this wedding (sister’s friend remember?). I don’t think that I could do this on my own, without help, and without a lot more practice. So I urge anyone who’s thinking about photographing a wedding to not take it lightly. It’s an important day for a lot of people – not just the bride and groom – but their parents, extended family, and friends will want to remember this day as well so you MUST get it right.

The moral of this story is that wedding photography can be a very rewarding experience, but you have got to put the work into it. If you are thinking to yourself that it will be an easy job – think again. Oh and please – don’t ever do this for free – being paid to shoot this wedding was what motivated me to find help, rent gear, drive to their location and process hundreds of photos – the experience was a bonus.

Some stats from the wedding

  • hours shot from start to finish on the day – 10 hours
  • number of images shot total – 1500
  • number of images given to the couple – 500
  • how long it took to edit it – approximately 5-6 hours
  • number of hours estimated spent preparing: time with other photographer, etc –  Dozens and dozens of hours of prep time between reading articles and spending time with this mentor photographer I would say easily 50 hours or more went into the prep.

Equipment used to shoot the wedding

  • camera bodies:  rental D600 and my own D7000 as backup
  • lenses:  rented the 24-70 f/2.8 (pretty much used for the entire event) also had my 55-300mm Nikon & 11-16mm Tokina, and a 50mm prime on my D7000 for odds and ends shots
  • flash:  Nikon SB700
  • light modifiers like umbrellas or reflectors – none
  • tripod:  had my Manfrotto 190XBPRO with me but rarely used it
  • other:  nothing else, But Jim (my mentor of sorts) told me that if I were to get into this that it’s a good idea to stock up on things like needles, various threads, safety pins, tape, Advil, Aspirin, Tylenol, scissors, and so much other stuff – not really for you, but you’ll be the hero of the wedding if you pull something the bride needs out of your magic bag of tricks

Editors note: 

Having done somewhere in the neighbourhood of 250 weddings in my time, I can concur that everything John has said is absolutely true, and some of the same advice I give people considering doing one for the first time. Being prepared is the number one thing I can say also. I remember wanting to throw up the entire first year I did weddings, the pressure is THAT intense. These are people’s memories and not something to take lightly. I too, like John’s mentor did carry such an emergency kit and can tell you I’ve used deodorant, men’s black socks, nylons, clear nail polish to stop runs in nylons, safety pins, After Bite for bug bites, Visine, allergy meds, Stain remover (get the stick, takes grease right out of a wedding gown), nail glue, bug spray, sunscreen,  and more. John gives great advice from his experience – heed it well.

The post The Story of Photographing my First Wedding also Likely my Last by John Davenport appeared first on Digital Photography School.


Digital Photography School

 
Comments Off on The Story of Photographing my First Wedding also Likely my Last

Posted in Photography


Confluence of Wildlife and Man – A Story from the South Platte River

23 Feb

I was looking at paintings by Nancy Rynes, a Colorado artist. I like her texture series and, especially, the picture called “Confluence”. Two red hawks sitting on a wall covered by graffiti. For me the confluence means here the coming together of wildlife and man made objects. It reminds me an old story from the South Platte River paddling – encounter of a young eagle sitting on old trashed car.

I really hated those cars from 1950s and 1960s when I started to paddle the South Platte River years ago. Then, having no choice, I accepted them and started to photograph them. At least they were put into the river for a reason – to protect river banks. It seems that wildlife is accepting them too.

Car Photography Session on the South Platte River
South Platte River – Another View or How to Photograph the River?

Here is my eagle story originally posted in 2007.

October 15 was my first day on the South Platte River in the fall/winter paddling season of 2007. I paddled upstream from Kersey in the Thunderbolt kayak. After exploring the Lone Tree Creek I paddled back down river to Kersey. It was just before sunset when I decided to shoot some pictures of old cars dumped there to protect river banks.

I squeezed my kayak into some standing backwater and started shooting. I didn’t notice anything unusual, but I did sense somebody’s presence …


bald eagle South Platte River

eaglet bald eagle south platte river kayak Colorado

Not farther from me than a length of my kayak there was an old truck and a young eagle was sitting on the top of it. I kept shooting my pictures. However, looking at a beak and powerful talons, I didn’t feel very comfortable balancing my tippy kayak in the front of that chick. Judging from the time stamps in my pictures I spent 12 minutes there. During that time the eaglet did not make the slightest movement.

I wished I had a better camera than my Pentax Optio W10. It was getting dark, so I backed up leaving the eagle on his truck.

I have seen adult bald eagles many times during my paddling on the South Platte, but it was the closest and most exciting encounter. As a first guess I assumed that I saw a juvenile bald eagle. After searching internet it seems that it is quite difficult to distinguish between immature bald and golden eagles. Some comments I got indicate that it was the golden eagle. So, who is that chick?

Breeding Bald Eagles in Colorado

… from the Center for Biological Diversity:

Bald eagles commonly nested in and around Rocky Mountain National Park as late as the 1950s (117). By 1974, just one pair remained in the state (93). The population remained perilously low through the 1970s and 1980s, began growing in 1986 and reached a peak of approximately 65 pairs in 2006 (2, 69, 93, 96). One-third of Colorado’s nesting bald eagles occur east of the Continental Divide in the South Platte River watershed (115). Other breeding concentrations include the Yampa River upstream of Craig, the White River in the vicinity of Meeker, the Colorado River upstream of Kremmling, and La Plata and Montezuma counties.

Bald Eagle – Nesting & Young from American Bald Eagle Information.

Other bird stories and pictures:

Do Wild Turkey Swim? A Photo Story of White Water Turkey Hen for Thanksgiving
Are My Paddlings Days Over?
Blue Heron – Bird Photography from a Racing Kayak with Pentax Optio W10 Camera?
From the Love Life of Canada Goose in My Paddling Pond: Rivals or Mates?


paddling with a camera

 
Comments Off on Confluence of Wildlife and Man – A Story from the South Platte River

Posted in Photography


If You Build It: A True Story of Hands-On Design Education

23 Feb

[ By WebUrbanist in Architecture & Public & Institutional. ]

design build project movie

What if high schools replaced shop classes with results-driven, full-scale architectural projects, where the goal was to collaborate and make something substantial for the entire community? If it sounds idealistic, perhaps it is – the reality on the ground can be full of setbacks and surprises, as this film illustrates in evocative detail. The title of the documentary in perhaps intentionally open-ended, because, unlike the phrase’s cinematic inspiration (Field of Dreams), what will happen if you build something is never quite clear until you try.

Directed by Patrick Creado, If You Built It is the compelling story of a one-year design/build program set in a small American town – a story that is both inspirational and heartbreaking. Its protagonist teachers are enthusiastic visionaries who are exceptionally driven. Its director shows these strengths but is unafraid to also highlight their steep learning curve, right alongside that of the students, who struggle at first to understand what two outsiders want to teach them and why.

design build movie poster

Studio H, a collaboration of designers/builders Emily Pilloton and Matthew Miller, is named for its focus on “humanity, habitats, health and happiness”. Its mission is born of a noble desire to enable people to change where, how and how well they live, all through design.

design build model making

Of course, working with a community as outsiders is challenging, as this pair learned when they moved to Bertie County, North Carolina, for the first year of their program. Their mission: to start small and build up to a student-decided project for the community, which turns out to be a farmer’s market inspired by contextual farm architecture.

design build studio h

In the press, idealized renderings and carefully-staged architectural photographs often gloss over the gritty reality of designing and building projects, as well as the slow change in thinking that comes with learning to design. Likewise, a look at highly-funded architectural programs and never-to-be-built college-student projects can make it easy to forget we have an opportunities to educate high school students everywhere through designing to build.

design build construction collaboration

For anyone not educated in design, this movie provides  a unique window into how it can be taught and how understanding design processes can help us see unrealized possibilities in our everyday lives and built environments. For the broader public, the documentary also provides fascinating insights into the present and uncertain future of rural America.

design building process outdoors

In the end, the film is neither a tale of outright success or total failure, but it does show how even the best intentions may not work in every situation. In a key flashback, we are shown scenes of a home built for charity by Miller as a thesis project that ultimately failed in practice but also provided him critical real-world feedback on projects where the owner is just a passive recipient. Anyone interested in the intersection of architecture and education should watch If You Build It and sign up for screenings to share it with students.

rural design farmers market

design build project results

A synopsis: “IF YOU BUILD IT follows designer-activists Emily Pilloton and Matthew Miller to rural Bertie County, the poorest in North Carolina, where they work with local high school students to help transform both their community and their lives. Living on credit and grant money and fighting a change-resistant school board, Pilloton and Miller lead their students through a year-long, full-scale design and build project that does much more than just teach basic construction skills: it shows ten teenagers the power of design-thinking to re-invent not just their town but their own sense of what’s possible.”

Share on Facebook


[ By WebUrbanist in Architecture & Public & Institutional. ]

[ WebUrbanist | Archives | Galleries | Privacy | TOS ]


WebUrbanist

 
Comments Off on If You Build It: A True Story of Hands-On Design Education

Posted in Creativity


Create Powerful Silhouettes by Telling a Story

06 Feb

Create Powerful Silhouettes by Telling a Story

Telling the Story

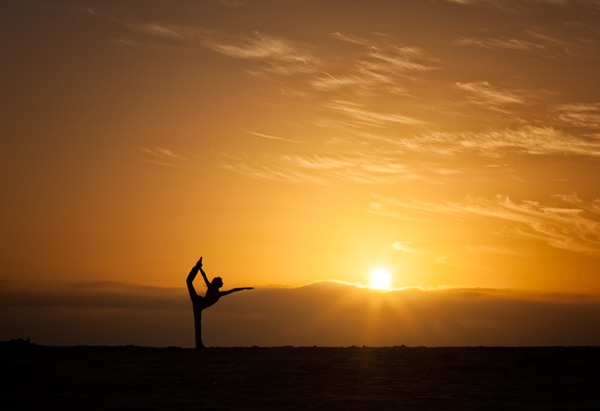
Silhouettes remove all the distractions and clutter in the scene and distill the image down to its most basic, this is why the story is so important. Just using shapes you must make a photo that is recognizable, and that the viewer can relate to. While this sounds easy in practice, it can be difficult to achieve. You must have the right elements. The light needs to be in the right location, the subject needs to be facing the right way, and they need to be in a pose that makes their action recognizable.

Silhouette 1

Movement by the subject helps tell a strong story in your silhouettes

Tips for creating good silhouettes that tell a story

Clean outlines

If you have multiple objects that are back-lit you want to make sure there is separation between the objects so that each one is distinct and recognizable.

Profiles or straight on shots work well

For people, profiles or straight on shots work best. For profiles you should be able to clearly make out the shape of the nose and chin on their face. For straight on shots the subject’s arms should be away from their body, and their legs parted so you can see both legs and not just a single blob. Recognizable shapes – this is important for every silhouette.

Capturing action

Movement in your subject can create strong lines and positions that are instantly recognized by the viewer and help convey the story of what the subject is doing.

Props

Silhouette 2

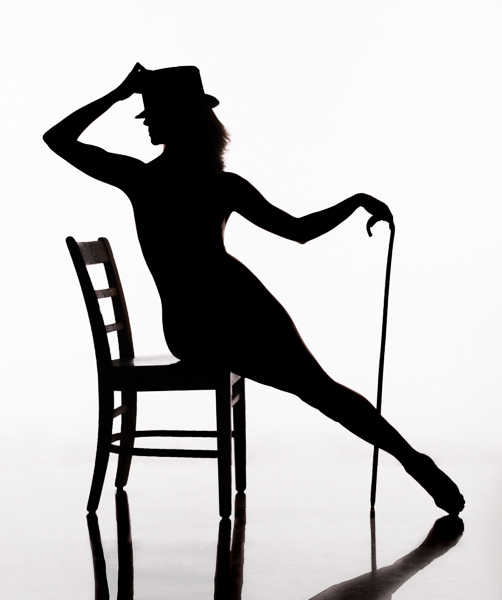
The added hat and cane help enhance the story in this image

Props can help tell the story, an outline of a flower, a tip of a hat can add meaning to the image.

Interaction between subjects

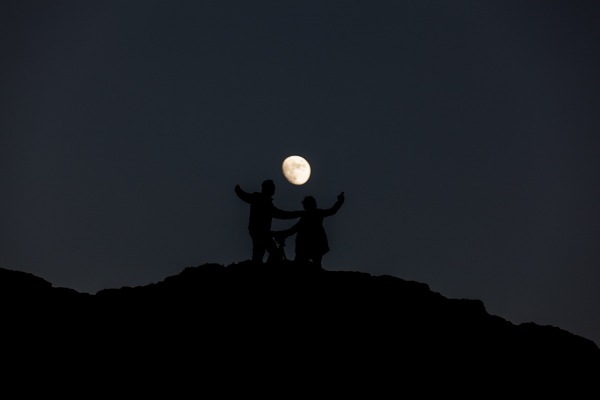
Having multiple subjects can be challenging because you want to minimize overlap of their shapes so they each maintain their own identity. There is a balance between telling the story and having the subjects interact in a minimal way. For example holding hands or kissing often work well, but a hug results in silhouette that is just a big black blob.

Silhouette 3

Separation between subjects is important. This image would be stronger if the man’s leg did not merge with the camera and tripod

Lighting for Silhouettes

To light a silhouette you need to light the subject from behind. The type of light is not important; it can be natural or artificial and can be direct or indirect. The important thing is that the lighting is behind the subject, and the subject is not lit. Technically silhouetting occurs when you have a lighting ratio of 16:1 or greater (4 stops), however I will describe how you can create a silhouette in post-production using lower lighting ratios.

Natural Silhouette Lighting

One of the most common types of silhouettes using natural lighting is to place the subject between the camera and the setting sun or moon. Your camera exposure should be set for the background lighting, either the sunset or moon, and this will cause the subject to appear black against the light background. Another common technique is to use the light reflected off of a wall or the side of a building.

Silhouette 4

This lighted wall in Las Vegas provides great back-lighting for silhouettes

Studio Silhouette Lighting

There are two common techniques for creating silhouettes using studio strobes. The first is to use a white background and bounce the strobes off the background. The second is to point the strobes towards the camera and place the subject between the strobes and the camera. This second technique can also produce a light flare in the image which can give an interesting effect.

Post-processing techniques

Silhouette 5

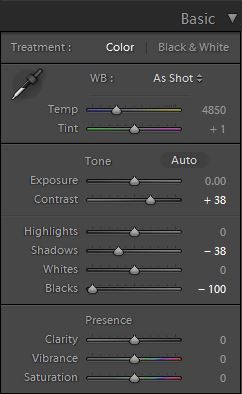
If you have a backlit subject, but can still see some detail in the subject you can often make it a pure silhouette in Lightroom, or Camera RAW. Use the develop module in Lightroom and adjust the Contrast, Highlights, Shadows, and Blacks sliders. Use different combinations to darken the subject. Typically you will need to increase Contrast and decrease one, or all of the other three sliders. Either the Shadow or Blacks slider should be set to -100, try both to see which produces the desired effect. Decreasing Highlights is typically only necessary if the edges of the subject are lit and you wish to make them darker.

Conclusion

Silhouettes are a fun and easy to do and by concentrating on the story being told you can create an image that has impact.

Want more silhouettes?

  • 5 tips for photography silhouettes (non-human subjects)
  • How to photograph silhouettes in 8 easy steps
  • 12 stunning silhouettes
  • Great B/W silhouette images

The post Create Powerful Silhouettes by Telling a Story by Craig Colvin appeared first on Digital Photography School.


Digital Photography School

 
Comments Off on Create Powerful Silhouettes by Telling a Story

Posted in Photography


Canon shows off new PowerShot N100 ‘Story Camera’

06 Jan

PowerShot_N100_White_06.png

CES 2014: Canon has announced the PowerShot N100, which it’s calling a ‘Story Camera’. The feature that gives it this moniker is its rear-facing camera, which captures an image of the photographer at the moment the shutter is released (this works for stills and video). The photo or video from the rear camera is then put into one of the corners of the image that was taken. Photo quality should be a strong point, as the N100 uses the same lens and sensor as the PowerShot S120. Other features include a 3-inch LCD that tilts upward by 180 degrees, 1080/60p video recording, and Wi-Fi with NFC.

News: Digital Photography Review (dpreview.com)

 
Comments Off on Canon shows off new PowerShot N100 ‘Story Camera’

Posted in Uncategorized


How I Shot It: Deanne Fitzmaurice Shares the Story Behind the Shot

20 Sep

A post by Pulitzer Prize winning documentary photographer Deanne Fitzmaurice. Presenter in this week’s CreativeLIVE Photo Week

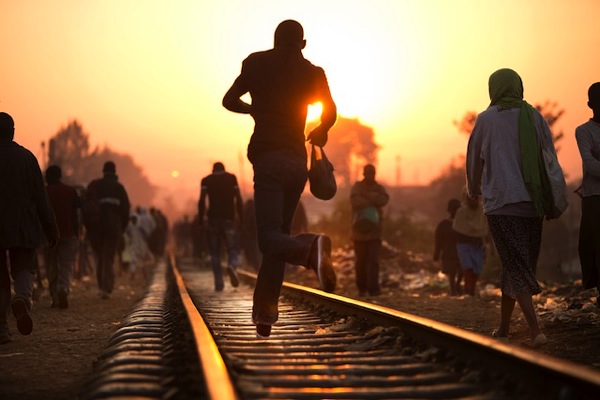
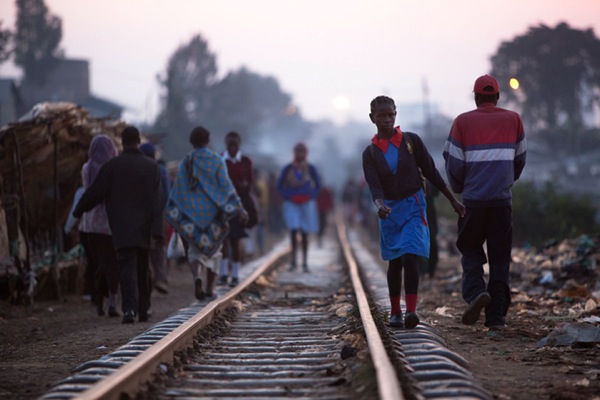
Kibera Tracks

So there I was, waiting in the quiet darkness that precedes Kibera’s beautiful sunrises, for the 12 disciples — our security team from a local tribal gang. They were the type of guys you want by your side and the definition of the guys you didn’t want to cross. Despite the high crime and desperation in Kibera, when any of those 12 guys were by my side, I felt safe and free to photograph as much as I wanted without having to look over my shoulder.

At the time of my visit, Kibera wasn’t just the largest slum in Kenya, it was, and as far as I know, still is, the largest slum in Africa. With two and a half weeks in the slum for our shoot, the crew and I had some time — which is really valuable in documentary photography work – time to research, time to talk to locals, time to scout locations, and time to return to promising locations. During our time observing the community, we discovered there was an exodus early in the morning, as many residents of Kibera left to go to work in local factories to earn meager wages.

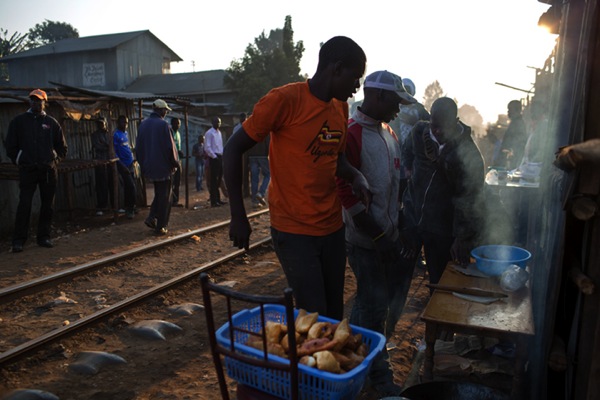
Always thinking about strong storytelling visuals, we thought it was a good opportunity to get some footage and images of this mass daily evacuation. The early-rising Kiberans used the railroad tracks as a main thoroughfare, and there were little shops alongside the tracks and vendors serving food. We wanted to shoot at sunrise with the hope of catching that beautiful, golden light.

On this early morning, I was shooting both stills and motion, trying to capture the mood and the feel of this unique place. I knew that shortly after the sun came up at 6:45am, the local train was scheduled to come through. I always try to position myself and my camera where there are the best odds of making a good image.

D3 8634

I started building the photograph in my head, working on the things I could control, and let everything else go to chance. I saw some vendors cooking some ugali, a cornmeal bread, causing smoke to rise from the cooking. I thought if I shot backlit, the smoke would help capture the mood of what I was seeing. I was also keenly aware that shooting into the sun can work either for you or against you.

D3 8877

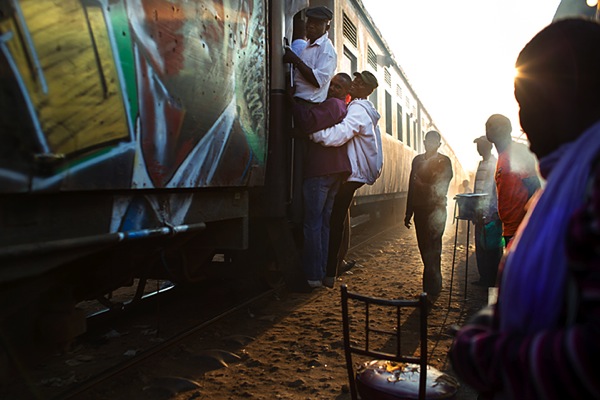
I moved in closer to where the smoke was rising so I had two contrasting elements, the sunrise and the smoke. I heard the train approaching and the masses of people started to rush to get off the tracks and onto the train.

My third element was the train. The only subject left to chance at this point was the people. I didn’t know where they would be or what they would be doing, but I knew I had all three other elements of the composition locked in. This is the fun part for me, in all of my work; when I build the composition and wait to see if I am going to get lucky.

My favourite was this image where three guys jumped up onto the train at the last minute as a starburst began to peek through. The smoke lends nice depth and layers to the photograph and the train was splattered with graffiti, adding a burst of color.

D3 8947

What Gear Did I Use?

I shot these photos with manual settings on a Canon 5D MKIII with a 35mm f1.4 shot at 1/500th at f2.8, ISO 200. I was carrying my equipment in a Think Tank Change Up convertible belt pack/shoulder/ bag and a Think Tank Shape shifter backpack. For the video I was using a Zacuto z-finder, a Zacuto Target rig and a 3 Legged Thing tripod.

To find out more about Deanne and her photography tips, catch her free course during creativeLIVE’s Photo Week

Deanne Fitzmaurice is a Pulitzer Prize winning documentary photographer and multimedia storyteller based in San Francisco, California. She is a regular contributor to Sports Illustrated and ESPN the Magazine, and has also been published in TIME, Newsweek, The Economist, Stern, and GEO. Deanne has also partnered with foundations and non-profits including NPR, The Bill and Melinda Gates Foundation, and the James Irvine Foundation.

Post originally from: Digital Photography Tips.

Check out our more Photography Tips at Photography Tips for Beginners, Portrait Photography Tips and Wedding Photography Tips.

How I Shot It: Deanne Fitzmaurice Shares the Story Behind the Shot


Digital Photography School

 
Comments Off on How I Shot It: Deanne Fitzmaurice Shares the Story Behind the Shot

Posted in Photography


End Of The Story: 12 Abandoned & Forgotten Bookmobiles

28 Jul

[ By Steve in Drawing & Digital. ]

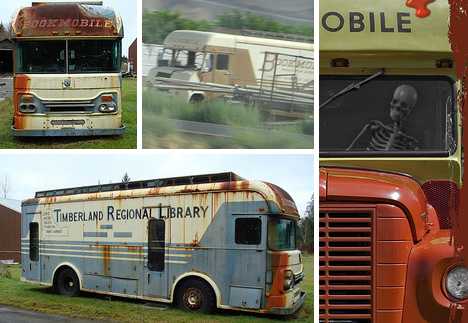
abandoned bookmobiles
Remember bookmobiles? Bookmobiles were bus-like rolling libraries that brought the joy of reading to folks who didn’t have easy access to books. Remember books?

To The Bookmobile!

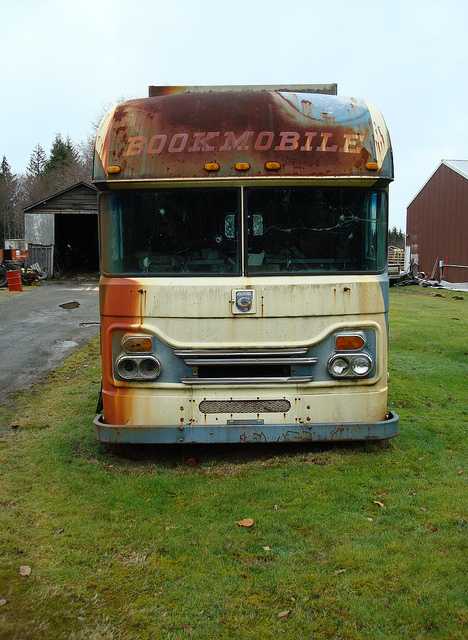
Washington State Library abandoned bookmobile (image via: Washington State Library)

The first bookmobiles were horse-drawn “perambulating libraries” that plied the rough & rudimentary rural roads of 1850′s England. By the early years of the 20th century traveling book-wagons began to visit isolated farming towns in the United States. The People’s Free Library of Chester County, South Carolina operated one of the first American bookmobiles, essentially a mule-drawn wagon modified to carry wooden-shelved boxes of books.

The automotive age provided a huge boon for bookmobiles, adding greatly to their size, speed and the distances they could travel. The abandoned mid-century bookmobile above, quietly rusting in peace just south of Amanda Park, Washington, epitomizes the apex of bookmobile design from a bright future whose time seems to have passed.

Checked Out, Won’t Be Returned

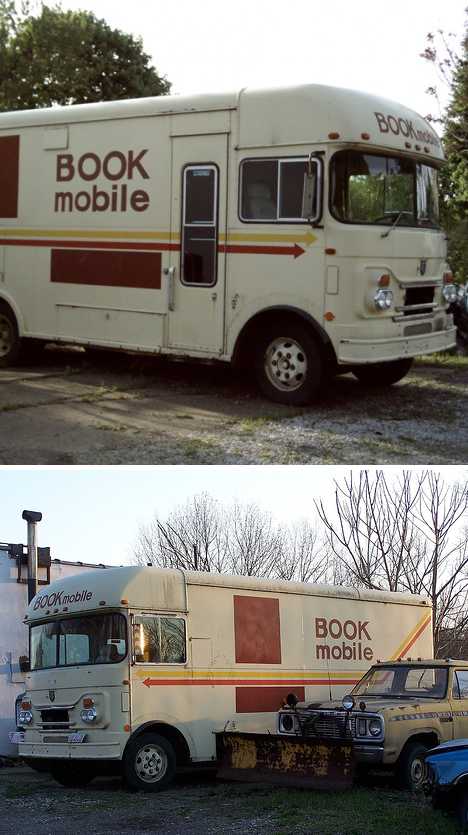
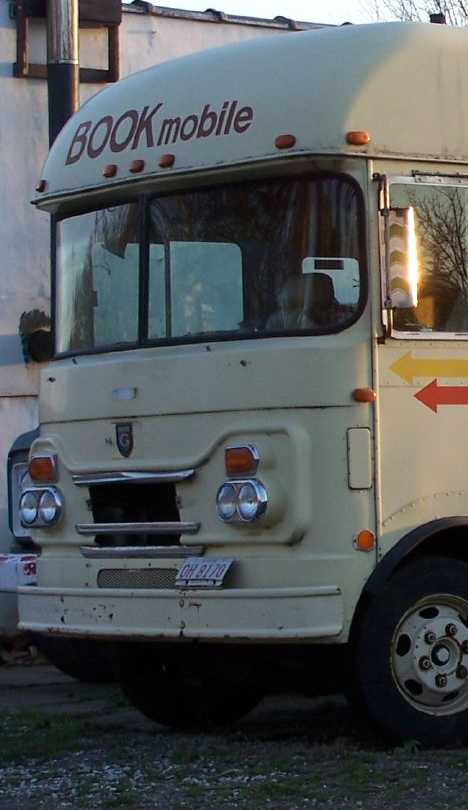
abandoned bookmobile Kent Ohio(images via: Wired and Roger Cross)

Displaying a strong Seventies earthtone vibe, this mid-sized bookmobile from Kent, Ohio looks to have made its final run and now awaits an uncertain future. Though still a useful tool for school districts and public libraries, the rise of the internet has negatively affected demand for bookmobiles these days. Older, less fuel-efficient bookmobiles that have been around the block more than a few times find themselves especially on the outs.

abandoned bookmobile Kent Ohio(image via: Roger Cross)

Kudos to Flickr user Roger Cross for capturing this somewhat sad bookmobile whiling away its sunset years, coincidentally at sunset. It’s a good thing he had his camera with him at the time, too, for as Cross relates: “As of this last weekend, 3 May 09, this bookmobile is no longer at this location in Kent OH.”

My Bookmobile, My Home

1953 abandoned bookmobile RV conversion (images via: Big Barkoz Speed Shop)

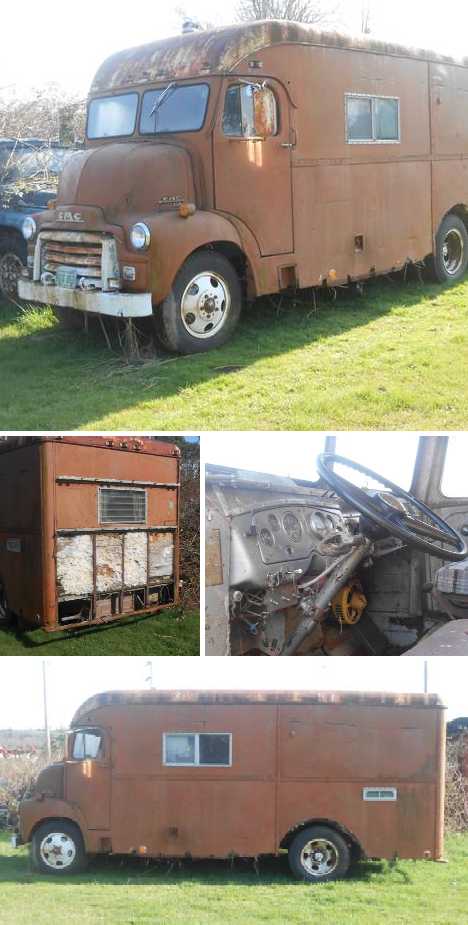
Now here’s a real fixer-upper: a 1953 GMC cab-over bookmobile that was converted to a motor home over 30 years ago. In its free & easy bookmobile days, the Kitsap County Public Library operated it in the Crystal Mountain area twice monthly while organizing longer distance expeditions around Washington State during the summer. Factory equipped with a straight 6 engine and a 4-speed manual transmission, this beast must have been a handful on frosty mornings high in the Cascades!

Next Page:
End Of The Story 12 Abandoned Forgotten Bookmobiles

Share on Facebook


[ By Steve in Drawing & Digital. ]

[ WebUrbanist | Archives | Galleries | Privacy | TOS ]


WebUrbanist

 
Comments Off on End Of The Story: 12 Abandoned & Forgotten Bookmobiles

Posted in Creativity


5 Ways to Strengthen the Message and Story of Your Photographs

12 Jul

A Guest Post by Sergey Sus/

Photographers decide what is in the frame and what is not. We cant always control every single item the frame. We can however, control of position relative to the subject and when we press the shutter button. Here are 5 ways to to improve our photographs.

Obvious Subject

Ways 1

Our brains analyze what the eye sees instantly. The subject and story of a photograph must be identified quickly by the viewer. If the viewer cant figure out what the subject is…. all interest is lost.

Brightest

Our depth perception of a photograph creates a 3D effect. The brighter objects appear nearer, darker objects recede further back. If the subject is ‘near’ to the viewer it has to be brighter then the rest of the frame. Dodging in post processing accentuates the subject while burning recedes.

Sharpness

Ways 2

Human brain focuses on sharp items in a photograph next. Photos with shallow depth of field are so pleasing to our eyes – we dont need to search for a subject as its the only sharpest part of the photo.

Size

The largest item in a photo – and our eyes go straight to it as we begin to ‘digest’ the photo. It is possible to have the subject as the smallest item in the picture, what then? Make it the sharpest and brightest!

Color

Ways 3

The 3 primary colors Red, Green and Blue – the colors which are noticed first. When photographing people outside in a park – get as little of the 3 primary colors in the frame. Sounds easy? Well, when in a park green and blue are unavoidable. If those colors are minimized and then desaturated in post the subject will stand out more in the final photograph.

Sergey Sus is a Los Angeles based photographer telling telling real stories, individual, professional and family. Problem solver, artist and teacher. His work can be found on http://www.sergeys.us/.

Post originally from: Digital Photography Tips.

Check out our more Photography Tips at Photography Tips for Beginners, Portrait Photography Tips and Wedding Photography Tips.

5 Ways to Strengthen the Message and Story of Your Photographs


Digital Photography School

 
Comments Off on 5 Ways to Strengthen the Message and Story of Your Photographs

Posted in Photography


The Secret of Creating a Strong Image – 5 Tips for Creating a Story in Your Image

18 Apr

Article and photos by Oded wagenstein.

In an era when we are drowning in images and lots of people and talents are competing for the viewers’ eyes or the magazines’ attention, have you ever wondered what makes you have a longer look at an image?

Is it the person that was photographed? Perhaps a certain color or an angle?

What is the secret of the photographers that mange to get their work published on magazines and newspapers? What is the secret of taking a strong image that lasts?

1.jpg

The secret of all strong images is their ability to provide the viewer a story .

Since the dawn of time, People gathered around the fire and shared stories with each other.

It doesn’t matter what subjects you like to shoot. If you want to become a good photographer, you have to be a good storyteller first. An image with a story, one that evokes emotion and curiosity will rise above other images and catch the viewer’s attention.

So what is the stuff of which “visual stories” are made from?

In most cases it is an emotion that the image creates. It can be empathy, curiosity or even negative emotions such is anger.

Even if you are dealing with macro or landscape photography it is better to have an image that tells a story. However, the best way for me to get a story is with people photography, as people are a large “pool” of stories and emotions.

Here are 5 tips for finding your “visual story” in Travel photography before departure, and on the road:

1. Preparation needed

The thing that makes the difference between an amateur and a professional in almost every field is usually preparation.

A professional photographer will start working even before leaving home, while an amateur photographer will wait for things to happen in front of their eyes in the field. Professionals will gather information that will help them exceed the potential of getting those photogenic stories on the road in minimum time and by doing so, increase the amount of good strong images.

2.jpg

What are the things that are worth checking before going to shot on a trip for example? Here are some classic examples:

Will there be any festival or photogenic event during your stay? Festivals are a great place for finding stories. Is there any taboo related to photography or culture in general in the country you are going to visit, that you must know? For example, the hill tribes that can be found on the mountains of Asia (as the woman from the Karen tribe in photo number 2) mostly believe that taking their photo would also take their soul. And trust me, the custom officers in your home country would not like the “soul” attached to your camera.

The best thing you can do to get this kind of information is to get the advice of a photographer who has already been there. Online photography forums would love to help you with that.

Want to take your photography to the next step? – Take a journey deeper into the place and read a little bit about the culture and history, prior to arrival.

The best tip someone has given me is to learn a few words of the local language. Locals appreciate people who try to speak their language (even if they laugh at them a bit at first)

Learning “Hello”, “Thank you” and ” may I take your photo?” will do wonders to your story telling images.

2. Getting closer

3.jpg

Taking photos of people from a distance with telephoto lens may be safer and will not ruin the spontaneity of the story, but there’s nothing like the narrative and emotional quality of close-ups in people photography.

Sometimes I want to photograph people from just a few inches away and still keep the spontaneity and intimacy.

What do I do? – I look for this moment in which the person returns to routine activity, after creating a bit of a connection with them and letting them understand that my camera and I don’t have any bad intentions.

I never approach people while the camera is hanging from my neck. It is threatening and may result in negative responses from the locals.

After greeting the person (in their language) I sit with them for a while, let them get used to my camera and me and only later I begin taking photos

Never ever forget- people don’t like to feel they are on a show for you. Always treat them with respect. The best way to do so is with the help of a local. So go to the next Section

3. Best ice breaker

4.jpg

Professional photographers use a fixer, which is a local who knows their needs as photographers and helps them to get around.

You can use a fixer, but you can also find your “fixer” in a much more interesting way and for free, in most cases. You can connect with local at your age in advance to your visit on the basis of “culture exchange”. The local will help you get to the best places and will also recommend which places to avoid. They will speak for you in their local language and will be the best “ice breaker”. All you have to do is be polite but it won’t hurt to bring your host something for your own country, like postcards or a unique product related to your place.

If you can find a photography student to be your fixer, it can be an exciting experience for both of you.

Hanging with a local as a friend or with a professional fixer does not give exemption from the previous section of “getting closer”.

4. The Stories generators

5.jpg

Feeling lost? Feeling unpleased with the photos you took? You can always try to visit a “story generator”. It can be anywhere that people Gather: a market, a central square or a festival. Just be alert and keep your eyes open and the stories will simply appear before your eyes.

The best tip for finding a “story generator” place is just to go to the places that interest you. It could be a church, a busy street, a quiet beach or even an abstract shooting of a building. Go with your passion and you will find your stories.

5, Last one for the road – get lost

We talked about the preparations and the work needed for good story finding, but sometimes all you need is to leave the tour guidebook in the hotel room and just go outside to walk the streets and roads looking for the unexpected.

Some of my best stories and photos came to me with this way of traveling.

Don’t forget to check with the locals or your fixer about the places that should be avoided and always, but always, check the time of your last ride home.

Oded Wagenstein is a travel photographer. His photographs were published on numerous magazines and websites world wide.

He is known for his intimate culture portraits. In his works he put the emphasis on understanding the culture and achieving good relationship with the person being photographed pre-shooting.

You can join his Travel photography group on Facebook and continue to discuss on travel and people photography:

Post originally from: Digital Photography Tips.

Check out our more Photography Tips at Photography Tips for Beginners, Portrait Photography Tips and Wedding Photography Tips.

The Secret of Creating a Strong Image – 5 Tips for Creating a Story in Your Image


Digital Photography School

 
Comments Off on The Secret of Creating a Strong Image – 5 Tips for Creating a Story in Your Image

Posted in Photography