You’ve heard it before: Photography is seeing and capturing light. It’s absolutely true, but what’s the best way to learn how to see something that can be infinitely shaped, altered by both environmental factors, and through intentional manipulation? As with most things, there’s a hard way and an easier way.
The hard way entails grabbing your camera and photographing everything you can, in every possible condition, and hoping everything clicks in one magic moment, thereby learning gradually through scattered experience. This works, but it can take an awful lot of time and practice before it leads to any real understanding of various lighting conditions.
The easier method, that this article covers, involves a more structured and goal oriented approach. It can get you looking at light in new ways and push you to the top of the learning curve in a very short period of time.
A trip to the toy store
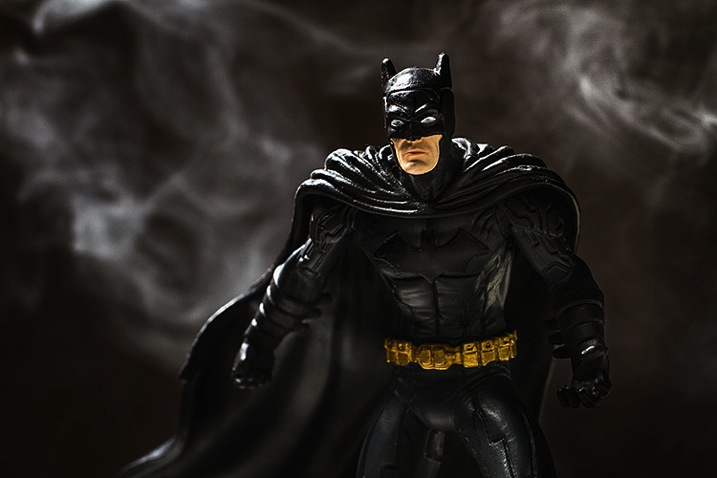
Because of the studious nature of this exercise, it can seem far less exciting and adventurous than being out and about with your camera. To combat this, I propose using toys as your subjects. Aside from the quirkiness and fun this can add to the exercise, a lot of toys, particularly action figures, have insane amounts of fine details that will really show off any changes in lighting conditions.
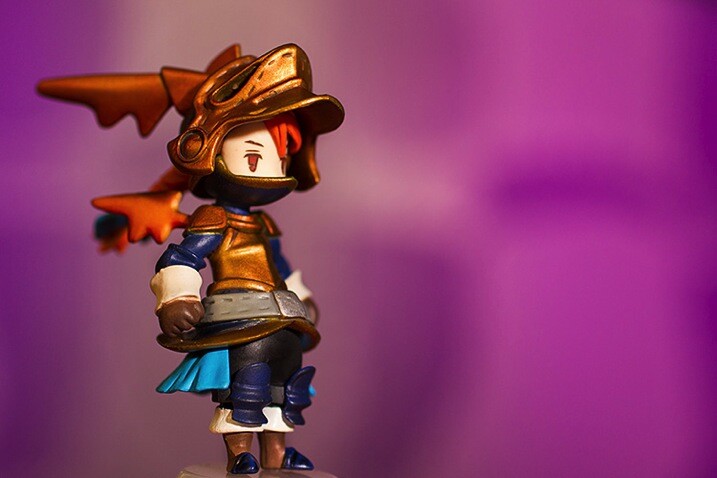
Another bonus of using toys for studying light is that if you use a character from a film or game that you know, you already have some idea of cinematic lighting schemes associated with that character, and you will quickly recognize some of them as you move through this process.
What you need to start
- A camera set on manual mode
- A tripod
- A toy
- A light source (natural or artificial with a modifier of your choice)
- A reflector
- A notebook (not required, but taking notes on what works and what doesn’t work never hurts)
- A macro lens for smaller toys is useful if you have one
Note: I’m using studio strobes for this exercise out of personal preference and ease, as it’s easier to move a light source around a subject than it is to move a subject around a fixed light source such as a window. Strobes also allow you to keep the exposure constant, provided the distance from light source to subject doesn’t change.
Also, please bear in mind that the intent of these exercises isn’t to create a final polished image. You’re simply watching and gaining experience with altering light. However, you can use the images you get from these exercises to build your own reference sheet for lighting effects for various light sources and modifiers.
Exercise one
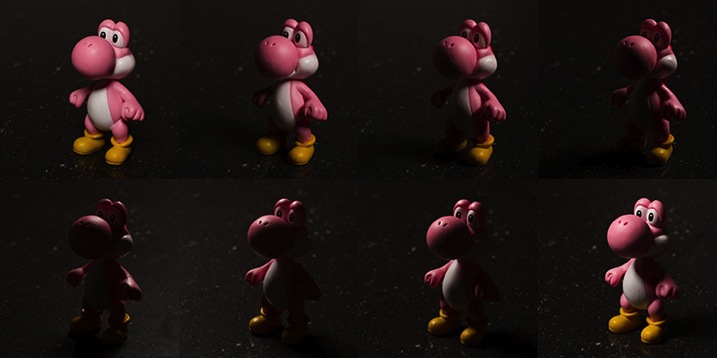
To start off, place your light source directly in front of your subject, pointed down at a 45 degree angle. Work out the correct exposure for your setup and dial it into your camera. These settings won’t change.
Now take your first photo.
Once that’s done, move your light source gradually around your subject, a little bit at a time, and take another photo at each angle. Repeat until you’ve come back to your starting position. Just make sure that your light source stays the same distance from the subject, while still pointed directly at it, each time you move it.
What you’re looking for is a series of images that clearly show how the light is altering as it moves around the toy. You can use these images to study how the light records in a photograph from any of the positions.
Exercise two
For the second part of this task, start with your light source directly in front of your chosen subject and as high possible. Work out your exposure and take the first photo. This time, move your light source down a few inches, again keeping it pointed directly at your toy. Repeat this until you can’t lower your light source any further. Now, your exposure will probably change this time as your light source gets physically closer to your subject. It’s up to you if you want to calculate a new exposure for each interval.
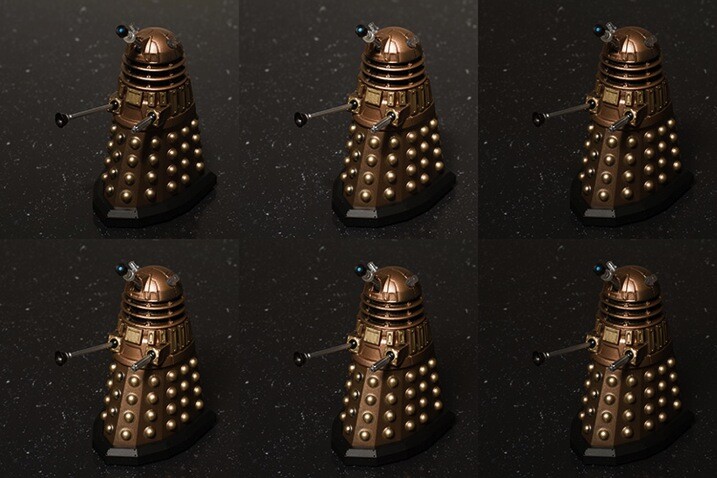
Top Left: Highest position of the light source. Bottom Right: Lowest position of the light source.
If you feel inclined, don’t be afraid to take the extra time and repeat this exercise once in each of the vertical positions as well. Doing so will only give you a more complete lighting reference in the end.
Exercise three
In this step, start with your light source as close to your subject as you can and place it at a 45 degree angle to camera right, pointed down at your subject. Once you have taken your first image, move it backward one foot.
Changing the distance of your light source from your subject is going to alter your exposure settings. By moving it backward, you will have less light falling on your scene. Simply recalculate your exposure and take your second shot. Repeat this until you can’t move your light source any further back.
What you should see as you do this is the light changing in quality. The closer your light source is to your subject, the softer the light. The further your light source from your subject, the harder the light. A lot people tend to have a personal preference on how they prefer their quality of light. Try to use this exercise and see if you can figure out yours.
When you change your modifiers, you may start to notice a shift in the colour temperature as shown in the bottom right image of the example. No two modifiers will be the same in this regard, so it’s always good to know exactly what you’re getting when you use your equipment.
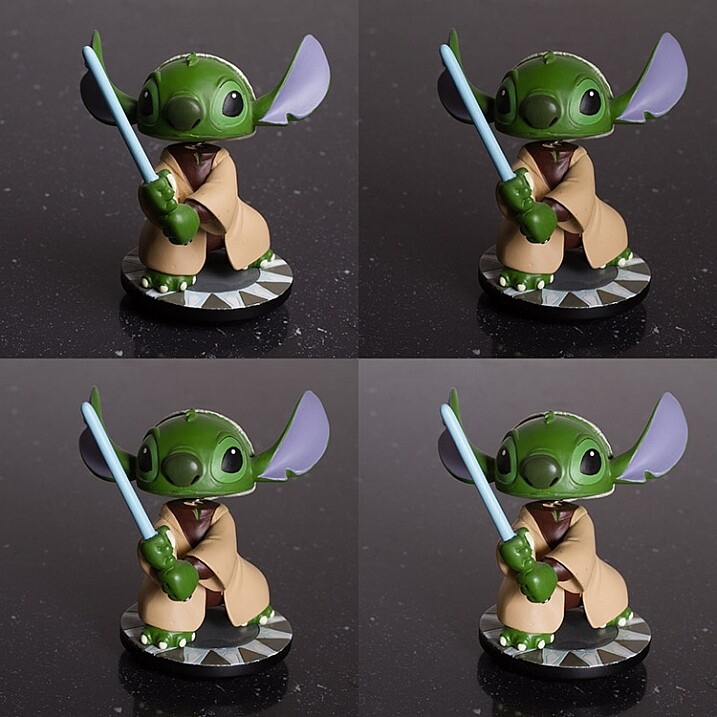
Top Left: Softbox at 2′ (61cm) away
Top Right: 4′ (1.2m) away
Bottom Left: 6′ (1.8m) away
Bottom Right: 8′ (2.4m) away
Exercise four
The next step is to start modifying your light; with a reflector in this case. Start with your light source pointed directly at your subject from camera left and above. Calculate your exposure and take a starting image with no modification.
For the next image, put your reflector at camera right, parallel to your light source.
Next, place it directly in front of your subject but as low down as you need to not block your lens and to keep it out of the frame.
Finally, if you can, curve your reflector and hold it at camera right with the centre pointed at 45 degrees from your subject.
Feel free to play around here and take photos with your reflector in as many positions as you can/want. The goal is to observe the changes it makes to the overall images. These changes can be extremely subtle so the more you can observe the better (more you will learn).
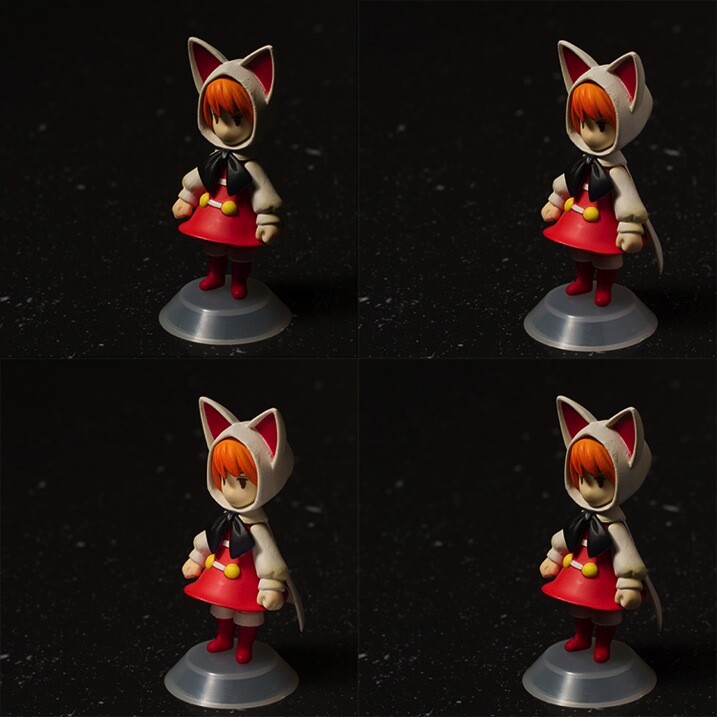
Top Left: No reflector. Top Right: Reflector from the right. Bottom Left: Reflector from in front and below the subject. Bottom Right. Reflector curved around the front right corner.
Exercise five
If you have a light source that can be modified with grids or similar (or maybe a window with blinds) it might be advantageous to study the different effects these modifiers provide. If you have a selection of modifiers available, you can use this as an opportunity to study the differences between them in a no pressure environment.
Like exercise one, your light source should be directly in front of your subject and pointed downward at a 45 degree angle. Start with no modifier at all and calculate your exposure and take your first image.
Add each of your different modifiers (softboxes, umbrellas, beauty dishes, etc.) taking a photo at each step. With that, you should have a reference for each of the modifications you can make to a particular light source.
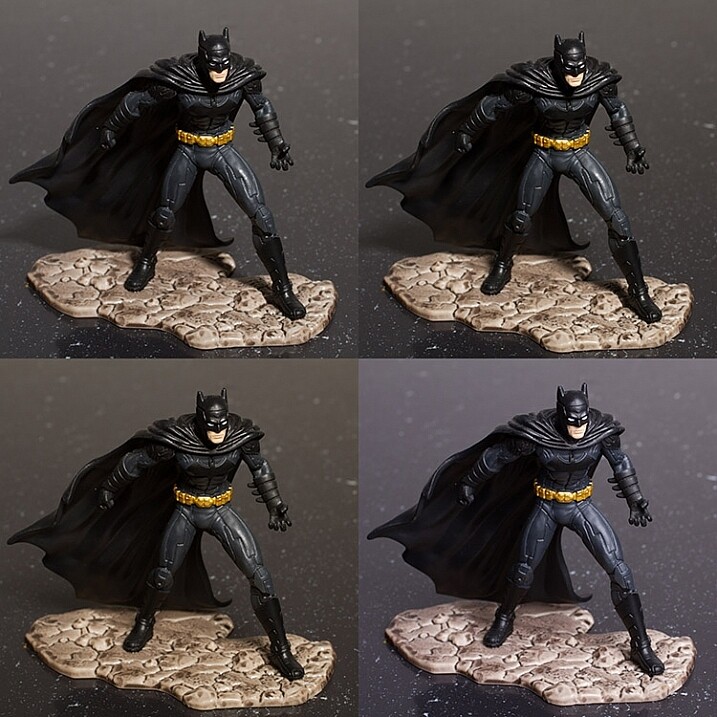
Top Left: No modifier ( bare bulb)
Top Right: 60 degree reflector
Bottom Left: Beauty dish
Bottom Right: Softbox
After-matter
By going through these exercises, you will have lit a subject from a huge variety of angles, with a good variety of modifications. From this, you should already start to see which angles are flattering and which aren’t. You may have also spotted ones that have affinity with your own personal tastes.
If you repeat the exercises with any new modifiers you get, as well as in natural lighting conditions at various times a day, then all of this should add together to quicken your understanding of light and how to apply it to your final images without a lengthy trial and error process. From here, you can start to automatically decide how to light or manipulate based on what you’ve learned.
Of course, if you don’t like the idea of using toys, feel free to use food, flowers, people or anything that’s fun and interesting to you!
googletag.cmd.push(function() {
tablet_slots.push( googletag.defineSlot( “/1005424/_dPSv4_tab-all-article-bottom_(300×250)”, [300, 250], “pb-ad-78623” ).addService( googletag.pubads() ) ); } );
googletag.cmd.push(function() {
mobile_slots.push( googletag.defineSlot( “/1005424/_dPSv4_mob-all-article-bottom_(300×250)”, [300, 250], “pb-ad-78158” ).addService( googletag.pubads() ) ); } );
The post Improve Your Lighting Skills with a Trip to the Toy Store by John McIntire appeared first on Digital Photography School.

Digital Photography School






You must be logged in to post a comment.