RSS
 

Posts Tagged ‘stop’

Photographers Need To Stop Taking Pictures

18 Jul

stop-taking-pictures

Stop taking pictures – OK – I assume that that headline grabbed your attention – and that was what it was designed for.  (I have to say that I’m only half-joking about this – I’ll explain…)   Recently I realized that – that for me as a photographer – one of the most effective and valuable things I could do with my time is NOT taking pictures!  I have to admit it was a bit of a shock when the reality of this started to sink in but now it makes absolute sense to me.


What, you might say – You’re a photographer. What’s going on here?


I’ll explain…  Since you only have a limited amount of time each day you need to prioritise and figure out what actions brings you the “biggest bang for your buck” or the highest lifetime value (you can use the term ROI [Return On Investment] as well).


In our every day we are juggling a lot of roles and I dare to say that most of us are running around “putting out fires” as they flame up instead of working on the really important stuff. The really important stuff are the things that will bring us a lot of value for a limited effort. I’m sure you’ve heard about the 80/20 rule (the Pareto Principle) – this is it!


Photographers – Stop taking pictures #photography #GettingThingsDone
Click To Tweet


Surprisingly taking pictures does NOT bring me the highest life-time value.  Building processes and workflows for my photography brings me the highest lifetime value because once they are in place they run on auto-pilot, automatically.  You spend some time on it but after that the process will just run and run and run…   See what i mean?   Taking pictures gives you some money – but you have to repeat it – over and over again…

productivity-pyramid

And here is the beauty of the whole thing – When you start putting processes and effective workflows in place for your photography you will increase the ROI on your work because the new processes will add  value to what you do – automatically!


IMAGE SOURCE:

Feature image & image 1: courtesy of Per Zennstrom


Fashion Photography Blog

 
Comments Off on Photographers Need To Stop Taking Pictures

Posted in Uncategorized


20×24 Studio will stop producing Polaroid 20 x 24 film next year

25 Jun
20 x 24 camera designed and built by Tracy Storer, Operator of Polaroid 20×24 Studio West

The Polaroid 20 x 24 is facing extinction as the last company producing the large-format instant film, 20×24 Studio, has announced plans to stop production at the end of 2017. 

The studio and its owner John Reuter originally purchased an original Polaroid 20 x 24 camera from Polaroid after it declared bankruptcy in 2008, as well as hundreds of cases of existing film for it. The company sought to keep the format alive by producing its own iteration of the cameras and film, but a lack of demand and other issues have forced it to abandon that dream.

In a statement posted on 20×24 Studio’s website, Mr. Reuter said:

“Our hope now is that we can work on some great projects with many of our legacy clients as well as new artists who have yet to experience the ultimate in instant analog image making. Our original business plan was for five years with the inventory purchased and for a variety of reasons we have not worked through the material. Instant film will not last forever and despite storing the film stock in cold storage and mixing the chemical reagent only as needed the studio projects that they can maintain the quality for two more years.”

Elaborating on this to the New York Times, Mr. Reuter said it would take a massive ‘multimillions’ investment to continue producing the film, something that isn’t feasible for the company given the relative lack of demand. As it stands, the camera itself costs $ 1750 to rent per day and each film exposure costs $ 125. Mr. Reuter anticipates the existing stock being used up by the time 20×24 Studio closes its doors next year.

Take a look below at the 20×24 camera in action as Douglas Doubler photographs ballet dancer Rachelle di Stasio. 

Via: New York Times

Articles: Digital Photography Review (dpreview.com)

 
Comments Off on 20×24 Studio will stop producing Polaroid 20 x 24 film next year

Posted in Uncategorized


How I Learned to Stop Worrying and Love Auto ISO

26 May

ISO is one of the three critical elements of exposure, and yet among the people I have talked to it seems to cause the most confusion. Aperture can be physically represented by simply making a circle with your fingers to represent the size of the opening in your camera lens, and shutter speed can be mimicked by closing your eyes, opening them briefly, and then shutting them. Neither one is a perfect comparison but it helps get the point across, especially to those who are new to photography.

ISO, in my experience, is a bit trickier to explain, and yet it can make or break a picture, even if you have the other two elements set just right. Or…it could make or break a picture in days gone by.

We have reached somewhat of a unique time in the history of photography in that ISO is, to some degree, no longer relevant in the same way that aperture and shutter speed still are. While I certainly would not let my camera choose the aperture and shutter speed for most of my shots, I have all but abandoned my misgivings about Auto ISO, and now almost always let the camera choose for me. As a photographer it has not been an easy leap for me to make, but it has been incredibly liberating, and I think it could be for you too.
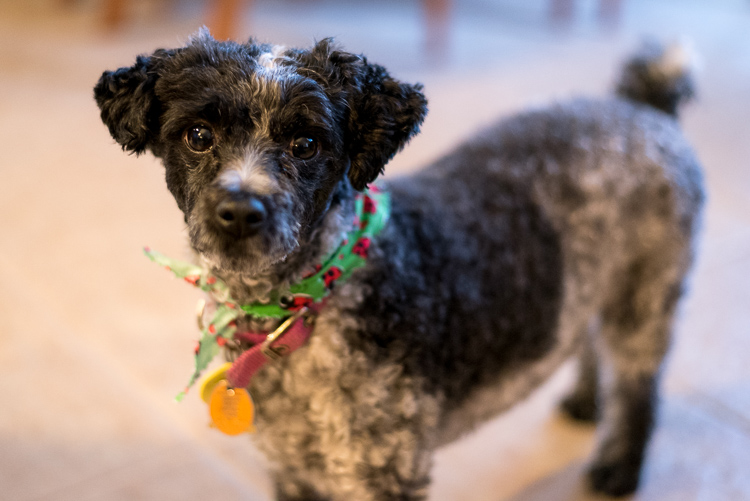
A tack-sharp picture shot at ISO 4000 with minimal digital noise.

A tack-sharp picture I shot at ISO 4000 with minimal digital noise.

My first real digital camera, not counting a few point-and-shoot models I had in the early part of the previous decade, was a Nikon D200. It was a beast of a camera, with some features that outclassed even most modern models, like a maximum shutter speed of 1/8000 second and a weather-sealed body. One thing it did not do so well was high ISO values, specifically anything past 400. I could shoot at 800 in a pinch, but going all the way up to 1600 resulted in pictures that were a muddy mess and 3200, its maximum possible value, was an unmitigated disaster. This trained me to use the following thought process in virtually all shooting situations:

  • Shoot in Aperture Priority (I set the aperture and let my camera set the shutter speed)
  • Set the ISO to 100, 200, or 400 depending on the lighting
  • Select an aperture that would give me the depth of field or overall image sharpness I wanted
  • Hope the shutter speed wasn’t too slow so I didn’t get a blurry picture
  • If the shutter speed was too slow, raise the ISO to no more than 800
  • If the shutter speed was still too slow, compromise my artistic vision by opening up the aperture
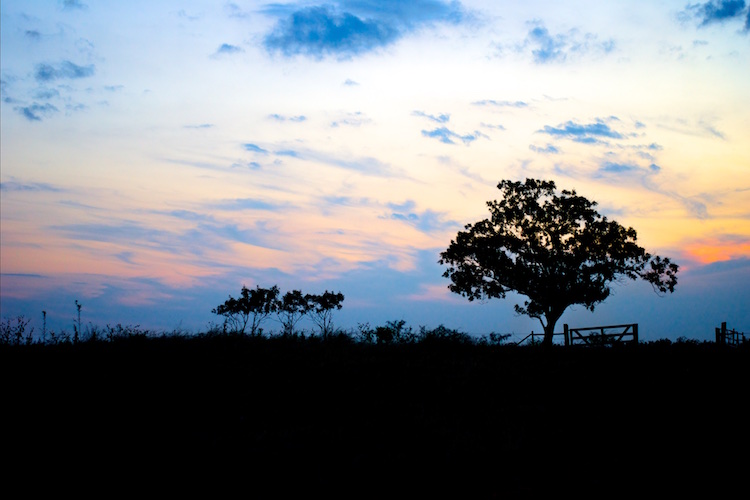
auto-iso-sunset

Even my old D200 could produce some fine images, though things quickly went south above ISO 400.

It was a process that worked somewhat successfully, but often resulted in images that were compromised in one way or another. When I finally upgraded to a much newer camera, a Nikon D7100, I still had the same mindset when it came to setting the ISO. I wanted to do it myself, lest my camera make some kind of silly decision on its own, that resulted in a picture with way too much noise for my taste. For a while I used the same thought process as shooting with my D200, even though the D7100 had vastly superior high ISO capabilities (which have since been surpassed by nearly every modern camera on the market today including its own successor, the D7200).

At first I used the old rule that had been burned in my mind regarding anything higher than ISO 400, which was to avoid it at all costs. Despite the evidence right in front of my eyes I was still used to the old way of doing things, and mentally set my maximum threshold at ISO 800, which I told myself, could only be exceeded in the most dire of circumstances. It took me far too long to discard this line of thinking, and I’m hoping you won’t have to make the same mistakes I did to get there.

Shot on my D200 at ISO 400.

Shot on my D200 at ISO 400.

A Brief History Lesson

The term ISO is somewhat of a holdover from the days of analogue film, when you would go to a camera store and buy an entire roll of film with an ASA value of 100, 200, or 400. ASA 200 was twice as sensitive to light as 100, 400 was twice as sensitive as 200 (which made it four times as sensitive as 100), and so on. Once the film was loaded in your camera you could not simply change your mind and use a different value; you had to shoot the entire roll before changing to another ASA for different lighting conditions.

ASA 100 film was great for outdoor situations or other scenarios where there was a lot of light, just like shooting at ISO 100 on a digital camera. ASA 400 was better for indoor situations when you needed film that was more sensitive to light, if there was simply not much to work with. If you looked hard enough you could get film that went up to ASA 800 or 1000, but anything beyond that was about as common as a polycephalous bos taurus (two-headed cow).
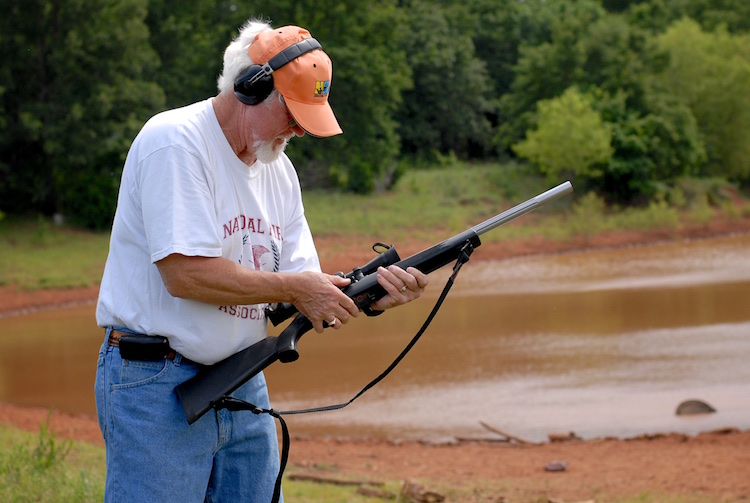
I took this photo of a champion marksman on my old D200 at ISO 400. If you look super close at the trees you will see some noise in the image, but doing that kind of misses the point of the photo.

I took this photo of a champion marksman on my old D200 at ISO 400. If you look super close at the trees you will see some noise in the image, but doing that kind of misses the point of the photo.

Early digital cameras, not unlike my world-weary Nikon D200, did not offer much in the way of low-light shooting capabilities that their film-based counterparts didn’t already have. Even as recently as a decade ago if you wanted to shoot in a low-light situation you might as well just grab a roll of high-ASA film, since most digital cameras just weren’t very good at their (roughly) equivalent high ISO values. (ISO and ASA are not directly 1:1 equivalent, but the measurements can be treated as fairly similar for the purposes of comparison.)

However, all this started to change rapidly as digital sensor technology advanced over the years, and now we are at the point where virtually any consumer camera can shoot up to ISO 3200 or even 6400 (a value that was unheard of with analog film) without much of a penalty in terms of overall color and luminance noise. In fact, most digital cameras are so good they can set the ISO automatically (hence the term Auto ISO), essentially removing a critical element of the exposure equation altogether, and freeing you so you only have to think about aperture and shutter speed.

Why I Use Auto ISO

This line of thinking was what used to stop me dead in my tracks as a photographer. The whole reason I learned to shoot in Manual mode was so I could have more control over my photos! Why on earth would I want to give control back to my camera, as if it knows better than I do what settings I want? The answer, I discovered over several years of shooting, is not as black and white as I once thought.

In most situations, the primary element of exposure that concerns me is the aperture, since it dramatically affects things such as depth of field and image sharpness. Of course I also have to pay attention to the shutter speed, since I generally don’t want motion blur, which then leaves the question of ISO. After shooting with my D7100, and subsequently my full-frame D750, I have realized that in most cases, I’m happy to let my camera decide the ISO for me, because I simply don’t care about it anymore. This might sound a bit extreme, but I humbly submit that perhaps you shouldn’t either.
Shot at ISO 2000 on a three-year-old Canon SL1 (EOS 100D)

Shot at ISO 2000 on a three-year-old Canon SL1 (EOS 100D)

Some photographers are prone to pixel-peeping, and I must admit I am certainly one of them. Zooming in on a picture to 100% magnification, in order to take note of barely-visible imperfections is a great way to compare various aspects of cameras, lenses, and even similar photographs. Shooting at high ISO values will often reveal noisy blemishes that stick out like a sore thumb when viewed up close. However, what I have come to realize, even when shooting with my D7100 which is over three years old, is that I simply don’t need to view my photos at ultra-close range to enjoy them, and for the most part don’t care about the noise that shows up when I see those ISO values skyrocketing. If I have to choose between a blurry picture and a noisy picture, I’ll take the latter every time, and twice on Sunday.

How to Use Auto ISO

The exact mechanics of enabling Auto ISO vary from one camera to the next, but on most models from major manufacturers like Canon, Nikon, Sony, Fuji, Olympus and their peers, there is usually an option in one of the menus that allows you to do a few things:

  • Enable Auto ISO
  • Choose a maximum ISO value
  • Choose a minimum shutter speed

Once you learn to find your comfort zone with these settings, you might find yourself thinking less about ISO, and more about things like framing and composition. On my D7100 I’m comfortable shooting up to ISO 3200, so I set that as the maximum value. I have the minimum shutter speed set to 1/(2x lens focal length). This means if I’m using a 50mm lens and shooting in Aperture Priority, my camera will lower the shutter speed to no less than 1/100th in order to get a properly-exposed picture, and if that still doesn’t do the trick it will then automatically raise the ISO clear up to 3200.

Learning to relinquish this amount of control has been incredibly freeing, so much so that for a while it actually felt like I was cheating because I was not manually selecting the ISO for every single shot. On my D750 I use similar settings but set the maximum value at 6400.

As you play around with this on your gear you are going to have to find a solution that works for your individual needs and photographic taste. Some cameras only let you specify one single value for the minimum shutter speed (as opposed to calculating it based on the focal length of your lens) and your mileage for how effective this technique is may vary, but if you can learn to embrace Auto ISO and let your camera do some of this heavy lifting, you might find yourself getting a lot more keepers on your memory card.

For this impromptu Easter photo I set the aperture at f/3.3 and let my camera do the rest. It chose a shutter speed of 1/100 and then raised the ISO as high as it needed to (2800) in order to get a good exposure.

For this impromptu Easter photo I set the aperture at f/3.3 and let my camera do the rest. It chose a shutter speed of 1/100 and then raised the ISO as high as it needed to (2800) in order to get a good exposure.

I would be remiss if I did not mention some of the downsides of Auto ISO as well, as not all is bright and sunny, and warm and fuzzy on this side of the fence.

One of the most significant limitations of shooting at high ISO values is the lack of dynamic range – basically, how much data your image sensor is able to capture in a given picture. If you have a RAW file that was shot at ISO 5000, and you need to use Lightroom to recover detail from the shadows, or raise the exposure of the whole image, you will find you have much less room to work with than if you shot the photo at ISO 100.

Also, depending on your camera, you may also find cases of severe banding, or ugly horizontal lines, that show up when you try to recover shadow detail at high ISO values. Finally, all things being equal a picture shot at ISO 4000 will generally have less vibrant colors, and skin tones will seem a little more artificial and false, than a similar picture shot at ISO 400.
Selecting the ISO was the last thing on my mind; I used an aperture of f/4 and a minimum shutter speed of 1/100. My camera selected an ISO of 5000 and I could not be more pleased with the result. A year ago I would have never gone that high, and would have had a blurry photo instead.

Selecting the ISO was the last thing on my mind when I made this image. I used an aperture of f/4 and a minimum shutter speed of 1/100, my camera selected an ISO of 5000, and I could not be more pleased with the result. A year ago I would have never gone that high, and would have had a blurry photo instead.

Despite these limitations, shooting with Auto ISO has been a huge boon for me, and I think it could be for you too. If you have never tried Auto ISO, I recommend giving it a chance and see how you like the results. For me it was a little like enabling back-button focus, in that I was highly skeptical at first, but after a few weeks I was hooked and now I don’t think I could ever go back.

Do you use Auto ISO? Share your thoughts in the comments below, and I’d love to see some of your favorite high-ISO images as well. Cameras today really are incredible imaging machines, and it’s fun to see what they can do if we push them a little bit.

googletag.cmd.push(function() {
tablet_slots.push( googletag.defineSlot( “/1005424/_dPSv4_tab-all-article-bottom_(300×250)”, [300, 250], “pb-ad-78623” ).addService( googletag.pubads() ) ); } );

googletag.cmd.push(function() {
mobile_slots.push( googletag.defineSlot( “/1005424/_dPSv4_mob-all-article-bottom_(300×250)”, [300, 250], “pb-ad-78158” ).addService( googletag.pubads() ) ); } );

The post How I Learned to Stop Worrying and Love Auto ISO by Simon Ringsmuth appeared first on Digital Photography School.


Digital Photography School

 
Comments Off on How I Learned to Stop Worrying and Love Auto ISO

Posted in Photography


Last Stop: Japan Keeps Old Train Station Open for Lone Passenger

27 Jan

[ By WebUrbanist in Culture & History & Travel. ]

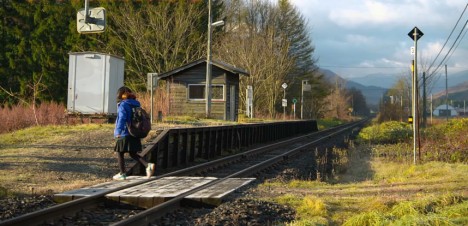
japan railways deserted abandoned

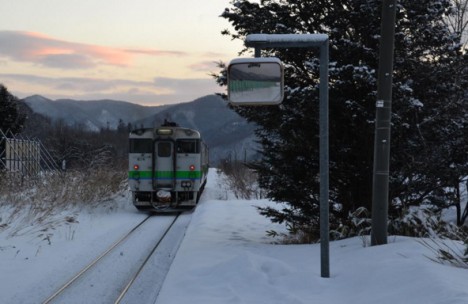
In a remote area of Hokkaido, the northernmost island of Japan, a train stops just twice a day, as it has for years: once to pick up a girl on her way to school, and once to drop her back off afterward.

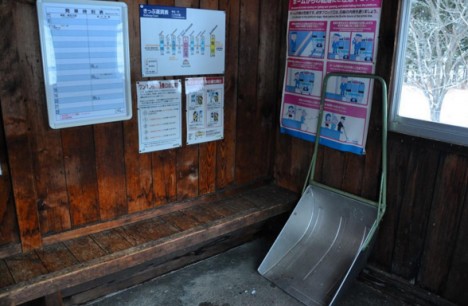
rural station interior

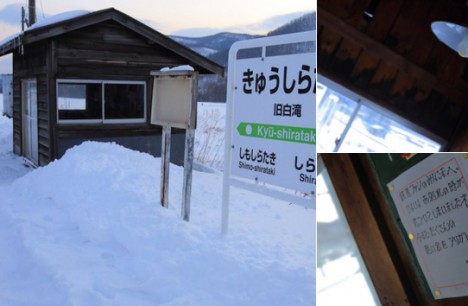
The otherwise-abandoned Kyu-Shirataki station remains open, thanks to Japan Railways, which honored the request of two parents to continue transporting their daughter back and forth until she graduates.

rural station last stop

The physical space is remarkably well-kept despite its relative disuse, still containing route maps and schedules as any other station would, despite serving as essentially a single-person shelter for the place’s only daily passenger.

rural station in japan

As the country’s population continues to shrink as well as urbanize, rural routes like this one have been forced to close – only high-speed railway lines remain on the rise. Fans of Japan Railways’ actions in this case see it as a victory for common courtesy as well as education. The line will ultimately close completely after the girl graduates and moves on (via CityLab).

Share on Facebook


[ By WebUrbanist in Culture & History & Travel. ]

[ WebUrbanist | Archives | Galleries | Privacy | TOS ]


WebUrbanist

 
Comments Off on Last Stop: Japan Keeps Old Train Station Open for Lone Passenger

Posted in Creativity


Mild Max: Perth Police Put a Stop to Motorized Picnic Tables

04 Dec

[ By WebUrbanist in Technology & Vehicles & Mods. ]

mobile motorized picnic tables

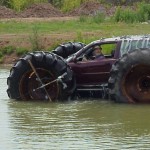
In what could be viewed as a pre-apocalyptic take on hacked vehicular hybrids of the Mad Max movies, a pair of picnic table cars have been spotted on the streets of Western Australia’s capital city.

These road-worthy cruisers can apparently reach speeds of 50 kilometers per hour, handling like go-karts with bonus table space for passengers to set down their beers.

motorized picnic tables

Cops put out alerts on the vehicles based on CCTV footage and eventually spotted them as they stopped to fuel up at a gas station.

picnic table vehicle

“They told the boys that were drinking to tip their liquor out and get rid of it which we did and they said we’re not allowed to drive [the picnic tables] on the road and just to push them back across the other side of the road and then we can carry on from there.”

picnic table intersection

Inspired by a friend who constructs similar creations in New Zealand, the tables’ owner and builder explained that each model is constructed with a four-speed clutch, gears, accelerator and brakes. Police are still evaluating their presumably-illegal road usage, with potential penalties or fines yet to come, though all appears to have been in good fun.

Share on Facebook


[ By WebUrbanist in Technology & Vehicles & Mods. ]

[ WebUrbanist | Archives | Galleries | Privacy | TOS ]


WebUrbanist

 
Comments Off on Mild Max: Perth Police Put a Stop to Motorized Picnic Tables

Posted in Creativity


Last Stop: 2,800 Drowned NYC Subway Cars Turned Marine Habitats

04 Dec

[ By WebUrbanist in Destinations & Sights & Travel. ]

dropping reef closeup

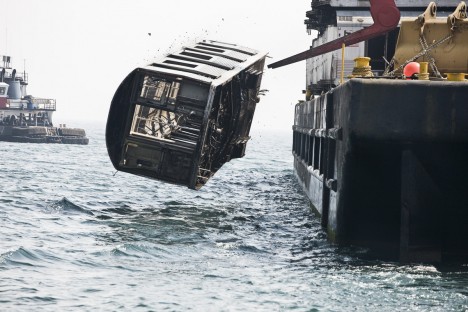
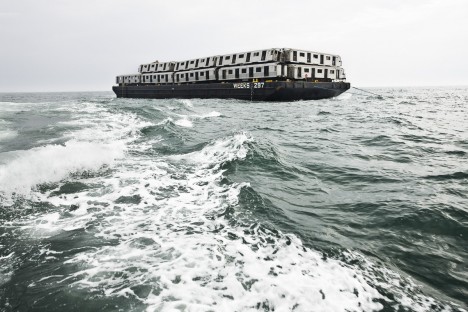
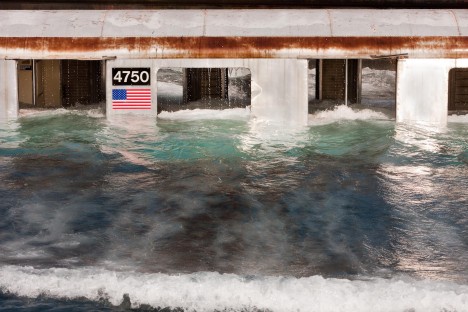
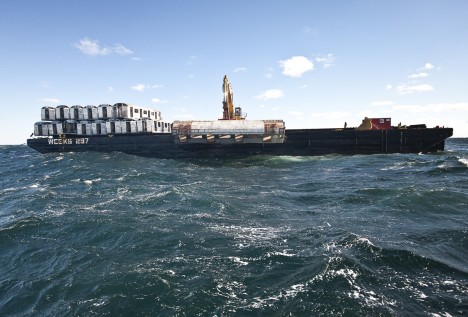
Since the early 2000s, decommissioned New York City subway cars have been seeded into the waters around New Jersey, Delaware, Virginia and other eastern states, creating infrastructure for fish habitats along the coastal shelf running from New York to North Carolina. Artificial reefs like these can increase sea life concentrations dramatically in otherwise-flat subsurface regions, boasting up to hundreds of times as much biomass per area of seafloor.

dumping subway cars

dropping reef filling

In late 2000, the Metro Transit Authority began dumping 1200 old cars into the water; in 2007, another 1600 were added to the list. These frameworks of these sunken cars serve as replacement rock outcrops on which corals and plants grow, leading to oysters, mussels and further sea life. Photographer Stephen Mallon has spent years capturing this deliberate subway-dumping activity in action on the surface.

dropping reef then

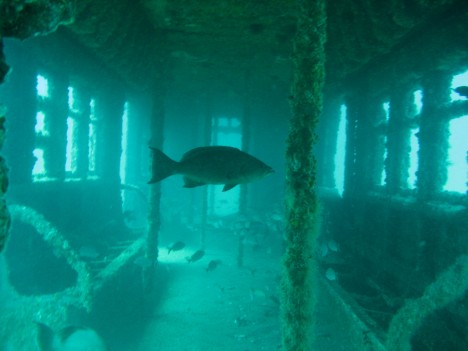
Meanwhile, sequential underwater images show the subsurface results over time. The progress photos above and below were shot after 5 years and 10 years, respectively, demonstrating just how rapidly and effectively these places can become populated, first sparsely and then densely.

dropping reef now

The critical amount of biomass that develops makes these cars hotspots for diverse populations of underwater creatures all along the food chain, together forming self-sustaining regional ecosystems.

dropping car crane water

In turn, these locations can attract fishermen and divers as well, keen both to see the thriving populations of aquatic life but also to explore the underwater ruins of modern machines. Far as they may be from their original subterranean homes, these train cars still manage to serve citizens of cities along the Atlantic coast in their own unusual ways.

Share on Facebook


[ By WebUrbanist in Destinations & Sights & Travel. ]

[ WebUrbanist | Archives | Galleries | Privacy | TOS ]


WebUrbanist

 
Comments Off on Last Stop: 2,800 Drowned NYC Subway Cars Turned Marine Habitats

Posted in Creativity


Liquid Stop Sign: Emergency Laser Projection on Sheet of Water

06 Nov

[ By WebUrbanist in Design & Graphics & Branding. ]

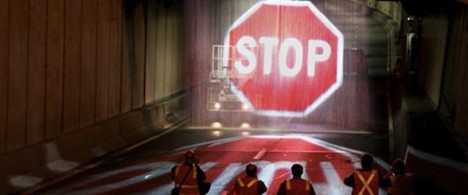
stopcropped

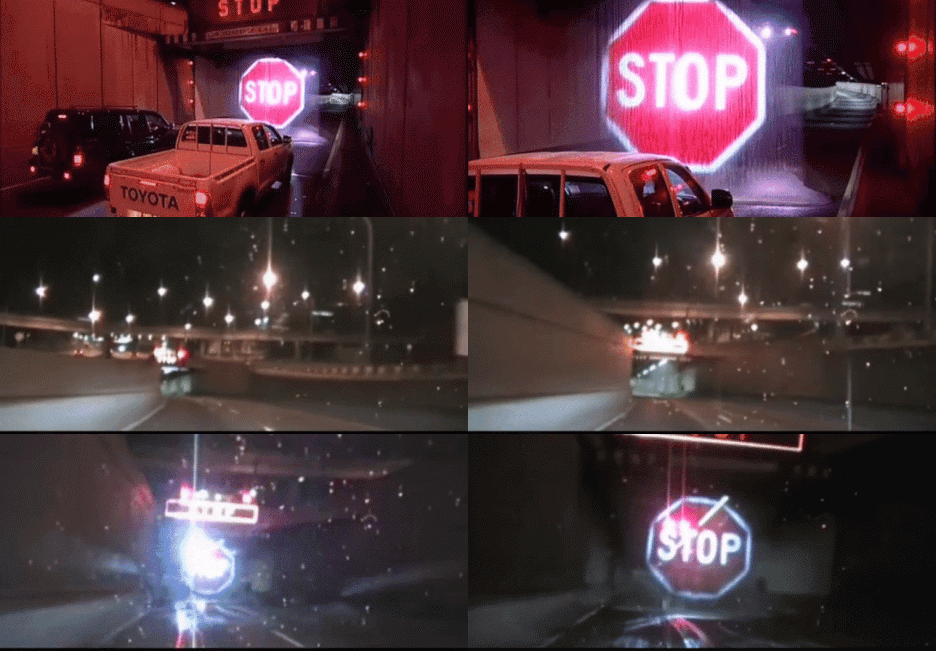
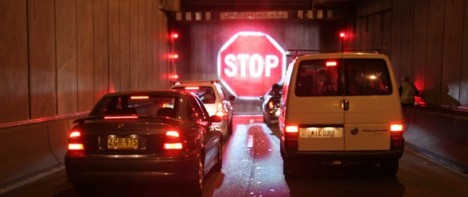
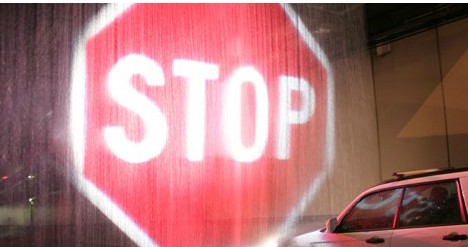
Serving as a bright and bold last-chance warning for vehicles about to enter tunnels, this wall of water painted turns into a kind of hovering hologram designed to STOP impending drivers from creating or compounding tunnel disaster situations.

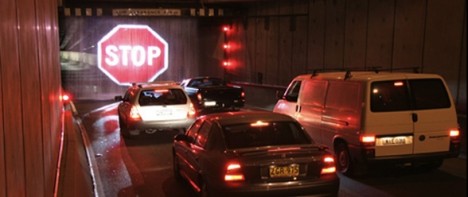
emergency stop lighting

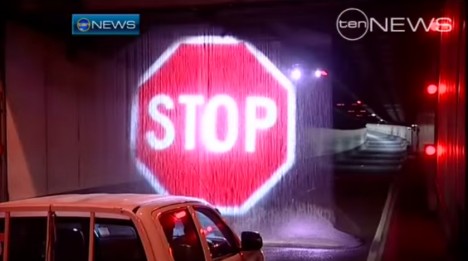
Dubbed Softstop and deployed first in Australia, the liquid signage does no damage should a car or truck pass through, but still provides an impossible-to-ignore signal for drivers. It is used to warn off too-tall trucks and deter Sydney Harbor Tunnel entry in cases of fires or crashes going on inside the tunnel.

stop sign photo

liquid stop sign

This solution came about after conventional signage failed to warn off drivers in an emergency. “We had a fire in the tunnel,” explains Harbor Tunnel GM Bob Allen, “motorists ignored the warning lights and signs and continued driving towards the fire. These drivers exposed themselves to smoke and toxic fumes from the fire and then to compound the situation they turned around (in a one way tunnel) and drove back out of the tunnel against incoming traffic.”

floating stop sign

stop signage

The wall-of-water solution came about as a collaboration between Laservision, a creative technology firm that designs architectural lighting, and a pump manufacturer: Grundfos.

Share on Facebook


[ By WebUrbanist in Design & Graphics & Branding. ]

[ WebUrbanist | Archives | Galleries | Privacy | TOS ]


WebUrbanist

 
Comments Off on Liquid Stop Sign: Emergency Laser Projection on Sheet of Water

Posted in Creativity


Opinion: The future of DSLR or: how I learned to stop worrying and love the ILC

19 Jun

Despite some sales growth, mirrorless isn’t taking over photography. Equally, DSLRs aren’t flying off the shelves the way they used to. But if you’ve found yourself arguing about whether mirrorless is the future, you’ve probably been addressing the wrong question. DPReview’s Richard Butler argues that convergence is coming and that it’s not the mirrors that matter. Read more

Articles: Digital Photography Review (dpreview.com)

 
Comments Off on Opinion: The future of DSLR or: how I learned to stop worrying and love the ILC

Posted in Uncategorized


Shooting Fast Moving Subjects – How to Stop the Blur

24 May

In this article you will see how to deal with fast moving objects. For me shooting action is the most fun you can have with your photography. You can freeze that instant split second that the human eye couldn’t even comprehend, and capture it in an image for all time.

Image 4

1/6400, f/6.3. ISO 800

Last weekend I was lucky enough to shoot a bicycle charity event in the countryside. The sun was out, the birds were singing and there was enough distractions for me to completely leave my imagination at home.

As I was shooting fast moving road cyclists I had two lenses that I used. One which is the bread and butter lens of most photographers, the 70-200mm f/2.8. On a full frame body it has a good focal length that can capture subjects at a medium distances and the fast aperture allows for shooting in quite low light conditions. The second lens was a wide angle, for capturing some different looking shots. You don’t want to have a memory card with all the same style of shots, boring for you, and if this is for work, definitely not what the client wants to see.

image 7

Shutter speed: 1/50th, f/16, ISO 200

Although I just listed pro lenses, honestly you can do this with any kit zoom lens, a 55-200mm variable aperture or a 70-300mm like the Nikon VR which is a great value for money zoom lens.

As with most shoots I make sure I get the classic shots that I KNOW I can nail first. For me this is frozen action, nice background, and the subject at approximately a 45 degree angle.

Image 1

1/2500, f/3.2, ISO 200

As you can see in this image, it’s not mind blowing, however it has all the ingredients for a nice photograph that meets the criteria of what you are trying to capture. To create this type image, shoot with your zoom lens using the following settings as a rough starting point:

  • Camera mode: Aperture Priority (Av in Canon, A in Nikon and most other brands)
  • Aperture: As you want to freeze the action you need as much light entering the camera as possible, so choose a large aperture setting. With most kit lenses go down as low as possible, at this focal length that may be f/5.6.
  • Shutter speed: No need to worry about this as the camera will adjust this automatically in this mode.
  • ISO: If it is a sunny day like above, then ISO 100 or 200 is fine. However, if it is a little bit gloomy you may have to increase your ISO, I’ll talk about this in a minute.
  • Focus: Set your camera for on Continuous or Servo focus depending on your brand. This means that while your shutter button is held halfway down, or your AF on button is pressed, the camera will continue to adjust its focus, which is what you need when tracking moving objects.

Your camera is now setup and ready to go. Get yourself in a position where the subject, in this case the cyclist, will be at approximately 45 degrees to you. Full side-on image and straight-on images can seem a bit odd unless it’s the style you are going for; at this angle you can see most of the rider and it’s more flattering.

Smoothly follow the rider with your camera; this might be easier in a crouch or if you have a monopod, utilize it. Once they are in a good position click off a shot or two. With any luck you have a nice photo of the rider, somewhat frozen in time.

Image 2

1/1600, f/3.2, ISO 200

It didn’t work? Okay, there are two main things that could trip you up here, firstly the shutter speed wasn’t fast enough and the rider is blurry (??? and secondly???). As you are using Aperture Priority (which means you set how much light is allowed in the camera and the camera adjusts the amount of time the shutter is open automatically) it’s possible that there just isn’t enough light. So the camera has slowed the shutter speed way down to let more light in to exposure your photo properly, which has caused blurring of the subject.

When looking through your viewfinder. check your shutter speed down the bottom. You should be aiming for at least around 1/500th of a second. If it is slower than that, it’s time to bump your ISO up to compensate. Your ISO is how sensitive your camera sensor is to light. As a general rule you always want to keep this as low as possible to guarantee grain and noise-free images. However, it is a tool to be used, and on modern DSLRs shooting at ISO 800 yields incredible results over the older generation digital.

image 6

1/4000, f/3.2, ISO 400

Adjust your ISO up to 400 and try again. If you are still experiencing motion blur bump it up to 800. Unless it’s a very dark and gloomy day this should give you a crisp clear image with a fast shutter speed.

The next issue you might encounter is that the focus isn’t right. Maybe the rear wheel of the bike is in focus, but the riders face isn’t. Or even worse, the background is sharp and the rider is way out of focus. This is a simple fix.

All DSLRs give you the ability to change focus points, the square which the autofocus uses to target the focal point. Move this point to where the riders head will be in your frame. You may have to change your focus mode to Single Point Focus, as many cameras have the ability to change which focus point they use automatically, depending on the situation. You will have to consult your manual to find out where this is located in your menu system.

image 5

1/3200, f/3.5, ISO 400

Now when your rider is in frame, and you are focusing, it will focus on the rider’s face. Honestly, as long as their face is in focus the rest could be a blur, it doesn’t matter, faces are the most import thing in nearly all photos.

These guide lines should give you most of the info you need to shoot this type of photo. However, as with all photography, it’s trial and error to get things right and to get it looking the way YOU want.

Practice this week. Get your kids out on their bikes, go to the park and try to get some photos of dogs running around (this is fantastic practice for tracking subjects) or head down your local racetrack and take photos of cars, motorbikes or horses!

Image 3

1/2500, f/7.1, ISO 500

Once you get this dialled in. it can be moved to many other subjects and situations, the photos of a skier (above) and snowboarder (top of article) were shot using exactly the same technique.

Do not dismay if things aren’t working out straight away. A lot of learning photography is trial and error and practice. Any entry level, or higher DSLR setup, can do this. Learn your gear and practice, you will be surprised at the caliber of photos you can get from even the least expensive setup.

Thank you for reading, I hope this helps you on your photography quest this week. Please post up your photos and practice shots, if you have any questions I will try to answer them all and get you on the right track to photography perfection. Happy snapping!

googletag.cmd.push(function() {
tablet_slots.push( googletag.defineSlot( “/1005424/_dPSv4_tab-all-article-bottom_(300×250)”, [300, 250], “pb-ad-78623” ).addService( googletag.pubads() ) ); } );

googletag.cmd.push(function() {
mobile_slots.push( googletag.defineSlot( “/1005424/_dPSv4_mob-all-article-bottom_(300×250)”, [300, 250], “pb-ad-78158” ).addService( googletag.pubads() ) ); } );

The post Shooting Fast Moving Subjects – How to Stop the Blur by Matt Hull appeared first on Digital Photography School.


Digital Photography School

 
Comments Off on Shooting Fast Moving Subjects – How to Stop the Blur

Posted in Photography


Stop Giving Away Your Authority – You ARE a Photographer

08 May

I recently started coaching my eldest son’s flag football team. Being a Mom, as opposed to a Dad, this was a rare situation. As the league’s only “Lady Coach”, I was not taken very seriously by anyone, including myself. I stepped up because no other parent volunteered, but once everyone saw that a woman was going to be coaching these young boys to fifth grade flag football success, Dads came out of the woodwork. Some to kindly assist me because ten 11 year old boys is a lot no matter who you are; yet others insisted on their services, because what could I possibly know about football and a bunch of boys? Certainly not enough to coach a youth sports team to uncertain victory.

lynseymattingly6

My turning point came at our weekly game last Sunday. Down more than a couple points in a season that has yet to provide a win, one of the kinder dads came up to me to suggest a play for the offense. When I didn’t understand he said, “Do you want me to draw it out for you?” and I said, “No. I want you to just run it with them.”

Another dad would have taken over and done exactly that. This Dad didn’t. Instead of letting me give away my role—the one that I had rightly came by and earned, he went and found my clipboard from my very well-prepped coaches bag and drew it out for me to take to the field. I would love to tell you that it worked and it was the winning touchdown, but it didn’t, and it wasn’t. Instead, I got an extremely valuable life lesson out of it: It’s one thing to have someone—ANYONE try to take away your earned authority, but it’s an entirely other thing to hand it to them on a silver platter.

lynseymattingly11

As I reflected on this, I realized how often I do this with photography. The way I dread shoots, you would think that I was being called on to singlehandedly perform heart surgery on the President, with my only (actual) medical training being retrieving splinters and applying Band-Aids. The way I take feedback on my images, it would be easy to assume I had zero confidence in myself. The way I’ve dismissed my own skills, you would begin to question if I had any.

You know that moment when your portrait clients show-up, dressed all perfect and looking adoringly at you, ready for whatever direction you give them? My first instinct is ALWAYS to run – away – fast. From these people who think I know what I am doing and want to give me money to do it.

lynseymattingly13

In actuality, I am a good photographer. I, more often than not, grant my client’s every wish and provide them with more than a questionable response to the always asked, “Do you think you got anything good?”

Truthfully, I am actually quite confident in many things—overly confident in some I bet. It’s when I am considered to be an expert that I lose my footing. It’s when I feel pressure to do something specific and challenging that I want to quit. It’s when there is an expectation from another than I mentally run through my getaway options.

lynseymattingly5

For most of us, it’s uncomfortable to be considered an expert at anything. Especially if what you have to back it up is basically just other scenarios where it worked out in your favor. I am around kids all the time; I work with them, I volunteer for them, I actually parent five of them. I’m pretty comfortable talking to and instructing a younger age group on just about anything – including a sport that is considered the most important American game by beer-drinking middle-aged men everywhere.

Why would I give away my power and not allow myself to be respected as the expert I am? For the same reasons I worry before every shoot, certain that I’ve finally reached the moment where my luck has run out and I, in fact, will not get anything good this time. And there will be the President of the United States, laying on the operating table while I stand over his open chest cavity with shaking tweezers and a flashlight.

lynseymattingly2

Just like I had never played flag football before a few months ago, I did not go to a formal photography school. In fact, I didn’t even study photography. I studied people and art, but the only true darkroom I have ever been in was when I wandered into my Grandfather’s in the basement once before, being knocked over by the chemical smell and never making that mistake again. I didn’t take pictures for my high school yearbook. I’ve never worked for a college newspaper. I don’t carry my camera with me everywhere (it’s heavy and really gets in the way). All of that said and when someone asks me what I do for a living, I say, “I’m a photographer.” (Cue the excited statements about the glamour and the questions about celebrities.)

lynseymattingly4

I got here differently than you did. You got here differently than every other photographer you know. Probably the only thing we all have in common is occasionally (or maybe more often) doubting ourselves, and disliking aspects of our job—just like most everyone else on the planet. We are so quick to move negative thoughts aside because: how lucky are we? That has to be our first, last, and only thought, right? That we do something so fun. So glamorous. So creative. So special. And should we ever change our minds or fall flat on our face, there is a line of people a mile long behind us, happy to trample over our humbled bodies to get to the front of The Photographer Line.

lynseymattingly8

In that moment on the football field when I wasn’t allowed to give my expertise and authority away to someone else, I vowed to make some changes in other parts of my life as well. Well not in that exact moment, but later that day when I was icing my entire body because walking back and forth, stiffly because you’re terrified someone will get something hurt – pride or otherwise – is more of a workout than you would assume.

I decided I’m not going to sugarcoat photography as easy, and more than that, I’m not going to dismiss myself anymore. Photography isn’t just some random skill I picked up at a party somewhere, like opening a champagne bottle with a knife. Photography is hard. It’s exhausting and full of pressure, and sometimes…….I don’t like it at all. The need to stay relevant and at the top of my game is more tiring than pacing 50 yards over and over again in the hot sun. The idea that sometimes people don’t like my work, don’t know I tried my best, don’t realize how hard I have worked to get here, or really want me to perform Photoshop plastic surgery is often frustrating and sad. The nervousness I feel before any shoot is enough energy to power my camera without batteries, if I could figure out how to convert it.

But I’m really good at it, and so are you.

lynseymattingly7

And, it turns out, that you all feel the same. Or at least some of you do. I know that because when I posted this on my photography Facebook page this morning: I don’t like editing or emailing or scheduling. I hate the pressure to make sure I “got something good” at every shoot and I hate being out in the hot sun or the bitter cold when I’m shooting. I get nervous meeting new people and I dread trying to get to know them and be on their good side in a matter of minutes. – Within an hour, it was liked by many and commented on in appreciation for “being honest” and showing how much mental and emotional work photography often is.

lynseymattingly1

I’ve been doing this for 10 years and I’ve seen a lot of portrait photographers start their own businesses. Some are still around, and some quickly faded. In the past, I have viewed them as competition, but the truth is that they aren’t. Not only is there enough business for all of us, but the more choice a client has, the more business is created and generated. I’m not the portrait photographer for everyone. You aren’t either.

But you are an expert. You possess an ability that few have and a vision all your own. Your skill level may be at the beginning stages, or it may be very advanced. You get to choose to be nervous before shoots. You get to despise pieces of your job as a photographer. But quit giving away your power. Stop being so humble that your expertise is up for grabs. Don’t reduce your authority on a subject you’ve been marinating in for however long.

Be confident in your piece of the photographer pie, no matter how small that piece is.

lynseymattingly12

You’re going to fail at some point. Brilliantly, brilliantly fail. You’re going to show up without your memory cards, or you’re going to shoot absolute garbage, or you’re going to ask someone to pose in a way that puts them in the emergency room (it’s my greatest fear). But just like there are 10 boys that don’t know any better than to think that I can led them to a certain flag football victory, there is a handful of people in this world that think of you first as an expert in photography – and that’s something you should never, ever, give away.

googletag.cmd.push(function() {
tablet_slots.push( googletag.defineSlot( “/1005424/_dPSv4_tab-all-article-bottom_(300×250)”, [300, 250], “pb-ad-78623” ).addService( googletag.pubads() ) ); } );

googletag.cmd.push(function() {
mobile_slots.push( googletag.defineSlot( “/1005424/_dPSv4_mob-all-article-bottom_(300×250)”, [300, 250], “pb-ad-78158” ).addService( googletag.pubads() ) ); } );

The post Stop Giving Away Your Authority – You ARE a Photographer by Lynsey Mattingly appeared first on Digital Photography School.


Digital Photography School

 
Comments Off on Stop Giving Away Your Authority – You ARE a Photographer

Posted in Photography