RSS
 

Posts Tagged ‘Stepbystep’

A Step-by-Step Guide to Using Light in Flower Photography for Awesome Photos

23 Oct

The post A Step-by-Step Guide to Using Light in Flower Photography for Awesome Photos appeared first on Digital Photography School. It was authored by Simon Ringsmuth.

using-light-in-flower-photography

Flowers are brilliant subjects for photography. They are bright, colorful, and are stay perfectly still for you as long as the wind is calm. You don’t need any special equipment or lenses to take great photos of flowers either. You can get great photos with just a mobile phone or a basic DSLR with a kit lens. If you really want to elevate your flower photography to the next level, you need to pay very close attention to one thing – the sun – because the light in flower photography is everything.
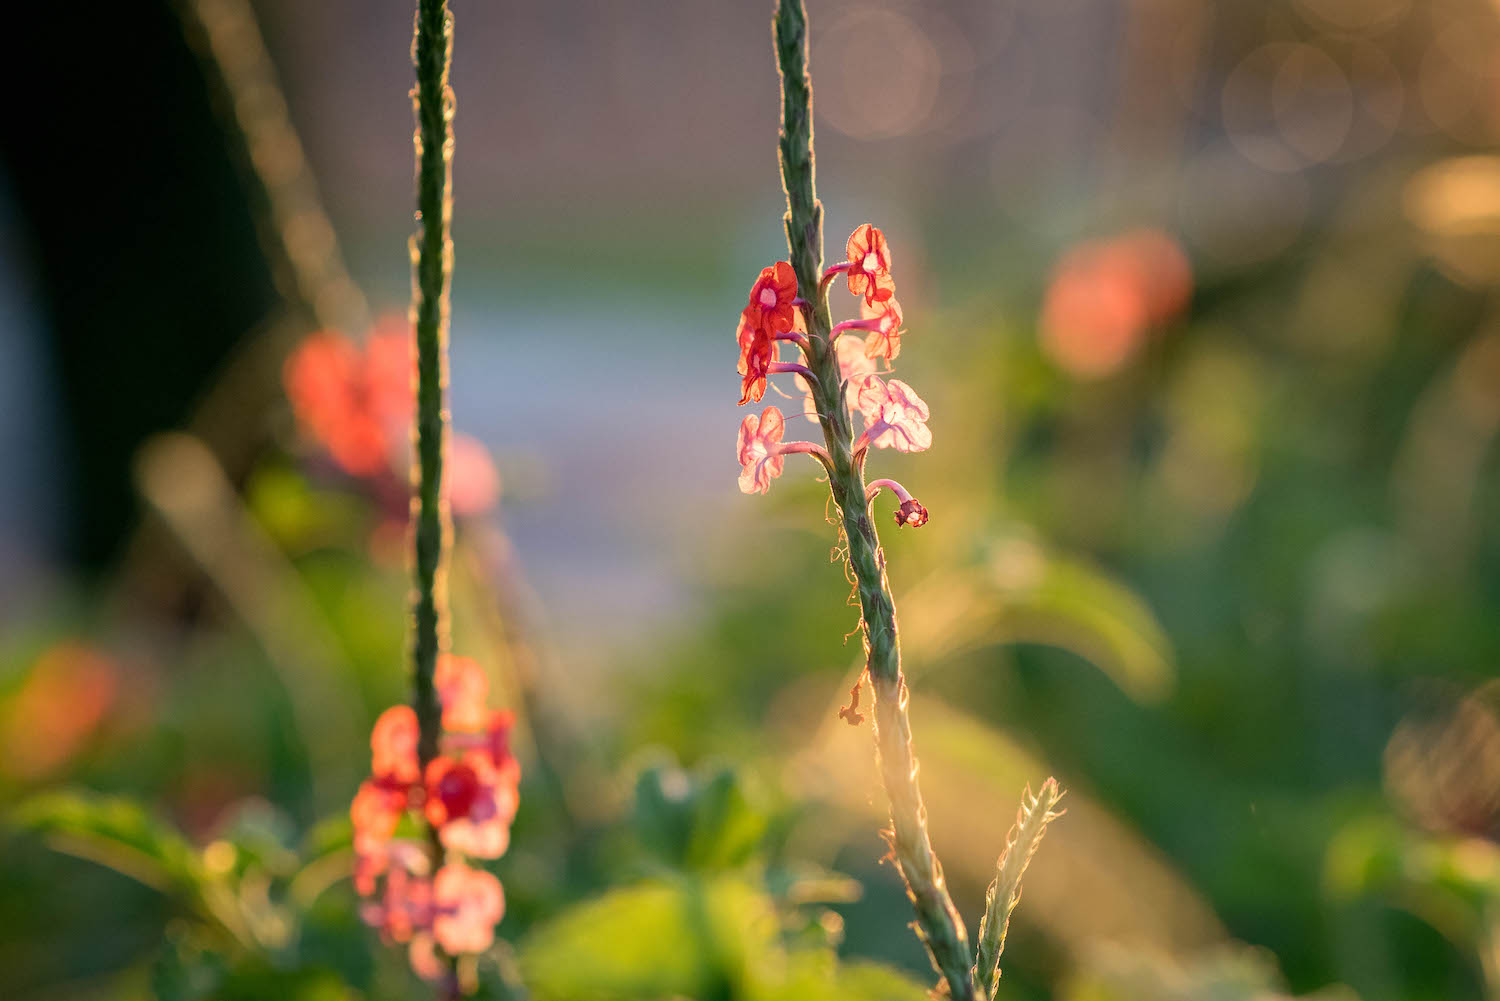
Image: 85mm, f/2.8, 1/3000 second, ISO 2200

85mm, f/2.8, 1/3000 second, ISO 2200

Of course, there are other sources of light besides the sun, but this is the most obvious and easily-accessible one when considering flower photography. Unfortunately, you can’t position the sun exactly where you want it, but you can position yourself to make the best use of it. You can also take note of the lighting conditions when you go out to shoot flower pictures. Understanding how the sunlight, and your angle of view, affect the finished product is key to getting great shots.

Don’t let anyone tell you that if you want to get good pictures of flowers you have to do it in certain conditions like a cloudy day or the evening. In truth, you can get great flower photos almost any time as long as you pay attention to the sun and the shot you are trying to get. Let’s take a look at some different scenarios and see how they affect flower photography.

Time of day

The time at which you shoot, such as early morning or mid-afternoon, can have a huge impact on your flower photos. In addition to altering the amount of light available, shooting in the morning or evening changes the type of light. It also changes the angle at which it hits your flowers and the surrounding area.

I shot the picture below just as the sun was coming up. The blurry triad in the background is a street lamp that had not yet turned off. It added a nice background touch to the picture. This would have looked entirely different had I taken the picture a few hours later.

Image: 50mm, f/1.8, 1/180 second, ISO 400.

50mm, f/1.8, 1/180 second, ISO 400.

If you want your flowers gently illuminated for a soft, almost hazy appearance, then early morning or late evening is going to work great. However, if you want your flowers bright, sharp, and punchy, then harsh overhead lighting is ideal.

It all depends on the type of picture you want to take and knowing how the lighting conditions affect the final image.

using-light-in-flower-photography

50mm, f/2.8, 1/1500 second, ISO 200

A monarch butterfly joined me as I was taking the above picture in the afternoon. The bright overhead sun made the reds, yellows, and greens bright and crisp, which doesn’t happen in the early morning or late in the day.

The sun was directly overhead when I took the picture below. This caused each of the colors in this picture to shine. It turned out I wasn’t the only one interested in this particular magnolia flower.

using-light-in-flower-photography

50mm, f/1.8, 1/6400 second, ISO 200

You can get great pictures of flowers at any time of the day. Just make sure you know where the sun is and how it will impact your pictures. Armed with that knowledge, you’ll be able to make better choices about the pictures you are going for.

Types of light in flower photography

Backlighting vs. front lighting

Backlight is when the main source of light comes from behind your subject. This can lead to some creative scenarios, especially when used to shoot subjects with rim lighting. Conversely, front light is when the main source of light comes from the front of your subject, usually behind the photographer.

Either one of these types of lighting works great for flower photography. However, you need to understand how backlighting and front lighting affect your flower pictures, so you know which one to use. I photographed the flower below with front lighting. The sun was behind me as I took the picture.

using-light-in-flower-photography

85mm, f/1.8, 1/3000 second, ISO 100

Front lighting makes the purples really stand out, especially against the background. There are also some prominent shadows along the left-hand side and at the base. These are neither good nor bad, just a result of using front lighting.

A similar flower, shot in the same location a few minutes later, reveals a much different image when employing backlighting.

Image: 85mm, f/2.8, 1/500 second, ISO 560

85mm, f/2.8, 1/500 second, ISO 560

Notice how the petals almost look like they are glowing as the sun shines through them. The shadows are more diffused, which is also due to the late hour of the day at which this was shot. Both pictures are good but in different ways. If you traditionally shoot flowers with front lighting, try doing some backlit shots and see if you like the results.

Image: Another backlit flower, where the shining sun made the yellow flower appear bright and radian...

Another backlit flower, where the shining sun made the yellow flower appear bright and radiant.

Sunny vs. overcast

There’s a common perception among photographers that cloudy, overcast skies make for some of the best lighting conditions. While I certainly enjoy shooting on days like that, the truth is, you can make any lighting condition work for flower photography. You just need to know how the light will affect your images.

One of my favorite flower photos I have ever taken was in the middle of the day just after a bit of rain. It’s a few coneflowers low to the ground. The overcast sky led to even lighting across the entire frame and rich, deep colors. There are no harsh shadows, no translucent petals, and no bright spots in the background. Instead, the frame is a mix of saturated greens, purples, and reds that I really like.

using-light-in-flower-photography

50mm, f/1.8, 1/640 second, ISO 200

Another example of this is the following picture, which I took in the morning after a night of thunderstorms. The clouds overhead dispersed the sunlight into all directions, which gave me an evenly-lit scene that worked great for this particular show.

Image: 85mm, f/1.8, 1/200 second, ISO 125

85mm, f/1.8, 1/200 second, ISO 125

However, these two pictures don’t mean you can’t take great flower pictures in bright sunlight. Far from it! Just know that flower images in bright sunlight will look much different than their cloudy-skied counterparts. The picture below is similar to the one above, but I took it on a bright sunny day.

using-light-in-flower-photography

50mm, f/1.8, 1/8000 second, ISO 360

This picture is neither better nor worse than the one above it, just different. Bright sunlight makes the red petals leap out of the frame. The rich blue sky and deep shadows of the grove of trees add a sense of space and depth that is missing in this picture’s counterpart.

Similarly, I photographed the purple magnolia flower below on a bright sunny day, but with just a bit of cloud cover. It’s kind of a cross between sunny and overcast and yields an interesting picture.

using-light-in-flower-photography

85mm, f/1.8, 1/200 second, ISO 140

The sun was off to the left, making the white inside of the flower petal shine out and compete with the purple in the foreground for the viewer’s attention.

I show all these examples as an illustration that you can get great shots of flowers in a variety of lighting conditions. The key is to use the sunlight (however it happens to be at the moment) to your advantage by knowing how it will affect your flower photos.

A comparison

If you can’t control the light in your flower photography, you can still control the angle from which you shoot your pictures. This has an amazing impact on how your flower photos turn out.

I shot the three photos below on a bright sunny day in about three minutes. The same flower is in each shot, and I used a 50mm lens with an f/2.8 aperture. The only difference is the angle from which I took each photo but that one simple thing changes each picture a great deal.

In this first picture, the flower is front-lit, meaning the sun was behind me and almost directly overhead as I took the photo. Notice the bright orange colors and stark shadows, which create a sense of depth and isolation. The background is shrouded in shadow because of the overhead light and the angle from which I took the picture. I see a lot of pictures similar to this online, especially on social media sites.

Image: 50mm, f/2.8, 1/2000 second, ISO 100

50mm, f/2.8, 1/2000 second, ISO 100

For this next photo, I stood in the exact opposite spot, looking up from below into the sun. Notice how the petals have become brilliantly translucent, and the greenery on the left is bursting with blurry bokeh.

It’s an entirely different version of the same flower and didn’t require anything on my part other than a simple perspective change.

Unlike the first picture, I don’t often see flower shots like this on social media. This is most likely because it’s just not something a lot of people think about doing.

Image: 50mm, f/2.8, 1/2000 second, ISO 100

50mm, f/2.8, 1/2000 second, ISO 100

I photographed this final image from the side, and what’s interesting here isn’t necessarily the flower but the background. From this angle, the background was entirely green, making the oranges and reds of the flower scream out by comparison. The lighting is similar to the first image, but this one is a lot more interesting to me because it’s a mix of colors instead of a flower against a mostly black background.

using-light-in-flower-photography

50mm, f/2.8, 1/2000 second, ISO 100

I really want to stress that none of the pictures in this tutorial are objectively better than any others. What I hope to have illustrated is that paying attention to the light in flower photography, as well as considering alternative viewpoints from which to shoot, can dramatically impact your flower photos.

Image: 23mm, f/5.6, 1/160 second, ISO 200. I had to hold my camera high above my head and fire off a...

23mm, f/5.6, 1/160 second, ISO 200. I had to hold my camera high above my head and fire off a series of shots hoping one of them would turn out. It did, and I’m so glad I didn’t just shoot a single sunflower from my normal eye level.

If you enjoy taking pictures of flowers, hopefully these images will give you some new ideas to consider. And if you haven’t spent much time out in nature capturing the beauty of blossoms like this, I hope you can find some time to go out, look at the lighting in flower photography and give it a try. You might be surprised at what you can get!

I’d love to see some of your shots – please share them with us in the comments below.

The post A Step-by-Step Guide to Using Light in Flower Photography for Awesome Photos appeared first on Digital Photography School. It was authored by Simon Ringsmuth.


Digital Photography School

 
Comments Off on A Step-by-Step Guide to Using Light in Flower Photography for Awesome Photos

Posted in Photography


A Step-by-Step Guide to Sky Replacement Using Photoshop

29 Sep

The post A Step-by-Step Guide to Sky Replacement Using Photoshop appeared first on Digital Photography School. It was authored by Simon Ringsmuth.

Picture this if you will: you’re out in nature with your hopes, dreams, and a camera to capture it all. You see the beauty of creation stretching out before you, so you carefully and patiently set up your gear to get the perfect shot. Finally, the sun moves to just the right spot, and you hold your breath while you press the shutter button. Then you realize the clouds are all wrong. You can wait for hours for the ideal opportunity to present itself, or you can do sky replacement using Photoshop to drop in another one. It’s not as difficult as it might seem and can lead to some exciting results.

sky-replacement-using-photoshop

The building is in Oklahoma, and I combined it with a long-exposure sky I shot in Kansas.

Before you get started with this operation, you will need two pictures: one with a boring sky and one with a breathtaking sky. If you’re just getting started, I recommend using two pictures shot at a similar time of day under similar conditions. If you replace a sunny sky with storm clouds, the lighting will be all different, and the results will look, well, Photoshopped.

Image: A scenic view in the middle of Kansas. The sky could use some clouds though.

A scenic view in the middle of Kansas. The sky could use some clouds though.

After finding a picture with a nice foreground, you need to get another picture with an interesting sky.

Image: I shot this in the Tallgrass Prairie Nature Preserve in another part of Kansas. These clouds...

I shot this in the Tallgrass Prairie Nature Preserve in another part of Kansas. These clouds would look great in the first image, and Photoshop can help.

The plethora of screenshots below might seem overwhelming, but this entire process is quite easy and a lot less complicated than it seems. Fire up Photoshop, follow along carefully, and you should have some good results in no time at all.

Step 1: Get rid of the boring sky

Open your picture with the sky you want to replace in Photoshop. If you’re not familiar with Photoshop, you’ll see that the Layers panel on the right side has your picture as the Background layer. It’s locked, meaning you need to unlock it or make a copy. Go with the latter route by right-clicking and selecting Duplicate Layer.

Image: Always work on a copy of the background layer so you can revert to it if you need to.

Always work on a copy of the background layer so you can revert to it if you need to.

Click the new layer in the Layers panel to make sure it’s actually selected. You will know it’s selected by the outline that you can see around each corner of the layer thumbnail.

Image: The currently selected layer has white borders around each corner of its thumbnail. Make sure...

The currently selected layer has white borders around each corner of its thumbnail. Make sure the original Background layer is hidden by clicking the eye icon to the left of its thumbnail.

Click the eye button next to the original Background layer to make it invisible. It’s still there if you need it for any reason, but if all goes well, you should be able to do the rest of this entire process using the duplicated layer.

The next thing you need to do is remove the sky, which you can do with a technique known as layer masks. Start by clicking the Selection tool and holding it down until the pop-up menu appears. Click “Quick Selection Tool.” While not perfect, this is a great starting point for people who are new to sky replacements. You can do some fine-tuning to get things just to your liking.

A Step-by-Step Guide to Sky Replacement Using Photoshop

Now click and drag in the sky and watch the selection grow until it covers your entire sky.

sky-replacement-using-photoshop

Use the Selection tool to create a selection around the sky in your original image.

This selection isn’t going to be perfect, but it’s a good place to start. You can refine things once you create your layer mask. As long as you have most of the sky selected, you’ll be good to go. You can also use the Magic Wand tool to select portions of the sky, and hold [shift] to keep adding new parts to the selection. This works well if you have clouds or other elements besides just the color blue in your sky.

With the sky selected, click the Add Layer Mask button at the bottom of the Layers panel.

Image: Click this button at the bottom of the Layers panel to create a Layer Mask. This lets you sho...

Click this button at the bottom of the Layers panel to create a Layer Mask. This lets you show and hide different parts of a layer.

The result might surprise you – everything in your picture is now gone except for the sky! (If you still see the original image, remember to click the eye to the left of the Background layer. This will make it invisible, but not remove it from Photoshop.)

sky-replacement-using-photoshop

The initial layer mask shows the sky, which is not exactly what you want for this operation. It’s a good starting point though.

Removing everything but the sky is the opposite of what you want to do! The fix for this is simple: invert your layer mask. Select your new layer mask by clicking on the black-and-white thumbnail in the duplicated background layer.

A Step-by-Step Guide to Sky Replacement Using Photoshop

Now invert the mask by pressing Control-I (Command-I on a Mac) or choosing Image -> Adjustments -> Invert from the menus at the top of your screen. Now we’re really making some progress since the sky is gone but the foreground remains intact.

sky-replacement-using-photoshop

Invert the layer mask to show only the foreground. With the sky out of the way you can now insert a new sky into the background.

If clouds, birds, or other elements of the original sky are still intact, you can remove them by using the Brush tool on your layer mask. (See Step 3 for details on how to do this.)

Step 2: Insert a better sky

There are a couple of ways to do this next step, and I’m sure you will probably develop your own workflow over time. Since this is just a tutorial to get you started though, it should work for most basic sky replacement.

Choose the File menu and then select Place Embedded. Navigate to the folder on your computer with the image you want and double-click on it. This loads the replacement sky picture into your current Photoshop document. You can then tweak the results to get just the right image you want. The image will load on top of the previous image, and you’ll see it at the top of your Layers panel.

Image: When you place a new image into your Photoshop document it will appear at the top of the list...

When you place a new image into your Photoshop document it will appear at the top of the list of layers, which means it’s the only thing you will see in the main image editing screen.

Photoshop layers work like a stack: whatever is on top is, literally, whatever you see on top of your picture. If you want something to appear underneath something else, just click and drag the layers to your liking. In fact, that’s what you have to do with your replacement sky. Click the layer you just inserted and drag it below the duplicated background layer.

Image: Click and drag the sky replacement layer so it’s beneath the copy of your background.

Click and drag the sky replacement layer so it’s beneath the copy of your background.

Now look at your sky picture! Just like magic, the original sky has gone and the new sky shows up in its place.

A Step-by-Step Guide to Sky Replacement Using Photoshop

Step 3: Clean things up

At this point, there are two common issues that generally need fixing. One is that the foreground has some errors that need correcting, like trees or other objects that are cut off or otherwise not showing up properly. The other is that the replacement sky doesn’t quite fit the empty space.

You can harness the power of Layer Masks to fix the first issue. Tap the Z key to switch to the Zoom tool, and click on your picture a few times to zoom in for a close-up view. Hold the space bar to switch to the Hand tool, and click-and-drag the picture to see the spots that need fixing.

Image: These trees don’t really need fixing, but I want to remove them for a cleaner horizon.

These trees don’t really need fixing, but I want to remove them for a cleaner horizon.

Make sure you select your Layer Mask and tap the B key to switch to the Brush tool. Right-click to adjust the size of your brush and other parameters like hardness and shape.

Image: Using the brush tool on the Layer Mask will show or hide specific parts of the layer.

Using the brush tool on the Layer Mask will show or hide specific parts of the layer.

Now click on the parts of the foreground you want to either remove from the picture or add to the picture. (Press the X key to switch between remove and add mode.) What you’re actually doing is painting white or black on the layer mask: everywhere you paint white is shown, and everywhere you paint black is hidden. You don’t actually see the white or black colors, just the results of painting them onto the image.

Image: A few clicks on the Adjustment Layer and the trees have gone!

A few clicks on the Adjustment Layer and the trees have gone!

If you find that your sky doesn’t quite fill the empty space, you can solve that by just adjusting the size of the sky layer. Click the top layer, the one with the foreground, and adjust the opacity to 30%. That way you can see the background layer, the one with the sky, along with the foreground layer.

Image: Set the opacity of the duplicate background layer to 30%.

Set the opacity of the duplicate background layer to 30%.

The result looks like some kind of weird double-exposure error, but it will look fine once you finish the operation.

Image: You can now see the replacement sky and the foreground. This will help you adjust the replace...

You can now see the replacement sky and the foreground. This will help you adjust the replacement sky size and position to your liking.

Select the layer with the replacement sky and choose Edit -> Free Transform, or press Control-T (Command-T on a Mac). Then use the handles at the corner of the sky layer to enlarge it until it fills the empty space.

sky-replacement-using-photoshop

After pressing Transform, click and drag on the squares in the corner of the layer to change its size. Click and drag in the middle of it to change its position.

After you have resized the sky layer, press the [return] key to lock in the transformation. Then go back to the foreground layer and increase its opacity to 100%. This same process is also a great way to adjust the sky in the background even if there isn’t necessarily anything wrong with it. One example of this is if you want to adjust the sky to emphasize a certain portion where the clouds happen to be more interesting.

sky-replacement-using-photoshop

The same image as before, but with the sky zoomed in (i.e. Transformed) to create a more interesting picture.

Once you get the hang of this process, it’s pretty simple. You can do a lot of custom work simply by editing the layer mask you create in the first step. You can also do this just for fun, like the picture below where I replaced the blue sky behind this building with a giant squirrel. If you have kids, or if you just want to have some fun experimenting on your own, this is a great way to explore some of the capabilities of Photoshop.

sky-replacement-using-photoshop

Attack of the Giant Mutant Killer Squirrels!

Once you try sky replacement using photoshop on your own, I’d love to see some examples of your work. Leave the results in the comments below!


sky-replacement-using-photoshop

The post A Step-by-Step Guide to Sky Replacement Using Photoshop appeared first on Digital Photography School. It was authored by Simon Ringsmuth.


Digital Photography School

 
Comments Off on A Step-by-Step Guide to Sky Replacement Using Photoshop

Posted in Photography


A Step-by-Step Guide to Achieving the Perfect Starburst Effect

04 Sep

The post A Step-by-Step Guide to Achieving the Perfect Starburst Effect appeared first on Digital Photography School. It was authored by Simon Ringsmuth.

Adding a starburst effect to your images is a great way to spice things up and really grab the attention of your viewers.

Seeing rays of light slice through your photo is one of the most enjoyable tricks to pull off, especially if you haven’t really done this sort of thing before. While some software programs let you do this on your computer, the real magic comes when you do it by knowing how to use your camera.

starburst on building

Step 1: Find a light source

Creating the starburst effect isn’t difficult. But it does require a bit of training and practice to pull off. You’ll need a few basics to get started:

First, you’ll need a bright source of light, such as the sun. A street lamp or really powerful flashlight will work too, but the sun is nice because it’s always available and doesn’t cost money to use.

If you don’t mind shooting pictures at night, you can get a starburst effect quite easily with a street lamp or other source of light. However, night photos might not look as interesting or visually compelling as shots of the sun.

Ironically, you also need something to block most of the sun. This is because the sun itself is too large and bright to give you good starburst shots; just a sliver of its light is all you need. Buildings and trees work great, but whatever you use can’t be too far away. If the thing blocking the sun is separated from you by too great a distance, you won’t get the starburst effect.

starburst effect on a building roof

The effect isn’t as pronounced in this image, but it’s definitely there. Using a structure to block most of the sun is a great way to help you achieve a good starburst.

Step 2: Choose a small aperture

As far as your camera goes, the one setting that really matters is your aperture.

To get a good starburst, your aperture should be small, such as f/11 or f/16. This means you will need a camera with aperture control, such as a DSLR or mirrorless system. Nearly all mobile phones use wide apertures and very few of them allow you to have any control over the aperture at all.

So if you want to pull off a cool starburst effect in-camera, you’re going to need a dedicated camera and not just a phone.

Step 3: Set up for your starburst shot

The basic setup for a starburst effect photo is also fairly simple and works best when the sun is lower on the horizon during the morning or late afternoon. You can do it at other times of day, but it’s a little more difficult to find objects that obscure the sun when it’s directly overhead.

starburst on a clock

To achieve the starburst effect, position yourself so that the sun is off in the distance and the object obscuring it is not too close and not too far. Then set your aperture to f/11, point your camera in the direction of the light, and take a picture.

Take care to not point your camera directly at the full sun, as it could damage your sensor or your eyes. Just a sliver of the sun and a small aperture is all you need.

Step 4: Experiment with different setups

If the object you use to block most of the sun is too far away, the starburst effect will be much more difficult to achieve. In the shot below, you can just barely see the points of light emanating from where the sun is peeking over the clouds. It’s subtle and can work if it suits your compositional goals for the image, but I don’t find shots like this to be nearly as fun as other starburst images.

A Step-by-Step Guide to Achieving the Perfect Starburst Effect

There’s a lot of creative things you can do when you start experimenting with starbursts. In the picture below, the sun was obscured just a bit too much by the tree branch. The cicada exoskeleton looks fine, but the photo lacks something in the way of a visual spark.

A Step-by-Step Guide to Achieving the Perfect Starburst Effect

I adjusted the position of my camera by mere millimeters so as to get the tiniest bit of the sun poking out below the branch. The result is a much more compelling photo:

cicada with starburst

The addition of a starburst adds a whole new dimension to the photograph and elevates it to a whole new level.

Note: How aperture alters the starburst effect

To see why a small aperture is important, look at the following photos, which were taken just a few seconds apart. The first used a large f/1.8 aperture, and as a result, the sun is a large yellow blob in the sky and not all that interesting. This is similar to the type of picture you could take on a mobile phone since most of those have large apertures ranging from f/1.8 to f/2.8.

Image: I took this photo with an f/1.8 aperture at 50mm.

I took this photo with an f/1.8 aperture at 50mm.

Stopping down to f/11 changes the image dramatically. Not only is the foreground and background in focus, but the sun is now a brilliant star pattern. This is a direct result of the smaller aperture.

fountain with starburst

I took this photo with an f/11 aperture at 50mm.

A similar effect is seen in the two photos below. Taken at different locations, they illustrate the effect quite clearly. The first shows a row of lights fading into the distance, and because I shot it at f/1.8, they appear as blurry orbs. This isn’t a bad thing, as my intent was for the viewer to focus on the light in the foreground.

row of lights without starburst

I took this photo with an f/1.8 aperture at 50mm.

The next image shows a similar row of street lights, but the small aperture I used caused every point of light in the image to appear as a starburst.

streetlights with starburst

I took this photo with an f/13 aperture at 50mm.

Even the green traffic lights far in the distance are starbursts. You can see how this dramatically alters the overall effect of the picture. If I had used a larger aperture, it would be an entirely different image.

Conclusion

My favorite part of shooting starburst photos is how easy it is once you get the hang of it. It’s also rather gratifying to know you can do it just by manipulating your camera.

starburst at night

Have you tried using the starburst effect in your images? What tips or tricks do you have for the DPS community, or for others who might not have done this type of photography before? Leave your thoughts in the comments below!


perfect-starburst-effect-in-photography

The post A Step-by-Step Guide to Achieving the Perfect Starburst Effect appeared first on Digital Photography School. It was authored by Simon Ringsmuth.


Digital Photography School

 
Comments Off on A Step-by-Step Guide to Achieving the Perfect Starburst Effect

Posted in Photography


How to Use Pinterest to Grow Your Photo Business (Step-By-Step Guide)

02 Sep

The post How to Use Pinterest to Grow Your Photo Business (Step-By-Step Guide) appeared first on Digital Photography School. It was authored by Darina Kopcok.

Do you use Pinterest to market your photography services?

You should.

Because here’s the thing: Millions of potential clients use Pinterest. In fact, 250 million people around the world use Pinterest every month, and this number continues to grow. 

Most people think of Pinterest as a social media platform, but it’s actually a search engine that’s driven by search and discovery. Statistics show that nearly half of online users search in Pinterest before turning to Google. It has an incredible power to drive traffic to your site and grow brand awareness. Visitors from Pinterest convert into leads or sales faster than those from social media networks.

Why?

One reason is that Pinterest has a much longer shelf life than social media. Once an image is uploaded to an Instagram or Facebook feed, it gets buried quickly. With Pinterest, your pins will have staying power and benefit you more the longer they’re around. 

Now that you know why Pinterest is so great…

…let me tell you how you can gain traction on Pinterest, fast.


pinterest photography business profile page

Step 1: Get a business account 

In order to use Pinterest effectively for your photography business, you’ll need to sign up for a free Business account. A Business account will allow you to monitor your analytics from within Pinterest. This will give you important information about the boards and pins that are most popular with your audience.

These insights can help you increase your engagement and pin more effectively.

pinterest statistics

Step 2: Create a succinct Pinterest profile

Your Pinterest profile needs to be short and to the point. It needs to let people know what you do. Are you a wedding shooter? Do you specialize in personal branding portraits? Include it in your profile.

For example, my main income comes from commercial and still-life photography, but I’m also a photography mentor. This third aspect of my business is the focus of my Pinterest account. Therefore, it’s the focus of my profile biography.

Step 3: Organize your board for your viewers

If you want to promote yourself as a photographer, you must always keep your target audience in mind. Your boards are not for you; they’re for your viewers, and so you need to speak to what they might be looking for when they log onto Pinterest.

This doesn’t mean you can’t have boards on crafting and cooking. It just means that you need to hide these non-business boards from public view.

Just remember, all of your visible boards must be relevant to potential clients.

Since I’m a food photographer, most of my boards feature beautiful images of food, organized into topical boards such as Salads, Desserts, Main Dishes, etc., as well as themes such as food photography lighting and styling.

And since I mentor food bloggers and emerging photographers, I also have boards such as Learn Food Photography as well as Blogging Tips. Use basic names for your boards that will be searchable and easy to find. 

Your boards should be organized from most relevant to least relevant, not by alphabetical order. Have your first board feature your own photography only; you want to show potential clients what you can do. Clean up your own boards and create new ones.

You’ll quickly see a big difference in your Pinterest traffic.

pinterest business boards

Step 4: Use keywords in your descriptions

Pinterest works similarly to Google – users search for specific content they’re interested in by using keywords.

In fact, keywords are the number-one tool for content discovery.

That’s why each of your boards should have a description using keywords or using hashtags created from keywords. Also, use as many keywords as possible in your pin descriptions. General keywords make your content easier to discover.

You can also use keywords to attract potential clients in your region. If you live in Portland and want to attract brides in your area, use keywords like “Portland Bride” or “Portland Weddings.” Add them to all of your descriptions and alt tags. Local keywords are underused and undervalued, especially in small markets, so they can make a big difference.

pinterest keywording
Step 5: Brand your pins

When creating pins, you may want to add text (depending on your niche and your reason for pinning posts).

If you’re just trying to share your stunning images, then this may not be relevant. But if you can think of a way to add text that will advertise your services, it’ll work in your favor. Surprisingly, pins with text get more attention than those without text.

For example, the purpose of my Pinterest account is to attract people to my photography coaching services and products. I do this by driving traffic from Pinterest to my blog.

How?

I create pins for each blog post I write. The pins are simply designed, but they’re consistent. I use the same font and style for each pin, which creates a “brand” for my pin that is consistent and that viewers will easily recognize.

Consider creating some pins with text in Photoshop or using an easy app like Canva. Canva offers a variety of free templates already sized for use on Pinterest. Test a few different styles and fonts and see how they perform. You may see that one style of pin gets repinned more than another. If so, then stick with that style.

branded pins

Examples of branded pins created on Canva.

The bottom line is that you should try to keep a strong brand identity, one that highlights specific services and remains visually consistent. It might be a bit of extra work at first, but it’ll pay off in the end.

Step 6: Join group boards selectively

Group boards are like regular boards, except that the board owner can invite collaborators to add pins of their own.

Group boards used to be a great way to generate traffic. Until Pinterest introduced the “Smart Feed,” which prioritizes and ranks pins based on their quality and engagement.

This led to a big decline in the value of group boards. You see, group board collaborators often rarely look at the board, and therefore rarely repin other members’ content. Because no one interacts with the boards, Pinterest assumes the pins are not popular. So they don’t show up in the Smart Feed.

How do you avoid this problem and use group boards to your advantage?

Choose active, niche boards that focus on one topic and have less than 100 contributors. Too many contributors can mean low-quality content.

The important thing to remember is that quality is much more important than quantity.

A board that encourages mutual sharing is also crucial. For example, a policy stating that you need to repin two pins for every post you make can make a big difference.

If you choose to join group boards, then keep these points in mind.

Step 7: Use boards to collaborate with clients

Visuals are a part of the communication that should take place between you and your clients before you start a job, especially if you’re in the commercial world. Pinterest can help you share images that serve as inspiration or a guideline for an upcoming shoot. If you work with commercial or editorial clients, you can collaborate on a mood board using Pinterest. This ensures that everyone involved in the shoot understands what the final results should be.

If you work in a retail niche like weddings or portraiture, you can use Pinterest to get a sense of the mood and color your client is drawn to. After all, a picture is worth a thousand words, right? Light green might mean one thing to you and another to your customer, so images that demonstrate the feel and color treatment that is sought can go a long way in helping you get the right look.

You can also use Pinterest boards to educate clients. If you do glamour or boudoir portraits, you can send your client a What to Wear board. This will provide inspiration and examples for choosing outfits for their shoot.

chef portraits board

Step 8: Schedule pins with the Tailwind app

Tailwind is a Pinterest-approved scheduling tool. It’s a fantastic app to help you grow your audience like crazy.

You see, pinning consistently is important growth strategy, but most people don’t have time to be pinning throughout the day. With Tailwind, you can sit down once a week to schedule your pins. They’ll automatically upload throughout the week at optimal times. Or, if you prefer, you can customize your pin schedule.

Tailwind also offers powerful tools that analyze your pins and boards, as well as your Pinterest profile. You can see which pins are getting the most engagement and reschedule them right from the interface.

Tailwind analytics

Conclusion

Pinterest is a great tool for generating visitors and leads.

And if you follow the steps I’ve given above, your Pinterest account will start expanding, fast.

So go set up your Pinterest account and start pinning!

Do you have any other tips for using Pinterest? Share with us in the comments section!

How-to-Use-Pinterest-to-grow-your-photography-business


The post How to Use Pinterest to Grow Your Photo Business (Step-By-Step Guide) appeared first on Digital Photography School. It was authored by Darina Kopcok.


Digital Photography School

 
Comments Off on How to Use Pinterest to Grow Your Photo Business (Step-By-Step Guide)

Posted in Photography


How to Take the Perfect Macro Photo (Step-By-Step Guide)

22 Jul

The post How to Take the Perfect Macro Photo (Step-By-Step Guide) appeared first on Digital Photography School. It was authored by Jaymes Dempsey.

In this article, I’m going to show you exactly how you can take the perfect macro photo.

I’m talking about macro photos that are unbelievably good – the kind of photo that professionals strive for.

Because it turns out there are a few simple macro secrets. And if you use them regularly, you can practically guarantee some gorgeous macro images.

Are you ready for some step-by-step instructions that will take your macro images to the next level?

Let’s dive right in.

Step 1: Shoot during the right light (clouds or Golden-Hour!)

Macro photography starts with light.

And without good light?

Your photos just won’t work.

But what counts as good light for macro photography?

First of all, the golden hours are amazing for macro photography. If you shoot during the hour or two after sunrise and the hour or two before sunset, you’re guaranteed incredible light.

You do have to be careful about the light’s direction. During the golden hours, the sun is low in the sky. This means that the light hits your subject from an angle. And this angle will affect how your photos turn out.

In general, frontlight is the best type of light for macro photography.

(Frontlight refers to light that comes from over your shoulder, and hits the front of your subject.)

So if you stick to frontlight, you’ll do just fine.

If you struggle to find the best position for frontlight, try pointing your shadow at your subject. That way, you can be sure that your subject is always perfectly lit.

However, the golden hours aren’t the only type of good light for macro photography.

You can also shoot beautiful macro photos when the day is heavily overcast.

Because clouds diffuse the light, making it nice and soft.

With soft light, you don’t have to worry about the direction. Instead, focus on shooting subjects with color. The soft light will make the hues more vivid.

And speaking of subjects:

Step 2: Find a single stand-out subject

All perfect macro photos need a strong subject.

Something that stands out. Something that can act as a focal point for your photo. Something that anchors the shot.

There are dozens of possible macro photography subjects, including:

  • Flowers
  • Insects
  • Rocks
  • Feathers
  • Leaves

But here’s the thing:

The particular category of the subject isn’t important. You can take amazing macro photos of flowers or insects, rocks or feathers.

What’s important is that you choose the right flower, the right insect, the right rock.

Because you need to choose a subject that’s going to stand out from its surroundings. That is, you should aim for a subject that contrasts with the environment (ideally in multiple ways).

For instance, your subject can be sharp, while its surroundings are soft.

Your subject can be dark, while its surroundings are light.

Your subject can be red, while its surroundings are green.

The point is for your subject to stand out. If your subject blends in with the environment, the shot generally won’t work. Because almost every macro photo needs an anchor.

Note that this means your subject shouldn’t overlap chaotically with other, similar objects. For instance, you don’t want a flower that’s surrounding by other distracting flowers.

Bottom line:

Make sure your subject is powerful. That’s the first step to capturing the perfect macro photo.

Step 3: Find a simple background that enhances the subject

You know the importance of a stand-out subject.

But your background is important, too.

If you want to capture a stunning macro photo, you’ve got to make sure that your background is totally aligned with this goal.

What makes for the perfect macro background?

First, the perfect background is simple. It doesn’t have much going on. It doesn’t distract.

Second, the perfect background enhances the photo as a whole. That is, it adds a splash of color, or creates a pure white look for the subject to rest on.

In general, you can make your macro backgrounds simple by creating a deep blur. You do this two ways:

  1. Use a wide aperture (in the f/2.8 to f/5.6 range).
  2. Have a large subject-to-background distance. For this, make sure that your background is off in the distance.

To enhance the photo with your background is harder. I like to make backgrounds by using the sun-shade technique – where you make sure that your subject is in the shade, and your background is in golden sun.

That’s how I was able to capture backgrounds like this one:

If you can’t use the sun-shade technique, that’s okay. Try to find a background that includes a bit of color – such as a distant autumn tree.

Note that you can often find better backgrounds by simply walking around your subject and observing it from multiple angles. Try getting down low, shooting from up high, or getting on a level with your subject.

Step 4: Pick the perfect settings for a sharp, well-exposed macro photo

Once you’ve chosen a subject and a background, it’s time to choose your macro settings.

I’ll start by sharing my common settings, and then explain why I choose them and what I suggest you work with.

When I shoot macro photography, I use Manual mode, because I like tweaking both my shutter speed and aperture to try out different looks. However, it can also make sense to work in Aperture Priority mode if you’re not interested in playing with different shutter speeds for creative results.

I don’t recommend Shutter Priority mode, because this relinquishes control over your aperture – and aperture is something that you should absolutely choose yourself.

Speaking of aperture: I consistently use apertures between f/2.8 and f/5.6. This gives me the perfect blurry background – which, as I mentioned above, helps create a stand-out subject.

However, macro photographers sometimes prefer their subject to be sharp throughout. In this case, you’ll need an aperture in the area of f/16 and beyond, and you’ll need a tripod. In fact, if your subject is very three-dimensional, you’ll need to focus stack (a technique that’s beyond the scope of this article).

I tend to work handheld (because I like the flexibility). This means that I rarely let my shutter speed drop below 1/120th of a second. But if you use a tripod, you’re free to let your shutter speed drop far below this mark (if there’s absolutely no wind, that is!).

In general, I advocate using the lowest ISO you can get away with. You want to minimize noise as much as possible. So try to keep this down.

Finally, make sure that you switch from autofocus to manual focus, especially if you’re working at high magnifications. You simply can’t focus well with autofocus at macro magnifications, no matter how good your lens. So manual focus is key to getting the perfect shot.

And that’s it! Take your shot – and admire it! Because if you’ve followed the instructions above, it’s going to look really, really stunning.

How to take the perfect macro photo: next steps

You know how to take the perfect macro photo.

You know how to find the perfect light, the perfect subject, and the perfect background.

You even know the perfect macro photography settings.

So go out and take some perfect macro photos of your own!

Which step in capturing a perfect macro photo do you struggle with the most? Leave a comment right now letting me know – and I’ll see what I can do to help!


how-to-take-the-perfect-macro-photo

The post How to Take the Perfect Macro Photo (Step-By-Step Guide) appeared first on Digital Photography School. It was authored by Jaymes Dempsey.


Digital Photography School

 
Comments Off on How to Take the Perfect Macro Photo (Step-By-Step Guide)

Posted in Photography


Step-by-step Guide to Long Exposure Photography

30 Jul

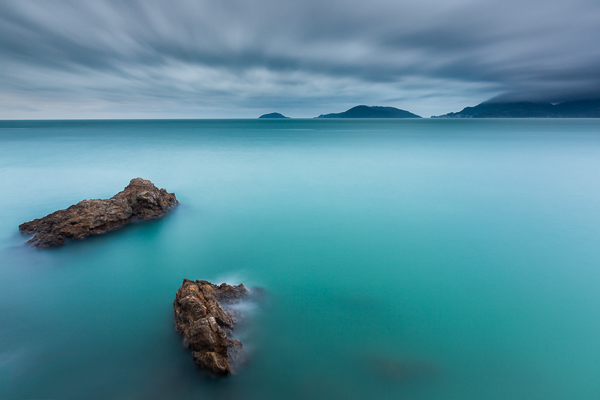
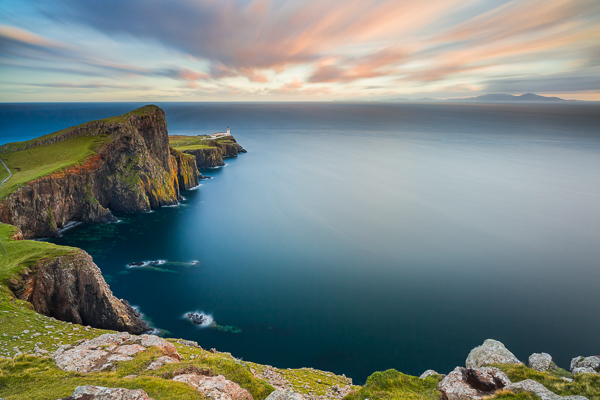
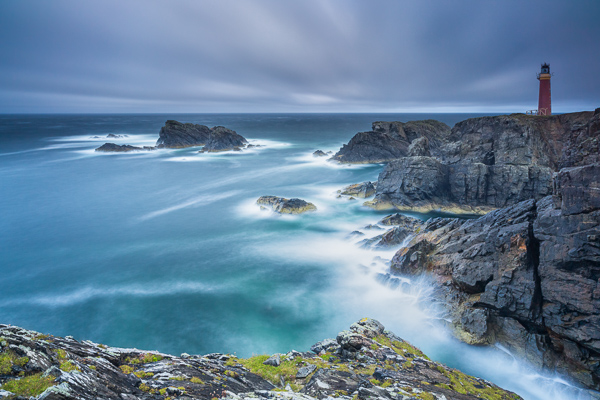
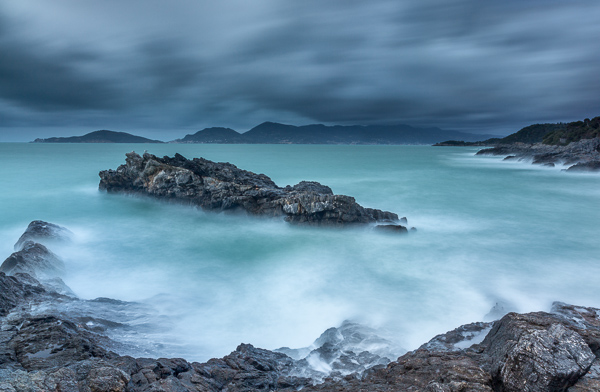
In the past few years, thanks to the diffusion of useful accessories and photographic filters with good quality and low prices, the technique of long exposure has become increasingly popular among photography enthusiasts. Even if this technique can be used both in studio and in a urban environment, the perfect playground of long exposures is landscape photography.

Unfortunately often it happens that the result we get is far from our expectations, and we end up classifying the long exposure as a demoniacal technique. However, following this step-by-step guide to long exposure photography, you’ll see how easy it is to get a good result on the first attempt (or almost).

Picture 1

Step One: study the weather

A day with a cloudless sky is a good day to drink a beer with friends, not to make long exposures. Likewise it cannot rain forever, so do not resign yourself to an afternoon with your PlayStation. You should study satellite images rather than the meteorological sites, trying to figure out if there is an incoming storm, or if the downpour is about to end.

Step Two: visit the location well in advance

Scout the location ahead of time, as you need a lot of time to find the perfect composition, or at least more than the time needed for a “short exposure”. In fact in a long exposure the world is completely different from how you see it with your own eyes. You have to try to see it with your mind, looking for a harmonious composition that includes moving subjects, trying to predict the direction of the clouds or the force of the sea. Try not to put the sun into the composition because its movement will ruin the shot and it will create area of overexposure that is not recoverable. If you cannot avoid the sun, wait for it to hide behind a cloud.

Picture 2

Step Three: use a tripod

Mount your camera on a tripod and install all the accessories such as the remote shutter release and the filter holder (if you are using drop-in filters). However, wait to actually install the filters. Very important!

Step Four: compose the image and lock focus

Refine your composition, focus on the subject and lock the focus. If you are using manual focus, just do it. If you are using the autofocus mode, you should focus by half-pressing the shutter button, and once the focus has been made, while still holding down the shutter button halfway, push the lever from Auto Focus to Manual. In this way, your camera will maintain the focus (or alternately you could use back-button focus).

Picture 3

Step Five: set the exposure

Now set your camera to Manual (M) mode or Aperture Priority (A/Av) mode. Then set the aperture to an appropriate value for the scene (for landscapes I suggest between f/8 and f/11) and take a “Test Shot”. The test is complete when you get a correct exposure. To determine if the exposure is correct, check the histogram (do not trust your display, it is too bright). It is true, there is no universally correct histogram, but there are histograms that are universally incorrect, namely moved completely to the right or left side (the image is respectively overexposed or underexposed). Once the test shot is successful, write down the shutter speed you used for that shot.

Step Six: add your filter

Now add your Neutral Density (ND) filter. If the filter is very strong, for example 10 stops, you will not be able to see through the viewfinder or the Live View. Do not worry, because if you have followed the guide up to this point you will notice that we have already made the composition and the focus too. You are blind, but your camera will see everything perfectly.

Picture 4

Step Seven: change to Bulb mode

Set the shooting mode to Bulb (B) in order to take over the thirty second limit of the camera. Do not change any of the other settings (ISO and aperture) used in the test shot.

Step Eight: take your long exposure shot

It is finally time to take our long exposure shot. But how long will you to leave the shutter open? It is less difficult than you might expect. First of all, recollect the shutter speed that you noted down from the “Test Shot” you did in Step Five above. Now you must compensate by the number of stops introduced by the filter. For example, if your test shot was 1/15th of a second, adding 10 stops will get a shutter speed of approximately 60 seconds. There you have your shutter speed. No need to be stuck in the mathematics: on the internet you can easily find conversion tables and applications for your smartphone that will do the conversion for you.

Picture 5

Step Nine: check the histogram again

Once you’ve taken the shot with the calculated shutter speed, check the histogram. If the new histogram is approximately equal to the one of the test shot, mission accomplished. If it is shifted too far to the right or to the left, repeat the shot again correcting the shutter speed.

Easy, isn’t it? Now fill your backpack with your camera and filters and go to practice in the field. For any doubt or if you need any help, don’t hesitate to ask questions in the comments below. Please share your long exposure images as well.

The post Step-by-step Guide to Long Exposure Photography by Francesco Gola appeared first on Digital Photography School.


Digital Photography School

 
Comments Off on Step-by-step Guide to Long Exposure Photography

Posted in Photography