RSS
 

Posts Tagged ‘solve’

Lensrentals tears down a Canon RF 100-500mm F4.7-7.1 lens to solve the mystery of a cracked element

22 Jan

Roger and Aaron are back at it again for Lensrentals, this time with a teardown of a Canon RF 100–500mm F4.7–7.1 lens with a little secret inside.

As Roger tells it, Lensrentals has come across ‘several’ copies of Canon’s RF 100–500mm F4.7–7.1 lens with a cracked element inside. He believes this crack occurs during shipping, but notes that ‘if you’ve ever rented from [Lensrentals], you know how we pack […] Nothing should break in shipping.’ As such, he did what he usually does when he can’t get an answer from the outside, he tore the lens down (with the help of Aaron, of course).

The large crack, seen through the rear elements of the lens. Click to enlarge.

Upon taking a closer look, Roger suspected the cracked element was inside the image stabilization module of the lens, due to the crack appearing to move when the lens was shifted around. He explains that while Canon was known for physically locking down IS units in its EF lenses, that practice has become less commonplace with RF lenses due to improved engineering measures. Naturally, he assumed this lack of lockdown could be the culprit for the cracked element in shipping.

As it turns out though, that wasn’t quite the case.

Roger and Aaron went through the usual routine, starting at the front of the lens. Despite easily removing the filter barrel and front optical group, they hit a roadblock with the light baffle inside. So, ‘like the cowards [they] are,’ Roger and Aaron turned the lens around and started to take it apart from the lens mount side.

A close-up view of the ribbon cables neatly tucked away inside the barrel of the lens.

Along the way, the pair ran into the usual array of screws, ribbon cables and sensors. But it wasn’t all that bad to take apart, thanks to the lens’ modular construction. Roger particularly appreciated how Canon managed to integrate almost all of the ribbon cables into the barrel of the lens, meaning there was little need to trace and mark down where every cable was supposed to be routed to:

‘I get accused every so often of being a Canon fanboy (or Sony, or Sigma, etc.). I’m not, but I’ll readily admit I’m a Canon lens construction fan; these are a pleasure to work on compared to most brands.’

A comparison of how the internals of the lens look when zoomed out versus zoomed in. Click to enlarge.

With the rear barrel off, Roger and Aaron took a look at the intricacies of the zoom section of the lens. Roger notes ‘everything moves in an impressively complex fashion’ and is almost overbuilt in some areas. Specifically, Roger points out that the front barrel moves along six heavy-duty rollers (as opposed to three in most other zoom lenses), each of which has custom-fitted nylon bearings to ensure the tightest fit possible while still offering a smooth glide. To this, Roger says ‘This is why nice things cost more; a lesser lens has three same-size small nylon bushings over screws.’

A close-up of one of the nylon bushings precisely fitted to the guide rail. Click to enlarge.

Another detail Roger noticed is that the two optical groups responsible for zoom operate independent of one another. That is, rather than both optical groups extending together with the barrel, the rear zoom optical group moves into the barrel, but isn’t doing so at the same rate as the front optical group.

From there, it was on to the inner barrel to see if the duo could get to the broken element. Before getting to the IS module though, Roger noted the use of springs to hold the rear baffle in place. He says Canon has been using more and more tensioning springs in its lenses over the years, ‘which suggests they originally thought it was a good idea, found out they were correct and increased usage.’ This particular lens has ‘over a dozen springs.’

A look at the tensioning springs used to hold the rear baffle tight. ‘It’s a complex little bit of engineering for a baffle,’ says Roger. Click to enlarge.

Eventually, Roger and Aaron hit the IS module, which Roger describes as ‘a pretty robust unit.’ He elaborates:

‘In older lenses, we sometimes saw IS units that were encased in a ‘cage’ of plastic bars, which broke sometimes. This is not that at all, it’s heavy-duty interlocking plastic shells with multiple screws and tension springs. We could (OK, we did) shake the heck out of it. It just rattled a bit, but there was nothing but solidness here.’

A close-up view of the ‘robust’ IS unit inside the RF 100-500mm F4.7-7.1 lens. Click to enlarge.

However, as you can see in the above image, there was no crack in sight. So it was on to more disassembling to get to the problematic element. After removing countless cams, spacers, screws and more, Roger and Aaron were able to find the cracked element — a thin, single element that sits right behind the aperture assembly and is also the forward focusing element.

Note the aperture assembly in front of the cracked element. Click to enlarge.

Still confused as to how the element cracked, the pair measured and tested everything around the element and determined there’s no way it could’ve impacted anything inside the lens. So, what could’ve caused it to crack? Roger doesn’t really know.

In his conclusion, Roger says:

‘My first thought, given that it’s winter, was perhaps temperature shock, moving from sub-zero trucks to warm indoors or something. But I’ve asked several people more knowledgeable than I and none think that’s a possibility. The ones that cracked are all early copies from a similar serial number range, perhaps there were some flawed elements early on. Maybe it’s just a statistical anomaly; we have a lot of copies and stuff happens. Or maybe it’s something we do or something with shipping. Nobody else has reported this. It’s worth looking into further, there are a number of things we’ve noticed before anyone else just because we have a lot of gear and a lot of repairs and inspections. But it may be an oddity that never happens again.’

Whatever the case, Lensrentals has sent all of its data and broken lenses to Canon, who already has a team assigned to more thoroughly investigating the issue. Roger says ‘Canon is always proactive about investigating these things and [is] one of the few companies willing to publicly say when they actually have a problem.’

Broken element aside, Roger says the rest of the teardown is what he’s come to expect from Canon RF L series lenses:

‘It’s filled with very robust construction, neatly and clearly laid out in a modular manner. It’s a very well-built and sturdy lens with cutting edge technology.’

To conclude, we’ll let Roger’s Rule of Broken Parts speak for itself: ‘the hardest to get to part is the one that’s broken.’

Articles: Digital Photography Review (dpreview.com)

 
Comments Off on Lensrentals tears down a Canon RF 100-500mm F4.7-7.1 lens to solve the mystery of a cracked element

Posted in Uncategorized


Codex Silenda: Solve Puzzles to Turn Pages in this Crafty Wooden Book

11 Sep

[ By WebUrbanist in Art & Sculpture & Craft. ]

codex silenda

Unlike The Maze and other classic puzzle books, the Codex Silenda brooks no cheating, forcing readers to solve elaborate puzzles on each page before proceeding to the next.

puzzle book top

puzzle design details

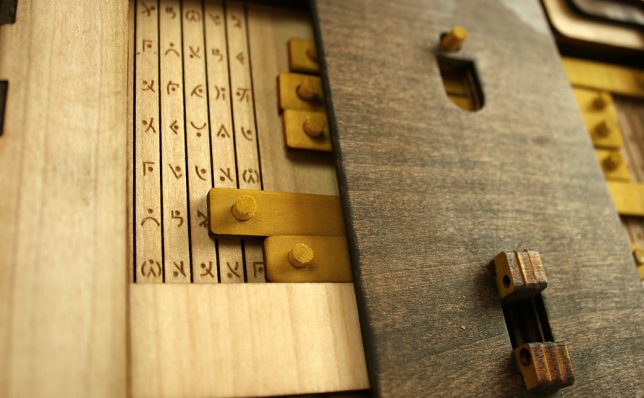
Somewhere between a choose-your-own-adventure novel, a Chinese puzzle box and a blacksmith puzzle, this five-page volume features dizzyingly complex mechanical puzzles that can only be completed in sequence. In each pair of facing pages, a short story unfolds on one side while a related new puzzle is revealed on the other.

laser etched wood

spinning wheels

new puzzle

Designed by Brady Whitney, the wooden book is laser-cut and ornately detailed, full of hidden mechanisms worthy of Leonardo Da Vinci – indeed, the story itself is about an apprentice stumbling into the master’s workshop and becoming trapped inside the tome. The laser-burnt edges give the work a hand-crafted but careworn look, like something you might find in a mysterious antique shop, covered in dust.

puzzle book top

puzzles

book flat


From the makers: “Codex Silenda is a five page book that features five intricate puzzles. Each page features a unique puzzle that requires the user/reader to unlock the corresponding bolts in order to progress to the next page.” More about its maker: “Brady Whitney is the designer of the operation, the mastermind of the Codex. He originally came up with the idea for his senior thesis research project during his final semester at Iowa State University. Having grown up with a childhood filled with imagination, his passion for design has always been focused on the realm of toys and games, creating the products and ideas he always wished he had as a kid.”

Share on Facebook


[ By WebUrbanist in Art & Sculpture & Craft. ]

[ WebUrbanist | Archives | Galleries | Privacy | TOS ]


WebUrbanist

 
Comments Off on Codex Silenda: Solve Puzzles to Turn Pages in this Crafty Wooden Book

Posted in Creativity


Sigma updates 150-600mm firmware to solve overexposure with Nikon D500

02 Jul

Sigma has announced new firmware for one of its super tele zooms that has a problem with exposure when used with the Nikon D500 and Sigma’s 1.4x tele convertor. Both Sports and Contemporary versions of the 150-600mm F5-6.3 DG OS HSM will need the new firmware if owners want to use the lenses with the company’s TC-1401 1.4x teleconverter on the Nikon D500. The company says it has discovered that when the three items are combined there is an issue with overexposure, and that the new firmware will fix it.

The TC-1401 can be used with the 150-600mm F5-6.3 lens because both it and the Nikon D500 can support autofocus at apertures up to F8.

Users who own the Sigma USB lens dock can update their firmware themselves, while those who don’t can receive the update free of charge from a Sigma service center.

For more information see the Sigma website.

Lens firmware Update for SIGMA 150-600mm F5-6.3 DG OS HSM |Sports / Contemporary in Nikon mount

Thank you for purchasing and using our products.

We would like to announce the availability of a new firmware update for the SIGMA 150-600mm F5-6.3 DG OS HSM | Sports in Nikon mount and the SIGMA 150-600mm F5-6.3 DG OS HSM | Contemporary in Nikon mount.

This firmware update can be installed using SIGMA Optimization Pro.

The lens firmware update corrects the phenomenon of overexposure when the lens is attached to the SIGMA TELE CONVERTER TC-1401 on Nikon Digital SLR camera “D500”, released by NIKON CORPORATION.

For customers who own the following applicable products and also SIGMA USB DOCK, please update the lens firmware using SIGMA Optimization Pro.

For customers who do not own SIGMA USB DOCK, the lens firmware update will be provided free of charge. Please contact your nearest authorized subsidiary/distributor of SIGMA.

Applicable products

  • SIGMA 150-600mm F5-6.3 DG OS HSM | Sports – Nikon mount
  • SIGMA 150-600mm F5-6.3 DG OS HSM | Contemporary – Nikon mount

Benefit of this firmware update
It has corrected the phenomenon that it shows some overexposure when it is attached with
SIGMA TELE CONVERTER TC-1401 on Nikon D500.

*For customers who are using SIGMA Optimization Pro Ver1.1 or earlier, please ensure to update it to Ver1.3 from the following Download page before updating the lens firmware.

Download page: http://www.sigma-global.com/download/

We appreciate your continued support for our company and products.

Articles: Digital Photography Review (dpreview.com)

 
Comments Off on Sigma updates 150-600mm firmware to solve overexposure with Nikon D500

Posted in Uncategorized


How to Prevent and Solve a Photography Gear Disaster?

15 Sep

What could possibly go wrong?

Let me be your fall guy here. I’ve been shooting for 25 years, and I’m completely human. I’m also not the most careful person.

I’ve left a SLR in a drybag that unfortunately collected water, then sat soaking for a week. I’ve had a camera slide off the top of a car (like a coffee cup – but much, much worse) then go bouncing across three lanes of traffic. Miraculously, the camera and its lens survived! I’ve opened my car door and had my DSLR fall only 1.5 feet and break off the lens at the mount. My main 28-300mm L lens has gone into the shop twice as the fabric in the locking collar has worn out. I left a lens behind during a hike, and it was gone when I went back for it. I’ve had camera errors while shooting a wedding, and my main desktop computer has been stolen.

Marcus_jb1973

By marcus_jb1973

Bad things happen sometimes. Sometimes it’s your fault, sometimes it’s not.

In this article I want to help you prepare for the the worst case scenarios for camera and lens care. I want to get you thinking about disasters before they happen and also give some advice on what to do when things go awry. Then at the end I’d love to hear your own tales, especially if they are helpful to other photographers.

We will cover cameras and lens mishaps, such as:

  • Theft
  • Lost or missing gear
  • Dropped
  • Moisture incursion
  • Corrupted/error message

What to do before things go wrong

There are steps you can take just in case things go wrong.

Insure it

Pictures Of Money

By Pictures of Money

Whether it’s for business or pleasure, if your camera gear is valuable to you, consider insuring it. For professional photographers this should be a no-brainer, but often those in the freelance realm aren’t bringing in huge paychecks, so they skimp by and avoid insurance. Don’t!

For non-professionals, check with your renter’s or homeowner’s insurance to see if your gear is covered. You might find there is a limit for electronics, but you can always pony up a few extra dollars to ensure all your gear is insured. Also check your auto policy to see if gear left inside a car is covered (while remembering to always lock your gear in your trunk!), it often is not.

Register it

GotCredit

By GotCredit

This is another part of the process many skip. Registering your gear with the manufacturer helps them update you if something should be found wrong with your equipment. We hear about food recalls on the nightly news because they have huge impacts. But did you hear about the Canon Powershot eyecup recall (14,000 units) in 2014 or the Nikon 1 NIKKOR VR 10-30mm recall in 2015?

These kind of recalls don’t make big news and often don’t even make the photo blogs.

Claim it

LensTag is a free service you should consider using to track your gear. The online service allows you to enter camera gear to their database, verify it with a photo of the serial number and search for stolen gear before you buy. We have an article here on dPS that explains the service in more detail Lenstag: a World Without Camera Theft.

In the UK there is a service called Immobilise.com which works in a similar fashion; log your items on the site before they are stolen, alert the service when something goes missing, cross your fingers. This service seems more robust and is checked by police in the UK. You can register more than cameras here as well.

Tag it

Tagging your equipment with contact information is helpful for having your goods returned when they go missing accidentally. I accidentally left a camera on a log on a trail many decades ago and the next day someone had turned it in to the park ranger’s office. Good people do exist! Give them a hand.

Avery, the label company, has a number of options for inkjet and laser printer. For instance, their 6570 label is meant to stay on permanently and can be cut to a useful size. This is a good option, though not perfect, for inkjet printers while the 6576 labels work better on a laserjet printer. You might want to write your information in permanent marker, but know that it will fade and need replacing.

Write it down

Ana C.

By Ana C.

This tip is the most common sense, but I feel it needs repeating. Grab a piece of paper and an old fashioned pencil and simply write down the serial numbers for your gear. Then store it in a safe place. Saving this info online is also handy, via services like Dropbox or Evernote, or email it to yourself, so it can be retrieved from any computer if you are away from home.

What to do after things go wrong

Theft

When I realized my Mac had been stolen during a break-in to my house, my stomach churned to the point of almost throwing up. Luckily, my camera was with me at the time. If it was stolen, I was prepared in a way I wasn’t for my computer. I have my camera serial numbers written down and in electronic form that I can retrieve from anywhere online (while noting it’s pretty easy for astute thieves to scrap off serial numbers).

The first step after a theft is to report it. Whether it is a break-in at home or a snatch and run in a foreign city, any insurance company will typically desire a police report with higher value items.

If you are keen on recovering your gear, don’t trust to the police alone to find it; start looking! In the US places liked Craigslist or eBay are popular choices for thieves looking to offload gear. Pawn shops are another option, but searching them all, depending on where you live, can be time consuming.

You might also want to try services like StolenCameraFinder.com or CameraTrace.com. I have not used either service so I can not vouch for them, but they both have the ability to search for your camera’s serial number (see section about writing down this info). CameraTrace also sells those permanent stickers I talked about earlier to make a reunion with your gear easier.

Missing

Sometime we are our own worst enemy and we misplace things, expensive things. If you never do, then you can skip this section.

Patrice-photographiste

By patrice-photographiste

For everyone else, the obvious thing to do is to retrace your steps. Believe that there are good Samaritans out there (there are!) who want to get you back together with your camera or lens.

If you visited shops, ask the employees if they have seen a camera. The best way for you to get back together with your gear is to let others know you are looking. Leave a card with your contact information everywhere you might have left your gear.

You can also try other online services like CameraFound.com, which will warm your heart when you see how many people are actually trying to help others retrieve their camera or phone equipment. It lists over 1000 found cameras even in far flung locations like Oman and Kazakhstan.

Breaks

Watching my camera fall out the passenger door, in slow motion, had me cringing before it hit the cement floor of my garage. I had reached over to open the door for someone and didn’t see the camera precariously wedged between the seat and the door.

This was a Canon L series lens and I thought I was out $ 1200 to buy a replacement. With a break this bad (the lens snapped off the mounting ring that holds it to the camera body) and no experience with repair shops, I thought I was out of luck.

Richard Masoner / Cyclelicious

By Richard Masoner / Cyclelicious

Many major manufacturers provide free estimates for repairs but you will be on the hook for shipping costs. Ask around at local camera clubs as well to see if there is a trusted local repair shop in your area. They can often save you some money, but make sure they are authorized by your manufacturer. My point is to not despair; get a quote first.

I was happy that the repair for my lens was only $ 200. Spending $ 200 still sucked, but it meant I was back in business, and didn’t need to drop $ 1200 on a new lens because of my own stupidity.

You might want to ask around to see if there is a reputable local repair shop other owners use. I know in Seattle there is such a store, and they can tell you the moment you walk in if your camera is salvageable or a goner. They can often be cheaper than a repair from your manufacturer.

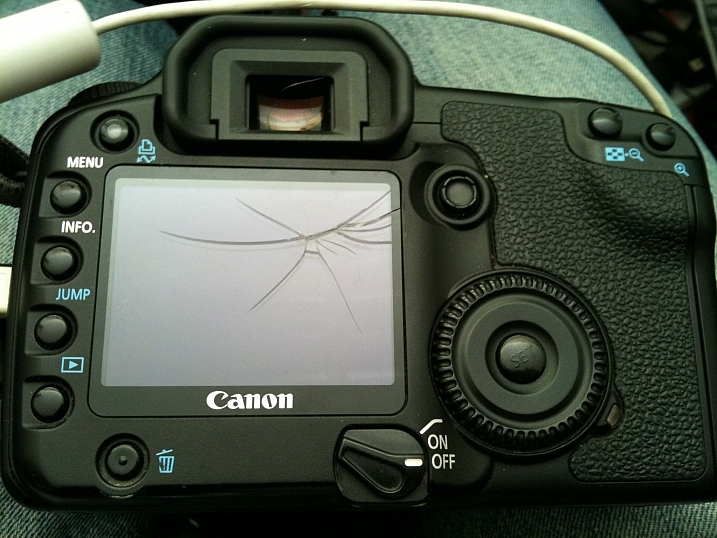
Also, things like cracked LCD covers can be replaced for relatively little money. If the LCD itself is broken, giving you weird colors and streaks, then it’s time to get it repaired. Adventurous photographers have replaced their own LCDs with success, but if you have any doubt, pay a pro to do it.

Moisture incursion

It’s no joke that moisture and electronics make horrible friends. The electronics always get the worst of it, but there are some things you can do to possibly limit or stop damage.

First, shut everything off! Take out the batteries too. Damage to electronics from water happens when the water acts as a connector between two items inside your camera, which normally won’t share power. The power from one circuit uses the water as an excellent conduit to move wherever the water touches. This is the classic short circuit that we think of that smells of melting wires and plastic. In worst cases, things can catch fire.

Limit those chances by shutting everything down, and taking out the batteries, until you are 100% sure the inside of your components are bone dry. This can takes days or sometimes weeks.

Kevin Baird

By Kevin Baird

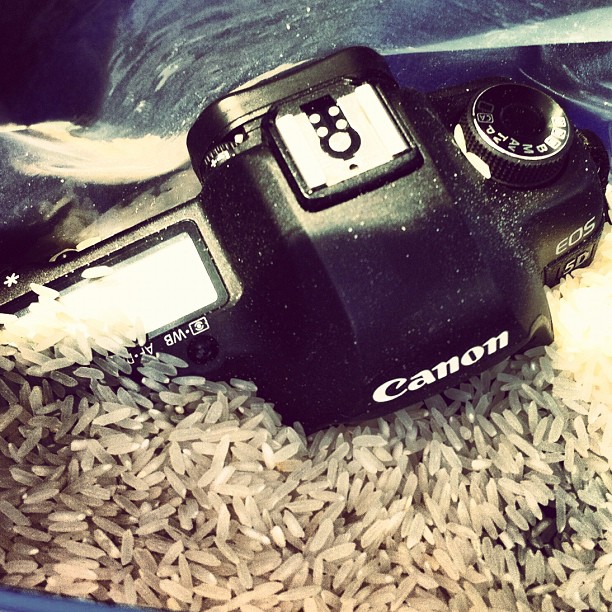
To dry out equipment on your own, go for a slow fix. Using a hair dryer may work for something like a memory card, but not for a whole DSLR. A time tested method is to use something that naturally absorbs water, like rice or the desiccant packs that come with new shoes. You want to make the new host hungry for the water inside the camera instead of just from the atmosphere itself, so put your camera, and soaked parts, together with the rice or absorbent items inside a ziplock bag large enough to hold them all.

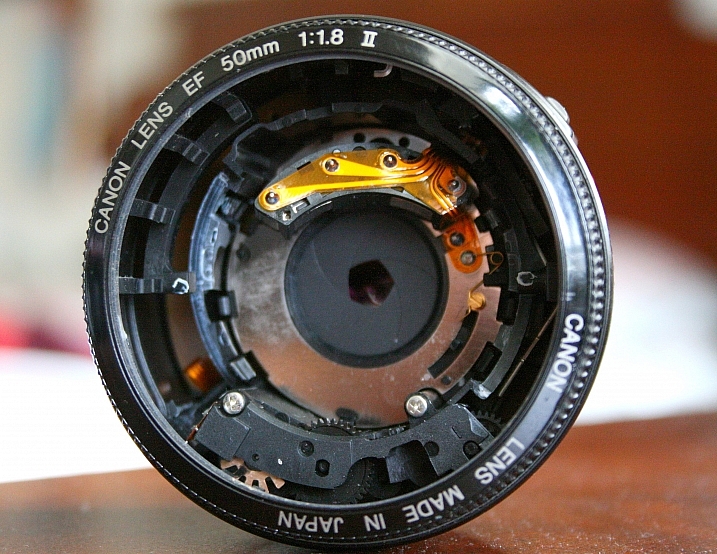
Lenses can be tricky as water might leave a film behind on elements inside as they dry. If after a thorough drying, the quality seems affected, it’s time for the lens to get a professional cleaning.

My personal advice with salt water is to not mess around with home fixes and get the camera in to a reputable repair shop or manufacturer as soon as possible. When salt water dries it leaves behind the salt, and that can corrode your camera’s innards a year from now without you realizing it.

Corruption or error messages

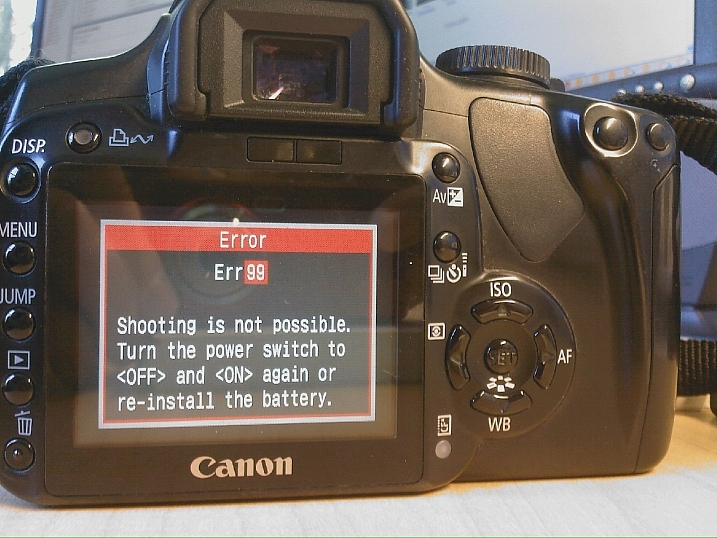
“Err 99” pops up on your camera. What do you do? Freaking out seems like a good option. But better than that these days, is simply googling the error.

Kate Sumbler

By Kate Sumbler

I can’t cover all the errors for all cameras, but I have run into these situations about four times in my 14 years of owning digital cameras. They are nerve-wracking  to say the least.

The first steps are always, 1) Breathe slowly. 2) Power off the camera if it appears any image writing activity is done. 3) Remove the battery (ies) and wait a minute before putting them back in.

Some errors dictate sending your camera in to the manufacturer. Some are cleared by the steps above when your camera simply stumbles over its own circuitry. Google is your friend and will list many remedies. Read forum threads to get a feel if certain suggestions cured other people’s similar issues.

Conclusion

I hope the tips here have helped you start thinking about disasters before they happen in order to lessen their impact. And if things do go south in a hurry, take action as soon as you can to get your gear back in working shape.

Most importantly, I’ve seen a lot of camera and lens gear mishaps, but I haven’t seen them all. I’d like to hear about problems you have had, and what you did to fix them if you think the information might help other readers.

googletag.cmd.push(function() {
tablet_slots.push( googletag.defineSlot( “/1005424/_dPSv4_tab-all-article-bottom_(300×250)”, [300, 250], “pb-ad-78623” ).addService( googletag.pubads() ) ); } );

googletag.cmd.push(function() {
mobile_slots.push( googletag.defineSlot( “/1005424/_dPSv4_mob-all-article-bottom_(300×250)”, [300, 250], “pb-ad-78158” ).addService( googletag.pubads() ) ); } );

The post How to Prevent and Solve a Photography Gear Disaster? by Peter West Carey appeared first on Digital Photography School.


Digital Photography School

 
Comments Off on How to Prevent and Solve a Photography Gear Disaster?

Posted in Photography


How to Solve 5 Composition Conundrums Faced by Landscape Photographers

07 Sep

2-for-1 special

As part of Landscape Photography Week here on dPS, we’re offering TWO for the price of ONE on our best-selling Living & Loving Landscape Photography ebooks!

Click here to take advantage of this offer.


Do you ever get frustrated when reviewing your landscape shots? In the field you thought you’d nailed the scene, but back at your computer you now see that things don’t look so great. I know sometimes my frustration seems endless after a landscape shoot. There are just so many questions about how to shoot and compose breathtaking landscapes.

DSC01032edit

Landscapes are both one of the easiest things to photograph, and the most difficult. Easy – because landscapes are everywhere, and they don’t really move, so no expensive technical equipment is needed. Often novice photographers mistake this ease of access with easy photography. Landscapes are difficult to photograph well because, like most other subject matter, the devil is in the details, and there are a myriad of details to pay attention to in landscape photography.

It is these details that create conundrums for photographers, especially when it comes to composing a great landscape shot.

When I’m out with a photography class, students seem to have several common dilemmas they want solved. So in this article we’ll explore these compositional conundrums and try to get you some solutions.

1) How do I choose my point of interest?

Most photography guides say that a great image must have a strong point of interest. In an expansive vista it’s often difficult to decide on just one central point. In fact, you may often feel like the entire scene is THE point of interest. But try thinking about the scene this way – why are you attracted to this scene? What is it that make it so stunning?

It might be the light at sunrise or sunset, or a confluence of streams, or maybe the patterns of wildflowers.  Take a moment to think about why you want to photograph this landscape. In a few moments a story will start to evolve in your mind.

If your story is about the light, where in the scene is the light most spectacular? In the clouds? Reflecting off water? Lighting up a mountain peak? You’ll soon find your answer, and will have solved conundrum #1. You now have a solid point of interest.

DSC01032editsymmetry

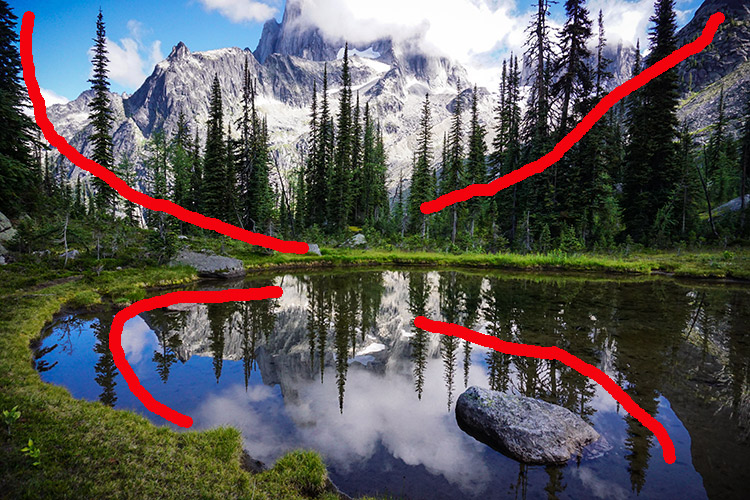
All roads lead to Rome – or in photography, to your center of interest. The symmetry of the scene is mirrored in both the reflection and the composition.

2) What should I include and exclude in the frame?

This is a big compositional conundrum for most photographers. Sometimes you may want to create a frame for your scene with something from the surrounding environment – tree branches are a common framing device. But will they be distracting? Will they prevent your viewer’s eye from traveling INTO your image, to land softly on the great point of interest you carefully identified above? Sometimes the scene itself will have framing elements in it. Should you use these?

If you decide to use this type of compositional device to frame your subject, should it be on the right? On the left? On the top, or all three sides?

_2DS2439before

BEFORE: The half tree on the left does nothing to move the viewer to the center of interest. Let’s remove it.

_-2DS2439after

AFTER: Using the framing technique AFTER removing distracting elements.

There are really only two considerations with objects at the edges of your viewfinder frame.

The first is to make sure that your leading lines are not broken by the object. So, if there is a nice big tree on the left of your composition, make sure to position yourself in such a way that the tree helps guide the viewer towards your centre of interest. If it is just a big dark shape on the left of your scene it may not add to the composition, and in fact may be detrimental. Large vertical objects on the left, or in the centre of the frame, tend to arrest the viewer’s gaze, and make for a weak composition.

Second, if you are going to use objects around the edges as a framing technique, be bold, and do it with purpose. Make sure your viewer doesn’t think it was a mistake, or something you didn’t notice. Bits of branches or clouds that seem to poke into the frame are more like intruders than active participants in your image. Move around a bit more to make sure there are no interlopers jutting in, or remove them in post-production.

2015-03-25-23.35

Be bold – add it like you mean it – include elements with purpose. This tree is here on purpose and its branch leads to the sun ray that takes you right into the center of interest, the glowing layers of the landscape, framed by the dark shrubs in the foreground.

If you’re using a wide angle lens, you know to include lots of the foreground to guide the viewer into the frame. But often students ask me what makes a good foreground? They walk around a bit, point to various items, and ask, “Would this be good? How about this? Or this?”

Because of the way the wide angle lens exaggerates perspective, you should take advantage of that by choosing a foreground subject that can create leading lines into your image. If there’s a big boulder in your scene, how does it look close-up through the wide angle lens? Does it create a pointer, or a set of lines that lead to your main point of interest? That will make a good foreground.

If the objects closest to the camera consist of mainly horizontal lines, running left to right in the frame, they may not be a great foreground to include, unless you can shoot at an angle so they become leading lines into your image. You may need to walk around the scene a bit more to see if this will work with the overall view. If not, choose another foreground, or if there is nothing that works, you can always select another lens – a 50mm is often a great choice for landscape photography.

Which brings us to the next conundrum – focal length, your lens.

3) What focal length is best for landscapes?

I think this is always the first question I get asked when shooting landscapes with a group, “What lens are you using?”

But the real question is what is your artistic intention for your image? If you want to get that awe inspired feeling you have as you view the scene into your image, why not try 50mm. This lens on a full frame sensor approximates what your eye sees in terms of angle of view. So it could be the best choice if what you want to convey is that awesomeness of the view that you are seeing with your eyes. Lately I have been using a 50mm (full frame) lens for landscapes almost exclusively.

4-whither-the-phoenix

The big picture, wide angle lens, and 50mm works well too.

Remember too, that the longer the focal length, the more compressed the image gets, and the closer the background becomes. It’s not just a matter of getting nearer or getting more in the frame, the entire look of your image will be very different depending on the lens. This is a definite conundrum for landscape photographers, because the choice is usually very subjective. If, as I mentioned above, you have nothing suitable for a creative foreground, try your 50 mm to get the big picture but without the perceptive grabbing view of the wide angles. If your intention is to get a more intimate view of the place, then a longer lens would be a better choice.

2_DSC6358W

A more intimate look at patterns, textures, and shapes with a 200 mm lens.

So your choice of lens has a few considerations, but a quick check of your intention, and the surrounding space you are standing on, will help you solve this one.

4) Should I Shoot Vertical or Horizontal?

This is another common landscape photographer conundrum, and one that I often have myself. Fortunately this one is very easy to solve. My way of dealing with this is to shoot the scene both ways, then do an honest critique once I am back at a computer to view the full images. But given the traditional style of landscape photography, most often the horizontal or (curiously!) named “landscape” orientation will serve you best.

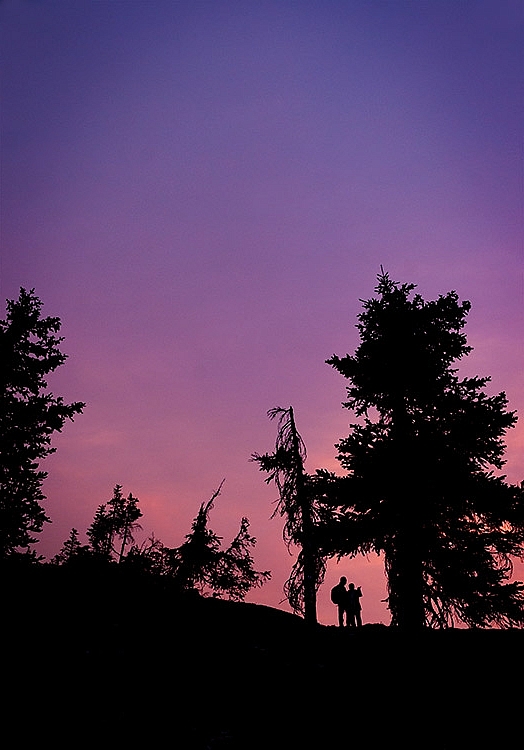
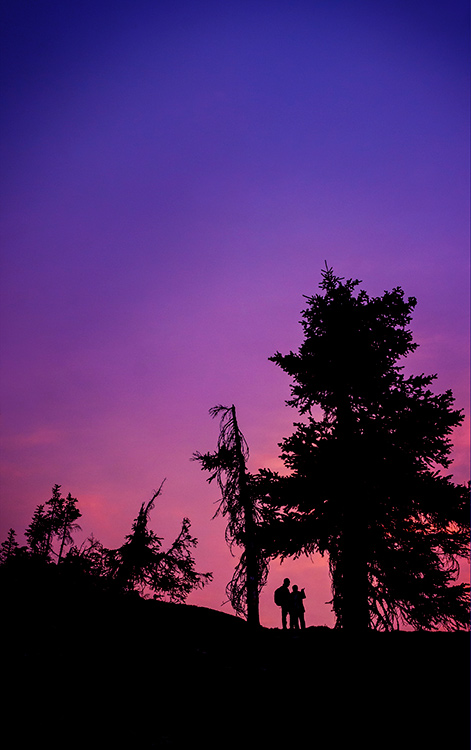
However, some things may be more suitable for the vertical (portrait) camera orientation: scenes with reflections in lakes, scenes with dramatic skies where the sky has a dominant role in your story, scenes that include the moon, or a dramatic afternoon sun with some lens flare shining through trees or objects, and scenes that include people beside tall objects or monuments so you can capture the sense of scale.

When in doubt, shoot both ways. It’s easier than having to go shoot the place again, if that is even possible. So conundrum #4: solved!

DSC01030W

_DSC1467

Horizontal or landscape orientation – the scene has a certain mood and story.

This image tells a very different story and has a different mood.

_DSC1451W-

Vertical shot, with a telephoto lens. Depth is compressed and the background is much closer in the frame.

5) Is this scene photo-worthy?

As unfortunate as it is, not every grand landscape is suitable for making a great photo. It may be that the light is not right, that there is just no place for the eye to rest, or that your point of view is not providing  a clear enough vantage point. There may be too many distracting items poking into your frame that would be too hard to remove in post-processing. There are numerous reasons that a landscape might not make a good photo. But consider this a challenge – capture it anyway, see if you can make something of it. Try different lenses, camera orientations, walk around a bit more. Get down like a worm and see if there is any vantage point that will give you a creative point of view.

Practice every chance you get, and know that the conundrums will present themselves in every landscape, but hopefully now you have them solved!

DSC00826W

A pretty scene, but not such a great photo. Not every landscape will make a killer photograph. Do you know how to tell if it will or not?

Have you ever struggled with any of these conundrums? What are some of your landscape photography struggles?

Have you solved them? How did you decide what to do?


Here on dPS this is landscape week – here is list of what we’ve covered so far. Watch for a new article (or two) on landscape photography daily for the next couple days.

  • 6 Tips for Better Low-Light Landscape Photography
  • Landscape Photography and the Human Element
  • 5 Ways a Telephoto Lens Can Improve Your Landscape Photography
  • Landscape Photography from the Side of the Road
  • 32 Majestic Landscape Photos to Inspire Your Wanderlust
  • Weekly Photography Challenge – Landscape
  • Landscape Photography – Shooting the Same Location Through the Seasons

googletag.cmd.push(function() {
tablet_slots.push( googletag.defineSlot( “/1005424/_dPSv4_tab-all-article-bottom_(300×250)”, [300, 250], “pb-ad-78623” ).addService( googletag.pubads() ) ); } );

googletag.cmd.push(function() {
mobile_slots.push( googletag.defineSlot( “/1005424/_dPSv4_mob-all-article-bottom_(300×250)”, [300, 250], “pb-ad-78158” ).addService( googletag.pubads() ) ); } );

The post How to Solve 5 Composition Conundrums Faced by Landscape Photographers by Alex Morrison appeared first on Digital Photography School.


Digital Photography School

 
Comments Off on How to Solve 5 Composition Conundrums Faced by Landscape Photographers

Posted in Photography


Van Dogh – Butterfly – solve the riddles, play with children – Preschool cartoon

24 Oct

Cartoon videos, show for children, puzzles and visual riddles to play with toodlers and kindergarten. Van Dogh is painting a butterfly when their friends come. The kids change the picture and know the butterfly is on a typical vehicle. Do you know what is it? Synopsis: Won, Pan and Kit, ride their tricycles through colorful, Spring-like paths, knowing they’ll find Van Dogh on their way. He shows them the magic in his brushstrokes, where shining stars mix his drawings and transform them into puzzles. Every day, the imagination of Yon, Pat and Kit, shall have to face the challenge of solving such these visual and colourful enigmas, while with his funny suggestions, Van Dogh fills their meetings with lots of laughter. Cartoon series that helps the development and stimulation of imagination and creativity of children through entertainment. Videos of games for children © Motion Pictures, SA Production – www.motionpic.com Format 104×4′ – 3D HDTV Target: Preschool More Van Dogh cartoon videos: www.youtube.com Subscribe to Channel: www.youtube.com Other cartoon videos: www.youtube.com Motion Pictures in social networks: Twitter – twitter.com Facebook – www.facebook.com Pinterest – pinterest.com

www.boxerhockey.com This film was animated entirely in Flash CS3 with some audio editing done afterwards in Premiere. This was my graduating thesis film for my final year at SCAD. It turned out alright, I think. I would have liked to do something more ambitious, but being that I was working alone for the entirety of the film and had other projects in production at the same time I had to keep things simple. The animation is mostly very pose-to-pose and nothing too visually impressive, but at the very least I hope it to be entertaining to someone. Enjoy.

 
Comments Off on Van Dogh – Butterfly – solve the riddles, play with children – Preschool cartoon

Posted in Animation Videos