RSS
 

Posts Tagged ‘‘Soap’

New owners completely redesign Mk ll Meyer Optik G?rlitz Trioplan 100 ‘soap bubble’ lens

17 Jun

The new owners of the Meyer Optik G?rlitz lens brand say they’ve completely redesigned the optical designs and much of the mechanics of the Trioplan 100mm f2.8 lens so it produces better resolution and contrast while controlling internal reflections more effectively.

Famous for its soap-bubble bokeh the original Trioplan 100 was recreated in 2015 by a company called net SE that eventually went bankrupt taking customer’s pre-order money with it. The new owners, Optical Precision Components, has produced its lenses up-front and has just started shipping them.

A OPC Optics spokesperson told us the Mk ll lens has a completely new optical construction and many newly designed mechanical parts inside too. ‘As we are an optics company, rather than a marketing company, we have the know-how and equipment to analyze and optimize optical systems in-house’, the spokesperson tells us. ‘This led us to completely redesign the optical construction of the Trioplan 100, as we especially wanted to improve its resolution and contrast performance.’

According to the spokesperson, ‘the new optical design meant we needed to use different glasses and differently shaped elements, which in turn required a lot of mechanical changes. We prioritized the optics first and everything else is built around that new design.’

The spokesperson further elaborated on the differences between the two lenses, saying (edited for clarity and brevity):

‘All the parts inside and outside the lens have been produced completely new, but some retain the same design as those used in the Mk I version. As we have changed the shape of the main elements in the design and changed the distance of the elements from the aperture, we also needed to redesign the mounts that hold the elements in place [and change] the way the aperture unit works, as in the Mk l version it had no hard stops when it closed or opened completely. That caused damage to the aperture, as the blades could get bent when the aperture ring was turned to its full extent. Our Mk II the aperture has hard stops, so you can turn the aperture ring and really hit against the end without damaging anything. Overall we changed many small things to produce a lens of much higher quality and to make the focusing smoother, but most important are the changes to the lens elements and those main mechanical parts that increase durability.’

As with the original model, this new version uses just three elements in its construction, and a newer 15-blade aperture diaphragm helps to form the characteristic round out-of-focus highlights in the background. The soap bubble effect is often enhanced through the use of macro extension tubes to bring the minimum focus closer and thus exaggerate the size of the bubbles. The lens is manual focus only and takes a 52mm filter.

OPC Optics says it has also redesigned the rest of the Trioplan series as well as its Primoplan lenses. Again, in these models the aim is to improve resolution, contrast and to reduce flare while building a more durable construction.

The Meyer Optik G?rlitz Trioplan 100 f2.8 ll is available in mounts for Canon EF, Fujifilm X, Leica L, Leica M, M42, MFT, Nikon F, Pentax K and Sony E cameras. It costs €999 (approx. $ 1100) and is shipping now. For more information see the Meyer Optik G?rlitz website.

Articles: Digital Photography Review (dpreview.com)

 
Comments Off on New owners completely redesign Mk ll Meyer Optik G?rlitz Trioplan 100 ‘soap bubble’ lens

Posted in Uncategorized


Frozen soap bubbles create scenes from a fantasy world

25 Mar

$ (document).ready(function() { SampleGalleryV2({“containerId”:”embeddedSampleGallery_8718171696″,”galleryId”:”8718171696″,”isEmbeddedWidget”:true,”selectedImageIndex”:0,”isMobile”:false}) });

In a recent episode of DPReview TV, new host (and mad scientist) Don Komarechka introduced us to the magical world of frozen soap bubbles. Take a look at some of the fantastical images he captured.

View the frozen soap bubble sample gallery

This was a really fun video, so if you missed it you’ll want to give it a watch. You can see it below or watch it on YouTube.

Articles: Digital Photography Review (dpreview.com)

 
Comments Off on Frozen soap bubbles create scenes from a fantasy world

Posted in Uncategorized


How to Photograph the Sheer Beauty of Soap Bubbles

16 Jan

Most of us are fascinated by soap bubbles and love playing with them since childhood. Watching bubbles float in the air and burst is a pleasure every child and even adults enjoy. Soap bubbles have an exciting range of color and textures. When light shines onto a bubble it displays vivid color that changes swiftly. Even though we see them on regular basis, we never actually observe them so closely to enjoy the thrilling beauty they hold within.

They are stunning, amusing and mesmerizing but extremely short-lived. Soap bubbles usually last only for a few seconds and then burst either on their own or upon contact with another object. So how can you capture these beautiful soap bubbles and keep it forever? Let’s find out.

Soap Bubbles 01

What gear do you need?

First, we’ll talk about the camera gear you need for photographing soap bubbles. These photos can be taken with any DSLR or even compact camera if it is capable of firing an external flash. And for the lens, it’s better to use a macro lens but if you don’t have one, any lens will work fine.

Get or make a large light source

The most important aspect of soap bubble photography is the light source rather than a camera. It requires a large light source. If you have a studio light with a large softbox or beauty dish that will work great. But if you don’t have one, it doesn’t mean that you can’t take this type of photo. It can be done by using off-camera flash with a DIY softbox too.

For a DIY softbox, make a frame of two by two feet by using wood or iron wire and wrap it in white cotton cloth or butter paper. This frame, combined with an off-camera flash, will give the same impact as studio flash with a softbox.

And if you don’t have an external flash, you may place this frame near the window (or hang a white bed sheet over a window) and use sunlight as your light source. The possibilities are endless, you just need to use your imagination.

Steady the camera

You will also need a tripod so you can fix your camera on it and free your hands to blow bubbles. If you have a shutter release cable (remote trigger) it would be great to use that as well.

Other supplies

Other than this, get a piece of black cloth or black paper to use as a backdrop. You’ll also need soap solution to blow bubbles. You can buy it from local stores or make it at home by adding two tablespoons of liquid soap and one tablespoon of glycerine in half cup of water and leave it overnight.

Workflow

Okay, now we have everything, let’s start shooting. First, switch-on your music system and start playing your favorite album. It’s not necessary but it’s always good to listen to music while you shoot.

Now pour soap solution into a small bowl and place it on a table. Put a black cloth or black paper behind the bowl and set up your light source. Your light should be very near to the bubble (just 2-3 inches). If you want your bubbles to look like a floating planet, place the light source right above the bubble otherwise place it at 45 degrees downward.

Soap Bubbles 19

Soap Bubbles 12

Set your camera on the tripod and attach the shutter release cable. Set a narrow aperture between f/11-f/16, so you can get deep depth of field and get the entire bubble in focus. Focus manually and change other settings like shutter speed and ISO according to the light. Now use a straw to blow bubbles and start clicking.

Problems and Solutions

Once you blow the bubble, you’ll notice that it doesn’t have the swirls of colors which you were expecting. Wait a few seconds, and the colors will begin emerging, which is your cue to start clicking pictures.

Soap Bubbles 14

Soap Bubbles 15

Also, keep a close watch on the surface of the bubble. If it starts looking transparent, it means that the bubble is about to burst. To increase its lifespan, use a straw and blow on the bubble slightly. This will also add some unique texture to it.

If you are using homemade soap solution which you made using the formula I talked about earlier, soap bubbles will have a longer life but if you are using other soap solution, bubbles will burst in very short time. If that’s happening, adding a few drop of glycerine will increase its lifespan.

I also discovered that the temperature and the humidity of room play an important role in increasing the life of a soap bubble. If the temperature of the room is hot or atmosphere too dry, the bubbles would burst very quickly. This happens because soap bubbles have a layer of water between two thin layers of soap and when the water evaporates, it bursts. This is why it has a shorter lifespan in hot and dry environments.

So, by adding glycerine and lowering the temperature of the room, you can increase the lifespan of the bubble up to five minutes. Soap bubbles show a whole range of colors and textures from their formation until they burst. Every second you’ll find different colors and patterns and you can get lots of different shots with just one bubble.

Soap Bubbles 09

Post-processing

If everything has been set up properly, there is no need for heavy post-processing. Just level adjustments, some cleaning, cropping and sharpening would be enough and your image end up looking like scenes from the movie Interstellar.

At last, keep trying until you get the desired results and share your photos in the comments below.

The post How to Photograph the Sheer Beauty of Soap Bubbles by Ramakant Sharda appeared first on Digital Photography School.


Digital Photography School

 
Comments Off on How to Photograph the Sheer Beauty of Soap Bubbles

Posted in Photography


How to Create Abstract Photos with Oil and Water and a Little Dish Soap

03 Aug

Oil and water are like chalk and cheese. They just aren’t the same are they? But despite their seeming incompatibility, each brings out the qualities of the other. As photographers, we love a good juxtaposition. There’s nothing that creates balance better than imbalance – well, it’s definitely the case here, at least. So in this article we’re going to use that to create some abstract photos.

For this project, we are going to create a body of images that look as if they come straight out of a chemistry class instructional… or a 60s liquid light show. With two philosophically opposed house hold items, several more amicable components, and a camera. The process is simple and the results are abstractedly beautiful and a little trippy too. Intrigued? Check it out below.

How to Create Abstract Photos with Oil and Water and a Little Dish Soap

How to Create Abstract Photos with Oil and Water and a Little Dish Soap

Things you will need to do this:

  • Camera
  • Sheet of glass
  • Two objects to set your glass on (I used milk crates but chairs and even stacked books work too)
  • A macro lens or extension tubes (I used my Kenko extension tubes)
  • Tripod
  • Towel
  • Some colorful materials
  • Oil (it doesn’t really matter what type, I used vegetable oil)
  • Dishwashing liquid soap
  • Water
  • Eyedropper or spoon

Find a background material

First, you’ll need to gather a few materials for the background of your image. You are looking for colored cardboard, magazines, posters, cloth, scraps – anything with a bit of color that won’t be missed if it gets coated in a little oil or dish washing liquid. Duller toned materials like brown or black won’t reflect light as readily, so aim for brighter colors to begin with.

Don’t worry too much about intricate patterns or details as they wont show in the final image. While you are scouting for materials, grab an old towel too, it’ll come in handy later.

How to Create Abstract Photos with Oil and Water and a Little Dish Soap

For my abstract oil project I selected a cardboard gift bag I had around the house and a reflective folder I flattened out. The bright color combinations of the bag will create smooth, vibrant gradients. The reflective sheen of the folder will guide a greater amount of light up through the image, but the holographic flowers can yield surprisingly subtle results.

How to Create Abstract Photos with Oil and Water and a Little Dish Soap

The reflective cardboard I used for this image directs small speckles of light up into the splotches of oil. The overall grey tone of the cardboard contrasts with the flecks of colors to create a surrealistic, rainy atmosphere.

How to Create Abstract Photos with Oil and Water and a Little Dish Soap

This is an image with the Happy Birthday bag as a backdrop. None of the details are discernible, but a soft gradient separates the image into soft hues

Setting up

One you’ve assembled a neat pile of colorful bits and pieces, it’s time to set up. The aim here is to construct a bridge of sorts for your sheet of glass to sit on. To reduce the impact of a potential oil-spill, I set my rig up outside. Wherever you choose to setup just make sure you work on flat, even ground. Grab your milk crates (or chairs, etc.), set them down a little distance apart and set the glass between the two. Now take a few of the colorful materials you’ve selected, and position them on the ground, directly under the sheet of glass.

To set up your camera, I strongly recommend using a tripod. Because macro lenses and extension tubes can reduce the amount of light reaching your camera’s sensor, the tripod will steady the camera for longer exposures. A tripod will also cut down the handling of your camera with oily fingers. Once your camera is locked into the tripod, turn it on, select Live View Mode and focus the camera on an area directly in front of the lens. You’ll need to be able to watch what you are doing on the LCD screen in the next step.

How to Create Abstract Photos with Oil and Water and a Little Dish Soap

Positioning my pane of glass between two milk crates, I then set my cardboard birthday bag in the space underneath. Using a tripod is highly recommended as this project requires a fair bit of hands-on adjusting and fiddling both behind and in front of the camera. The lemon tree is not mandatory

Time to start cooking

Gather your water, dish washing soap, oil, spoon (or eyedropper), and towel and place them within reach. Begin by adding a small spot of oil to the glass. Keeping an eye on your LCD screen will help you position your drops within the camera’s field of view. To build up layers of liquid, add dots of water or dishwasher liquid to the center of the oil. As the liquids span out over the glass, add in new droplets of the different ingredients. Alternating between ingredients takes advantage of their natural resistance to each other, delineating shapes and patterns more readily. If you like, you can use the tip of your spoon or eyedropper to manipulate the shape of the growing bubble.

That’s about it really! The rest is totally up to you. You can’t mess up, so don’t worry if you aren’t getting perfect circular bubbles or patterns. Allow the medium to take shape as you cycle through your three ingredients. Try running a spoon through the middle of the concoction to create smaller clusters of bubbles. Or use a greater ratio of dishwasher liquid to oil to enhance the spiderweb look of the cleaning chemicals. Even spritzing mists of water over the glass can make fascinating reflections.

Experiment with the background and elements

While you are watching the details unfurl beneath the camera lens, don’t forget to experiment with your background too! Add or remove materials, layer new colors, add materials which have a greater or lesser reflective surface. Use a flashlight (torch) to illuminate different areas in the image or shine the light up into the bubbles suspended on the glass.

There are no hard and fast rules – the more you experiment the more you’ll discover. And, once all your liquids have inevitably pooled in a messy, semi-clear river of goo, grab your towel, wipe down the glass and start again! A word of caution, however, this project can become an addition in itself, not only because it looks good, but because each result is so illusive and unpredictable.

Have fun and share your abstract photos made from oil, water and dish soap in the comments below.

This smooth effect was created as the oil and dish washing liquid slowly spread over the surface of the glass

The delicate strands in this image is a result of the dish washing liquid being spread across the glass surface with a spoon


This image was photographed with a single color background. The consistent color illuminates the beads of oil and water in the light

The post How to Create Abstract Photos with Oil and Water and a Little Dish Soap by Megan Kennedy appeared first on Digital Photography School.


Digital Photography School

 
Comments Off on How to Create Abstract Photos with Oil and Water and a Little Dish Soap

Posted in Photography


Scrubbed: 10 Unclean Abandoned Soap Factories

30 Oct

[ By Steve in Abandoned Places & Architecture. ]

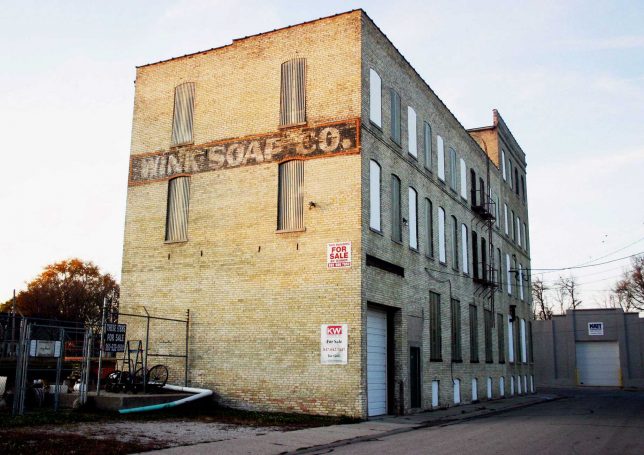
soap-factories-1a

These abandoned soap factories sure look filthy… if only there was something that could scrub away the dirt & grime, making them look shiny and new again.

soap-factories-1b

soap-factories-1c

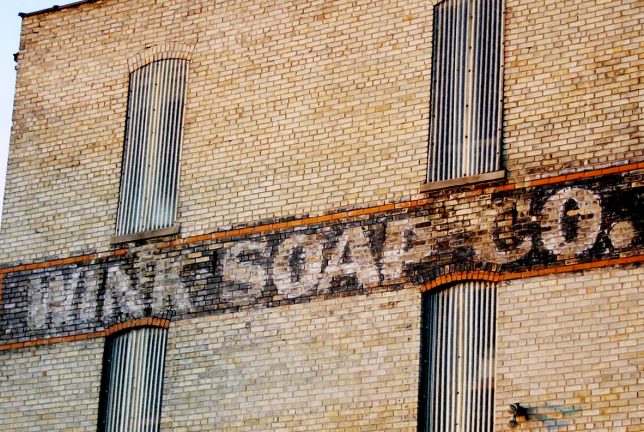
The old abandoned Wink Soap Company building in Racine, Wisconsin was built in 1900 though Wink didn’t move in until 1938. The company then proceeded to make soap like it was going out of style – it wasn’t but Wink was, shutting down their soap-making operations in 1980. The building, still sporting its handsome though faded painted sign, looks like it closed fairly recently instead of 35-odd years ago.

Hosed Down

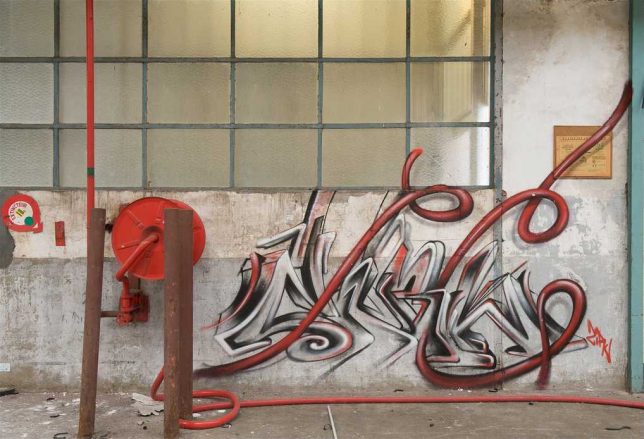
soap-factories-2a

This abandoned soap factory somewhere in France isn’t much to look at but within its bland decaying shell, a graffiti masterwork by the artist Ziru complements the factory’s detritus of hoses and rust. Kudos to Flickr user Romany WG who captured this ephemeral artwork for posterity in mid-October of 2011.

Finnished

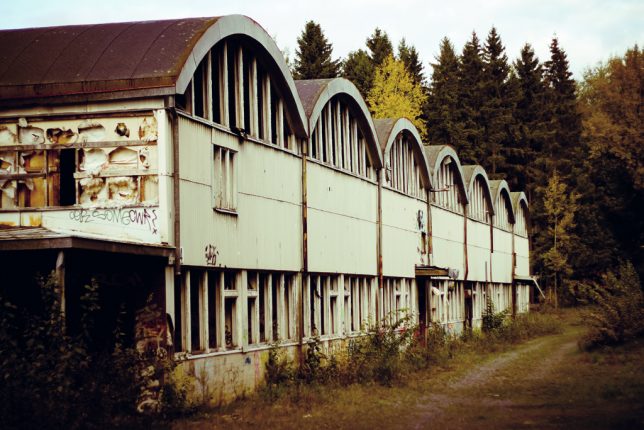
soap-factories-3a

soap-factories-3b

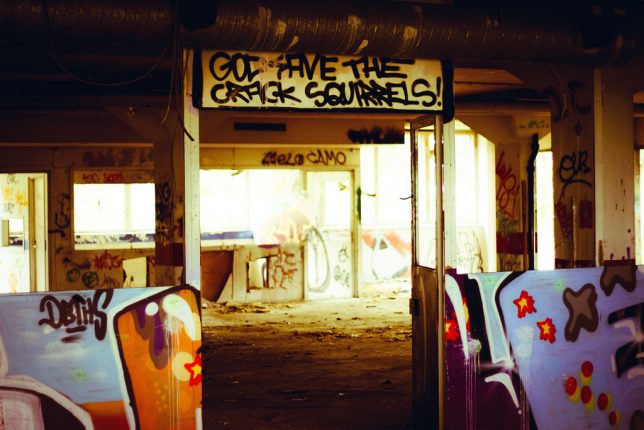
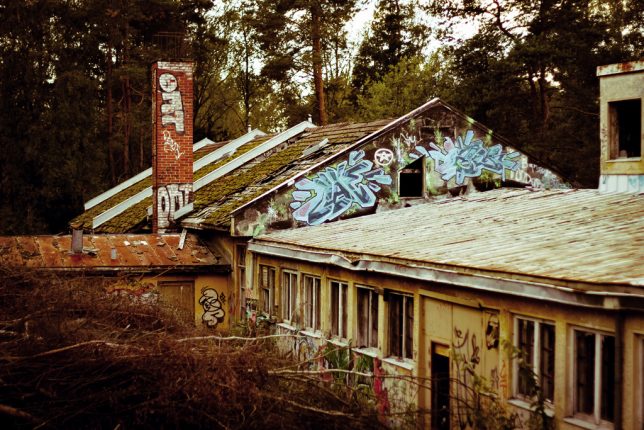
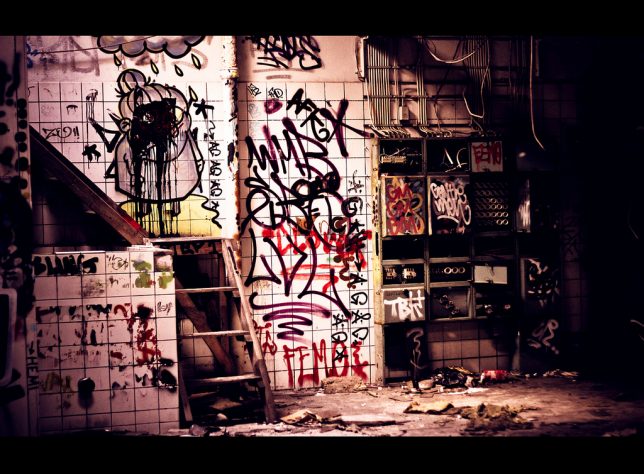
This abandoned soap factory in Kaarina, southwestern Finland, is close enough to a major city (Turku, in this case) to attract graffiti artists yet isolated enough to let them do their deeds in relative privacy.

soap-factories-3c

soap-factories-3d

It’s not known why the factory closed – supplying all those saunas must have been good for business. Kudos to Flickr user WIGILOCO for snapping these images and more on a visit to the factory in late 2010.

Next Page – Click Below to Read More:
Scrubbed 10 Unclean Abandoned Soap Factories

Share on Facebook


[ By Steve in Abandoned Places & Architecture. ]

[ WebUrbanist | Archives | Galleries | Privacy | TOS ]


WebUrbanist

 
Comments Off on Scrubbed: 10 Unclean Abandoned Soap Factories

Posted in Creativity


Meyer-Optik launches Kickstarter campaign for 50mm ‘Soap Bubble Bokeh’ Trioplan lens

15 Apr

$ (document).ready(function() { SampleGalleryV2({“containerId”:”embeddedSampleGallery_3223429076″,”galleryId”:”3223429076″,”isEmbeddedWidget”:true,”standalone”:false,”selectedImageIndex”:0,”startInCommentsView”:false,”isMobile”:false}) });

German optical manufacturer Meyer-Optik Gorlitz has begun a Kickstarter campaign to raise funds to produce a modern 50mm F2.9 version of its Trioplan lens. The Trioplan design is known for its exaggerated circular bokeh which earned it the nickname ‘Soap Bubble Lens’ in its original version. The company has recently released a 100mm F2.8 Trioplan after a similar Kickstarter campaign that raised almost $ 360,000. On this occasion the company is hoping to reach an initial target of $ 50,000 – which is going swimmingly, as it met that goal within hours of the campaign going live.

The new lens will be an updated version of the company’s original 50mm Trioplan but using glass from the Schott factory and with modern coatings and production standards. The new 50mm Trioplan also has a movable front element that allows much better close focusing and a maximum reproduction ratio of 1:4.

The lens uses a basic Triplet design with three elements in three groups with a 12-bladed iris designed to help produce smooth and circular out-of-focus highlights at all apertures.

Meyer Optik plans to produce the manual focus lens in mounts for:

  • Canon EF
  • Nikon F
  • Sony
  • FujiX
  • Micro Four Thirds
  • M42
  • Leica M (rangefinder not supported/focusing via live view)

The expected price is $ 1299 though discounts can be had by backing the Kickstarter campaign. For more information visit the Meyer-Optik Gorlitz website.


Press release:

Today Is the Day.
Support the Historic and Innovative Trioplan 50 Now!  

We just launched our Kickstarter for the Trioplan f2.9/50, a special new lens that returns the tradition of a versatile soap bubble bokeh lens to the Meyer Optik line up. Order the art lens that you will always keep attached to your camera body now!  In addition to its regular focus element, the Trioplan f2.9/50 features a second front focus element that opens a whole new horizon of creativity to the world of photography.

These elements and the quality of the glass used takes the legendary Trioplan 50mm soap bubble bokeh lens to a wider variety of creative photographic situations, including events, travel, street, nature, portraits, macro and so many more scenes.  

The new Trioplan f2,9/50 is the one lens you can use for every situation. It is ultra compact and features an innovative front focusing element putting incredible amounts of creative opportunity into the palm of your hand. The movable front lens reduces the minimum focusing distance to less than 30 cm (under 12 inches) and raises the image ratio up to 1:4.

This feature takes the Trioplan 50 into the Macro-Spheres.  Carrying a heavy set of lenses is something that most photographers choose to shed at some point, but they do not want to cut back on their creativity. We give you the best of both worlds in one lens – with only 200 g or about 7 ounces — it has never felt so light to be this prepared.

The Trioplan 50 produces smaller, finer soap bubbles that turn into a small swirl effect in the corner of the image. Sharpness and contrast are also the highest yet of any Trioplan lens.  

Surprisingly, for a 50 mm lens it is a perfect tool for portraiture especially including awesome landscapes in the image. Moreover the possibilities in street photography are awesome and the macro capabilities are stunning. This is more than just a nostalgic art lens. It is the most modern innovative lens you can imagine.

The lens will be available with mounts for
* Canon EF
* Nikon F
* Sony
* FujiX
* Micro Four Thirds
* M42
* Leica M (rangefinder not supported/focusing via live view)

The most creative historic lens you have ever held in your hands is available to Kickstarter Backers starting at $ 449!

The lens is estimated list price is $ 1299. Restore 100 Years of Tradition with the Most Versatile Soap Bubble Bokeh Lens.

What better way to bring back the Trioplan lens than with the most versatile version possible, the f2.9/50 with its new innovative front variable element? Innovating upon the classic, modernizing the traditional, extending soap-bubble bokeh creativity to a new modern era. Help us bring back the Trioplan 50. Pledge your support now !  Click the Link to visit our Kickstarter campaign.

Sincerely,
Dr. Stefan Immes and the whole MOG team.

Articles: Digital Photography Review (dpreview.com)

 
Comments Off on Meyer-Optik launches Kickstarter campaign for 50mm ‘Soap Bubble Bokeh’ Trioplan lens

Posted in Uncategorized