RSS
 

Posts Tagged ‘SKILL’

The Photography Skill Progression that Stunned Us

23 Jul

The post The Photography Skill Progression that Stunned Us appeared first on Digital Photography School. It was authored by Darren Rowse.

If you’re still stuck on auto mode and struggling with all the settings on your digital camera, this story of photography skill progression is for you. You may wonder, “Just how long does it take to become a better photographer? 3 days? 31 days? Two years?

In this feature of one of our students, the answer was all three.

Today I wanted to share with you the story of Marie Costanza. Marie grew up in Rochester, NY – the home of Kodak. So it’s no surprise she grew up taking photographs with her Kodak Instamatic camera.

Prior to starting our course 31 Days to Becoming a Better Photographer in February 2018,  Marie described her experience being at the novice level.  

“I was enthusiastic about taking photos and some of my images were decent, but I was not able to explain what I did to cause some of my images to be decent and many of them to be mediocre.”

Marie Costanza

She shared with us a sample of photos she took a few years before doing the course with instructor, Jim Hamel.

Marie Costanza children in water
Children playing in water – Marie Costanza (before the course)
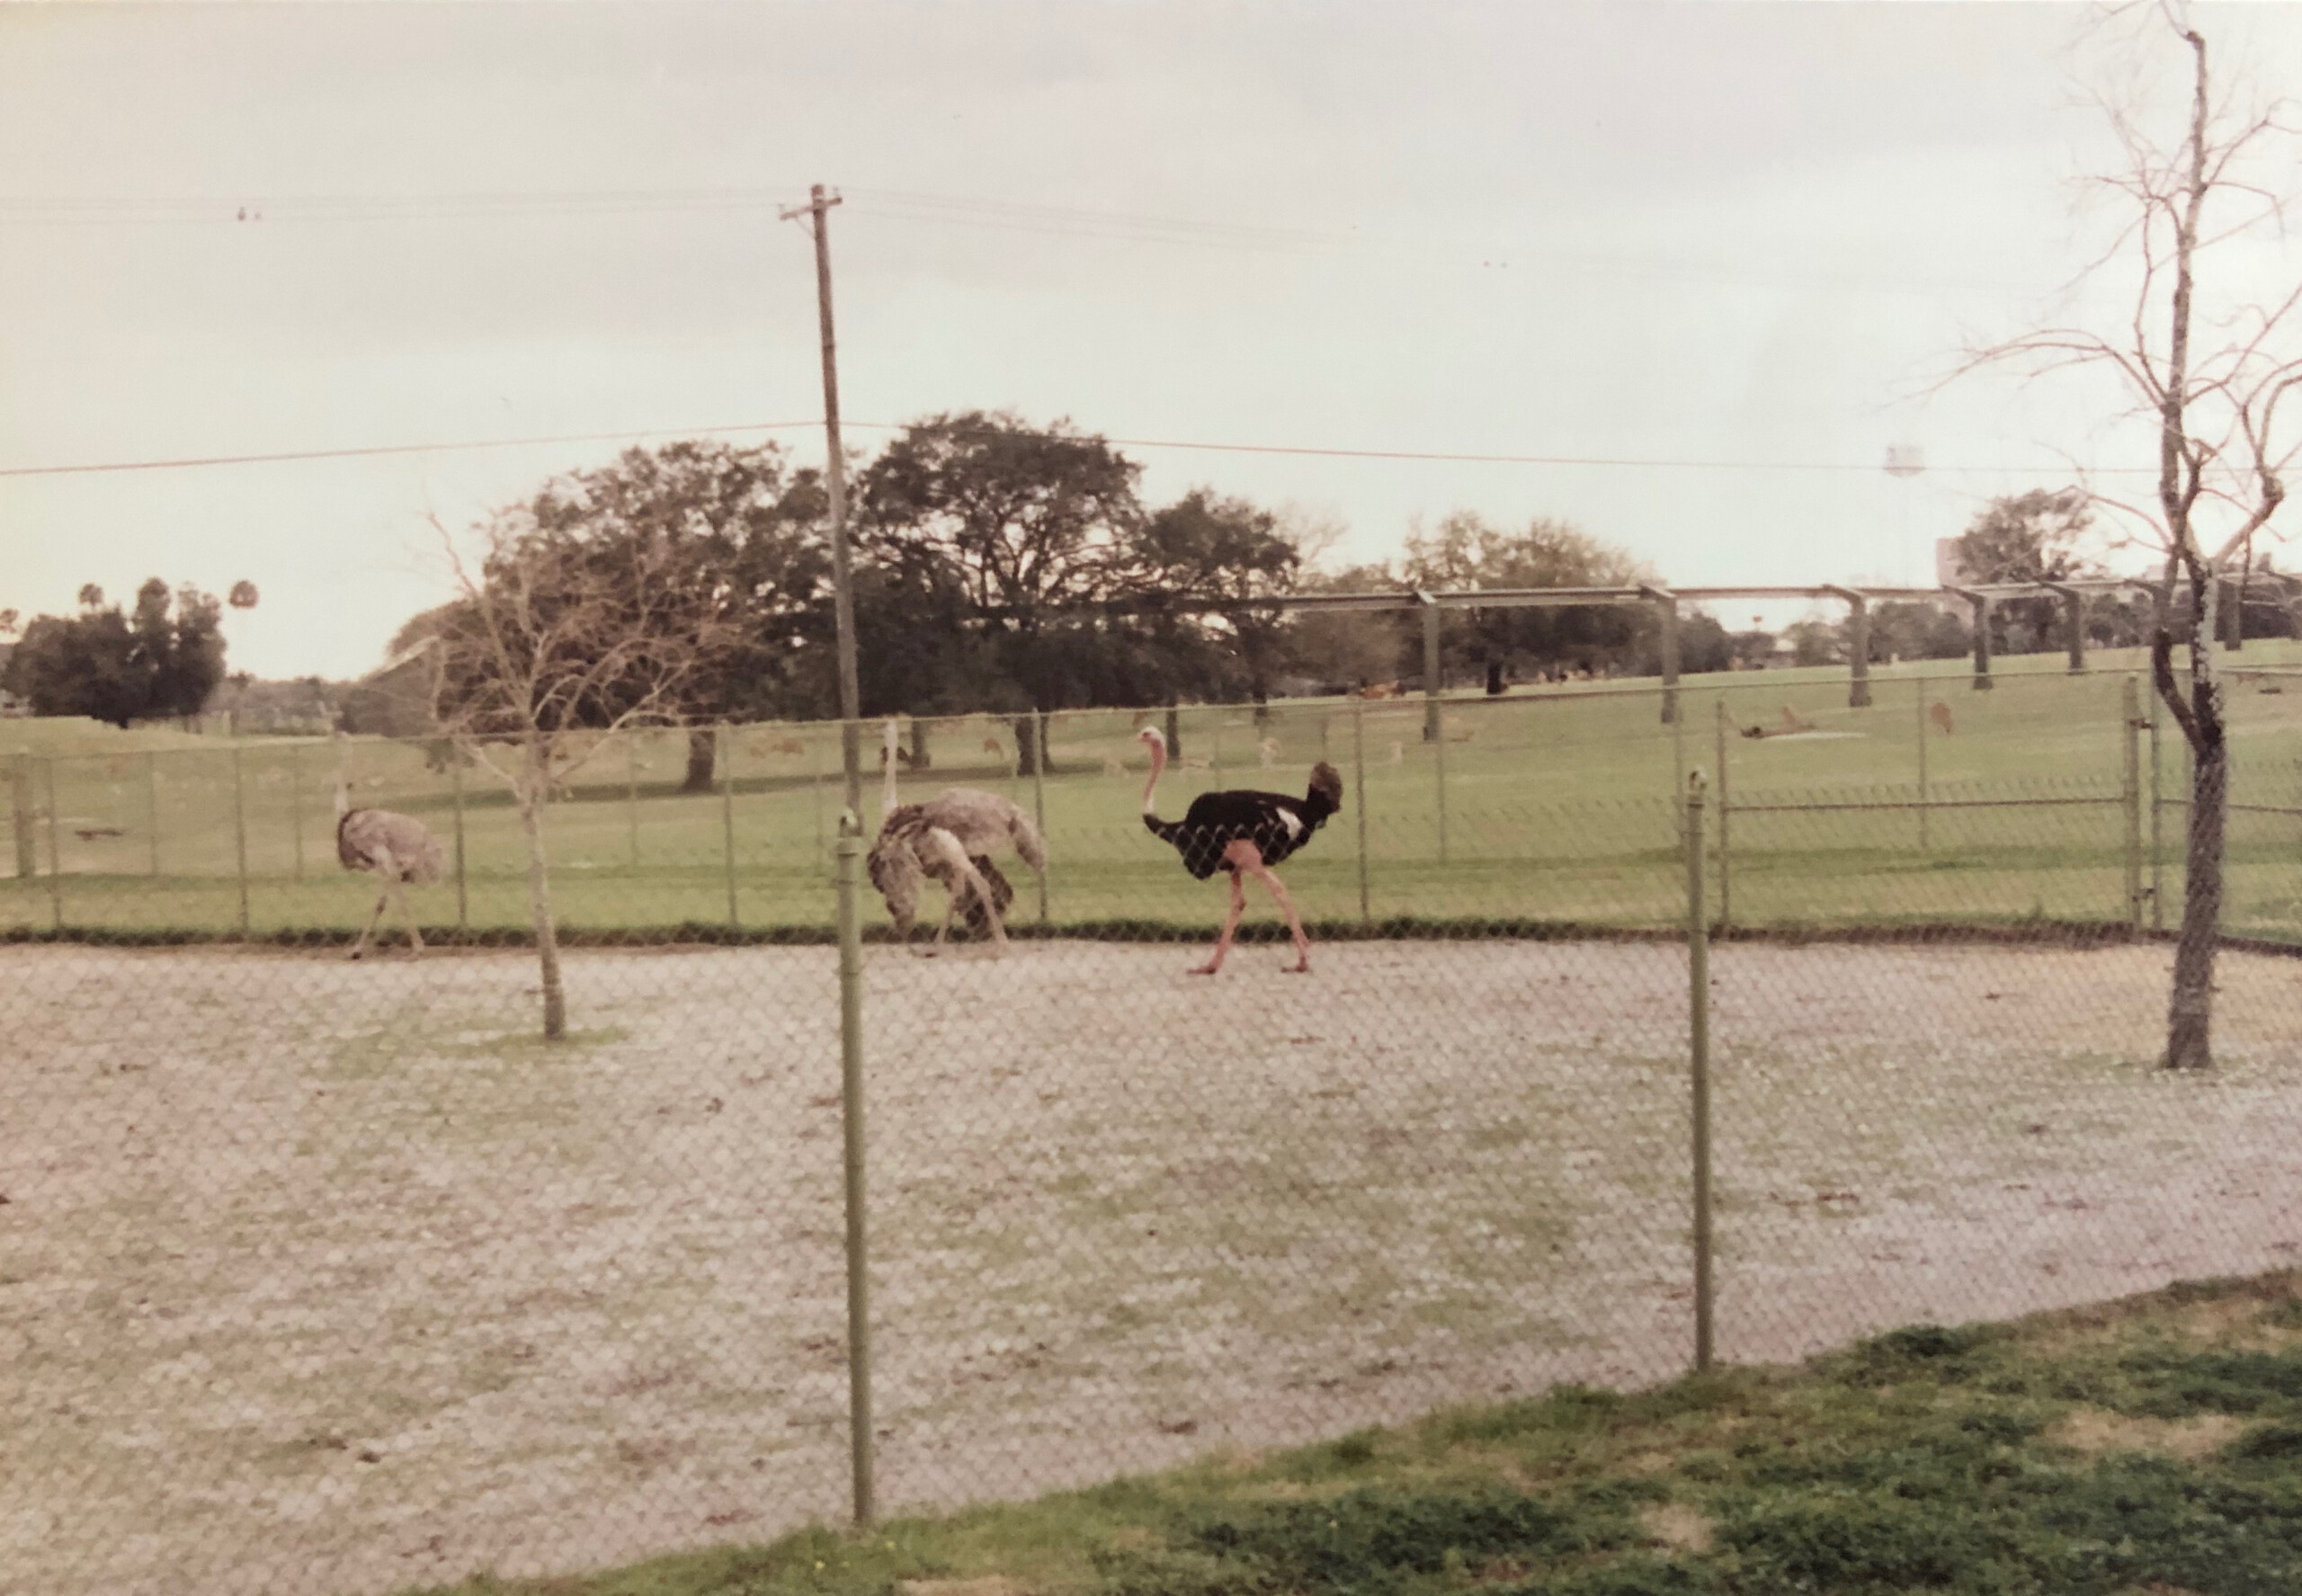
Marie Costanza Bird in zoo
Birds at the zoo – Marie Costanza (before the course)
Marie Constanza sunset before
Sunset – Marie Costanza (before the course)

She wasted no time getting stuck into the course and extracting value from Jim. Here are the first images she shared with the group, after just 3 days.

Marie's First Photo Share in Course Group

And how right Jim was when he said . . .

Nice work. And this is only the beginning.

Jim Hamel

By “Day 7” Marie was experimenting more and starting to get shots like these:

Marie's Day 7 Photos

And Jim’s response:

Jim's Day 7 Feedback

Prior to Jim’s course, I only shot on Automatic mode.  I was completely intimidated by Manual and I did not fully understand the relationship among ISO, Shutter Speed or Aperture.  I did use Aperture priority occasionally, and I was starting to understand that mode slightly.  Jim’s  Day 3 lesson was like a revelation for me. Being able to understand how to meter and how to use the Manual Mode opened up a whole new world of photography. 

Let’s compare some of her more recent photos with the ones she shared earlier:
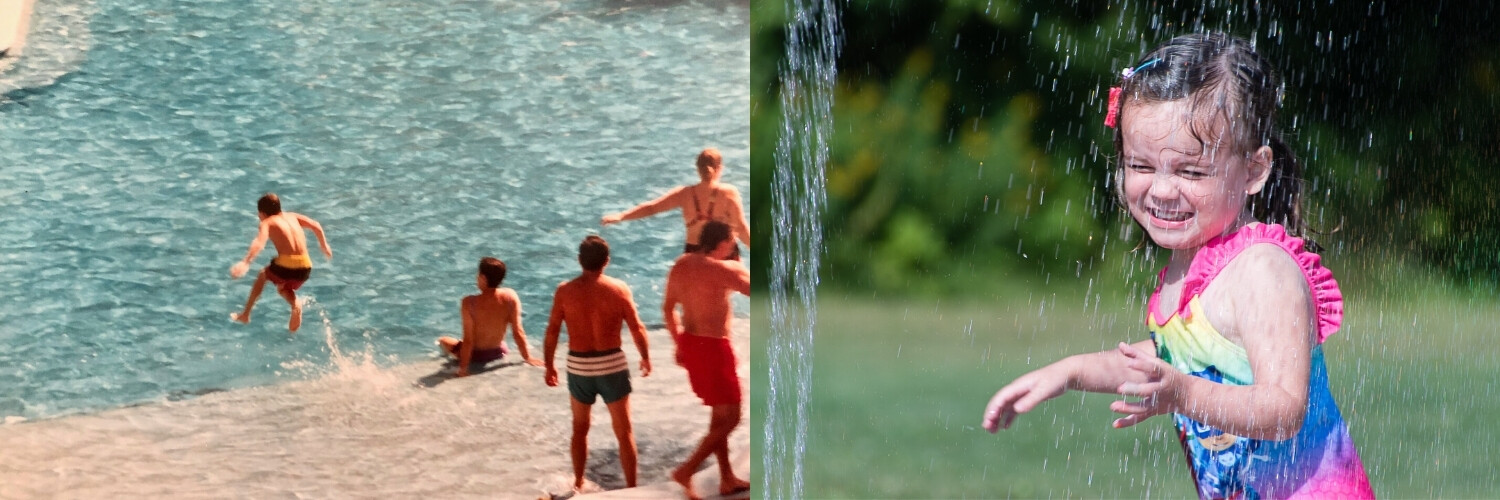
Marie Costanza Before and After Children Playing in Water
Children Playing in Water – Marie Costanza (Before and After the course)
Marie Costanza Before and After Birds
Birds – Marie Costanza (Before and After the course)
Marie Costanza Before and After Sunset
Sunset – Marie Costanza (Before and After the course)

But by far our favourite progression has been what our team like to refer to as “Marie’s Duck Progression”! It certainly caught our attention and it’s the reason we wanted to feature her photography today.

Marie Costanza Duck Before
Duck – Marie Costanza (Before the Course)
Marie Costanza Duck During the Course
Duck – Marie Costanza (During the Course)
Marie Costanza Duck After
Duck – Marie Costanza (After the Course)
Define the subject…for this challenge, I went back to my duck subject….those of you who have known me since we began the 31 Days course back in 2017…you might recall my original duck and then my post course duck. I love using ducks for my subject! This guy is called, “Late for an Important Date.” I used the following settings: ISO 1000, 380 mm, f6.0, 1/2000. I was using my Tamron 150-600 lens, hand held.

In addition to Day 3 (Metering), Marie also said Day 9 (Making Images Tack Sharp) was very beneficial in improving her duck photos because it helped her understand the impact of the shutter speed. Day 15 was helpful because learning about the importance of simplification helped her to understand that it’s important to eliminate distractions and to fill the frame with the subject. You can really see the impact of that in her second photo.

And the final photo, taken this year is a culmination of everything she has learned and practiced. Marie says, “Prior to the course I had just begun to play around a bit with Lightroom, so all of Jim’s lessons where he took us through the process of editing an image really helped me to understand the power of post processing.”

We asked what advice she’d give other aspiring photographers considering 31 Days to Becoming a Better Photography course.

The best part of this course was the fact that there was daily interaction between the student and instructor as well as all the new people we met in the Facebook Group.  Anyone considering a course like Jim’s, should make sure this aspect is included.  The helpful suggestions were invaluable and practical.  Getting immediate feedback, which included positive elements as well as suggestions for improvement, made me eager to try the techniques.  

Marie Costanza

And Marie and thousands of students since have received amazing attention from Jim like this reply to her very first post in the group:

Jim's Reply to Marie's first post

Marie also had the following to say about Jim’s teaching style:

Having been an educator for over 37 years I am able to recognize effective teaching and the successful learning that is directly related. (For 15 years I was in charge of the Career in Teaching Program in the Rochester City School District, and I observed/provided feedback to countless teachers.)   

Jim’s method of teaching is why the course is so successful.  He teaches one concept at a time, has the student practice the new techniques, and then he provides feedback immediately.  

The videos were the right length, which enabled me to effectively process the concepts/skills.  When a teacher gives too much information or presents too many tasks/concepts, the learner has cognitive overload, resulting in the learner being unable to process the information.  

Jim is highly skilled at knowing just how much information to present in order to challenge the student without forcing the student into cognitive overload.  He is a highly effective teacher!

Marie Costanza

The Photography Skill Progression that Stunned Us

Marie’s photos star in our course promotions, along with photos from fellow students. Real photos, real students. Join them for the final class intake and save $ 100 when you sign up now.

Learn More

We love what Marie has achieved with her photography since doing the course. She has joined her local photography club and has even won some awards for her photos. Here are some more of our favourite photos she has taken – a world apart from her earlier snaps.

Marie Costanza Moon Composite
Moon Composite – Marie Costanza
Marie Costanza Sunflowers
Sunflowers – Marie Costanza
Marie Costanza Pier
Pier – Marie Costanza
The Photography Skill Progression that Stunned Us
Bee – Marie Costanza

If you’d like to experience improvement in your photography like Marie, please check out our final class intake for 31 Days to Becoming a Better Photographer and save $ 100 when you join before 31 July.

The post The Photography Skill Progression that Stunned Us appeared first on Digital Photography School. It was authored by Darren Rowse.


Digital Photography School

 
Comments Off on The Photography Skill Progression that Stunned Us

Posted in Photography


The One Skill That Will Help You Become a Better Portrait Photographer

04 Nov

Watch any accomplished people photographer at work and you’ll see deliberate intention. Not so much with their camera, but with their subject. Bruce Gilden takes just moments to photograph New Yorkers in the streets. Nick Knight spends hours with models in his studio or on location. The relationships they have with the people they photograph is calculated and purposeful.

The One Skill That Will Make You A Better Portrait Photographer Monk in a Samlor © Kevin Landwer-Johan

© Kevin Landwer-Johan

Photographers with less experience approach making a portrait differently. They’ll look at the camera in their hands, make technical decisions, alter and check settings, change lenses, perhaps add filters. All with the intention of making a better photograph.

Meanwhile, the portrait subject is probably feeling a bit lost or ignored. They may become disinterested, or even bored.

Engaging with the person you want to photograph will help you get better photos far more than fiddling with your camera at the last minute.

The One Skill That Will Make You A Better Portrait Photographer Kayaw Girl © Kevin Landwer-Johan

© Kevin Landwer-Johan

Connect and Relate

Pay attention to your subject. You won’t see an experienced professional focusing on the camera when they are with their subject. They will have already taken care of the exposure and focus options, made conversation, and paid their compliments. The smiles and laughter will come naturally, or a more somber mood established if needed.

Relating to your subject, giving them your attention and engaging them will help them relax. When the subject enjoys the process and feels good about it you’ll get much better portraits.

The One Skill That Will Make You A Better Portrait Photographer Pretty Dancer © Kevin Landwer-Johan

© Kevin Landwer-Johan

For this photo made during a street parade, I wanted to eliminate the background. This was a challenge as there were people and activity everywhere. I had to move her until there was nothing distracting behind her. As I did, I chatted with her and mimicked how I wanted her to hold her hands. She was fascinated that I was being so precise and enjoying the interaction.

Even if you have only a short time to make a portrait, learning to connect is the best thing you can do to improve your craft. For me, it was extremely difficult as I’m a naturally shy person.

The One Skill That Will Make You A Better Portrait Photographer Laughing Lady © Kevin Landwer-Johan

© Kevin Landwer-Johan

Purposefully Build Your Confidence

My career started in the photography department of a daily newspaper. I quickly realized that to be successful I needed to overcome my insecurities. Most photos in newspapers include at least one person in the composition, so if I didn’t overcome these securities, I wouldn’t have a job for long.

You probably won’t have the same pressure to perform and come up with publishable pictures. But if you aren’t accustomed to connecting with people, you’ll need to change if you want to make engaging portraits.

Shy photographers often think, ‘I don’t want to impose on people, or cause them any bother.’ This is the first aspect of portraiture you need to work on.

The One Skill That Will Make You A Better Portrait Photographer Grandpa © Kevin Landwer-Johan

© Kevin Landwer-Johan

Instead of thinking you’ll be a nuisance, think that you might just make someone’s day by photographing them. People often like attention. If you approach them with a smile and a friendly manner, you’ll be surprised at the responses.

Revisit the Same Locations

Building relationships with people over time will allow you to photograph them more easily. We run photography workshops in Chiang Mai, Thailand. The people at the markets and villages are now quite familiar with us. We know many people who enjoy being photographed. We’ve been purposely building relationships.

You may have a local farmers market or your kid’s football club you can go to regularly with your camera. Return to the same locations and photograph the same circumstances. Doing so will help build relationships – and your confidence.

The One Skill That Will Make You A Better Portrait Photographer Lemon Grass © Kevin Landwer-Johan

© Kevin Landwer-Johan

I’d never photographed this man before. But he’d seen me around taking photos and was keen to have his picture taken. This makes life easy for a photographer. Him being so open and willing meant I could easily engage with him and get a very natural environmental portrait, even though he was posing. I showed some interest in him. I asked about the produce he was selling and he responded warmly.

Take Control of Your Camera

Know your camera. Plan ahead and set your gear before you’re with your subject. Choose the right lens. Guess what the light will be like and whether you want a soft or sharply focused background. If you’re unsure about using manual controls, choose aperture priority so you can get the depth of field you want.

When you know your camera well and are in control of it, you’ll be free to engage your subject. Talking with your subject before taking their photo will be far more beneficial than messing around with your camera settings.

The One Skill That Will Make You A Better Portrait Photographer Porter © Kevin Landwer-Johan

© Kevin Landwer-Johan

I’d seen this porter at the market a number of times, and sensed he was a little shy. But I wanted to photograph him. He has an interesting face and traditional tattoos on his forearms.

When I saw him resting on his push cart I set my exposure manually and made a test frame from across the street without him being aware. I guessed my focus distance and then approached him. I anticipated him being shy, and that some of the vendors might start teasing him and encouraging him to smile.

He agreed to me photographing him. But as he did, he put his hands by his side. I asked him to put them back where he had them, explaining that I wanted to photograph his tattoos as well.

In this short moment, two or three people did start to tease him. He got embarrassed and pushed his handcart off down the street. This frame is the only clear one I got.

If I’d been ill-prepared with my camera and not engaged him, I doubt the picture would be as interesting.

The next time I saw him I gave him a print of his portrait. He always says “Hi” to me now and gives me a big smile when we visit the markets.

The One Skill That Will Make You A Better Portrait Photographer Model and Mask © Kevin Landwer-Johan

© Kevin Landwer-Johan

Learn From the Masters

When I was learning there were no YouTube or other internet resources to help me. These days there are dozens of documentaries and programs showing photographers at work. Find some you admire and wish to emulate, and learn how they do it.

This documentary about some of New York’s well-known street photographers will give you a good insight into how different people achieve their results.

One of my favorite Instagram feeds is that of Lee Jefferies’ portraits. In this video, he tells a little of his story, and how he creates his incredibly intimate portraits of homeless people.

Many of the best portrait photographers are naturally more reserved. This comes through in their photography. Their portraits speak more about the subject than the photographer.

Engage Intentionally

Next time you make a portrait, converse and connect with your subject more than with your camera.

And if you’ve had a fun conversation with someone while making a portrait, share your story with us in the comments.

The post The One Skill That Will Help You Become a Better Portrait Photographer appeared first on Digital Photography School.


Digital Photography School

 
Comments Off on The One Skill That Will Help You Become a Better Portrait Photographer

Posted in Photography


How to Edit Old Images with Your New Skill Set

14 Aug

This article is going to be a little different from some of the others I’ve written. It’s going to be more like a journal entry or a reflection. It’s very personal in some ways but the ideas within will have universal value for everyone.

The idea is to show a personal exploration of my editing skills, which will hopefully inspire you to explore your skills and progression as a photographer as well.

How much can experience change your editing workflow?

I was recently cleaning up my catalogues and image storage when I ran across a bunch of my older work. I looked at the images and how I had processed each pic. Looking back, I can see how my tastes and skills have evolved.

Over time we become better photographers, but we also become more adept at using Lightroom, Photoshop, Luminar or any other editing programs we might love to use. So as our skills evolve so does the way in which we process each image.

It was at this moment that I decided to go back and edit some of my old images. The goal was to compare the ways my skills have changed as well as my personal aesthetic. You can do the same thing. The results may be surprising.

You might also learn something about the way in which your work has evolved over time. Perhaps you were totally into creating monochromatic images way back when. This might contrast with your recent images in which you’re into creating brilliant warms tones in your work. You may also have become more skilled at cloning, utilizing layers, or using plugins. It all depends on what you have learned over time.

So without any further rambling, let’s take a look at an older image of mine.

How to Edit Old Images with Your New Skill Set - photo of a path and steps in a forest

Here’s the initial image with my original edits. This was framed and sold a number of times during my earlier years.

This shot was one of the first I processed and created for sale in a gallery. It sold quite well. I was very proud of the work but what if I went back now and edited the RAW file again. How would my more refined skills change the look and feel of the photograph?

This image was edited fairly simply. I used Lightroom, and at the time I didn’t have anything else in my arsenal to utilize. I’m pretty sure I adjusted the blacks and whites in this image and added a little bit more saturation to the greens.

At that time, however, I didn’t have much of skill set, and edits were pretty basic. This doesn’t mean that what I did was bad. It was just simple and created a pretty clean and attractive image.

So now it’s time to see the difference and how my workflow has changed.  Here are the steps I took to re-edit this image some six years after it was first shot.

Searching for ideas and inspiration

One of the first things that changed about my workflow is how I begin to create my final image. These days I tend to surf through a large amount of presets searching for some ideas.

Part of this is experience, and part of it is time-saving. Over the years I’ve collected a large amount of presets, some of which I’ve created others I’ve purchased. I’ve also acquired a few plugins and I also use the presets available in these as inspiration.

Most of the time, however, I have a pretty good idea of the type of image I want to create already stored in my brain. As time has gone by, there’s far less trial and error associated with my work. Instead, my work is now far more purposeful with specific goals.

How to Edit Old Images with Your New Skill Set - inside NIK Analog Efex

I took the image into Nik Analog Efex just to see what kind of looks I could create. I didn’t use anything from the plugin but I did get the idea to use a radial filter to focus attention on the path.

In the case of this old image, I studied the previous look and decided I wanted to change it. I feel the first edit was flat and a little too dark with not enough warmth or contrast. I also searched through some presets and decided I wanted more emphasis on the pathway leading to the stairs.

The following edits were made to create the look and feel I wanted specifically.

The Workflow

Step #1 – Sharpening

I ran the image through a RAW sharpening plugin. I wanted to have nice sharp details on the pathway. The image was also shot long ago with a very basic kit lens which I felt was softer than my newer 50mm lens.

Step #2 – Histogram

The histogram was adjusted so that the image touched both ends of the spectrum for black and white tones.

Step #3 – Local Adjustments

Next, I applied the adjustment brush to several different parts of the image. I wanted the pathway to have a brighter light that leads the viewer’s eye back through the image. More clarity and sharpness were also added to certain parts of the image.

How to Edit Old Images with Your New Skill Set

I used the adjustment brush to add more highlights to the pathway.

Step #4 – Presets

I used a preset to quickly deepen shadows and also to warm the tones within the image.

Inspired by a film preset I added a small bokeh to the image by using a radial filter and pulling the clarity and sharpness down. The filter was inverted and applied to the outer edges of the image.

How to Edit Old Images with Your New Skill Set

Here’s a quick screenshot after I used a preset to deepen shadows in the image.

Step #5 – Vignette

Finally, to create a little bit of depth, I added a small vignette to the image.

How to Edit Old Images with Your New Skill Set

Here’s a side by side comparison of the initial jpeg image and my updated edit.

The editing of the image didn’t take an overly long time. These are all fairly simple steps to take, but they have changed to look and feel of the piece. I didn’t use Photoshop with this image, and as per usual it was edited solely in Lightroom.

When I first edited this image Lightroom was the only program I used, so it seemed appropriate to keep all edits within the same program for a fair comparison.

The look and feel of the new version are certainly bolder and brighter. It’s a subtle change from the first edit. There’s nothing hugely drastic but I think what it shows is how our skills evolve and we become more polished in our editing work.

When I first created this image all those years ago, I loved the look. Now I find it a little flat so the edits that were applied this time adjusted what I now find to be a fault in the work.

How to Edit Old Images with Your New Skill Set

Here’s the final image. This was edited fully in Lightroom with the exception of the RAW sharpening, for which I used a plugin.

It’s always good to reflect on things

Sometimes it’s interesting to dig through the past and see what you can find. It’s worth it to experiment and explore how your work has changed. Don’t be afraid to go back and rework some of your old photographs, who knows what you’ll discover.

If you’ve done some experimenting, then please share it with us. We want to see how your skills have evolved or maybe the ideas you’ve come up with as time has passed. I’m sure there’s someone out there with a really dramatic edit.

Let’s see what you can cook up to inspire the rest of us.

The post How to Edit Old Images with Your New Skill Set appeared first on Digital Photography School.


Digital Photography School

 
Comments Off on How to Edit Old Images with Your New Skill Set

Posted in Photography


6 Ways to Skill Up Your Night Photography on Halloween

30 Oct

Lights, camera, action. Photography is often referred to as painting with light, and one of the more enjoyable ways to experiment with photography is to grab your camera and capture the lights of the night. Halloween offers a unique opportunity to have fun photographing the lights and colors of the season while honing your nighttime skills. 1. Have fun with Continue Reading

The post 6 Ways to Skill Up Your Night Photography on Halloween appeared first on Photodoto.


Photodoto

 
Comments Off on 6 Ways to Skill Up Your Night Photography on Halloween

Posted in Photography


SKILL Concept Project 34 Night Practice PART III

28 Nov

Shot 100% on the HD HERO2® camera from ?GoPro.com This week I went out again at night. I didn’t have time to go during the day due to my trip to Okayama, so I was forced to go out after everybody went to bed. I had good fun, considering that I had no idea what i will do. It took me about 50 min to set up a course with lots of Front One-way action. I hope you will enjoy it as much as I did making it I also made this soundtrack to the video. If you like any of my music, you can download it from the address bellow. Feel free to use it as long as you give credit to MSPDawgs/Kezo sutros.com If you like my videos, please SUBSCRIBE!!! Thanks for watching and happy drifting to you all! Car: Chassis – Yokomo Drift package Basic with Stage 2 upgrade Yokomo’s Front One Way Body – HPI’s Mazda RX-8 Tires – SURGING SDT-002C D60 for carpet High speed steering servo (FUTABA BLS-451) Transmitter is also Futaba (4PL-2.4G) NO D box! Original music by MSPDawgs/Kezo

SUBSCRIBE/RATE VIDEO TOO =)! MaBSTOA’s West Farms Bus (BX36) | Gun Hill Bus (BX40/Bx42) | Kingsbridge Bus (BX41) BX36 | 179th Street/Broadway (US9), Manhattan and Soundview, The Bronx BX41| Gun Hill Road/White Plains Road, and Mott Haven, The Bronx BX40/BX42| River Park Tower and Throgs Neck, The Bronx New Flyer D60HF in the New MTA Livery is shown here Orion 5 CNG Bx36 and New Flyer D60HF BX40 or BX42 is seen here as well ENJOY! Video Taken: March 4, 2011
Video Rating: 5 / 5

 
Comments Off on SKILL Concept Project 34 Night Practice PART III

Posted in Nikon Videos


SKILL Concept – Project 24 Gymkhana 3.0 (GoPro HD Hero2@120fps)

27 Nov

In this video I went back to my favorite Gymkhana style. The slide from project 11 is back. All captured on my GoPro HD Hero2 camera at 120fps. Check out their website at www.gopro.com I highly recommend this camera to anyone. For best results watch it at 480 resolution. Higher frame rate gave me opportunity for some awesome slow motion. I really love this camera. My favorite setting is 720p at 60fps. Thank you all for watching. Don’t hesitate to send me a message if you wish to talk. You can do so here on the YouTube or come and visit my Facebook page 🙂 www.facebook.com If you like my video, please SUBSCRIBE!!! Car: Chassis – Yokomo Drift package Basic with Stage 2 upgrade Motor – Tamiya brushed 27T Body – HPI’s Mazda RX-8 Tires – SURGING SDT-002C D60 for carpet High speed steering servo (FUTABA BLS-451) Transmitter is also Futaba (4PL-2.4G) NO D box! Original music by MSPDawgs/Kezo

 
Comments Off on SKILL Concept – Project 24 Gymkhana 3.0 (GoPro HD Hero2@120fps)

Posted in Nikon Videos