RSS
 

Posts Tagged ‘simulator’

Samyang has released its own lens simulator web app

21 Sep

Optics manufacturer Samyang has released a new lens simulator web app that allows you to see how certain lenses will affect the look of a scene based on sensor size and lens settings.

The web app creates a simulated scene using a cutout portrait of a woman as well as three backgrounds. By changing the sensor size, focal length, aperture and distance, the scene will adjust to show a simulated representation of what the image would like like when the shutter is pressed.

The web app is somewhat rudimentary, but its simulated representations do a good job of showing photography newcomers how crop factors, focal lengths, apertures and the subject’s distance from the lens can impact the look of an image. Samyang also includes an option to select on of its lenses to use as a preset of sorts to see what a given Samyang (also sold under the Rokinon/Bowen brands) lens will produce.

Both Canon and Nikon have lens simulators of their own, so this isn’t exactly an original idea, but it’s yet another option you can try out.

Articles: Digital Photography Review (dpreview.com)

 
Comments Off on Samyang has released its own lens simulator web app

Posted in Uncategorized


Crash drones over and over again with Microsoft’s open source simulator

17 Feb

Microsoft has released a free, open source simulator to help engineers test drones in a photo-realistic environment. The AirSim, as it’s called, offers a space for developers to run simulated flights again and again, gathering data and seeing how a drone’s onboard perception systems react to a complex environment. Naturally, that’s a lot cheaper and less time-consuming than studying repeated real-world drone crashes.

The cross-platform software supports manual or programmatically controlled flights, and thanks to its open source nature, data gathered from test flights can be easily used to create new algorithms to guide drone operation. There you have it – hundreds of simulated drone crashes aren’t just amusing to watch, they may be actually useful.

The code is available for download via GitHub.

Articles: Digital Photography Review (dpreview.com)

 
Comments Off on Crash drones over and over again with Microsoft’s open source simulator

Posted in Uncategorized


Painting in VR: Kingspray Graffiti Simulator & Google Tilt Brush

24 May

[ By WebUrbanist in Art & Drawing & Digital. ]

graffiti simulator

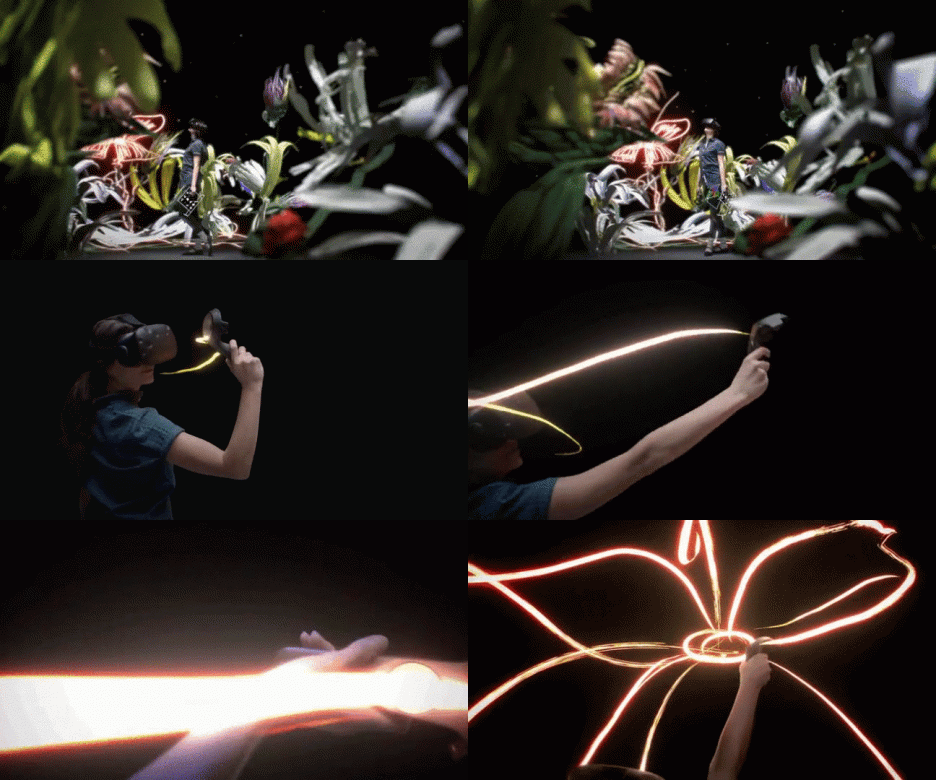
Virtual reality is not just about interacting with people at distance, or engaging with static worlds designed by others – it can also be a place where users are invited to create their own works of art and design. Games and apps like the two featured here (in videos below) are opening up new digital worlds for creatives to explore and shape.

graffiti simulator experience

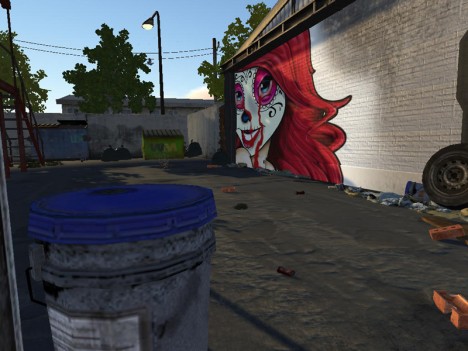
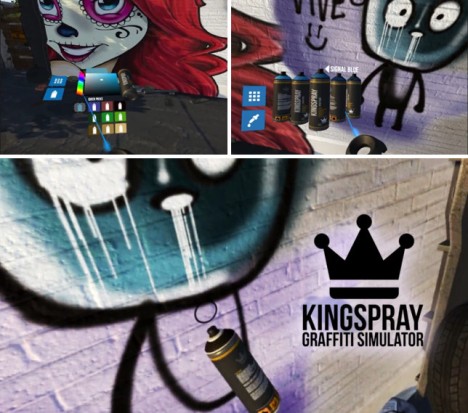
The Kingspray Graffiti Simulator, currently in development, gives players a palette and can of spray paint, adding realism through trips and spraying effects. Walking around the simulated world, artists can paint over and re-tag, then walk around to view other works and step back to enjoy the view.

tilt brush artworks

The Tilt Brush app from Google lets users sketch and draw in three dimensions. While the Graffiti Simulator places you in 3D space painting 2D surfaces, the Tilt brush actually lets you paint in space all around you. In turn, the finished pieces can be experienced from various perspectives by the artist and viewers invited to share the experience.

3d art

light painting

“Tilt Brush, at its core, is a virtual reality painting application. It creates something anyone can use, intuitively, for kids, artists, and absolutely anyone,” say the app’s developers. “Within the first 30 or 45 seconds, anyone can start VR painting and making marks in space all around them… It allows everyone to see how powerful VR is and how transformative it will be.”

Share on Facebook


[ By WebUrbanist in Art & Drawing & Digital. ]

[ WebUrbanist | Archives | Galleries | Privacy | TOS ]


WebUrbanist

 
Comments Off on Painting in VR: Kingspray Graffiti Simulator & Google Tilt Brush

Posted in Creativity


City Lab: World’s Largest Urban Simulator Spans 26 Square Miles

28 Aug

[ By WebUrbanist in Architecture & Cities & Urbanism. ]

city lab new mexico

It will be a brand-new, from-scratch American city like any other, with urban, suburban, exurban and rural zones dotted with houses, malls, power plants, police and fire stations, missing only one key ingredient: inhabitants. Currently under construction in the New Mexico desert, the Center for Innovation, Testing, and Evaluation (CITE) is a sort of real-life Sim City, the “first of its kind, in scale and scope,” a unique “fully integrated test, evaluation and certification facility dedicated to enabling and facilitating the commercialization of new and emerging technologies.”

city lab deserted complex

Known informally as City Lab (click to enlarge the diagram above), the 26-square-mile urban laboratory complex has a billion-dollar budget and will host all kinds of tests, including but not limited to: intelligent transportation systems, smart grid technologies and green energy strategies. Wired for data collection and replete with tunnels, system-wide scenarios can be monitored in the minutest detail, a dystopian twist on what might otherwise seem an idyllic mid-sized city capable of supporting 35,000 citizens.

citylabmasterplan

Complete with all the infrastructure of a ‘real’ city, the developer’s target clients include university researchers, federal agencies and commercial enterprises. The facility aims to combine elements of private and governmental test environments like Gravesend, a military and police complex in the UK, Liberty City, a drone-oriented cityscape in the US and Mcity, a newly-built autonomous vehicle testing site in Detroit.

city lab simulation space

If you have one in your town it is a safe bet CITE has one as well, from churches and highways to a city hall and even an airport. While this place contains all a community could ever hope for, the only ‘residents’ of the place will be a staff of over 300 that maintain its infrastructure and supervise experiments. Imagine the reaction of some archeologist from the distant future, seeing a sort of dystopian settlement wired for full surveillance and connected by a vast array of underground tunnels (The Cabin in the Woods comes to mind, poster below), but at the same time oddly unoccupied and devoid of art, brands or billboards.

cabin in the woods movie

Noting the lack of these quintessential hallmarks of modern civilization, a professor at the University of New Mexico decided to ask what kind of public art would fit such a strange and made-to-be-deserted city. Her students solicited proposals from around the country and selected a set of winners. Ingenious ideas included: sculptural mounds made from the dirt displaced during excavation, testing paint colors around the complex for durability and weather resistance and a farcical strategy to sell lots and gentrify the faux city.

city lab public art

More from Pegasus Global Holdings: “As a privately-owned, privately-operated test and evaluation center, CITE is open and accessible to a wide array of public and private customer segments – domestic and international. The structure and policies in place at CITE are specifically designed to remove legal, cultural and budgetary impediments as are currently prevalent in the process of moving beyond basic research and development activities.”

Share on Facebook


[ By WebUrbanist in Architecture & Cities & Urbanism. ]

[ WebUrbanist | Archives | Galleries | Privacy | TOS ]


WebUrbanist

 
Comments Off on City Lab: World’s Largest Urban Simulator Spans 26 Square Miles

Posted in Creativity


How to Use Film Simulator Presets in Lightroom

26 Jun

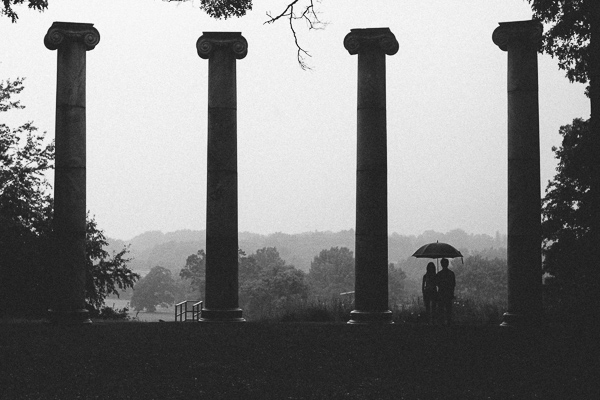
20130620 dPS 000  tri x
processed using VSCO’s Kodak TRI-X film preset

Those of you who think Instagram and its ilk are pushing us towards the end of “real photography” can quit reading right now.  For everyone else, the following paragraphs will show you how to get that ever-so-trendy, faded, slightly desaturated, vintage, “look” that is so prevalent from both professionals and hobbyists.  I’m going to let you in on a secret that professionals have been utilizing for awhile (many use it secretly!) to give their photos that added edge. 

Specifically, I am going to cover the use of film simulation presets to develop your RAW files in Lightroom.  Why use film simulation at all?  As evidenced by the popularity of mobile apps like Instagram, emulating the look of traditional film stocks has become a rather trendy and prevalent practice in photography and can be a useful tool in your post-processing arsenal.  Your clients may not specifically request a certain film, but they may ask you to give them a specific look & feel that is a result of simulating film, i.e. “Can you give my engagement photos that faded, vintage-y feeling?”, or “Make my photos look like they were taken with Instagram”.  I’ve had several clients ask for that style of processing without realizing it was the result of emulating a 50-year old film stock.  Film simulators answer the question: “What would this digital image look like if I took it with Kodak TRI-X film?”.
 
In short, film simulation presets are designed to process your camera’s specific RAW files into images that emulate the look provided by some classic film types.  Before I discovered these plugins, I foolishly spent countless hours playing with various Lightroom sliders attempting (and failing) to get that look I wanted to emulate.  After trying a number of these, my favorite by far is VSCO Film, created by a company called Visual Supply Co (VSCO for short).  They create a number of plug-ins for Lightroom, Adobe Camera Raw, and Aperture, that all do the same thing; make your digital image look like it was taken with an old-school film camera. We’ll be covering how to use these in Lightroom though they should have the same effect in ACR or Aperture.  It should be mentioned that I do NOT work for VSCO and / or receive payment in any way from them.

VSCO Logo

VSCO’s film packs come as downloads from their website and installation is as easy as running the downloaded installer and booting up Lightroom afterwards. You will then find several new groups of presets once you’re in Lightroom’s Develop module. 
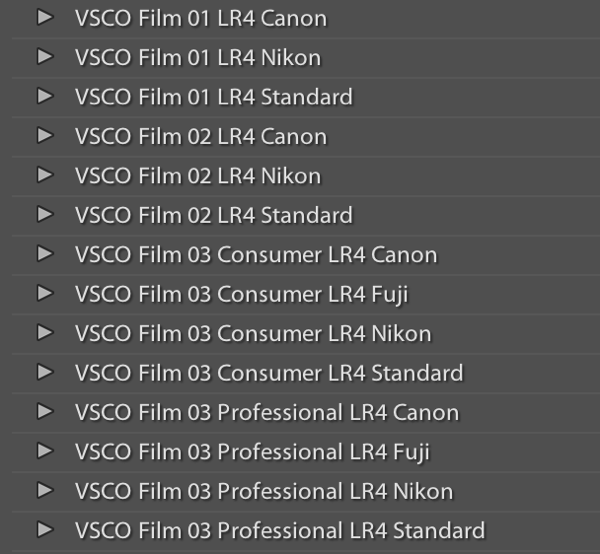
VSCO Presets

Once you’ve installed the presets, applying them is as easy as selecting the image(s) you want to process, and clicking on the desired preset on the left.  If you mouse-over the list of presets, you’ll notice that the Develop module’s Navigator window will show you a preview of the preset’s effects on your image.  You’ll find that each different film type will give you varying effects on color, contrast, brightness, and will alter the tone curve of the image.  Some film presets will introduce subtle changes, while others do dramatic things, and covert your image to B&W, add grain, and reduce the dynamic range of the image by resetting the tone curve. 

Frankly, I am unsure if there is anything a VSCO filter can do that you can’t do manually, however, it is an incredible time saver if you don’t want to spend hours re-creating the look of specific film stocks.  VSCO’s team has already done the research into the settings to emulate popular film types, and all you need to do choose which ones you like.  You’ll also notice that each preset has  “-”, “+”, “++” versions of each film, representing the degree to which you’d like the particular film’s effects applied.  Film presets work like any other preset and the develop settings can be copied and pasted from image to image or applied to a large batch of images at once.

However, the beauty of VSCO (and similar presets), is that once you’ve selected a film stock that you like, you can then tweak it to your heart’s content.  For example, you can start off with a baseline Kodak Portra 400+, and decide that you’d want to bring up the shadows, add some grain, and saturate the blues.  Save those settings as a new preset, and boom, you’ve developed your own, unique look.  VSCO’s film pack also comes with “Toolkit” presets that will help you fine-tune your image.  With a click of a button you can add grain, bring up the shadows, save your highlights, or fix Chromatic Aberration.  Again, these are all things that you can do manually, but the presets will save you quite a bit of time.
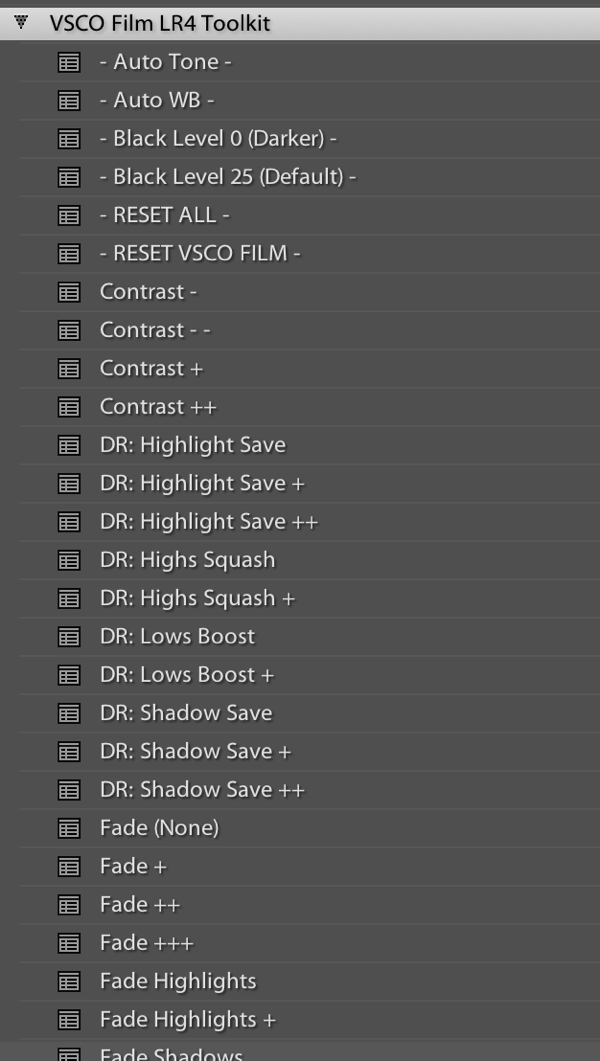
VSCO Toolkit

VSCO has now released three different film packs, each with its own set of films, with the latest film pack focusing on a variety of instant (Polaroid!) films.  The film packs are not cheap, at $ 119 / pack, but existing customers will receive a discount on subsequent film pack purchases.  I’d suggest buying VSCO 01 and only adding the others if you really like the first pack.  Don’t feel like ponying up the dough or only use your iPhone to take pictures?  VSCO actually has an iOS app called VSCO Cam. 

So that’s all there is to it! I will leave you with some quick before & after examples that may help demonstrate how powerful these presets can be.  Each of these following images will be presented in two forms, the “before”, sans preset and without any major Lightroom modifications, and the “after”, with a specific preset applied. For the sake of this demonstration, I have picked films with a relatively dramatic effect on the original image.

Before:
20130620 dPS 001??After, with a “Polaroid 690 cold” preset applied:

20130620 dPS 001  polaroid 690 cold

Before:

20130620 dPS 002

After, with a Polaroid 669 preset applied:
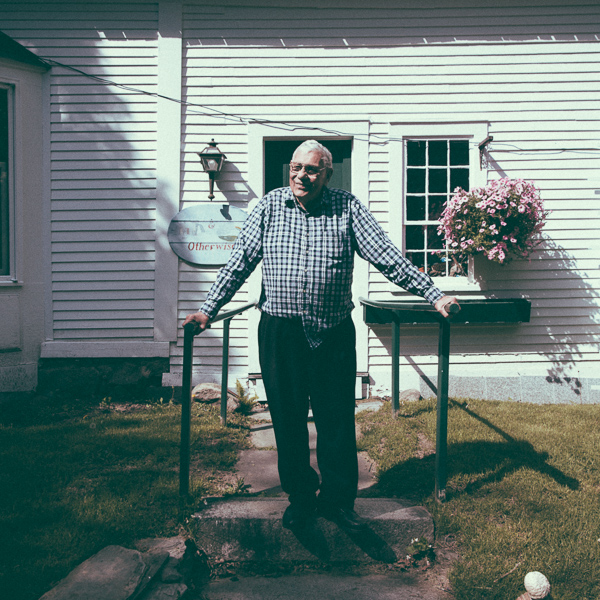
20130620 dPS 002  polaroid 669

Before:

20130620 dPS 003

After, with a “Polaroid 690 cold” preset applied:
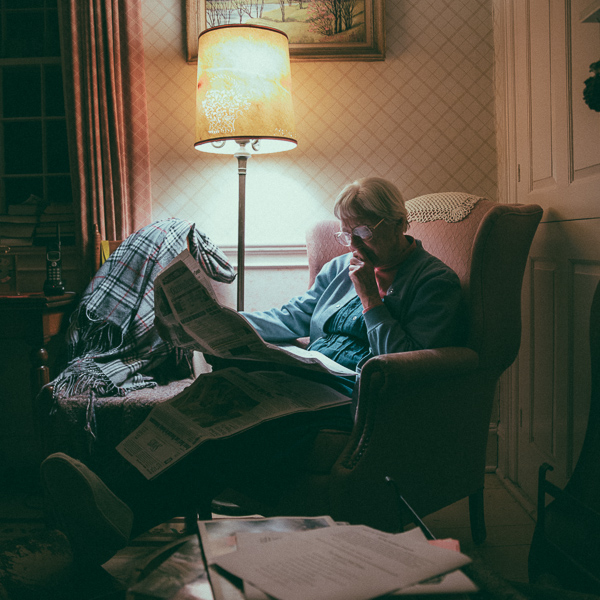
20130620 dPS 003  polaroid 690 cold

Before:

20130620 dPS 000

After, with a Kodak TRI-X filter applied:
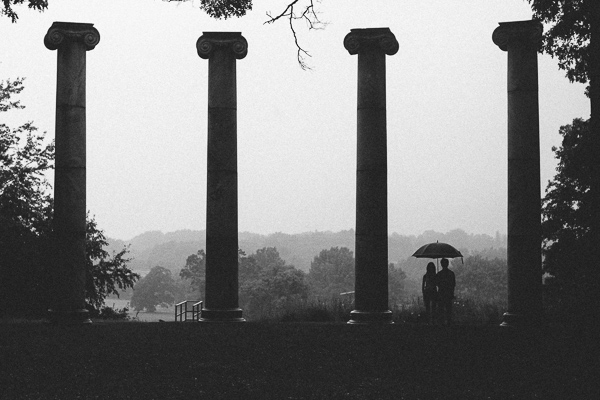
20130620 dPS 000  tri x

Frank Wang is a NYC photographer specializing in portrait and architectural photography. You can find him online at www.frankwangphotography.com and www.framephotographics.com. Connect with him via witter / Instagram: @frankwangphoto

Post originally from: Digital Photography Tips.

Check out our more Photography Tips at Photography Tips for Beginners, Portrait Photography Tips and Wedding Photography Tips.

How to Use Film Simulator Presets in Lightroom


Digital Photography School

 
Comments Off on How to Use Film Simulator Presets in Lightroom

Posted in Photography


Home Soaring simulator

29 Jun

My home soaring sim setup with 2 projectors, 3D stereoscopic, Trackir4 headtracked, simmeters instruments. Running on Condor soaring simulator and Alpi3 scenery
Video Rating: 4 / 5