RSS
 

Posts Tagged ‘Sharpening’

RawTherapee 5.8 update adds new Capture Sharpening feature, CR3 support and more

06 Feb

Free, open-source software RawTherapee has been updated to version 5.8, the team behind the product has announced. This is a relatively small update, at least as far as general users are concerned. RawTherapee 5.8 brings a new tool called Capture Sharpening that automatically recovers the detail lost due to diffraction/lens blur.

The RawTherapee team explains that Capture Sharpening can be used with Post-Resize Sharpening in order to produce ‘detailed and crisp results.’ The tool is found within the ‘Raw’ tab.

In addition, RawTherapee 5.8 adds support for Canon’s CR3 raw image format. The team says that at this point in time, RawTherapee can decode the image data so that users can process these image files; it cannot, however, retrieve the metadata. Though it’s not explicitly stated, it appears the team plans to add metadata support for these files in the future.

Those two features aside, the new update brings various improvements to camera models, optimizes tools, speeds up the application, improves its memory management and fixes a number of unspecified bugs. RawTherapee 5.8 can be downloaded for Windows, Mac and Linux from the software’s website.

Articles: Digital Photography Review (dpreview.com)

 
Comments Off on RawTherapee 5.8 update adds new Capture Sharpening feature, CR3 support and more

Posted in Uncategorized


Photoshop Sharpening for Beginners – Unsharp Mask, High Pass and Smart Sharpen Explained

02 Jan

The post Photoshop Sharpening for Beginners – Unsharp Mask, High Pass and Smart Sharpen Explained appeared first on Digital Photography School. It was authored by Nisha Ramroop.

photoshop-sharpening-for-beginners

With the constant improvement of technology, it is realistic to expect tack sharp images straight out of your camera. Many times, though, the image appears sharper on your camera than when uploaded to your computer. This is because images need to be sharpened for their specified output. In Photoshop sharpening for beginners, we look at why and how to sharpen your images. Also, you will review some of the sharpening filters and techniques that help make a huge difference to the overall quality of your final edit.

Image: F/5.6 1/200/ ISO800 @420mm

F/5.6 1/200/ ISO800 @420mm

Why sharpen?

Before we delve into the photoshop sharpening tools, it is important to know why and when you need to sharpen your images. The premise of sharpening is that it increases the contrasts around the edges in your image.

As previously mentioned, you need to sharpen images for their specific output types. This means you sharpen an image displayed on the internet differently than one meant for print.

Sharpening is also very useful when it comes to correcting smaller focus issues. For example, if you are shooting a portrait and the focus is on the ear instead of the eyes.

Sharpening the subject’s eyes brings the attention back where you intended. In other genres of photography, use sharpening in pretty much this same way. Sharpen the areas you want to draw the viewer’s eyes to and decrease the sharpness in areas you want to “fall away”.

Photoshop-Sharpening-for-Beginners

Sharpen for your respective output: web vs print. Details make a difference F/11 1/250 ISO200 @10mm

Keep in mind that while sharpening takes your image to the next level, there are times when it is not needed. While sharpening a person’s eyes and lips can take their portrait to the next level, you want to avoid sharpening their skin!

How to sharpen

As with other editing techniques, Photoshop sharpening filters are destructive (when applied directly to your image). Use layers and smart objects, to maximize the following sharpening tools and avoid permanently changing it.

Bonus Tip: When post-processing, save the application of your sharpening technique for last.

Unsharp Masks

While the name “unsharp” sounds like a tool that would make your images less sharp, this counter-intuitively named filter is, in fact, a sharpening tool. Interestingly enough, it was regarded as the best tool to sharpen images in earlier iterations of Photoshop.

While it is still useful, some of the other tools afford you a greater amount of control.

Photoshop-Sharpening-for-Beginners

Photoshop sharpening for beginners notes: When you sharpen an image too much, it starts to look a little noisy.

To use Unsharp Mask:

  • Duplicate your original/background layer
  • Right-click on your new layer and choose “Convert to Smart Object”
  • Go to Filter -> Sharpen -> Unsharp Mask. This brings up a dialog box with the options: Amount, Radius and Threshold


Remember, we said that sharpening basically increases the contrasts around the edges in your image? Well, building on that will make these sliders easier to understand.

Use the Amount slider to increase or decrease the amount of contrast in the edges of your image.

Radius manages the level of detail. So a smaller radius will manage the smaller details, while a large radius affects a bigger area.

The last slider, Threshold, affects the areas of higher contrast.

Photoshop Sharpening for Beginners – Unsharp Mask, High Pass and Smart Sharpen Explained

When using these sliders, a good starting place is to figure out your radius first. Do you want to sharpen the smaller details or the larger ones? If you are still unsure how to work with Photoshop sharpening for beginners, experiment!

In this example, push your radius up and then work back down until you affect the areas that you want. From here, you can start moving around the other two sliders until you get your desired results.

One of the downsides of using Unsharp Mask is that it is Layer specific. This is because it affects your entire image, so you need Layer Masking to discard areas that you don’t want sharpening.

Smart Sharpen

The Smart Sharpen tool is like a child of Unsharp Masks, as it gives you some more options. One of the cool things with Smart Sharpening is that it ignores skin detail and focuses on areas with higher contrasts e.g. eyes, eyebrows, lips.

Use the same workflow as above to access the Smart Sharpen filter. The dialog box gives you more advanced options than the previous Unsharp Mask. Amount and Radius work the same way as previously described.

Image: F/5.6 1/1600 ISO100 @420mm

F/5.6 1/1600 ISO100 @420mm

A drop-down menu allows you to remove different types of blurs such as Gaussian, Lens and Motion blur. Lens blur is the most common removal used in this menu.

Image: In Photoshop CC, your menu looks a little differently but has all the same options. Additiona...

In Photoshop CC, your menu looks a little differently but has all the same options. Additionally, it includes a useful option to reduce noise.

Smart Sharpen also allows you to create presets. This is helpful if you are sharpening a batch of images at similar focal lengths. Remember, when you apply your filters/filter preset to a Smart Object, you can further adjust/refine it.

High Pass Sharpening

Another photoshop sharpening for beginners is the High Pass Sharpening technique. While it is a little more advanced than the other tools, you can still easily apply it. It is not a filter found in the Sharpen Menu like the Unsharp Mask and Smart Sharpen filters. What it is, however, is a combination of steps that sharpens your image.

To process with High Pass Sharpening:

  • Duplicate your layer
  • Desaturate your new layer. It seems like a strange step, but since sharpening increases saturation around your edges, your image may start to look surreal.
  • Right-click on your desaturated layer and choose “Convert to Smart Object”
  • Go to Filter -> Other- > High Pass. Your entire image now turns to gray, and when you move the radius slider, you will see the targeted detail areas affected.
Photoshop-Sharpening-for-Beginners

Left: Using High-Pass in the default normal mode, see how your edges are defined. Right: Using High-Pass in Overlay Blend Mode allows you to see your changes in real-time

There is, of course, an alternate way to this gray image where you see your edit in real-time.

Prior to the last step above:

  • Select your desaturated layer and go to Blend Modes
  • Select Overlay
  • Then go to Filter -> Other -> High Pass and adjust


Photoshop-Sharpening-for-Beginners

At full size, you don’t always see that the eyes are not as sharp as they can be. Like Smart Sharpen, the eyes and lips are sharpened, but the skin is unaffected. F/7.1 1/125 ISO100 @70mm

Note: This sharpening technique is the only one that lets you apply sharpening with different blend modes.

Conclusion

Remember, sharpening should be the last step in your post-processing workflow. These filters and techniques in Photoshop Sharpening for Beginners will take your image to that next level. It helps to know when and why to sharpen an image and as with all processing, applying correctly makes a huge difference to your final image.

Do you have any other photoshop sharpening for beginners tips you’d like to share? Please do so in the comments!

The post Photoshop Sharpening for Beginners – Unsharp Mask, High Pass and Smart Sharpen Explained appeared first on Digital Photography School. It was authored by Nisha Ramroop.


Digital Photography School

 
Comments Off on Photoshop Sharpening for Beginners – Unsharp Mask, High Pass and Smart Sharpen Explained

Posted in Photography


Faster operation and new sharpening tools for Phase One Capture One Pro 10

02 Dec

Camera, lens and software manufacturer Phase One has introduced a new version of its image manipulation software package that it says improves the speed at which it runs and which adds a collection of new editing tools – as well as compatibility with additional cameras and lenses. Capture One Pro 10 features faster browsing, zooming, image scrolling and magnified view comparisons after what the company describes as ‘under-the-hood tuning’, while a new design makes the interface easier for those new to the application.

Phase One has also added new sharpening tools that between them counter softness caused by diffraction, reduce the effects of haloing and which allow localized sharpening of selected areas. A further sharpening control provides the means to create output sharpening parameters for raw images as they are converted for particular purposes – such as for different print sizes or for web use. For images going to print the tool allows users to specify how far away viewers are likely to be so the program can generate suitable sharpening levels.

On the organizational side Version 10 allows users to move folders within a catalogue and allows filtering of images by their orientation. Those shooting with a Sony or Phase One camera tethered get a new ‘camera focus tool’ that helps users make critical focusing adjustments directly from the software without having to touch the camera.

The new application is also compatible with Tangent editing products. These are mixing-desk-like tools that provide an alternative to traditional keyboard-and-mouse operation of software. These panels are said to make editing software more intuitive and faster to use.
New hardware supported with this upgrade includes the Olympus OM-D E-M1 ll and the Sony A99M2 and A6500 cameras as well as Sony FE 70-200 mm F4 G OSS, Sony 70-200 mm F2.8 G, and Sony E 18-200mm F3.5-6.3 OSS lenses.

Capture One Pro 10 is available now and costs $ 299/€279. Users of version 8 or 9 can upgrade for $ 99/€99, though if you bought version 9 after 1st November you can upgrade for free. Subscribers can just download the latest version as part of their package.
For more information visit the Phase One website.

Press release

Phase One Releases Capture One Pro 10

Ready for the Future of Image Editing – A Faster, More Powerful Experience

COPENHAGEN, December 1, 2016 – Phase One today released Capture One Pro 10, a major release of the world’s premiere raw conversion and image editing software. Designed to support wide ranging workflows of both professional and passionate photographers, Capture One Pro is known and trusted for rendering the finest image color and detail from more than 400 digital camera models. Now, based on customer feedback, Capture One Pro 10 puts superior user experience center stage – with interface improvements, under-the-hood tuning, and exciting new features that furnish the fastest, most reliable and most powerful performance yet.
www.phaseone.com/ten

What’s New with Capture One Pro 10:

Enhanced User Experience. Faster browsing, zooming, panning, and ease in switching between images even at 100 percent view. Also, a new default workspace offers a more intuitive experience for new users, with examples for getting started.

Greater control, with a three-stage image sharpening process:

  • A new lens tool option corrects lost sharpness caused by diffraction;
  • User-defined creative sharpening (utilizing a new Halo Suppression slider and a new blending algorithm) allows the photographer the option to sharpen an entire image, or just various elements within it;
  • User-defined output sharpening in the recipe tool. For print sharpening, users can also specify the distance from which the final output image should be viewed.

On-screen proofing. An enhanced proof mode takes the guesswork out of the raw conversion process. From the viewer panel, users can now simulate the final size, resolution, color, compression artifacts and sharpening of images. This is especially useful for live assessment of files – particularly small files for the web and for optimizing image compression quality.

A look into the future of image editing: Inspired by video grading processes, users can now access Capture One Pro directly through a Tangent panel system. This fully integrated panel is literally a new interface into image editing – for deep dive color and image adjustment –– allowing fast, multiple input commands simultaneously, while viewing the master monitor as the editor “feels” input into the application.

A camera focus tool module for tethered cameras — especially useful for product, still life, macro, and Cultural Heritage photography projects.

“We have developed Capture One Pro 10 to greatly improve users’ experience so they can achieve the results they want much faster and with greater confidence,” said James Johnson, software product manager, Phase One. “Image adjustment options are now at a whole new level. We believe that with this release, we are delivering the most powerful, responsive, and user customizable image processor available.”

The Complete List of New Features:

  • Three-phase sharpening tools (see above)
  • Output proofing (see above)
  • New default and intuitive workspace (see above)
  • Camera focus tool module for tethered cameras (see above)
  • Tangent panel: full integration (see above)
  • New filter option: search by orientation of images
  • Optimization of Jpeg output for size/quality
  • Move folders in catalogs
  • Auto masking extended to any editable file type (including Xtrans)
  • Improved compressed RAW and Fuji support
  • Hardware acceleration – OpenCL is now enabled by default
  • Stripe reduction LCC for 100MP
  • Optimized LCC creation
  • Computer ID in license for activation management
  • Apple script – new properties (Mac only)

New camera and lens support
New camera support includes: Olympus E-M1 mkll, Sony RX100M5, Sony A6500 and A99M2. 

New lens profile support includes: Sony FE 70-200 mm F4 G OSS, Sony 70-200 mm F2.8 G, and Sony E 18-200mm F3.5-6.3 OSS

For a complete list of newly supported cameras and lenses, please go to: www.phaseone.com/download.

Availability and Pricing
Capture One Pro 10 is available now for the Mac and Windows operating systems online at www.phaseone.com/store and from Phase One authorized partners worldwide www.phaseone.com/partners.

Owners of Capture One Pro 8 and 9 may upgrade for 99 USD or 99 EUR. For customers who have purchased Capture One Pro 9 since November 1, 2016, Phase One is offering a grace period, exempting them from the upgrade fee. Eligible customers can download their upgrade today at phaseone.com/download and reuse their license key.

New customers can purchase Capture One Pro 10 for 299 USD or 279 EUR. Capture One Pro is also available by subscription. Capture One Pro (8 and 9) subscribers can simply download the new Capture One Pro 10 release. A single-user subscription is 15 USD / 12 EUR per month for a 12-month plan. Please see all subscription options at www.phaseone.com/store.

Articles: Digital Photography Review (dpreview.com)

 
Comments Off on Faster operation and new sharpening tools for Phase One Capture One Pro 10

Posted in Uncategorized


How to Make Your Photos Shine Using Clarity, Sharpening, and Dehaze in Lightroom

01 May

The goal of any photographer is to make each and every photo stand out from the crowd. Making an image that pops is something that we all strive to achieve, but it’s not always easy to do. Luckily, there are tools at our disposal in Adobe Lightroom that can go a long way to help us achieve an image that we can be proud of, and that catches the attention of the viewer. What are these tools? They are many and varied, but there are three central processing techniques that can make your images transcend the average, and reach the potential you intended. They are Clarity, Sharpness, and Dehaze.

These three tools are deceptively simple and subtle. When used properly, the enhancements they will make to your photos will be nearly imperceivable. They can take your image from good to great, with just a few simple clicks of the mouse. In this tutorial, I will show you how each one of these processing tools affect your photos, and how they can be put to best use, so that your photographs really stand out from the rest. Let’s get started!

After CSD

Clarity

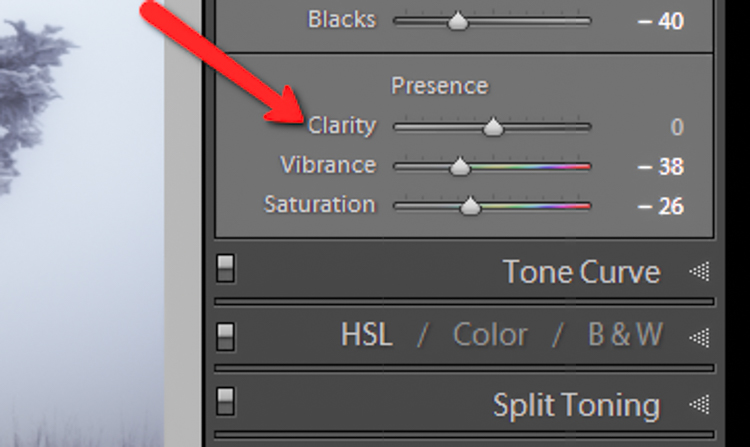
The clarity slider has been around virtually since the inception of Lightroom. You can find it in the Basic panel of the Develop module. It functions to add definition and well, clarity, to your images. It accomplishes this by darkening the lines surrounding the perimeter of objects within your photo. Think of it as contrast on steroids. The clarity slider can really add a lot of punch to your photos, and add drama.

Clarity

Tips for Using the Clarity Slider

  • Don’t add too much. If you push the clarity slider too far to the right, you can begin to see unattractive halos around objects within the frame, resulting in a fake or unnatural looking photograph. If using it globally (applies to the entire image), do so judiciously. Be careful when applying the clarity slider to an entire image, most areas of your photo probably won’t need to be clarified.
  • It’s best to apply clarity after everything else. Since the clarity tool will add a good amount of contrast to your photo, it’s best to apply it towards the end of your workflow. While this is not always true, it is a good guideline to follow in order to avoid the need to backtrack.
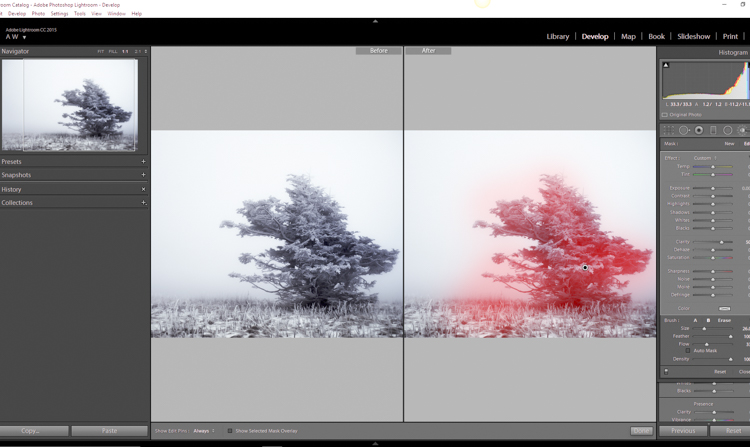
  • Use the Adjustment Brush or Graduated Filter tools to apply it to select areas of your image that need clarity. This will enable you to apply clarity only to foregrounds or backgrounds and to specific points you want to emphasize in the image.

Clarity Adjustment

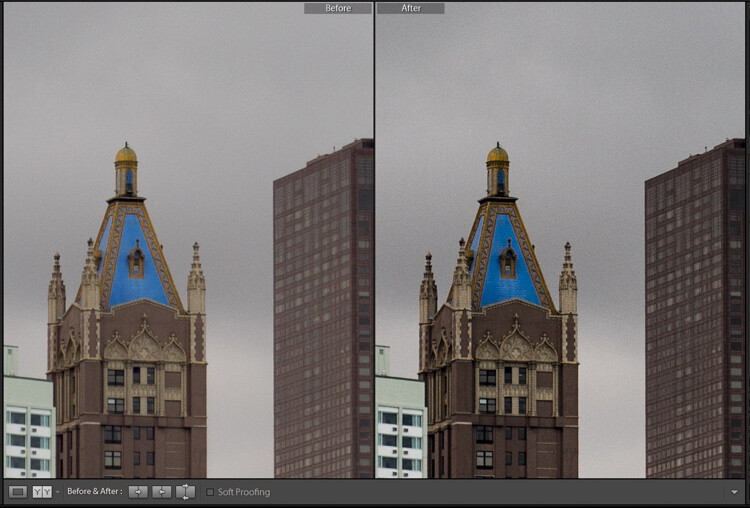
Clarity applied, viewing at 1:1

Clarity applied at +30, viewing at 1:1

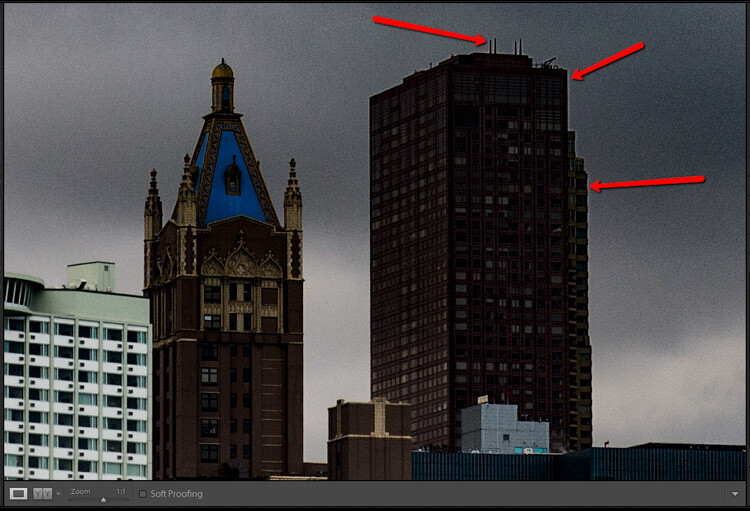
Clarity slider taken too far, viewed at 1:1 (100%)

Clarity slider taken too far, viewed at 1:1 (100%)

Sharpness

The art of sharpening an image can often make or break the composition. Sharpening is one of those awesome features of Lightroom which has been around from the beginning, and it only seems to be getting better with time.

Sharpening

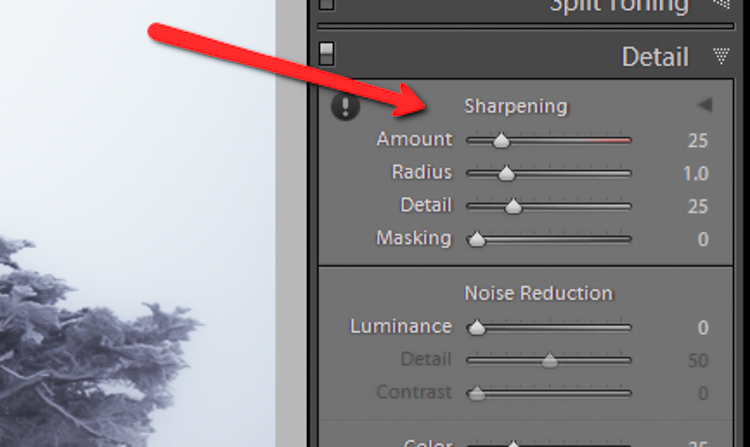
The sharpening tool is located under the Details panel in the Develop module. Basically, sharpening is accomplished by adding contrast between pixels so that the area being sharpened appears to have more definition, compared to its surroundings. There are a few key tweaks that you can perform in order to get the most from the sharpening panel.

Make use of the radius slider. The radius controls how many pixels around the perimeter of objects are affected by the sharpening. Think of this as the halo of sharpness. The greater the radius, the more apparent the sharpening will become. Don’t over do the details. You might think the more details you preserve in your sharpening, the better quality your image will be. This is not true. Usually, the farther you move the detail slider to the right, the more grainy and gaudy the image will be. Find a happy medium here and you will be happy in turn.

Global sharpen at +50

Global sharpen at +50

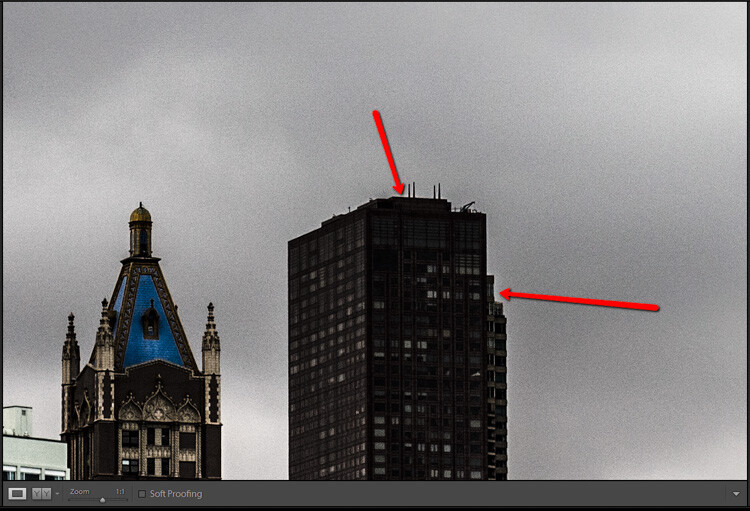
Over sharpened

Over sharpened – this is what too much sharpening looks like at 1:1

Apply sharpening only to the areas you need to sharpen. It’s easy to simply sharpen an entire image instead of taking the time to selectively apply the edit. Rest assured though, if you apply your sharpening using the Adjustment Brush tool you will have a much more aesthetically pleasing result. Much like clarity, you usually do not need to sharpen the whole photograph.

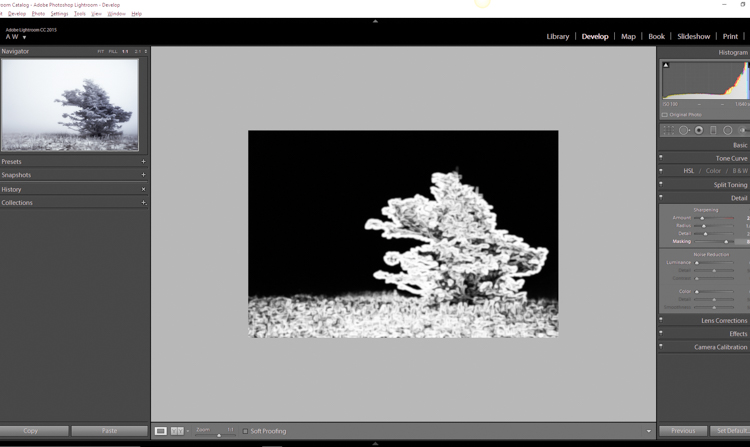
Use the masking slider with the Alt key (Option key on Mac). The masking slider can be considered the most underrated asset in the sharpening panel. It dictates what areas will be sharpened. However, by itself the masking slider is rather lacklustre. This is where the Alt key comes into play. Hold down the Alt key while you adjust the masking slider.

Sharpening Mask

You will see that the image is transformed into a black and white relief image. The areas in white are where the sharpening will be applied; the areas in black will not be sharpened. This is a great way to fine tune your sharpening when adjusting globally. (Note: to keep people’s skin from becoming overly sharp and showing every pore and bump, move the masking slider until the skin areas are black and therefore unaffected by the sharpening adjustment)

Dehaze

This is a feature that was introduced very recently in Lightroom CC. It is a magical little function that people seem to either hate or love.

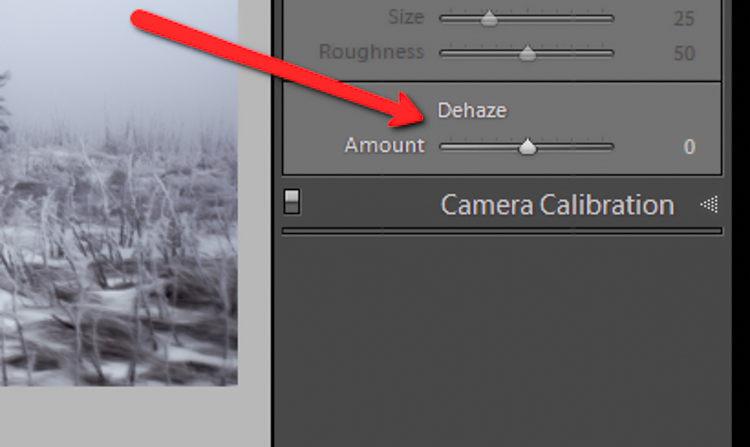
Dehaze Slider

I for one love this little guy. It’s located under the Effects panel. The explanation of how exactly it works is somewhat cryptic. Here is an answer pulled directly from Adobe Blog:

The Dehaze technology is based on a physical model of how light is transmitted, and it tries to estimate light that is lost due to absorption and scattering through the atmosphere.

Simply put, the dehaze slider can reduce haze within your images. It can also add a mystical fogginess as well if you choose (just slide it the other way).

Dehaze

Basically, it will make an otherwise hazy photo more clear. This comes in handy for photographs of the night sky when your want to make the stars more pronounced, or when you have to deal with physically dense atmospheric conditions.

Tips for Using the Dehaze Slider

  • Keep an eye on your black points within the image. The dehaze slider can cause loss of shadow detail if you push it too far. Use the J key to show highlight and shadow clipping in order to preserve details.
  • Perform your white balance adjustments BEFORE you apply dehaze. The dehaze tool can do some incredible things for your photo, but it can also cause some funky color distortions if you adjust white balance after the fact. As always, strive to obtain optimal white balance before you ever begin to post-process an image.
  • Sometimes an image will benefit from added haze instead of dehazing. Experiment with adding a small amount of haze by moving the dehaze slider to the left. This can add an ethereal glow to some landscapes and even portraits.
Dehaze +20 at 1:10 view

Dehaze +20 at 1:10 view

Dehaze pulled too far

Dehaze pulled too far

As with all post-processing, the less you have to adjust after the image has been made, the better off you will be. The tools in Lightroom are a fantastic way to bring out the true power of your photographs, if you use them deliberately, and with good judgment.

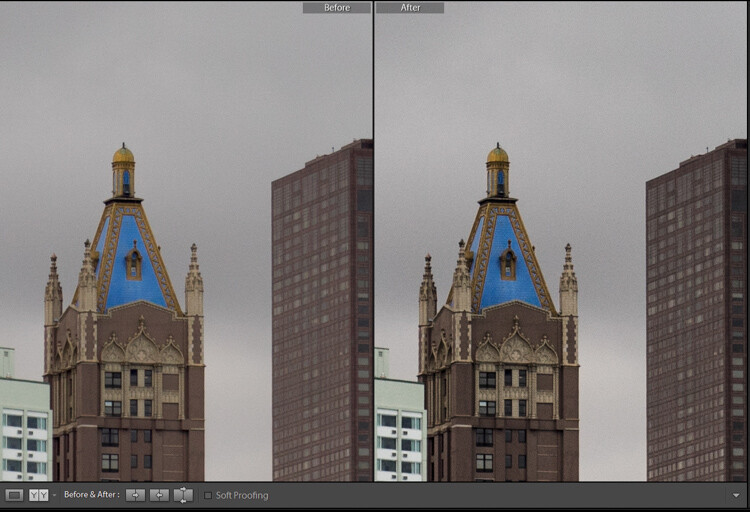
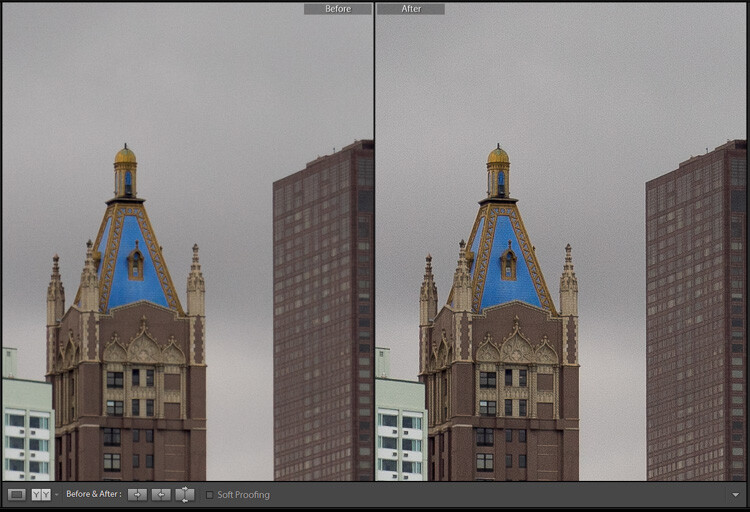
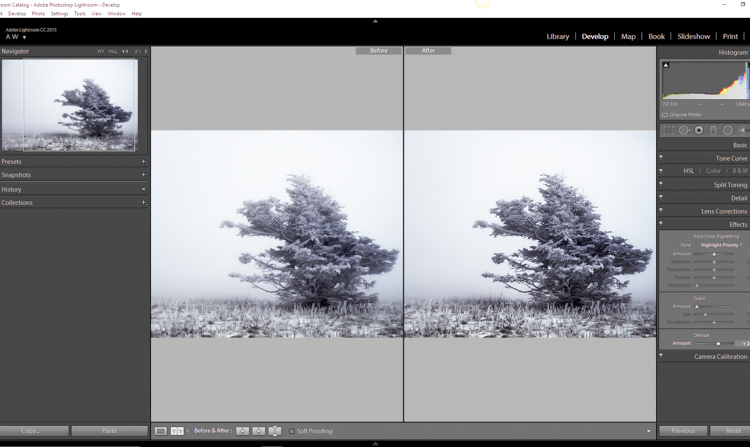
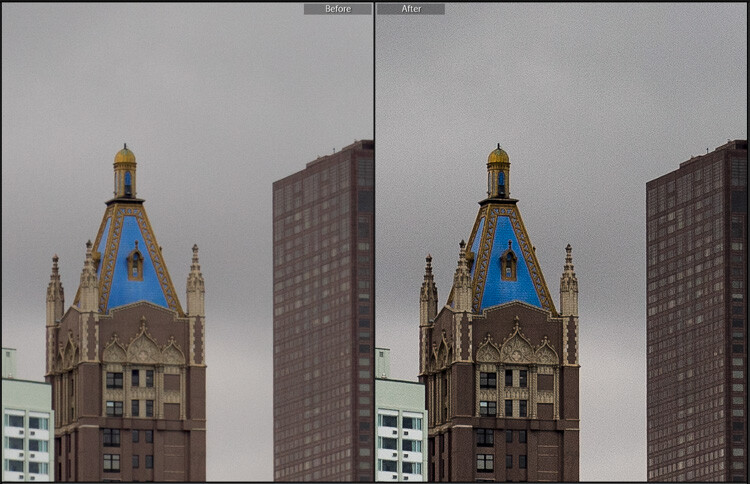
Before clarity, sharpening and dehaze

Before clarity, sharpening and dehaze

After

After

After clarity, sharpening and dehaze were applied

After clarity, sharpening and dehaze were applied

Any adjustments you make to the clarity and sharpness of your photo should never make them appear unrealistic (with exceptions) or detract from your original vision. Even the dehaze tool should be used sparingly and only when required. Just as the saying goes that one brush stroke can ruin a painting, so too can one more click of the slider. The goal of post-processing is to enhance a photograph to the point of meeting your pre-visualzation. No more and no less. Experiment with the tips you’ve learned here and witness the hidden potential within your own photographs!

googletag.cmd.push(function() {
tablet_slots.push( googletag.defineSlot( “/1005424/_dPSv4_tab-all-article-bottom_(300×250)”, [300, 250], “pb-ad-78623” ).addService( googletag.pubads() ) ); } );

googletag.cmd.push(function() {
mobile_slots.push( googletag.defineSlot( “/1005424/_dPSv4_mob-all-article-bottom_(300×250)”, [300, 250], “pb-ad-78158” ).addService( googletag.pubads() ) ); } );

The post How to Make Your Photos Shine Using Clarity, Sharpening, and Dehaze in Lightroom by Adam Welch appeared first on Digital Photography School.


Digital Photography School

 
Comments Off on How to Make Your Photos Shine Using Clarity, Sharpening, and Dehaze in Lightroom

Posted in Photography


Smarter Sharpening in Photoshop using Adobe Camera Raw

13 Oct

sharpen-in-Photoshop-using-Camera-raw-opener

Sharpening in Photoshop has traditionally involved a compromise between applying it to the places in the image that you want to sharpen and avoiding those that you don’t want affected. Both Lightroom and Adobe Camera Raw have always had a much better sharpening tool which not only lets you see what you are doing more clearly, but also includes a very smart mask that lets you limit sharpening to detail areas.

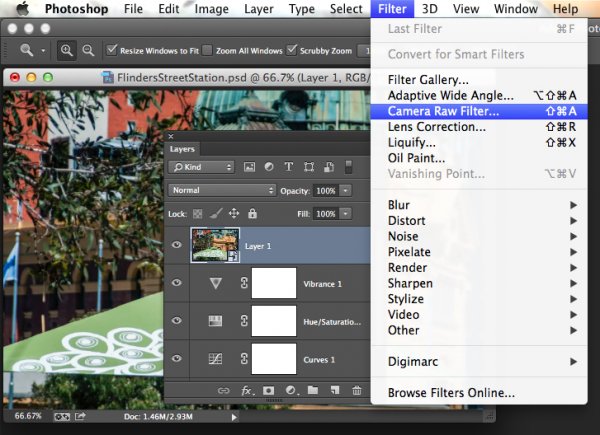
In Photoshop Creative Cloud a Camera Raw filter was added. This opens up a world of possibilities for sharpening images better and more easily and at the completion of your Photoshop editing workflow.

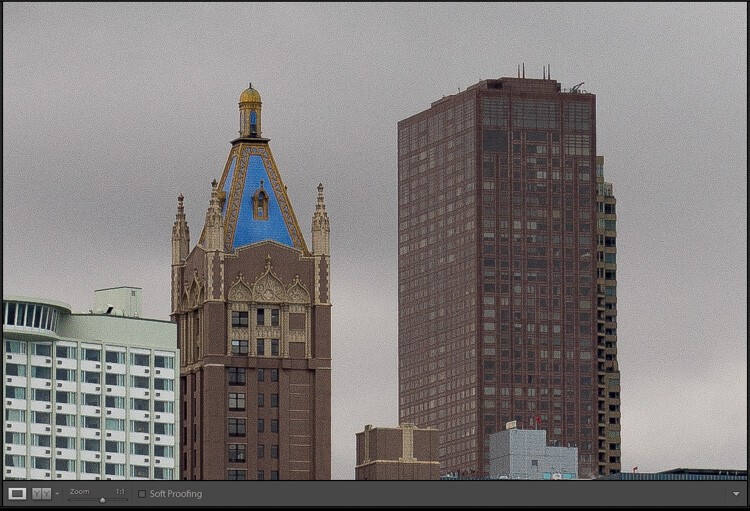
So now, in Photoshop CC as you can do in Lightroom and Adobe Camera Raw, you can take advantage of this better sharpening tool. So you can sharpen a photo of a building and apply the effect to the building but not to the sky above it. This is important because blue sky is typically an area of flat color which may contain noise that you certainly don’t want to sharpen and make even more obvious!

In the video below I show you how to sharpen an image from inside Photoshop CC using the new Camera Raw filter.

Before you do this, if your image contains layers, you need to create a flattened version of the image to sharpen it. To do this, select all the layers in the image and choose Filter > Convert for Smart Filters so you are operating on the entire image. Alternately, click the topmost layer of the image and press Shift + Control +Alt +E (Shift + Command + Option + E on the Mac) to make a new layer containing a flattened version of the photo. Lastly, convert that to a Smart Filter and you’re ready to go:

Do you have any other sharpening tips?

The post Smarter Sharpening in Photoshop using Adobe Camera Raw by Helen Bradley appeared first on Digital Photography School.


Digital Photography School
 
Comments Off on Smarter Sharpening in Photoshop using Adobe Camera Raw

Posted in Photography


Learn How to Use the Sharpening Tools in Lightroom

23 May

There’s no question that Lightroom is a powerful piece of photo processing software, but due to that power sometimes it’s not as easy to wrap our heads around everything it has to offer, that’s in part why I started my Let’s Edit YouTube series a weekly segment in which I share my own editing workflow for viewers to learn from.

After starting this series one of the most commonly asked questions was to go into more detail on how the sharpening tools in Lightroom work. Sharpening in Lightroom is broken down into four different sliders – Amount, Radius, Detail and Masking – and they each work together to help you achieve the perfect amount of sharpness in your photograph. Today, rather than simply answer this question to the comparatively small group of people over on my site, I thought I’d bring these tips to the dPS community as a whole. I know there are a lot more people out there looking to master the art of sharpening images and I’m happy to help explain them.

Before We Get Started

There is one thing I’d like to mention before we dive into the tutorial and that is that these tools are designed to help improve an image that is sharp to begin with. They won’t fix camera shake, missed focus points, or poor DOF choices, but rather improve upon an already sharp image. So with that said if you’re struggling to get your image tack sharp you might want to check out this great DPS article on five tips to achieve sharper images first and then head back here to learn how you can make them even better.

The Amount Slider

As the name implies the amount slider is a broad and general addition or subtraction of the amount sharpening applied to your image. The more you slide to the right the sharper your image will become. It works by increasing the contrast between different pixels in a fairly general way. The next three sliders can help us refine how the amount of sharpening is applied throughout the image.

Amount

Before we get into those other sliders though I do want to mention that each of these four tools has an extra option attached to it. By using the Alt (windows) or Option (Mac) key on your computer you will be shown an overlay that will help aid you in making better decisions with your sharpening.

For the amount slider this option removes the color from the image letting us use a simple gray scale image for sharpening. This is important because some colors can give false sense of sharpness when placed next to each other and can make it difficult to determine the true level of sharpness in the image.

The Radius Slider

Next in the detail panel is the Radius Slider which lets you control how far away from the center of each pixel the sharpening effect occurs. This is great for determining if you’d prefer a more airy feel (smaller radius) or a more hard edge feel (larger radius).

Radius

Each photograph is different and often times in portraiture the radius is left rather small, while in architecture or landscape, the radius can be made a bit larger to truly define the edges of your scene.

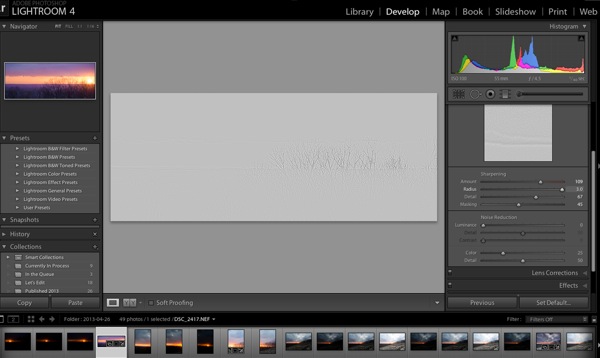
With the radius slider the option key will create an overlay that allows you to see the effect of the edge sharpening in a visual and easy to understand way. The edges that are being effected become clearly defined and the areas of the photograph where this effect is not being applied will be left hidden behind a gray overlay. In the screen-capture above you’ll see with the radius slider maxed out the trees along the horizon are clearly defined in the overly.

The Detail Slider

I like to think of the detail slider as a fine-tuning slider or even just simply as picking up from where the radius slider left off. Rather than focusing on the hard edges of the image the detail slider is designed more for bringing out the finer textures of the images.

Detail

It does this by controlling how the high frequency data is displayed.

The further you push the detail slider to the right the more high frequency data will be displayed resulting in more textures in your image. Be warned, if you push it too far in some cases the outcome will be overly sharp or you may start sharpening unwanted noise. These negatives are things you’ll want to watch out for as they can start to make your photograph too harsh for your viewer and distract from the overall story you’re trying to tell.

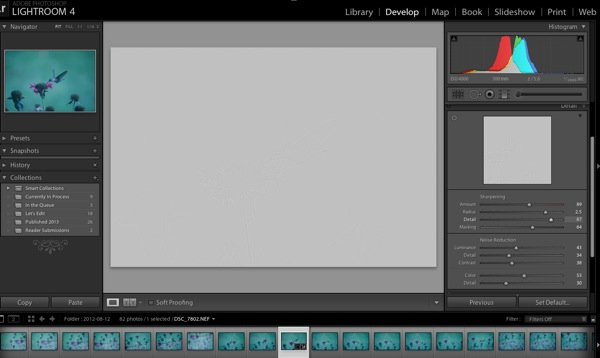
To help you determine the optimum positioning of the detail slider the option overlay available works in much the same way as the radius slider showing you where your detail is being applied by showing you the areas effected by your changes.

The Masking Slider

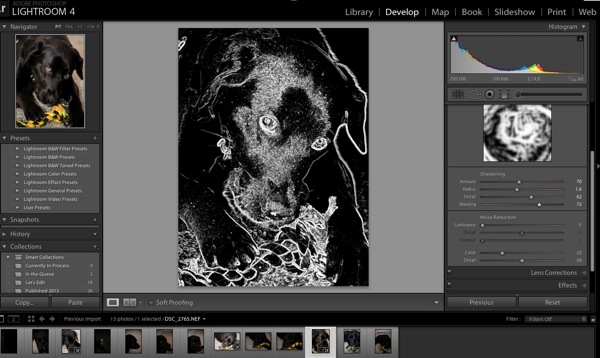
Finally we’re down to the last one of the four. The masking slider allows you to in a sense control where your sharpening is to occur. By sliding it to the right you reduce the areas of the photograph that sharpening will occur by ignoring less important edges and only sharpening the more obvious ones.

Masking

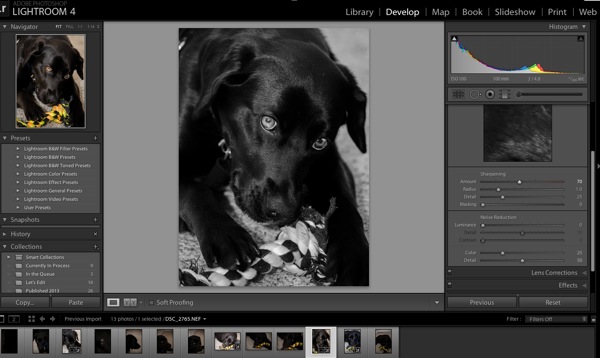
Again with the alt or option key held down you are presented with an overlay for this slider which shows you where everything is occurring The areas in black are being masked out, while the areas in white are where the sharpening will take effect. As you can see above here the hard edges of the dog around her ears, muzzle and eyes are being sharpened where as the areas in black are not. It’s a great way to keep you background filled with creamy bokeh, but sharpen the face or focal point of your subject.

Well that’s it – I hope this quick look into Lightroom’s detail sliders has helped you learn a bit about how to sharpen your photographs, if you’d like to see it in action check out this video where I go through the above steps while sharpening a Macaw from a recent trip to the local zoo.

John Davenport is an avid amateur photography who shares his photography on Facebook. He also runs a weekly series called “Let’s Edit” which focuses on editing photos in Lightroom.

Post originally from: Digital Photography Tips.

Check out our more Photography Tips at Photography Tips for Beginners, Portrait Photography Tips and Wedding Photography Tips.

Learn How to Use the Sharpening Tools in Lightroom


Digital Photography School
 
Comments Off on Learn How to Use the Sharpening Tools in Lightroom

Posted in Photography


Next Version of Adobe Photoshop to Be Branded Photoshop CC, Includes Awesome New Motion Blur Sharpening Tool

07 May

Today Adobe announced a new branding of their flagship Photoshop product to be released later this year, Photoshop CC. The new version will only be available via a monthly subscription to Adobe’s Creative Cloud and will not be sold as a traditional boxed application that consumers can purchase.

Probably the most anticipated new feature in the next iteration of Photoshop is a revolutionary new image sharpening tool that focuses on fixing camera shake issues.

The new tool analyzes images that are out of focus due to the slight movement or motion that takes place while a shutter is open. There are lots of reasons why photographers may find camera shake in their images. Many images shot slower than about 125th of a second are susceptible to camera shake unless you’re on a tripod or have a very steady hand. Telephoto shots, especially can be problematic.

With the new version of Photoshop CC, Adobe uses an algorithm to try and detect which direction the camera was moving that produced the shake. They then try to account for the movement back into the direction of a steady image without camera shake. This new sharpening tool won’t help you with other types of focal blur issues, like lens position, but it does address a fairly common issue dealt with by photographers.

Adobe had previously offered a sneak peak of this new technology in a video that they posted to Youtube. Watch the video and you’ll be impressed.

What makes this interesting to me is that there are a lot of old images that I’ve taken in the past that now will suddenly become salvageable.

This new technology advancement should be yet another reminder to photographers why they should save ALL of their images, even the bad ones that they don’t think they can use. With technology advancements in image processing, I’m finding more and more images that I’d previously dismissed due to problems. Whether previous Adobe noise reduction tech or newer tech like this new sharpening tool, it pays to save all of your images no matter what. Storage is cheap and you never know when you may need that image that you never knew you needed at the time. Even years after you are dead, those images may be important to someone, somewhere for some reason.

While the camera shake feature is the sizzle of the new Photoshop upgrade, there are several other enhancements they have made to the program as well including, smart Sharpen (new technology promising more realistic sharpening without halos or noise) and new upsampling tech (this helps make your photos look better when you make them larger than you processed them).

The biggest news though is Adobe’s moving Photoshop 100% into the Cloud and 100% by subscription. You’ll still be able to purchase Photoshop CS for the time being, but it won’t have the new features available in CC.

Pricing varies by type of customer but starts at $ 49.99 a month per person for individuals. Existing Creative Suite customers, students, and teachers will get a discount to $ 29.99 a month. Creative Cloud has a lot more applications than just Photoshop and also includes Lightroom and a whole suite of other Adobe Creative applications. It also includes integration with Behance, a portfolio site for creatives that Adobe recently purchased.


Thomas Hawk Digital Connection

 
Comments Off on Next Version of Adobe Photoshop to Be Branded Photoshop CC, Includes Awesome New Motion Blur Sharpening Tool

Posted in Photography


Take control sharpening in Photoshop

25 Nov

Most people who have experimented in Photoshop, especially those who shoot in raw, will have some experience of trying to sharpen an image.  Sharpening increases the contrast between neighbouring pixels resulting in the visual effect of a crisper image.  It is typically the last processing step that should be performed on an image and is often used to enhance already well-focussed images or in desperation to try and rescue elements of a photograph that weren’t captured in-focus when the shutter was pressed.

There are numerous ways to sharpen images in Photoshop, so much so that there is a whole sub-menu of filters dedicated to sharpening, each offering a different amount of control and different levels of success.  However, one of the most overlooked filters that can help you achieve better results with more control isn’t found in the Sharpen sub-menu, but is in fact found in the, usefully named, Filter -> Other menu: the high pass filter.

I’ll take you through a step-by-step guide to using high pass filter and hopefully show you how simple and effective image sharpening can be.

Step 1

Start by opening the image that you want to sharpen – ideally, the image will have come from a raw file so not to over-sharpen an ‘out-of-camera JPEG’.   Make sure that you have completed all other processing steps that you wish to perform.  Here I’ll use this image of a fox to illustrate the process (feathers and fur often react well to a bit of sharpening).

HIgh pass sharpening step 1

Step 2

In the layers palette, right click the Background layer, select Duplicate and click OK.  This creates a copy of the original layer and is a key step for the application of the high pass filter.

High pass sharpening, step 2

Step 3

With the duplicate layer selected, select Filter -> Other -> High Pass

High pass filter, step 3

This will bring up a high pass window with a small preview of the results and a Radius control.  If you can see the whole image behind this window, you will notice that the Duplicate layer has turned grey – don’t panic, it’s supposed to.

High pass sharpening, step 3

Step 4

Set the Radius value and click OK.  The higher the Radius, the more sharpening will be applied to the image.  If you play around with the Radius slider, you will notice that at low values, e.g. 1.0 pixels, only high-contrast edges are visible in the grey layer, whereas if you move the Radius slider up to 10 pixels, you will notice that more edges within the image will be highlighted.

HIgh pass sharpening, step 4

The precise Radius value that will result in optimal sharpening will be image dependant, but somewhere in the range 1.0 to 5.0 pixels will suffice.  Generally, 5.0 pixels will be too much, but given that we are performing this action on a duplicate layer gives us the flexibility to be heavy handed with the high pass filter, I’ll explain more shortly.

Step 5

In the layers palette, set the blending mode of the duplicate layer to Overlay.

The Overlay mode ‘multiplies’ the blacks and ‘screens’ the whites of the layer below – that is, makes the dark areas darker, and the light areas lighter.  Up on application of the high pass filter, our image was turned grey (neutral grey in fact), and when setting the Radius value, edges were picked out in light/darker shades of grey.  Therefore, when the blending mode is set to Overlay, the neutral grey areas of the image have no effect, yet the lighter/darker edges screen/multiply the edges of the layer below, increasing the contrast, resulting in a sharper image.

High pass sharpening, step 6

Step 6

Change the Opacity of the duplicate layer to achieve the desired sharpness.  I mentioned that you can be heavy handed with the high pass filter – that is because you can tone back any over sharpening using the Opacity slider.  It is often a good idea to set the Opacity to zero and work your way up to an acceptable level of sharpness so not to over sharpen and introduce artefacts.

Step 7

It is advisable to try and print off a section of your image, at the same scale as you intend to print the full photograph, to get a feel for how much sharpening an individual image requires and adjust the Opacity slider as appropriate.

And that’s it, image sharpened!

High pass sharpening, before and after

The benefit of using this method to sharpen your images is that the sharpening effect is applied in a non-destructive fashion, on a duplicate layer, with a very simple to understand parameter (in the Radius value) that controls the magnitude of the sharpening, as well as giving you the ability to fine tune the final effect using the Opacity slider.

In addition, given that the sharpening is entirely controlled by the duplicate layer, you can have further control for where the sharpening is applied within the image by applying a layer mask to the duplicate layer.

So there you have it, a quick yet effective method for sharpening your images that gives you full control.

Post originally from: Digital Photography Tips.

Check out our more Photography Tips at Photography Tips for Beginners, Portrait Photography Tips and Wedding Photography Tips.

Take control sharpening in Photoshop


Digital Photography School
 
Comments Off on Take control sharpening in Photoshop

Posted in Photography


Photoshop – Sharpening Images with High Pass

25 Oct

If your like me, you sometimes have a great picture which from no fault of your own is a bit fuzzy. I have some great pictures but they never look as good as when you were there! Sharpening images is always a painful process, because you never get them the way you saw them. Using the sharpen filters kind of works but never brilliantly. Well, there is a better way which this video will explain. Using the “High Pass” filter can perform nothing short of miracles. Within 6 minutes you will be able to control how much sharpness you put on an image. This and many more videos can be seen at PCTeach.me
Video Rating: 4 / 5

 
Comments Off on Photoshop – Sharpening Images with High Pass

Posted in Retouching in Photoshop


Photoshop: High Pass Sharpening — Part 2

10 Jan

Learn how to use highpass sharpening to enhance your images. This video will show not only how to create high pass sharpening but also how to optimize high pass sharpening through blend modes and the radius setting. To download a copy of the transcript for this video, view several other photography videos, and access over 100 photography articles visit www.ronbigelow.com
Video Rating: 4 / 5

So I decided to record the process of photoshopping a friend of mine into a Na’vi from Avatar. If you don’t think my method stinks, then request a tutorial and I might just make one!