RSS
 

Posts Tagged ‘shape’

How to Dramatically Shape the Light and Mood Using Adjustment Brushes in Lightroom (video)

18 Apr

The post How to Dramatically Shape the Light and Mood Using Adjustment Brushes in Lightroom (video) appeared first on Digital Photography School. It was authored by Caz Nowaczyk.

How to Dramatically Shape the Light and Mood Using Adjustment Brushes in Lightroom (video) Featured image

In this video from PiXimperfect, you’ll learn how to dramatically shape the light and mood of a photo using Adjustment Brushes in Lightroom.

Throughout this tutorial you’ll learn:

  • the difference between local adjustments and global adjustments
  • how to auto-set particular sliders
  • ways to expand the tonal range
  • how to avoid edge glow when using particular sliders
  • about the tone curve and how to use it effectively
  • valuable shortcuts to help you see when you are creating clipping (blown-out, and underexposed areas with no detail), to view before and after shots, to select the adjustment brush and more
  • how to use the HSL panel to great effect
  • ways to use split toning

We’d love to see the images you edit after watching this tutorial. Please share them with us in the comments section.

You may also like:

  • Landscape Editing Techniques for Fine Art Photography Using Lightroom
  • 5 Things to Do to Every Photo In Lightroom to Improve Your photos
  • How to Jump from Lightroom to Photoshop and Back Again When Editing Photos (video)
  • Answers to Your Most Common Lightroom Questions
  • How to Make Your Photos Pop in Lightroom (With Just 4 Quick Edits!)
  • Create Amazing Sunrise Photos with these Easy Lightroom Editing Tips
  • How to Make Your Photos Awesome in Lightroom or Photoshop Camera RAW

The post How to Dramatically Shape the Light and Mood Using Adjustment Brushes in Lightroom (video) appeared first on Digital Photography School. It was authored by Caz Nowaczyk.


Digital Photography School

 
Comments Off on How to Dramatically Shape the Light and Mood Using Adjustment Brushes in Lightroom (video)

Posted in Photography


What is Shape and Form in Photography?

05 Dec

The post What is Shape and Form in Photography? appeared first on Digital Photography School. It was authored by Megan Kennedy.

shape-and-form-in-photography

The words shape and form in photography are sometimes used interchangeably. However, the terms are actually two distinct visual characteristics. In this article, we’ll take a look at the difference between shape and form and their application in photography.

shape-and-form-in-photography-pink-blossom

What is a shape?

shape-and-form-in-photography-shapes

In basic terms, shape describes a flat, enclosed area of space. Shapes can be constructed with colors and lines, but all shapes are limited to two dimensions – width and length.

Curves and other irregular, flowy shapes are known as organic shapes, while angular shapes like squares and triangles are geometric shapes.

Early rock art is an early example of the use of shape in visual culture. During the Renaissance (and for many years thereafter), form was the predominant characteristic of two-dimensional art. However, with the advent of modern art, artists returned to the use of shape within abstracted and minimalist artistic movements.

Artists like Piet Mondrian, Picasso, Wassily Kandinsky and Agnes Martin all applied the language of shape to convey a visual experience.

What is form?

shape-and-form-in-photography-forms

Forms in visual art differ from shapes because they are perceived as three dimensional – they operate on width, length and depth. Forms can be either geometric or free-form, with no specific delineation or visual boundary. In two-dimensional formats like painting and photography, three-dimensional forms are generated with aspects like line, movement and value (darkness and lightness).

Artists from Leonardo da Vinci and Michelangelo to Mark Rothko and Georgia O’Keeffe are well known for their execution of form.

Shape in photography

carpark

From Anna Atkin’s cyanotype impressions to Grant Mudford’s flattened architectural depictions, shape has had a strong presence in photography since it’s inception.

Lewis W. Hine’s Steamfitter, an iconic depiction of the 1870s industrial labor, makes use of strong, flat shapes to emphasize the form of the subject.

And Harry Gruyaert and Ed Peters both incorporate bold shapes into their street photography.

Form in photography

shape-and-form-in-photography-color

Form has also had a consistent presence in photographic history.

Carleton E. Watkin’s Sugar Loaf Islands is an example of texture elevating form.

And Hiroshi Sugimoto’s Abandoned Theater series studies the power of light in sculpting form and time.

Philippe Halsman’s famous Dali Atomicus combines shapes and forms to create a dynamic and surreal portrait of Salvadore Dali.

And Robert Frank’s Parade, Hoboken, New Jersey appeals to our sense of both shape and form in photography to create an intriguing street perspective.

How to use shape and form in photography

There are endless photographic opportunities for both shape and form. Focusing on aspects like light, perspective, depth of field and color/black and white will help coax out shape and form in your photography.

Focus on light

shape-and-form-in-photography-silhouette

Depending on the angle of a light source, light can either elevate or flatten a subject. If you want an image made up of dramatic forms, aim for angled lighting to encourage shadows.

Silhouettes, on the other hand, render subjects as dark two-dimensional shapes. To create a silhouette, photograph a subject positioned against a light background with little or no front-lighting.

Get some perspective

shape-and-form-in-photography-fern_light

Sometimes form can be stimulated with a change in perspective. Photographing front-on to a subject can flatten forms into shapes. Approaching your subject from an angle reveals shadows that cultivate form.

Dive into depth of field

depth_field

Depth of field affects the way shapes and forms are read.

A shallow depth of field separates the subject from the background (and sometimes foreground) of an image, conveying a more dimensional picture.

The borderless nature of blurred forms also create a sense of activity within a photograph, contributing further to the perception of form.

Experiment with color/black and white

black_and_white_demo

To place greater emphasis on form, many photographers choose black and white over color. Often you’ll find that depth can be emphasized to a greater extent with the tonal sensitivity of a black and white scheme.

On the other hand, solid colors emphasize the ‘flatness’ of shape. Using blocks of bold color is a way to enhance the immediacy of two-dimensional structures.

Movement

What is Shape and Form in Photography?

Form is often visualized with fluid borders. This effect can be created through intentional camera movement (or ICM). ICM involves moving the camera during a long exposure (usually 1/125th or less). The results are abstracted forms that are unique, engaging and fun to make!

Conclusion

While shape and form in photography play different roles, each cultivates a distinct level of impact and engagement.

Through the use of light, perspective, depth of field, color/black and white and movement, we can use shape and form to enhance the construction of an image.

The post What is Shape and Form in Photography? appeared first on Digital Photography School. It was authored by Megan Kennedy.


Digital Photography School

 
Comments Off on What is Shape and Form in Photography?

Posted in Photography


Aputure announces the Spotlight Mount, an add-on to shape light just right

09 May

New and unique in the world of light modifiers, Aputure have announced its new Spotlight. This unit interfaces with their range of C.O.B. lights, including the recently announced 120D MK II.

After the recent reveal at NAB 2019, more details have emerged for this unique light modifier. There are three lenses available at launch—19°, 26° and 36—each of which are user interchangeable to give either wider coverage or more pinpoint accuracy. This, together with the iris and shutter, allow more flexible creative options in shaping the beam.

Key features

  • Bowens mount to interface with Aputure’s 120D, 120D Mk II and 300D lights.
  • Available with a 19°, 26° or 36° lens.
  • Dual slots for included Gobo frame and gel holder or optional iris.
  • Internal shutters for precise beam shaping.
  • Lightweight aluminum die-cast alloy construction.
  • Dual Junior/Baby mount.
  • Includes B size Gobos
Precision lenses reduce chromatic aberrations and fall off

The Spotlight uses newly developed lenses to minimize color fringing at the edges of the projected beam circle down to less than 1 mm at 0.5 m. The new high resolution optics give 10x the native light output when used with a 120 D Mark II. This is combined with minimal light fall off and a color shift of less than 200° Kelvin.

The dual mount system also enables the spotlight to be mounted easily on C stands in the field or under slung on the lighting grid in the studio. Below is a quick video from Newsshooter detailing the new Aputure Spotlight:

The Aputure Spotlight is available to pre-order (Adorama, B&H) with one of the three lenses for $ 499. The lenses are also available separately at $ 259 (Adorama, B&H), as is the optional iris at $ 99 (Adorama, B&H). The Aputure Spotlight and accessories are expected to ship mid-May.

Articles: Digital Photography Review (dpreview.com)

 
Comments Off on Aputure announces the Spotlight Mount, an add-on to shape light just right

Posted in Uncategorized


Behind the scenes with Albert Watson: Watch a photographic legend shape light

07 Sep

Profoto recently connected two icons in their respective fields: Albert Watson, the portrait photography legend, and Sergei Polunin, the so-called “bad boy of ballet” and probably the only ballet dancer you could call “mainstream.” Together, they set about capturing some unique portraits, and filmmaker Eric Becker, the director of our own long-form video series, was there to document the process.

Watson’s work—which you can find in galleries and museums world-wide—spans a few genres. But the shots that define his career are his portraits… photographs of influential men and women that often look almost sculpture-like. If you’re interested at all in portrait photography, listening to Watson talk you through his light shaping process will be incredibly inspirational.

And if you’re a fan of high end lighting equipment well… you might just slobber all over your keyboard as you watch his assistants unpack a veritable army of Profoto Pro-10’s ($ 14,000 each) for this shoot.

$ (document).ready(function() { SampleGalleryV2({“containerId”:”embeddedSampleGallery_1445470748″,”galleryId”:”1445470748″,”isEmbeddedWidget”:true,”standalone”:false,”selectedImageIndex”:0,”startInCommentsView”:false,”isMobile”:false}) });

In the end, of course, Watson was less concerned with the gear than the portraits he was trying to capture with said gear. His process is a journey that he describes as, “not a distinct road to the final shot. You don’t know until you get there.”

And when he got there, this is what he captured: three photographs, one showing Sergei in flight, the other two described as “modern sculptures.”

$ (document).ready(function() { SampleGalleryV2({“containerId”:”embeddedSampleGallery_8776530642″,”galleryId”:”8776530642″,”isEmbeddedWidget”:true,”standalone”:false,”selectedImageIndex”:0,”startInCommentsView”:false,”isMobile”:false}) });

All in all, Profoto doesn’t miss the mark when they call the video above “a masterclass in light shaping.” Check it out for yourself, and then head over to the Profoto website to hear the story in their own words.


All photographs courtesy of Profoto

Articles: Digital Photography Review (dpreview.com)

 
Comments Off on Behind the scenes with Albert Watson: Watch a photographic legend shape light

Posted in Uncategorized


FrontRow is a life-logging camera in the shape of a necklace pendant

16 Aug

$ (document).ready(function() { SampleGalleryV2({“containerId”:”embeddedSampleGallery_9879662567″,”galleryId”:”9879662567″,”isEmbeddedWidget”:true,”standalone”:false,”selectedImageIndex”:0,”startInCommentsView”:false,”isMobile”:false}) });

Company Ubiquiti has announced the launch of FrontRow: a pendant-shaped life-logging camera designed to record your life experiences automatically. As with other life-logging cameras, FrontRow doesn’t require user interaction; instead, it faces outward from your necklace and records everything that takes place in front of you automatically. The content is then assembled with a mobile app and can be shared with the world at will.

Life-logging cameras are not new, and they are arguably not very popular either, leaving Ubiquiti with an uphill battle if it hopes to see any substantial success with FrontRow.

Unlike past life-logging cameras, FrontRow is designed to dangle from a lanyard rather than clip onto a shirt or backpack strap—a design that is ostensibly more convenient when you’re talking about something that is supposed to be worn all day or for many hours at a time.

FrontRow features an 8MP F2.2 main camera with a 148-degree FOV, as well as a 5MP F2.0 reverse camera. Unlike some other life-logging cameras, FrontRow also boasts a round touchscreen display not unlike what you’d find on a smartwatch. The display has a 640 x 572 resolution with full color and multi-touch support.

Other features include USB-C, a stereo microphone, 1W integrated speaker, Bluetooth 4.1, WiFi, a quad-core processor, 2GB of RAM and 32GB of storage.

This camera is compatible with both Android and iOS, and supports both live streaming video and creating time-lapses as part of its ‘Story Mode’—supported platforms include YouTube Live, Twitter Live, and Facebook Live. FrontRow is currently listed as ‘coming soon’ on its product website, where both Black and Rose color options are presented with a $ 400 USD price tag.

Whether consumers will be willing to pay such a high price for what is essentially a novelty camera is yet to be seen. Previous life-logging cameras from other manufacturers have largely struggled to survive in a market dominated by smartphones, and they have been the subject of fierce criticism over their perceived threat to the privacy of both users and anyone who comes into contact with them.

Press Release

Introducing FrontRow: The Camera Re-Invented

NEW YORK—Ubiquiti Networks, Inc. (NASDAQ: UBNT) today announced FrontRow, a new camera technology enabling the effortless capture and sharing of life’s experiences.

Truly Wearable

FrontRow’s sleek, 55-gram (less than the weight of a typical smart-watch) form-factor was specifically designed to wear conveniently. Unlike traditional cameras and smartphones requiring manual operation, FrontRow can operate fully autonomously — allowing one to capture life’s experiences while completely staying in the moment.

The Design

A subtle interlocking connector provides the flexibility to wear FrontRow using the included stylish lanyard or multi-purpose magnetic clip, or third party chains. Upcoming accessories include a car window mount and flexible coil mount. FrontRow features cameras on both sides of the device. The primary camera features a 140 degree wide-view lens (roughly double that of a typical smartphone) that, combined with FrontRow’s microphone array, allows for more complete capturing of experiences. The device features a speaker for local playback and an easy-access clickable media button that can be used to quickly start and stop many of FrontRow’s capture functions. FrontRow has a standby time of up to 48 hours and is capable of capturing in Story Mode (time-lapse capture of experiences) for up to 16 hours and in Live-Streaming Mode for up to 2 hours. With its USB Type-C connector, the device can be charged on the go using other Type-C smartphones and has a quick-charge time of around 20 minutes.

The User-Experience

FrontRow’s user experience is unlike any camera brought to market. Built around a custom 2-inch circular hi-resolution touch screen, FrontRow’s user interface allows instant live streaming on social networks including Twitter, Facebook, and YouTube, as well as integration with a variety of popular applications like Dropbox, Spotify, and more. Fast Bluetooth allows effortless connectivity to smartphones running the FrontRow App (iOS and Android compatible) and provides seamless captured media transfer along with powerful remote control capabilities. The device can also be accessed (even remotely) through the Internet using the web UI controller at frontrow.com.

Not Just a Device, A New Platform

Although FrontRow’s user experience and graphical user interface are unique, its underlying operating system was designed to be Android-compatible in an effort to open up 3rd party application development. Users and developers are welcome to openly discuss new applications and shape the future of the platform — directly with the FrontRow’s engineering team on community.frontrow.com.

FrontRow is available now on FrontRow.com and Amazon.com. A full press kit is available for download here. Follow FrontRow on Instagram, Facebook, YouTube, and Twitter.

Articles: Digital Photography Review (dpreview.com)

 
Comments Off on FrontRow is a life-logging camera in the shape of a necklace pendant

Posted in Uncategorized


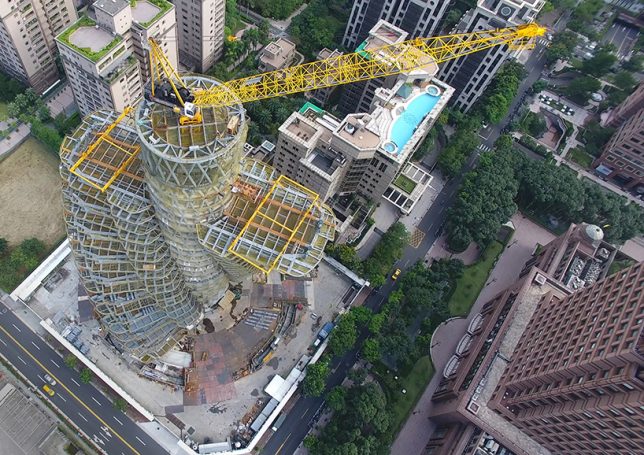
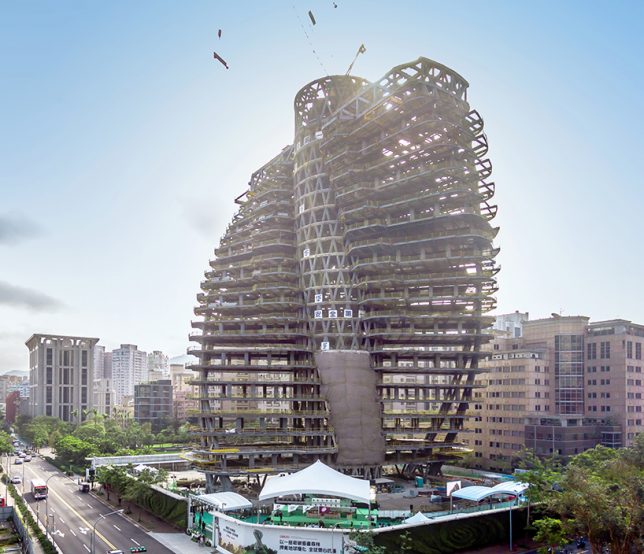
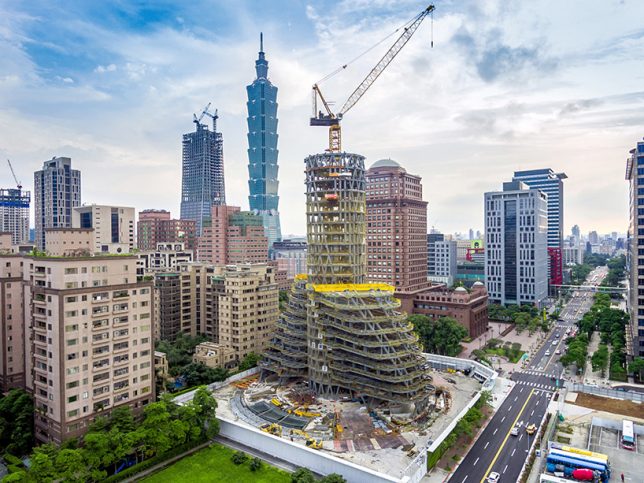
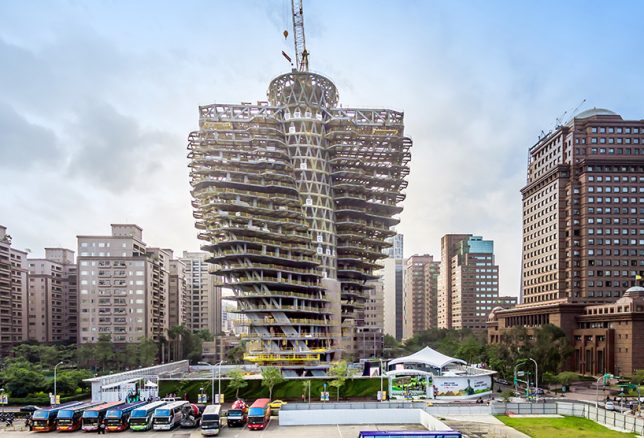
Fantasy is Now Reality: Twisting Tree-Covered Callebaut Tower Taking Shape

29 Nov

[ By SA Rogers in Architecture & Cities & Urbanism. ]

callebaut-taipei

We’ve seen lots of dazzling concepts by Belgian architect Vincent Callebaut, most of which seem far too fanciful to ever actually materialize, but his twisting high-rise tower in Taipei is finally taking shape in three dimensions. ‘Tao Zhu Yin Yuan’ is about halfway complete, pivoting on a central axis for a layout that enables outdoor space brimming with greenery on every floor. Scheduled for completion in September 2017, the residential tower will support 23,000 trees absorbing up to 130 tonnes of carbon dioxide each year.

callebaut-concept

callebaut-taipei-2

The tower is conceived as a ‘inhabited tree,’ set upon a circular footprint with towers extending from the core in a double helix shape. From the north or south, it looks like a pyramid, while east and west views give onlookers a fuller idea of the building’s scale. It will contain 40 luxury apartments and additional facilities, and is set to meet LEED gold status as well as diamond-level Low Carbon Building Alliance certification.

callebaut-taipei-6

callebaut-taipei-5

Callebaut is known for proposals that emphasize sustainability, self-sufficiency, the inclusion of vegetation and eye-popping shapes. Examples include his dragonfly-wing-shaped urban farm, the Lilypad floating city concept, the ‘Asian Cairns’ residential towers and a series of futuristic ‘smart towers’ aiming to reduce pollution and create renewable energy while integrating into existing built environments.

callebaut-taipei-3

Most of these concepts either appear too wild and expensive to developers and investors to inspire confidence for real-world success, or rely on theoretical technology that hasn’t been fully developed or proven. But nobody can accuse Callebaut of limiting his own creativity in the way he envisions the future of architecture, in a world where the choices we make for our cities directly impact our ability to withstand the consequences of climate change.

callebaut-taipei-4

“In 2050, we will be 9 billion of human beings on our blue planet and 80% of the world population will live in megacities,” says Callebaut. “It’s time to invent new eco-responsible lifestyles and to repatriate the nature in our city in order to increase the quality of our life with respect of our environment.”

Share on Facebook


[ By SA Rogers in Architecture & Cities & Urbanism. ]

[ WebUrbanist | Archives | Galleries | Privacy | TOS ]


WebUrbanist

 
Comments Off on Fantasy is Now Reality: Twisting Tree-Covered Callebaut Tower Taking Shape

Posted in Creativity


Step by Step How to Clean Camera Gear so it Stays in Good Shape

29 Sep

You may be very aware that photography equipment is not cheap. If you’re not, you’re in for a rude awakening! Camera bodies can cost thousands of dollars and it’s not uncommon for a lens to be even more expensive than a body! Sometimes it’s very tempting to baby your equipment; treat it with extra caution and wrap it up in cotton wool so as no harm will come to it. But with the right care and maintenance, your equipment will last and continue to perform for many years, no matter what, and without the babying!

DANS4206-2

Being a professional photographer myself, my equipment is often subject to some not-so-camera-friendly circumstances. Rain, snow, dust, and even champagne (!) are not uncommon encounters for my equipment. Even though I generally take the right precautions (for example, I use rain covers on for my cameras and lenses if it’s raining) there are times when the conditions are just unavoidable and my equipment gets a little dirty. It’s going to happen. But because I care for my equipment (even though it may look like I don’t!), it keeps on performing and hasn’t let me down. So I thought that I would share some of my tips to help you do care and maintenance on your gear, too.

Supplies needed

The good news about caring for your equipment is that it’s relatively cheap to buy what you need. With so few things in photography being cheap, this comes as a nice relief! Here is a list of what I use to care for my gear.

From a camera store (camera specific tools)
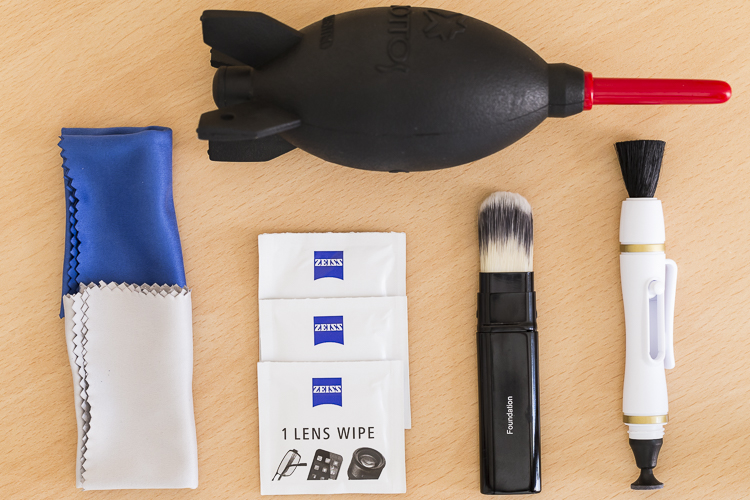
An overview of essential cleaning items.

An overview of some essential cleaning items.

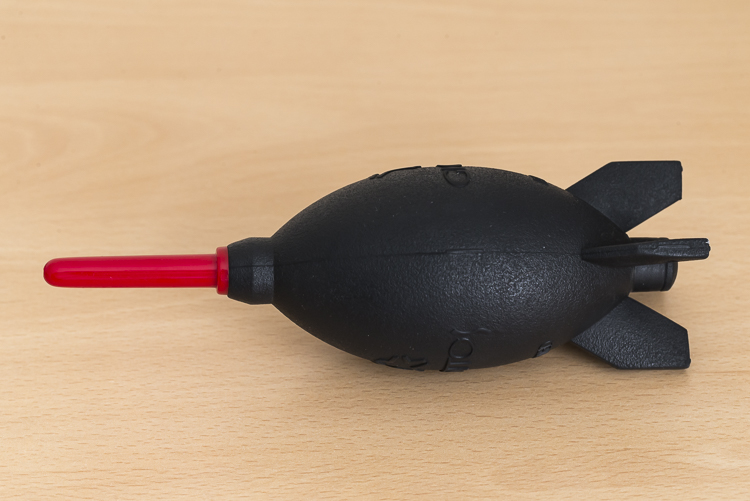
  • Rocket blower: I use this a lot! Squeezing it blasts out a puff of air to blow away any dust.
DANS4199

  • LensPen: I have just added one of these to my kit. At one end there’s a small soft, cleaning tip. At the other, is a retractable brush. I haven’t yet used it extensively but have been impressed with it so far. However, the cleaning tip is quite small so it’s not something I use on my larger lenses, such as a 400mm f/2.8; it would take forever.
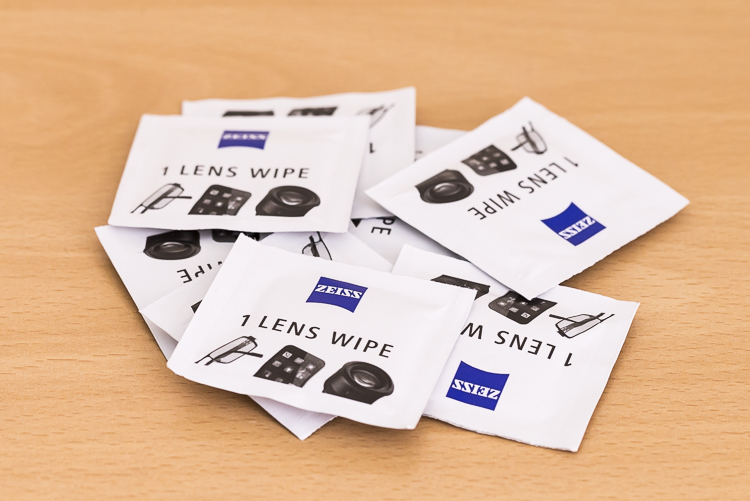
  • Pre-moistened lens wipes: I love these things. These are almost like the refresher towelettes you can get at KFC, but for lenses. They’re pre-moistened with a lens cleaning solution that quickly evaporates from the lens. They’re also dirt cheap. I use the Zeiss brand ones (only ones I’m aware of) which for a pack of 200, cost about $ 13.90USD. (Note: also available by Hoodman especially for camera lenses)
DANS8686

  • Microfibre cleaning cloths: Another cheap must have. I like to have several of these. I reserve one just to buff lenses after using the wipes, and another just for cleaning the lenses without any product at all. I avoid using the same one across many devices, for example, using the same clothing to clean my iPhone screen, then using it to clean my lenses.
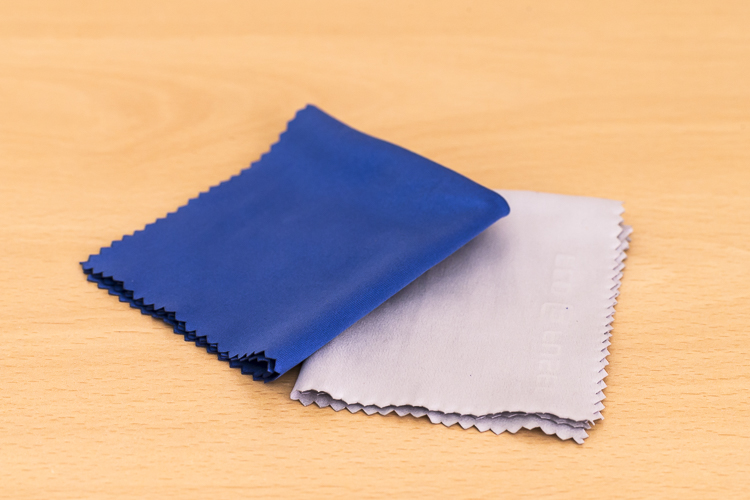
DANS8688

From a regular store (non-camera tools):

  • A paint brush: These are very handy at removing dust from the surface of camera bodies and lens barrels. Again, buy this brand new. You don’t want this to be super soft either, as it’s just being used on the outside of the cameras and lenses and not on anything that needs to be protected.

DANS4195

  • Make-up brush: this is something that people often have a laugh at when they see it in my bag. But then think, “Hey that’s a good idea”. If you want to add one to your kit, make sure you buy one brand new. You don’t want your partner’s blush going all over your lens. Generally, the more expensive brushes are better as their bristles are much softer. The one I have is also retractable, which is ideal as it protects the brush.
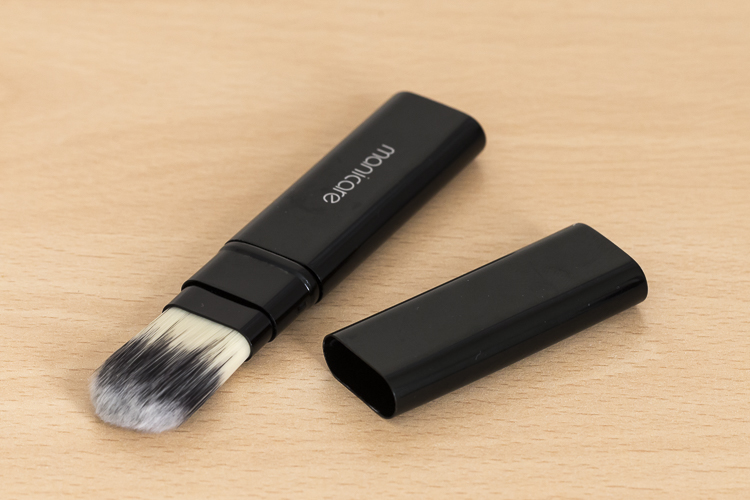
DANS4193

  • Teck Towel: I got a Tek Towel for my birthday years ago and decided to give it a go cleaning my gear. It works brilliantly, but a clean towel will work just as well.
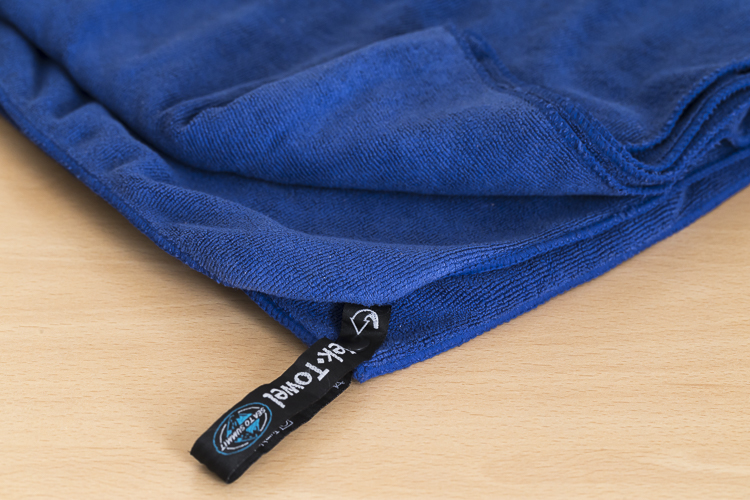
DANS4197

  • Zip-Lock Bag: This is where I store my cleaning gear, to keep it clean and as dust free as possible!

With these items, I am able to keep my lenses and camera bodies looking (almost) like new. Here’s my workflow when it comes to cleaning time.

Lenses

Step 1. Use the Rocket Blower

The first step is to remove any larger bits of dust, etc., from the lens. For this, I use the rocket blower. Squeezing it blows air out of the tip and will blow away larger, loose bits of dust, etc. It’s important not to use a cloth for this step as this can drag dust over the lens and scratch it. This is why the Rocket Blower is very useful.

Step 2. Use the LensPen
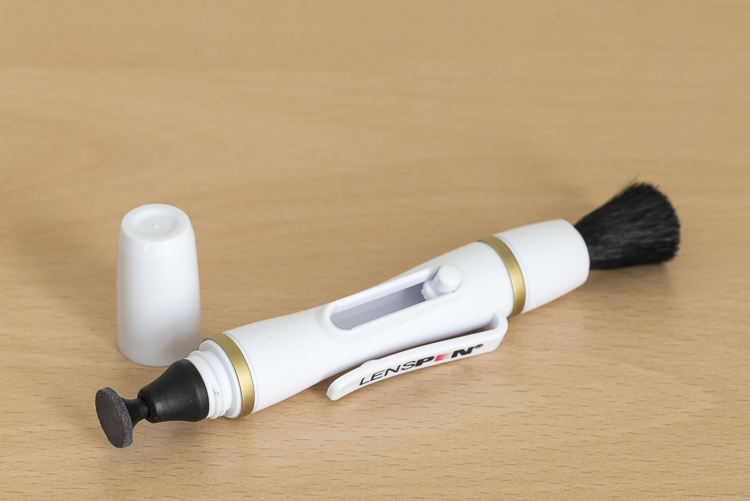
DANS4194

Hopefully, the blower was able to remove all the dust. However, there are times when some little specs remain. To remove these, I use the brush on the end of the LensPen. Doing a quick flick of the brush around the lens should do the trick. There shouldn’t be a need to apply much if any pressure at all. This should remove all the dust from the surface of the lens. You may need to do a quick repeat with the blower, though. If you don’t have a LensPen, using a makeup brush works just as well.

If you don’t have a LensPen, using a makeup brush works just as well.

Step 3. Clean the glass

Your lens should now be free of dust and other debris. If there are some marks surface on the lens, this is when to give it a little clean. First off, use the cleaning end of the LensPen. It is very soft and doesn’t damage the glass at all so it is ideal for this. Using a circular motion, work your way around the lens until all the marks have been removed. This may take several passes to achieve. It’s important to not be tempted to push on the lens too hard. Just keep going around in a circular fashion until it’s satisfied. Give the blower another quick go over, too if necessary.If you don’t have a LensPen using a

If you don’t have a LensPen using a clean micro fibre cloth will also do the job. Just use the same circular motion and again, repeating the motion is preferred over applying more pressure.

Step 4. Get rid of stubborn marks

After Step 3, I am normally done cleaning the lens. Step four is completely optional, but sometimes, there is some muck on the lens that just will not budge; no matter how many times it’s gone over. This is when to use the pre-moistened lens tissues.

Using the same circular motion, I work my way around the lens until it’s been completely gone over (I normally go over it two or three times). Then I get a microfibre cloth (generally, a different one that I use just for this purpose) and give the lens a bit of a buff using the same circular motion. I’ll go over it a few times.

I favour these tissues over sprays because I don’t like the idea of having a bottle of liquid inside my camera bag. If it breaks, it can leak into my gear and cause major damage. I also quite like their single-use quality.

For me, using cleaning solutions is an absolute last resort and not something I do each and every time I clean my gear. I also don’t breathe on my lenses (you know, to fog them up to make it easier to wipe off grime) if I can avoid it. If you’re like me and quite a coffee drinker, your breath can be slightly acidic and with repeated use, it can wear down the coatings on your lens. At least that’s what Nikon mentioned a while back in an article I read (ps, I’m a Canon guy).

Step 5. Don’t forget the lens cap

The front element is now clean. But for me, the process is still not yet finished. Before placing the lens cap back on, I have a quick look at it – there could be grit and dust on it that is about to put back on my newly cleaned lens. Giving it a quick once over with the blower and a paint brush will keep it and the lens cleaner.

Step 6. Clean the rear element

Now it’s time to have a quick look at the rear element – the bit that goes inside your camera. This shouldn’t be too messy; after all, it stays inside the camera. But dust can fall on it, especially when changing lenses and this dust, while it may not show up in pictures, can definitely make its way on to the sensor. I give it a quick once over with the Rocket Blower making sure the bottom of the lens is facing down. Doing so will stop any dust from falling back on it.  Some rear elements are further recessed into the lens than others. With lenses that have the rear element much closer, I also may give it a quick wipe with a micro fibre cloth or LensPen to clean it up.
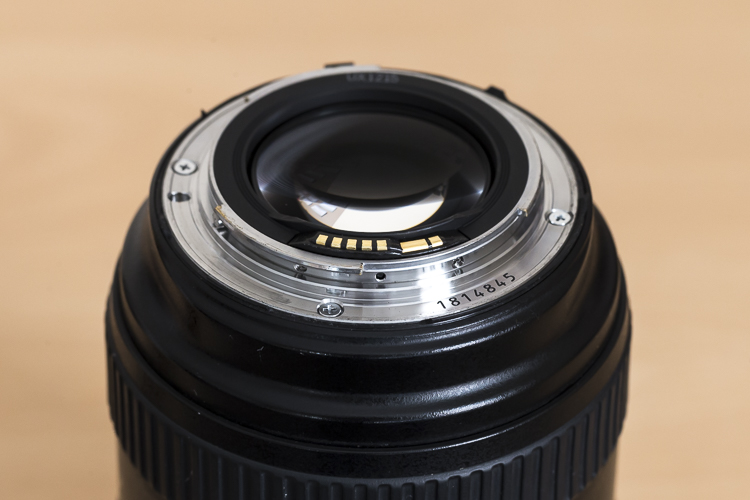
DANS4207

Notice with this lens, the rear element is very close to the surface. Also, those gold bars are the lens contacts.

Occasionally, I’ll also give the mount a clean up too, as well as the lens contacts. For this, I just use a Tek Towel, although any clean towel will do. Carefully wipe around the mount and go over it a couple of times. A small amount of alcohol on a cotton tip can be used to clean the contacts. Cleaning the contacts every now and then can help to prevent errors between the camera and lens caused by a build up of grime.

Now it’s time to give the rear cap a quick go over. Remove any dust with the blower and put it back on the lens.
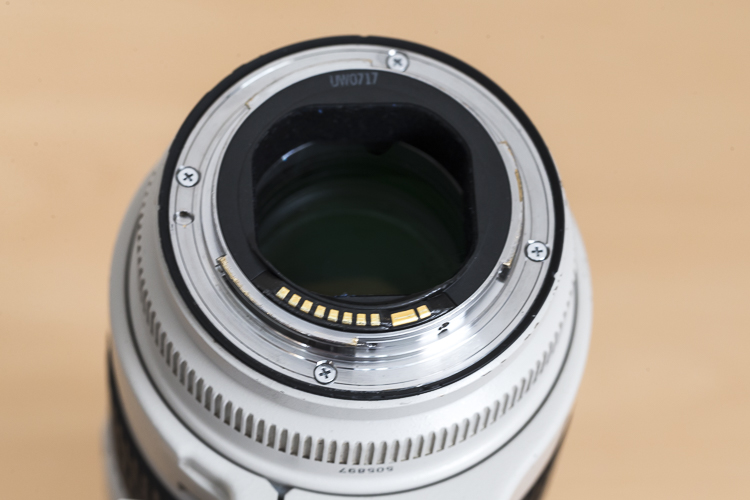
With this lens the rear elements sits deeper in the lens barrel.

With this lens, the rear element is recessed deeper into the lens barrel.

Step 6. Clean the outside of the lens

Now that the elements (both front and rear) and the lens mount are clean, it’s time to give the outside a quick go over. For this, I whisk away any dust with the paint brush and wipe the whole surface area with the Tek Towel. If I’ve been at the beach (salt in the air), or my lens has had a shower, I’ll dampen the towel in fresh water to remove any salt or champagne, etc.

This step, while very quick and simple, has proven to be quite helpful in picking up some things that may need my attention. For example, a while back I was cleaning my 70-200mm lens and I noticed that the end of the barrel was a little loose. I took it into Canon it was fixed in 10 minutes and cost nothing. Prevention is the best remedy.

Camera
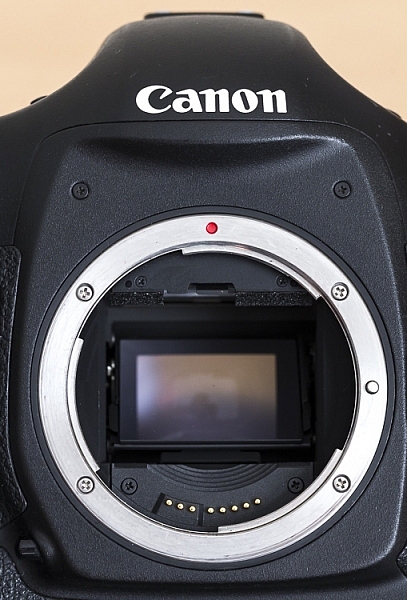
Here is a view of one of my camera bodies without its body cap. Care should be taken when cleaning around the lens mount so as to avoid dust/dirt etc from falling in. It's good practice to do this with the lens mount facing down.

Here is a view of one of my camera bodies without its body cap. Care should be taken when cleaning around the lens mount as to avoid dust, dirt, etc., from falling inside. It’s good practice to do this with the lens mount facing down.

Cleaning the camera is MUCH easier and quicker than the lenses. First off, I start by giving the outside a once over with the paint brush, followed by a thorough wipe down with the towel. I make sure the screens and the viewfinder are all nice and clean, too. As with lenses, I make sure that the mount and the contacts on the body are clean using the same steps and dampen the towel in fresh water if I’ve been at the beach.

While I have the body cap off, I’ll also blow out any dust that may be in the camera with the blower. With this step, I am much more cautious as I don’t want to blow into the body too much. Again, I also have the camera mount facing down to prevent dust from re-entering. This step can help reduce the amount of particles inside the camera which may eventually find their way onto the sensor.

Sensor

For me, this is where the cleaning process stops. I don’t do my own sensor cleaning as I much prefer it be done by the right people. Some people like to do their own sensor cleaning, and that’s completely fine. This is just something I like to give to professionals because if anything goes wrong, I can blame them.

Filters
Cheap-UV-Filters-202px.jpgYou may have noticed that I haven’t mentioned anything about UV filters. The reason for that is simply I don’t use them. I am yet to be convinced that they will actually save a lens from breaking if being dropped and have the view that if a lens is going to break from a fall, it will break; filter or no filter. I always use lens hoods which not only help to reduce lens flare but also provide some protection from objects falling on to the front element. However, if you’re in an extremely dusty environment, for example, then the use of a UV filter could be a smart investment.

Conclusion

So that’s it for my gear cleaning process. This isn’t something I do after each and every shoot, but I do try to get to it at least once a month or after shoots where my gear has been a little abused by the elements. It may seem that there are a lot of steps involved, but it really doesn’t take that long to do it. It’s even quite therapeutic when you get into it.

How do you clean your gear? Do you have any other tools you use? What’s your procedure and how often do you do it? Please share in the comments below.

googletag.cmd.push(function() {
tablet_slots.push( googletag.defineSlot( “/1005424/_dPSv4_tab-all-article-bottom_(300×250)”, [300, 250], “pb-ad-78623” ).addService( googletag.pubads() ) ); } );

googletag.cmd.push(function() {
mobile_slots.push( googletag.defineSlot( “/1005424/_dPSv4_mob-all-article-bottom_(300×250)”, [300, 250], “pb-ad-78158” ).addService( googletag.pubads() ) ); } );

The post Step by Step How to Clean Camera Gear so it Stays in Good Shape by Daniel Smith appeared first on Digital Photography School.


Digital Photography School

 
Comments Off on Step by Step How to Clean Camera Gear so it Stays in Good Shape

Posted in Photography


18 Shape Defining Silhouette Images

23 Sep

Doing a good silhouette requires a few things. A subject with a good shape, proper exposure, and position of the subject to best showcase its shape and define its outline.

Lighting is key, and contrast is essential to get a nice clean silhouette. Look at how these photographers pulled off some great silhouette images. Take note of the kinds of subjects make good silhouettes.

Club Med UK

By Club Med UK

Kenneth Garcia

By Kenneth Garcia

Grendelkhan

By grendelkhan

Darron Birgenheier

By Darron Birgenheier

Jqpubliq

By jqpubliq

Nicolas Alejandro

By Nicolas Alejandro

Iggyshoot

By iggyshoot

Grant

By Grant

Jonathan Camuzo

By Jonathan Camuzo

Deven Dadbhawala

By Deven Dadbhawala

Nattu

By Nattu

Matthew Roth

By Matthew Roth

Tara R.

By Tara R.

Andy Tolsma

By Andy Tolsma

Wheats

By Wheats

Jenny Downing

By jenny downing

Brian Gratwicke

By Brian Gratwicke

Chuck Holland

By Chuck Holland

googletag.cmd.push(function() {
tablet_slots.push( googletag.defineSlot( “/1005424/_dPSv4_tab-all-article-bottom_(300×250)”, [300, 250], “pb-ad-78623” ).addService( googletag.pubads() ) ); } );

googletag.cmd.push(function() {
mobile_slots.push( googletag.defineSlot( “/1005424/_dPSv4_mob-all-article-bottom_(300×250)”, [300, 250], “pb-ad-78158” ).addService( googletag.pubads() ) ); } );

The post 18 Shape Defining Silhouette Images by Darlene Hildebrandt appeared first on Digital Photography School.


Digital Photography School

 
Comments Off on 18 Shape Defining Silhouette Images

Posted in Photography


ThinkTank updates Shape Shifter camera bags and offers ‘naked’ option

23 Aug

$ (document).ready(function() { SampleGalleryV2({“containerId”:”embeddedSampleGallery_3303476890″,”galleryId”:”3303476890″,”isEmbeddedWidget”:true,”standalone”:false,”selectedImageIndex”:0,”startInCommentsView”:false,”isMobile”:false}) });

Thanks to their use of individual pouches for camera bodies and lenses and the ability to expand their size, ThinkTank’s Shape Shifter camera bags are known to be among the most versatile in the business. Now ThinkTank has funneled years of feedback from photographers into an update and released a new generation Shape Shifter line.

The series consists of three models: the Shape Shifter 15, the Shape Shifter 17, and the Naked Shape Shifter 17. Like their predecessors all new bags compress down to only three inches when empty and can be expanded in line with the amount of gear you carry on a shoot. They also come with a detachable water pouch, YKK RC-Fuse zippers, a removable waist belt, a tripod attachment and a rain cover. 

The Shape Shifter 15 holds a 15″ laptop, a DSLR, three lenses and a 12-inch tablet plus accessories. The larger Shape Shifter 17 is good for a 17-inch laptop, up to two DSLRs, four lenses, tablet and all the cables, lens caps and other accessories you need. The Naked Shape Shifter 17 is even more versatile, as you can configure the bag in exactly the way you prefer by inserting ThinkTank’s Skin Pouches and Lens Changers. The Shape Shifter 15 is available now for $ 250, the 17-inch model is $ 280 and the Naked version will set you back $ 220.

Articles: Digital Photography Review (dpreview.com)

 
Comments Off on ThinkTank updates Shape Shifter camera bags and offers ‘naked’ option

Posted in Uncategorized


Lighting 102: Shape and Detail

03 Aug

"One light for shape, another for detail."

This simple concept, which I learned from photographer Jim Richardson about 25 years ago, forever changed the way that I thought about lighting. It's like a switch was turned on inside of my brain. Read more »
Strobist

 
Comments Off on Lighting 102: Shape and Detail

Posted in Photography