The post Made in the Shade – Why Taking Portraits in the Shade Can be Ideal appeared first on Digital Photography School. It was authored by Rick Ohnsman.

You’re taking portraits, and it’s time for your subjects’ “moment in the sun.” If you really want them to shine, let’s look at why taking portraits in the shade is the way to go.
I can remember when the recommendation to photographers was to “always photograph your subject with the sun at your back, so the light is on their face.”
I think I read that many years ago on an insert in a box of film. Perhaps the idea was not to wind up with a silhouette with the bright sky tricking the camera into an underexposed subject.
There are no doubt circumstances where you might do it this way, but I’m ready to teach you why the shade is your friend and that of your subject as well.

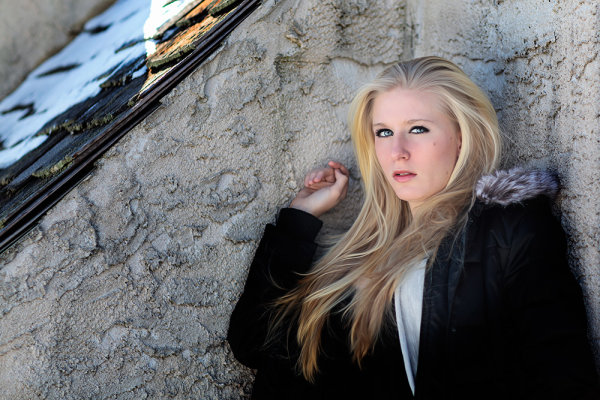
Make a bad location with your subject squinting into the sun work by shading them. 1/160 sec. f/5 ISO 100. White reflector fill.
Why not to shoot portraits in the sun
Let’s list some reasons you probably don’t want to shoot portraits in the sun:
- The light will be bright, contrasty, and the shadows will be hard and distinct.
- Your subject will probably squint.
- On a hot day, your subject will get hot, and cranky and both you and the subject won’t have much fun. The photos will suffer.
- The extremes of the exposure range between highlights and shadows will make getting a good exposure difficult.

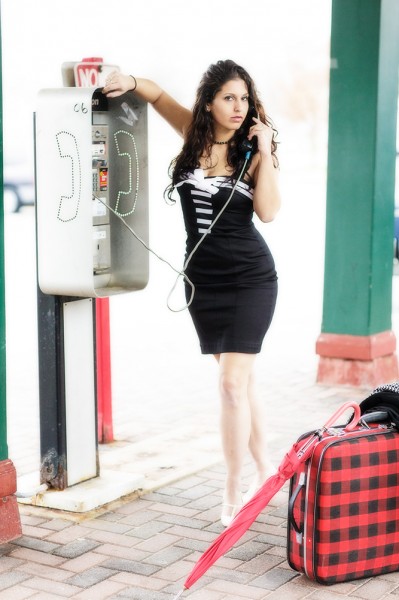
Mixed, speckled, uneven shade…don’t do this!
Why taking portraits in the shade is better
- The light will be diffuse, less contrasty, and the shadows will be minimal
- Your subject will relax and open their eyes.
- On a hot day you and your subject will be more comfortable, have more fun, and the photos will show it.
- Getting a good exposure will be far easier and you will have less editing later to create a nice image.
Light direction
Obviously, when discussing taking portraits in the shade, we’re talking about working outdoors with the sun as your primary light source. Depending on the position of your subject relative to the position of the sun in the sky, the light can come from these basic directions:
Overhead
Most photographers know that the worst time for photos is mid-day when the light is directly overhead. This is especially true for portraits and even more so if you make the shot in direct sunlight.
Working in the shade has the advantage of allowing you to make portraits during midday since the overhead light is diffused.
Side
If the sun is lower in the sky, you can position your subject, so the light comes from either side. There might be circumstances where you’d want one side of the subject to brightly lit while the other side is in shadow, but generally not. Again, taking portraits in the shade is the answer.

Taken in an alley, the light in this shot was from camera right and above. A fill flash helped fill the shadows and put a nice catchlight in the subject’s eyes.
Front
With the sun lower in the sky, you could position your subject, so, as the film insert I mentioned suggested, the sun was at your back and on the face of your subject. Occasionally this works if the sun is not intense, you have the right background, and you don’t mind a more contrasty look.
Most often you’d still be better, that’s right…in the shade.
Back
If the sun is lower in the sky, sometimes you can make backlighting your subject work. With their back to the sun, their face will be shaded. Now it’s you and your camera that will be looking into the sun.
You will need to be careful with your exposure so as not to make your subject a silhouette or totally blow out the background. Sun flare can also be a problem.
This could be a time for spot metering. You may also wish to use a reflector or fill-flash (we’ll cover that in a minute). Properly done, however, you may get a nice rim-light look.
Open vs closed shade
You will hear the terms “open shade” and “closed shade.” Let’s define those.

The subjects are in a shaded area looking toward a brighter lit area. This is “Open Shade.” 1/250 sec. f/6.7 ISO 400
Open shade
Even with your subject in the shade, the light will still usually come more from one direction than the other. Your subject will be in “open shade” when in the shade, but the ambient light is strongest on their face.
If you can’t determine which direction this is, walk around your subject. Ask them to turn as you walk so as to keep facing you. The position when the light is at your back (and on their face) is the most “open shade” position.
One advantage of shooting in this position is the light will be brighter on their face, and the catchlights in their eyes will usually be most dominant.

The predominant light is from behind and the subject is looking into a more shaded area. Fill-flash is used to fill the shadows. This is “Closed Shade.” 1/200 sec. f/8 ISO 200
Closed shade
This is pretty much the opposite of open shade. Your subject is in the shade, but looking into a darker area.
An extreme example of this might be a subject standing just inside a doorway where they are in the shade, but looking inside toward a darker room or area.
Usually, this will not be as good because the background will be brighter than the subject, and the eye catchlights will be minimal if they are there at all.

This is “closed shade” where the predominant ambient light is behind the subject and she is looking into a darker area. Fill-flash brightened her face and filled the shadows. 1/180 sec. f/7.1 ISO 100
Making it all work
It might be a fine idea to suggest you always take portraits in the shade. Usually, though, you also want to consider:
- your location,
- what you want in the shot other than just your subject
- your background
- where you and the subject can position yourselves
- camera angle
- and many other factors other than just where a shady spot might be.
If you want to pose your subject in front of that iconic landmark, and you’re there during the middle of the day, you may not have much choice where you position them.
So let’s discuss ways to use shade where you find it, make shade when you need it, and enhance the light you find while still making the portrait you want.
Let’s take a look at some examples.
Under the trees
It’s often pleasant in the shade of a tree, and sometimes even the tree itself works well in the shot. Depending on where the light may be coming from, you might be working with open or closed shade, and light coming from various directions.
We’ll cover enhancing the light you might find there in a minute, but here’s a couple of things to keep in mind when working in the shade of a tree or other foliage.
1. Light color
The leaves on most foliage are green (though perhaps other colors at different times of the year). Sometimes the translucent leaves will cast their color on your subject.
Kermit the Frog will tell you, “it ain’t easy being green.”
Green light and skin tones usually won’t be a good mix. Keep this in mind.
Shoot in Raw mode, and if necessary, be ready to tweak your white balance and tint slightly in post-production to back off the green color if it appears.

With green foliage above and green grass reflecting from below, your subject may go green – not a good look. Shoot in Raw format, and you can tweak the white balance when editing. 1/60 sec. f/5 ISO 400 with fill flash.
2. Dappled light
When making portraits, deep shade is good. Dappled light, the kind where the leaves put a pattern of light and shadow on your subject is bad – very bad.
You can rarely fix this in editing. So when taking portraits in the shade, always look to be sure the shade is complete, and the light is not dappled and patchy on your subject.
This can be especially tricky with group photos where some subjects may be in the shade and others in the sun. See what you can do to have everyone in total shade or, if that’s not possible, find a spot where you can have the light coming from behind them so at least their faces are shaded.

Take advantage of shady spots that work with your composition. The object making the shade can sometimes work with your shot. 1/125 sec. f/5.6 ISO 200 with pop-up fill flash.
Other shady spots
Depending on where you’re photographing, there might not be trees but other ways to put your subject in the shade.
Buildings, structures, rocks and cliffs – whatever you might find that works with your shot and vision can be useful.
Something to keep in mind is that other structures or objects might be reflecting light into your shady spot. Your subject might be in the shade, but whatever else that is close by, even the nearby sunlit ground, could reflect light into the scene.
Sometimes you can make this work for you. Other times, particularly if the reflecting object has a strong color, it will reflect colored light onto your subject.

With the surroundings painted in warm colors, as well as the opposite red brick, the reflected light is going to be warm as well. Shot in Raw mode, I could adjust as desired later in post-processing. 1/30 sec. f/4 ISO 100
Throwing shade
Most people don’t like it when you “throw shade” on them. However, in photography, this can be a good thing, especially when you want to photograph them in the shade, but the place where you want them to stand isn’t shady.
What to do?
Make your own shade!
Anything you can put between the light source and your subject is going to put shade, aka a “shadow” on your subject.
This could be a piece of cardboard, a 5-in-1 reflector (which we’ll discuss in a minute), an umbrella – you name it. If the object lends itself to the theme of your image, you can even include it in the shot. Just be sure whatever you use is large enough to shade the area you need completely.
If you’re making a full-length image of a person and your 5-in-1 can only shade their upper body while their legs are still in the sun, that won’t look good. You’ll either have to restrict your shot to the shaded area or find something bigger to shade them with.

Bad light where you want to make your shot? Throw some shade on your subject! Here, I’ve used the black side of a 5-in-1 to shade the subject. A fill-flash nicely evens out the light, also putting a catchlight in her eyes. 1/60 sec. f/6.3 ISO 100
A Scrim shot
The reason you will usually want to put your subject in the shade is that the direct sun is bright, harsh, and produces hard shadows. In the studio, photographers use diffusion to soften the quality of light. Photo umbrellas and softboxes use a translucent material, which scatters and diffuses the light. It also makes the light source “larger” relative to the subject.
This can work outdoors with the sun as well. Rather than use the pinpoint of intense light that is the sun, instead, put the translucent panel of a 5-in-1 between the sun and subject to make the light source larger relative to the subject. It will also make the light more diffuse.
Need something bigger? A translucent shower curtain or piece of white nylon cloth can work well if you have a frame or helpers to hold it.
Of course, there are commercial versions of this if you will be doing a lot of outdoor portrait photography and have the budget.

On a sunny day, you might be surprised on how much fill the silver side of a 5-in-1 will throw.
How about some fill?
So you put your subject in the shade, they’re happy, their eyes are open, you like the composition, but now you see the subject is darker than you’d like. What can you do?
It’s time for a little fill light.
There are several ways you can (and often should) add additional light to your subject.
Let’s cover a few.
Reflectors
I mentioned a 5-in-1 reflector above. This is a portable, and usually collapsible, disk typically covered with translucent fabric. Use it alone as a scrim, as we just discussed.
It then has a zip-on cover that is black on one side, white on the other, and turned inside out, silver on the inside and gold on the reverse of that.
Variations exist. So, 1) Scrim, 2) Black, 3) White, 4) Silver, 5) Gold = a 5-in-1.
You can use the colored side to reflect light onto your subject. Black is the side to use when you want to shade the subject. The white will give a softer, less intense light while neutral in color. Silver is the most intense and can be a slightly cooler light, while the gold will warm your subject.
For photographers doing outdoor portraits, I’d almost consider a 5-in-1 reflector mandatory. It is that useful. There are many brands, styles, and sizes. I have a 42″ (106cm) Interfit brand as well as a little 23″ (59 cm) version that, when collapsed, is just 9-inches (23 cm) and fits nicely in my photo bag.

One device, 5 ways to use it – a 5-in-1 reflector. I think all outdoor portrait photographers should own one, or even a few of these in different sizes.
Doing it “on-the-cheap” you can also use a piece of white poster board or foamcore. It has the disadvantage of being less portable, but the advantage of being available in very large sheets if you need that big of a reflective panel.
Fill-Flash
If the only time you use a flash is indoors, at night, or in dimly lit situations, you’re missing a real use of this lighting tool.
Shooting subjects in the shade and then filling the shadows with a touch of flash works exceptionally well, especially with most cameras doing a great job of balancing the fill light using ETTL (Evaluative Through-the-Lens) exposure control.
If you are a new photographer just getting into outdoor portraiture and have a camera with a pop-up flash, I’d strongly encourage you to shoot in the shade and use the pop-up flash for every shot.
Even on sunny days with plenty of light, that little extra flash will fill shadows and put a nice catch-light in your subject’s eyes.
Your portrait photography will improve tremendously. As you advance, a Speedlight is the next step, and beyond that, a fill-flash you can use off-camera.
Backlit/Golden hour/Rim light
Photographers love the “golden hour,” that time in the morning or evening when the sun gets low, and the light is warm. You can make beautiful portraits in such light.
Often you can pose your subject with the light behind them, and the golden glow will rim-light their hair with a beautiful look. (Visualize a model on the beach with the setting sun behind them).
To get some light on your model’s face and better balance the exposure between them and the background, it’s time for some fill light. A reflector or fill-flash will do the trick.
One advantage of the reflector is that you’ll be bouncing the same warm light back onto their face and so your white balance will be consistent.
If you use a flash, consider putting a warming gel on it to better match the color of the background light.

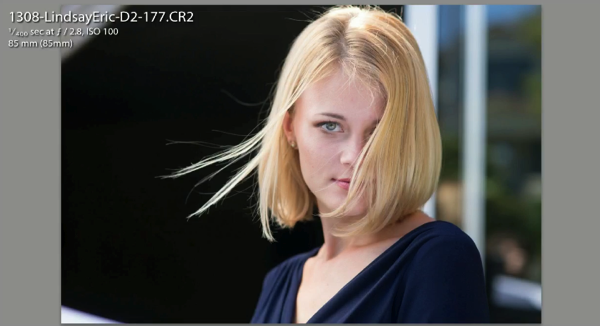
Here the subject is standing in full sun. With the light from behind, her face is shaded. I used the bright silver side of the reflector for fill. You may need to “feather” the reflection slightly by adjusting the reflector position as it can easily become too bright and make your subject squint. 1/160 sec. f/5 ISO 100
Nature’s Softbox
The average person would think a “nice day for portraits” would be that beautiful, sunny, cloudless “bluebird day.”
They’d be wrong.
On such days you’ll really need the tricks we’ve explored here and should be taking portraits in the shade.
If, however, the day you’ve scheduled to do that outdoor portrait shoot should be overcast, consider yourself blessed, especially if you need to shoot at midday. Now, instead of that harsh, pinpoint light source of the sun with associated hard shadows, the entire sky becomes your light source – “nature’s softbox.”

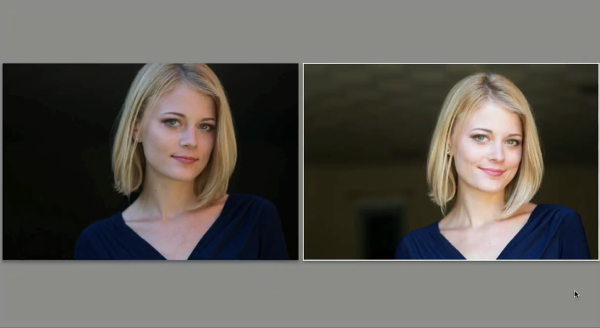
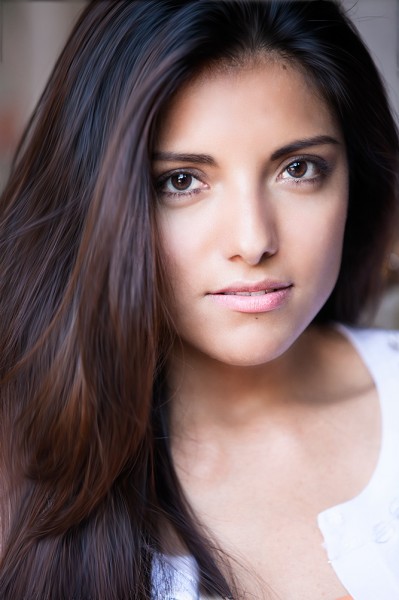
Made in the shade…This one was done in full shade and filled with flash. Note the catchlight in her eyes. 1/40 sec. f/4 ISO 100
Now the challenge might become working with light that is too flat. The effect of your reflector will be much less on a day like this, but your portable flash could perhaps now become your key light. It can give you just enough contrast to make your portrait more dimensional and interesting.
I’ve also just started exploring the use of portable LED lights for portraiture and purchased a Lume Cube.
This small and intense little light doesn’t immediately strike me as something I’d use for the standard portrait, but when taking portraits in the shade or on overcast days, perhaps it could work into the mix.
After I’ve had more experience with it, perhaps I’ll cover how you can use such a device in a later article.
Go do it and show us your work
It’s always great to see photographers putting new knowledge to work, so we’d love to see the images you make when taking portraits in the shade.
Post your images in the comments below and tell us a little about what you did. Best wishes!
The post Made in the Shade – Why Taking Portraits in the Shade Can be Ideal appeared first on Digital Photography School. It was authored by Rick Ohnsman.






You must be logged in to post a comment.