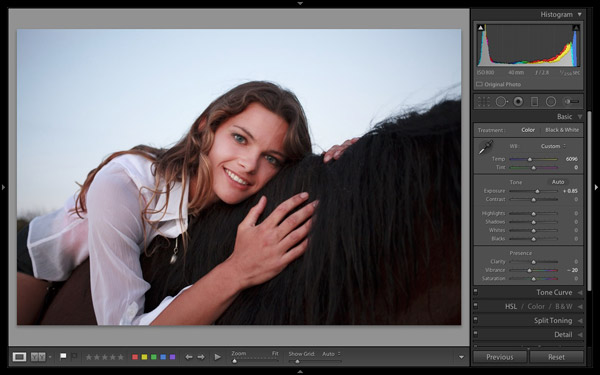
Andrew S. Gibson is the author of Mastering Lightroom: Book 2 – The Develop Module. There’s a special deal on now at Snapndeals, get 40% off for a limited time only.
A Digital Photography School poll held earlier this year revealed that the majority of readers carry out their post-processing in Lightroom. Lightroom is attracting users all the time as it is not just a photo processor – it helps you organize, search and view your photos as well. If you are new to Lightroom then these tips will help you get started.
1. Understand the Lightroom Catalog
The Lightroom Catalog is a database containing all the information that Lightroom holds about your photos. It includes metadata, records of any edits you have made, star ratings, keywords, Collections and the locations where your photos are saved.
***An important note: the Catalog doesn’t contain any photos, just information about them.***
The Catalog is important, and for maximum peace of mind you should set Lightroom to make a backup copy every time you close the program. Do this by going to the General tab in Lightroom > Catalog settings and setting Back up Catalog to Every Time Lightroom Exits:
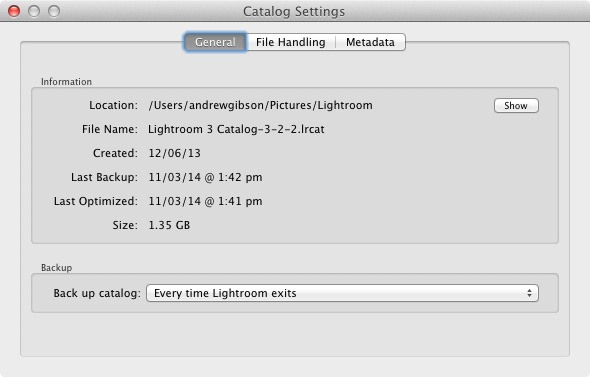
The next time you exit Lightroom it will give you the choice where to save the backup – it’s a good idea to save it on a separate hard drive to the one containing your Lightroom Catalog (located on the computer’s main hard drive). If the backup and the original Catalog are on the same hard drive, and it fails, you will lose both.
2. Appreciate the advantages that using Lightroom gives you
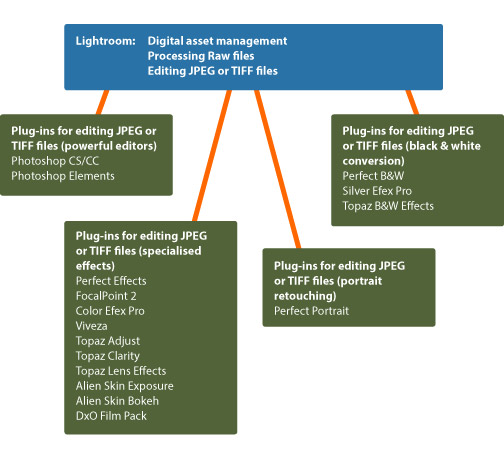
The main benefit of using Lightroom is that it becomes the heart of your post-processing workflow. You can do most of what you need in Lightroom: including viewing, organizing, searching and key-wording photos, through to post-processing and exporting. If you need to finish a photo in Photoshop or another program you can export it from Lightroom first, then bring it back into Lightroom when it’s done, where the two versions will exist side by side.
This diagram shows the workflow:
Another advantage is that Lightroom saves you hard drive space. Think about what happens if you process a Raw file in Photoshop. You start by converting it in Adobe Camera Raw, then open the file as a 16 bit TIFF in Photoshop itself, before finally saving it. Depending on what format you save it in, you end up with either a Raw file and a JPEG, or a Raw file and an 8 bit or 16 bit TIFF.
In Lightroom, on the other hand, all the edits you carry out on your photos are saved as text commands in your Lightroom Catalog. This takes up a lot less space and you only need to export your files into another format (JPEG, TIFF etc.) when you actually need them for something.
You can save even more hard drive space by converting your Raw files to the DNG format when you import them into Lightroom. This also makes Lightroom run faster. This is covered in more detail in my article Make Lightroom Faster by Using DNG.
3. Learn what you can and can’t do in the Develop module
Lightroom is primarily for processing Raw files, although it can also be used for editing JPEGs and TIFFs. All this is done in the Develop module. Even if you are processing a Raw file with the intention of exporting it to another program (like Photoshop or a plug-in) it is a good idea to do as much editing as you can in Lightroom first.
Why? The main reason is that using Lightroom saves you hard drive space, as mentioned earlier. When you export a photo to use in a plug-in, Lightroom converts it to a 16 bit TIFF (or other format of your choice) first. This negates the benefit of using Lightroom to save hard drive space, so you should avoid it where possible.
Things you can’t do in the Develop module are anything involving layers, creating HDR images by tone mapping, exposure blending, adding textures, creating composite images or adding fancy borders. For these you will need Photoshop or another program.
4. Retouching portraits in Lightroom
There are lots of Lightroom plug-ins available designed to help you retouch portraits. Indeed, there are so many that it’s difficult to know which are any good, especially as some cost more than Lightroom itself.
While you may need a plug-in (or Photoshop) for high-end retouching work, Lightroom has a built in Adjustment Brush preset that will do the job for you. It’s called Soften Skin and is a quick and easy way to retouch a portrait.
This before (left) and after (right) comparison shows what you can achieve in Lightroom:
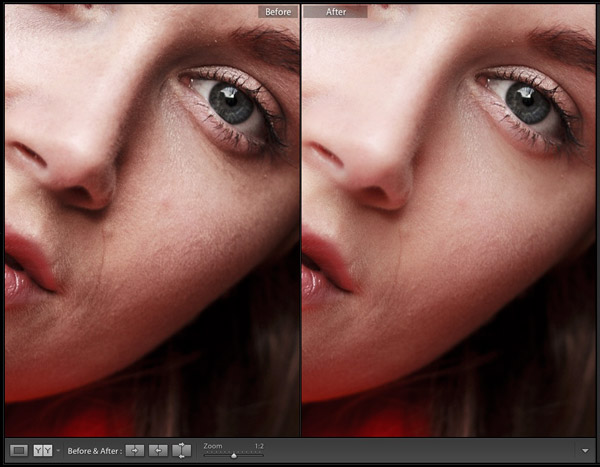
This is a good example of learning what you can achieve within Lightroom, saving yourself time, hard drive space and the expense of purchasing another plug-in in the process.
For more on retouching portraits in Lightroom see: How to professionally retouch portraits in Lightroom
5. Learn to organize your images in the Library module
If you are new to Lightroom you will be accustomed to organizing your photos into folders on your hard drive. In Lightroom though, things are different. There’s only one module (Library module) that gives you direct access to the folders on your hard drive. The others all use Collections instead.
Lightroom is set up that way because Adobe wants you to organize your photos in Collections. The advantage of working this way is that a Collection can contain images that reside across a multitude of folders and bring them together in a way that makes sense for you. You can organize your images by date, subject matter, people’s names or any other way that is useful. My article Use Lightroom Collections to Improve Your Workflow goes into this in more detail.
6. Decide how to use colour labels, star ratings and keywords from the beginning and stick with it
This is the hardest piece of advice to follow because when you are starting out you’re still figuring how to use these features. As your understanding of Lightroom grows, you will work out how to use these things in a way that suits you. Just be aware that consistency is your friend. If you start out using (for example) colour labels one way, then change your mind after a few months, it has the potential to cause confusion.
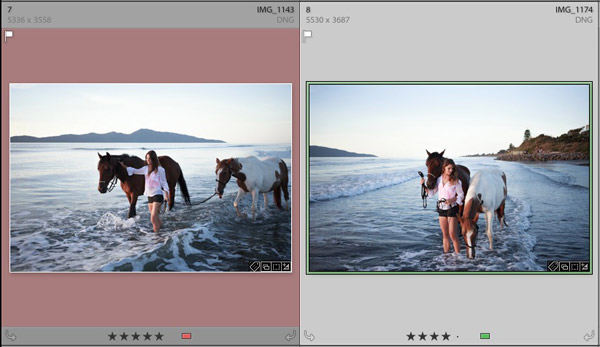
For help with keywords, read my article Creative Ways to Use Keywords in Lightroom 5.
7. Put all your Raw files in a single folder on an external hard drive
This makes it easy to back them up. If you need help with deciding on a file structure then my article Organising Photos for Lightroom will help. The main benefit of keeping all Raw files in a single folder is that it is easy to back up. I recommend that you back your Raw files up to at least two different hard drives. Given that hard drive failure is inevitable (it is always a question of when, not if, even if the when is years into the future) it is wise to have multiple copies. That way if the worse happens it is an inconvenience, not a disaster.
Over to you
Now it’s your turn. What advice would you give to new Lightroom users? What do you wish you had known from the start?
Mastering Lightroom: Book Two
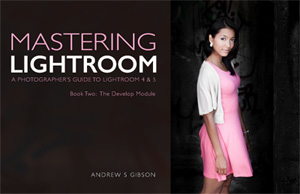 My new ebook Mastering Lightroom: Book Two – The Develop Module teaches you how to process your Raw files in Lightroom for spectacular results. Written for Lightroom 4 & 5 it takes you through every panel in the Develop module and shows you how to creatively edit your photos. It’s now 40% off at Snapndeals for a limited time only.
The post Seven Pieces of Advice for New Lightroom Users by Andrew S. Gibson appeared first on Digital Photography School.





You must be logged in to post a comment.