RSS
 

Posts Tagged ‘session’

10 Tips for Doing Your First Family Portrait Session

30 Jan

The post 10 Tips for Doing Your First Family Portrait Session appeared first on Digital Photography School. It was authored by Louise Downham.

family portrait tips

Photographs from a good family portrait session will be treasured for many years to come. It’s an incredibly rewarding area of photography, but it can also be a little daunting for new photographers. You need to build a rapport with the family, keep the children on board, and meet the parents’ expectations with gorgeous photographs.

Family portrait family group

So where do you start? Which camera settings should you choose?

Here are some important pointers to make your first session go smoothly, and to help you take great family portraits every time!

1. Get down on their level

If you’re photographing children, get down on their eye level. This will lead to far more engaging photographs, and will also help you interact better with the child.

Family portrait girl with flowers

2. Use the center AF point to focus

Different focus settings suit different photographers, but using the center point to focus tends to be the most useful for family portraits. As you take more and more family images, you’ll get a feeling for whether this setting suits you.

But it’s a great starting point for your first session.

3. Choose an appropriate aperture

Your aperture settings will be influenced by the style of photography you prefer.

As a starting point, many lifestyle family photographers choose to shoot wide open for individual portraits (f/2.2 works really well if you’re after beautiful background bokeh), and around f/5.6 for group shots to ensure everyone is in focus.

Here’s an example of the effect you get with a wide aperture:

girl in the park family portrait
This image was shot at f/2.2.

And here’s what you get when shooting at f/5.6:

Family portrait dad and son black and white
This image was taken at f/5.6.

4. Choose a fast shutter speed

Children move fast, and sometimes unpredictably.

That’s why you generally want a faster shutter speed, at least compared to your average portrait settings. A good place to start is 1/250s, which will still deliver sharp photos, even if children are rolling over or waving.

If you have a situation where someone is moving very fast, such as a child jumping or racing off into the distance, choose a much faster shutter speed (such as 1/800s).

family portrait baby held up high
To capture a sharp shot of this child being tossed in the air, I shot at 1/800s.

5. Use Auto ISO

While you’re familiarizing yourself with the apertures and shutter speeds that work for family portrait sessions, consider setting your ISO to Auto. The results are usually satisfactory, and it’s one less thing to think about when shooting.

As you gain experience and confidence, you can start to select the ISO manually.

6. Experiment with metering modes

Certain metering options suit some photographers better than others. As you take more family portraits, you’ll soon see which mode works best for you.

To start with, try using Spot metering for individual portraits, and Evaluative metering (also known as Matrix metering) for group shots.

family portrait mother and baby
This photo was taken using Evaluative metering mode.

7. Shoot in RAW format

If you shoot in RAW, you’ll have a far greater range of colors and details in your images – which you can then use for stunning edits in Lightroom.

8. Use Auto White Balance

Set your white balance to Auto if you’re doing a location shoot.

Why?

Because you’ll be working with a variety of scenes with different lighting, and you won’t have much time to change the white balance as you go.

Plus, correcting white balance is an easy edit in Lightroom, so you’d be better off spending the time engaging with the family you’re photographing.

9. Choose your lenses carefully

Carefully consider which lenses to take to the family portrait session.

If you don’t have several lenses, consider renting some. This can be surprisingly economical, and it’ll give you the opportunity to try out different focal lengths to see which suit your style of shooting.

Family portrait baby at 85mm
This baby photo was taken with an 85mm lens.

Using several lenses in a family portrait session will also help you vary your compositions, and it’ll ensure you can cope with most locations. A zoom lens like a 24-70mm will give you lots of flexibility, while a popular prime lens for family portraits is an 85mm lens (it creates very flattering photos!). A wide lens, such as a 35mm prime, will help you set the scene.

As you gain experience photographing families, you’ll develop a sense of which lenses work best for your style. And once you know what you like, I recommend you invest in the highest-quality lenses you can afford.

family portrait siblings at 35mm
This sibling photo was taken with a 35mm lens.

10. Set limits

Limit yourself to capturing five versions of each scene. This will train your eye to look for the details and expressions you want to capture, and will teach you to include everything you need in a single photograph.

Family portrait photography tips: Conclusion

So there you have it – family portraits in a nutshell!

Practice makes perfect, though, so be prepared to work hard and hone your camera skills. Above all, a friendly and professional attitude combined with careful preparation for each family portrait shoot should make for happy clients and repeat business.

Do you have any family portrait photos you’re proud of? Share them in the comments below!

The post 10 Tips for Doing Your First Family Portrait Session appeared first on Digital Photography School. It was authored by Louise Downham.


Digital Photography School

 
Comments Off on 10 Tips for Doing Your First Family Portrait Session

Posted in Photography


How to Plan and Pull-Off a Toddler Photo Session

26 Aug

The post How to Plan and Pull-Off a Toddler Photo Session appeared first on Digital Photography School. It was authored by Mat Coker.

Toddlers are filled with volatile emotions. They can be shy, moody, defiant, chaotic, unpredictable, and in need of bribes. So a toddler photo session can be a challenge.

But when you build a photo session just for toddlers, it’s far less challenging and lots of fun. It is also the perfect opportunity to get creative.

Here’s how to let your inner child create a toddler photo session that’s fun for you and toddlers.

Toddler-photo-session-Documentray toddler photo session

1. The big idea

The first step is to plan out the photo session. I think that a themed lifestyle or documentary session is perfect for toddlers.

The big question is, how do you come up with an idea or theme for the session?

Many photographers choose a theme themselves, such as princesses or pirates. The benefit of choosing your own theme is that you get to exercise your creative vision (designing the set, costumes, etc.) and let people choose to be part of it or not.

Of course, one downside is that it’s a cookie-cutter approach that gives every child similar portraits.

If you want to choose something unique to the child, keep in mind that every toddler has something they love to do. Go with that as the theme for the session.

If they love dinosaurs, then find a way to make dinosaurs part of the session. If they love to play with big-rigs and diggers, then make those part of the session. Whatever it is they love, try to make it larger than life for the session.

Toddler-photo-session-Toddler photos at football field

When I found out that this little guy loved watching football with his Mom and Dad, I knew we had to visit an actual football field for his photo session.

Start with a small everyday experience and take it to the next level (I’d love to hear some of your ideas in the comments).

2. The toddler photo session

When it comes to pulling off the session, start by being prepared. This seems obvious, but many photographers come unprepared, and it can ruin a session.

If you are prepared, then you won’t have to think about it during the shoot. The less you have on your mind, the more room you have to be creative.

Gear

Pack the right gear and check twice that you’ve got it all.

  • Spare camera
  • Charged batteries
  • Lights (if needed)
  • Props (provided by you or the family)
  • A checklist of other things you need

Part of being prepared is being familiar with your camera and knowing what settings to use. I keep things as simple as possible with aperture mode and exposure compensation. I only use manual mode when I need it.

Fire fighter thmemed toddler photo session.

Even though props for the session should be prepared in advance, you should still allow room for spontaneity. Dressing up as a firefighter was not part of the plan, but it was the best part of the session.

Chaos

Generally, you’ll need to embrace chaos as part of the toddler photo session. Toddlers are emotionally volatile, and the session may take many twists and turns. This is one of the reasons that I love lifestyle sessions. It easily allows for pauses, breaks, and spontaneity.

Go with the flow and don’t try to force anything. If you design the session for the toddler, then it should be fun. They should be happy, and it should be the perfect environment for them. Even a studio can be fun.

Keep the parents informed, but don’t feel the need to explain things to the toddler. You don’t even need to tell the toddler it’s a photo session. If it’s a lifestyle or documentary session, just let them be themselves.

How to Plan and Pull-Off a Toddler Photo Session

Creativity

Use many creative elements with your photography. Go for a variety of angles, close-ups, storytelling, wide angles, and beautiful light.

Football mascot photo session.

Part of your creativity is in choosing the environment and backgrounds for your session. I used a combination of background, composition, and moment for these two photos. The moment began with him confronting his opponent’s mascot and ended with him making a run for it.

Beware of yourself

You’ve got to be able to handle any problems that arise and still get great photos.

Before a toddler photo session, I do some reflection. What could go wrong with this session? Has anything gone wrong in the past? What is the worst that could go wrong? But most importantly, how will I respond? I make this decision in advance so that I don’t have to think in the moment. Do the thinking while things are calm, and you’ll make better decisions.

Consider answering these questions in advance:

  • What if the toddle is grumpy?
  • Suppose the parents are overbearing?
  • What if the kid throws mud at my camera or turns the firehose in my direction?
  • What if the toddler gets hurt?
session at beach.

As much as we all love nature, there are many harmful elements out there for toddlers. Keep parents close by and make sure they are comfortable with where their toddler is exploring.

3. The edit

When it comes to the edit, be ruthless in narrowing down your photos. Most photographers are happy if they keep 10% of their photos from a session. Some are satisfied with less. Don’t be afraid to cut, cut, cut!

Your final selection of photos should have lots of variety to it.

  • Close-ups
  • Full scene
  • Details

When it comes to touching up your photos, I recommend a simple edit with Lightroom or a similar program.

How do you know what to do with a photo? Keep these two principals in mind. When it comes to editing you’re either:

  1. Putting the finishing touches on your photo (crop, exposure adjustments, etc.)
  2. Or you’re trying to fix a photo that didn’t turn out
Toddler-photo-session-Before and after edit with Lightroom

The main things I did with this RAW photo is I cropped it and warmed it up with the temperature slider.

Generally, I would say if you need to do a heavy amount of fixing or editing of a photo, you should just leave it out of the final collection. If you constantly have to fix certain elements of your photos in editing, this is a good clue as to what you need to learn to improve your photography. Editing should be about finishing touches, with fixing as a last resort.

A perfect session for you and toddlers

Follow your nature as a creative person and the nature of the toddler you are photographing. Design everything for the toddler, and you’ll have an amazingly creative toddler photo session that will leave everyone wanting more.

Do you have any other tips for a successful toddler photo session? Share with us in the comments below!


toddler-photo-session

The post How to Plan and Pull-Off a Toddler Photo Session appeared first on Digital Photography School. It was authored by Mat Coker.


Digital Photography School

 
Comments Off on How to Plan and Pull-Off a Toddler Photo Session

Posted in Photography


How to Choose the Right Location for Your Photo Session

15 Feb

The post How to Choose the Right Location for Your Photo Session appeared first on Digital Photography School. It was authored by Jackie Lamas.

It’s thought that clients are the ones who choose the location for their portraits, but more often than not, choosing the right location is left entirely up to the photographer. In this article, we’ll outline a simple formula to help you and your client settle on the perfect location for the session.

1. It’s not about location, it’s about the look and feel

When you talk to your client about possible locations, change the language you use. Instead of “have you thought of where you want your session to take place” with “what look and feel would you like your photos to have?”

That simple change in language will help your clients to visualize their final images. I’ve listed a few words that can help your client choose which look and feel they want for their final images. Thus, helping you to choose the best location for the session.

These two locations offer different “feelings”.

  • Ethereal: This can be an open field, nature park, or a bright location with little to no busyness in the background like buildings.
  • Nature/natural: Here you can offer a park with lots of green grass and tall trees. Giving them a more natural feel to the photos. You can also offer a field of wildflowers.
  • High fashion/urban: This is definitely in a busy neighborhood or downtown area with lots of big buildings, reflective windows, and metal accents. Giving lots of contrast to the photos and the look and feel of a busy city.
  • Vintage: This can mean either old architectural buildings with wooden doors and big arches or it can mean that they want a location where there are lots of vintage accents, like a neighborhood of restored or historical homes.
  • Warm/homey: These words are a little broad but they can mean that the session can happen at a nice warm location like a field or during sunset at the beach. Homey can mean that they want to feel comfortable and relaxed, which can mean a location they frequent or even their own home.
  • Beach: This one is pretty easy, you can offer the beach if you are near one as a location. The time of day will give you the look and feel. The morning will give you a more blue and pink hue whereas during sunset you’ll get the beautiful golden hour lighting. Make sure to explain both options to your client so you can choose the right time for the look and feel they are visualizing.
  • Meaningful location to the client: Yes, this is an option as well! Especially for engagement sessions because it can be really meaningful to have the photo session at a location where the couple met, or where they got engaged, or simply where they spend a lot of their time together. This is also important for clients celebrating anniversaries or a really important milestone, like graduating from high school or college.

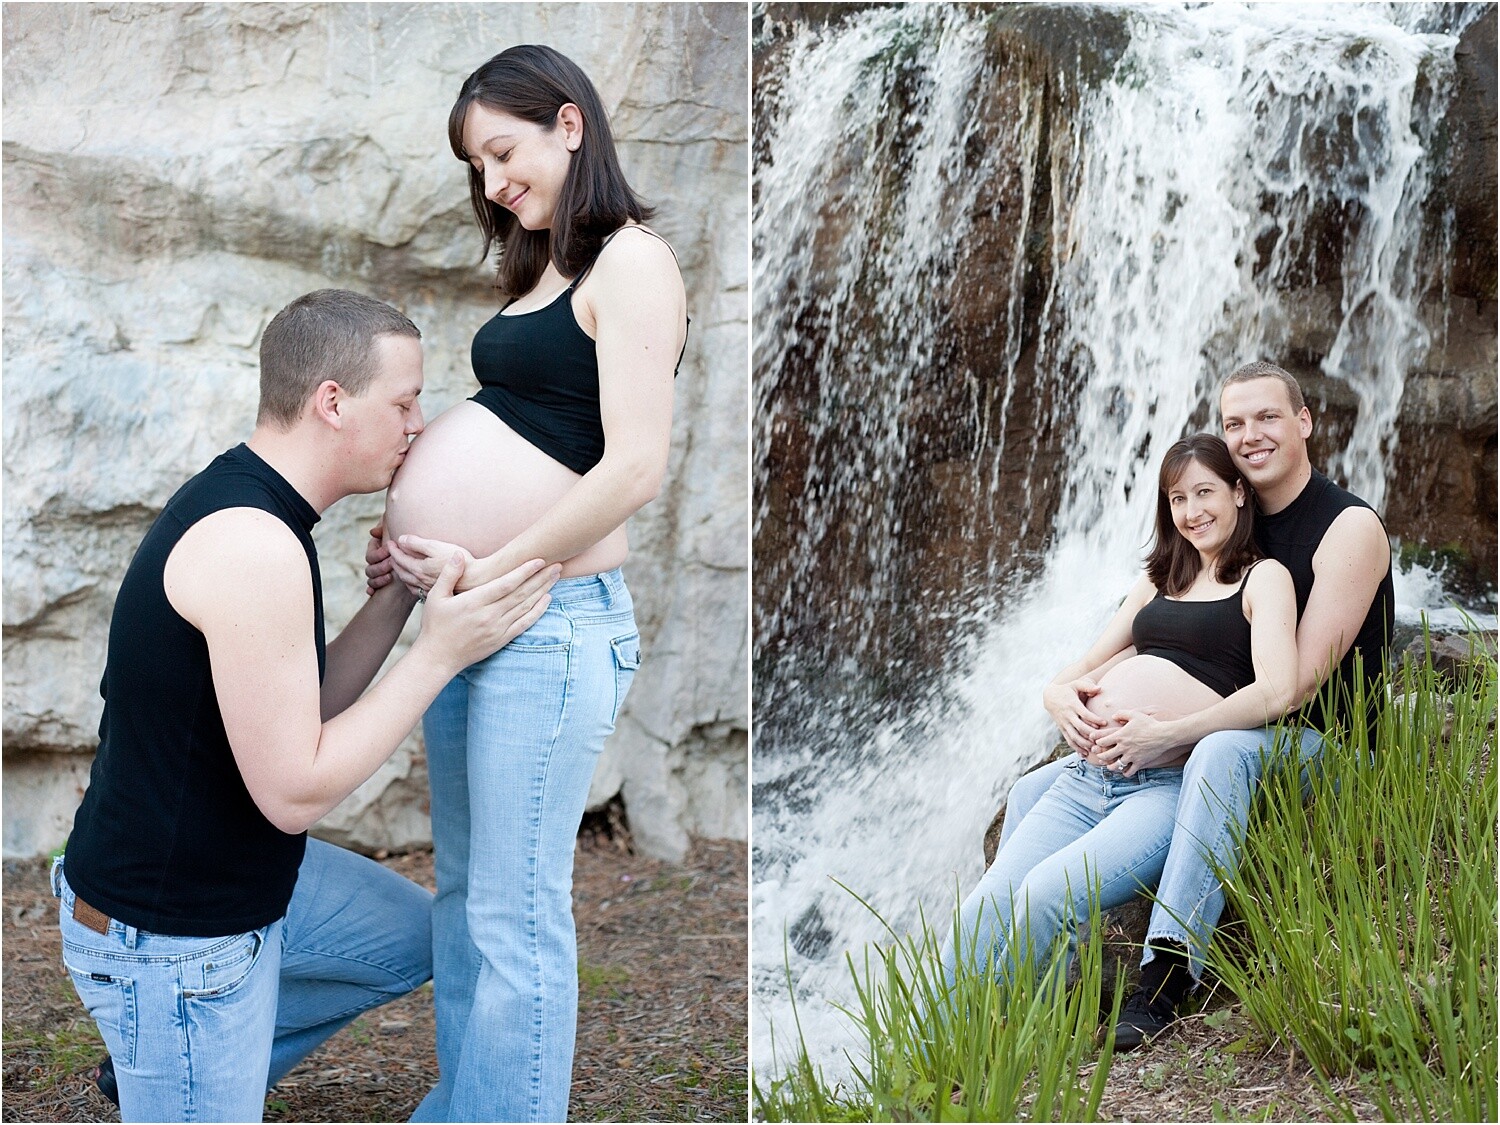
Two different locations for the same maternity portrait session to offer variety.

2. Ask what their home decor looks like

Another way to set a location for the portrait session is to find out what kind of home decor, theme, or color scheme they already have. This way, when it comes time to hang beautiful photos in their home, you can be sure that it won’t clash with the rest of the home.

Your clients will appreciate that you took the time to find out what would look best in their home before even taking a single photo. This makes you look even more professional because you are going to choose the perfect location so that when they are ready to frame, they are reassured that the photos you took will match their home decor perfectly.

This can also help you to upsell items like albums because you’ll know the right album cover and color to choose for each one of your clients. It will make them see that you care more about how their photos will match their home rather than simply choosing an easy location for all of your photo sessions.

For example, choosing a black leather cover for an album can look great in a contemporary modern home whereas a fabric cover album would look better in a more country style home. Or another example would be if the home has brown, beige, and reds in the decor then a perfect location would be a field of flowers.

3. Time of the session

Time can be a huge factor in choosing the right location. Some families need to keep nap times and energy levels in mind when scheduling a session. For example, if your clients need to keep in mind a little one’s nap time at 2 pm, you can choose to have the session in the morning or in the evening when the child is at his best. Photographing in a park that is rich in trees and greenery can help shade you from afternoon light or keeping the sun off your clients.

Or, you could schedule the family during the golden hours at a nearby beach or lake so that the child can play and still have had his nap time earlier.

Sometimes the time is dictated by the location itself. For example, photographing in an urban setting where tall buildings can shade the sun during sunset means that you might have to photograph your client at an earlier time to have enough light.

Or, if you’re photographing in a field, sometimes the early morning hours are best when it’s cool and not so bright. Golden hour is also perfect for fields and beaches.

Midday sun at the beach may be a little harsh but it is still doable. Speak with your clients to choose the best time that works for their schedule.

Talk with your client to see if time will be the determining factor in choosing the right location.

4. Use your website to help choose the location

Chances are, your clients have already looked through your website and have fallen in love with your style! This is great because this can also help your clients to choose the perfect location for their portraits.

This photo is a common favorite on my website since most family sessions are on the beach and during sunset.

If your clients are having trouble visualizing what they want their photos to look like, have them go over to your website and point out a photo that they like the most.  The one that just jumps out at them and had them convinced they wanted you to photograph them.

If the location is nearby or accessible, offer that same location to your client! They loved the photo and it is what led them to contact and hire you, so why not photograph them there? It’s guaranteed that they’ll love the final photos.

5. When they leave it up to you

Even though you’ve gone through all the steps above, some clients don’t know what they want for their photos. They’ll look to you to offer up the best locations because what they want is to have the best photos possible so any location, look, and feel is okay with them.

When this happens, don’t be afraid to take charge. Choose a location that perhaps you’ve been wanting to photograph in for a while, or a location that you know has great golden hour lighting.

Sometimes, clients just need more of a visual to get an idea of what they are actually looking for. Send your clients links to two or three specific locations that you’ve chosen so that they can see with their own eyes what the images will look like. Blog posts and images from your website would be perfect examples.

This way, even though they don’t know what they’re going for, they can choose the one that seems more interesting to them. Giving them the final decision on where they would like the location for their session to take place.

6. More than one location

Depending on your portrait business model and what you have offered your client, and if you’re willing, you can do one session in multiple locations.

For example, if you are photographing an engagement session and they are going for a natural park look but got engaged in front of the downtown theater, then you could offer your clients to photograph in both locations for their session. Either on the same day or on different days.

Photographing in multiple locations offer your clients a variety in their photos so that they can showcase different photos in different rooms in their house as well!

Of course, sticking to one location where there is variety in looks can also be an option to add variety to the photos without having to go somewhere else.

In conclusion

Each session is different and each client is different, using the tips above will help you to determine the perfect location for all of your sessions. When you guide and help your client visualize the perfect location for their session, you will not only look more professional, you will be giving your clients a very personalized experience that they will appreciate. Resulting in more referrals and return clients!

The post How to Choose the Right Location for Your Photo Session appeared first on Digital Photography School. It was authored by Jackie Lamas.


Digital Photography School

 
Comments Off on How to Choose the Right Location for Your Photo Session

Posted in Photography


Essential Family Photo Session Preflight Checklist

26 Nov

Essential Family Photo Session Preflight Checklist 1

When preparing for a family photo session, there are plenty of things to keep in mind. Such as: making sure you know what time to meet, where you are going to do the shoot, and having all your gear handy. However, even the most seasoned family photographer can overlook some items from time to time though.

For people who are new to this type of work, it can be a headache trying to keep track of all the little things that can make or break a portrait session. A simple solution is to borrow a technique from the aviation industry known as a Preflight Checklist. Creating a checklist makes all the difference between happy clients and photographic disaster.

2 Essential Family Photo Session Preflight Checklist

A Preflight Checklist is a list with various items on it that you can physically check off. Pilots use them to make sure everything is in order before taxiing down the runway, and photographers can use them before they start snapping photos.

You could create one on your phone with any note-taking app, but I recommend a physical Preflight Checklist. Since you can keep it in your pocket, you don’t have to worry about accessing apps or unlocking your phone. You can also hand it to someone else if you need another pair of eyes to check it over.

Some of the items on a photographer’s Preflight Checklist might sound relatively obvious, but it’s a good idea to keep one handy to make sure you have everything in order. Simple mistakes can make or break a photo shoot, and it doesn’t hurt to double-check that you have every little thing set – especially when dealing with families and children.

Following are the items I advise you to put on your checklist. You may want to customize it to suit your needs and possibly even create your own from scratch using a word processing program. I have included explanations for each item on this list. You could remove them to save space and focus just on the items and not the rationale for including them.

3 Essential Family Photo Session Preflight Checklist

Checklist items

1. Format Your Memory Cards

Each photo session should use fresh memory cards. The best way to do that is to format them using your camera. Doing a complete reformat, using the instructions provided in your camera’s manual, is preferred over merely deleting the pictures one-by-one. Doing a complete reformat resets your memory card to a fresh state. Deleting pictures can leave certain bits of data intact that, over time, could cause problems and make it more difficult to recover images in the case of a card failure.

2. Charge All Batteries

Charging your batteries may seem painfully obvious, but most photographers have been in at least one situation where they forgot to bring fully-charged batteries to a session. Having this on a checklist ensures that this doesn’t happen to you.

4 Essential Family Photo Session Preflight Checklist

This engagement session lasted quite a while, but luckily I remembered to have plenty of fully-charged batteries. I almost forgot though, which would have spelled disaster for the entire shoot.

3. List the Camera Gear You Need

You probably don’t need to bring all your camera gear to every photo shoot. Having a checklist for family photo sessions (or other types of sessions, such as sports or weddings) is an excellent way to ensure nothing gets overlooked. This list should include camera bodies, specific lenses, flashes, filters, even specific equipment like camera straps and lens cleaners. Don’t just assume you will remember to bring these! Having them on a checklist can save you from a big disaster during the photo session.

4. List the Accessories You Need

Accessories can include something to write with, something to write on (such as a clipboard), blankets for people to sit on, benches, footstools, and even stepladders (depending on the location and situation). Be as detailed as you like with this. It may help to have different accessories listed for different types of sessions such as pictures involving young children, or elderly grandparents.

5 Essential Family Photo Session Preflight Checklist

I was so focused on getting the gear I needed for this shot that I nearly forgot to bring a blanket for this baby to lay on.

5. Edible Items

It never hurts to have food or snacks on hand. As well as pacifying fussy kids or calming nervous parents, it sends a message to your clients that you know what you are doing and have their needs in mind. Chewy granola bars, single-serve packs of fruit snacks, and bottles of water all come in handy at photo sessions. The clients appreciated it too. Just be sure to avoid food that leaves crumbs or stain clothes!

6. Specific Types of Shots

Wedding photographers know this well, but some family photographers can easily make the mistake of forgetting specific shots in the hustle and bustle of a session. Write out the shots you want (i.e., Mom and Dad, Mom and kids, Dad and kids). Consult with the family beforehand to see if they want anything unique to their shoot. Even if they don’t have something in mind, they may appreciate that you asked for their input.

6 Essential Family Photo Session Preflight Checklist

The family specifically requested this type of shot, so I made sure to include it on my checklist.

7. Specific Poses

It’s easy to get lost in the shuffle and chaos of a family photo shoot only to realize afterward that there were certain poses you wanted to get. Or worse, certain poses your clients requested that slipped your mind. Once, I looked through my photos in Lightroom after a session. I banged my head against my keyboard because I forgot to get a shot of the parents holding their daughter or all the brothers in one group.

If you take more of a freeform approach to your sessions, you might not be too concerned about certain poses. However, if you want to cover your bases, putting your poses in your checklist is a great way to get the ones you want.

8. Clear the Pockets

If I had a dollar for every time I looked through pictures from a photo session only to realize that someone had keys, a giant cell phone, a glasses case, or other sundry items sticking out of their pockets, I’d be a rich man. These types of imperfections can land an otherwise frame-worthy photo in the rejection bin. Alternatively, it requires hours of postprocessing to fix.

The easiest solution is to have clients empty their pockets before you start taking pictures. Family sessions can be so hectic that it’s easy to overlook. Put this item on your checklist, and you’ll be all set.

7 Essential Family Photo Session Preflight Checklist

I forgot to use a checklist on this photo shoot. As a result, I didn’t think to have everyone empty their pockets. Even though the family was very pleased with their pictures, the phone and handkerchief are glaring mistakes that could have been easily avoided.

9. Clothing Check

Similarly to pocket-clearing, this one is an easy fix but can cause you to pull your hair out in post-processing if you forget. Make a note on your checklist to see that shirts are tucked in, collars are down, and ties aren’t sticking into belts.

10. Names

Names are last, but it’s one of the most important things to remember. It can make the difference between a one-time client and years of repeat business. Leave space on your checklist to write all the names of your clients and take a bit to rehearse them before your clients show up. This helps to avoid an awkward scene when directing a person to stand somewhere or put a hand on another’s shoulder, but you can’t remember their name. Nothing says unprofessional like barking out, “Hey you over there, move your hand!” Write your clients names down and use them during the photo session as much as possible. It helps the entire event to run smoother.

8 Essential Family Photo Session Preflight Checklist

There were a lot of names to keep track of during this session, but writing them down on a checklist was an easy way to help me remember.

Every photographer is going to need different items on his or her checklist. Hopefully, these give you a good idea of where to start. Creating the list is as simple as opening up a word processor and starting a bulleted list. Once you have a basic one created, you can fine-tune it to meet your needs on each shoot. It might seem like much work to create a checklist, but in the end, it saves you far more time than you might realize. You create better results for your clients too.

If you’d like to use my checklist as a template, you can download it here. I strongly recommend using this as a starting point and adding, removing, or changing the items to suit your needs.

Do you already use a Preflight Checklist or other such devices to help you with your photo sessions? If so, what do you put on it? I would love to hear your thoughts in the comments below, and I’m sure other photographers would as well.

The post Essential Family Photo Session Preflight Checklist appeared first on Digital Photography School.


Digital Photography School

 
Comments Off on Essential Family Photo Session Preflight Checklist

Posted in Photography


A Behind-The-Scenes Look at a Family Photo Session

19 Nov

You’re probably used to seeing perfect family photos on Pinterest. After all, photographers love showing their best work. But you’ll learn a lot more from seeing an entire family photo session rather than just one perfect photo.

So today I’m giving you a glimpse into one of my traditional family photo sessions. I’ll tell you what gear I used, my thought processes during the shoot, how many photos it took to get a keeper, and how your mistakes can help you develop as a photographer.

I’ll show you the good, the bad, and the photos I didn’t even let the family see.

Family photo tips - golden sunlight

I love photos like this with golden back light in idyllic scenes. But the reality is for every ‘perfect’ photo like this there are dozens (if not hundreds) that don’t look so nice.

Gear

For this family photo session, I used a Nikon D7100. For most of the photos, my lens was an 18-70mm f/3.5-4.5, although a few were taken with a 70-300mm f/4.0-5.6 lens. I decided to shoot in RAW and JPEG but only processed the RAW files using Lightroom.

Family photo tips - lightrrom

Lightroom is my favorite post-processing program. I had 982 photos from this session. To narrow them down I flag the photos that stand out to me and then highlight the final keepers in yellow.

The Session

This session is from my earlier days as a family photographer. I  chose it because there was a lot I hadn’t learned yet, and I’d rather show you a tough session because it will help you a lot more.

There was an infant and most of the kids were under five. Thankfully, I had a lot of experience photographing young kids after being a school photographer for a couple of years.

The aim was to get a variety of photos of the family, siblings and individual kids.

Family photo tips - sooc

This photo is straight out of the camera (SOOC) and is typical of the photos I ended up with. It can be really challenging to get a family of six to all look at the camera and smile at the same time. One or two kids are always looking away or not smiling. Inevitably, the mom and dad end up looking at the kids instead of the camera. You’ll need to learn to capture their attention.


Family photo tips - sunflower field

This is what the photos look like after editing with Lightroom. It took 70 photos to get this one. I was discouraged, but it taught me that I needed to get better at interacting with groups.


Family photo tips - siblings

This photo is SOOC. It can be really tough to get four siblings (one of them an infant) to look at the camera and smile at the same time. It helps to have a parent or assistant standing directly behind you to get their attention. That person should be playful and silly to engage the kids. This is far better than having adults off to the side yelling at the kids to “look here!”


Family photo tips - siblings

This is a nice photo after editing with Lightroom. It took 33 bad photos to get this good one.


Family photo tips - siblings

Sometimes you’ve got to let little kids get the silliness out of them. Why shouldn’t a photo session be fun for them? But be careful. Sometimes letting them be silly unleashes too much craziness. Honestly, I think they were much happier by this point.


Family photo tips - siblings

By now, you can see that most of my photos were underexposed. I had to brighten them a lot in Lightroom. Now I use a combination of aperture priority and exposure compensation. I aim for the brightest exposure I can without overexposing it. Them I can make final adjustments in Lightroom.


Family photo tips - siblings

This final photo (edited in Lightroom) has a pretty relaxed feeling to it. I’m not always looking for stillness and perfect posture in a photo.


Family photo tips - children

I found it much easier working with each child individually. I could connect with each of them and provoke nice expressions. As a group, it’s difficult to engage them all at once.


Family photo tips - infant

SOOC. Typically, infants don’t sit up very well on their own, especially while sitting on bales of hay. I always have a parent sitting nearby to steady them. They pull their arm away for a few seconds while I’m snapping photos.


Family photo tips - infants

When they’re in a good mood it’s so much fun to make an infant smile.


Family photo tips - infants

Infants and toddlers can be really tough to photograph when they’re in a bad mood. They need lots of snacks (but not bribes) and time to be themselves between photos.

This photo session should teach you the value of paying attention to your exposure in the moment. Watch your histogram and use exposure compensation to make adjustments.

Practice engaging kids and small groups of people so you can do it effortlessly at photo sessions.

Don’t worry that it might take you 10–20 photos to get one worth keeping. That’s pretty normal for many photographers.

One thing I hadn’t learned at this stage was the creative power of angles. Angles and candid moments are now the most important part of my approach to family photo sessions. The creative use of angles in combination with candid moments help make each photo more unique and personal.

Candid Moments

While I had a fair bit of photography experience at this point (yearbook, several weddings, school photos, and some families),  I certainly hadn’t developed my own vision or style. But this session was part of that development.

I share these candid photos with you because it was photos such as these that helped me develop as a photographer and made me who I am today.

Family photo tips - candid

This photo was taken right at the beginning on the way out to the sunflower field. You can take candid photos at the beginning of the session as a way to warm up and get everyone used to the camera.


Family photo tips - candid

This was a quiet moment before the session began. I love the soft light on the mom’s face.


Family photo session - candid

This is a pretty good example of letting infants and toddlers explore during the session. They’re curious about the world around them. So let them explore and you’ll likely make some great candid photos.


The last place we took a family photo was outside a big barn. The girls played with the barn cats and I couldn’t resist a few photos (even though I felt like my job was to focus on posed photos). My camera misfocused, so this picture is blurry. But there’s something so priceless about the moment that I consider this photo worth keeping anyway. I actually find something nostalgic about the misfocus. It doesn’t look so bad as a small print or on a small screen. But I wouldn’t give this to the family or put it in my portfolio.


Family photo tips - walking

This photo of the family walking together was captured as we moved from one location to the other. These days I plan a circuit for sessions and capture candid photos between locations.


Family photo tips - infant

This candid moment came after a few posed photos with the mom and her little one.

Final Thoughts

If you’re in the early stages of being a family photographer, don’t feel bad if you haven’t settled in yet. Keep persevering through the tough moments and you’ll grow. Those rare photos that make your heart skip a beat are clues to who you will become as a photographer. Pursue more of those, but understand that you also need to pursue lots of other things because you never know what will make your heart skip a beat.

Family photo tips - dancing

I saved this photo for last because it was one of the moments that changed me forever as a photographer. While I was photographing the mom and little sister I looked over and saw the big sister dancing on the path. To me, it was the essence of childhood. It didn’t take me 70 tries to get this shot. In fact, right after I took this photo she stopped dancing and posed. To this day, dancing is part of many photo sessions.

What else do you need to know?

I’m happy to share anything about this family photo session with you. Let me know in the comments what else would be helpful to you.

The post A Behind-The-Scenes Look at a Family Photo Session appeared first on Digital Photography School.


Digital Photography School

 
Comments Off on A Behind-The-Scenes Look at a Family Photo Session

Posted in Photography


Maternity Session Tips For Better Client Experience

13 Nov

There are many different types of portraiture. Maternity is probably one type that is truly one-of-a-kind. Each maternity session is different, however, these tips will help you have the same approach to your sessions so they run smoothly from beginning to end.

Maternity Session Tips For Better Client Experience 1

Keep Posing Simple

When women get a maternity session photographed, they are usually between 7-9 months pregnant. As a photographer, you should know that a growing belly is tiring. Therefore, keep posing simple and move your client to a minimum to help her stay comfortable while you are photographing this beautiful moment in her life.

Maternity Session Tips For Better Client Experience 2

In order to keep the focus on the belly, use your client’s hands to frame the belly. One hand on top and one below, both below, both on top, or rubbing the belly. All are great ways for your clients to connect with their belly. They will also appear more natural in photos as the bump is the main focus.

Maternity Session Tips For Better Client Experience 3

Popping one knee out can help give your client a little more shape. This is especially helpful if she is wearing a long maxi dress or wardrobe that hides her natural shape. Make sure that your client pops out the knee that is closest to the camera. She can do this by putting one foot on tip-toe or just bending the knee.

Maternity Session Tips For Better Client Experience 4

In order to make the belly stand out while still giving your client a bit of shape to her body, angle her at 45 degrees from the camera. This makes the maternity silhouette more prominent in the photographs.

Maternity Session Tips For Better Client Experience 5

Pose your client with a knee pop and at 45 degrees toward the camera to put the focus on the belly silhouette.

Posing with Partner or Siblings

When posing with siblings, make sure to pose your client first and then have her children surround her. Or if she is willing to carry one sibling. Try different poses and allow for natural posing to happen. Children might be excited to rub or kiss the belly, and you can capture many natural expressions.

Maternity Session Tips For Better Client Experience 6

When posing with partners, make sure that they are interacting or connecting with the belly as well. A hand on the belly, or kneeling, rubbing or speaking to the belly can really bring out a connection. Don’t be afraid of just focusing on the partner and the belly bump. Take photos close-up and from afar to include both clients.

Maternity Session Tips For Better Client Experience 7

Photographing the whole family can be tricky during a maternity session. Keeping the energy light and happy can really help bring out the best expressions. Working quickly is a good idea to keep the siblings interested and engaged. Move through poses swiftly and try to tell jokes or be playful to help.

Maternity Session Tips For Better Client Experience 8

Whether you’re photographing your client indoors or outdoors, try to maximize the number of poses in one spot. Being pregnant can cause swollen feet if she is on her feet for too long. When posing siblings and partners, move them first or move them closer to your client so that she doesn’t have to move around too much.

Know Your Pregnancy Facts

If you are a female photographer and have been pregnant before, then you can skip this tip. However, if you have never been pregnant or are a male photographer, it is really important to take the following into consideration. You will ensure your client has the best maternity session experience.

Maternity Session Tips For Better Client Experience 9

  • Maternity clients may not be able to walk around a lot without getting tired or swollen. Take breaks between setups and offer her a seat whenever possible.
  • Bathroom breaks: Be close to bathrooms because a pregnant woman will need to go often.
  • Offer water and snacks. Pregnant women need more calories so it’s really important for them to have healthy snacks and lots of water. It’s a nice gesture if you these to the session to offer her. Take it a step further by asking what her favorite snack is right now.
  • Ask if they will want retouching done to their belly. Some women prefer to keep it natural as it is in real life. Some will want a little extra editing. Asking up front can keep you from doing double the work or having to re-edit photos later.
  • Ask if your client will want to show her bump or not. This will help you prepare her to bring the right wardrobe.
  • Do not point out the obvious: that they are pregnant, or big, or look like they are having twins or anything of that nature. All you should ever say to a pregnant woman is that she looks beautiful and congratulations. Anything outside of that can seem like unsolicited advice or opinions. It may be interpreted as rude.

Maternity Session Tips For Better Client Experience 10

These are just a few of the things you should be aware of in order to give your client the best maternity session experience. She will see that you have put a great deal of effort into her comfort and will be instantly appreciative.

Props and Accessories

Ask your client to bring props or accessories that she has already purchased for her little one. Shoes, bows, onesies, signs with the name or another special item that can really personalize the session for them.

Maternity Session Tips For Better Client Experience 11

The more they bring, the more you will have to play with resulting in more options and variations for your clients. It can be exciting to incorporate the items into the session.

Maternity Session Tips For Better Client Experience 12

Photograph the items alone as well as with the bump. A nice detail photo of the item can look really nice in an album. You can also offer ideas for them to bring props or particular accessories to create more of a story.

Maternity Session Tips For Better Client Experience 13

If you are photographing inside your client’s home, you can photograph the nursery. As well adding to the overall experience of her pregnancy, it will show the experience of waiting for the baby to arrive.

Show Your Client Photos During the Session

Pregnant women are very self-conscious about the way they look. To make sure that they feel confident, show her a really great portrait of herself during the session. This can give her a boost knowing that you have captured her best.

Maternity Session Tips For Better Client Experience 14

Letting her see for herself that she is radiant and beautiful can make the session go much smoother. She will trust that you are getting the best photos of her during this very unique and important moment in her life.

Offer a Newborn Session

When you are wrapping up the maternity session, offer your clients a newborn session for when the baby is born. Newborn sessions are typically done within two weeks of the baby being born so they don’t lose their newborn features.

Maternity Session Tips For Better Client Experience 15

Chances are that your client hasn’t thought that far in advanced yet and it will be nice for them to come back to you since you have already built trust.

Maternity Session Tips For Better Client Experience 16

Let them know about the session options you offer and how you can create a beautiful album of both sessions so that they can always look back on these joyous moments in their lives.

Maternity Session Tips For Better Client Experience 17

If they walk away with a great experience during their maternity session, they will certainly want to come back for the newborn session. And all subsequent portraits thereafter. Don’t miss your chance to keep your clients coming back!

In conclusion

A maternity session is special in that you get to photograph this very unique, one-of-a-kind moment in your client’s life. Make sure to stay positive and energetic. Take breaks and snacks, and be aware of what you say.

Guide your clients through the process so that they can enjoy and trust you to make the best photographs possible of such an important time in their lives.

The post Maternity Session Tips For Better Client Experience appeared first on Digital Photography School.


Digital Photography School

 
Comments Off on Maternity Session Tips For Better Client Experience

Posted in Photography


Tips for Preparing for a Portrait Session

21 Sep

A portrait session can be a nerve-racking event. There’s so much to remember and prepare before the actual press of the shutter button. It takes a lot of prep work. People don’t always realize what goes into being ready.

Even if you’re an amateur taking pics of your family and friends, there are some important steps to take if you want to capture some really beautiful images. Here are some tips to help you out.

Tips for Preparing for a Portrait Session - girl jumping into the water

In some cases, planning for a shoot is really simple. In this case, we took the kids to the beach at sunset to shoot some pics we could share on social media.

Logistics and Planning

This is the part where you discuss the portrait session with your friends or clients. You need to pick a date, location, and a time. You should also discuss backup dates in case the original plan doesn’t work.

If you’re shooting professionally, you need to get the contract signed, collect a deposit and ensure that clients know under which circumstances their deposit (retainer) is refundable.

Image Sharing

If you are taking family pics at a reunion and you intend to share these photos with everyone, consider setting up an online photo album you can send to everyone. It’s much easier to share the pics this way.

Make sure you have everyone’s email so that they can all download the images afterward. It’s a huge pain to email people separately. You’re taking the pictures to stay in control and don’t overwork yourself sending them to everyone. They can take some of the responsibility.

If there are older family members, consider printing out a set of instructions they can use for accessing and downloading the images. I’ve run into that issue before and found myself driving an hour to click download on someone’s computer.

kids running in the water - Tips for Preparing for a Portrait Session

Another from the sunset shoot of informal family pics.

The Style and Portrait Session Design

It’s also a good idea to discuss the type of look and feel you want to create in the portrait session. If you’re working professionally, this is really important. Make sure you and the clients are on the same page.

Do they want relaxed, candid images or do they prefer something more formal? Clothing can affect the look of a photo shoot so be sure to discuss attire. If you’re snapping pics at a family event, you probably won’t have much control over the look of the images unless you plan and get everyone on board.

I’ve seen families choose themes like “Old West” for a fun afternoon of photos. At some reunions, I’ve seen groups create a t-shirt they all wear to commemorate the pics.

A friend of mine set up a photo booth at a Christmas party. Everyone was asked to bring one piece of “bling” for their photo. When paired with the props and the background she created, it was a ton of fun.

portrait of a boy by a tree - Tips for Preparing for a Portrait Session

In this case, I was working with a family. Prior to the shoot, I visited the home and we discussed possible locations.

Location Matters

The chosen location can also affect the look and feel of a shoot. Consider a big comfy couch in a brightly lit room versus wooden dining room chairs on a studio backdrop. The background can considerably change the feel of an image so plan carefully.

Props

Collect some props for the portrait session. If you’re working with really young people like toddlers, it is really helpful to have things to distract the kids. Teenagers love goofy items they can hold and use for posing.

If you’re working with your own kids, it can be a huge battle to get them to cooperate. I find other people’s kids far more flexible, but if I want to photograph my kids, it’s a huge ordeal.

So think about styling the shoot in such a way that your little ones will cooperate. This might mean including their favorite toy is in the image. That’s okay! Go with it because it’s far better to get a positive, happy image than a forced angry looking smile.

Tips for Preparing for a Portrait Session - 3 ladies smiling and laughing

This was another paid session. The family had gathered for a 50th-anniversary celebration. They were dressed semi-formal for the occasion.

Be Informed and Plan Ahead

Make sure you do your research. Know the area in which you are going to be shooting. It’s helpful to visit the site before the shoot so you can be familiar with all the little nooks and crannies.

Plan your route to the photo shoot if you can’t visit before the big day. Download offline instructions to your phone in case you lose your connection. It’s happened to me once that I lost the signal and drove around for ages before I could find the location.

Get Permits if Needed

Double check to be sure you don’t need a permit for shooting at a specific location. Some places require you to buy a permit. So don’t get caught without one.

I know of a family that planned to do photos in the Distillery District here in Toronto only to learn they could not photograph each other when they were halfway through the shoot. I’ve also seen a family get in a lot of trouble for trespassing on private land. All they wanted to do was take a family pic for their Facebook profiles.

So double check that you can visit and use the site you want for the session. If you’re shooting professionally, permits and property releases are a must so be sure to take care of the entire nitty gritty well before the day of the shoot.

Backup Plans are Essential

Have a Plan B. Always! Have an alternative plan at the ready. You never know what may go wrong. Have a family member bring an extra camera (or rent or borrow one) in case yours breaks. Choose an alternate site if the first won’t work.

Just be prepared. The reality is that when things go wrong, they usually go horribly wrong. So try to plan for every possible road bump in advance.

girls in the snow doing a selfie - Tips for Preparing for a Portraits Session

This shoot was planned for months. Friends were happy to join me for a day of photographs in the winter.

Day of the Portrait Session

Always make a checklist of items that you can use to help you pack up and be ready for the photoshoot. It’s really frustrating to leave equipment at home.

Arrive early! This should go without saying. You don’t want to make people wait.

Check the weather forecast and make sure you can contact people in case of emergencies. Get contact numbers from folks.

Be prepared to have fun! Just before everyone arrives or your clients show up at the studio make sure you’ve relaxed a little. I know some photographers who take 5 minutes to have a coffee before shooting. Others will sit and meditate for a few minutes beforehand.

Whatever works for you, just make sure you are confident and enthusiastic before you begin shooting. Your nerves will affect the quality of your work so don’t let them control you.

Conclusion

Photography is so much more than picking up a camera. To take memorable images, you need to put in some effort and plan out the event. So think carefully about the shoot and make sure you have everything ready.

If you are prepared and relaxed you will enjoy the event more, and so will those you are photographing!

girl blowing snow off her hand - Tips for Preparing for a Portraits Session

We wanted to create some of those images where you make snow dust. Of course, there was just too much white space around our chosen location. So sometimes your plans won’t work.

Tips for Preparing for a Portraits Session

We tried a lot of different locations.

Tips for Preparing for a Portraits Session

Eventually, we chose to shoot portraits that were much different from our initial plans.

Finally, make sure you share with us some of the ways you prepare for a photography session. Let’s get a good base of tips together we can use to our benefit.

The post Tips for Preparing for a Portrait Session appeared first on Digital Photography School.


Digital Photography School

 
Comments Off on Tips for Preparing for a Portrait Session

Posted in Photography


4 Tips for Helping People Feel Comfortable During Their Portrait Session

10 Sep

Sooner or later, almost everyone has to sit alone in front of a camera for a grad portrait or professional headshot. It is almost always an uncomfortable experience for portrait clients. But it’s easy to forget this as photographers.

When I great people for their portraits they often confess things like, “I’m terrible with photos,” “I feel sick,” or “I hate my face.”

Perhaps because I’m so empathetic, I’ve developed a knack for making the most nervous and hopeless people shockingly excited about their photos.

In this article, I’ll show you how I do it so that you can make even your most uncomfortable portrait clients happy with their experience.

Black and white head shots - 4 Tips for Helping People Feel Comfortable During Their Portrait Session

I am personally drawn to black and white portraits.

1. Simple Light Setup

Since everyday life already throws you a heavy load of distractions and difficulties, I always encourage photographers to keep their projects as simple (but meaningful) as possible.

No matter how you choose to light your portrait subject, I recommend you do it as simply as possible. The point is to put all your focus on the person you’re photographing, not on equipment.

I either use natural light (a window and a reflector), or a one light setup inspired by Zack Arias.

Window Light

The benefit to natural light is that there are no flashes of light or large umbrellas to make the person feel as though they are at a high-pressure professional photo session. Your subject’s imagination is filled with the photo shoots they’ve seen on TV and you should relieve that pressure for them.

Natural light studio setup - 4 Tips for Helping People Feel Comfortable During Their Portrait Session

This is my natural light setup.

Window light portrait - 4 Tips for Helping People Feel Comfortable During Their Portrait Session

This is a portrait taken with that window light studio setup.

Using natural light and a silent shutter with a mirrorless camera allows the photography part to be as invisible as possible.

One Speedlight

My one light setup includes a speedlight with a 60-inch umbrella and a reflector.

One Light Setup - 4 Tips for Helping People Feel Comfortable During Their Portrait Session

This is my one light setup. It’s one speedlight with a 60-inch umbrella.

One light portrait - 4 Tips for Helping People Feel Comfortable During Their Portrait Session

This photo was taken with that one light setup.

Once set up, you should forget about your gear (the window, speedlight, and the camera) and focus 100% on your subject.

2. How to Focus

This isn’t about your camera, but focusing on your subject in order to make the best portraits possible.

If you are at all self-conscious as a photographer, it is absolutely critical that you do not focus on yourself.

Perhaps you’re nervous because of a lack of confidence, or because you’re worried they’ll hate their photos. Forget all that and just focus on your subject.

Small talk

“A portrait is not made in the camera but on either side of it.” — Edward Steichen

Female head shot - 4 Tips for Helping People Feel Comfortable During Their Portrait Session

You can use small talk to distract the subject from their own nervousness and self-consciousness in front of the camera. Talk about their business, their kids, or the last trip they went on. Anything that will distract them from being camera shy.

Warm up

Feel free to warm up with some “test shots,” even if you don’t really need them. Have your subject sit in front of the camera for a few shots where you’re doing nothing but “testing the light.”

Direct them a little bit, but nothing too serious. I sometimes transition into the real photos by saying something funny like, “Okay the light is perfect, now let me see a cheesy smile.” It can often lead to some laughter and the first candid photo.

Female headshot, laughing - 4 Tips for Helping People Feel Comfortable During Their Portrait Session

Candid portraits are the most joyful part of a portrait session for me. You don’t have to be a comedian to make people laugh. Just connect over something in your life and laughter will eventually flow.

Male headshot with suit. 4 Tips for Helping People Feel Comfortable During Their Portrait Session

I’ll often try to match the expression with the clothes my subject is wearing. I think a softer expression is more suitable for formal wear. But I’ll try everything at the moment and decide what looks best later.

Candid portraits

“There is one thing the photograph must contain, the humanity of the moment.” — Robert Frank

Yes, even a professional headshot session should include some informal candid photos. Candids are real, and even if you’re after a posed photo, candids are the path to discovering who they are when their guard is down.

Female headshot laughing - 4 Tips for Helping People Feel Comfortable During Their Portrait Session

When people can laugh together there begins to be a comfortable connection.

Female headshot - 4 Tips for Helping People Feel Comfortable During Their Portrait Session

We often laugh because of the tension created by a joke. But even real-life discomfort or tension can lead to the eventual release through laughter.

3. Finding Soul

“Look and think before opening the shutter. The heart and mind are the true lens of the camera.” — Yousuf Karsh

I don’t care whether I’m photographing real estate agents, future lawyers, high school grads, or “mompreneurs.” I treat everybody like an executive, valedictorian, or royalty during their portrait session.

We’re all much deeper than our occupation, even though it may be a deep expression of who we are. Fill your sessions with lightheartedness and true human connection. When you look through your photos later, you should be able to see the moment that your subject finally became relaxed.

Once relaxed, you’ll find the “real” person that was trapped below the surface of fake smiles and self-consciousness.

It may take you 10 minutes or more to get there, but it is the point in the session that you can move through your creative vision with your subject. You can show them how to squinch (Peter Hurley’s famous technique with the eyes), strike more advanced poses, or move in for close-ups.

Female headshot - 4 Tips for Helping People Feel Comfortable During Their Portrait Session

Once I know I have made the portrait that the subject needs, I move on and try other things. I love this very soft expression and the way that her hair creates a frame around her. This won’t likely appear on her business card, but I think it’s a wonderful portrait.

4. Completely Candid

“It’s one thing to make a picture of what a person looks like, it’s another thing to make a portrait of who they are.” — Paul Caponigro

Being inspired by photojournalism and the idea of capturing truly raw, candid, spontaneous photos, I decided to try a portrait session with no posing. All there would be was conversation and pictures.

Here are some of the results, which I love.

Close up female headshot - 4 Tips for Helping People Feel Comfortable During Their Portrait Session

This photo is all about the eyes, and whatever is going through her mind makes me want to laugh!

Female soft light headshot - 4 Tips for Helping People Feel Comfortable During Their Portrait Session

A completely candid photo portrait session means taking a lot of photos. Some of them looked posed, but it was a matter of quickly noticing something that looked right and capturing it before the moment passed.

Window light headshot - 4 Tips for Helping People Feel Comfortable During Their Portrait Session

I used a window as a natural light source. There were moments of silence during our conversation when she just looked out the window. Those were wonderful chances.

Portrait of a mother and her son - 4 Tips for Helping People Feel Comfortable During Their Portrait Session

Leave room for surprises in your portrait sessions. You may find yourself thinking, “Did this client dare to bring their kids to a portrait session?” True, they’ll tear your studio to pieces and distract her from her professional portrait session. But along with a little chaos comes life and surprisingly human moments. In the middle of it all, her son came up to be nursed. Maybe this is what Robert Frank meant about the “humanity of the moment.”

Mother hugging son portrait - 4 Tips for Helping People Feel Comfortable During Their Portrait Session

The portrait session was supposed to have been for her. But who she is on her own isn’t who she is completely. We’re all much deeper than ourselves and are who we are partly because of the people around us.

Portrait of a mom nursing her baby. 4 Tips for Helping People Feel Comfortable During Their Portrait Session

Perhaps you know your subject has reached their maximum level of comfort when they can nurse their baby even while the camera is still clicking. I’m thrilled to photograph people one on one and make portraits that they’ll use as authors or business people. But I’m even more thrilled when those portraits become intensely human moments.

 Get Comfy

The next time you greet a nervous portrait client, remember that the experience has been hyped up in their mind. Distract them from their discomfort with small talk, warm them up with “no pressure” test photos, and make laughter a part of your session.

Include the candid photos when you deliver their photos. Even if they don’t use them for business purposes, they may be the photos they (and you) love most.

I’d love to hear what else you do to help people get comfortable in front of your camera. Let me know in the comments below.

The post 4 Tips for Helping People Feel Comfortable During Their Portrait Session appeared first on Digital Photography School.


Digital Photography School

 
Comments Off on 4 Tips for Helping People Feel Comfortable During Their Portrait Session

Posted in Photography


5 Tips for Location Scouting Before a Photo Session

20 Jul

Maybe by a show of virtual hands, how many of us have ever been in a situation where we have gone to a location for a photoshoot only to find out that something unexpected like a marathon, construction or worse demolition, is going on that prevents you from using the space as you intended? And I am being very serious in the demolition example!

One of my favorite local parks went through a complete revamp a couple of years ago and for months the only thing I could see was demolition equipment all around. The dirt paths that I loved so much had all gone and tar biking paths took their place!

5 Tips for Location Scouting Before a Photo Session

The dirt path with the cover of trees in the background was one of my favorite spots in this local park. The light would filter through the trees and the dirt path would act as a natural reflector and bounce golden light back to my subjects! – now this whole area is a parking lot that leads up to the trees!

I am a natural light outdoor photographer for the most part. Hence, I rely on outdoor locations for 75% of my photoshoots including the weddings I photograph. More often than not, my clients, the bride and groom, look to me for suggestions on natural outdoor locations for their bridal portraits and family formals. Even my lifestyle family photo shoot clients love suggestions on the best locations for beautiful family photos especially in the fall when the leaves all change colors. To that end, I am always on the look out for clean, beautiful and unique outdoor locations for my photoshoots.

Here are a few tips on how to scout and find the perfect location for your next photo shoot.

#1 Know your clients

Every client is different and every photoshoot is unique. It behooves us photographers to really get to know our clients so we can tailor the photo shoot to fit their personality. This not only ensures that they will have a good time but also that they will be more relaxed and happy during their photoshoot. This means you will get pictures that they are bound to love and hence recommend you to all their friends and family. It’s a win-win for everyone.

For my wedding clients, I have a formal questionnaire that they fill out to describe their style and that of their wedding. This helps me plan out locations and poses that will reflect their style and personality. For my family photos, I have a conversation with the family to see what type of photos they gravitate towards. Do they want to have fun outside in a park? Or do they want to hang out at home with each other? The family photo session is tailored around their needs.

5 Tips for Location Scouting Before a Photo Session

My lovely clients wanted a location in nature among the trees. She told me her outfit choices ahead of time so I chose this park with a small waterfall. It seemed to fit their personality and the theme of the shoot ‘The quiet before the storm” quite well.

5 Tips for Location Scouting Before a Photo Session

This session, on the other hand, took place at my client’s home. During our consultation, she mentioned that she wanted to use her 2.5-acre backyard for photos. I knew the green of the grass and the trees would add a lot of color cast to my subjects so I recommended neutral colored clothing. We also waited until the sun passed behind some clouds to take some of these shots to prevent too much color cast on their faces.

#2 – Scout at different times of the day

When I look at potential locations for my photo shoots, I always try and visit the place at multiple times during the day. This gives me an idea of the lighting at different times. Does the location get direct sunlight or is it shaded and hence gets only directional light? Is it a busy street and with potentially lots of people that might be walking around and getting in my shots? What are the traffic patterns to get to the location? All these little details are really important for me to be able to plan my day and photoshoot so that I can get the best possible pictures in the time I have at the location with my clients.

Tip: If you cannot get to a location ahead of time, use Google maps and sunset/sunrise times to figure out where the sun will be at the time of day you are photographing. This will help you be a little prepared when you get to your location.

5 Tips for Location Scouting Before a Photo Session

For a bridal editorial shoot at a beautiful historic location, I scouted the location a few days ahead of time and realized that the area where I wanted to photograph was full sun at 2:00pm (on the left)). So I knew that if I moved the photo shoot to the morning, this area would be in the shade and be evenly lit. Sure enough, the light was gorgeous for my editorial photo shoot! Had I not scouted the location, I would have been scrambling to find the right spot in the afternoon.

#3 Pay attention to details

One of the biggest problems that most photographers face is related to light. Not all light is equal and photographing in different lighting conditions will lead to different results.

Early morning light is generally soft and subtle. The afternoon light is often harsh, especially if you place your subject in full sun. Evening light tends to be more warm and golden hue. Post-sunset light is blue. You can photograph in each of these lighting conditions provided you know how to position, pose, and light your subject in each of instance.

Quality of light matters

When scouting a location, pay attention to details around the quality of light at different times of the day. Another thing to keep in mind is color casts from surrounding objects. This is quite prominent around trees, colorful buildings and graffiti walls. Try and find natural reflectors (eg. a white wall) that will bounce light back onto your subjects or use reflectors that do the same thing and balance off the color cast. You can always fix it in post-processing if all else fails.

5 Tips for Location Scouting Before a Photo Session

A location in historic prairie preserve is a photographer’s favorite in my town. But I find that photographing inside the front patio adds a color cast from the yellow ceilings and directional light (photo on right). Yes, in a pinch I will take the shot and fix it in post-processing. But I prefer to either photograph my clients sitting at the edge of the patio on the steps where they are still in the shade of the patio arch but don’t have any color cast.

Karthika Gupta Memorable Jaunts DPS Article Importance of Location Scouting For a Photoshoot-06

So instead of dealing with the color cast from the porch, I took my client outside along the dirt path by the house and photographed her there. The concrete and the dirt path acted as natural yet neutral reflectors and bounced soft white light back onto her face, eliminating any color casts.

#4 – Tap into other resources

I belong to several photographer groups online and offline and we constantly share tips/tricks and location ideas amongst the groups. These groups exist to help each other out and everyone is open and welcoming. If you are photographing in an area that you are not familiar with, try finding a local photographer group for that region and ask around. Be friendly and genuine in your requests, and you may find some unique and off-the-beaten-path locations from the locals in the area.

#5 – Take a road trip

I love road trips! It is the best way to explore new areas and scout potential photography locations that will suit you and your specific needs. I generally take my family along so it is a fun-for-all experience. In a pinch, my kids will also act as models helping me test the light and background ahead of my client photo shoots.

A few years back I had a high school senior’s photo session and her mom wanted to find a unique spot where we could see the fall colors. I drove around my area for a few hours but was not finding anything that I really liked. I stopped by a local farm to pick up some fresh fruits and realized that the farm had everything I was seeking for my photo shoot. So I walked up to the owner and got permission to photograph there the next day. The senior’s mom got the photos she wanted and I found a unique location for my fall photos.

5 Tips for Location Scouting Before a Photo Session

The red of the trees does add a little color cast to my subject’s face but she really wanted the backdrop of the fall colors.

What are your tips to find the perfect location for your photos?

The post 5 Tips for Location Scouting Before a Photo Session by Karthika Gupta appeared first on Digital Photography School.


Digital Photography School

 
Comments Off on 5 Tips for Location Scouting Before a Photo Session

Posted in Photography


How to Plan a Successful Sunset Portrait Session

02 May

In this article you will get some solid tips for planning and executing a sunset portrait session. Learn how to take the images that you and your subjects will love.

Planning sunset portrait session 01

Plan ahead for a successful sunset portrait

Many photographers feel overwhelmed when they start photographing portraits, professionally or for fun.

Where should I shoot? How should I pose people? What lens should I use? What settings should I be using? When should I move them to/from a great spot? What should I say to get great emotion?

A plan will give you confidence and help alleviate some of the immediate pressure of decision making. It’s not restrictive because often the best shots are unplanned, but rather something to give you confidence and a direction to fall back on when you aren’t feeling inspired.

Here is our rough plan for all of our sunset shoots, whether it be an engagement, part of a wedding, family portrait, maternity, or outdoor newborn session. Our sunset portrait sessions are always planned approximately one hour before sunset.

This plan’s purpose is twofold – it not only helps you have more confidence and direction, but will also help you make the most of your location and sunset lighting.

Planning sunset portrait session 04

STEP ONE: ARRIVE EARLY TO SCOUT

Plan to arrive at least 20-30 minutes early to scout a new location. You never know what amazing little lane or spot may be just around the corner, so it’s worth taking some extra time to explore. It’s also nice to arrive before your client so that you can make them feel welcome upon their arrival.

STEP TWO: ASSESS THE LOCATION

Start to assess the location by asking the following questions:

Where are some nice shady spots to begin? Shady spots are perfect to start off with while the sun is still bright and harsh.

What is the highest point at the location? If you are at a hilly location, this is where you will be able to capture the final moments of sunset and make the most of the golden light.

Where is the most impressive spot for sunset? This is where you want to end up – so it should be last on your route.

With these questions answered, you can very roughly map out a planned route. This means you’ll always have a direction to head and will be able to lead the clients confidently around the location.

Planning sunset portrait session 07

STEP THREE: SHOOT FOR THE BEST LIGHT

To make the absolute best of the sunset lighting, you can follow the same sort of pattern every shoot (in this order):

  1. Shade shots
  2. Filtered Light shots
  3. Silhouette shots
  4. Sunset shots
  5. Dusk shots

Let’s put your plan into practice, assuming sunset is 6 pm:

4:40 pm – Arrive, scout the area and assess the location.

5:00 pm – Your client arrives and is briefed about the fun time they are going to have!

5:10 pm – SHADE SHOOTING

Get straight into shooting in the nice shady spot you already found. We love to knock out some more formal shots like these here, as usually these are photos clients love, but don’t want big on the walls. Save the more impressive lighting for landscape shots.

Planning sunset portrait session 02

Planning sunset portrait session 03

5:25 pm – FILTERED LIGHT SHOOTING

You can then move on to any shots where you want the sun in the photo, but you can filter the light through the trees. (Read our past article on four different ways to filter sun flare in this article: How to Control Sun Flare in Your Photos). Photos such as these:

Planning sunset portrait session 05

Planning sunset portrait session 06

5:40 pm – SILHOUETTE SHOOTING

Roughly 10-20 minutes before sunset is usually the best time to try a silhouette. As silhouettes require you to shoot at a very low angle, you won’t be able to match up the height of the sun with the clients’ feet if you wait any longer. You can read our article on capturing silhouettes here.

Planning sunset portrait session 08

Planning sunset portrait session 09

Planning sunset portrait session 10

5:50 pm – SUNSET SHOOTING

At this point, the light will be golden – so you want to be at your final spot. Do all you can to make this most of the beautiful soft light – you can even position your clients out in the open if you know how to control sunflare. We try to take a variety of photos at this time – a landscape, waist-up, and close-ups. That way, we can create wall art sets that all have the same sunset colouring.

Planning sunset portrait session 11

Planning sunset portrait session 12

Planning sunset portrait session 13

6:00 pm – DUSK SHOOTING

The sun has set, but you still have a glorious window of 15 minutes where you can capture the gorgeous colours of dusk. Because the sun is no longer emitting harsh light, you can now use the whole other side of the location! Areas that were previously too lit by the sun can now be shot in the soft light of dusk.

Planning sunset portrait session 14

Planning sunset portrait session 15

Planning sunset portrait session 16

6:10 pm – DONE!

This plan is designed to give you some structure if you are lacking confidence and direction for your sunset portrait photo sessions. It will help you get the most from the sunlight, and effectively manage your time during the shoot. Of course, being photographers, we’re all for creativity, so breaking the rules is great once you have more confidence.

Please share your sunset portrait images in the comments below.

Planning sunset portrait session 17

The post How to Plan a Successful Sunset Portrait Session by Alana Orth appeared first on Digital Photography School.


Digital Photography School

 
Comments Off on How to Plan a Successful Sunset Portrait Session

Posted in Photography