RSS
 

Posts Tagged ‘SemiAutomatic’

How to Move from Auto to Manual Modes Using Camera Semi-Automatic Modes

06 Feb

The post How to Move from Auto to Manual Modes Using Camera Semi-Automatic Modes appeared first on Digital Photography School. It was authored by Ana Mireles.

Are you tired of the auto mode of your camera but don’t feel confident enough to go full manual? In this tutorial, you’ll learn how exposure works and how to use your camera semi-automatic modes to make the transition easy and smooth.

William Bayreuther


The Exposure Triangle

The first thing you need to know is that you control exposure by three factors: aperture, shutter speed, and ISO. They are all interconnected, meaning when you move one of them, you have to adjust the others to compensate. This connection is known as the exposure triangle.

So, if the correct exposure can be achieved with many different values, as long as it’s compensated, what’s the problem with letting the camera choose those values? Because they control more than just the exposure. Let me show you with a visual explanation. Below is the same photo shot with different settings:

This photo was shot in Auto Mode meaning the camera decided what shutter speed to use, what aperture and what ISO. I had no control whatsoever about which would take priority:

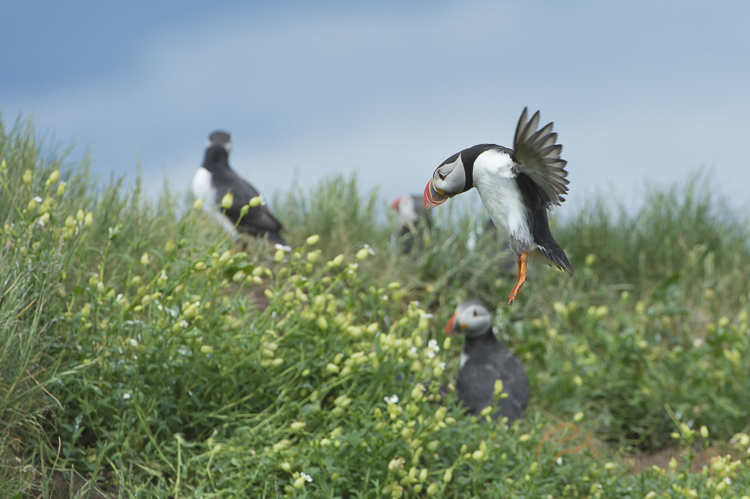
Here I decided the shutter speed so I could control how long the light would come into the camera, which translates into freezing moving objects or capturing movement. The aperture and ISO were then automatically decided by the camera.

Left image – SHUTTER PRIORITY:1/250, f/3.5, ISO 800 = Freeze Subject. Right image – SHUTTER PRIORITY:1/30, f/10, ISO 800 = Motion Blur.

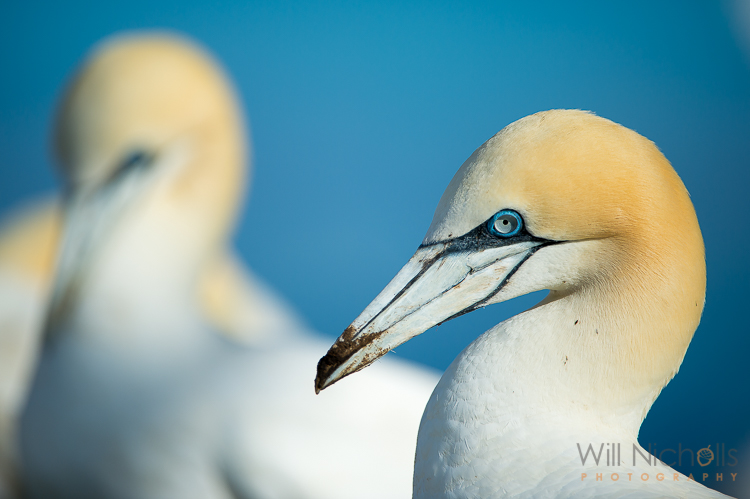
In this case, I chose the aperture because this controls how much of your photo is in focus. This technique is called Depth of Field. Shutter speed and ISO were then automatically decided by the camera.

Left image – APERTURE PRIORITY:1/200, f/2.8, ISO 800 = Shallow depth of field. Right image – APERTURE PRIORITY:1/6, f/22, ISO 800 = Deep depth of field.

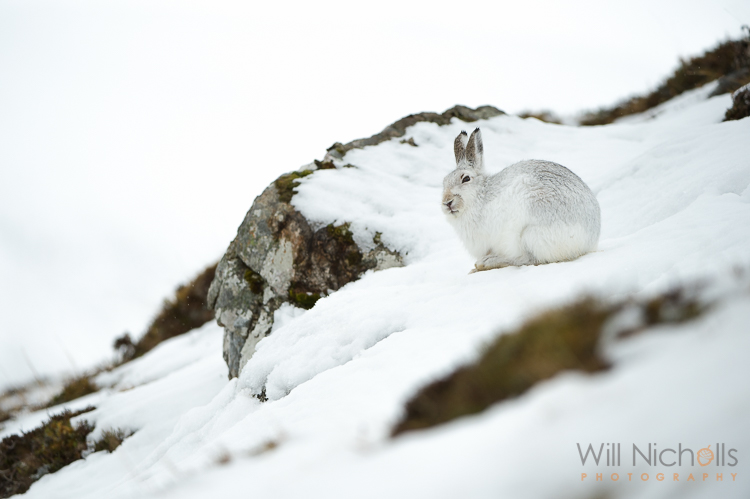
In this last one, I changed the ISO, and the result gets reflected in the amount of noise you find in your photo, especially in the darkest areas. I’ll show you a zoomed in comparison for you.

Left image – AUTO ISO:1/200, f/16, ISO 6400 = Much noise. Right image – AUTO ISO:30, f/2.8, ISO 200 = No noise.

Now, if you go from Auto Mode into Manual Mode, suddenly you’re changing from no control into full control, and that can be difficult at first. Especially if you’re shooting scenes where you might lose the perfect shot if you take a long time figuring out the correct exposure. Fortunately, camera manufacturers know this, and they’ve created different semi-automatic programs for you to choose from.

Aperture Priority Mode

Aperture Priority Mode is marked as A or Av. It’s the same thing, but it changes according to the brand. With this setting, you can manually choose your ISO and your aperture number, which leaves the shutter speed up to the camera. This setting is handy when you are photographing still objects or landscapes. Just make sure to use a tripod if there’s low light because with a low shutter speed even your own movement can be recorded. However, if you don’t have a tripod, you can increase the ISO. But be mindful that the higher the number, the more noise you’ll have. Why would you want to control the aperture? Because it controls the depth of field.

Left image – APERTURE PRIORITY:1/60, f/2.8, ISO 200. Right image – APERTURE PRIORITY:1/50, f/22, ISO 4000.

The smaller the aperture number is, the wider the plane of focus becomes. However, most lenses have a sweet spot around f/8 that gives you the sharpest image of all. You can use this Aperture Priority Mode to experiment with your lens.

Shutter Speed Priority Mode

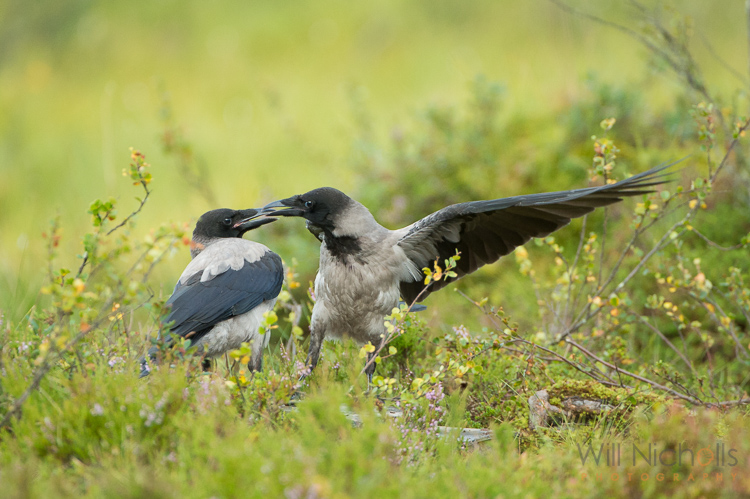
Shutter Speed Priority Mode can be marked as S or Tv, again depending on the brand. You control the shutter speed and ISO, while the camera takes care of the aperture. You’ll want to use this setting when there’s movement involved in your shoot, such as sports photography. In this case, you need a high-speed value if you want to freeze the moving object, or a slower speed if you want the moving object to leave a trail. Another situation in which this is useful is night or dark scenes, and you don’t have a tripod. In this case, you need to make sure to put your shutter speed fast enough so that the natural movement of your body doesn’t register with the camera.

Top image – SHUTTER PRIORITY:1/8, f/2.8, ISO 200. Lower image – SHUTTER PRIORITY:1/30, f/2.8, ISO 800.

Auto ISO

Finally, automatize the third factor of the exposure triangle, Auto ISO. There’s no program mode on the mode dial as such, but there is a setting. While being in Manual Mode, adjust your ISO sensitivity to AUTO so that you can decide the other two factors (aperture and shutter speed). However, you can also pair Auto ISO with any of the semi-automatic modes listed before, and then you only have to think about one factor. What you have to consider in this case is that the higher the ISO, the more noise you’ll have in your photo.

*A couple of extra considerations:

-Always check the results as your camera may misread the scene, especially in scenes with high contrast.

-When using the priority modes, the settings values start to flash if you’re out of reach (if it doesn’t have a way to compensate what you’re adjusting.) In this case, depending on what your shoot requires, you may have to solve it by adding a flash, raising the ISO or adding a filter.

Have fun using the semi-automated modes and remember to switch to full manual once you feel more comfortable with the entire exposure triangle. That way you’ll always keep learning!

The post How to Move from Auto to Manual Modes Using Camera Semi-Automatic Modes appeared first on Digital Photography School. It was authored by Ana Mireles.


Digital Photography School

 
Comments Off on How to Move from Auto to Manual Modes Using Camera Semi-Automatic Modes

Posted in Photography


Why Semi-automatic Mode is the Best Choice for Wildlife Photography

14 Aug

There is a mindset that a lot of photographers seem to have around anything but manual mode is cheating. Not only does this frustrate me as a statement, but it’s just bad advice, that hinders the photographic progress of others. I would argue that there’s no cheating in photography, and that using your camera in fully manual modes actually makes it harder to achieve the photo you’re looking for – so let’s take a look at why semi-automatic modes are a good choice for wildlife photography.

Tracking this puffin in flight, I'd never be able to change the settings quick enough if I was in full manual mode.

Tracking this puffin in flight, I’d never be able to change the settings quick enough if I was in full manual mode.

Now I’d never recommend anyone use full automatic modes. They are a pain in the backside, to be frank. The camera focuses wherever it sees fit, seemingly changing its mind on a day to day basis. The setting are often wrong, since you have no bearing over how the exposure triangle is balanced (other than a little bit of exposure compensation). For wildlife photographers, this is a pretty poor choice of mode.

However, what I do recommend is that you run with a semi-automatic mode. Because with wildlife, everything is so unpredictable that there is little chance you can spin the wheels, and react to changing conditions fast enough in manual mode. Picture this: you’re photographing an eagle swooping down from the sky to catch a fish from the water. It’s moving through many different ambient light conditions, from looking up towards the sky, all the way down to the water, and away again. You can’t accurately change the settings quick enough.

semi-automatic modes

Northern Gannet

So what can you do? Use a semi-automatic mode. It’s definitely not cheating, and is a choice favoured by almost all wildlife photographers in the industry. It’s not to say that we can’t run the camera in manual mode – and that’s definitely something you should learn to do – but rather that there is no point putting such a simple task as adjusting the shutter speed, in the way of you composing a stunning wildlife image.

Choosing a semi-automatic mode

There are a few choices you can make here when it comes to semi-auto modes. Let’s take a look at the best choices.

Aperture Priority Mode

This is my personal favourite. Aperture priority mode allows you to set the aperture you require, leaving the camera to adjust the shutter speed automatically, in order to balance the exposure. You can increase your ISO should the light become a limiting factor, letting the camera increase the shutter speed as a result. But you still have total control really, because all you need to do is adjust your exposure compensation to fine-tune the resulting photo.

DSC_2260

Exposure compensation allows you to retain control and properly expose a photo, even in a partly automatic mode.

A wide aperture often favours wildlife photographs, as it allows for a nice, soft bokeh, that isolates the subject from the background. This is what often gives a wildlife image a sense of quality, although I am a big believer in breaking the rules and actually including the background in your shots. For this reason, aperture priority often makes sense as you are able to control the setting that can make or break a photo.

Shutter Priority Mode

This is definitely not the mode you want to be in, if you’re going to involved in wildlife photography. Chances are you’ll be setting your shutter speed high – and probably too high at that. Wildlife is most active at dawn and dusk, and while you may find it relatively easy to see, it is surprising how little light is available to the camera, especially if you’re shooting with a lens slower than f/2.8. With a shutter speed dialed down, the camera only has so far it can go in increasing the aperture before the photo starts to become underexposed. Conversely, with aperture priority mode there is no real limit to how fast or slow the shutter speed can go – the worst thing that may happen is you get a blurred image, although this can sometimes come off artistically.

Note: Stay away from shutter priority mode for wildlife photography!

Two hooded crows engaged in a scrap.

Two hooded crows engaged in a scrap.

Manual Mode with Auto ISO

This is a popular choice amongst wildlife photographers too, although I have yet to use it myself. By sticking the camera into manual mode, but leaving the ISO set to automatic, you retain control over both aperture and shutter speed, allowing the camera to adjust the ISO to balance the exposure. Personally, I like to have control over the ISO, as I feel this can ruin an image.

This mode does allow you to ensure you have the desired aperture and shutter speed for proper effect, but consequently you may not notice that your ISO is increasing quickly as light conditions drop. The worst thing to find is a photo that looks fantastic on your camera’s LCD, until you return to your studio and find it is peppered with digital noise.

Even so, getting into a good habit of checking the ISO settings periodically during a shoot, will mean this is no longer a problem. With experience you’ll learn what the limits tend to be for certain ambient conditions, before the ISO gets ramped up.

semi-automatic modes

You still have full control in semi-automatic modes, allowing you to achieve more unusual images.

You also still retain the ability to use exposure compensation while ISO is set to auto. This allows you to fine-tune the exposure, just like with aperture and shutter priority modes.

So which mode should you use?

Now we’ve looked at three different semi-automatic modes you’re probably wondering which you should go for? Well, you know what I think about shutter priority mode. Other than that, it’s essentially up to you. If you want to be entirely confident in your aperture and shutter speed, then opt for manual with auto ISO.

Thanks to a semi-automatic mode, I was ready for action when this woolly monkey surprised me in the Amazon rainforest. Manually mode would have rendered my efforts useless in such a fleeting moment.

Thanks to a semi-automatic mode, I was ready for action when this woolly monkey surprised me in the Amazon rainforest. Manual mode would have rendered my efforts useless in such a fleeting moment.

If, like me, you find the prospect of an unacceptably high ISO speed creeping up on you, then stick to aperture priority mode. Professionals use both modes, and either can result in great success with the right photographer behind it. It’s just getting used to the mode of choice, and playing to the relative advantages each one brings with it.

You’re going to feel the limitations of either mode as light drops, but I always say that a slightly blurred image (or risk of one from a slow shutter speed) is better than a photo rendered unusable thanks to digital noise.

googletag.cmd.push(function() {
tablet_slots.push( googletag.defineSlot( “/1005424/_dPSv4_tab-all-article-bottom_(300×250)”, [300, 250], “pb-ad-78623” ).addService( googletag.pubads() ) ); } );

googletag.cmd.push(function() {
mobile_slots.push( googletag.defineSlot( “/1005424/_dPSv4_mob-all-article-bottom_(300×250)”, [300, 250], “pb-ad-78158” ).addService( googletag.pubads() ) ); } );

The post Why Semi-automatic Mode is the Best Choice for Wildlife Photography by Will Nicholls appeared first on Digital Photography School.


Digital Photography School

 
Comments Off on Why Semi-automatic Mode is the Best Choice for Wildlife Photography

Posted in Photography


Akiwi semi-automatic tagging site suggests image keywords

10 Nov

Students at HTW Berlin University of Applied Sciences have created a new semi-automatic tagging website called akiwi in cooperation with Fotolia and Pixolution. Users simply upload an image, which is compared to a library of more than 22 million photos, and keywords are suggested based on similar images and input from the user. Read more

Articles: Digital Photography Review (dpreview.com)

 
Comments Off on Akiwi semi-automatic tagging site suggests image keywords

Posted in Uncategorized


The Minecraft Files – #233 – Semi-Automatic Pineapple Farm (HD)

03 Nov

Leave a LIKE & FAV to show your support 🙂 Subscribe to become a Swifter! bit.ly Official ChimneySwift11 T-Shirt & Apparel Store www.redbubble.com SUPER SPELLBOUND CAVES PLAYLIST: bit.ly My Twitter: twitter.com My Facebook: facebook.com 2nd Channel: www.youtube.com Website: www.ChimneySwift11.com My DeviantArt chimneyswift11.deviantart.com *Send me some good art!* The Rise of EnderSwift Ep. 14 “The Pearl” – bit.ly World Download: bit.ly Texture Pack: bit.ly Show Page: bit.ly Music: c418.bandcamp.com Tropicraft Mod: bit.ly Minecraft Files Intro Animation: www.youtube.com Vocals: www.youtube.com Guitar: www.youtube.com Thumbnail Logo by: boshirexman123.deviantart.com Outro Music: www.youtube.com

 
Comments Off on The Minecraft Files – #233 – Semi-Automatic Pineapple Farm (HD)

Posted in Animation Videos