RSS
 

Posts Tagged ‘Self’

Weekly Photography Challenge – Self Portrait

12 Sep

The post Weekly Photography Challenge – Self Portrait appeared first on Digital Photography School. It was authored by Sime.

It’s been a long time since we pushed a ‘Self Portrait’ challenge in your general direction! These can be very confronting for many reasons, how we see ourselves, confidence, or something as simple as the lack of a tripod (You can put your tripod on a bench, or the floor, or in a tree!) but it’d be great to get as many of us to try this out as possible – it’s not about anything other than learning to photograph people, and who is your most readily available subject? YOU.

One of our resources on self portraiture

I’m one of those crazy (or not?) people that have participated in a 365, got the t-shirt, made a small book, it was fun! But it really goes a long way to showing you a lot about portrait photography, lighting (I used a desk lamp for the longest time!) and how your gear works… But we don’t want to see 365 of these, just one.

Simon Pollock Self Portrait

A self-portrait doesn’t need to JUST be of you, you can disguise yourself behind a coffee machine, or across a workbench. But set your scene and think about your lighting, and see what you come up with! Here are a couple of helpful resources on portraits for you to have a look at, grab a cup of tea and your camera and get started!
Self Portrait Tips & Examples and A Mirror Self-Portrait challenge from a few years back!

Simon Pollock Self Portrait

A little shout out to ‘Moncat‘ who submitted this photograph to last week’s ‘Spring’ challenge!

Weekly Photography Challenge – Self Portrait

Great! Where do I upload my photos?

Simply upload your shot into the comments field (look for the little camera icon in the Disqus comments section) and they’ll get embedded for us all to see. Or, if you’d prefer, upload them to your favourite photo-sharing site and leave the link to them.

Weekly Photography Challenge – Looking Up

Share in the dPS Facebook Group

You can also share your images in the dPS Facebook group as the challenge is posted there each week as well.

If you tag your photos on Flickr, Instagram, Twitter or other sites – tag them as #DPSSelfPortrait to help others find them. Linking back to this page might also help others know what you’re doing so that they can share in the fun.

Follow us on Instagram?

The post Weekly Photography Challenge – Self Portrait appeared first on Digital Photography School. It was authored by Sime.


Digital Photography School

 
Comments Off on Weekly Photography Challenge – Self Portrait

Posted in Photography


How to Shoot a Self Portrait to Support your Brand Identity

30 Aug

The post How to Shoot a Self Portrait to Support your Brand Identity appeared first on Digital Photography School. It was authored by Charlie Moss.

Personal branding has become more and more important over the last few years. As photographers, we often carefully curate the image that we present to the world, even as amateurs. Our brand and image are usually closely linked to the kind of photographs we shoot.

Photographers will often carefully curate the look of their website. They’ll spend hours contemplating the images and text that they use to express their photographic hopes and dreams. They want their websites and online portfolios to give people an insight into their creative working process and the kind of photos that they intend to take.

How-to-Shoot-a-Self-Portrait-to-Support-your-Brand-Identity

I often start with natural light when shooting self-portraits. It’s how I prefer to shoot most of the time!

And yet, I often look at the ‘about me’ page on a photographers website, portfolio page, or social media, and front and center is a photograph of them taken by someone else. The image on your “about me” page, or your portfolio profile picture, is a great piece of marketing real estate. You can use this space to express yourself and tell a story. So why let someone else take that photo?

So what’s the solution? Shoot a self portrait! Put your own work in that valuable space, and express yourself and your photographic style clearly and coherently – even on your “about me” page.

What is a brand identity?

Now more than ever, photographers are the face of their brand. Almost everywhere you go on the internet, you’ll have the option to upload an ‘avatar’ image that represents you in digital format. This avatar image is a space to tell the world something about you and your photography.

A brand identity is the way you present your work to the world. It’s the visual and textual elements that differentiate you from other people in the minds of your audience. Since photographers are usually the main (and often only) person in the creative process when it comes to image-making, they are often the embodiment of their brand.

Image: A single large beauty dish for this portrait reflects one of my usual lighting styles.

A single large beauty dish for this portrait reflects one of my usual lighting styles.

Generally, for a photographer, their brand identity will be heavily tied up with their style in which they usually work. A photographer who creates beautiful fine art portraits inspired by the Old Masters may have a brand identity that embodies timelessness, heritage, and classical values. On the other hand, someone creating cutting edge contemporary portraits may embody qualities such as innovation, diversity, and courage.

The key is to get your values into the images you’re shooting. You’ll probably find it happens naturally once you’ve been shooting a while and have developed a style. However, creating a self-portrait for your “about me” page and avatars is a good time to brainstorm what your work is about. The challenge is to see if you can capture these ideas in a single shot.

Got a fear of shooting self-portraits?

Self-portraits are hard. They’re hard technically, creatively, and emotionally. It’s no surprise really that photographers often shy away from self-portraiture. Portraits can be hard enough to get right when you’re shooting other people, let alone when you’re photographing yourself!

How-to-Shoot-a-Self-Portrait-to-Support-your-Brand-Identity

Experimental tricks like this shallow depth of field combined with fairy lights can add an artistic side to a self-portrait while covering up any perceived flaws in the way we look.

That aside, a self-portrait or two is also a great way to improve your skills, try new things, and make sure that the entirety of your personal branding works together coherently. You are likely to be your most patient subject, and if you set aside a day to create your self-portrait then you have time to get it exactly right – even if you’re trying something new.

Go light on the retouching. When you’re working on a self-portrait in post-processing, it’s easy to be super-critical of everything you don’t like about yourself. Stick to your usual workflow and only retouch as much as you normally would.

Start simple

If all else fails, start like you would any other portrait. If you’d usually start with a simple two-light headshot in your studio, then give that a go first. Review your images and then make adjustments. Once you’ve found a shot that works then try something a bit different. You might find a completely new direction for your work!

Image: This self-portrait was shot with natural light against a grey paper background. Often simple...

This self-portrait was shot with natural light against a grey paper background. Often simple pictures can be really effective!

It’s easy to think about self-portraits in the context of a studio, but don’t limit yourself! Take your camera outside into natural light if that’s a place you enjoy taking portraits usually. You can even buy stands to hold reflectors so that you can take advantage of all the usual light modifiers that you’d use.

But if you’re going out on location to shoot self-portraits, consider taking someone with you. It’s easy to get distracted while shooting self-portraits out and about. Having an extra pair of eyes can help protect you and your equipment. You can also get your assistant to hold the reflector or a flashgun too!

And if you want to really show off what you do, consider an environmental portrait in your own studio and surrounded by your tools of the photographic trade.

Think about the context

Where is your self-portrait going to be placed? Will it be on your own website or will it be on social media?

In traditional media, you usually want to have the subject facing the viewer or looking towards the center of the book or magazine. There’s a reason for this. It helps direct the readers focus back to the content rather than off the edge of the page into the wider world. It’s a simple trick to help keep the readers’ attention where you want it.

Image: The “about me” page on my portfolio website showing my self-portrait in relation...

The “about me” page on my portfolio website showing my self-portrait in relation to the text block.

You can apply this to your website too. Think about the placement of your self-portrait on the page of your website. Does it fit better on the left or the right of the “about me” text? When you’re working out your poses, keep this in mind and make sure you’re either looking straight ahead or towards the text block.

It’s possible to break the rules, of course, but make sure you shoot both options if you’re going to be adventurous!

What about the practicalities of self-portraits?

If your camera connects to a phone app that can assist with exposure and focusing, then make sure you take full advantage of that. Self-portraits used to be a lengthy process that involved sitting my mannequin on a chair in my studio to get the focus and lighting right.

Now I can see everything in real-time, including exposure and focus adjustments, using the Fujifilm Cam Remote app that connects to my camera.

Image: Using the Fujifilm Cam Remote app to set up the lighting and exposure, and the resulting self...

Using the Fujifilm Cam Remote app to set up the lighting and exposure, and the resulting self-portrait a few minutes later. (Lighting was a single large beauty dish).

If you don’t have a camera that connects to your phone, get yourself a remote trigger and consider shooting tethered to a laptop so that you can see the images as you trigger the camera. You can look at software such as Lightroom or Capture One Pro for tethering. That way you can make small adjustments to your pose and settings as you go along to make sure that you really nail everything and create your best work.

Using a good tripod will also save you some frustration when you’re shooting portraits. Balancing the camera on a stack of books can work (believe me, I’ve done it before), but a tripod will help you compose a shot more effectively. Don’t forget to try unusual compositions too. Raising the camera up above your eye level can be very flattering while shooting from down low can create a powerful pose.

How-to-Shoot-a-Self-Portrait-to-Support-your-Brand-Identity

A profile self-portrait recalls the kinds of images that you often see historically on coins and medals. Don’t be afraid to experiment with unconventional poses when photographing yourself.

Keep your standards high

And lastly, be as thorough and rigorous with your standards as you would when shooting a portrait of anyone else.

Make the effort to do your hair, press your clothes, and get a great expression. Just because it’s a self-portrait it doesn’t mean it’s an excuse to be lazy and “fix it in post.”

I’d love to see how you get on with shooting your self-portrait to support your brand and expressing your values through them. Drop a comment below with the results, and don’t forget to update your avatar with your new portrait!


How-to-Shoot-a-Self-Portrait-to-Support-your-Brand-Identity

The post How to Shoot a Self Portrait to Support your Brand Identity appeared first on Digital Photography School. It was authored by Charlie Moss.


Digital Photography School

 
Comments Off on How to Shoot a Self Portrait to Support your Brand Identity

Posted in Photography


How to Know if Your Photo is Good or Not – The Art of Self Image Critique

15 Mar

One of the common issues that amateur or newbie photographers often have is deciding which photos to include in their portfolio or website. The great thing about photography is that it is subjective, and every person will have different ways of assessing if they like a photo or not, doing an image critique.

You should always aim to photograph what you enjoy with your own unique style and vision. But sometimes, especially if you are looking to earn money from your images, you will need to consider other people’s tastes and needs. Here is a quick guide on how to know if your photo is good or not.

How to Know if Your Photo is Good or Not - The Art of Self Image Critique

1. Is it Technically Good?

Different photographers have different workflows, but often for most, it starts with actually checking if a photo is technically good because let’s be honest, a blurred or poorly focused photo isn’t going to make it into your portfolio.

So a good first step when evaluating a particular photo is checking that it is sharp with good tonal range, good contrast between shadows and highlights and focused correctly on the right part of the scene.

Of course, there might be occasions when a photo might be slightly off in terms of focus, for example, but it still works and if you want to showcase it in your portfolio that’s fine. But the majority of the time, a blurred photo can be discounted.

How to Know if Your Photo is Good or Not - The Art of Self Image Critique

Image not sharp and not completely in focus.

2. Is it Missing Something?

Sometimes you can look at one of your photos and you can tell that it is missing something.

It might be a quiet cobbled street that just looks empty without a person in the shot. Or it might be a landscape image that’s missing a point of interest. These are the type of photos that you look at and think, “I wish I had done this” or “if only there was something or someone in that spot”.

If you think that about one of your images, then it’s probably missing that certain something that would make it a great photo.

How to Know if Your Photo is Good or Not - The Art of Self Image Critique

Whilst it’s a nice landscape and sunrise, there is no point of interest. Would have improved with a boat in the lake or similar point of interest.

3. The Stop Test

One of my favorite tests when I edit a collection of my photos is what I call the “stop test”. As you flick through one of your galleries of photos – whether that’s on your smartphone, your computer, or even your camera, there are usually some photos that make you stop.

Sometimes it might just be a split second longer than usual, but you did still pause briefly from continuing to flick through the set to look at that one photo.

This is usually a good sign that there is clearly something about that particular shot that grabs your attention. If it can grab your attention it might grab the attention of others as well.

How to Know if Your Photo is Good or Not - The Art of Self Image Critique

4. Are You Being Sentimental?

One thing that is really easy to do, as a photographer, is to get sentimental about a photo. Regardless of how detached you want to make yourself when editing your photos, there will still be that part of you that remembers what it took to capture the shot.

It might have been that you spent hours getting to a location or maybe it reminds you of a memorable encounter with someone interesting. No photographer is a robot and we are all guilty of being sentimental about some of our images.

So try to ask yourself, if you are unsure about an image, if it is actually a good photo, or you are just being sentimental.

How to Know if Your Photo is Good or Not - The Art of Self Image Critique

Even though it took a while to get up to this point to be able to capture the photo, the lack of light means the image doesn’t work.

 5. Is it Different Than What Already Exists?

In this era of digital photography, often the biggest challenge is capturing unique photos. But that is also a good test of whether you should include a photo in your portfolio or not.

It could be that the photo you have taken is perfectly fine, but if you have managed to capture something unique that doesn’t already exist, then it might be a great photo. The key is to search what already exists and see if your image is better or different than others.

How to Know if Your Photo is Good or Not - The Art of Self Image Critique

6. Can You See it Being Used?

Even if you are not planning on selling your photos, trying to envision them being used in real life scenarios can often be a good guide as to how good they are.

When you look at your image can you imagine it being used on the cover of a magazine or to illustrate something for a feature or story? Can you see it on a billboard, flyer, or even a postcard? If you can imagine your photo in those scenarios then it’s probably a good photo and you should include it in your portfolio.

How to Know if Your Photo is Good or Not - The Art of Self Image Critique

7. Go With Your Gut

For all of the different ways that you can critique or evaluate a photo, sometimes you just have to go with your gut feeling.

Sometimes you could be proved right and that image that you were unsure of, leads to work or even ends up making sales. Always remind yourself that photography is subjective and at some point, we all look at a photo we’ve taken and just have a good feeling about it.

How to Know if Your Photo is Good or Not - The Art of Self Image Critique

Taken at a local market in London, it was a last minute decision to submit this image to my agency. Since then it has made over $ 350 worth of sales.

Conclusion

These are just some of the ways that can help you assess if a photo is good or not. But remember that these are not hard and fast rules that you should adhere to all the time.

Not every photo will fall into every point above and that doesn’t make it a bad photo. Use these points as a guide when you are really stuck on an image and if in doubt go with your gut feeling.

Read more on image critique tips in these dPS articles:

  • How to Critique Your Images Objectively: Ask for Other Points of View
  • Constructive Photography Critique: How to Give and Receive with Grace
  • 4 Ways Self-Critique Can Improve Your Photography

The post How to Know if Your Photo is Good or Not – The Art of Self Image Critique by Kav Dadfar appeared first on Digital Photography School.


Digital Photography School

 
Comments Off on How to Know if Your Photo is Good or Not – The Art of Self Image Critique

Posted in Photography


Valentine Gifts Your Sweetie (or Self) Will Love

02 Feb

Express your love of photography and of that special someone in your life!

Even if that someone is yourself, we’ve got you covered.

From phoneography gizmos for that special someone who loves their phone almost as much as they love you, to lens shaped shot glasses for all those “just friends” out there.

Find your relationship status below and the perfect gifts to accompany it.

(…)
Read the rest of Valentine Gifts Your Sweetie (or Self) Will Love (0 words)


© laurel for Photojojo, 2016. |
Permalink |
No comment |
Add to
del.icio.us

Post tags:


Photojojo

 
Comments Off on Valentine Gifts Your Sweetie (or Self) Will Love

Posted in Equipment


Self portrait: Olympus PEN E-PL7 First Impressions Review

28 Aug

At first glance the Olympus PEN E-PL7 looks like yet another compact, selfie-friendly mirrorless camera — but looks can be deceiving. The innards of the camera come largely from the excellent OM-D E-M10, and Olympus touts the E-PL7’s autofocus system as its best yet. For all the details on the latest PEN, check out our First Impressions Review.

Articles: Digital Photography Review (dpreview.com)

 
Comments Off on Self portrait: Olympus PEN E-PL7 First Impressions Review

Posted in Uncategorized


How to use the Art of Self Reflection to Make Better Photos

06 Aug

Have you ever “hit the wall” with your photography? Do you sometimes get the feeling your images aren’t improving as much, or as fast as you’d like? Have you ever thought about what you must do to cross that chasm from being a pretty good photographer to being a WOW photographer?
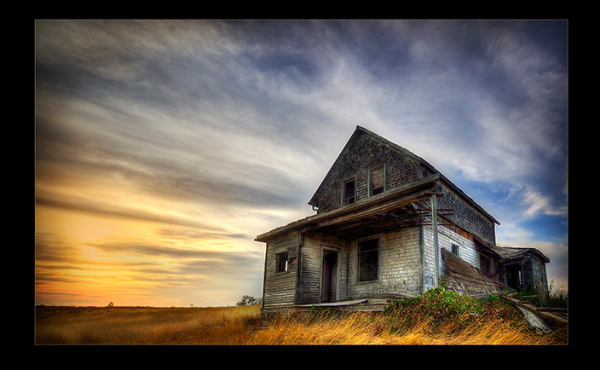
Is this a WOW shot? How do you know?

Is this a WOW shot or not? How do you know?

ONE SKILL FITS ALL

There’s really only one ability that you need to develop to help you advance your talents, and it will serve you well in any creative pursuit, not just your photography. This skill is reflection.

No, not THAT kind of reflection (although reflections in images can be captivating), I’m talking about introspective reflection, the thoughtful self-analysis of your work.

  • What worked well in the image?
  • What is not working?
  • Was your vision translated accurately into your photo, did you achieve your goals?
  • Is it a WOW shot?
  • How can you tell?
  • How can you be objective about your own photos?

Reflection is so important for improvement. Yet many aspiring and seasoned photographers alike, go out and shoot, come back to their computers and fire up Lightroom (or another image processor) and start editing. They edit until they have an image they like; save it, print it and share it. And that’s the end of the workflow. I’d like to encourage you to add reflection to your photographic post-processing methods.
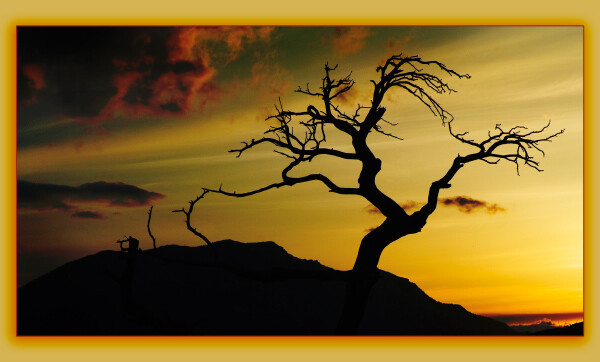
dinosuar_sunset

IT’S CRITICAL TO BE CRITICAL

It’s not easy to be critical about one’s own creative work. Our hearts and souls are embodied in every shot we take and it can be difficult, if not almost impossible to be objective. But I have a handy and easy checklist, to help you critique your images. It’s fast, almost painless, and it works. You can use this checklist as well if your friends or other photographers ask you to critique their images. You can be objective, you can back up your opinion using the checklists items, it  works for almost all genres of photography and it will help you fully absorb new information, and rapidly advance your photography skills.

PPOCMB_comp1-copy

BEING OBJECTIVE – THE CHECKLIST*

This checklist will help you evaluate your images, and those of other photographers in an objective way. It’s the prefect way to reflect on your shots and absorb those things you did well. It also allows you to understand why an image isn’t working.

Ask yourself:

Does the image have:

1) Impact

This is the immediate feeling the viewer gets when they first see the image. Compelling images evoke laughter, sadness, anger, pride, wonder or another intense emotion.

Reality Check: When you show someone your image, what is their immediate reaction? Do they instinctively take a breath, or inhale quickly? This is a good sign your image has made an impact.

2) Storytelling

Storytelling refers to the ability of the image to evoke imagination. One beautiful thing about art is that each viewer might collect his own message or read her own story in an image.

Reality Check: WHAT is the story your image tells? This need not be complicated but perhaps as simple as one sentence. For the image Prairie Sundown, the old house above, is there a story in that photo for you?

3) Creativity

This is the original, fresh, and outward expression of the imagination of the maker by using the photographic techniques to convey an idea, message, or thought. Does your image display something in a very creative and original way?

Reality Check: Have you ever seen an image similar to yours? Why is yours different and better than the similar one?

dps_DSC4830W

4) Style

Style is defined in a number of ways. It might be a specific genre or simply recognizable as the characteristics of how a specific artist applies light to a subject.  It can impact an image in a positive manner when the subject matter and the style are appropriate for each other, or it can have a negative effect when they are at odds.

Does your image show a sense of YOUR style? Describe your style? Look at the works of famous photographers and see if you can identify the elements that make up their style.

Reality Check: What have you done in taking this image, or in post-processing it, that makes it uniquely YOUR image? Do you use a certain angle a lot of the time so people start to recognize certain images as being yours? This uniqueness is your style.

5) Composition

Composition is important to the design of an image, bringing all of the visual elements together in concert to express the purpose of the image. Proper composition holds the viewer in the image and prompts the viewer to look where the creator intends. Effective composition can be pleasing or disturbing, depending on the intent of the image maker.

Does your image have leading lines that help the viewer come into your image? Is there enough contrast, pattern, white space, repetition, or tension to keep them looking once they are there?

Reality Check: Have you used any rules of composition in this image (Rule of Thirds, Golden Triangle, etc.). Which one and why did you use this particular one? Have you purposely broken any rules? Which ones and why did you break them?

6) Center of Interest

This is the point, or points, on the image where the photographer wants the viewer to stop as they view the image. There can be primary and secondary centers of interest. Occasionally there will be no specific center of interest and the entire scene collectively serves as the center of interest.

Reality Check: There is a clear and obvious centre of interest with no distracting elements; or the viewer can tell you in a second what is the point of interest. If they can’t then you must score yourself lower.

7) Lighting (the use and control of light)

Light is how dimension, shape and roundness are defined in an image. Whether the light applied to an image is man-made or natural, proper use of lighting should enhance an image.

Have you used unique, or unusual lighting angles? Is the image taken at a time when the sun is NOT directly overhead or using flat light?

Reality Check: The light is a key component of this image. If the light were different would the image be better or worse? If this image had been shot at sunset it would be a better image? If you could do better, score yourself lower for use of lighting.

8) Subject Matter

The subject is appropriate to the story being told in an image.

Reality Check: Is your subject realistic for the story it is telling? Is the symbolism evident? Is there continuity between the logic of the elements you’ve used in your image?
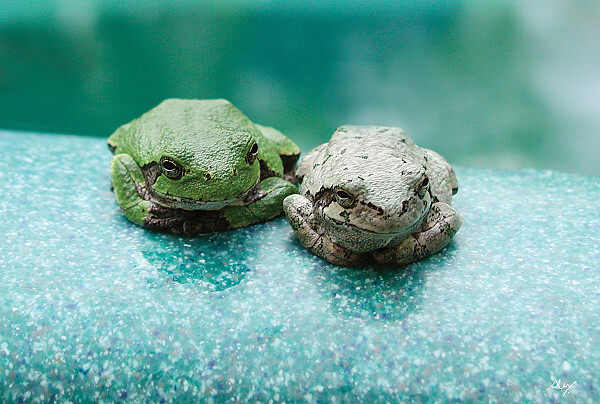
frogbuddiesW

9) Color Balance

Color balance supplies harmony to an image.  An image in which the tones work together effectively supporting the image, can enhance its emotional appeal. Color balance is not always harmonious and can be used to evoke diverse feelings for effect.

Reality Check: The tones and colors you have used in your image are coherent with the type of emotion you want to convey. Dark, shadowy, purples, blues, deep reds etc., evoke a different emotion than whites, pastels and semi-saturate tones. Is your use of color consistent with your story?

10) Technical Excellence

This is quality of the image itself as it is presented for viewing. Sharpness, noise, pixelation, exposure, printing, mounting, and correct color all speak to the qualities of the physical print.

Reality Check: The extreme reality check for this is viewing your image at 100% in Photoshop or other image editor. Is your subject sharp at 100%? If so then it’s sharp. Is there visible noise in the shadows? If yes your exposure is off. Are there “blown-out highlights”, if yes your exposure is off. Check your histogram for clipping. If your images are of people, are the skin tones pleasing and natural?

11) Technique

Technique is the approach used to create the image. Printing, lighting, posing, paper selection (if printed) and other elements are part of the technique applied to an image.

Reality Check: Is everything you have done to create and make this image technically good?

CRITIQUE ME

To help you get the hang of this, I would be delighted to accept your objective assessment of the images in this article, using the points from checklist of course.

Here are a couple more for for you to reflect on, and critique:

cave-Ver-3-small

What’s working in this image? What’s not?
Does this image have impact, storytelling, anything else? WOW shot or not?

Does this image have impact, storytelling, anything else? WOW shot or not?

Once you have the “feel” for this, give the Reflection Checklist a try on some of your images, and feel free to share your self assessment with us here. You can post your checklist results and images in the comments section.

 You can even download a PDF of the Photographer’s Reflection Checklist with a scoring guide here.

* This checklist has been adapted from the PPA’s 12 Elements of  Merit Image and used with their permission.

The post How to use the Art of Self Reflection to Make Better Photos by Alex Morrison appeared first on Digital Photography School.


Digital Photography School

 
Comments Off on How to use the Art of Self Reflection to Make Better Photos

Posted in Photography


Five Self Assignments That Teach You To See

15 Aug

In my 20 years in photography, I’ve seen a lot of different assignments teachers have given their students.  Most I have heard, or been given myself from time to time, have centered around learning to use the camera.  Things like “Use Only One Exposure Mode”, “Use Only One Lens”, or “Use One Aperture Setting”.  The most interesting to me, from a photographic standpoint, involved learning to see.  The reason I say this is that simple camera use can be easily learned. It’s basic math when you boil it down.  But learning to see creatively, learning to compose a shot, takes much more than learning buttons, dials, and controls.  These self assignments force you to look around you, to really see what you’re shooting and try to make interesting images.

1. Pick A Color

Pick up your camera and choose a color for the day. Go out and make images with that color as a dominant element in the image. Find as many different ways as possible to do this.

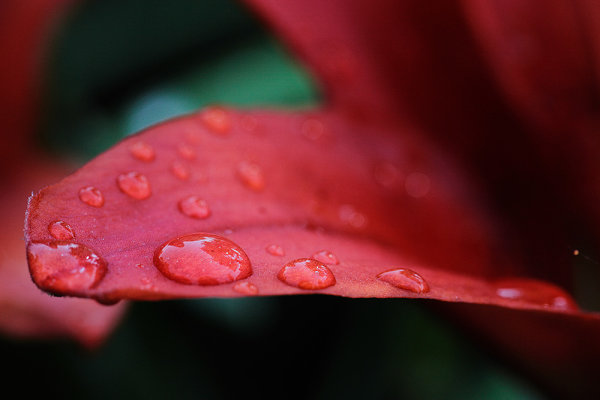
This image I went in search of things red. 1/320, f/7.1, ISO 1000. EOS 5D Mark II, EF 100mm f/2.8L IS Macro.

This image I went in search of things red. 1/320, f/7.1, ISO 1000. EOS 5D Mark II, EF 100mm f/2.8L IS Macro.


2. Pick A Shape

Choose a shape and create images which use that shape in an interesting way. It could be features in architecture, artwork, or juxtaposition of multiple structures. Squares are relatively easy. Start there, and then search out triangles, circles, or combinations of shape.  Again, look for the most interesting composition you can to highlight that shape in your image.

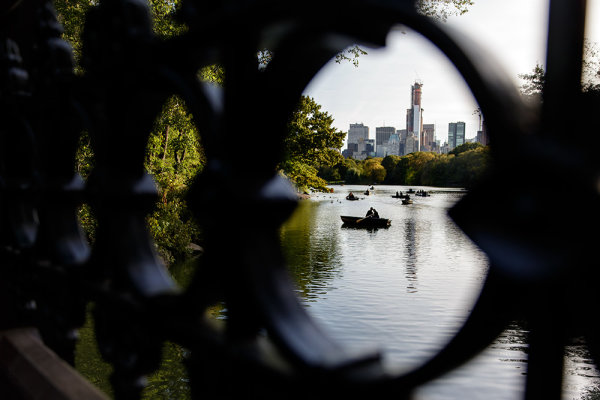
I ventured into Central Park in New York City without a real game plan in mind. I found a sundial and started shooting that, and then went in search of more circles. Found this ironwork and used it to frame a pair of lovers in a rowboat. 1/160. f/2.8, ISO 100. EOS 5D Mark III, EF 24-70 f/2.8L II at 24mm.

I ventured into Central Park in New York City without a real game plan in mind. I found a sundial and started shooting that, and then went in search of more circles. Found this ironwork and used it to frame a pair of lovers in a rowboat. 1/160. f/2.8, ISO 100. EOS 5D Mark III, EF 24-70 f/2.8L II at 24mm.

3. Shoot Something Different

If you’re like me, you probably have one type of subject you gravitate to more than any other.  But it’s easy to get too comfortable, and miss opportunities to make great images, when you’re only looking for one thing.  Once in a while it’s a good idea to change things up and shoot something different.  If you’re a sports shooter, try shooting a still life.  If you’re a landscape artist, try shooting macro.  These types of exercises forces you out of your comfort zone and helps you learn to see in a new way.

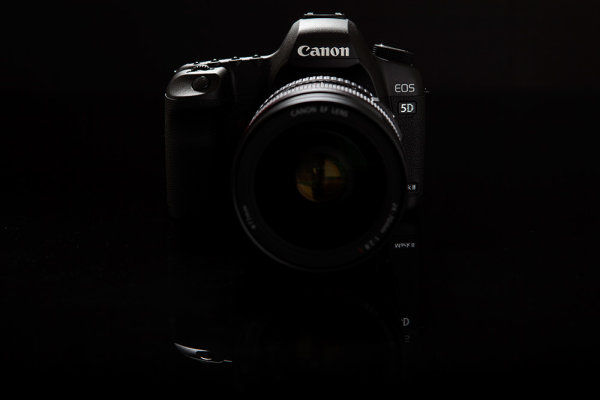
Normally I'm a landscape guy first. But I decided I wanted to try a still life of one of the tools of my trade.  I used some black plexi as the table, and black matte board for the background. I used a single speedlite in a softbox above and behind the subject. EOS 5D Mark II with EF 24-70 f/2.8L II. 1/200, f/8, ISO 100.

Normally I’m a landscape guy first. But I decided I wanted to try a still life of one of the tools of my trade. I used some black plexi as the table, and black matte board for the background. I used a single speedlite in a softbox above and behind the subject. EOS 5D Mark II with EF 24-70 f/2.8L II. 1/200, f/8, ISO 100.

4. Shoot Reflections

Reflections are a powerful element in photography, but I’m almost embarrassed to admit how long it took me to actually start SEEING them.  I had a “lightbulb moment” one day when shooting with a friend of mine, and since then, I am constantly looking for reflections as an element in my work, whether it be portraits, landscapes, or still lifes.

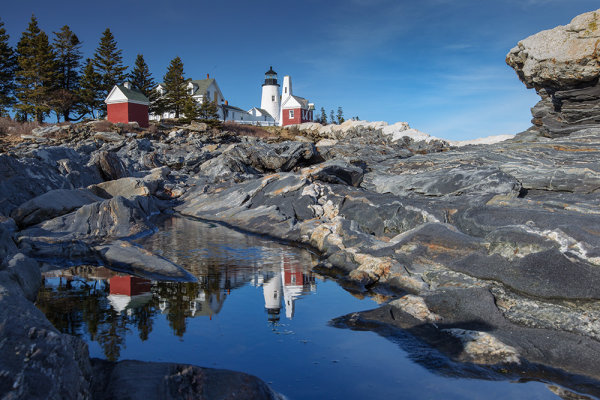
This is probably the most photographed puddle in New England, but it's great for producing a reflection of Pemaquid Point Lighthouse. Reflections add interest to images so always be on the lookout. EOS-1D Mark IV, EF 16-35mm f/2.8L II. ISO 100, 1/20, f/16.

This is probably the most photographed puddle in New England, but it’s great for producing a reflection of Pemaquid Point Lighthouse. Reflections add interest to images so always be on the lookout. EOS-1D Mark IV, EF 16-35mm f/2.8L II. ISO 100, 1/20, f/16.

5. The 15 Foot Circle

Stand in the center of a room, or wherever you happen to be.  Make photographs only of subjects that happen to be within 15 feet (or 10, or 5) of where you’re standing.  Give yourself a time limit. Exhaust all possibilities. Get as many images as you can using only that area before moving on.  This kind of exercise forces you to really look at things and work to compose interesting images.

I was standing in a dining room at the holidays last year and decided to try the 15 foot circle. This was a line of candles on a fireplace mantle. EOS-1D X with EF 70-200 f/2.8L IS II. ISO 400, 1/250, f/2.8.

I was standing in a dining room at the holidays last year and decided to try the 15 foot circle. This was a line of candles on a fireplace mantle. EOS-1D X with EF 70-200 f/2.8L IS II. ISO 400, 1/250, f/2.8.

For beginners, these assignments are great for learning to see. For more experienced photographers, these are great ways to stay fresh, to restart the creative eye when you’re feeling blocked, or to just do something different.  What other self assignments have you tried to refresh your photographic vision?

Post originally from: Digital Photography Tips.

Check out our more Photography Tips at Photography Tips for Beginners, Portrait Photography Tips and Wedding Photography Tips.

Five Self Assignments That Teach You To See


Digital Photography School

 
Comments Off on Five Self Assignments That Teach You To See

Posted in Photography


18 Stunning Self Portraits

12 May

This post is by Anna Gay – creator of our eBook – The Art of Self Portraiture.

by Ali Uher

For thousands of years, artists have used self-portraiture as a means of perfecting their technique. From ancient cavemen, to the classical masters, to Salvador Dali in the 20th century, artists have looked to self-portraiture not only to discover new aspects of their artform, but also as a means of self-discovery.

Today, photographers world-wide are stepping out from behind the camera, and placing themselves in front of the lens. Thanks to photo-sharing websites that display thousands of beautiful and unique self-portraits, many photographers are finding that not only is self-portraiture a wonderful, exhiliarating way to practice composition and lighting – amongst many other skills which are valuable to portrait photographers – it is an honest expression of self, and a way to share their experiences with other photographers.

Each of the photographers whose work is featured in this post has their own unique way of expressing themselves in front of the camera. Some use natural light, while others use studio lighting. Some take a more natural approach to post-processing, whereas others take a more conceptual route. Whether you consider yourself an amatuer, or a full-blown artistic self-portrait photographer, these self-portraits are sure to inspire you to step in front of the lens.

by Lila Limited

by Kelly Kardos

by Brian Day

by Boy_Wonder

by Miguel da Silva

by Bunny Spice

by ICT_Photo

by Zack Ahern

by Misha

by Viva Deva

by Steve Pontbriand

by *iNiNa*

by Zee Anna!

by KatB Photography

by FaceNorth

by sparkleplenty_fotos

by Lucem

Interested in improving your Self Portrait Photography? Check out Anna Gay’s eBook – The Art of Self Portraiture.

Post originally from: Digital Photography Tips.

Check out our more Photography Tips at Photography Tips for Beginners, Portrait Photography Tips and Wedding Photography Tips.

18 Stunning Self Portraits


Digital Photography School

 
Comments Off on 18 Stunning Self Portraits

Posted in Photography


Self Snuggling: 7 Super-Cozy Full Body-Wrapping Seats

19 Mar

[ By WebUrbanist in Design & Furniture & Decor. ]

snuggle seating

Forget your chair-and-blank combination – with these ultra-warm wonders of domestic design, curling up with a good book has never seemed more enticing.

built in sweater chair

Speaking of chairs and blankets, Aga Brzostek (well familiar with winter cold in Poland) starts off this series with her combined vision of both items in one. Sitters and sleepers alike can curl themselves up into a warm integrated sweater. It also  comes complete with a pocket for storing your favorite book or magazine.

sleeping bag chair hybrid

An even more relaxing experience beckons for those prone to falling asleep in their favorite chair. Les M presents a hybrid sleeping bag seat that zips up around you. Its white inside shows up bright when open, and exterior turns it dark when (en)closed.

nest rest hanging hut

When things warm up a bit, but sitting fully outside still is not an appealing option, consider the suspended Nest Rest. This wicker-woven retreat can be hung from trees or set on the ground – either way, it comes with a comfortable pad and can be stuffed with pillows for snuggling (oneself or otherwise).

Next Page:
Self Snuggling 7 Super Cozy Full Body Wrapping Seats

Share on Facebook


[ By WebUrbanist in Design & Furniture & Decor. ]

[ WebUrbanist | Archives | Galleries | Privacy | TOS ]


WebUrbanist

 
Comments Off on Self Snuggling: 7 Super-Cozy Full Body-Wrapping Seats

Posted in Creativity


11 February, 2013 – Self Publishing a Photography Book

11 Feb

Lives there a photographer who doesn’t want to see a book of their work in print? Likely not. But publishers are reticent, book markets are contracting, and the costs of self-publishing are high. So how to finance such a venture?

Find out in Peter Cox‘s new essay Self-Publishing a Landscape Photography Book.

Win a New 128GB iPad with Retina Display
Including all Major Luminous Landscape Videos
– Pre-Installed –

Find Out More  


The Luminous Landscape – What’s New

 
Comments Off on 11 February, 2013 – Self Publishing a Photography Book

Posted in News