RSS
 

Posts Tagged ‘Selecting’

Tips for Selecting What Gear to Take Along for Travel Photography

28 Apr

Travel photography is exciting. There’s always this sense of finding new and exotic places to capture. Of course, if you work hard you can find new and exotic places to photograph right near home. But there’s something about travel that truly sparks the imagination.  It’s really about capturing the look and feel of a place that isn’t your home.

Tips for Packing for Travel Photography

I used a 70-200mm lens here to compress the space between the sheep and the village beyond.

The thing is that it’s difficult to travel with camera gear, especially large DSLRs and their rather bulky lenses. Then there’s the expense. You could potentially be traveling with some very expensive equipment.

If you’re a hobbyist photographer, the loss of that gear could be devastating. I’ve known several individuals who have lost their gear while out traveling and have found that their insurance didn’t cover the whole loss. For these hobbyists, it was a blow from which they couldn’t recover.

So while travel photography with a DSLR can be exciting, it can also be stressful. That’s why every professional travel photographer will tell you all about the importance of packing wisely when traveling with your DSLR.

So without further ado let’s take a look at some helpful tips for traveling the world with your DSLR.

Be economical in choosing lenses

Weight is a factor if you don’t want to pay the fees for extra baggage. So when packing for travel photography, it’s best to economize your lenses. Instead of taking every lens you own, consider packing ones that give you a full range of focal lengths without doubling up.

If you have a 70-200mm lens why pack the 85 mm prime? Instead, a wise decision may be to take your zoom lenses. Choose a wide angle like the Canon 16-35mm. Granted the lens is heavy. The 70-200mm isn’t a lightweight either, but if you are only going to take two lenses then it’s not such a big issue.

Tips for Packing for Travel Photography - truck in a driveway

Shot with a wide angle lens. This image was taken from the rooftop of a hotel.

Choose lightweight lenses

Prime lenses aren’t a bad idea for travel either. They usually have a wider aperture which is great for low light, and if you’re visiting a dark castle somewhere in Europe that can be really useful. Primes are much lighter than their zoom counterparts, and with a little practice, you can get used to shooting with just prime lenses.

It takes a little more thought than zooming in and out but you can capture amazing images with prime lenses. If you’re going to pack a general set of lenses for travel your bag might include the following, a 24mm for wide angles, the 50mm for general shots and an 85 mm for a little more range.

Tips for Packing for Travel Photography - gnarly tree branches

I had to use a zoom lens for this shot. The tree just wasn’t accessible from up close and I wouldn’t have been able to shoot at this level if I were closer. The telephoto was essential for this shot.

Choose lenses for a purpose

The lenses you choose to take with you might also be determined by the type of photography you’re planning on doing while you’re traveling. Perhaps you’re going on safari to Kenya. If that’s the case, you’re going to be focused on capturing wildlife, so your longer telephoto lens is going to be essential, and you might choose to take something in the 100-400mm range. I would argue that adding a nice light 50mm prime to your bag might be all that you need in that situation.

I recently visited the city of Havana, Cuba. I knew I wasn’t going to be going outside of the city and that my focus was on shooting architecture and street scenes. So, in that case, I left my telephoto lenses at home. On the busy streets, it would have been difficult to pull out my 100-400mm and shoot comfortably. So I chose to pack a wide-angle lens and my nifty 50mm. That was all I needed within the cramped streets of Havana.

This is in contrast to a trip I took last month to Wales. I was going to shoot both landscapes as well as city scenes, and I was hoping to capture some images of birds as well. So I chose to pack a little more weight. I chose to leave my prime lenses at home and took three zoom lenses; the 16-35mm, the 70-200mm and the 100-400mm.

Tips for Packing for Travel Photography - garbage can in an alley with graffiti

Shot with a prime lens. Graffiti alley in Toronto is a great place to use a mid-range focal length.

Just use your phone

I know a number of travel photographers who challenge themselves to shoot just one trip a year using nothing but their phones. The results are truly beautiful and they love the ease of traveling with just a phone.

Many smartphones have fantastic cameras and can capture huge RAW images. So it’s definitely worth a try. Limit yourself to your phone and see what kinds of images you can capture.

Tips for Packing for Travel Photography - city scene

I took this shot using my phone. It’s 5000 px on the long edge, a large file. I could never have gotten this with the gear I had with me that day.

Embrace the excitement

Travel photography is exciting. Taking your camera to places that are new and different from home can truly raise adrenaline levels. It’s a lot of fun, and I highly recommend you get out there to visit other places and explore with your camera.

Embrace the challenges of packing for the trip as well. It’s part of the excitement. You’ll be challenged to shoot great images with a limited amount of gear. There’s nothing wrong with that. Take the challenge by the horns, pack wisely, and push yourself to try and capture great images of far-off places with just a few simple tools.

Tips for Packing for Travel Photography - forest shot

This would have been impossible to capture without my wide angle lens. We were just too close to the falls for anything mid-range.

The post Tips for Selecting What Gear to Take Along for Travel Photography appeared first on Digital Photography School.


Digital Photography School

 
Comments Off on Tips for Selecting What Gear to Take Along for Travel Photography

Posted in Photography


Tips for Selecting and Doing a Successful Photography Project

19 Jan

If you find yourself stuck in a rut, can’t find anything to shoot, or just need to get shooting – here are some videos to help you select an idea and get started doing a personal photography project.

The importance of doing a photography project

Photographer Matt Day talks about the importance of doing a personal photography project and gives you some ideas and direction to get started in this video.

5 Reasons why you should do a photography project

Adam from First Man Photography has five good reasons why you should start a photography project:

    1. Find direction – break out of a rut.
    2. Improve your photography.
    3. Build a social media following.
    4. Challenge yourself – get out of your comfort zone.
    5. It’s fun!

The most important ASPECT of doing a photography project

In this short video, COOPH founder Ulrich Grill shows you five things you need for a successful photo shoot or project. They follow the acronym A.S.P.E.C.T. – can you guess what they are? If not, go ahead and watch the video now.

  • A – atmosphere
  • S – shadows
  • P – positioning
  • E – energy
  • C – contrast
  • T – timing

Still need some help starting a photography project? Try these dPS articles for more tips.

  • 12 Creative Photography Project Ideas to Get You Motivated
  • How to do a Photography Alphabet Project
  • Tips for Doing a Successful Picture-a-Day Photography Project
  • How to Start and Finish a Photography Project
  • 6 Tips for How to Build a Story and Shoot a Photo Project
  • Tips for Creating a Personal Photography Project

The post Tips for Selecting and Doing a Successful Photography Project by Darlene Hildebrandt appeared first on Digital Photography School.


Digital Photography School

 
Comments Off on Tips for Selecting and Doing a Successful Photography Project

Posted in Photography


Getting Your Priorities Straight – A Guide to Selecting Your Shot Priority

11 Oct

A major goal when starting out in photography is to get off Auto mode and onto the semi-automatic Aperture and Shutter Priority modes. Is it daunting at first? It can be, but I promise that wrestling creative control away from your camera and into your hands is one of the first and greatest joys of digital photography.

I teach people that a deeper reason exists for the name priority mode. The obvious one is you’re prioritizing control of shutter speed or aperture and surrendering control of the other. But also, you can teach yourself to base this decision on your shot priority.

Getting Your Priorities Straight – A Guide to Selecting Your Shot Priority

Flag dancers in Liberty Square – Taipei, Taiwan. Shot priority: Freeze motion. Shutter speed: 1/500th.

This article identifies four major shot priorities: to freeze motion, to imply motion, to create a shallow depth of field, and to create a deep depth of field. The goal is to get you to ask which of these is your priority for your next shot and then to select the appropriate mode and settings to achieve that.

Shutter Priority Mode

Shutter priority mode is marked with an “S” on Nikon and Sony cameras and “Tv” on Canon mode dials. Like your eyelid, the shutter opens and closes to expose the camera sensor to light. Through selecting this mode, you can choose how long it opens.

With Shutter Priority mode, you’re prioritizing shutter speed as the crucial element for the image you want to take. Your camera will then select a corresponding aperture to create a correct exposure. It is the mode to use when your priority is either freezing motion or implying motion.

Getting Your Priorities Straight – A Guide to Selecting Your Shot Priority

Traditional dance performance at Haemi Fortress, South Korea. Priority: Freeze motion. Shutter speed: 1/1000.

Priority #1 – To freeze motion

Much of the time when shooting, you require sharp images in crisp focus. Shutter speed is the most critical factor affecting image sharpness; however, requiring image sharpness isn’t a fully-fledged shot priority. Here, we’re talking about freezing fast motion.

Select this mode to freeze action in sports fast-moving water in landscapes, and other fast motion. For example, a runner could be frozen with a shutter speed of 1/500th of a second, whereas motorsports might require 1/2000th or faster.

Getting Your Priorities Straight – A Guide to Selecting Your Shot Priority

For this image of flag dancers in Taipei’s Liberty Square, I selected a shutter speed of 1/800th to freeze the motion. As well as freezing the dancer, the fast shutter speed also froze the flag and ensured the writing was crisp and legible.

Getting Your Priorities Straight – A Guide to Selecting Your Shot Priority

At the ghats by the River Ganges in Varanasi, India’s holiest city, I saw a procession of ladies heading downstairs and a cow heading up towards them. The animal looked ready to charge at them! I had just been shooting a game of cricket so my camera was already set to 1/1000th in Shutter Priority mode. I began shooting as the cow charged at the last two women before veering away. The cow and the women’s facial expressions were frozen, preserving a fleeting moment.

Priority #2 – To imply motion

Using Shutter Priority mode, implying motion is a beautiful effect that you can easily apply to your images. Everything from slight motion blurs to light trails to dreamy water effects are possible with a variety of moving subjects.

Imagine that you’re shooting handheld street photography and you chance upon a pair of dancing street performers. You decide you want people viewing your images later to be able to get a sense of the action, so choose to imply motion as your shot priority. Because a shutter speed of 1/500th would freeze the performers, you could try 1/250th and work down from there until the desired motion blur is achieved.

Getting Your Priorities Straight – A Guide to Selecting Your Shot Priority

While working as a tour photographer in South Korea, I was tasked with capturing tourists prepare green tea leaves. To imply motion, I took a sample shot at 1/50th and then worked down until I achieved this blur. This image was 0.4 seconds – admittedly pushing the acceptable limits of handheld photography – but thanks to my lens’s image stabilization and steady hands, I ended up with this interesting shot.

Now imagine you’re on the rooftop of a tall building at nighttime and you have a tripod. Because of the added stability a tripod allows, you can open up your shutter for significantly longer. Through selecting the right settings, you can achieve crisp backgrounds, blurred subjects, and light trails that build on top of each other.

Getting Your Priorities Straight – A Guide to Selecting Your Shot Priority

A nighttime cityscape of Seoul’s Han River and Namsan Tower featuring blurred white and red light trails. I used a shutter speed of 15 seconds to allow the light from numerous cars to reach my sensor, accumulating into long streaks of light in the final image. No golden rule exists for the number of seconds, so just enjoy experimenting.

Aperture Priority Mode

Aperture Priority mode is marked with an “A” on Nikon and Sony cameras and “Av” on Canon dials. Like an iris in a human eye, aperture represents the hole that opens to expose the camera sensor to light. Through selecting this mode, you can choose how wide or narrow to open the aperture. The lower the f-number, the wider the hole. Controlling aperture is mainly used to affect what is known as depth of field.

You’ve seen portraits where the subject is in crisp focus but the background is beautifully blurry; this is called a shallow depth of field. Also, you’ve seen fantastic landscapes that are in sharp focus throughout the image from front to back; this is a deep depth of field.

Through selecting Aperture Priority mode, you’re marking aperture as the crucial element for the image you want to take. Your camera will then select a corresponding shutter speed to create a correct exposure. It is the mode to use when your priorities are creating either a deep or shallow depth of field.

Getting Your Priorities Straight – A Guide to Selecting Your Shot Priority

Stall owner at the Mother’s Market in Imphal – Manipur, India. Priority: Shallow depth of field. Aperture selected: f/2.0.

Priority #3 – To create a shallow depth of field

As a travel photographer specializing in portraits, creating a shallow depth of field is often my priority. This allows me to have my photo subject (i.e., a person’s face, and more specifically their eyes) in crisp focus, while the background melts away in a dreamlike blur. To achieve this effect, you want to select a low aperture value.

If you’re shooting with a kit lens, the lowest value available to you might be f/3.5. However, with a fixed focal length lens (prime), this will be lower, making this type of lens perfect for portrait photography. Let’s take a look at the two example images below.

Getting Your Priorities Straight – A Guide to Selecting Your Shot Priority

A Hindu lady showing her devotion during the Ganga Aarti ceremony – Varansi, India. When I’m out meeting people and taking portraits, I make sure my Sigma 35mm 1.4 Art lens is on my camera body. The aperture selected for this shot was f/1.4, ensuring a beautifully blurry background.

Getting Your Priorities Straight – A Guide to Selecting Your Shot Priority

A resident of Houtong Cat Village – Northern Taiwan. Aperture selected: f/2.8. This is a great example of shallow depth of field. The front of the cat’s paws are blurred and so is the back of its body. There is just a thin focal plane in sharp focus. The lower the aperture value selected, the thinner this slice of the focal plane becomes. For this shot, I spot focused on the cat’s left eye, ensuring that this was the sharpest spot of the image.

Priority #4 – To create a deep depth of field

By contrast, a deep depth of field enables front to back sharpness throughout an image, making it the shot priority to select for landscape photos. If the lowest aperture values provide the thinnest focal planes and the blurriest backgrounds, then surely the highest aperture values provide the best landscape settings, right? Wrong. Your lens may be capable of f/22 but please don’t select it.

The highest aperture values can create image distortion. I recommend not going above f/16 for landscape photography with a tripod, and not going above f/11 handheld. A solid choice for handheld landscapes is actually f/8 because it provides a mid to deep depth of field while enabling a lower ISO and faster shutter speed for a sharper image.

Getting Your Priorities Straight – A Guide to Selecting Your Shot Priority

Beautiful Itsukushima Shrine at Miyajima, one of “The Three Views of Japan” – Hiroshima Prefecture. A higher aperture value creates a narrower hole through which light reaches your sensor. A deep depth of field is one of the main effects, which in landscape photos creates front to back sharpness. For this image, I selected an aperture of f/7.1 and spot focused on the pool of water in the foreground.

Getting Your Priorities Straight – A Guide to Selecting Your Shot Priority

On the road to “Zero Point”, the end of the road heading north in the Sikkimese Himalayas, and looking back toward Yumthang Valley – Sikkim, India. This is a simple handheld landscape shot, for which I selected f/8 because my shot priority was a deep depth of field.

Conclusion

Remember these four major shot priorities and put them into practice using the Aperture and Shutter priority modes. Don’t forget to share your work and comments below.

The post Getting Your Priorities Straight – A Guide to Selecting Your Shot Priority by Ben McKechnie appeared first on Digital Photography School.


Digital Photography School

 
Comments Off on Getting Your Priorities Straight – A Guide to Selecting Your Shot Priority

Posted in Photography


The Science of Selecting Photos

06 Nov

By Annie Tao

The business of photography is a complicated matter. I spend hours after each photo shoot culling, processing and sorting the photos to tell the story of the day.

From a recent session of one of my own children, I realized that choosing the final photos can be described as a Venn Diagram! One circle represents images photographers love and the other circle represents images clients love. Some images overlap and some don’t.

To be successful, you want the largest area to be the one that overlaps: images both photographers and clients love. It is important, however, to be aware of what images may fall into the other areas.

Here is an example.

Professional Photographers Venn Diagram by Annie Ta bg

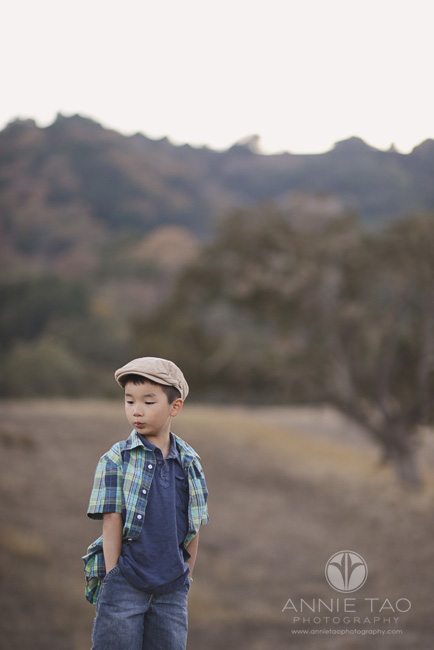
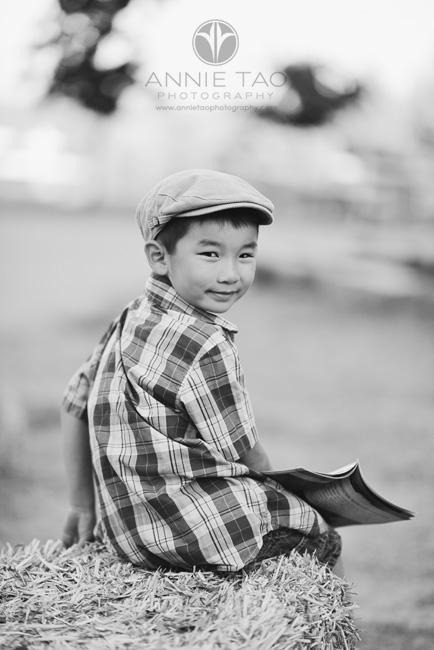
I had a photo shoot of my son just last week. He recently turned 6 years old, so this mini shoot was to capture how he loves reading, loves playing with Legos, and still has hints of having a baby face.

After the shoot, I went through the images as though this was a regular client gallery, but found myself saving a few images that I know would NOT have made it into a client gallery!

That got me thinking.

Are there photos that I’ve left out of a client gallery that should have been in it?

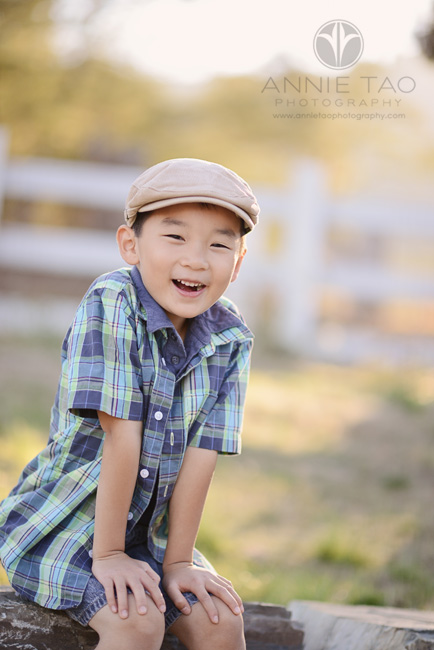
Below are examples of photos from this recent shoot that would make it into a client gallery…

Annie Tao Photography The Science of Selecting Photos article image that would make it into client gallery 2

Annie Tao Photography The Science of Selecting Photos article image that would make it into client gallery 1

Annie Tao Photography The Science of Selecting Photos article image that would make it into client gallery 3

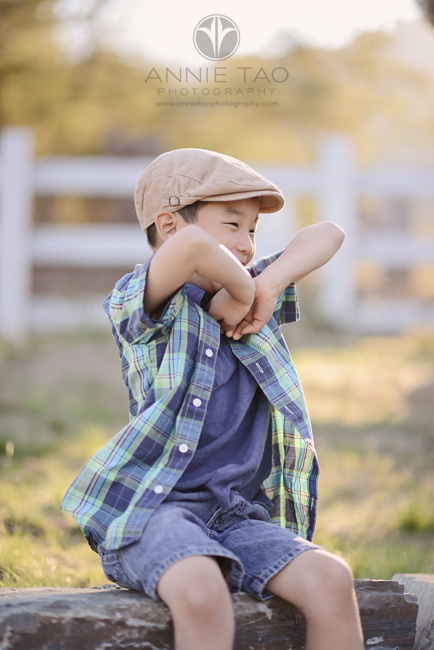
Below are examples of photos that would NOT have made it into a client gallery, but I love…

Annie Tao Photography The Science of Selecting Photos article image that would NOT make it into client gallery 2

Above: he is playing with his hands and arms, which he does when he’s nervous.

Annie Tao Photography The Science of Selecting Photos article image that would NOT make it into client gallery 1

Above: he is chewing gum (I can even see it in his mouth – Oy!), which is his favorite treat.

What does this mean?

Note: I am writing this for Children and Family Photography, but this can apply to any portrait session.

  1. During the session, pay attention to the children’s behavior. What are the little things they do when they’re happy, nervous or excited?
  2. Have an open dialogue with the parents. If they feel comfortable with you, they will share details about what they love or the little quirks that represent their child. It could be something you wouldn’t have guessed.
  3. Remember your client when selecting your final images. Think about what images your clients may like that perhaps didn’t make it into your selection. There may be something you’d want to include in the final images that may bring a tear to their eyes or make them laugh, but isn’t “perfect” in your eyes.

In terms of photo selection, your job as a Photographer is to choose photos that represent your artistic style. You are also a Service Provider whose ultimate goal is to make your clients happy.

Annie Tao is a Professional Lifestyle Photographer in the San Francisco Bay Area who is best known for capturing genuine smiles, emotions and stories of her subjects. You can visit annietaophotography.com for more tips or inspiration and stay connected with her at facebook.com/annietaophotography.

Post originally from: Digital Photography Tips.

Check out our more Photography Tips at Photography Tips for Beginners, Portrait Photography Tips and Wedding Photography Tips.

The Science of Selecting Photos

The post The Science of Selecting Photos by Guest Contributor appeared first on Digital Photography School.


Digital Photography School

 
Comments Off on The Science of Selecting Photos

Posted in Photography


Microsoft Word 2010 – Stop Selecting Entire Words!

16 Oct

When selecting text in a Word 2010 document, prevent the application from forcing you to select entire words.

If you use the mouse to select text in a Microsoft Word 2010 document, you may notice that after you select one word, preceding or following words are selected automatically as you move the mouse – you cannot select individual letter of the words.

If you tire of this behavior and want more fine-tuning in your text selection without having to use the keyboard to select text, do the following:…

Read more at MalekTips.
New Computer and Technology Help and Tips – MalekTips.Com

 
Comments Off on Microsoft Word 2010 – Stop Selecting Entire Words!

Posted in Technology