RSS
 

Posts Tagged ‘Seemingly’

How to do Focus Stacking in Photoshop for a Seemingly Infinite Depth of Field

02 Oct

Whenever you do macro or close-up photography you usually have to choose very carefully what you want to keep in focus. This can also happen when you want to shoot a landscape and you want to include an element close to you but you end up with a blurry background.

So it seems that doesn’t matter if you go big or small you always have to make compromises regarding the depth of field. However, there is a post-production way around it, stay with me and I’ll show you how to do focus stacking!

Focus Stacking for an Infinite Depth of Field

First, what is depth of field?

Depth of field, commonly referred to as DoF, refers to the distance between the first and last object that appears in focus or sharp within an image. It covers the space in front of and behind the focal plane, in other words where you put your focus.

How broad this space or distance is can be determined by different factors: the aperture, the focal length of your lens and the physical distance between the camera and the subject.

Even if you have these three factors to move around in order to expand your depth of field, there are certain conditions that just won’t allow you to get as much DoF as you need. This is where Photoshop comes in, when you need to achieve an impossible or seemingly infinite depth of field.

While this is a post-production process, you need to consider and get it at the shooting stage as it’s not something you can achieve by fixing your photo later. You need to prepare several photos that you’ll stack together in order to create one fully focused image.

So basically what you need to do is shoot the image with different parts in focus. Everything else needs to remain the same, this means the same framing and settings and you ONLY adjust your focus in each shot.

Focus Stacking for an Infinite Depth of Field - source images

A few tricks for shooting images for focus stacking

  • For best results in the post-production, it’s better to have good material to work with so I recommend using a tripod so that the framing is exactly the same in each image.
  • Adjust the focus manually and in order (like from closest to farthest) so that you don’t lose track and have a shot where every area of the photo wasn’t sharp at some point during the shooting. Think of it as bracketing the focus.
  • The more photos you take the better so that Photoshop will have enough information to form your final image.

Getting Started

Okay once you’re back at home base, download your photos to the computer. The first thing you need to do is open them all into the same file in Photoshop. You can do this by going to Menu > File > Scripts > Load Files into Stacks.

In the pop-up window, set it to use Files and then with the Browse button choose the set of photos you took. Check off the option “Attempt to Automatically Align Source Images”, especially if you didn’t use a tripod. But even if you did it’s useful to keep it checked to compensate for the focus breathing which is the change in scale when you re-adjusted the focus for each photo.

Focus Stacking for an Infinite Depth of Field - load images into a stack

Once you have them all, just click Open and Photoshop will load them in the same file, each on a separate layer. The filenames will become the name of each of the layers.

Note: If you forgot to check the Attempt to Automatically Align Source Images in the step before, you can always do this by selecting the layers and going to Menu > Edit > Auto-Align.

Focus Stacking for an Infinite Depth of Field - layers

Blending the layers

Now, select all of your layers. You can do this by clicking on the first one, then holding Shift+Click and click on the last layer. That way everything in between will get selected too. Now go to Menu > Auto-Blend Layers. A pop-up window will appear, check the “Stack Images” option and leave the Seamless Tones and Colors checked as well.

Focus Stacking for an Infinite Depth of Field - auto blend

From there Photoshop will do all the work so you just have to be patient.

Focus Stacking for an Infinite Depth of Field

I recommend that you zoom in and check the edges as you can find some problem areas that may require you to copy paste from the original files for fine-tuning, like this:

Focus Stacking for an Infinite Depth of Field

Once Photoshop has your image pasted together, you can go to Menu > Layer > Flatten Image to compress all the layers into one. Finally, make any adjustments you need to the exposure or contrast to get your final result.

Focus Stacking for an Infinite Depth of Field

This is the best way of doing focus stacking in Photoshop. However, if you find yourself outside the studio, without a tripod and unprepared, you can still give it a go. Just try to stay as steady as possible or you won’t achieve the required result.

For example, I took two photos, one where the small sculpture of the head in the foreground was focused and one where the background was focused. It was done without a tripod or any care about it leaving all for Photoshop to fix and as you can see it wasn’t able to align them.

Focus Stacking for an Infinite Depth of Field

However, in these examples, I also used only two pictures and no tripod but I was very careful and did my best not to move at all except for my two fingers turning the focusing ring. Of course, it’s impossible to actually do that but it was good enough for Photoshop to do an acceptable result on my images.

So it’s not ideal but it can be done, never prevent yourself from trying!

Focus Stacking for an Infinite Depth of Field

The post How to do Focus Stacking in Photoshop for a Seemingly Infinite Depth of Field appeared first on Digital Photography School.


Digital Photography School

 
Comments Off on How to do Focus Stacking in Photoshop for a Seemingly Infinite Depth of Field

Posted in Photography


Balancing Buildings: 14 Seemingly Gravity-Defying Structures

07 Oct

[ By Steph in Architecture & Offices & Commercial. ]

Balancing Buildings Cubic Houses 2

Heavy structures seem to hover in mid-air, supported only by spindly poles or narrow beams of concrete. Towers lean toward the ground at alarming angles. Narrow houses jut out over cliffs. Whether cantilevered, tilted or strangely stacked, these 14 buildings sometimes seem physically impossible.

Perched Partition by Niizeki Studio

Balancing House 1

Balancing Buildings Niizeki 2

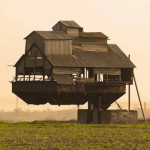
In response to a narrow 2.5-meter-wide space crammed between two neighboring buildings, Japanese architects Niizeki Studio created a metal volume perched on a slice of concrete. The result is a hovering home that feels separate from the structures around it, and maintains an open space at the ground level. The cantilevered portion of the home is connected to a more grounded volume in the rear of the property.

Hypo Alpe-Adria Bank Creates its Own Shade

Balancing Buildings Alphe 1

Balancing Buildings Alphe 2

Unlike a certain other infamous building in Italy, the Hypo Alpe-Adria Bank leans at a dramatic angle on purpose. The passive solar design tilts the entire building 14 degrees to the south so the upper portion provides shade to the lower portion.

Cubic Houses by Piet Blom

Balancing Buildings Cubic Houses 1

It’s more than a little disorienting to gaze up at Rotterdam’s Cubic Houses from ground level – not only does it seem as if these geometric volumes are going to come tumbling down off their perches, they’re also tilted at such unusual angles that it’s difficult to picture what the interiors look like. Architect Piet Blom took inspiration from Le Corbusier in designing a complex that elevates inhabitable volumes on narrow trunks to give residents great views while maintaining open space on ground level.

Balancing Barn by MVRDV

Balancing Buildings MVRDV 1

Balancing Buildings MVRDV 2

The gleaming metal Balancing Barn by MVRDV looks more like a sculpture than an actual house, but this seemingly teetering vacation rental in the English countryside is quite comfortable inside. The architects describe it as “boldly designed to provoke a gut response to architecture and nature over a short stay.”

CCTV Headquarters by OMA

Balancing Buildings CCTV 1

Balancing Buildings CCTV 2

At 75 meters (246 feet), the cantilevered portion of the jaw-dropping CCTV Headquarters building is as wide as many skyscrapers are tall, and it’s supported only by two leaning towers. It’s hard for anyone without a pretty good grasp o advanced engineering techniques to understand how the whole thing doesn’t just topple over.

Next Page – Click Below to Read More:
Balancing Buildings 14 Gravity Defying Structures

Share on Facebook


[ By Steph in Architecture & Offices & Commercial. ]

[ WebUrbanist | Archives | Galleries | Privacy | TOS ]


WebUrbanist

 
Comments Off on Balancing Buildings: 14 Seemingly Gravity-Defying Structures

Posted in Creativity