RSS
 

Posts Tagged ‘scan’

DPReview TV: Scan film negatives with the Nikon ES-2

04 Mar

Nikon’s ES-2 film digitizing adapter promises to be an easy way of scanning slides and negatives. We tested it with a bunch of different film stocks and discovered that it works pretty well!

Subscribe to our YouTube channel to get new episodes of DPReview TV every week.
  • Introduction
  • What's included?
  • The scanning process
  • Sample images
  • Who's it for?

Sample gallery from this episode

$ (document).ready(function() { SampleGalleryV2({“containerId”:”embeddedSampleGallery_7837334261″,”galleryId”:”7837334261″,”isEmbeddedWidget”:true,”selectedImageIndex”:0,”isMobile”:false}) });
Articles: Digital Photography Review (dpreview.com)

 
Comments Off on DPReview TV: Scan film negatives with the Nikon ES-2

Posted in Uncategorized


Review: What it’s like to scan film on the Epson Perfection V600

01 Nov

Film continues to be a popular medium among photographers today, and whether you’re an active or former analog user, the easiest way to share your treasured moments is by digitizing your film through scanning.

Many photo labs offer scanning as part of their services, often using large scanners able to process a full roll of 35mm film in a few minutes. But, just like developing at a lab, having a lab scan your film costs money, which is why many people like the idea of scanning negatives themselves. There are a lot of options when it comes to digitizing film yourself (including simply using a digital camera), but some of these methods require complex setups, some have huge equipment costs, and some just aren’t very good. Others, meanwhile, are actually pretty good and affordable. Meet the Epson Perfection V600.

Epson Perfection V600 key specs:

  • Compatible with 35mm and medium format
  • Max film scan resolution: 6400 x 9600 dpi
  • Dust/scratch removing technology
  • 48-bit color
  • USB 2.0
  • MSRP: $ 229.99

The Epson V600 retails for $ 229.99, although there were several deals around the web for under $ 200 at the time of writing this article. In the box you get the scanner, two plastic film holder inserts, a power cable, a data cable and an Epson software CD.

Outside of the film holders, this is a really straightforward out-of-the-box experience.

Before I get too deep into breaking down what using this scanner is like I want to give some context. First, while the Epson V600 can be used for a variety of scanning applications, I’ll only be talking about using it to scan film. Second, I’ve been scanning my own film for several years using all sorts of various film scanners, and let me tell you there is a steep learning curve. Everything can be done right, but it just takes time to piece together each element and make sure you’re processing things in a way that works for you.

There are, of course, many different approaches to getting a desirable image from scanning film; the opinions in this article are just based off of my experiences. Film negatives are a lot like Raw files; how you process them can make a big difference to how they end up looking (particularly in the case of color negative and black and white films).

Getting the V600 set up

The V600 can scan normal documents as well as negatives. To scan film, remove the white cushioning bit from the top of the scanner bed and set it aside. Now you’re ready to load up the supplied film holders. You can scan either 12 35mm or 4 medium format images at once.

Once unboxed and set up, using this scanner is pretty straightforward: you lay your film in one of the supplied plastic holders, snap it shut and place it in the scanner so that your negatives are centered on the scanner bed. You’ll be able to scan up to twelve 35mm photos or four medium format photos at once. The scanner also comes with an additional film holder for mounted slide film.

I wish the plastic holders were made of something higher quality. I’ve used other scanners that have magnetic strips for their holders and I prefer those by a long shot.

Once your negatives are in place, it’s time to get scanning via the included software, ‘Epson Scan’. Depending on which scan mode you choose (more on that below), you simply set your desired scan quality, make a preview scan and select your scan area with a marquee tool (except in Full Auto mode). Then you commit to the final scan, which can take a long while or a short while depending on your quality settings. Sound simple? Not necessarily…

On my Windows 10 desktop the scanning software was completely unstable

When I initially set up the V600, I had it connected to my Windows 10 desktop and quickly found the software to be unstable, crashing frequently during the preview scan. Eventually I couldn’t even get my computer to recognize that the scanner was on and connected. This is apparently not an uncommon problem either (I tried all the fixes in the link to no avail). I ended up following a bunch of tutorials online to fix the problem and still wasn’t able to get it to work reliably.

So, I switched over to my Apple Macbook which, though generally slower than my PC, had no issues at all running the software. Once I finally got it up and running, I actually found it fairly user-friendly. The design looks dated, but the operation is straightforward.

Scanning modes

The software has four modes, the specific options of which you can see in the images below (I’ve omitted the “Office Mode” because I’m not covering document scanning in this review).

Full Auto Mode

Full auto mode is the easiest of the modes to use, but will be too dumbed-down for most users.

Home Mode

Home mode is the mode I’d recommend as it offers just enough options without being overwhelming.

Professional Mode

Pro mode offers the most options but it can be overwhelming, with so many scanning quality windows that unless you really know what you’re doing, you’ll likely feel claustrophobic.

If you’re using the Professional Mode, the desktop can get crowded real fast with the different modules. There’s actually an additional Color Palette module in Professional Mode that you can use to alter the hues of colors in your photos that isn’t pictured above because I couldn’t fit it alongside all the other windows. If you’re up for it, the Professional Mode offers a ton of control, but I think Home mode will likely suit most users just fine.

‘Home’ vs. ‘Pro’ mode

Home Mode offers just enough control to get a good scan so that you can then make the rest of the adjustments to image quality in whatever photo editing software you prefer. You’ve got DPI, Brightness scale, and a handful of intelligent options like Color Restoration. The V600 also includes Epson’s ‘Digital ICE technology’ – available in all scanning modes – which automatically removes dust and small scratches (though I still advise dusting with canned air or a rocket blower before each scan).

Home Mode offers just enough control to get a good scan

Professional Mode, on the other hand, offers a full slew of adjustments and filters including Grain Reduction and additional dust removal alongside exposure and color adjusting tools like histograms, curves, white balance sliders, and so on. One other really nice feature is that you can change the bit-depth of your scans, with the option of 8- or 16-bit Grayscale and 24- or 48-bit Color. The DPI setting goes all the way up to 12800, so if you’re planning on making big prints this will set you up right for that.

Home Mode Professional Mode

Above you can see a comparison of the same shot scanned in Home Mode (left) and Professional Mode (right). The Home Mode scan has noticeably less dust and hairs while the Professional Mode (with dust removal turned off) has more dust but is a bit closer to how I think the photo should look after some slight white balance, tint, and contrast corrections. Photo was shot on Portra 400VC with a Hasselblad 80mm F2.8 and a Proxar macro filter.

Quality compared to photo lab scans

More important than how this scanner stacks up against itself is how it stacks up against scans done by professionals in a photo lab. Below is a gallery comparing photos scanned on the Epson V600 to ones scanned by the professionals at Panda Lab here in Seattle, WA.

The Epson scans were all done in ‘Home’ mode at 4800 DPI (for 6400 DPI scanning you’ll need to switch to ‘Pro’ mode) and saved as Tiffs. This resulted in files ~6600 x 4400 pixels. For the sake of comparison we’ve downsized them to match the Panda Lab scans and saved them as JPEGs. Other than that, no additional adjustments were made to either scan.

$ (document).ready(function() { SampleGalleryV2({“containerId”:”embeddedSampleGallery_7267226613″,”galleryId”:”7267226613″,”isEmbeddedWidget”:true,”selectedImageIndex”:0,”isMobile”:false}) });

When viewed at 100% or on a large monitor, the lab scans show more detail and significantly finer grain than the Epson scans. They also do a much better job reflecting the tonality of the Fujifilm Pro 400H film they were shot on. With the Epson scans, the color is OK, but there’s a need for color-correction.

The corrected Epson scans are certainly good-enough for social media sharing or small printing

The image below and to the right is an Epson scan edited in Lightroom to match the tonality of the Professional scan. With a little fussing, you can get the colors close, but the professional scan still looks sharper, more detailed and less noisy than the Epson. But depending on your intended viewing size, that may not matter; the corrected Epson scans certainly look good enough to me for social media sharing or small printing.

Professional lab scan. Lightroom-corrected Epson V600 scan.

Of course, the lab scans cost money (~$ 10) and the Epson scans cost you time, after initial investment. It took about 3 minutes to scan each 35mm frame, which means if you’re shooting rolls of 36 exposures, that’s 108 minutes of scanning. So if you purchase the Epson for the retail price of $ 229.99, you’d theoretically have to scan 23 rolls before saving money versus the cost of lab scans, which would take more than 41 hours.

Medium format hiccups

Note the slightly darker band in the highlights in the upper left quadrant of this photo (120 HP5+ Pushed two Stops and scanned with the Epson V600). This appears in several of my images.

Sure, the V600 can scan at high resolutions and high color depth, but unfortunately some slight banding can be an issue when working with medium format film – I didn’t notice this issue with 35mm. Banding is not an uncommon issue for flatbeds, but it is something to be aware of.

For those who don’t know, banding looks like what it sounds like: a portion of your photo will have a straight band of a slightly different exposure along the line of the scan. This is something that can sort of be corrected using Photoshop but depending on the complexity of your image it can become a huge pain to deal with.

Below you can see a full gallery of that same roll of HP5+ all scanned using the Epson V600 and edited to taste in Lightroom.

$ (document).ready(function() { SampleGalleryV2({“containerId”:”embeddedSampleGallery_4117815188″,”galleryId”:”4117815188″,”isEmbeddedWidget”:true,”selectedImageIndex”:0,”isMobile”:false}) });

The wrap

The Epson V600 has some flaws, like flimsy film trays and dated-looking software. But assuming you can get everything set up successfully (sorry Windows 10 users), it’s relatively easy and straightforward to get decent-looking scans using Home mode, especially if you’re only looking to scan 35mm. However, for the highest quality scans, you’re going to spend a lot of time waiting around for the V600 to do its thing.

Ultimately I think this product is a good option for amateurs and enthusiasts looking for a decent way to scan their current work, or for those looking to bring new life to old negatives. But for those desiring both high quality files and painless turnaround, your local lab is still your best bet – if you have one nearby.

What we like:

  • Good price
  • Easy-to-use
  • Decent scan quality

What we don’t:

  • Flimsy film trays
  • High-quality scans take a long time
  • Banding can be an issue when scanning medium format
  • Dated-looking scanning software
  • Hiccups with software on some Windows 10 machines

Articles: Digital Photography Review (dpreview.com)

 
Comments Off on Review: What it’s like to scan film on the Epson Perfection V600

Posted in Uncategorized


Sony’s updated 3D Creator app can use your smartphone’s front camera to scan your face

21 Apr

Sony’s 3D Creator app with its 3D-face-scanning function was first introduced with the Xperia XZ1 and XZ1 Compact last year. Now the Japanese manufacturer is rolling out the update to version 2 of the app.

The most important upgrade of the new version is the ability to create 3D models of your face with your smartphone’s front camera. This means, unlike with the previous version, you don’t need the help of another person to create a 3D-model of your face and head. Of course, the option to use the main camera and get someone else to do the job is still available.

The updated app also lets you share the results straight to Facebook or order a 3D-printed copy of your model. And version 2.0 also comes with “post-scan cloud processing,” which allows you to render 3D models with 4K resolution textures for better detail and realism.

3D Creator 2.0 is compatible with the Xperia XZ1, XZ1 Compact, and XZ Premium. If you’re lucky enough to own one of these devices, you can download the newest version of the app from the Play Store now. If you are an iPhone X user, check out the Bellus 3D app for similar face scanning capabilities.

Articles: Digital Photography Review (dpreview.com)

 
Comments Off on Sony’s updated 3D Creator app can use your smartphone’s front camera to scan your face

Posted in Uncategorized


Bellus3D uses the iPhone X’s TrueDepth camera to 3D scan your face

05 Apr

Bellus3D, a Silicon Valley startup that last year launched a 3D face scanning accessory camera for Android smartphones, today unveiled its FaceApp iPhone X application. The app does pretty much the same thing as the accessory camera but does not require any additional hardware as it is making use of the iPhone X’s front-facing TrueDepth camera, which Apple uses for Face ID.

FaceApp captures more than 250,000 3D data points on a face in 10 seconds while the user slowly turns their head in front of the camera. The app then reconstructs a virtual high-resolution version of the face that can be rotated, zoomed and viewed in three dimensions. Additionally, the face model can be viewed with interactive lighting, using the device’s gyro to control viewing angles.

The resulting 3D selfie videos can be saved, shared or posted on Facebook.

The app is not all about 3D selfies though. Bellus3D imagines the technology being used in a range of consumer applications, including: mobile gaming, custom eyeglass design, virtual make-up sessions, medical applications and custom dolls.

“We are thrilled to be introducing this exciting breakthrough to Apple iPhone X users,” said Eric Chen, co-founder and CEO of Bellus3D. “Our FaceApp takes full advantage of the TrueDepth camera to bring easy-to-use and professional quality face scanning capability to millions of users and will inject an entirely new level of personal presence into our daily use of digital media.”

Bellus3D is launching a public beta program today, and version 1.0 of FaceApp will be available at no charge. Future releases will allow file export in industry standard 3D formats and the company will also release a Face SDK for iOS to enable third party developers to use the technology.

If you are interested in the beta trial, you can sign up on the Bellus3D Facebook page, and developers can register to receive notifications about the SDK on the Bellus3D website. Check out the video above to see the system in action, and then head over to Facebook for some 3D sample scans.

Press Release

Bellus3D Announces High-Resolution 3D Face Scanning App for Apple iPhone X Utilizing Built-In TrueDepth Camera.

Bellus3D FaceApp for iPhone X is first to utilize the Apple TrueDepth Face ID Camera to capture and reproduce high-resolution lifelike 3D selfies.

Los Gatos, Ca. April 4, 2018 – Bellus3D, Inc. a Silicon Valley startup formed by leading computer vision experts, announced today the Bellus3D FaceApp iPhone X application, a remarkable advancement in face scanning technology. The company is the first to utilize the built-in TrueDepth camera incorporated in the Apple iPhone X smartphone to scan 3D faces in high resolution with a lifelike quality that was only previously available with expensive professional 3D scanners.

Bellus3D FaceApp for iPhone X is an easy-to-use, high-resolution, 3D face scanning application that captures over 250,000 3D data points on a user’s face in 10 seconds while the user turns their head in front of the smartphone camera. Immediately after the scanning, the user’s face is virtually reconstructed in 3D with lifelike detail and can be rotated, zoomed and viewed in three dimensions on the screen of the iPhone X.

The app allows: the 3D face to be viewed with interactive lighting; the use of the smartphone’s built-in gyro to control viewing and; the ability to save a 3D selfie video to their camera roll photo album to share with others. Users will also have the ability to immediately post their 3D selfie as a 3D post on Facebook.

Bellus3D is the first to use the iPhone X TrueDepth camera for high-resolution 3D face scanning and the company is already seeing many new uses that will impact millions of people. Consumer applications incorporating 3D faces include mobile gaming, custom eyeglass design, virtual 3D make-up sessions, medical applications, 3D selfies, custom dolls, and emerging 3D augmented and virtual reality experiences.

Bellus3D is starting a public beta program in April to enable early adopters and third-party developers to test the application as the company finalizes its formal release. Version 1.0 of Bellus3D FaceApp will be free and will include posting of 3D selfies to Facebook. A subsequent release of the app will allow users to export their 3D faces in industry standard 3D file formats to other applications and AR/VR digital environments. Bellus3D will also release a Face SDK for iOS to enable third party developers to add high-resolution 3D face-scanning capabilities to their own iPhone X apps.

“We are thrilled to be introducing this exciting breakthrough to Apple iPhone X users,” said Eric Chen, co-founder and CEO of Bellus3D. “Our FaceApp takes full advantage of the TrueDepth camera to bring easy-to-use and professional quality face scanning capability to millions of users and will inject an entirely new level of personal presence into our daily use of digital media.”

In addition to FaceApp for iPhone X, Bellus3D currently ships the Face Camera Pro USB accessory camera for Android & Windows platforms. The accessory camera captures up to 500,000 3D data points and is targeted for professional markets such as orthodontics and custom eyewear design. The Face Camera Pro is currently available and will continue to be offered for Android and Windows platforms.

Interested users can participate in the beta trial of the Bellus3D FaceApp for iPhone X by signing up at: www.Bellus3D.com/FaceApp.

Third party software and hardware developers can register to be notified of the availability of Face SDK for iOS by filling out an inquiry form at: www.Bellus3D.com/FaceSDKiOS.
To see examples of 3D Face Posts on the Bellus3D Facebook page, visit: https://www.Facebook.com/bellus3d/

Articles: Digital Photography Review (dpreview.com)

 
Comments Off on Bellus3D uses the iPhone X’s TrueDepth camera to 3D scan your face

Posted in Uncategorized


Moar Megapixels! Pixel peeping a 709MP drum scan of 8×10 slide film

17 Mar

Large format wilderness photographer Ben Horne recently embarked on a little experiment with some help from his friend, Michael Strickland. Horne shoots large format 8×10 slide film, and Strickland has a drum scanner that can scan that film at insanely high resolution. How high? Using a little bit of trickery, Strickland was able to provide Horne with a 709.6-megapixel file to pixel peep in this video.

Take that, 100MP medium format sensors!

To give you an idea of just how high resolution this file is, printed at 300ppi, the resulting print would measure 79.3 x 99.4 inches. As we mentioned, this took a bit of ‘trickery’—namely: Strickland actually had to drum scan the print twice. He first scanned the top half, then the bottom half, and then merged the two scans together in post.

In the video, Horne zooms in to 100% and makes his way around the file. He explains how he shot the image, what sacrifices he had to make regarding sharpness in the closest foreground and furthest background, and shows off just how sharp this thing is in the parts of the image he’s most concerned with.

Check out the full explanation for yourself up top, and then head over to Horne’s YouTube channel for more videos like this one.

Articles: Digital Photography Review (dpreview.com)

 
Comments Off on Moar Megapixels! Pixel peeping a 709MP drum scan of 8×10 slide film

Posted in Uncategorized


The Nikon D850 can scan film using the new ES-2 digitizing adapter

25 Aug

There’s a neat trick baked into the new Nikon D850 that you may not have noticed yet. Hidden away among the many features broken down in the D850 announcement is this line:

Negative/Positive Scanning: With the optional ES-2 Film Digitizing Adapter and compatible Micro-NIKKOR lens, the camera enables super high-resolution digitizing of 35mm slides or negatives and converts them in-camera to positives

For Nikon shooters who occasionally get their film photography on, this is actually a pretty interesting and useful feature. Basically, the D850 allows you to eschew the film scanner, pop a Nikkor macro lens onto your DSLR—Nikon recommends the AF-S Micro NIKKOR 60mm f/2.8G ED—and take pictures of your negatives or slides using the FH-4 Strip Film Holder or FH-5 Slide Mount Holder.

The camera will then convert these into positives in-camera and save them as JPEGs. Sure, you’ll still want to use some sort of light table or flash to light the film up for the shot, but it’s quite convenient and definitely quicker than scanning.

The ES-2 was announced quietly alongside the D850 last night, will retail for $ 150, and is already available for pre-order on the Nikon website.

Articles: Digital Photography Review (dpreview.com)

 
Comments Off on The Nikon D850 can scan film using the new ES-2 digitizing adapter

Posted in Uncategorized


Scan to CAD: Software Turns Volumetric Snapshots into Usable 3D Models

17 Nov

[ By WebUrbanist in Gaming & Computing & Technology. ]

scan

Bringing a critical gap between 3D scanning technology and functional outputs for architects, designers and homeowners, Canvas can scan a room in minutes then generate useful CAD software files.

Raw scans of spaces can be helpful in terms of generating rough measurements and usable as a baseline for a more rigorous three-dimensional model, but it takes time and energy to translate between the two. So while they are great for point-to-point measurements and as-built drawings, such scans are limited in terms of letting someone rework or envision changes to a structure.

3d-sensor-technology

Occipital, the startup behind Structure Sensor, wants to make that transition smooth, painless and effectively automatic. After a users scans a room (or a whole house) with their iPad, they can send away for CAD files that will be returned in two business days. They can then plug those files into software of choice, like Sketchup, and begin remodeling their space.

3d-design-capture

The company calls their vision “augmented home” and pictures their software and hardware getting increasingly refined over time to the point where on-the-spot shots can be immediately transformed into precise and full-color 3D files.

3d-space-model

“I think we’ll probably look back at today as a time, just like the 1830s, when we just started to have photographs,” says Adam Rodnitzky, the company’s VP of marketing. “We’re now entering the era when we’re going to start having a 3D record of the world around us.”

Share on Facebook


[ By WebUrbanist in Gaming & Computing & Technology. ]

[ WebUrbanist | Archives | Galleries | Privacy | TOS ]


WebUrbanist

 
Comments Off on Scan to CAD: Software Turns Volumetric Snapshots into Usable 3D Models

Posted in Creativity


Scan & Draw: Color-Mixing Pen Can Make 16 Million Hues & Shades

14 Aug

[ By WebUrbanist in Design & Products & Packaging. ]

color scanning pen

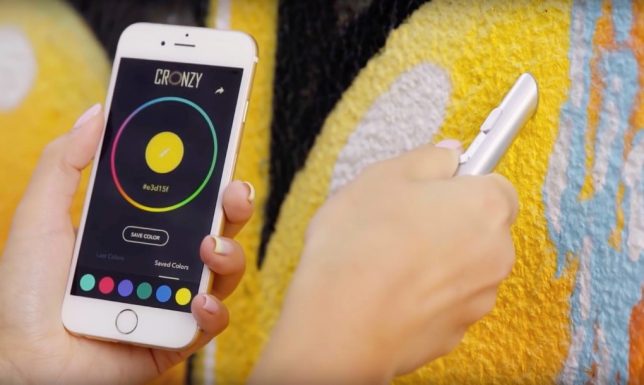
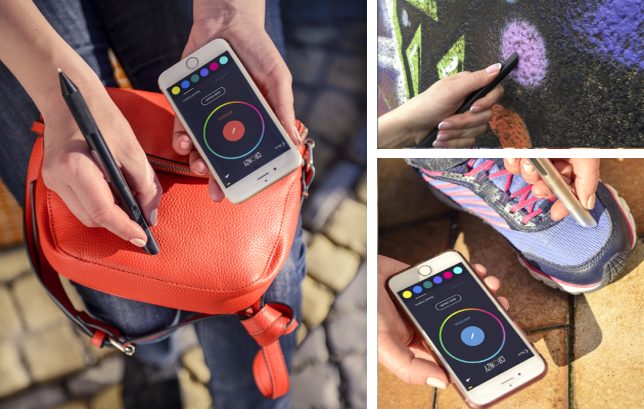
A new pen aims to take art to the next level, letting users scan colors from their surroundings and deploy them, all via a single gadget. The Cronzy can be employed to scan plants, walls, cloth, and other surfaces; a connected app can then save, collect and use these colors on the go.

color draw pen

The scan-and-draw concept has been around for years, but getting this versatility and complexity into a single small and portable device has been a challenge. Some tools on the market can deploy present mixes and others can scan natural and built environments. This one taps your smartphone’s computing power to speed up and scanning and combines it with a cartridge-enabled drawing device.

The scanned colors, tints and shades are converted into CYMK (matching the swappable cartridges) or RGB formats so they can be deconstructed, remixed or adjusted according to an artist’s whim on a connected device. The gadgets comes with a portable case and charger and works with Android, IOS and Windows phones.

color draw app

Naturally, they can be shared with other users as well this way, allowing people to create and distribute custom palettes for further use. For now, the device is in crowdfunding, but its makers aim to have a consumer model on the market by early 2017. If the prototypes are any indicator, this could be the best one-stop digital-plus-physical drawing tool to date.

Share on Facebook


[ By WebUrbanist in Design & Products & Packaging. ]

[ WebUrbanist | Archives | Galleries | Privacy | TOS ]


WebUrbanist

 
Comments Off on Scan & Draw: Color-Mixing Pen Can Make 16 Million Hues & Shades

Posted in Creativity


Laser Precision: 3D Site Scan Enables Architectural Intervention

09 Mar

[ By WebUrbanist in Architecture & Houses & Residential. ]

3d view

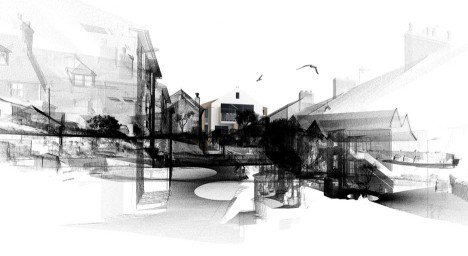
Incredibly accurate laser-scanning technology, precise down to a hundredth of a millimeter, has helped British architects not only plan a new structure but also secure permission from a local planning commission. Their proposed Rock House, now approved, preserves both natural and architectural features currently on a government-protected site.

3d view preservation

Cornish firm Poynton Bradbury Wynter Cole (PBWC) Architects enlisted CESurveys to lidar scan the existing property, located in a conservation area. Their scanner system fires tens of thousands of lasers per second to get precise distance readings on complex terrain. Compared to traditional surveying and site-mapping strategies, this approach is much faster, cheaper and more effective.

3d building model

3d architectural addition

The results are translated into a three-dimensional model that can be manipulated, showing the effects of site changes or interventions. Scans from around sites are stitched together to form a complete picture.

3d scan section

3d scan side

3d scan elevation

The resulting models have an array of benefits, including the ability to show approving parties what the impacts of additions and remodels might be to a given property. They also helped the architects, in this case, maintain key lines of site, such as views out to the sea, and limit the cost of revisiting the site frequently to document additional features. Slices of the scans also make it easy to generate sections and elevations, sliced directly out of the models.

3d model lidar laser

Applications of lidar scanning goes well beyond architecture, too, including the ability to document historic infrastructure and preserve 3D models of fresh crime scenes.

Share on Facebook


[ By WebUrbanist in Architecture & Houses & Residential. ]

[ WebUrbanist | Archives | Galleries | Privacy | TOS ]


WebUrbanist

 
Comments Off on Laser Precision: 3D Site Scan Enables Architectural Intervention

Posted in Creativity


Chameleon Pen: Scan, Save & Draw Up to 16 Million Unique Hues

16 Aug

[ By WebUrbanist in Design & Products & Packaging. ]

scribble surface scan grab

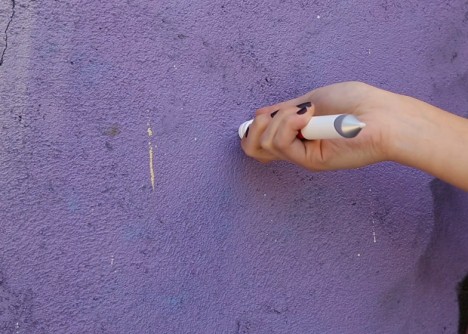
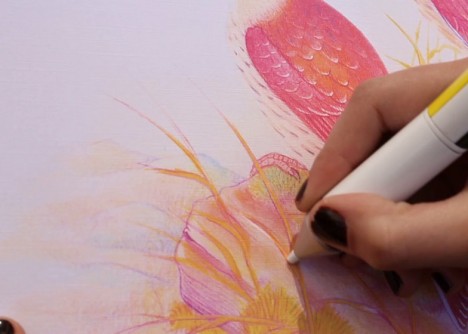
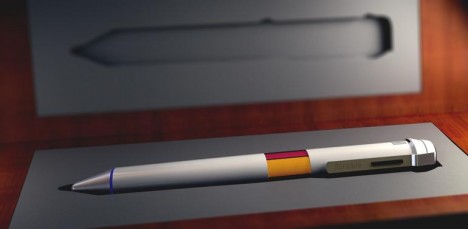
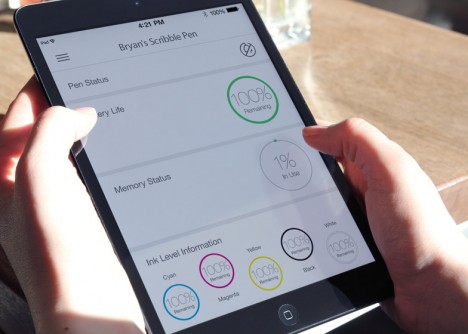
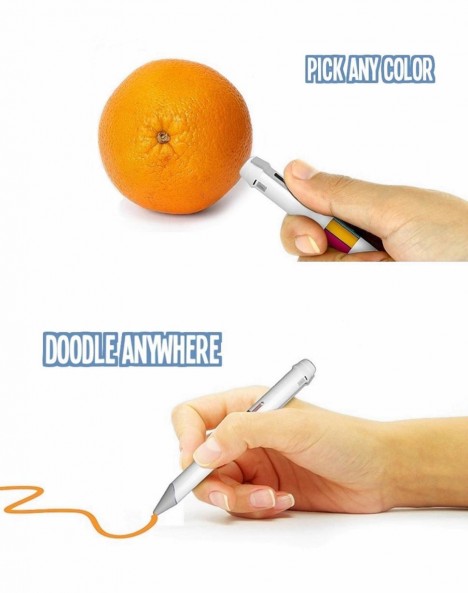
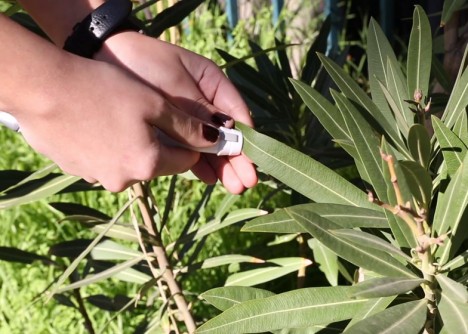
Five years ago it was an mind-boggling design concept, but today the idea color-changing pen has morphed into a working prototype that draws colors from objects and surfaces, natural or artificial, then lets you use them in all kinds of creative ways. This real-world version can make over 16,000,000 different tones and store over 100,000 unique colors in its memory.

scribble drawing color picked

scribble pen in case

scribble pen user interface

Imagine the possibilities of Scribble, both artistic and practical: instead of trying to mix just the right paints to capture a landscape or replicate a color scheme for your interior remodel, you can scan the actual colors of environments and use those. Users can then upload, store, tag and share their color picks for future applications.

original color scanning pen


see n scan pen

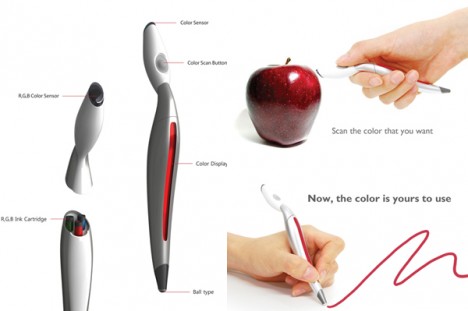
The Color Picker by Jinsun Park (shown below) was a purely conceptual design model at the time, but operated on the same principle (like the Photoshop eyedropper tool), made to contain a series of inks that (much like a printer) would mix in the appropriate amounts, reproducing colors scanned into it. This new variant on the device also converts the colors into other formats (like binary, decimal and hexadecimal) that can be saved and deployed for digital art. And with cartridge refills, you will never need to buy another color of pen.

scribble pen prototype

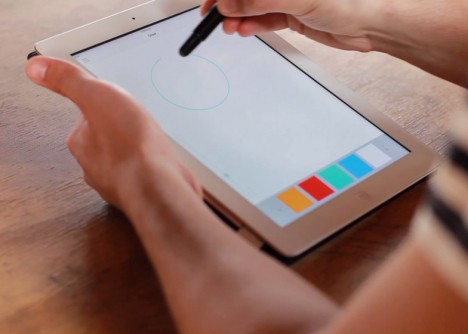
The applications are myriad: “For the colour blind, kids, interior decorators, homeowners, teachers, artists, photographers, designers and students, the Scribble colour picker pen will make copying an exact colour, any colour from any object, an absolute breeze. With Scribble you can scan, match or compare colours, draw on paper or your mobile device.” Of course, you don’t have to scan in a new color – you can always mix your own on the computer and input that preferred tone too.

scribble nature scanning tool

scribble child user example

scribble tablet device upload

Here is the executive summary from the company: “Scribble is the first coloring device of its kind that can take the world of color around you and transfer it directly to either paper or your favourite mobile device. Simple hold the Scribble’s scanner up to any color, like on a wall, a book or magazine, a painting or even a child’s toy and within a second or two that color is stored in Scribble’s internal memory. You can now instantly draw on paper with the Scribble Ink Pen or draw on a digital device like an iPad or Wacom Tablet with the Scribble Stylus Pen.”

Share on Facebook


[ By WebUrbanist in Design & Products & Packaging. ]

[ WebUrbanist | Archives | Galleries | Privacy | TOS ]


WebUrbanist

 
Comments Off on Chameleon Pen: Scan, Save & Draw Up to 16 Million Unique Hues

Posted in Creativity