RSS
 

Posts Tagged ‘Safety’

Indemnis Nexus parachute for DJI drones is first to achieve crowd safety standard

12 Jan

Indemnis has announced its Nexus parachute system designed for DJI drones is the first to be certified as compliant with the ASTM F3322-18 standard. The system is designed to prevent a faulty DJI drone from free-falling to the ground by deploying a small parachute, which slows the drone’s descent for a safer, more gentle landing.

Both the US and UK require drone operators to get permission before operating a small UAV (sUAV) above a crowd, a limitation that intends to protect innocent bystanders from injury in the event of a drone crash. Waivers are offered on a case-by-case basis by both the US’s FAA and the UK’s CAA, but require operators to show how people below will be protected if the drone experiences a failure mid-flight.

The FAA granted its first waiver in October 2017, when it gave CNN permission to fly a Vantage Robotics Snap drone featuring protective rotor cages over a group of people. A parachute system like the Indemnis Nexus offers a different type of protection, one that is the first ever to meet the international ASTM F3322-18 standard for small UAVs.

The standard covers deployable sUAV parachute systems, including design, fabrication, and testing, and was designed to help drone operators get permission for flying over crowds from agencies like the FAA and CAA.

According to Indemnis, it was required to pass a series of 45 functionality tests spread across five drone failure scenarios. Testing took place at New York’s Griffiss International Airport in a controlled airspace; the Northeast UAS Airspace Integration Research Alliance oversaw the process.

The Indemnis Nexus system is designed to strap onto existing DJI drones, which it monitors using sensors. If the sensors detect a flight disruption, a ballistic launcher deploys a parachute at 90MPH / 144kmh. The tube containing the parachute is designed to inflate in order to protect the parachute from the drone’s rotors and body.

The drone was validated for use with the DJI Inspire 2, but may be offered for the Matrice 200 and 600 series, as well, by the end of the year.

Articles: Digital Photography Review (dpreview.com)

 
Comments Off on Indemnis Nexus parachute for DJI drones is first to achieve crowd safety standard

Posted in Uncategorized


UK government will require drone users to register and take safety tests

25 Jul

The UK has announced new upcoming regulations that will require some drone owners to register their aircraft and to complete safety awareness tests related to drone operation.

The requirements will be implemented for all drones weighing a minimum of 250g / 8.8oz and registration will be possible both online and via apps, though the UK government says it is still exploring potential plans. The tests, meanwhile, will require drone operators to demonstrate knowledge of the UK’s various regulations related to drone usage, privacy, and safety.

The new requirements were detailed over the weekend by the UK government, which explained in a statement that these new measures will “improve accountability and encourage owners to act responsibly.” A recent safety research study is cited as one of the reasons for the planned regulations. In the study, various UK authorities found that drones weighing as little as 400g / 14oz can damage the windshields on helicopters.

Many details about the UK’s drone registration plans are still missing, including how much such registrations may cost, how long the registration is good for, the extent of identifying details the drone operator must provide, and more. The UK’s statement indicates that it is still developing its plans and hasn’t yet established these finer details.

The new regulations will follow the drone code established by the UK’s Civil Aviation Authority in 2016. That drone code establishes operational rules for drone owners, including requiring that the drone stay within sight of the operator, that it stay below 120m / 400ft, avoid all things related to airports and aircraft, and maintain acceptable distances from property and people.

Articles: Digital Photography Review (dpreview.com)

 
Comments Off on UK government will require drone users to register and take safety tests

Posted in Uncategorized


Bikesphere: Car-Detecting Ring of Red Light Puts Cyclists in a Safety Bubble

09 Jun

[ By SA Rogers in Design & Products & Packaging. ]

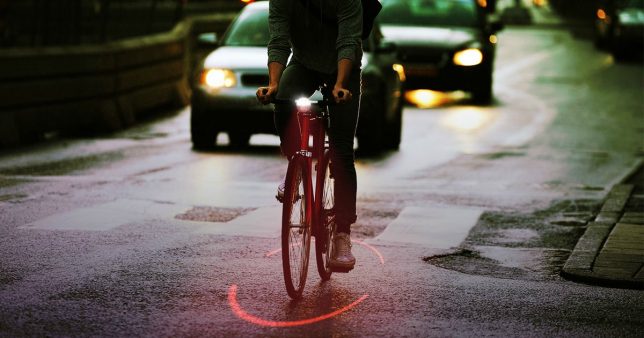
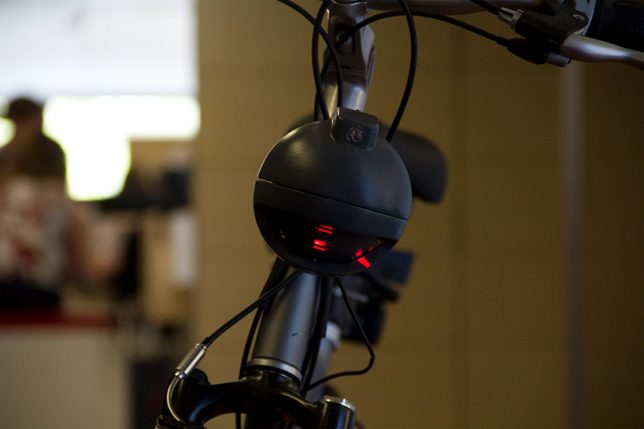
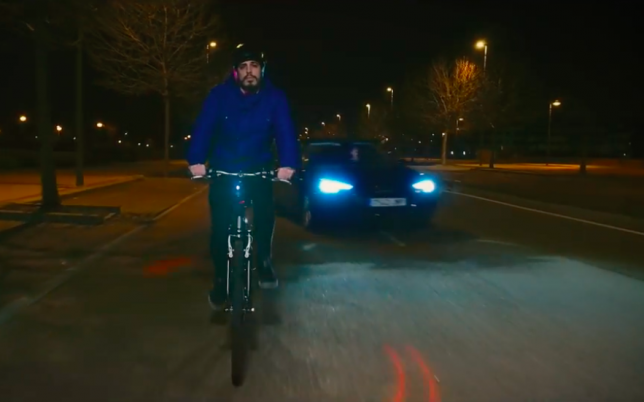
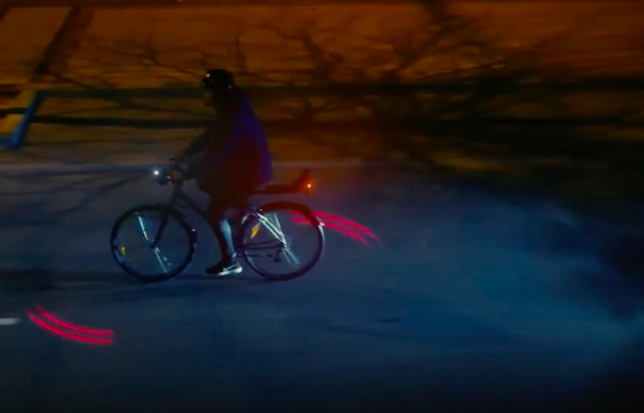
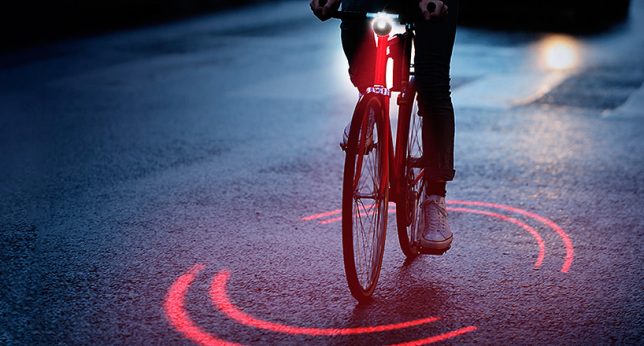
There’s no missing cyclists – or the zone of space you need to safely pass them – when they’ve got a ring of red light encircling them as they ride down the road. Michelin’s new open-source project, Bikesphere, features a light sensor and proximity detecting sensor that work together to monitor the environment around a cyclist and react accordingly if a car gets too close, pointing a double laser spotlight on the ground to define a safety area.

As it stands, riding a bike in an urban area can be a risky proposition, with more than 5,000 avoidable accidents happening every year due to cars passing cyclists at an unsafe distance.

During the day, the Bikesphere works like a normal light-detecting bike lamp, turning on when you go through dark areas as needed. By night, it’s ready to defend you, projecting a single-lined sphere for the entirety of your ride. When it can tell a car is coming, the light turns into a double line and starts to spin faster to alert both the cyclist and the driver.

Bikesphere is the first crowd-sourced idea to come to fruition through Michelin’s #TrendyDrivers movement, which aims to change the habits of drivers to make the roads safer. When an idea is approved, they fund the project to get it off the ground. Ultimately, the Bikesphere will be made public, so anyone who wants one can purchase the common components and download the plans to print the rest using standard 3D printers.

Share on Facebook


[ By SA Rogers in Design & Products & Packaging. ]

[ WebUrbanist | Archives | Galleries | Privacy | TOS ]


WebUrbanist

 
Comments Off on Bikesphere: Car-Detecting Ring of Red Light Puts Cyclists in a Safety Bubble

Posted in Creativity


Talking Points: 12 Odd Japanese Safety & Traffic Cones

04 Apr

[ By Steve in Culture & History & Travel. ]

safety-cones-0
Plastic safety cones have become so ubiquitous along Japan‘s roadways, unusual measures have been taken to ensure they stand out amongst the crowd.

safety-cones-1a

safety-cones-1b

“Safety in numbers”… a self-defeating term if there ever was when it comes to Japan’s countless cohorts of conical warning signs. They’re everywhere it seems: parking lots, construction zones, anywhere the ground is disturbed and could possibly pose a hazard to drivers and/or pedestrians.

safety-cones-1c

safety-cones-1d

safety-cones-1e

If these cones were all standard Safety Orange, our senses would tune them out as visual background noise. What to do? If you’re Japan, you deviate from the norm in oft-unexpected, cute and quirky ways… like these endearing Mount Fuji cones captured by Asagiri Web, Setsugekka, One Sometimes Futari, Daily Model Railroad Room, and Illumination Designer.

Smile When You Safety That

safety-cones-2a

safety-cones-2b

Is it somewhat incongruous for warning markers to sport goofy grins? Yes, yes it is, but this is Japan so all bets are off. Flickr user Martin Bryant (MartinSFP) and blogger Cat (Overtake) Chan spotted these smiling sunflower cones making light of a serious situation.

Flower Power

safety-cones-3a

safety-cones-3b

At the Sakuragi shrine in Chiba prefecture (east of Tokyo) it’s all cherry blossoms, all the time. The theme extends even to the temple’s parking lot where cherry blossom-wrapped safety cones add a note of scenic harmony. Kudos to blogger “Drawer of his Head” for noticing the cute cone in October of 2015 and proving one does not have to blend in, in order to stand out.

Size Matters

safety-cones-4a

safety-cones-4b

safety-cones-4c

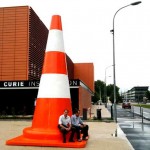
Go big or go home, and that goes for safety cones, to the chagrin of local police forces. Kudos to Flickr user Kat n Kim and blogger Minkara for the images above.

Next Page – Click Below to Read More:
Talking Points 12 Odd Japanese Safety Traffic Cones

Share on Facebook


[ By Steve in Culture & History & Travel. ]

[ WebUrbanist | Archives | Galleries | Privacy | TOS ]


WebUrbanist

 
Comments Off on Talking Points: 12 Odd Japanese Safety & Traffic Cones

Posted in Creativity


Safety Tips for Travel Photographers (Particularly Women)

06 Mar

Let me first address the obvious that while this article talks about safety tips for women photographers, it does not mean that these tips don’t apply to men as well. Most are general tips that could be applied to both genders. Being a woman photographer who has started to venture out alone for photoshoots and solo photowalks, these are things that I notice and practice as I do travel photography.

Solo Hiking in the Appalachian Trail in Great Smoky Mountain National Park USA

Solo Hiking the Appalachian Trail – Great Smoky Mountain National Park, USA

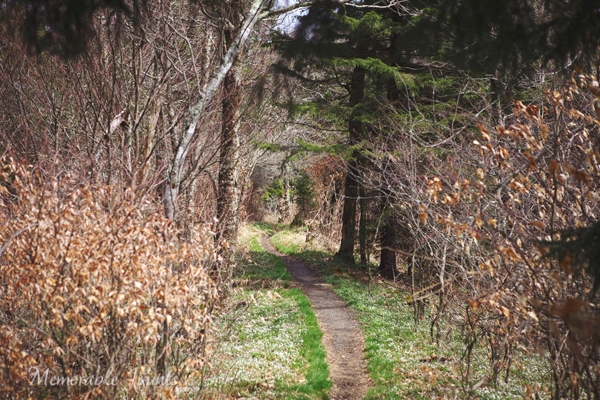
It all started with a single trip. A couple of years ago while visiting Great Smoky Mountain National Park in the US, I decided to flex my muscles and go for a solo hike with my young kids. This was supposed to be a bonding experience as well as a confidence booster that I could do this alone. So off we went, water bottle and camera in hand to hike a two to three mile stretch of the Appalachian Trail.

Half way into the trail, my confidence took a nose dive, as I realized I had done several stupid things – I vaguely remember telling my husband the actual trail we were going to take, we only had one bottle of water among the three of us, I was carrying 20lbs of photo gear and I had no emergency kit or even a phone. My kids, then 7 and 3, were hot and cranky and there was no end in sight. In my paranoia of either being attacked by a bear or a crazy psychopath on the trail, we literally sprinted the entire way. Thankfully, my husband had started off at the other end of the trail and met up with us. While it was an adreallian pumping, nerve racking experience, it did make me realize that with a few simple tips, one can travel smart, safe and actually have a wonderful time.

#1 Research, research and then do more research

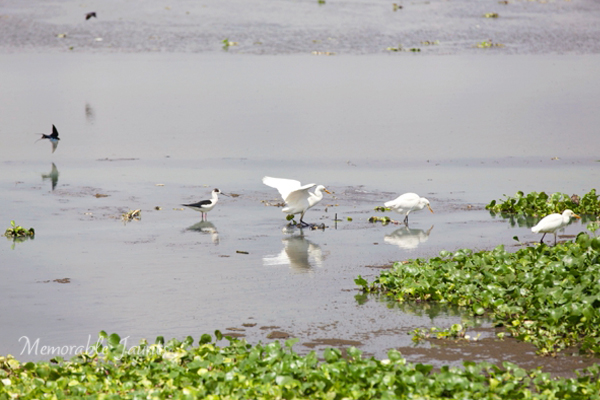
Bird Photography in Chennai India

A google maps satellite search revealed a bird photographer’s paradise literally five minutes from home when I travelled to Chennai, India

There is no lack of informational resources for someone wanting to travel anywhere in the world. Between maps, guide books and online forums we can pretty much take a virtual tour in our pajamas and not have to leave the comfort of our homes. But if you are anything like me, the wanderlust bug is very prominent and the urge to escape the clutches of everyday life too urgent to ignore. Make sure you know everything there is to know about the place you want to visit. Scope out all the possible locations that interest you in detail. There are many online photography and travel forums where you can post questions around photographic opportunities for specific locations.

#2 Record and insure your gear

This is one of those business expenses that may seem like it is discretionary but trust me, it is absolutely critical especially if you plan to travel extensively. Having that peace of mind that your gear is as protected as it can be is very liberating.

#3 Blend in as much as you can

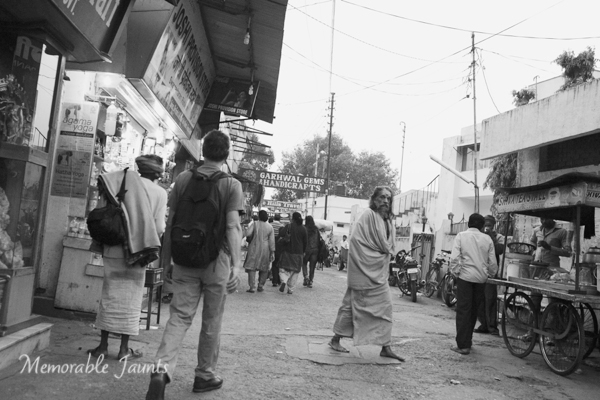
Safe Travel Tips for Photographers DPS Article Memorable Jaunts

A simple bag pack to carry your equipment might be the best travel gear to blend in with the locals

With a camera in one hand and a map/guide book in the other, chances are you already stand out from the local crowd. Try not to make it more obvious in the way you dress or behave. The smart thing to do is to blend in with the locals. Dress like the locals wherever possible, then if you have done your research and planned out your excursion you don’t need to hold on to the map (a sure giveaway that you are a tourist).

#4 Keep an updated itinerary with family and friends at all times

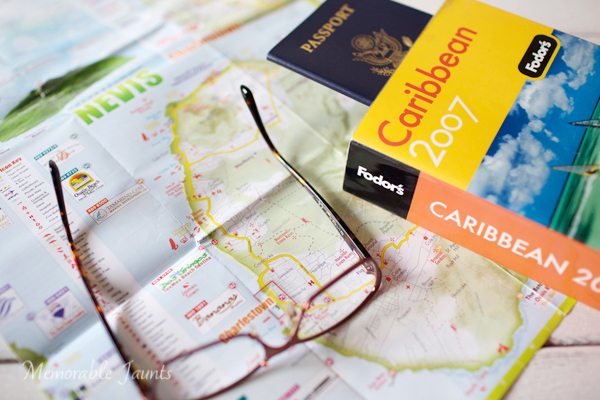
Safe travel tips for women photographers DPS Memorable Jaunts Article

Have a plan of where you want to go and what you want to do and make sure you communicate that to the right people

This seems like a no-brainer but often times is easily overlooked. It’s one of those travel smart strategies that could literally save a life. This is one time when having a game plan for where you want to go, and when you want to get there is advisable particularly for solo travellers. Avoid changing plans on the fly – especially if you have taken the time to research and scope out the best photographic opportunities for your trip. If you have to change travel plans, make sure changes are communicated to the right people, at the right time.

#5 Plan for emergencies

Lets face it – this is life, not a scripted, rehearsed, movie set. Chances are things are going to go wrong – travel plans may change, equipment may malfunction, batteries may run out. Regardless, have a plan of action for some of the more obvious mishaps. Keep numbers handy for any local camera shops in case you need to use them in a pinch – definitely a much cheaper option than having things shipped or mailed to you, especially if you are out of the country.

#6 Listen to your gut

Words like “gut feeling” and “woman’s intuition” do actually exist, and more often than not, they are spot on. Trust your instincts. At the end of the day missing a photo opportunity is not as critical as being safe. Don’t do anything that you are not comfortable doing.

#7 Carry only the essentials

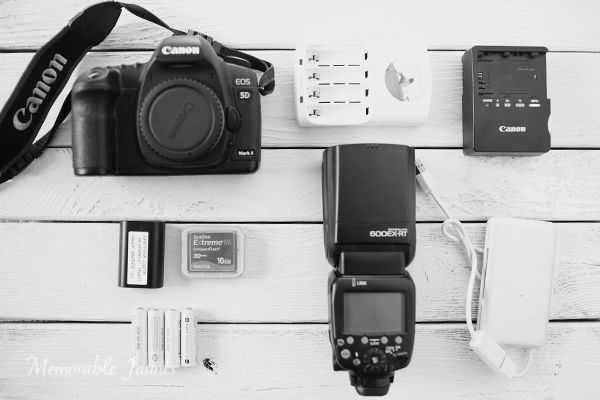
Safe travel tips for photographers DPS Memorable Jaunts Article

We photographers LOVE our gear and cannot imagine being away from it. Most of us feel we need every lens and gadget for every shoot for those what if situations. But challenge yourself to pack light. Maybe you only want to shoot with a wide angle lens or the nifty-fifty. Carry only what you need and not all the gear you own – your body will thank you.

#8 Carry personal protection equipment

No, I am NOT advocating carrying a gun or other such personal protection mechanisms. Personal protection can mean different things to different people and can also differ based on the situation. For a while I carried pepper spray in my purse. Then I switched to a swiss army knife. Then I decided that my 90lb german shepherd dog was my best defense mechanism especially for local sunrise and sunset photo excursions. Choose what is appropriate and practical for you.

Do you have any safe travels tips to share based on your personal experiences? Feel free to share…

googletag.cmd.push(function() {
tablet_slots.push( googletag.defineSlot( “/1005424/_dPSv4_tab-all-article-bottom_(300×250)”, [300, 250], “pb-ad-78623” ).addService( googletag.pubads() ) ); } );

googletag.cmd.push(function() {
mobile_slots.push( googletag.defineSlot( “/1005424/_dPSv4_mob-all-article-bottom_(300×250)”, [300, 250], “pb-ad-78158” ).addService( googletag.pubads() ) ); } );

The post Safety Tips for Travel Photographers (Particularly Women) by Karthika Gupta appeared first on Digital Photography School.


Digital Photography School

 
Comments Off on Safety Tips for Travel Photographers (Particularly Women)

Posted in Photography


Railroad Safety for Photographers

10 Nov

by Lori Peterson

If I walked into your yard and just started taking photos, would you call the police or would you just ignore it?

If you have a studio and I waltzed in with my camera and models and started shooting my latest and greatest session, would you have me removed immediately?

Chances are that after initial shock wore off you would be calling the police and asking them to get me out of your studio or off of your property.

It might an extreme example, but realistically this is what happens when a photographer brings their client, props, and their camera onto railroad tracks to shoot.

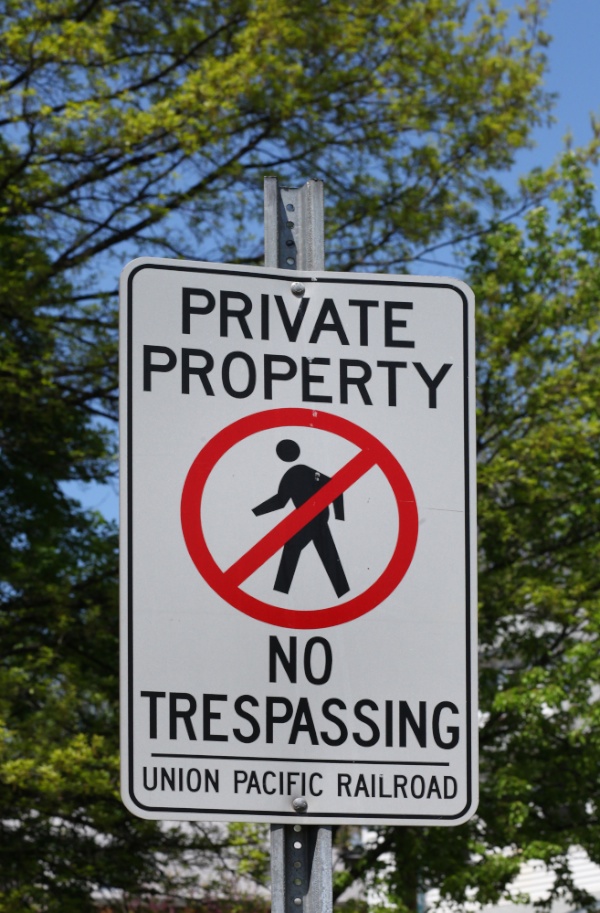
Railroad tracks are private property. They are not public property. It is illegal to shoot on railroad tracks. You can see what your particular state says about even being on the tracks by going HERE.

You might say “Well, these tracks are abandoned”. Unused tracks are not abandoned. They are still owned by the railroad company and you are still trespassing.

Ignorance of the law will only get you so far when you are confronted by a police officer or a tragedy because you didn’t follow the law. It is virtually impossible for the railroad companies to cover every inch of track with signs that warn them that they are trespassing.

railway photography safety

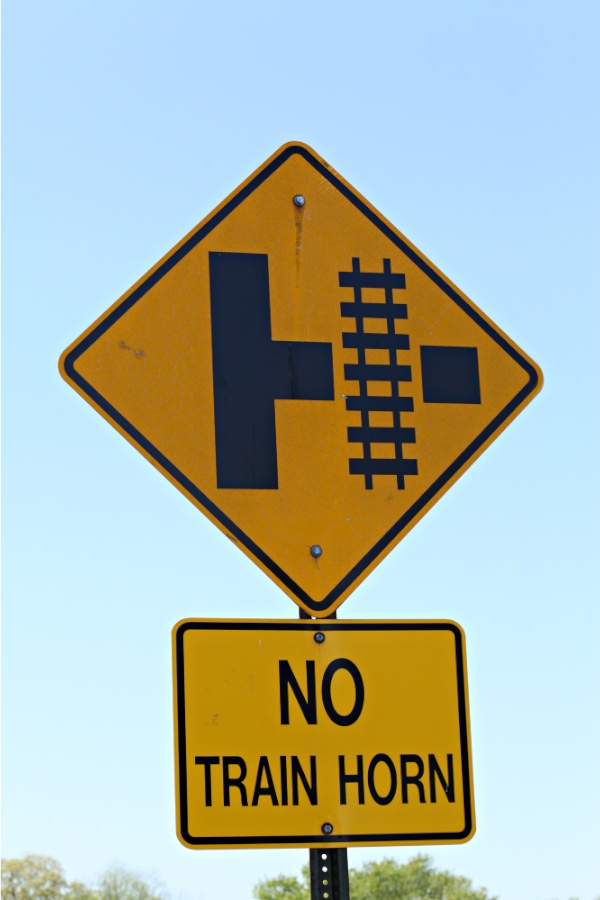
You might say “We can hear the trains coming.” Not all trains will sound their horns. Trains cannot stop as quickly as a car. It takes approximately one mile for a train to come to a stop. Trains travel between 79-125 mph even though it may not look like they are going that fast.  If you are driving 125 mph and a child ran out in front of you, would you have time to react to stop in time to not hit the child? No, you wouldn’t. Now think about all the cars that are attached to that front of the train. The force of the trains coming to a quick stop in time to avoid a tragedy is unimaginable. Even moving at a slower speed it would be very hard for a train to come to a complete stop to avoid hitting people who are on the tracks.

railway safety photography

I recently had an exchange with a photographer and we talked about her shooting on active railroad tracks. Her response when she found out that it was not only illegal but dangerous was “There are about 6 other photographers that take pictures in this location that I know of. As far as accidents, the trains have came many times while we are out there & the lights and little gate things come down way in advance.”

Where is the logic or the pure common sense in her defense of being on the tracks? There is none. She clearly stated that she was on active tracks and she clearly dismissed any danger. In her portfolio there are images of small children on suitcases and several props around them. There are images of pregnant women lying down on the tracks. Client safety clearly is not a priority.

Trains can move in two directions. The railcars can be pushing the locomotive instead of the locomotive pulling the railcars. Someone in the locomotive might see you on the tracks, but by the time they communicate with the back of the train that is pushing those railcars it would be too late.

When you bring clients onto railroad tracks you are putting them at risk and you are putting yourself at risk. You or your client could get hurt or killed. You are also putting the people who are operating that train at risk. The potential pile-up when they have to abruptly stop means you are putting more people at risk. A train derailment can mean chemical spills and property damage to any nearby homes. A photographer causing accidents on the tracks would be responsible for the any injuries or deaths, derailments, chemical spills, property damage, delays in shipping, etc.

Photographers will imitate other photographers. Client education is a key component when it comes to railroad tracks and safety. If your client asks for a session on railroad tracks, explain to them about the laws and the fines for being on the tracks.. As the photographer, you are the one ultimately responsible for the photo shoot. If anything happens it is your business, your finances, and your name on the line. Photographers need to educate other photographers that shooting on tracks is NOT acceptable and then they need to work on educating their clients that shooting on tracks is dangerous on too many levels to get that clichéd image.

For further reading about railroad safety and photography:

Amtrak’s guidelines for photographers is outline on their website

If you are found shooting in areas that are owned by Amtrak that are considered a part of their restricted area, and this includes the tracks, you can be subject to fines, arrest, and seizure of your camera and equipment.

Union Pacific has very specific policies regarding their tracks, whether they are active or inactive. They not only fine photographers who trespass on their tracks, but if they find the images online, they will request that they be removed.

Operation Lifesaver has published an article regarding railroad track safety and it can be found HERE.

Download a pdf copy of Why Photographers Must Stay Away from Train Tracks HERE

Lori Peterson is an award winning photographer based out of the St. Louis Metro Area. Her dynamic work ranges from creative portraits to very unique fine art photography. Lori’s work can be seen at www.loripetersonphotography.com and also on her blog at www.loripetersonphotographyblog.com. You can follow her on Facebook at https://www.facebook.com/LoriPetersonPhotography.

Post originally from: Digital Photography Tips.

Check out our more Photography Tips at Photography Tips for Beginners, Portrait Photography Tips and Wedding Photography Tips.

Railroad Safety for Photographers

The post Railroad Safety for Photographers by Guest Contributor appeared first on Digital Photography School.


Digital Photography School

 
Comments Off on Railroad Safety for Photographers

Posted in Photography


Four Tips on Your Image Data Safety Procedures

01 Feb

Introduction

The following is an excerpt from the SLR Lounge Lightroom Workflow System Workshop on DVD, a system designed to increase your post production speed by 5 to 10 times. Click here to learn more.

I was attending a workshop last year in Los Angeles where the instructor talked about the importance of having backup gear for an important shoot. His mantra was that during a shoot, “something always goes wrong.” Gear redundancy is important, especially when you are on the client’s clock. Without a doubt, not having a backup to your gear can potentially derail a photoshoot if something were to break.

However, the most important and expensive component of your photoshoot is indeed not your camera gear. Unlike your gear, which you carry insurance for and can be replaced, the images from the shoot may not be replaceable and are therefore the most critical component of a paid photoshoot.

Not only would it be far more expensive to setup a reshoot, for photojournalists shooting a wedding or a Presidential inauguration, a reshoot is simply impossible.

So just like your gear, it is important to have duplicate copies of your client’s images from the shoot to your computer. Here are four tips that you can integrate into your shooting workflow.

1. Back up the Images in Camera

Ideally, when you are working professionally, it is best to shoot with a DSLR that can record onto two cards on the fly. It is the most convenient and most portable method of creating backups of your images as you can simply set the camera to “duplicate” the images onto each card as they are recorded. If you are in need of frequent high speed burst shooting for action/sports, this may not be possible since using dual cards can often fill your cameras buffer too quickly. But, wherever possible, using two cards in camera will automatically add an additional level of security to your workflow.

The majority of the full-frame DSLRs such as the Nikon D600, Sony A99, Canon 5D mkIII, Canon 1D Series, Nikon D800 and the Nikon D4 Series have this capability already. Currently, the Nikon D7000 is the only APS-C DSLR that has two card slots.

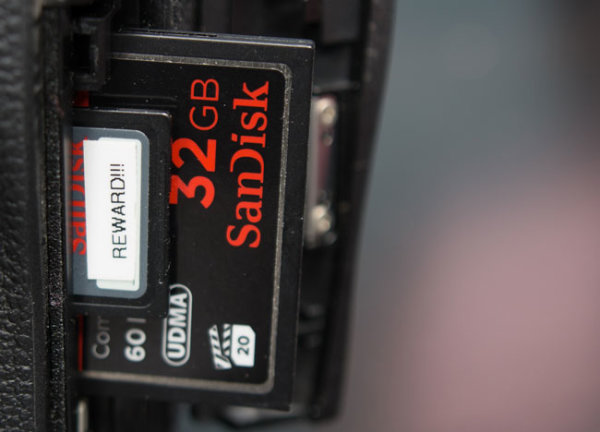
Additionally, we recommend that for your most important shoots to only use memory cards from established manufacturers such as Sandisk and Lexar. There are also many fake Sandisk and Lexar cards out there, so be wary of them. For Amazon shoppers, be sure to buy directly from Amazon itself and not a third-party seller on Amazon. Often times these counterfeit cards are virtually impossible to differentiate from packaging alone. For those that want the extra peace of mind there are also “zero failure” memory card brands out there such as Hoodman. However, in sticking with the major name brands, I have never had a card failure and thus never really felt like it was worth the 5x-10x premium price for zero failure memory.

It is also a good idea to have a standardized system of storing your cards in order to know which memory cards have been used. An example of a straightforward system is to place any used card face down in the wallet.

2. Back up the Images at the Shoot

Another method of backing up your images during the shoot is by backing up the images to either a laptop or a portable media storage drive such as the Sanho Hyperdrive Colorspace UDMA. This is especially useful when you are shooting with a single-card camera or if you have a second shooter with you

The laptop is easier if you are in a controlled environment such as a studio or a private photoshoot, but it is not recommended when you have to be in a less-secure environment such as a wedding where you may be running around everywhere. This is where a portable media drive can attract less attention, while also being far more portable than a laptop.

3. Safeguard the Memory Card on the Trip Back

The trip from the shoot is another part of the day where having a contingency plan can keep the client’s images safe in case something happens on the way home or to the studio.

One way to ensure the safety of the images is to keep both copies of the images in two separate places. I usually carry the primary cards in my card wallet which is attached to my belt loop and kept in my pocket. The back-up cards, laptop, hard drive, or portable media storage stays in the trunk.

If someone rear ends the car and damages the gear, or if someone breaks into the car while I’m eating at a restaurant, I still have at least one set of the images with me. Additionally, if the memory cards in my pocket somehow fall out, I still have the backup in the trunk.

4. Back up to Images to at Least Two Locations on the Computer

Once you returned to your studio or home, be sure to back up your images to your computer and into the backup hard drive. For additional security, you can also upload the images as either the original RAW or the finished images on to an online storage site like Amazon’s Glacier or Crashplan.

Thankfully, hard drives are relatively cheap nowadays, and additionally, there are plenty of online storage options as well. It pays to research the brand names and websites to know which hard drives and online storage sites are the most reliable. I personally use 1TB Silicon Power Rugged Armor A80 portable hard drives because they can take a beating (literally). The current online storage solution that I use is Crashplan.

Conclusion

Remember, gear can be replaced, but the client’s images may not be replaceable, so it is important to work image redundancy into your shooting workflow. The good news is that it does not take that much more effort to safeguard your images, just good habits and awareness.

The SLR Lounge Workflow System Workshop on DVD

The SLR Lounge Workflow System Workshop on DVD takes everything that we taught in the Lightroom 4 A to Z Workshop on DVD and builds by teaching you how to maximize your shooting and post processing efficiency and workflow. This 7 hour DVD covers data safety procedures, file management, culling standards and overall develop techniques to increase your post production efficiency by up to 15x! In fact, using this Workflow System we can cull and edit over 1,500 images per hour! Don’t believe us, watch the teaser video! The Workflow System is also available as a part of the Lightroom 4 Workshop Collection. To learn more click this link.

Post originally from: Digital Photography Tips.

Check out our more Photography Tips at Photography Tips for Beginners, Portrait Photography Tips and Wedding Photography Tips.

Four Tips on Your Image Data Safety Procedures


Digital Photography School

 
Comments Off on Four Tips on Your Image Data Safety Procedures

Posted in Photography


Safety Geeks: SVI Ep 1 First 3D Live Action Web Comedy Series

01 Mar

See the whole stereoscopic 3D series only on store.yabazam.com IN TRUE STEREOSCOPIC 3D THIS IS THE ONLY PLACE TO SEE IT To view this video in 3D, select viewing style first from the option of drop down list box named “3D”, Red/cyan, amber/blue etc. requires 3D glasses. Some other options, parallel and cross etc. doesn’t require any glasses. No viewing style with polarization type glasses like Real D is supported by YouTube 3D so far. 3D view style drop down menu may not appear unless using latest browser and player plug in.
Video Rating: 5 / 5

First level of the DeadAir compaign. To watch with Yellow/Blue “colorcode” glasses. (superbowl inTru3D glasses) Red/Cyan anaglyph version www.youtube.com 3D is rendered with the iZ3D driver v1.09, works for both Ati and Nvidia graphics cards www.iz3d.com Aiming is performed through the right eye. (iZ3d left shift mode) Full colour 3D version available for 3D monitors and 3DTVs at Meant-To-Be-Seen forums www.mtbs3d.com Meant To Be Seen : consumer driven stereo-3D advocacy group www.mtbs3d.com
Video Rating: 5 / 5