RSS
 

Posts Tagged ‘Safari’

Tips for Doing a Backyard Photo Safari

09 Jun

The post Tips for Doing a Backyard Photo Safari appeared first on Digital Photography School. It was authored by Simon Ringsmuth.

dps-tips-for-doing-a-backyard-photo-safari

Have you ever thought about taking a trip to the other side of the world to get beautiful shots of exotic locations? You certainly can, and traveling is one of the best things you can do to take your photo skills to the next level. If flying across the world isn’t an option, what about stepping out of your door? A backyard photo safari is just a few meters away instead of a thousand miles, and you can take some beautiful photos without expensive gear too.

backyard photo safari dandelion
Nikon D7100, 50mm, f/2.8, 1/2000 second, ISO 100

While you could just drop what you are doing and head outside right now, it helps to do a bit of planning first. If you keep a few tips and techniques in mind, it will save you some frustration and give you a few ways to approach your very own backyard photo safari that will help produce the best possible results.

Timing is everything

Familiar places can take on dramatically different appearances depending on the time of day. It’s not just about the quality of light but the type of things you are likely to find – especially in your backyard. In the morning, plants are covered in dew, and bugs and insects are seizing the day. You might also find familiar sights shrouded in fog. Revisit the same patch of earth in the evening, and the scene will be dramatically different.

backyard photo safari frog
Nikon D750, 50mm, f/8, 1/90 second, ISO 800. This frog wasn’t just in my backyard. It was on my back door! I shot this after the sun went down after a rainy day.

You already know your own backyard well, but have you ever gone out in the early hours of the morning, or as the sun was setting, or even late at night? It’s not the same place at all. You will quickly notice things that you just don’t see during the day. Familiar objects take on a whole new appearance when photographed in the early morning or late at night.

You can even take great shots after the sun goes down by using a long shutter speed.

backyard photo safari night stars
Fuji X100F, 23mm, f/8, 15 seconds, ISO 1250. I took this from my back porch very early on fall morning. It was only a few feet away from where I shot the photo of the frog!

It’s not just time of day that matters, but the time of year as well. Revisiting familiar places, even your own backyard, throughout the year can reveal amazing photo opportunities that were hiding right before your very eyes.

Act fast though! When you see an interesting picture idea, take the shot. Waiting even one day can change everything and suddenly your beautiful photo is nothing more than dust in the wind.

backyard photo safari leaf on ground
Nikon D7100, 50mm, f/2.8, 1/1000 second, ISO 100. I saw a photo opportunity on a Saturday morning right as the sun came up, so I ran outside barefoot to get the shot. The very next day, the leaves had all blown away!

Spring, summer, winter, fall – everything changes throughout the year, and this has a profound effect on the photos you can take in your yard.

Rich greens in spring, deep colors in summer, browns and yellow in the fall, and shades of gray in the winter.

Even if you think you’ve seen it all, try revisiting familiar spots in your own yard at different times of the year. The result may surprise you and give you some interesting photo ideas.

Tips for Doing a Backyard Photo Safari
Nikon D7100, 85mm, f/4, 1/30 second, ISO 800. Composite of several shots of a lunar eclipse I took from my back yard over the course of two hours.

Look at the light

No matter the time of day or season of the year, it’s essential to look for where the light is coming from.

Then think about how you can use the light to make a more interesting or compelling composition.

Most objects look great with standard front-lighting – that is, with the main source of light positioned behind you, the photographer. You might need to scoot around or shift your position to make this happen, but your photos will be better off for your efforts.

backyard photo safari sunflower
Nikon D200, 50mm, f/2.4, 1/80 second, ISO 100. This sunflower was right by my back porch, with the sun positioned behind my shoulder so the flower was evenly lit.

Backlighting is a fun technique to use also, especially on a backyard photo safari where you get fun and interesting colors. This involves placing the main source of light behind your subject, which can create really fun effects and make ordinary objects take on a whole new appearance.

It’s loads of fun if you have flowers. Even ordinary, run-of-the-mill flora that you probably have in your own yard.

backyard photo safari crocus
Nikon D7100, 50mm, f/2, 1/3000 second, ISO 100. These crocuses show up for a few days every spring, and each year I enjoy taking their picture. I didn’t plant them, but I sure enjoy having them while they bloom for a few days. I used backlighting to make it seem like they were glowing.

It’s not all about sunlight either. There are other sources of light that you can keep in mind when looking for photo opportunities right where you live.

Streetlights can cast an eerie, moody glow over everyday streets and sidewalks. Passing cars can make really fun motion trails. You can even create amazing artwork right in your yard with nothing more than a tripod and a flashlight – all it takes is a little creativity!

backyard photo safari foggy morning
Nikon D200, 50mm, f/16, 15 second, ISO 200. This is looking down the street from my driveway on a calm, foggy morning.

Adjust your angle of view

Most of the time, we see the world around us, especially our own domicile, from the same point of view. Our eye-level remains roughly the same throughout the day, altering between three to five feet off the ground, depending on whether we are standing or sitting. To really find some interesting photo opportunities, particularly in your backyard, try getting low to the ground. Really low. A whole new world awaits you if you have eyes to see it.

backyard photo safari Indian Paintbrush
Nikon D750, 85mm, f/1.8, 1/200 second, ISO 125. I had to position my camera very low to the ground to get this shot, but it was worth the effort.

Lots of interesting things start to show up when you change the angle from which you see the world around you. Even familiar settings can be transformed with a simple change in perspective. While you could get some really good shots by getting up high and shooting with a ladder, I find that it’s a lot more fun to literally crawl around on my hands and knees when looking for photos in my backyard.

backyard photo safari toys on ground
Nikon D200, 50mm, f/1.8, 1/3000 second, ISO 400. I put a few of my kids’ toys on the ground, laid down on my stomach, and photographed them in my own backyard. This picture isn’t going to win any awards, but I had fun taking it.

It might not be the most glamorous or flattering photographic pursuit, but photography can be a messy hobby. And if you’re more worried about how you look when taking pictures instead of the pictures you are taking, it might be time to reevaluate your priorities!

backyard photo safari bubble on grass
Nikon D7100, 50mm, f/1.8, 1/1500 second, ISO 280. My kids were blowing bubbles in the front yard. I had to practically lay on the ground to get this shot but the result was worth it.

Look for wildlife

I live in a small town in middle America. The most exotic animal I’m likely to see on any given day is what we call a Texas Speed Bump. (Think of what happens when an armadillo crossing the road meets a pickup truck.) It might seem like any attempt to take wildlife photos on a backyard photo safari would be an exercise in futility. However, while you might not have lions, giraffes, or gazelles out your front door, you probably have more interesting animals than you realize. You just have to look for them.

backyard photo safari spider and grasshopper
Nikon D750, 50mm, f/8, 1/180 second, ISO 5600. Shot with a +4 close-up filter. This was right outside my garage door. Cue the Lion King song “The Circle of Life”

Bugs, insects, worms, and other multi-legged creatures might give you the willies, but they can be fascinating photography subjects. The same goes for bees, butterflies, or anything with wings.

If you look closely and have a bit of patience, you can find all sorts of wildlife right where you live.

backyard photo safari wasp
Nikon D7100, 50mm, f/4, 1/125 second, ISO 400. Shot with +10 close-up filter. This wasp was hanging out on the lid of my trash can on a chilly autumn morning.

I’m no entomologist or zoologist, and when I’m out in my backyard looking for photo opportunities, I don’t even know what most of the animals are that I’m photographing. If it’s interesting to look at, and if the lighting is good, then I’ll take a picture. Sure I get a little grossed out from time to time, but I get some really cool images too.

backyard photo safari cottonwood borer
Nikon D200, 50mm, f/1.8, 1/750 second, ISO 200. I don’t know what this thing is, but it was hanging out in a pine tree in my front yard and it made for a really interesting photo.

You don’t just have to think small when taking pictures of animals on a backyard photo safari. Rabbits, squirrels, snakes, and birds – you probably have lots of animals come through your property that would be fun to photograph. The trick is to keep your eyes open, and it helps to have the tiniest sense of adventure too.

You don’t have to just look for small things either. Always keep your camera ready in case something larger comes your way! It might not be especially exciting, but it’s fun to get shots of everyday wildlife like rabbits, squirrels, birds, or other critters that call your backyard home.

backyard photo safari cardinal
Nikon D500, 200mm, f/2.8, 1/400 second, ISO 1600. A little patience was all it took to capture this photo of a male cardinal on my backyard fence.

Every now and then, you might see something a bit more exotic too. When those moments strike, it can be supremely rewarding to attempt a shot. Even if you don’t get the photo, you will at least have a fun story to tell.

backyard photo safari snake in grass
Nikon D200, 50mm, f/4, 1/160 second, ISO 200. My wife saw this snake slithering across our front yard, so I grabbed my camera and a broom. After I got a few photos I gently encouraged it to vacate the premises.

Get a set of close-up filters

One of the best things you can do if you’re looking for a way to get great shots of the world around you is to buy a set of close-up filters. When you think of going on a wildlife safari, you might imagine huge camera rigs and giant telephoto lenses. Close-up filters are the opposite: they let you get very close.

Close-up filters are extremely inexpensive and screw on to the front of your camera lens. They take a bit of patience to learn, so make sure to plan some time to get acquainted with how to get the best results in order to avoid frustration when the moment strikes. Once you get the hang of it, close-up filters make even the most ordinary backyard subjects appear majestic and even otherworldy. In other words, they’re perfect for a backyard photo safari.

backyard photo safari mushroom
Nikon D7100, 50mm, f/11, 1/200 second, ISO 400. Shot with a +4 close-up filter.

Flowers, mushrooms, berries, leaves, sticks, even blades of grass take on a whole new appearance when shot up close.

These stationary objects work really well for macro shots because they allow you to try different focal lengths and experiment with manual focus.

When you’re ready for something a bit more challenging, you can combine close-up filters with bugs and insects. This involves a lot more skill, practice, and patience (as well as mastering the back-button focus technique, which I recommend for best results) but you will never look at your own yard the same way again.

backyard photo safari bee
Nikon D500, 50mm, f/5.6, 1/250 second, ISO 360, shot with +4 close-up filter. It took nearly a hundred shots over two days to get this image of a bee in my back yard, but it was worth the effort.

If you can find a bug that is relatively slow-moving, you can combine all the techniques in this article to get some really amazing shots. For this final image, I went out in the evening, looked at the angle of the sun, adjusted my own point of view accordingly, and used a close-up filter. I’m not even sure what kind of bug or insect this is, but I really like the photo.

backyard photo safari insect on tree
Nikon D750, 50mm, f/1.8, 1/100 second, ISO 900. Shot with a +4 close-up filter.

Conclusion

This list is really just scratching the surface of what’s possible when you go on a backyard photo safari. You don’t need a lot of expensive equipment, and you don’t need to hire a tour guide. These few simple tips will be enough to get you started, and then it’s up to you. How far will your creativity and sense of exploration take you when you’re right in your own yard? It could be a lot farther than you think.

Share your tips, tricks, and backyard safari photos in the comments below!

The post Tips for Doing a Backyard Photo Safari appeared first on Digital Photography School. It was authored by Simon Ringsmuth.


Digital Photography School

 
Comments Off on Tips for Doing a Backyard Photo Safari

Posted in Photography


Leica releases limited ‘Safari’ edition M10-P camera, Summicron-M 50mm F2 lens

01 Feb

Leica has announced the launch of a limited edition Leica M10-P Edition ‘Safari’ camera and accompanying Summicron-M 50mm F2 Edition ‘Safari’ lens.

The launch of the limited edition pieces continues Leica’s tradition of olive green camera releases. In Leica’s own words, ‘Leica cameras with the olive green enamel finish were originally designed and created for hard-wearing military use, as they were seen as robust and reliable tools that consistently delivered under extreme conditions.’

The Leica M10-P Edition ‘Safari’ is identical to its less colorful counterpart in terms of specs and includes a full-grain cowhide leather carrying strap as well as a matching leather case for memory cards and credit cards, both of which were designed to ‘complement the unique aesthetic of the limited edition camera.’

The Leica Summicron-M 50mm F2 Edition ‘Safari’ lens is the first time a Leica M lens will be available in the olive green finish. Aside from the new color, the limited edition lens features a distance scale and focal length engravings that are hand-filled with red paint to ‘contrast to the other bright white engravings on the lens.’ Like the camera, this lens is identical to its black and silver counterparts.

Interestingly, the camera and lens are being sold separately with no option of getting them together as a kit. Leica says the M10-P Edition ‘Safari’ camera body is available today for $ 8,450 in a limited run of 1,500 units while the matching lens will be available on February 15, 2019 for $ 2,750 in a run of just 500 units. Both the camera body and lens are available for pre-order at B&H.

Leica Camera Continues a Longstanding Tradition with the Leica M10-P and Leica Summicron-M 50 mm f/2 “Safari” Limited Editions

The first-ever release of a Leica M-Lens in the olive green coloring accompanies the fifth iteration of “Safari” camera offerings

January 31, 2019 – The launch of the limited Leica M10-P Edition “Safari” camera and Leica Summicron-M 50 mm f/2 Edition “Safari” lens reopens a beloved chapter in Leica Camera’s ongoing tradition of special olive green camera releases. Dating back nearly 60 years, the eye-catching finish has recurred throughout the brand’s rich history, making each rare piece highly sought after among Leica collectors and enthusiasts alike. Leica carries forth this tradition with the new limited edition camera body and limited edition lens in the olive green enamel finish, which when paired together, create the perfect symbiosis of functionality, design and history.

Leica cameras with the olive green enamel finish were originally designed and created for hard-wearing military use, as they were seen as robust and reliable tools that consistently delivered under extreme conditions. The rugged aesthetic of the Leica M1 “Olive” for the German armed forces, made in 1960, proved to be a great success from its onset. The subsequent olive green Leica M3 and M4 cameras were also created exclusively for the rigors of military use in the field, however, in response to rising popularity and increasing demand, in 1977 the olive green Leica R3 “Safari” camera became the first of its ilk to be created for sale to the general public. As popularity grew and the legacy carried on over the years, Leica Camera launched the M6 TTL “Safari” in 2000, the M8.2 “Safari” in 2008 and, most recently in 2015, the M-P (Typ 240) “Safari.” Each piece, a significant highlight in Leica’s historic lineage and timeline of milestones.

Today, Leica continues the tradition of these unique and storied cameras with the Leica M10-P Edition “Safari”, a modern take on the olive green finish, at its core containing the same performance and technical capabilities of the standard Leica M10-P and its industry-leading quiet mechanical shutter. The limited edition camera is accompanied by a leather carrying strap as well as a matching leather case for SD memory cards and credit cards. Both accessories are crafted from brandy-colored, genuine full-grain cowhide and complement the unique aesthetic of the limited edition camera, of which there are only 1,500 units available worldwide.

For the first time in Leica’s history, a Leica M-Lens will be available in the legendary olive green finish. The matching Leica Summicron-M 50 mm f/2 Edition “Safari” will be offered separately from the camera, with only 500 units being made available. In addition to the special enamel finish, the Leica Summicron-M 50 mm f/2 Edition “Safari” is distinguished by its distance scale and focal length engravings, which are precisely engraved and carefully hand-filled in red paint – in contrast to the other bright white engravings on the lens. The technical specifications and optical performance are identical to those of the well-regarded production model, though the artful coloring and compact design of this high-performance standard lens makes it an attractive addition to any photographer’s set of Leica M equipment.

Every bit of visible metal components of the Leica M10-P Edition “Safari” and the Leica Summicron-M 50 mm f/2 Edition “Safari” lens are crafted from solid brass. The premium enamel finish in olive green makes the camera and lens resistant to finger marks and scratches, providing enduring protection against external elements such as solvents, chemicals and UV light to ensure a long-lasting look that can stand the test of time and transcend generations, just as its forebears before it.

The Leica M10-P Edition “Safari” camera body is available for sale today for $ 8,450. The Leica Summicron-M 50 mm f/2 Edition “Safari” premium lens will be available starting February 15th for $ 2,750. Both camera and lens are sold separately at Leica Stores, Boutiques and Dealers.

Articles: Digital Photography Review (dpreview.com)

 
Comments Off on Leica releases limited ‘Safari’ edition M10-P camera, Summicron-M 50mm F2 lens

Posted in Uncategorized


Photography Equipment Tips for an Africa Photo Safari

06 Dec

The post Photography Equipment Tips for an Africa Photo Safari appeared first on Digital Photography School. It was authored by Andrew Sproule.

There’s no doubt that booking and planning for an Africa photo safari is an exciting time, especially if it’s your very first venture. As a photo safari tour leader, I’m used to the process. Nevertheless, I still behave very much like a child in anticipation of what Christmas brings. As your departure date draws nearer, your thoughts move to packing for your trip. Although the appropriate clothing is essential, these trips are really about amazing wildlife encounters, shared experiences and capturing memories. It’s time to think about your photography equipment, – your gear.

It’s time to pack your camera bag!

Author’s Note

Before I dive in, I would like to state that this article represents my tips for maximizing your experience while on an Africa photo safari. It’s a guide with a mix of opinion and facts based on my on-location, in-the-field experience. It’s a summary, an introduction and not a laboratory review and therefore should be treated as such.

Secondly, I always recommend photography enthusiasts choose a safari designed explicitly with photographers in mind. General ‘tourist’ safaris have their place, but they’re much more likely to be governed by a species timetable. Lion, check. Move on. Buffalo, check. Move on. You get the picture. On a dedicated Africa photo safari trip, not only will you share a vehicle (often customized for photographers) with liked minded people, you’ll also benefit from being able to spend much more time with an individual animal or group of animals. You’ll be able to witness unusual behaviors and explore different angles and lighting situations. Explicit and invaluable guidance and advice are also on tap.

Thirdly, you’ll notice that I’ve included my camera settings below a number of the images. These settings worked for me in those particular situations, under certain conditions to produce the type of image I was after. I suggest you use these posted settings as a guide only. Instead, think about how these images might look if you were to adjust the shutter speed, aperture or ISO. Then, take that information into the field with you. The relationship between these elements can create widely different outcomes and also help you to define your style.

Leopard, Botswana. Canon 1DX, Canon 70-200mm(at 105mm), f/2.8, ISO 400, 1/125th sec handheld. Image © Andrew Sproule

Cameras for an Africa Photo Safari

Notice I have stated ‘cameras’ in the title and not ‘camera.’ I recommend you take at least two camera bodies with you. On the surface, this may seem like overkill or even a touch extravagant, but there are valid reasons why.

Firstly, it’s peace of mind. Imagine the heart-sinking moment if your camera fails. That emotion is tenfold if it happens on day one of a two-week photo safari! Whether you take two DSLRs, two mirrorless cameras, a combination of both, or an alternative solution, possessing a backup prevents any unnecessary anxiety. Before I purchased a second camera body, I used to hire one for my Africa trips. I still do this on occasion. It’s a great way of testing and trialing gear in the field beforehand and working out what works best for you.

Secondly, Africa is an extraordinarily harsh and dusty environment. Sand and dust particles are the enemies of sensitive camera sensors. Consequently, eliminating the need to swap lenses while on location can be a huge plus.

Furthermore, having two cameras armed with different lenses (for example a telephoto lens and a mid-range zoom), you’ll find it easy to switch between them. Switching between them is useful when wildlife comes too close, or if you are pulling away for a wide shot of wildlife in context of its habitat. Being able to adapt to shifting conditions can mean the difference between capturing, or not capturing the shot.

Not everyone is in a position to take two cameras. It also doesn’t matter whether your camera is full-frame, crop-sensor or another type, as there are pros and cons to all. What is fundamental is that you know your camera intimately. Practice on your dog, your cat or deer in a local park. Whatever you can. The more familiar you are with your camera’s features, the quicker you’ll be able to adjust to conditions that unfold in front of you with confidence.

Lenses for an Africa Photo Safari

Super-telephoto lenses with a focal length of 300mm plus are the staple for most Africa photo safaris. For crop-sensor cameras, 300mm should be ideal. If you intend to photograph birds as well as large game, the longer the focal length, the better. Full-frame cameras usually need lenses of 400m+.

Wild dog, Botswana. Canon 1DX, Canon 500mm, f/5.6, ISO 200, +2/3 EV, 1/160th sec, monopod. Image © Andrew Sproule

Although my go-to lens is a 500mm, I believe the versatility of zoom lenses make them ideal for African safaris. There’s such a wide variety of birds and mammals of a degree of varying sizes and distances that a good lens option would be something like the 100-400mm.

A short-zoom lens in the range of 24-70mm is also a great option as it provides the flexibility to pull away to present wildlife within its environment, adding real context to an image. Because I’m also a landscape photographer, I also favor super-wide lenses in the range of 16-35mm or 14-24mm.

Much of Africa’s wildlife is active in the early mornings and late evenings meaning you’ll be battling low levels of light. Lenses with larger apertures, such as f/2.8, allow more available light into the camera, so you’ll be able to use a reasonably high shutter speed for much longer. These lenses are a luxury item though, so an alternative solution is to increase the ISO. Doing so most certainly increases noise, but most photographers would rather have a sharp shot with an acceptable amount of noise than an out of focus shot with no noise. In many cases, you can eradicate most noise in post-production.

Filters for an Africa Photo Safari

I often use filters when composing landscape images, and on an Africa photo safari there are most certainly circumstances when the use of a filter is advantageous. For filters that reduce glare, saturate colors and darken skies, I recommend using a polariser filter.
If you need help to correctly expose bright skies, while preserving exposure detail in the foreground, then I recommend an ND filter.

Camera Support on an Africa Photo Safari

Burchell’s Zebra, Kenya. Canon 1DX, Canon 500mm, f/4, ISO 200, 1/50th sec, bean bag. Image © Andrew Sproule

Bean Bags

Bean bags are my go-to support, especially in East Africa. They are a simple, yet extremely effective support for your camera. Bean bags can be used to rest your lens on a vehicle’s doorsills, window frames, roof rails and the actual roof itself. Also, wildlife is often on the move, so you’re not limited to one position within the vehicle. Many reputable Africa photo safari tour operators provide beanbags. However, that said, it is always worthwhile double-checking beforehand. Bean bags can pack light and get filled with rice or beans on arrival. Some photographers prefer to fill their beanbags with lightweight polystyrene balls before they leave. It’s bulkier but a lightweight alternative. I’ve been using a couple of Kinesis SafariSacks 4.2™ for a while. As well as being a great support, the quick release straps secure the bags in place, so you never lose them in the bush.

A typical East Africa safari vehicle. Image courtesy of Governors Camp, Maasai Mara, Kenya

Unfortunately, bean bags are not a universal solution, contrary to what you may have read in certain books or magazine articles. Although they’re a fantastic solution in East Africa, they’re not as useful in Southern Africa (including South Africa, Botswana, Zambia, and Zimbabwe). The reason is that the vehicles there are radically different. Safaris in Southern Africa use open Land Rovers and Land Cruisers with no sides at all – often there isn’t even a windshield! So, there is nothing on which to rest the beanbag. In Namibia, both open Land Rovers and closed vehicles are in common use.

A typical Southern Africa safari vehicle. Image courtesy of Motswari Private Game Reserve, South Africa

Monopod

If a bean bag is not an option, a monopod offers a lightweight and more practical alternative to use within the confines of a safari vehicle. Especially in Southern Africa. You don’t need to extend it entirely, and it takes the strain from your arms and shoulders while seated. It’s surprising how effective it can be. I have tested many monopods over the years and have found that Gitzo Monopods™ best suit my needs. I also use a Really Right Stuff™ lever-style, quick release that makes the process of taking lenses on and off the monopod very fast.

Tripod

A tripod is useful or even an essential piece of kit for evening photography, longer exposures or for around the camp. Although, the wide-spread tripod legs make them impractical and ill-advised for most safari vehicles. However, if you’re in an open vehicle on your own, or perhaps with one other, a tripod can be rigged to provide an excellent platform for larger lenses. To avoid badly damaging your camera from vehicle shake, always remove your camera from the tripod while on the move.

Some airlines take a dim view of tripods, and you may find it difficult to persuade them to let you take it in the cabin as part of your hand luggage. If it’s going in the hold, it can take up more of your baggage weight allowance.

Clamp

I often use a ball head or gimbal head on a Manfrotto® Superclamp that can be bolted almost anywhere, including a vehicle’s roof bars. If I’m on my own, or part of a tiny group, I may even have several of these clamps placed in strategic points around the vehicle making it extremely easy to switch from side to side and back to front.

Manfrotto 035 Superclamp. Image courtesy of Manfrotto®

Storing Images while on an Africa Photo Safari

Laptop

You could easily take 300-500 images a day. Trigger-happy photographers may even have over 1,000, so a small laptop with external hard drives are useful for securely backing up your photographs. If weight restrictions allow, two hard drives that mirror each other is a great solution. Remember to pack essential items such as connecting cables, chargers and memory card readers.

Memory Cards

An alternative solution to external hard drives is to bring extra memory cards. You can file these away at the end of each day. That way, you are safe in the knowledge that your data remains untouched until you arrive home. If you don’t like the idea of swapping out memory cards too often, go for larger capacity ones such as 32GB. That said, I don’t like to put all my eggs in one basket, and therefore I opt for 2 or 3 smaller cards in favor of one larger one.

Accessories for an Africa Photo Safari

Batteries

Get to know what you can expect out of your camera with regards to battery life and take enough spares to get you through each day. Cold is a battery’s nemesis, so make sure they’re not getting too cold overnight. I have two spare batteries for each camera body, and that’s always been more than adequate for my purposes.

Lens Cleaning Cloth

Remember lens cleaning cloths. I would also recommend a camera and lens cover that helps protect your camera in the event of a rain shower and for protecting your gear against the dust mentioned above.

Others

Don’t forget your smartphone, binoculars, head torch, notepad and pen, personal medication, malaria medication, toiletries, money, your passport, and visa.

For detailed, up-to-date information on vaccinations and more, you are best to consult an official website.

Packing for an Africa Photo Safari

I recommend packing high-value items like cameras, lenses, and laptops in your hand luggage. Some airline safety requirements require you to pack batteries in your hand luggage, so ensure you charge your items, as airport security often requires you to demonstrate that laptops and cameras are all in full working order. A simple rule of thumb is to pack items essential to your photography, travel, and health in your hand luggage.

Pack your gear very carefully with disruption in mind. Some Africa photo tours can consist of two or three successive flights to get to various destinations in Africa. There may be two or even three layers of airport security on each of these flights. You may be required to unpack large cameras, lenses, and laptops. If you can, avoid placing smaller accessories on top of larger items that you may need to take out repeatedly and re-pack. Pack cables and batteries together in small pouches rather than loose in your bag.

Your camera bag should be large enough for your gear but small and light enough for all cabin limits. When packed you should be able to safely lift your bag in and out of the overhead lockers without assistance. Check the maximum sizes and weights for all the airlines and be aware that different flights often have different rules.

For small internal charter flights within Africa, total baggage allowance (hand luggage plus hold luggage) can be as little as 20kg and bags must be soft and pliable.

Typical Southern Africa internal charter flight. Image courtesy of Moremi Game Reserve, Botswana

Final Thoughts on an Africa Photo Safari

An Africa Photo Safari is an incredible experience. For many, it is a-once-in-a-lifetime opportunity both to experience incredible scenery and wildlife and to take amazing photographs.

There’s no doubt that it can be a daunting experience packing expensive and essential photography equipment for a safari. Even for seasoned photographers. Just remember to seek out advice. If you are booked on a photographer-specific tour, you can request support from your guides and or Africa safari tour facilitator. They have the experience and knowledge to help you make it the through this process with as little stress as possible.

The post Photography Equipment Tips for an Africa Photo Safari appeared first on Digital Photography School. It was authored by Andrew Sproule.


Digital Photography School

 
Comments Off on Photography Equipment Tips for an Africa Photo Safari

Posted in Photography


Paris Safari: Projected Wildlife Gets Chic in the City

17 Sep

[ By Steph in Art & Street Art & Graffiti. ]

paris wildlife 4

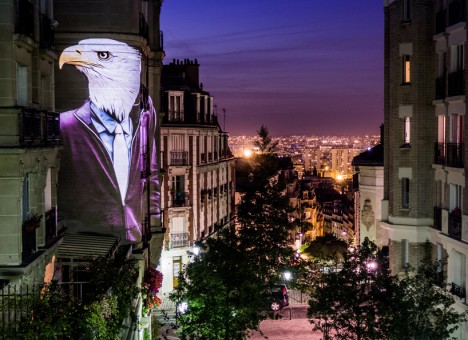
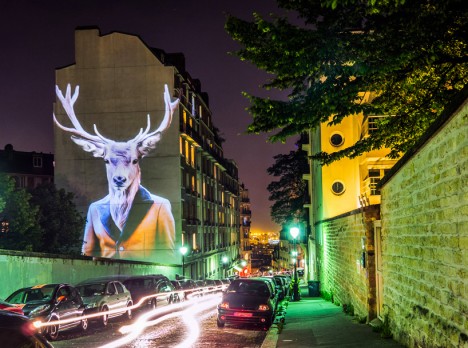
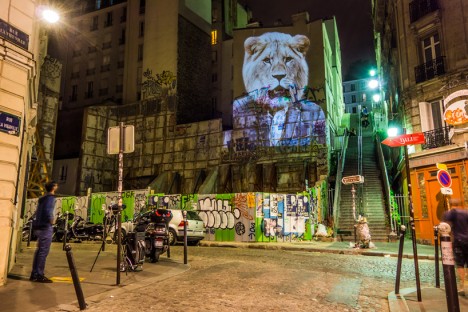
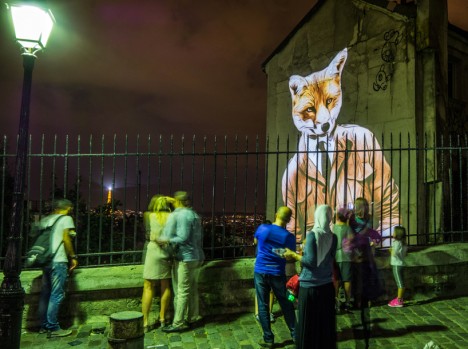
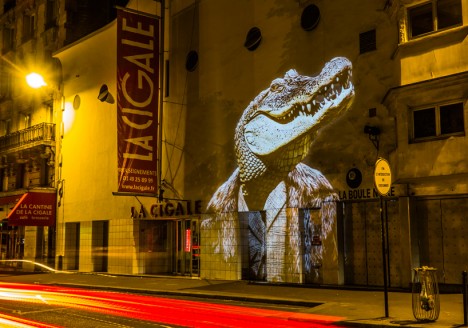
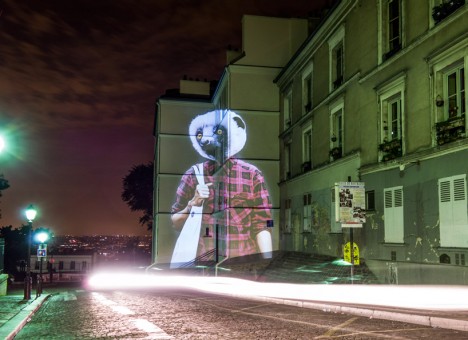
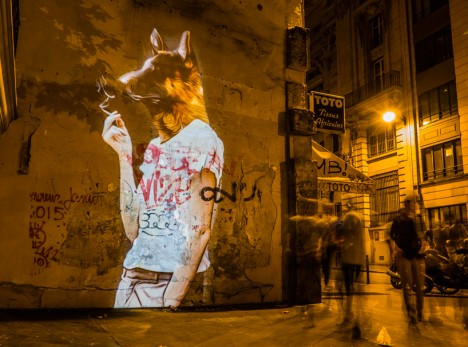
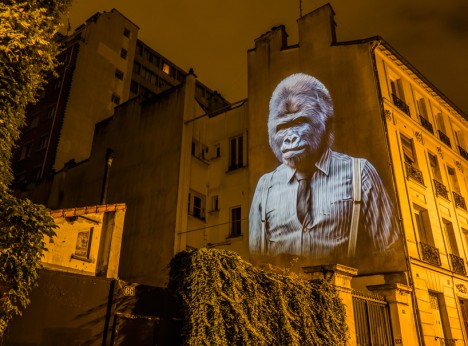
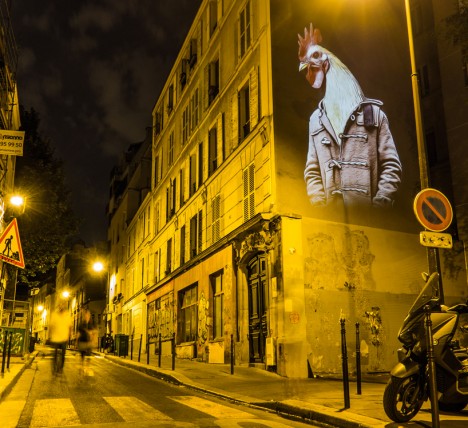
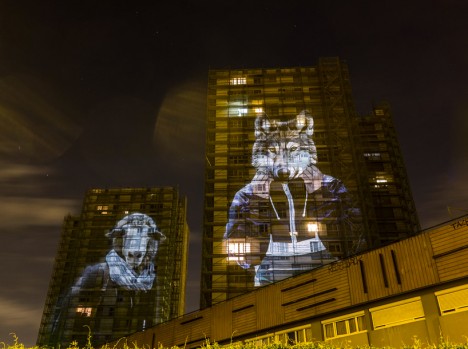
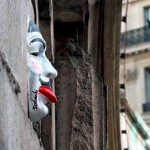
Soaring up to six stories in height, these lemurs, deer, gorillas, eagles and other carefully clothed creatures projected onto buildings all over Paris are mocking your fashion choices. The exotic animals – which certainly can’t be found in the streets of the city otherwise – might seem like just a bit of fun, or a statement on the lack of nature in urban environments, but the creator of the project has something a little deeper to say.

paris wildlife 1

paris willife 5

paris wildlife 6

Artist Julien Nonnon has spent all of September beaming his creations onto building facades after the sun sets, in a mix of street art and video mapping. For ‘Safari Urbain,’ Nonnon developed his own tools to project the images anywhere from life size to the full height of towering apartment buildings.

paris wildlife 11

paris wildlife 9

paris wildlife 10

Some of the animals are clad in three-piece suits, others in plaid flannel shirts or hoodies, echoing the fashions seen among the human passersby who stop to gaze up at them. The point, says Nonnon, is calling attention to how we contradict ourselves with what we choose to wear, wishing to be unique while simultaneously marking ourselves as part of a clearly defined group in an attempt to fit in.

paris wildlife 2

paris wildlife 3

paris wildlife 7

“The bestiary coming right out of fashion magazines, questions our behavior… In our way of dressing, we express our vision of the world, while indirectly revealing our social position and financial power. Fashion is nothing other than a means of communication, of integration and belonging to a group.”

Share on Facebook


[ By Steph in Art & Street Art & Graffiti. ]

[ WebUrbanist | Archives | Galleries | Privacy | TOS ]


WebUrbanist

 
Comments Off on Paris Safari: Projected Wildlife Gets Chic in the City

Posted in Creativity


Put the Fun Back into Your Photography with a Cow Safari

05 Aug

Whether you are a pro photographer or a dedicated amateur, sometimes when you are photographing a lot you can get so caught up in achieving the perfect image, that you lose the sense of fun that got you interested in the first place.

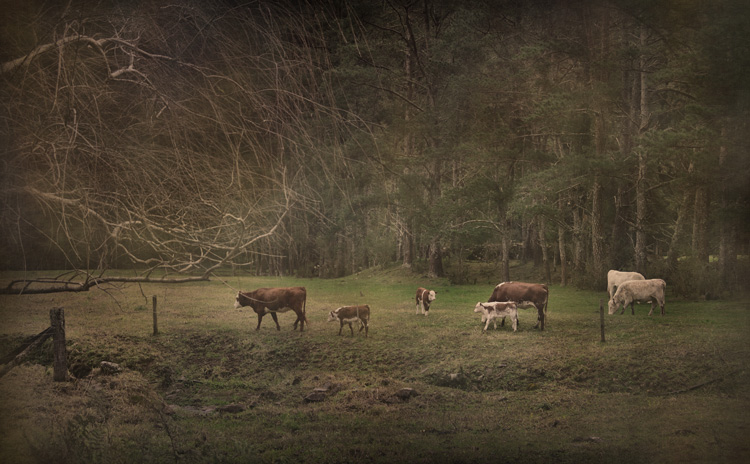
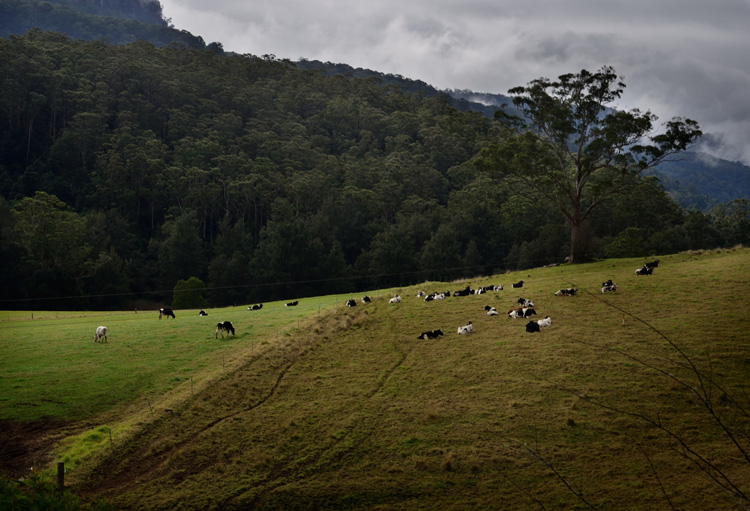
Actively putting the fun back in can not only help you to enjoy your regular photography work more, and assist in getting your photo mojo back, but can inspire new ideas you otherwise might not have come up with. My favourite way to do this is a Cow Safari. It’s kind of like an African safari, but with cows.

Fun-photography-safari-01
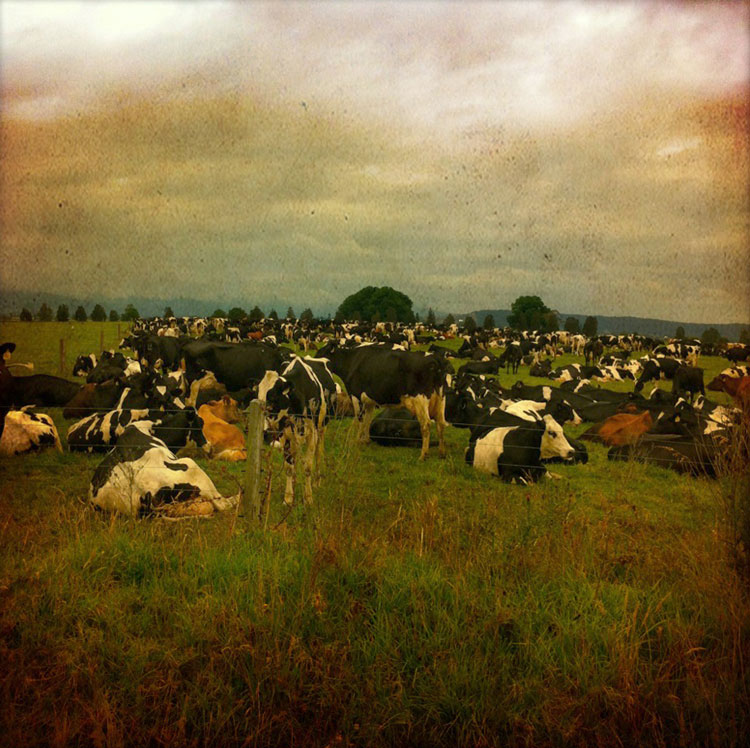
Why cows? Well, for a start they tend not to eat you as much as lions and it’s much cheaper than a trip to Africa. Cows are not the most athletic of creatures, they tend to just stand around a lot and are not well camouflaged, so are pretty easy to capture in a photo. They generally hang out in very picturesque areas, perfect for a day out photographing.

Cows generally hang out in very photogenic areas.

Cows make a great safari subject and are generally vegetarian so your risk of getting eaten by one is fairly low. Can’t say the same for lions.

However, if you don’t live close enough to a cow hang out, you can make up your own safari. For example; if you’re in the city, maybe a pigeon safari, or seagulls if are near the beach. Perhaps a people walking their dogs safari, or even a flower safari – it doesn’t really matter, just so long as you can find your subject in various different places that you can travel around to easily over a few hours, a day, or even a road trip weekend.

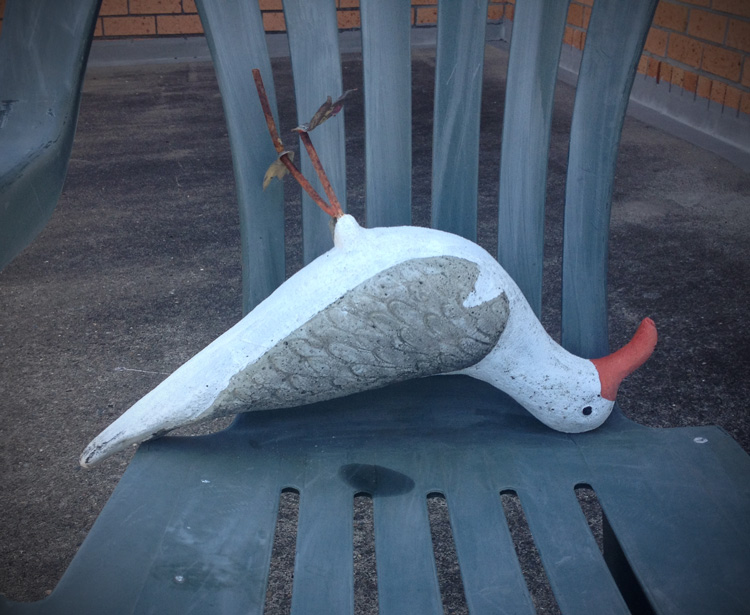
My first safari was some years ago by the seaside with my father, the subject was seagulls. We set up a small wager, winner gets bragging rights. There has been no definitive winner, because the safari still continues years later. Even when we’re in different parts of the country, there is an occasional exchange of seagull photographs. It’s been inspirational, I’ll be bogged down in the photographic process and my phone will light up with something like this:

It's all about fun with these safaris.

A photograph sent to me by my father while on a seagull safari. I don’t think that seagull is very well, in fact I don’t think it is actually a seagull, I suspect foul play! Photo credit: Chris Hawkins

The main point of the safari is to step away from your usual photography routine and just enjoy taking photographs for the sheer sake of doing so. No planned images, no trying to achieve anything or get that perfect shot, just fun photographic play time with the idea of loosening and lightening up a bit as a photographer, and not taking yourself or your images too seriously.

Once you take the trying hard part out of the picture, you can get back to experimenting, and maybe surprise yourself, just like you did when you first fell in love with photography. Of course you may not end up with anything worth saving, and that’s not the point of the exercise. But, then again, you never know what you might come across in your travels.

You never know what you might find on your safari.

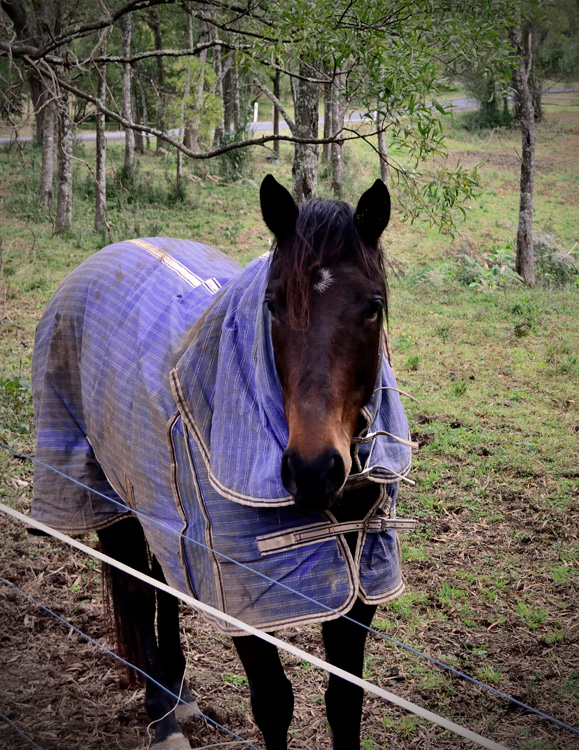
Had I not been out on a cow safari, I may have missed the opportunity to capture this cow doing a remarkably good impersonation of a horse.

Your safari is a great time to experiment with things you might not normally try when you’re too busy trying to get that perfect shot. Try the lens you haven’t really played with yet, test out some of the features on your camera you haven’t gotten around to trying. If you are a pro who is dedicated to manual setting, maybe just try out some of the Scene Modes, or vice versa, play with manual settings if it’s something you have not really tried. Maybe even pick up one of those cheap disposable film cameras, or test out some different mobile phone apps.

A safari is a great time to experiment with your gear.

Use the photographic time-out to slow down and experiment with things like mobile phone photography apps. 

How to Conduct Your Safari

Step 1: Grab a fun friend or two

They don’t necessarily need to be photographers, although I’m willing to bet they’ll end up taking a shot or two on their phones. Encourage them to bring a camera, or bring one for them. They could also come in handy as a model.

Take some friends, photographers or non photographers, it doesn't matter, it's about fun!

Safari fun is best shared.

Step 2: Bring some supplies

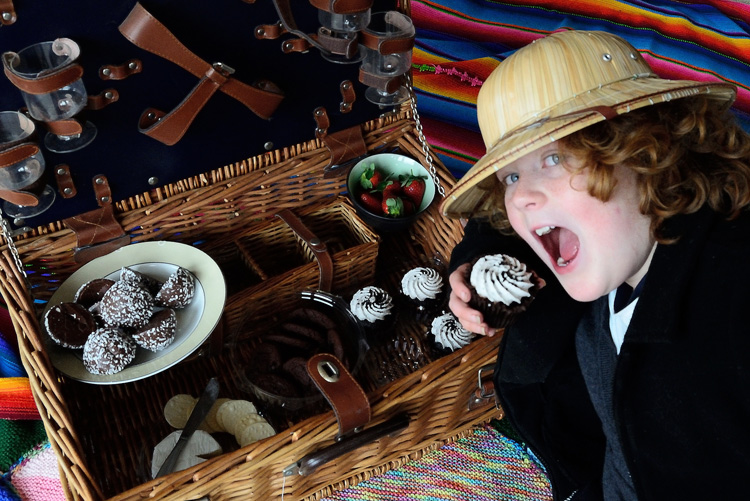
Depending on where you conduct your safari, you may not be close to a convenient cafe or food place, so why not take your own. Pack a few sandwiches or a whole picnic.

Supplies are a good idea, less time hunting for food places, more time to photograph.

Maybe pack a healthy picnic for your safari. It’s all healthy as long as there’s some fruit right?

Step 3: Get out there and have fun

Jump in the car, on your bikes, the train, or get your walking shoes on and head out. You can map your trip beforehand, or perhaps toss a coin for which direction to go, as you step out the front door. Just so long as you travel around a bit, and have a few different spots to stop and take some photographs.

Taking time out to have photographic fun with friends or family  is worth it, and not just for your own photography.

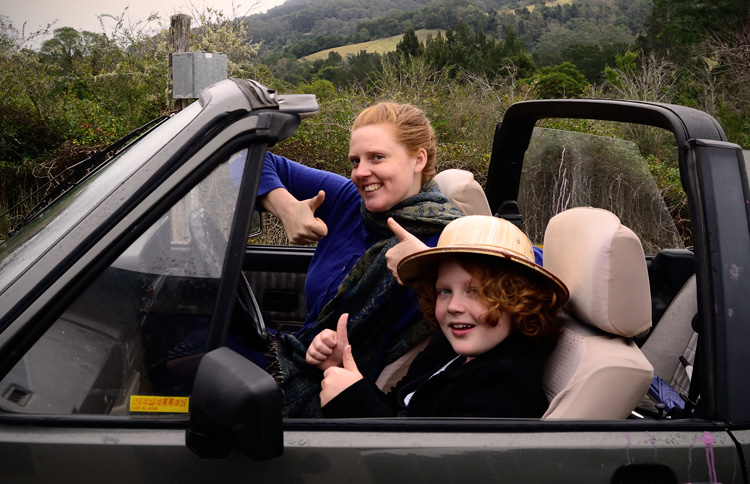
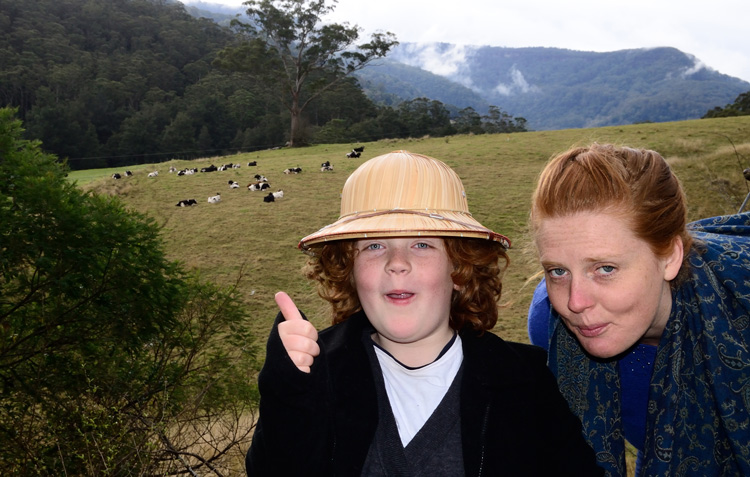
It’s thumbs up for the cow safari. My little friend here really got into the spirit of the day. He even took some great photographs and video on his portable gaming device. By the end of our safari he wanted to know how much he had to save up to buy a camera. Safari success!

Safari Tips:

  • Experiment: Use the safari to experiment with different lenses, settings, or cameras.
  • Go Mobile: Don’t disregard the phone camera, even if you are not a fan of phone photography.
  • Do variations: Try all versions of the above at each place you stop. See how each setting/lens/app deals with the same situation.
  • Don’t trespass on properties, as much as you might be tempted to slip under a fence to get that perfect cow shot, these animals can be dangerous, as can farmers who don’t appreciate trespassing.
  • Don’t hassle the cows. If they are close to the fence, keep a distance and approach very slowly. If they start to get up and move, back off. No shooting off a flash in their moo-ey faces.  The same applies to other subjects. Just be kind and respectful.
  • Set up a challenge with your co- safarians (I think I just made that word up), such as best, funniest, or worst pic of the day. Just don’t get too serious about it!
  • Keep it going in the processing stage: The fun doesn’t have to stop when you get home from your safari, take the same approach to editing. Use some of your images from the day to experiment in your editing program with different effects and techniques that you wouldn’t normally try.
  • Take it global: You could do your safari with online friends, just set up a date or an event on Facebook. In this day and age of instant online access, you can safari with friends from around the world.
Get out there and start having some photographic fun!

The final shot on our cow safari, taken through the car window on the way home.

Above all, have fun, relax, enjoy, laugh, play. This is about taking a photographic break of sorts and getting outside your normal photography practice. You never know, you may end up with that coveted perfect shot in the process. Or, maybe not. It doesn’t matter, as long as you were having fun with your camera. Although I am sure you will end up with at least one shot that makes you smile, and I would love to see that shot or any others you take on your safaris.

Please do share in the comments below, any safari shots inspired by this article or from a previous safari, or any tips or safari ideas you might like to share with fellow safarians (yup, it’s a word now). They don’t have to be great shots! It’s about sharing the experience and having fun with your photography.

googletag.cmd.push(function() {
tablet_slots.push( googletag.defineSlot( “/1005424/_dPSv4_tab-all-article-bottom_(300×250)”, [300, 250], “pb-ad-78623” ).addService( googletag.pubads() ) ); } );

googletag.cmd.push(function() {
mobile_slots.push( googletag.defineSlot( “/1005424/_dPSv4_mob-all-article-bottom_(300×250)”, [300, 250], “pb-ad-78158” ).addService( googletag.pubads() ) ); } );

The post Put the Fun Back into Your Photography with a Cow Safari by Lea Hawkins appeared first on Digital Photography School.


Digital Photography School

 
Comments Off on Put the Fun Back into Your Photography with a Cow Safari

Posted in Photography


Backyard Macro Photography Safari

26 May

Editor’s Note: This is part a series on macro photography this week. Look for a new one each day. The next newsletter will have them all if you miss any!

As photographers, we often have the opinion that in order to capture a great image we need to head out to an exotic location. But, what if you don’t have the time or opportunity to go to one of those places? Say you have free time some morning, and would like to go outside and capture some stunning images. You might be surprised at what you can find to photograph right in your own backyard!

If you don’t have a backyard, take a trek to a nearby park. Everywhere you look, you will find subjects to photograph in macro. Spring and summer are great seasons to go on a backyard macro photography safari. There are many advantages to such a shoot. For one, you don’t need to be up and at’em before the crack of dawn to travel – though it is beneficial to take full advantage of the early morning light. Also, keep in mind that if you are planning a Backyard Macro Safari for your weekend, you should put off mowing your grass until after your macro adventure, because your mower will likely destroy some potential subject matter in your yard.

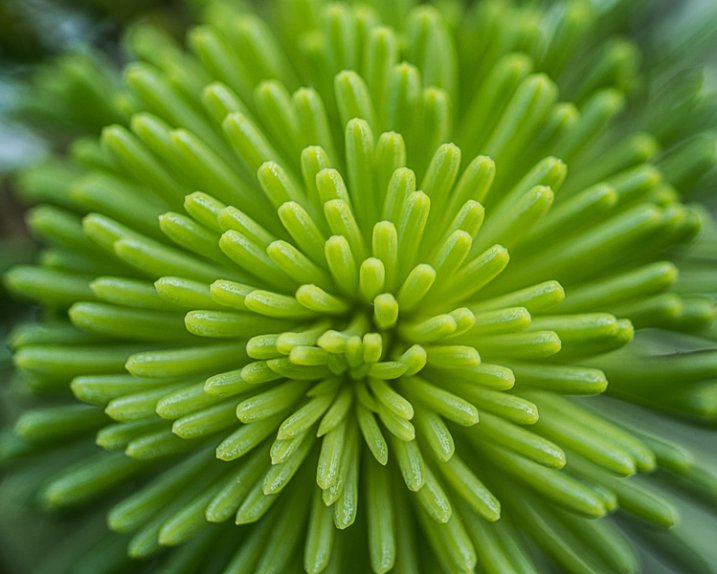
New growth on a pine tree creates a unique color burst effect.

New growth on a pine tree creates a unique color burst effect.

Necessary Equipment:

Keep it simple! Start out with your camera and macro lens on a tripod. Other equipment you might find useful includes a mat or knee pads, an off-camera flash, a reflector, and a diffuser. Another great thing about a backyard safari is, if you decide to use another piece of equipment you can just go back in the house and get it!

Tripod

As with almost every type of photography, the tripod is one of your most important pieces of equipment, for a couple of reasons. The most obvious reason is to avoid camera shake, But also, in many cases, your depth of field will be very shallow, and keeping your camera still on a tripod will help keep your subject in sharp focus. Another benefit to using a tripod is that to do so will slow you down, which is very helpful with setting up the composition and lighting of your image.

Mat or knee pads

Not every capture will be found at standing level. A mat or knee pads are great tools for helping you get to ground level conveniently and comfortably in your yard.

Off-camera flash

Sometimes you’ll find some of the most interesting subjects in the deep shadows of your yard. In these cases, using an off-camera flash will add some light to better reveal or enhance your subject.

Light Reflectors

Reflectors come in very handy when you need to add some light into the shadowy areas of your image.

Light Diffusers

If you are dealing with very harsh light, diffusers or light modifiers can soften the light.

Black and white

Converting to black and white can bring out the patterns and textures of your images.

Take time to look around

Yogi Berra once said “You can observe a lot by just looking around.” In macro photography, sometimes less is more, so slow down and seek out even the smallest detail that could create a great macro image. Try to find new angles that make even the simplest object interesting. Don’t be afraid to experiment with new techniques such as multiple exposures.

What to look for, subject-wise

There are many objects right in your own backyard that make great macro photography subjects, such as flowers and insects. But don’t just stop there! Look for repeating patterns, textures and leading lines. Water droplets and spider webs can become beautiful subjects if photographed carefully. Just as in any other form of photography, look for the color red to compose a powerful image.

14844445274_cf84722530_o

Choose your background wisely

The background is one of the most important elements of a good macro. Setup your camera at the level of your subject. This will allow you to move 360 degrees around it, and carefully choose just the right background to enhance the subject. Be aware that if the background is too busy or too light, it will draw the viewer’s eye away from the subject.

DSC_6693-Edit

The muted colors of the background causes the subject to stand out sharply.

Light

Avoid harsh lighting or flat lighting. By looking for side light, or even back-lighting, you can create more dramatic images. Adding an off-camera flash is an effective technique to enhance your subject and separate it from the background. By setting your fastest flash sync-speed, and using a small aperture, you can make your subject pop from an otherwise boring background.

Focusing

Focusing can be the most difficult component of macro photography. Here’s a little trick to help you get the focus result you are looking to achieve: First, set your lens on manual focus. Next, turn the focus ring to the minimum focus length. Now simply move your camera closer to your subject until the part of the image that you want to be sharp is in focus and take the shot.

The wind is not your friend

Windy days make it very difficult to capture sharp macro images, and even harder to compose one if your subject is swaying back and forth in the wind. Try adding a flash to freeze your subject in windy conditions. In some cases the wind can help create interesting effects, but it’s a challenge!

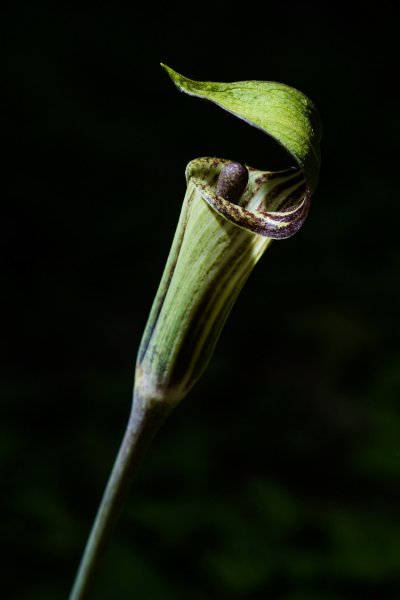
Found this in the under growth in my backyard. Because of very low light I add a off camera flash set to low power on the side. I wanted to add some light to the top so I used my hat to reflect some of the light from the flash to the top of the plant.

An off camera flash was used here to add side light to this Jack-in-the-Pulpit. A light colored hat was used as an impromptu reflector to add light to the top of the wild flower.

Conclusion

Capturing images of nature in your own backyard is rewarding and convenient. One of the best things about a Backyard Macro Safari is that you don’t have to go anywhere for the shooting experience, so if things don’t work out, you don’t have that long disappointing ride home with nothing to show for it. If it was successful, you can kick back and celebrate right away, though you may still have to face mowing the lawn! What macro images can you capture in your backyard safari?


macro-coverWant to learn more about macro photography? Check out Ed Versosky’s Introduction to Close-Up & Macro Photography ebook – just $ 10 (over 30% off) this week with coupon code: DPS. You will need to enter the code to apply the discount.

googletag.cmd.push(function() {
tablet_slots.push( googletag.defineSlot( “/1005424/_dPSv4_tab-all-article-bottom_(300×250)”, [300, 250], “pb-ad-78623” ).addService( googletag.pubads() ) ); } );

googletag.cmd.push(function() {
mobile_slots.push( googletag.defineSlot( “/1005424/_dPSv4_mob-all-article-bottom_(300×250)”, [300, 250], “pb-ad-78158” ).addService( googletag.pubads() ) ); } );

The post Backyard Macro Photography Safari by Bruce Wunderlich appeared first on Digital Photography School.


Digital Photography School

 
Comments Off on Backyard Macro Photography Safari

Posted in Photography


Win an Alaskan photo safari with Datacolor

07 May

Screen_Shot_2014-05-06_at_2.36.22_PM.png

Datacolor has announced its Great Alaskan Photo Expedition Sweepstakes, an online contest that offers an all-expense-paid trip to Cook Inlet, Alaska. Winners will get to spend a week photographing wildlife in Lake Clark National Park with nature photographer David Cardinal. The grand prize has a $ 10,000 value and includes round-trip airfare to and from Anchorage as well as all meals, lodging and charter flights to the wildlife preserve. Learn more

News: Digital Photography Review (dpreview.com)

 
Comments Off on Win an Alaskan photo safari with Datacolor

Posted in Uncategorized


Delhi Safari Official Trailer [2012] [3D]

02 Nov

Hello Everyone, You are watching [XYZ-D] converted videos. For More Details contact us at: xyzdconversions@gmail.com This is our presentation of movie Delhi Safari Official Trailer [2012] converted in 3D. We donot claim any copyrights of this video, this is for demonstration purpose only. To watch this video you may require Anaglyph Specs (Red and Cyan or Blue). We respect all artists, technicians & owners of this work. Hope you all will like it. Video Conversion in 3D by our [XYZ-D] Conversion process Team – The Third Dimension Solutions
Video Rating: 0 / 5

Opening titles from the 1983 3D film “Friday The 13th Part 3” I DO NOT OWN ANY OF THIS MATERIAL All credit and material belongs to Paramount Pictures 3D conversion by Aiseesoft Platinum Software For best viewing,use red cyan 3D anaglyph glasses,and view from three to four feet from your monitor. Enjoy!!
Video Rating: 0 / 5

 
Comments Off on Delhi Safari Official Trailer [2012] [3D]

Posted in 3D Videos


Article: Gearing up for an African safari

26 Nov

cover.jpg?v=1232?v=1233?v=1233?v=1233

Wildlife photographer and tour operator Dallas Dahms explains how to choose the most appropriate photo gear when embarking on an African safari. His article shares camera lens and accessory combinations best suited to particular modes of transport and specific types of photo opportunities. He also supplies a handy tip for safely carrying your gear aboard in-country flights.

News: Digital Photography Review (dpreview.com)

 
Comments Off on Article: Gearing up for an African safari

Posted in Uncategorized


[MODIFIED] Safari for Windows – Change Font Smoothing

02 Sep

Change the amount of smoothing Safari performs on text to increase legibility.

Similar to some other web browsers, Safari for Windows includes technology to smooth the display of on-screen fonts to help increase text legibility.

However, Safari takes font smoothing a step further and lets you adjust the amount of smoothing you wish to perform instead of using Windows default settings. Depending on your monitor type and preferences, experimenting with these settings may create pleasing results:…

Read more at MalekTips.
New Computer and Technology Help and Tips – MalekTips.Com

 
Comments Off on [MODIFIED] Safari for Windows – Change Font Smoothing

Posted in Technology