RSS
 

Posts Tagged ‘Rings’

H&Y Revoring variable step-up rings allow filters to fit multiple lens thread sizes

30 Jun

Filter manufacturer H&Y has launched a series of new step-up adapter rings that have variable thread sizes to allow users to fit a single screw-in filter to multiple different sized lenses. Using a sprung iris the thread size of the Revoring can be altered to fit a range of lens sizes via a rotating ring on the adapter. The idea is a single screw-in filter can be switched between different lenses very quickly without the need for changing adapter rings.

There are four sizes of Revoring to cover lens threads of 37-49mm, 46-62mm, 67-82mm and 82-95mm. The 37-49mm ring, for example, takes a 52mm filter. Once attached to the Revoring that filter can be switched between lenses that use filter thread sizes of 37mm to 49mm, by twisting the revolving ring to adjust the size of the adapter’s thread.

Twisting the adjustable ring closes the iris to its smallest size, and releasing it allows the thread to expand to fit the lens in use. The adapter holds in place immediately, but can be screwed in for extra security. To take the adapter off the lens the ring is turned to again contract the iris so it comes free of the lens.

Each of the sizes comes as a stand-alone ring for users to attach their own filters, or a second version is available that has H&Y’s variable ND filter with a circular polariser already built-in. The variable ND ranges from ND 3-1000 covering light reductions of 1.5-10 stops.

I’ve had couple of the rings for a while and thought a video would explain them a little better.

H&Y says the Revorings are made from architectural building-grade 6063 aluminum giving them strength while maintaining a light weight – the 67-82mm ring weighs 64g/2.25oz – and that the metal is protected with a matte black anodised coating.
Revorings are being launched via a Kickstarter campaign that runs until August 8th.

Post-campaign RRP:

37mm – 49mm REVORING: Accommodating 52mm filters – $ 35
46mm – 62mm REVORING: Accommodating 67mm filters – $ 35
67mm – 82mm REVORING: Accommodating 82mm filters – $ 40

37mm – 49mm REVORING Variable Neutral Density ND3-1000 + CPL – $ 184.00
46mm – 62mm REVORING Variable Neutral Density ND3-1000 + CPL – $ 189.00
67mm – 82mm REVORING Variable Neutral Density ND3-1000 + CPL – $ 199.00

The 82-95mm Revoring will be a ‘stretch goal’ that will be made available should the campaign raise $ 500,000. Should it reach $ 750,000 the 82-95mm ring will be released with the variable ND and CPL option. Reduced prices during the campaign will start at $ 23 for the 37-49mm Revoring and $ 139 for the same size with the filters built-in. For more information see the H&Y website or the Revoring Kickstarter campaign page.

Press release:

H&Y Announce The REVORING: A Revolutionary Adapter with a Twist

Imaging innovation campaign now live on Kickstarter

H&Y Digital Company Limited has announced the launch of a brand new Kickstarter campaign for the innovative step ring adapter, the H&Y REVORING and REVORING with Variable Neutral Density ND3-1000 & Circular Polariser combined filter, for use with DSLR, mirrorless and video camera lenses.

The REVORING is a true first in the image-making world. Its revolutionary design overcomes the need for multiple filters and step-up rings, saving photographers and filmmakers both time and money.

REVORING: The last word in filter adapters

The REVORING arrives as a completely new type of filter adapter. With its patent-pending variable and tough retractable blade technology, it can fit any lens with filter thread sizes between 37 – 49mm, 46mm – 62mm or 67mm – 82mm, accommodating either 52mm, 67mm or 82mm screw-in filters for the sizes available at launch. This versatility negates any need for photographers, cinematographers and content creators to carry multiple step-up rings, which can make for messy kit bags and adding unnecessary extra weight.

REVORING Variable ND + Circular Polariser combination

In addition to the standard REVORING, H&Y’s Kickstarter campaign includes another brand new REVORING which combines the REVORING’s adapter technology with the brand’s market-leading Variable Neutral Density & Circular Polariser combination filter. This heady combination creates a truly unique and complete product for image-makers everywhere.

Completely eradicating the need to invest in multiple filters for each lens or multiple step rings to adapt existing filters, the REVORING Variable ND + Circular Polariser combination system will adapt to fit a wide range of lenses, improving handling and boosting workflow speed to the next level.

H&Y’s REVORING Variable ND + Circular Polariser combination will quickly become an essential tool for shooting both moving and still images, giving a wealth of dynamic range to the user’s fingertips with the added bonus of a high-quality H&Y Circular Polariser onboard.

Kenny Leung, CEO of H&Y, said: “Almost 3 years of research and development, along with field testing, have been applied to bringing the REVORING that much closer to reality. The manufacturing process ensures that the materials used match the quality that their customers come to expect from H&Y. We are confident that image-makers across the globe will fall in love with this new concept and the REVORING systems will quickly become an indispensable partner for many photographers and filmmakers.”

The REVORING’s variable neutral density offers an incredible dynamic range of ND3 to ND1000, which equates to a minimum of 1.5, through to 10 stops of light control. However, due to the vast range, the stops achieved will vary based on different focal length. Full details can be found on the H&Y website, and also in the product guide, which will be included with every REVORING.

Japanese Nitto polarising film has been applied to produce the Circular Polariser section of the filter, which offers up to a near-comprehensive 99.9% polarising efficiency.

Market Leading Quality Meets World-Class Innovation

Key to the REVORING’s unique design is in the innovative, retractable & variable diaphragm. This precision-engineered feature allows the REVORING to make 1 filter applicable to multiple lenses, and with the potential for an expansive 4 size options, filter thread sizes from 37mm through to 95mm are all covered.

The REVORING has been manufactured entirely from architectural building-grade 6063 aluminum, making it incredibly strong and lightweight. Finished in a matte black anodised coating, further protecting it from adverse weather conditions, the REVORING is truly a ‘go-anywhere’ solution that will serve for years to come.

Anti-Fingerprint & Waterproof Nano-Coating Technology has been applied to the REVORING to preserve the glass from the unpredictable factors that all photographers and filmmakers face when shooting outdoors. The coating helps with beading and any excess droplets can be easily removed with a lens cloth without the fear of eliminating any of the coatings and without leaving stubborn smears on the glass.

The German Schott B270® glass also includes Anti-Reflective coating, which virtually eliminates all flare and reflections from the front and rear surfaces. This helps visible light to pass through the glass by removing unwanted reflections, giving the user the best possible light transmission, (up to 97%) optimizing images for the sharpest possible outcome. Whether shooting at 16mm or 400mm, the glass and coatings used in the REVORING produce sharp images, even at 10 stop exposures.

The H&Y REVORING Kickstarter Campaign

A number of additional features have been confirmed ahead of the campaign launch and will be included in the final product. These include:

  • A HARD stop at the MAX point shown on the filter ring, restricting the movement of the VND filter beyond the maximum 10 stops (ND1000).
  • An additional guide, fitted to the VND frame filter, meaning you can control the VND and CPL positions more easily.
  • New laser markings will be introduced to the outer edge of the VND ring. These new markings will be calculated and applied based on the maximum focal distance before any crossfade appears, helping image makers set up their shot more efficiently. There will be a live chart on the H&Y website offering guidance with a variety of lenses and sensors.

Campaign Pledge Levels

  • 37mm – 49mm REVORING: Accommodating 52mm filters
  • 46mm – 62mm REVORING: Accommodating 67mm filters
  • 67mm – 82mm REVORING: Accommodating 82mm filters
  • 37mm – 49mm REVORING Variable Neutral Density ND3-1000 + CPL
  • 46mm – 62mm REVORING Variable Neutral Density ND3-1000 + CPL
  • 67mm – 82mm REVORING Variable Neutral Density ND3-1000 + CPL

PLEASE NOTE: A further size of 82mm – 95mm for REVORING and Variable Neutral Density + CPL combination will unlock as a stretch goal as the campaign progresses and reaches a specific level of backing.

Pricing and availability

The H&Y REVORING Kickstarter campaign will begin on June 29th 2020 at 2pm GMT and 9am EST, 9pm HK time and will run for 40 days until August 8th 2020.

  • Standard REVORING will retail between USD $ 35 – USD $ 45
  • REVORING Variable Neutral Density + Circular Polariser combination will retail between USD $ 184 – USD $ 239.

Disclaimer: Remember to do your research with any crowdfunding project. DPReview does its best to share only the projects that look legitimate and come from reliable creators, but as with any crowdfunded campaign, there’s always the risk of the product or service never coming to fruition.

Articles: Digital Photography Review (dpreview.com)

 
Comments Off on H&Y Revoring variable step-up rings allow filters to fit multiple lens thread sizes

Posted in Uncategorized


Hidden Stories: 3D-Printed, Architect-Designed Rings Tell Looping Tales

26 May

[ By WebUrbanist in Design & Products & Packaging. ]

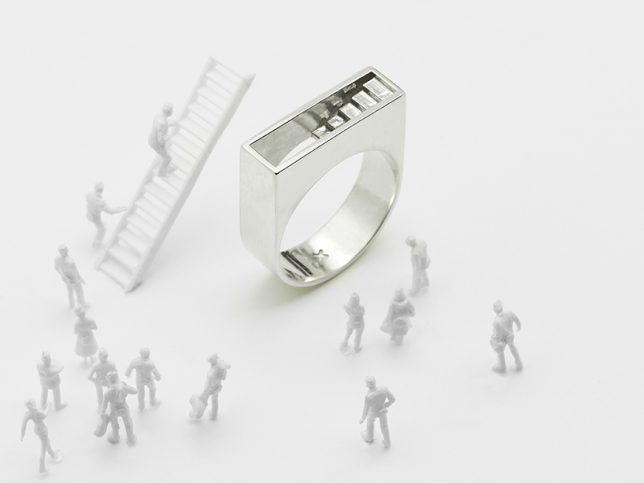
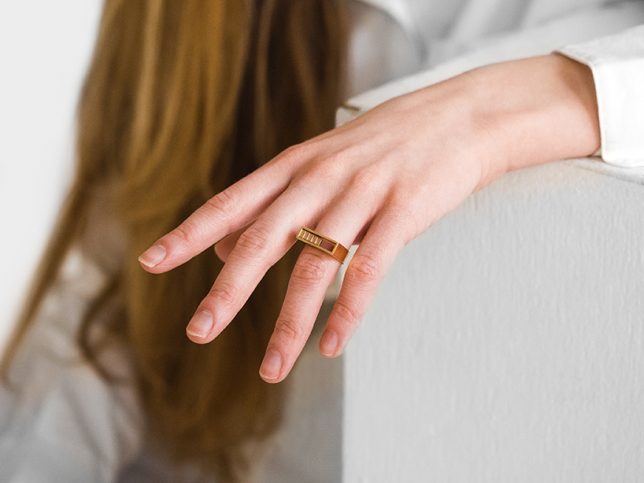
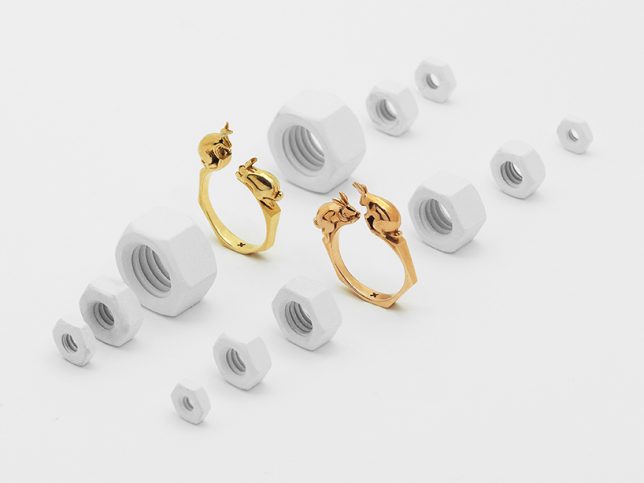
Most jewelry tells some kind of a story (about its origin if nothing else) but these pieces are a bit more explicit, featuring tales of structures, characters and actions in miniature built environments.

Architectural designer Artur Dabrowsk produces rings, cuffs, necklaces and bracelets that revolve “around the concept of ‘depth’ in terms of formal language (shadow lines, composition, depth of field) as well as in meaning (details, storytelling).”

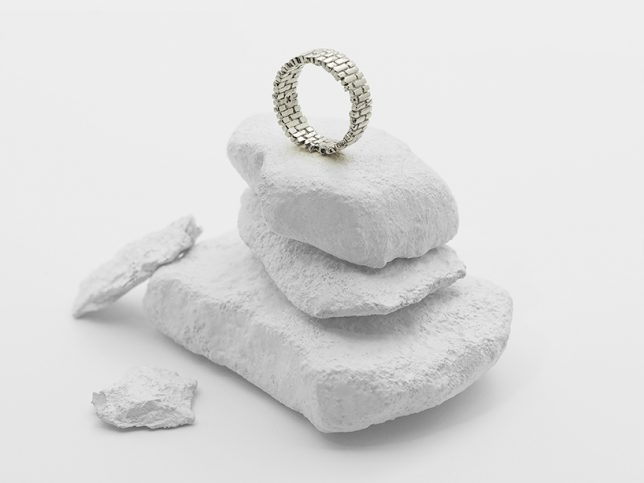
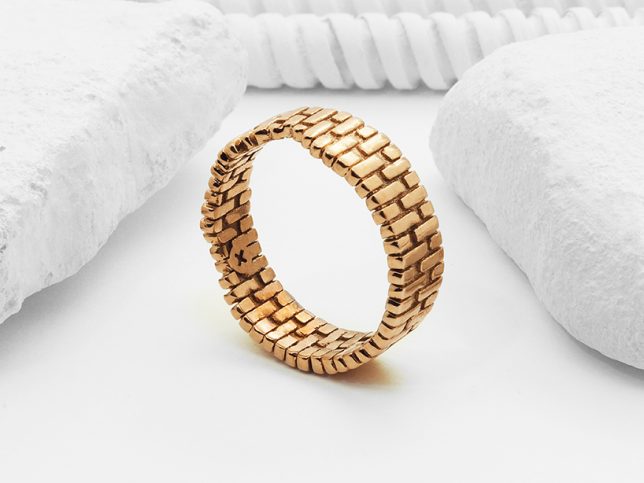
Whether he is crafting mysterious staircases to nowhere or endlessly looped brick arches, each piece involves careful attention architectural detail (including theoretical structural load calculations) and is available in brass, bronze or silver.

The brick ring specifically goes back to his days in architecture school — “there is something very tactile and nostalgic that give [bricks] both timeless function and meaning,” says the designer.

“I was raised in a brick clad apartment building in Brooklyn,” he explains, “so I associated the brick wall as a shelter for my introverted childhood. The arch became a metaphoric portal through which I could turn the corner, open up, and express myself while still proud of my introverted self.”

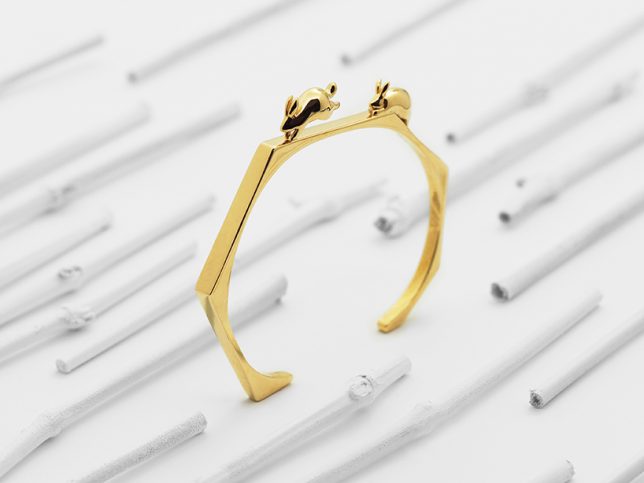
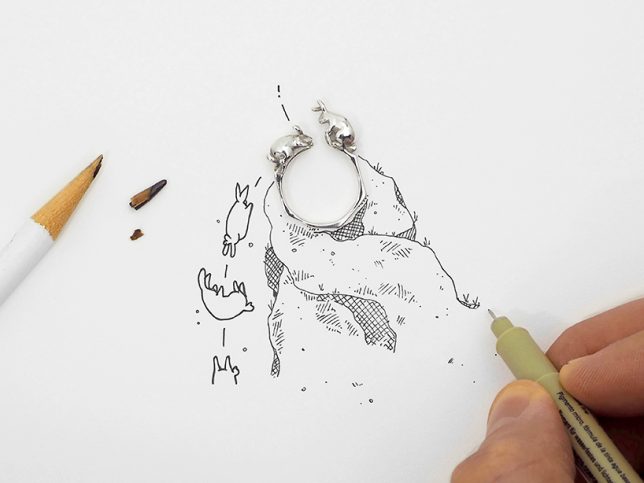
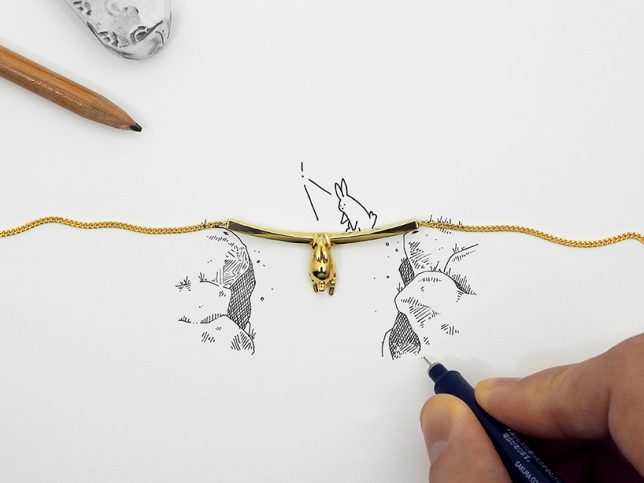
Dabrowsk also has a thing for rabbits, which are something he has sketched idly for a long time and has since started to include as characters in his tiny built environments. “I started drawing them in the margins of my notebooks during grade school and personify them to express thoughts, situations or feelings I was having.”

“I think the imagery of it being personified is playful — the rabbit is cute, hops around, eats, multiplies… and lives naively in this world.” Even here, though, he is conscious of real-life conditions – the suspended rabbit above hands from what would, in reality, be the bare minimum load-support beam across an abyss.

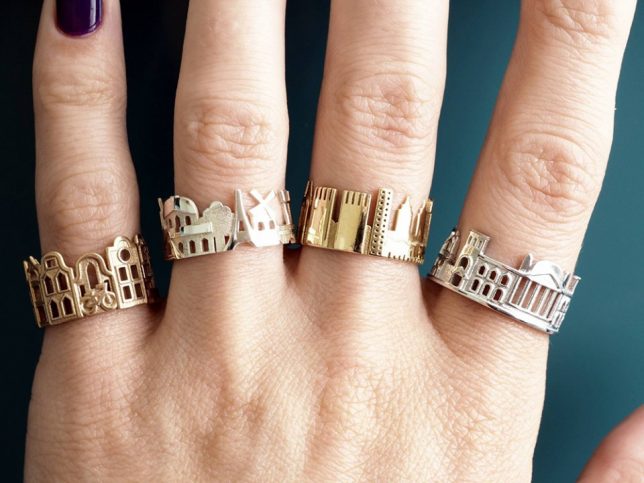
Fans of architectural jewelry should also take a peak at this series of wearable skylines, featuring famous scenes and settings (though in a more two-dimensional format) from around the world.

Share on Facebook


[ By WebUrbanist in Design & Products & Packaging. ]

[ WebUrbanist | Archives | Galleries | Privacy | TOS ]


WebUrbanist

 
Comments Off on Hidden Stories: 3D-Printed, Architect-Designed Rings Tell Looping Tales

Posted in Creativity


NASA puts it all in perspective with this image of Earth between Saturn’s rings

22 Apr
Earth, photographed from 1.4 billion kilometers / 870 million miles away. Photo: NASA/JPL-Caltech/Space Science Institute

NASA’s Cassini spacecraft will soon meet its demise in Saturn’s atmosphere, but one of its last photos of Earth is making for a heck of a swan song. The image, dated April 12, 2017, shows Earth as a bright white dot framed by the planet’s rings. For comparison, it’s about the same size as your standard speck of dust. Our entire planet.

Cassini has been orbiting Saturn since 2004 and has spent the last decade and then some beaming back information about the ringed planet and its moons. But all good things must come to an end, and as the spacecraft’s fuel supply runs low, NASA will begin the process of safely putting it out to pasture.

Articles: Digital Photography Review (dpreview.com)
 
Comments Off on NASA puts it all in perspective with this image of Earth between Saturn’s rings

Posted in Uncategorized


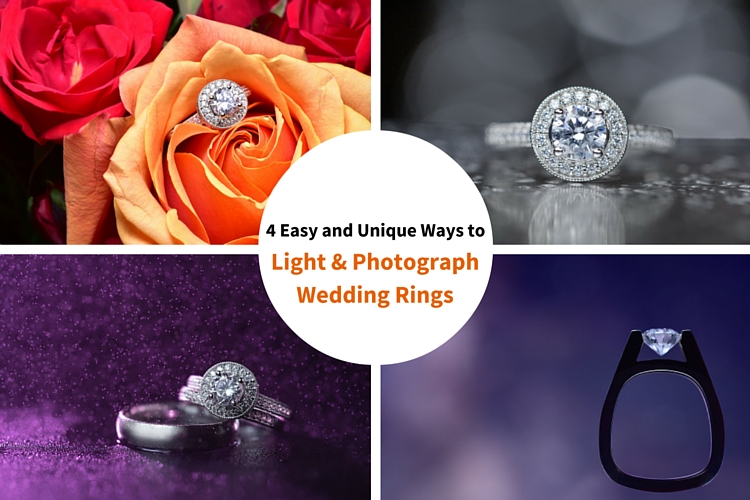
4 Easy and Unique Ways to Light and Photograph Wedding Rings

10 Jun

Snapdeals Sale: If you’d like to learn more about how David and Patrick photograph weddings you may want to check out their 14 hour tutorial on all things wedding photography. It’s currently $ 100 off at SnapnDeals.

Wedding photographers are expected to capture every aspect of a wedding day and in many cases we only have a couple minutes to work. The wedding rings are an important detail that many photographers either overlook completely or over think. Over the years I’ve taught some practical ways to improve your wedding business and shooting skills. Let me show you four quick and unique ways to photograph the wedding rings.

4 Easy and Unique Ways to Lightand Photograph Wedding Rings

You’ll Need a Macro Lens

04.jpg

To capture wedding rings properly you’re going to need a macro lens. Without one, you simply won’t be able to zoom in and focus close enough. Yes, you could shoot wider and crop in but you will be losing tons of resolution. Luckily basic macro lenses are not that expensive.

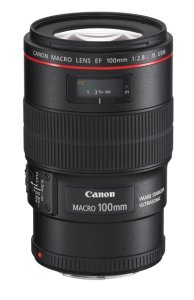
If you’re shooting Nikon I would suggest the Nikon Micro 55mm f/2.8 or the Micro 60mm f/2.8. These lenses are very small and will easily fit in your bag. If you’re shooting Canon I would suggest the 100mm f/2.8L IS USM Macro. This one actually does have auto focus.

If you’re anything like me, you’re not going to use a macro lens very often, so you won’t want to spend a ton of money on extra features like vibration reduction (image stabilization). If you want to save even more money, buy the lens used. Amazon is actually great for used lenses. Simply click used at the bottom of any description on Amazon. You can get them cheap and they will hold their value for years to come.

Technique #1 Wedding Rings in Flowers

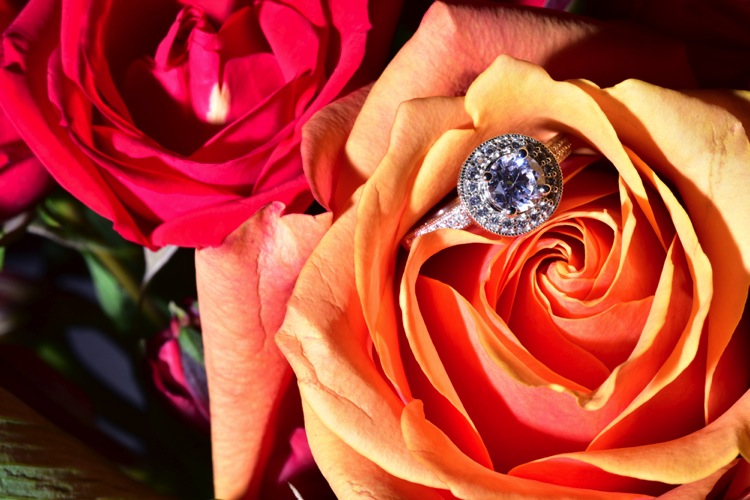
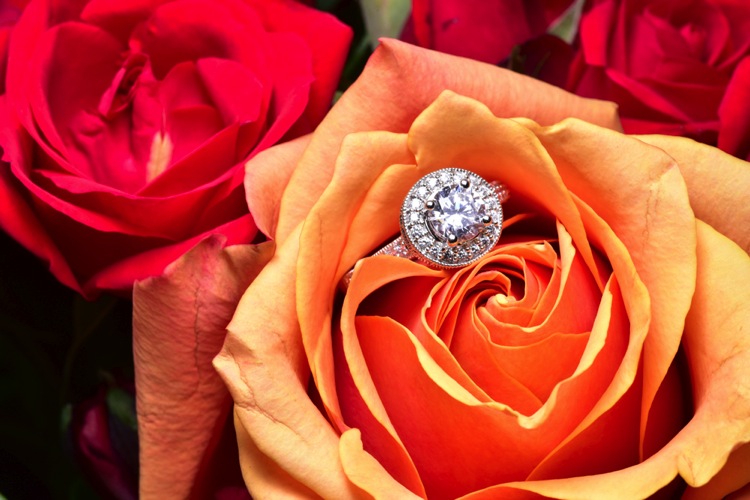
The absolute easiest shot to capture, and one that I’m sure to get at every single wedding I photograph, is one or more of the wedding rings placed inside, or on top of flowers. I don’t think I’ve been to a single wedding where flowers weren’t easily available. This shot is overdone and boring to a lot of photographers, but keep in mind that your clients will (hopefully) only get married once. So, to them, this shot is unique. It shows off the wedding rings, and it also captures the flowers, which they spent a lot of time and money picking out.

Sometimes I will use the bouquet of flowers and lay them down on the table, but I usually find it easier to work with flowers that are standing up. For this I will often use a vase of flowers, usually found in center of the tables at the reception.

For lighting this first shot I’m going to use a speedlight, any type will work. If you don’t have enough money to buy a name brand-name speedlight, then I would highly suggest checking out Yongnuo flashes, the base version is only 70 bucks. If you shoot Canon, you may want to spend a bit more, and buy the YN600EX-RT, that will communicate with radio signals for $ 129.

1 flowers direct flash

Holding the camera in one hand and the flash in the other, you can see that we can get a decent result (image above), but it would be much better if we could soften the light.

If you didn’t bring a modifier with you, you can use anything nearby that’s white. I’ve used a white plate, paper napkin, white t-shirt, and a tablecloth in the past. For this shot we will use a white paper towel. By bouncing the light off of, or through the paper towel, we can get much larger, softer light.

Having my assistant move the flash with each picture I take, ensures that we will get a lot of variety, without wasting time looking at each shot individually. Remember, this is all taking place during a wedding, so I really don’t want to spend more than a minute or two on these shots. After taking 10-20 shots in rapid succession, I can quickly review them and confirm that I have a keeper.

2 moving soft light

I consider this to be my safety shot because I can get it in under two minutes at every wedding I do, and the client always loves it. After I knock it out, if I have time, I’ll try some more complicated and creative shots.

Adding Multiple Lights and Water

For this next shot we are going to complicate things a bit in terms of gear, but we are also going to be able to do it without the help of an assistant.

First, find an interesting surface to place the rings. It could be a tablecloth, wood grain, granite, or anything you find around the reception site. We took our picture on a black, glass-top table.

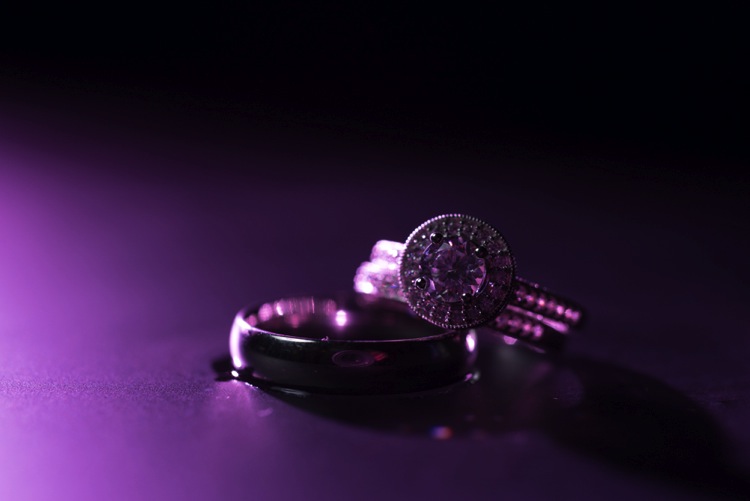
First I setup the camera up on a tripod so that I could keep my hands free. From behind the ring, I added the first speedlight, to create a rim light on the back of the subject. To add a bit of interest I used a purple gel, and to confine the light, the Magmod grid.

3 Final Back Light Only

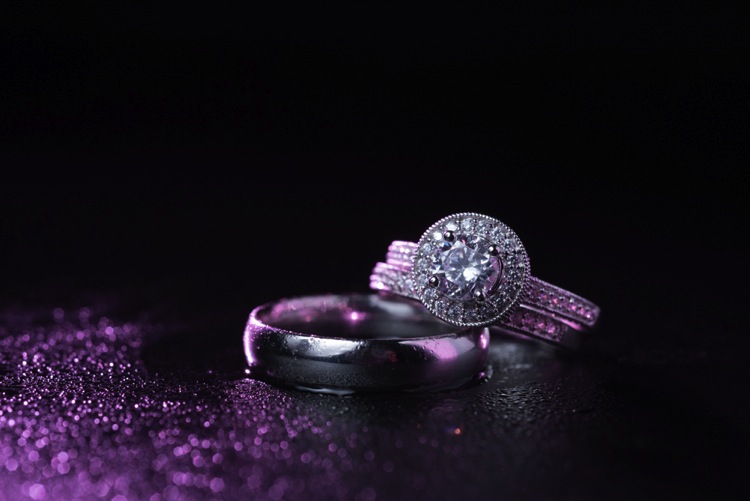
Now it’s time to light the rings from the front. Instead of using a paper towel, I decided to use the Fstoppers FlashDisc. It’s basically a collapsible softbox that can used with just one hand. When it’s collapsed down, it’s small enough to fit in your pocket, which makes it extremely convenient at weddings.

Read: Review: Flash Disc Lighting Modifier by Fstoppers for more information on this product.

4 Final backlight and flashdisc

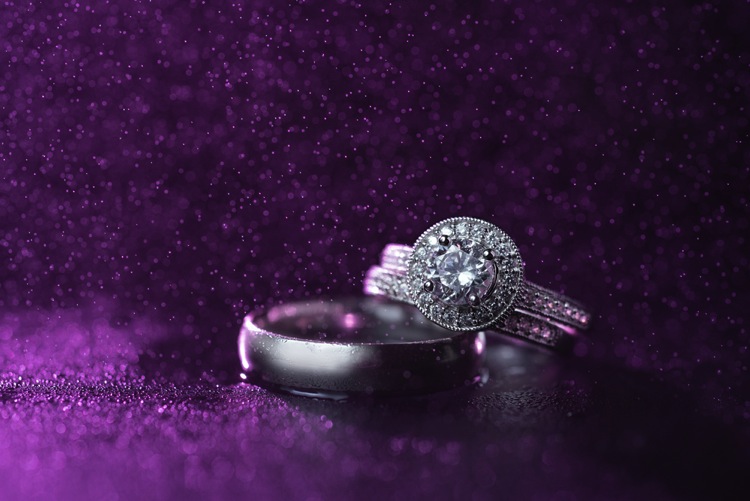
To add one more interesting aspect to this shot, I used a miniature spray bottle to add mist behind the rings. The purple light coming from the back, lights up the water, and takes this shot to the next level.

5 Final best 1 retouched

Building Your Own Set and Using Continuous Lighting

If you like to be prepared for any situation, you’re going to want to travel with a few props that you know you can work with, if the items around a wedding aren’t cutting it as a background. I travel with a pack of metallic foils that can be used to place the rings on. I also brings along cheap reflective jewelry that I can use to create bokeh effects.

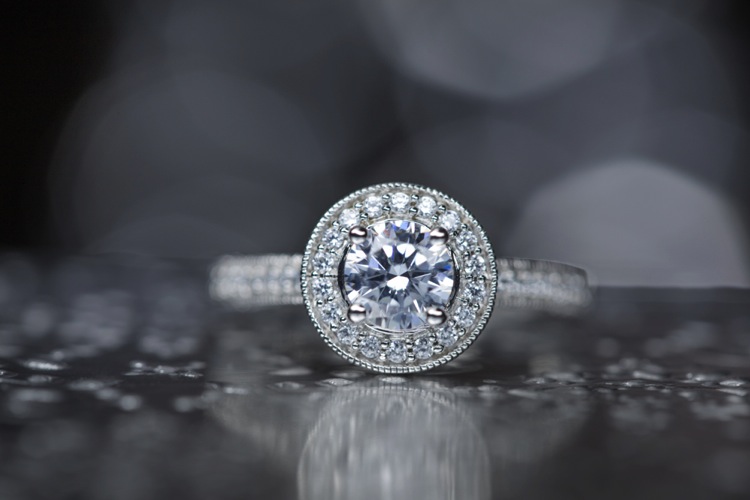
Instead of using a strobe for this shot, a cheap LED panel was used as a continuous light source. These panels can be extremely handy, but keep in mind that you will probably want to use a tripod if you are going to use them to light the rings so that you can keep everything sharp (the shutter speed may be slow). If you want extremely blurry bokeh, you’re also going to want to shoot at a wider aperture than you normally might.

6 Final Image 2

Using a Screen to Create Your Own Background

For this final shot, we are going to use a computer screen to create our own background. If you don’t travel with a laptop, you could use an iPad, or maybe even a smartphone screen instead.

I would suggest practicing this shot at home before you ever get to a wedding. You don’t want to be fiddling around with your setup, or searching for different backgrounds while the wedding is going on. If you are prepared though, this shot can be extremely easy to pull off.

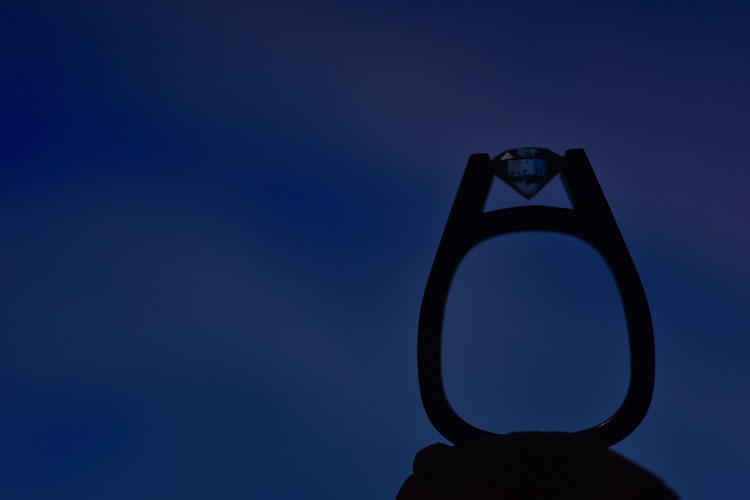
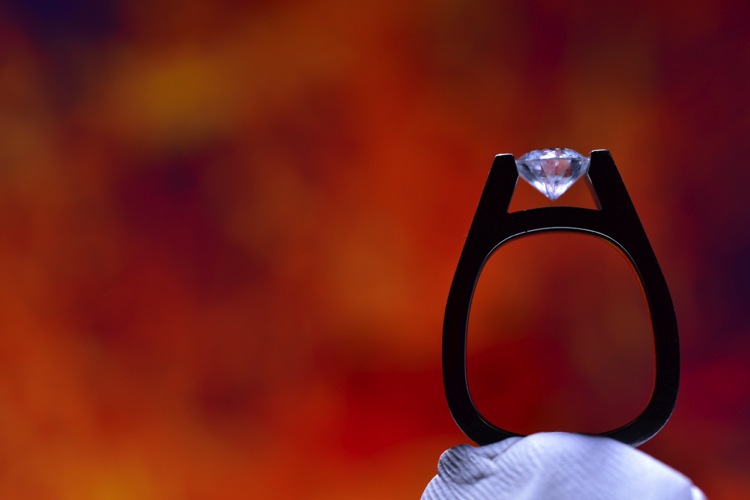
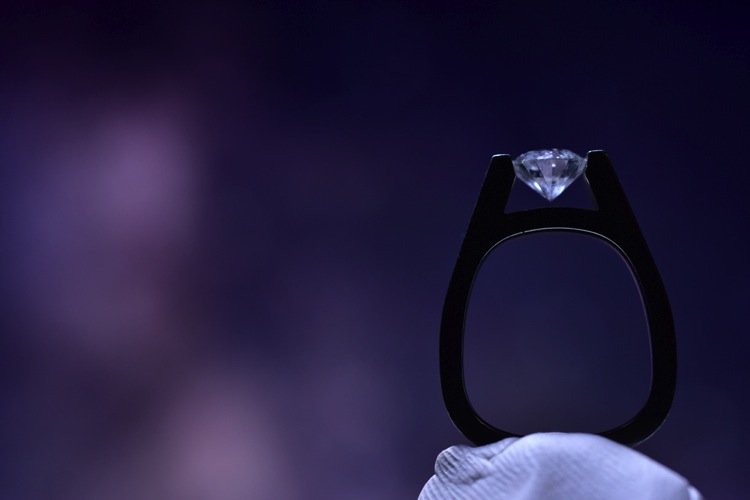
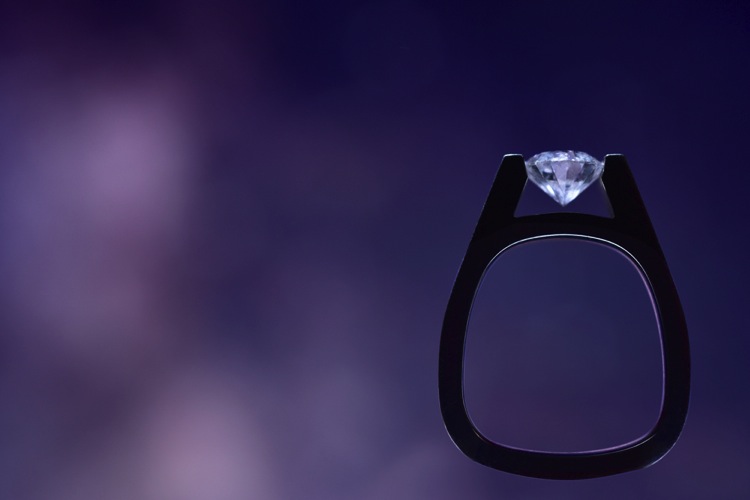
First I placed the ring on bit of putty to get it to stand up. I then set my computer screen to its brightest setting, and exposed for the screen itself. At this point the shot is a silhouette of the ring.

7 Screen backlit

To light the ring itself you could use your smartphone’s flashlight, or you could use any cheap LED flashlight. If your flashlight doesn’t dim, you can simply move it closer or farther away from the ring to get a correct balance of light, with the screen in the background.

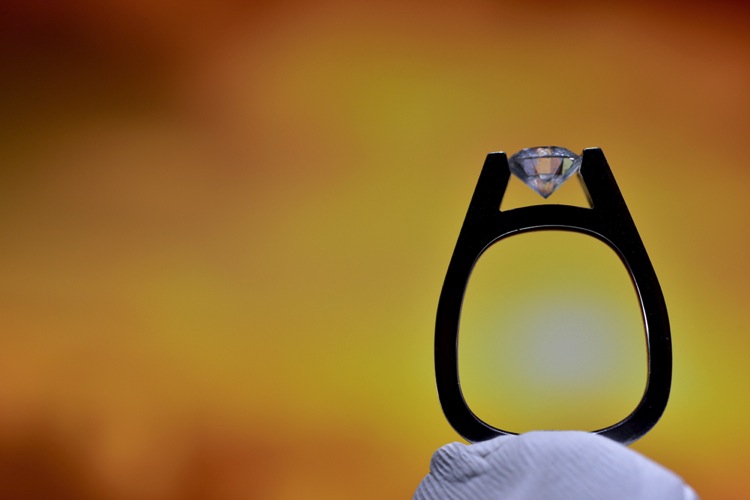
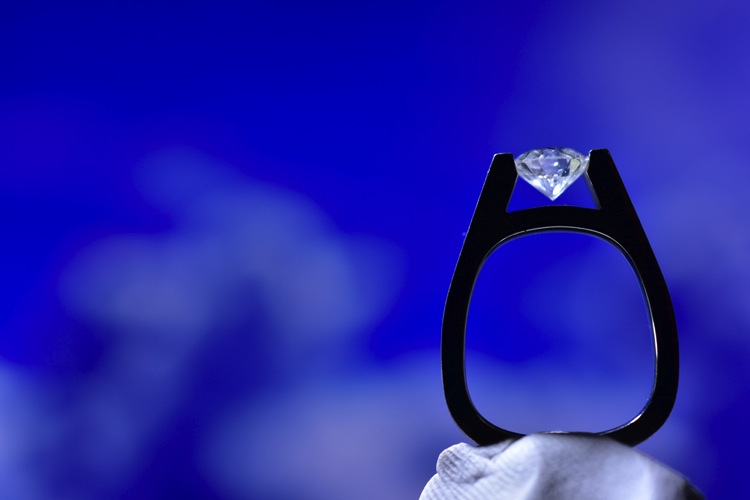
Because your background will be so blurry, it really doesn’t matter what is on the screen in the background, you are basically looking for certain colors, and large shapes that will create an interesting mood.

8 screen shot 1

9 screen shot 2

10 screen shot 3

11 screen shot 4

In the post-production you can either zoom-in past the putty (crop it out) or you can Photoshop the putty out and have a floating ring effect.

12 Final Edit 4

You can also watch us go through these techniques in the following video:

Snapdeals Sale: If you’d like to learn more about how David and Patrick photograph weddings you may want to check out their 14 hour tutorial on all things wedding photography. It’s currently $ 100 off at SnapnDeals.

googletag.cmd.push(function() {
tablet_slots.push( googletag.defineSlot( “/1005424/_dPSv4_tab-all-article-bottom_(300×250)”, [300, 250], “pb-ad-78623” ).addService( googletag.pubads() ) ); } );

googletag.cmd.push(function() {
mobile_slots.push( googletag.defineSlot( “/1005424/_dPSv4_mob-all-article-bottom_(300×250)”, [300, 250], “pb-ad-78158” ).addService( googletag.pubads() ) ); } );

The post 4 Easy and Unique Ways to Light and Photograph Wedding Rings by Lee Morris appeared first on Digital Photography School.


Digital Photography School

 
Comments Off on 4 Easy and Unique Ways to Light and Photograph Wedding Rings

Posted in Photography


Wearable Skylines: Architectural Rings Wrap Up Global Cities

05 Feb

[ By WebUrbanist in Art & Sculpture & Craft. ]

architecture wrapping cityscapes

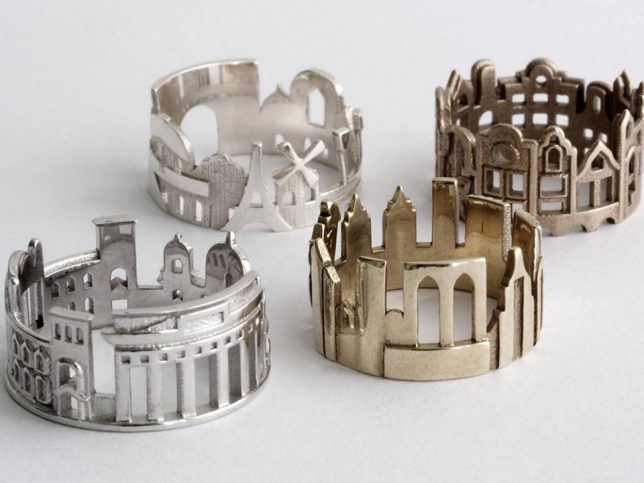
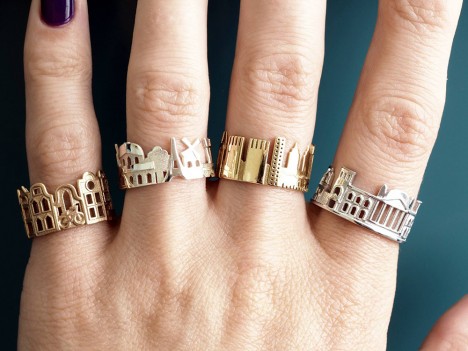
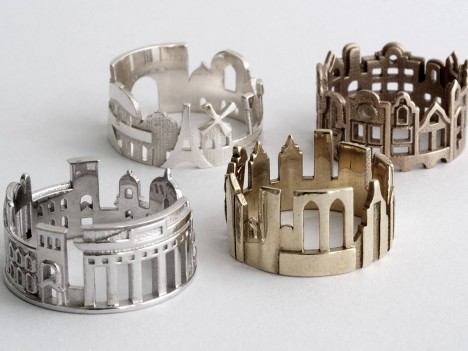
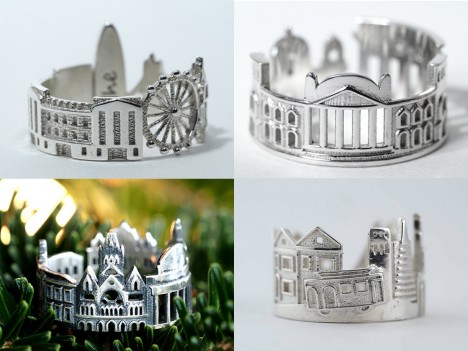
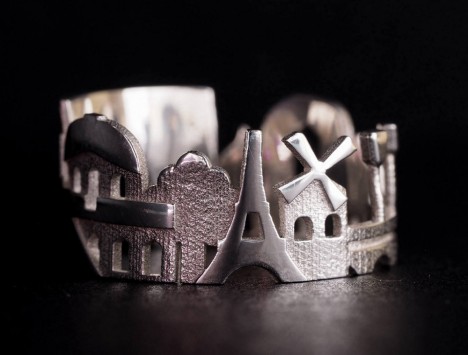
Jewelry for urbanists has taken a new turn with these silver, gold and platinum cityscapes, each featuring iconic buildings, monuments and landmarks from major metropolitan centers around the world.

architectural ring collection

Ola Shekhtman, a goldsmith from North Carolina, has crafted rings around cities including San Francisco, Boston, New York City, Paris, Amsterdam, Stockholm, Berlin and Hong Kong, selling them online via Etsy.

architecture finger jewelry

Growing up in Siberia, Ola wanted to travel the world, eventually visiting London and San Francisco before moving to New York.

architecture silver gold rings

With the help of 3D-modeling software, she created this series to capture the spirit of places she has been and those she yet wishes to visit. Buyers can likewise decide whether to pick places they live, favorite past points of travel or goal-oriented rings for desired future destinations.

Share on Facebook


[ By WebUrbanist in Art & Sculpture & Craft. ]

[ WebUrbanist | Archives | Galleries | Privacy | TOS ]


WebUrbanist

 
Comments Off on Wearable Skylines: Architectural Rings Wrap Up Global Cities

Posted in Creativity


Wedding Photography: Shooting The Rings

12 Sep
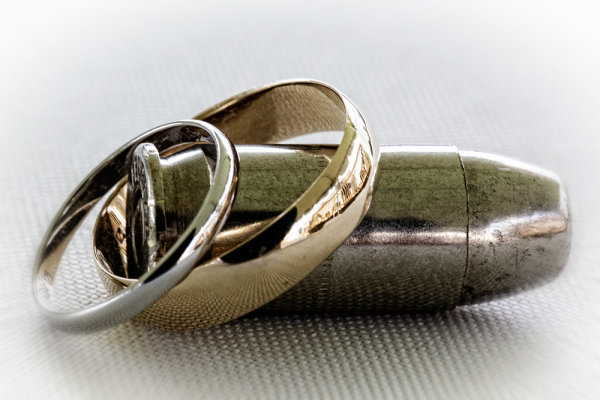
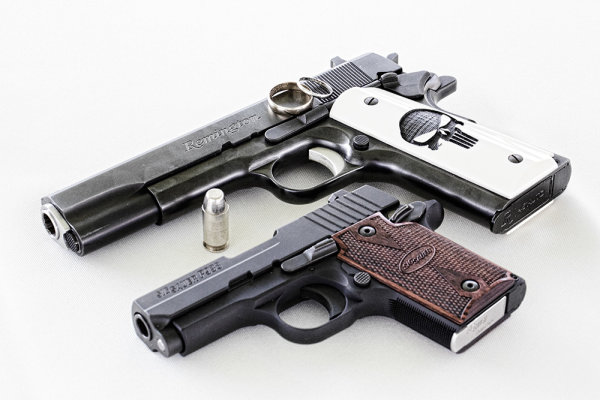
This bride and groom are both serving in the army, and both are gun enthusiasts. I asked the groom if he had their guns handy, and a bullet, and came up with this shot as one of the ring shots. This shot was taken in available light, under a tent outdoors.  EOS 5D Mark III with EF 100mm f/2.8L IS; ISO 2500, f/16, 1/125.

This bride and groom are both serving in the army, and both are gun enthusiasts. I asked the groom if he had their guns handy, and a bullet, and came up with this shot as one of the ring shots. This shot was taken in available light, under a tent outdoors. EOS 5D Mark III with EF 100mm f/2.8L IS; ISO 2500, f/16, 1/125.

In my career in photography, I’ve chosen not to focus on weddings as a business model, and shoot only a few every year.  I try to avoid being “traditional” in my approach to weddings, mixing traditional shots or types of shots with my own approach- which may or may not have been borrowed from other photographers I have worked with.

One such shot is the ring shot. It is what’s known as a detail shot, and while this may not be the most important shot of the wedding, it is one of the shots that helps sets the tone of an album, and can allow for a lot of creativity if you have the time.  If the shot fails, it will definitely be noticed.

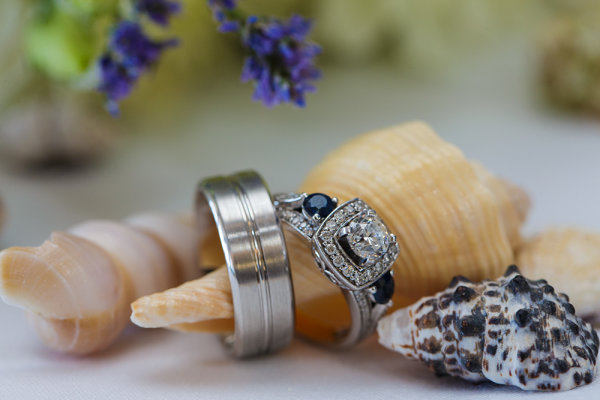
The bride and groom in this wedding had a special affinity for the beach, and brought a beach theme to their wedding. Shells were scattered about the tables. I selected a few and quickly shot the rings on a table. The room was brightly lit with daylight pouring in the windows nearby, and I set my flash to bounce off the ceiling to add just a touch more light. . EOS-1D X, EF 100mm f/2.8L IS. ISO 800, 1/250, f/5.6.

The bride and groom in this wedding had a special affinity for the beach, and brought a beach theme to their wedding. Shells were scattered about the tables. I selected a few and quickly shot the rings on a table. The room was brightly lit with daylight pouring in the windows nearby, and I set my flash to bounce off the ceiling to add just a touch more light. . EOS-1D X, EF 100mm f/2.8L IS. ISO 800, 1/250, f/5.6.

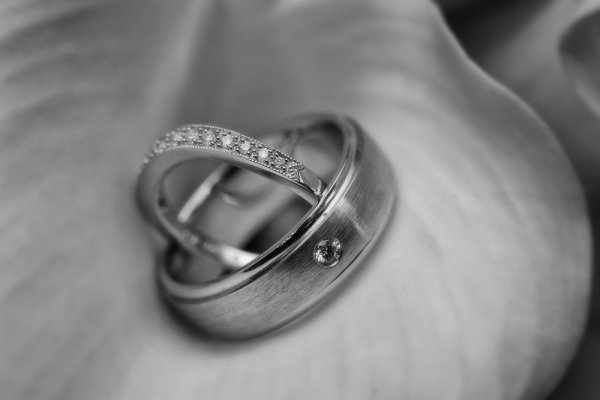
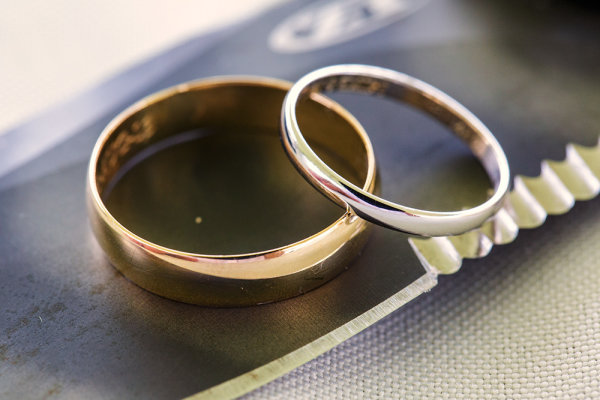
There are many ways to go about these types of shots, some more cliche than others. The one that always comes to mind is a shot of the rings resting on the invitation, or the rings casting a shadow of a heart on a Bible opened to 1st Corinthians. My preference is to find something personal that connects the rings to the bride and groom, or else I’ll pull something from the theme of the day.  It may take some digging with your clients to find that personal connection- maybe a story about how they met, or something they share together, but once you find it, it can make shooting the ring shot a lot more fun. If I can’t find a personal connection, I’ll use flowers, the bouquet, or a even a champagne cork.  Be creative. There are a lot of ways to photograph wedding rings that will make them stand out.

There was no overriding theme at this wedding, and as a second shooter I didn't have time to get to know the bride and groom. I found a flower arrangement and played with several arrangements before settling on this one. EOS 5D Mark III, EF 100mm f/2.8L IS. I bounced the flash off the ceiling for this shot. ISO 800, f/8, 1/200.

There was no overriding theme at this wedding, and as a second shooter I didn’t have time to get to know the bride and groom. I found a flower arrangement and played with several arrangements before settling on this one. EOS 5D Mark III, EF 100mm f/2.8L IS. I bounced the flash off the ceiling for this shot. ISO 800, f/8, 1/200.

Technically, while a macro lens is helpful, it’s not absolutely necessary.  You can highlight the rings in whatever setting you choose, but be careful not to let them get lost in the setting.    Typically I use a Canon EF 100mm f/2.8L IS macro lens, but any lens that will let you get fairly close will work, depending on your composition. Ideally, I would use off-camera flash every time, but weddings tend to me fast moving events, and there isn’t always time to do it the way you’d prefer.  In this case, I’ll set up a small reflector or bounce card to bounce the flash and give a better quality light.  I will often try several angles to get different looks.  Outdoor weddings during the day are a bit easier. I’ll look for a shaded area and shoot the rings in the available light.

Ring shots are often my most fun shot of the day.  There’s no one stressing about their hair or makeup, and no one trying to pull their attention in a different direction.  So use the ring shot as your moment of peace on an otherwise busy day, and have some fun with it.

This shot was also from the military wedding. The bride and groom are knife enthusiasts as well. The groom gave me one of his knives and I played with a few arrangements before shooting this one. EOS 5D Mark III, EF 100mm f/2.8L IS. ISO 3200, f/9, 1/125.

This shot was also from the military wedding. The bride and groom are knife enthusiasts as well. The groom gave me one of his knives and I played with a few arrangements before shooting this one. EOS 5D Mark III, EF 100mm f/2.8L IS. ISO 3200, f/9, 1/125.

This is another set up from the military wedding.  His 'n' hers .45's.  This shot doesn't require a macro lens, though I used the EF 100mm f/2.8L. EOS 5D Mark II, Ef 100mm f/2.8L IS. ISO 3200, f/16, 1/160.

This is another set up from the military wedding. His ‘n’ hers .45′s. This shot doesn’t require a macro lens, though I used the EF 100mm f/2.8L. EOS 5D Mark II, Ef 100mm f/2.8L IS. ISO 3200, f/16, 1/160.

Post originally from: Digital Photography Tips.

Check out our more Photography Tips at Photography Tips for Beginners, Portrait Photography Tips and Wedding Photography Tips.

Wedding Photography: Shooting The Rings


Digital Photography School

 
Comments Off on Wedding Photography: Shooting The Rings

Posted in Photography