Perhaps one of the most important things we do as portrait photographers is preserve memories. While the digital era and its ever-evolving technology have made it easier to ensure that the photos we take today will last longer than their analog counterparts, there are still things we can do to help preserve memories captured before the advent of the pixel. Several years ago, I came across a sizable collection of very old family photos and started scanning them. Unfortunately, some had already been damaged to one degree or another. Fading, creasing, staining, and tearing had all left their marks, and the fact that some of these photos were close to 100 years old did not help their cause. At first I wasn’t sure what to do about them, but closer inspection made it clear that restoring many of these photos would not be as difficult as I initially thought. With the help of only three or four Photoshop tools, I was able to bring this photo of my great grandparents back to life.
STEP 1 – ASSESS THE DAMAGE
Once the image has been scanned, open it in Photoshop to assess the damage and formulate a plan. A good rule of thumb when editing any sort of photo is to tackle your global edits first, before worrying about specific target areas. I like to make overall tonal adjustments first. If I clean up dust, rips, and creases first, I run the high risk of those imperfections reappearing later when I adjust tone and contrast to the entire image.

Open the image in Photoshop and assess the damage.
STEP 2 – LEVELS & CURVES
As with almost everything in Photoshop, there are so many ways of doing just about everything. When I first started doing this kind of work I used the Levels adjustment. I prefer using the Curves adjustment, though, because it lets me set the levels and adjust the contrast from within the same dialog. By using the droppers below the graph, you can do a quick Levels adjustment, bringing the tone of the image back under control. Using the black dropper, I click on what I see as one of the darkest points in the image. You’ll see an immediate improvement in the overall appearance of the photo. For purposes of fixing this photo, I don’t need the white or gray droppers. Once I’ve adjusted the levels by setting the black point, I tweak the contrast of the entire image by creating a slight “S” curve. Don’t panic if you push the adjustment too far. You can turn the “Cancel” button into a “Reset” button in any Photoshop dialog box by holding down the ALT/OPTION key.
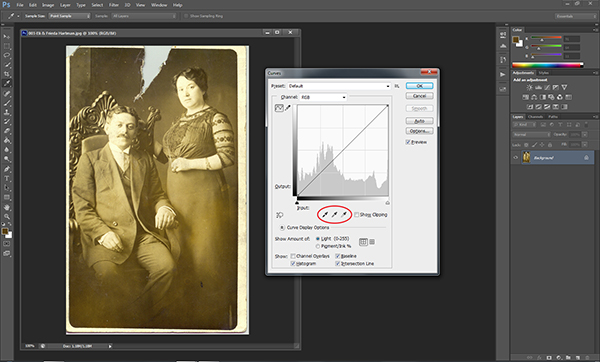
Select the black dropper on the left and click on the darkest part of the image to adjust the levels.
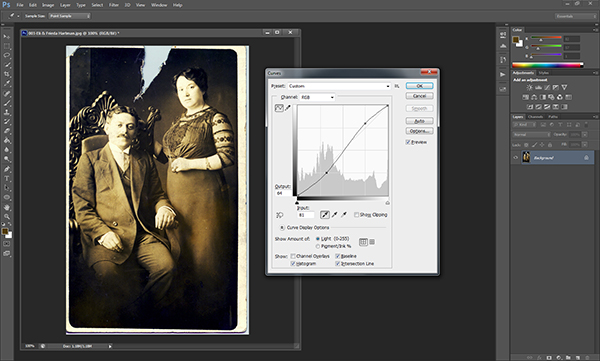
Adding a slight “S” curve will add some needed contrast.
STEP 3 – TACKLE THE DETAILS
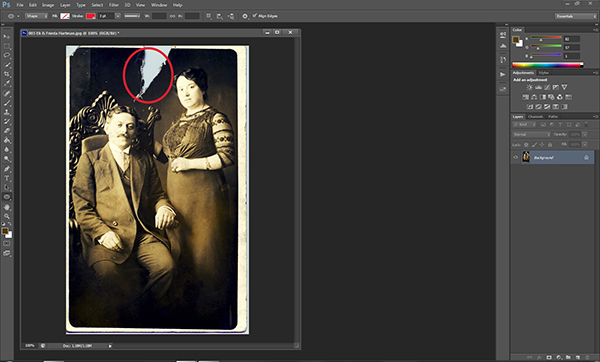
As far as global adjustments go, this particular image really only needed a small levels and curves adjustment. Once that’s been addressed, we can zoom in on the image and start addressing the details. For this photo, the next step is dealing with that big tear at the top. For this part of the repair I’m relying on the Clone Stamp tool (keyboard shortcut: S). Be sure to zoom in kind of tight to make sure you have a good view of the area. You’ll be using the tool to sample similar nearby pixels to copy and fill in the damaged area. Start with the edges and work your way in towards the middle and then up towards the top. Be sure to change your sample area as you cover more of the tear in order to ensure that the tones and shading are consistent. Don’t worry about keeping a straight edge at the top of the photo. We’ll be cropping that out later.
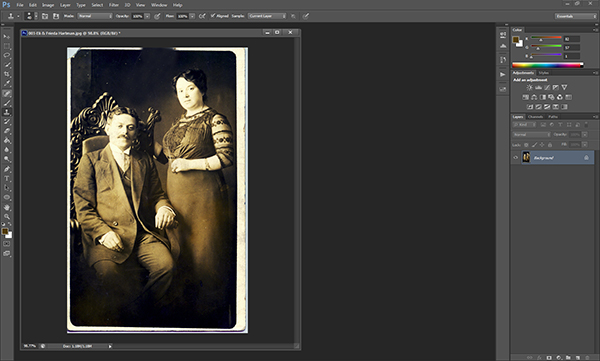
Now it’s time to zoom in really tight and deal with small things like dust, scratches, stains, and creases. In earlier versions of Photoshop, the best tool for this part of the job was the Clone Stamp, and in some situations that might still be your best bet. Ever since the introduction of the Spot Healing Brush, however, cleaning up dust and scratches has never been easier. The spot healing brush reads the surrounding pixels and uses that information to cover up and repair minor damage. As with all detail adjustments, be sure to zoom in pretty tight. This will let you make the repair with fewer and– more importantly– less noticeable clicks.
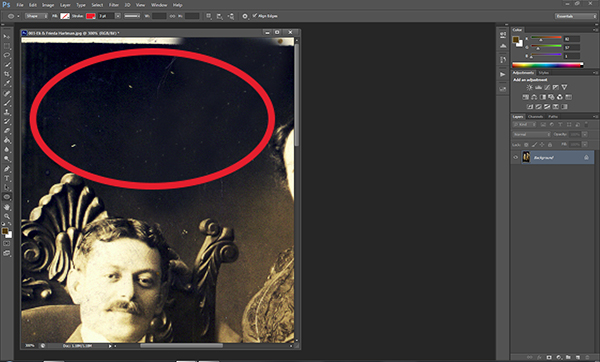
Use the zoom tool to make sure you catch all of the small imperfections.

STEP 4 – CROP FOR A CLEAN EDGE
Once we’ve addressed the damage we’ll zoom back out and use the Marquee tool to crop out the extraneous edges of the original scanned photo, creating new, clean edges.
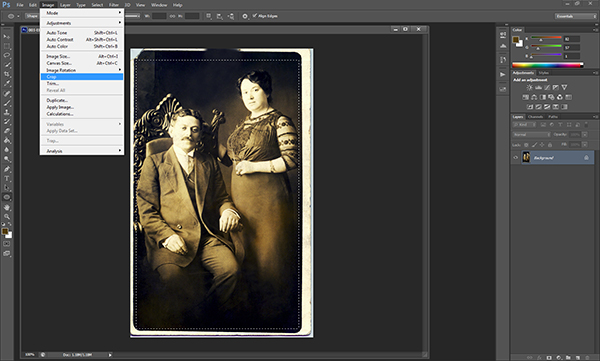
STEP 5 – ADMIRE YOUR RESULTS
Rescuing a memory is always gratifying. I never knew the people in this photo, but I know that without them I wouldn’t be here. That alone makes the time spent restoring this photo well worth it. With a little practice, edits like this will become a streamlined process. Don’t be afraid to try it.

Post originally from: Digital Photography Tips.
Check out our more Photography Tips at Photography Tips for Beginners, Portrait Photography Tips and Wedding Photography Tips.
How to Restore Old, Damaged Photos

You must be logged in to post a comment.