RSS
 

Posts Tagged ‘Repair’

How to Repair Corrupted Videos Shot on Digital Cameras and Other Devices: A Step-by-Step Guide

18 Mar

The post How to Repair Corrupted Videos Shot on Digital Cameras and Other Devices: A Step-by-Step Guide appeared first on Digital Photography School. It was authored by Theodomentis Lucia.

How to repair corrupted videos featured image

Earlier today, I thought about playing some videos that I shot on my digital camera during my last vacation. Sadly, every time I tried to play them on VLC or Windows Media Player, I got a gray or green display on the screen instead. I realized that my videos were corrupt and thought of digging up and finding an ideal solution for it. To be honest, after some failed attempts, I was finally able to repair my corrupted videos. If you have also encountered a similar situation in the past, then you may learn something from my experience.

Read on to find out how.

What could have caused your videos to become corrupt?

Before we head into the details on how to repair corrupted videos, it is important to discuss a few things in advance. You should know the major reasons why a video gets corrupt or damaged so that you can avoid it in the future.

These reasons include:

  • The transfer process of videos from your digital camera to the computer could be halted mid-transfer.
  • You may have restarted the system while the video was still playing in the background.
  • Sometimes, a third-party tool like a video editing software can also end up corrupting a file.
  • The location (drive or partition) where your video is stored could be corrupted.
  • The meta content or the header of the video might be tampered with as well.
  • If you have forcefully tried to change the video extension or type, then it can corrupt the file.
  • The audio-video components of the file might not be synced properly or could be missing.
  • You have played the video with an unsupported media player, or there could be an issue with the video encoding.
  • Other logical issues related to video playback, picture, sound, etc. can also cause this problem.
How to Repair Corrupted Videos Shot on Digital Cameras and Other Devices: A Step-by-Step Guide

How can you repair corrupted videos on Windows or Mac?

If your videos have been corrupted, then you need to look for the right tools to fix them. 

Since there are so many tools out there to repair corrupted videos, I asked a friend of mine, who is an expert in the field. He recommended Recoverit Video Repair, so I decided to give it a try as well. 

Ideally, Recoverit is a dedicated application to recover the lost or corrupt data of all kinds. However, it also has a dedicated video repairing tool that can fix various issues related to a video file.

After getting to know these features, I wanted to give Recoverit a try and found its click-through process pretty easy. 

Once you have installed the Recoverit Video Repair application, you can follow these steps to fix your corrupt files.

Steps to repair corrupted videos and files

Step 1: Launch the Video Repair tool

If you have some videos to fix, then just launch the Recoverit application on your system and launch the “Video Repair” tool from its home page. Also, attach your digital camera to the computer and move your damaged videos to the system.

How to Repair Corrupted Videos Shot on Digital Cameras and Other Devices: A Step-by-Step Guide

Step 2: Add corrupt videos to repair

Once you launch the Recoverit Video Repair application, you can just click on the “add” button to load the corrupted videos.

How to Repair Corrupted Videos Shot on Digital Cameras and Other Devices: A Step-by-Step Guide

This will further launch a browser window, letting you locate and load the videos that are damaged. If you want, you can load multiple videos and repair them at the same time.

How to Repair Corrupted Videos Shot on Digital Cameras and Other Devices: A Step-by-Step Guide - Adding the videos screenshot

Step 3: Start the repairing process

After you have added the corrupted videos to the application, the interface will let you know. You can view the details of the added videos and even remove them from here. 

If you are ready, then just click on the “Repair” button to commence the repairing process.

How to Repair Corrupted Videos Shot on Digital Cameras and Other Devices: A Step-by-Step Guide

Step 4: Wait for the repairing process to be over

As soon as you click on the “Repair” button, the application starts fixing the loaded videos and displays the progress. Kindly be patient as of now and let the application complete the process.

How to Repair Corrupted Videos Shot on Digital Cameras and Other Devices: A Step-by-Step Guide - waiting for the repair process screenshot

Once the repairing process is completed, Recoverit will let you know by displaying the following prompt.

How to Repair Corrupted Videos Shot on Digital Cameras and Other Devices: A Step-by-Step Guide

Step 5: View the repaired videos

You can now preview the results of the repaired process by clicking on the play icon adjacent to the video.

How to Repair Corrupted Videos Shot on Digital Cameras and Other Devices: A Step-by-Step Guide - View repaired videos screenshot

This opens a pop-up window with a video player that will let you play the repaired video. In this way, you can check the results of the application before saving the videos.

How to Repair Corrupted Videos Shot on Digital Cameras and Other Devices: A Step-by-Step Guide

Step 6: Save the repaired videos

If you are satisfied with the results, then click on the “Save to Folder” button right next to the video. 

If you want, you can also click on the “Save All” button to save all the videos. This opens a browser window, letting you select a secure location to save the videos.

How to Repair Corrupted Videos Shot on Digital Cameras and Other Devices: A Step-by-Step Guide

Step 7: Run an advanced video repair (optional)

In the case that you are not satisfied with the standard video repairing results, then click on the Advanced Video Repair feature, which you can find at the bottom of the video player.

How to Repair Corrupted Videos Shot on Digital Cameras and Other Devices: A Step-by-Step Guide - Advanced video repair screenshot

To run an advanced repair, you need to load a sample video to the application. The sample video should be shot on the same device as the corrupted video and must be in the same format. 

After loading the sample video, you can start the advanced video repair process and view its results as well.

How to Repair Corrupted Videos Shot on Digital Cameras and Other Devices: A Step-by-Step Guide

Conclusion

When using Recoverit, it’s easy to repair corrupted videos. Recoverit is able to fix all sorts of issues related to videos like missing fragments, gray/green screens, video not loading error, and so on and supports a wide range of video formats like MOV, AVI, FLV, 3GP, MP4, MKV, MTS, and more. It can fix all kinds of videos shot on a wide range of devices like digital cameras, drones, camcorders, and smartphones.

The video repair tool is available in three different purchase options – $ 29.95 a month, $ 39.95 a year, or $ 49.95 (lifetime purchase) for the Windows version. If you get it now, you can get 30% off Recoverit for windows or 30% off for mac.

Download and Get 30% off Recoverit video repair now by using the exclusive coupon code: LENOP09

Disclaimer: Recoverit is a dPS paid partner.

The post How to Repair Corrupted Videos Shot on Digital Cameras and Other Devices: A Step-by-Step Guide appeared first on Digital Photography School. It was authored by Theodomentis Lucia.


Digital Photography School

 
Comments Off on How to Repair Corrupted Videos Shot on Digital Cameras and Other Devices: A Step-by-Step Guide

Posted in Photography


Nikon is killing off its authorized repair program in March 2020

11 Dec

Repair website iFixit has confirmed Nikon will be ending its authorized repair program in the United States in March 2020, effectively de-authorizing more than a dozen independent shops across the U.S.

The news first came from a letter obtained by iFixit that Nikon USA sent out to its roughly 15 remaining Authorized Repair Stations in early November. The letter notes that Nikon will not be renewing its agreements with the shops after March 31, 2020, meaning these stores will unlikely be able to obtain genuine Nikon parts, as Nikon stopped selling genuine parts to non-authorized shops back in 2012. This will leave just two facilities on opposite sides of the U.S. — in Melville, New York and Los Angeles, California — compared to the roughly 15 shops currently in operation.

An illustration showing the weather-sealing around the perimeter of the Nikon D700 frame.

According to iFixit, the letter notes ‘The climate in which we do business has evolved, and Nikon Inc. must do the same.’ As a result, Nikon needs to ‘change the manner in which we make product service available to our end-user customers.’

Nikon confirmed the news in a statement to iFixit, saying ‘We remain committed to providing the best product support and repair services to our customers.’ However, Nikon didn’t respond to iFixit’s question regarding whether or not former authorized shops will still have ‘access to parts or other official services.’

In its coverage, iFixit spoke with half-a-dozen of the authorized repair shops — most of whom spoke on the condition of anonymity —that received the letter and shared statements and thoughts from managers and owners. As you can expect, it doesn’t look good for the independent shops (or photographers who don’t want to ship their gear halfway across the country for a repair); repairing Nikon camera gear is about to get much more difficult after March 31, 2020.

We have contacted NIkon for a comment of our own and will update the article accordingly if we receive a response. In the meantime, head on over to iFixit to read the full report.

Articles: Digital Photography Review (dpreview.com)

 
Comments Off on Nikon is killing off its authorized repair program in March 2020

Posted in Uncategorized


DxO PhotoLab 3 brings improved repair tools, local adjustment masks and new camera support

25 Oct

DxO has launched DxO PhotoLab 3, the latest version of the company’s photo editing software. The new version of PhotoLab brings new and improved tools, including an optimized Repair Tool and entirely new Local Adjustments Masks Manager, as well as support for keyword searches in PhotoLibrary and new camera support.

PhotoLab 3 introduces a new color adjustment mode as part of the software’s Hue, Saturation, and Luminance (HSL) Tool, one that is based on the DxO ColorWheel. With the tool, users are able to choose color ranges from eight separate channels, according to the company, as well as replacement colors and more.

Joining the ColorWheel is the new Local Adjustments Masks Manager, which enables users to manage an image’s layered local correction masks. This control includes individually adjusting opacity, reversing selected masks, and more.

Below is a brief rundown of the new features from photographer Robin Whalley:

Beyond that, PhotoLab’s Repair Tool, which allows users to scrub specific elements from an image, has also been ‘optimized’ to include a new Clone Mode and support for manually repositioning the tool’s source area. Both Repair Tool modes include support for opacity adjustment and feathering.

As mentioned, the software’s PhotoLibrary has also been updated to include keyword searches and management. The PhotoLibrary now shows image keywords in the interface, plus there’s the ability to add, rename, and delete keywords, including for multiple images at once. At this time, support for keywords in multi-criteria searches is only available on the macOS version of the software, but DxO says it will bring the same functionality to the Windows version soon.

DxO is offering PhotoLab 3 Essential and Elite Editions for Mac and PC at discounted prices until November 24:

  • DxO PhotoLab 3 Essential Edition: €99.99 / £86.99 / $ 99.99
  • DxO PhotoLab 3 Elite Edition: €149.99 / £129.99 / $ 149.99

DxO PhotoLab 3: The most colourful upgrade yet

DxO, one of the most innovative companies in the photography and image editing industry, is announcing its latest version of DxO PhotoLab, the most advanced photo editing software on the market in terms of image quality. With its completely redesigned HSL colour adjustment feature, optimized Repair Tool, and brand-new Local Adjustments Masks Manager, DxO PhotoLab 3 offers an exceptional level of colorimetry control, making the photographer’s job easier than ever before. Because the DxO PhotoLibrary now supports keyword searches, it offers an even more comprehensive workflow and improved compatibility with other photo editing software programs.

A new approach to adjusting colour

With its innovative and visual approach to colour management, DxO PhotoLab 3’s HSL (Hue, Saturation, and Luminance) Tool offers unparalleled control so you can produce even more natural- looking or creative images. It features a new colour adjustment mode based on a chromatic circle called the DxO ColorWheel. With this tool, you can select a colour range from eight different channels, fine-tune the value, select a replacement colour, and adjust your transitions to your heart’s desire. A new Uniformity setting also lets you adjust colour variations within a specific range. The Saturation and Luminance sliders now operate more independently, which offers more flexibility, especially when converting from colour to black and white and creating partially desaturated images.

“With the DxO ColorWheel, we were looking to create a new approach that could make colour management both flexible and fun. This tool is incredibly user friendly,” says Jean-Marc Alexia, VP Marketing & Product Strategy at DxO.

A Repair Tool that offers even more control

DxO PhotoLab 3 continues to improve its local adjustments options to offer users even more precision. One of these features, the Repair Tool, which acts as a brush that can erase unwanted elements from the image, has been updated. You can now manually reposition the area in the source image that you want to use to reconstruct an area in the image being edited. In addition to Repair Mode, DxO PhotoLab 3 also offers Clone Mode, which lets you directly replace the area you are editing. Feathering and opacity level can also be adjusted in both modes.

New Local Adjustments Masks Manager

DxO PhotoLab 3’s new Local Adjustments palette lets you manage local correction masks that have been layered within a single image. Make them visible, mask them, or adjust their opacity individually. The tool also lets you reverse the selected mask with a single click, adding additional flexibility and saving a significant amount of time.

A more complete workflow through keywords

In addition to the search criteria that are already available in the DxO PhotoLibrary (metadata, shooting parameters, folders, etc.), DxO PhotoLab 3 now offers keyword management and optimizes image organization all the way up to export. The keywords associated with an image can now be displayed in the interface, including when they are imported from other software programs. You can now add, delete, or rename keywords for one or multiple images simultaneously and include them in multi-criteria searches (macOS version only; this feature will be available in the Windows version in the near future). DxO PhotoLab 3 also offers more complete information and metadata display options as well as additional Projects management options.

New camera support

DxO PhotoLab 3 continues to add new cameras to the list of equipment it supports. It recently added the Canon G5 X Mark II and G7 X Mark III, the Nikon P1000, the Panasonic Lumix DC- G90/G95/G99/G91, the Lumix DC FZ1000 II and Lumix TZ95/ZS80, the Ricoh GR III, and the Sony A7R IV and RX100 VII. More than 3,000 optical modules have also been added to the database, which now includes over 50,000 different camera/lens combinations. The software’s de-noising capabilities for RAW photos taken with certain Canon and Olympus cameras has been improved as well.

Price & availability

The ESSENTIAL and ELITE editions of DxO PhotoLab 3 (PC and Mac) are now available for download on DxO’s website for the following launch prices until November 24, 2019:

page2image570121568

DxO PhotoLab 3 ESSENTIAL Edition: DxO PhotoLab 3 ELITE Edition:

DxO PhotoLab 3 ESSENTIAL Edition: DxO PhotoLab 3 ELITE Edition:

DxO PhotoLab 3 ESSENTIAL Edition: DxO PhotoLab 3 ELITE Edition:

€99.99 instead of €129 €149.99 instead of €199

£86.99 instead of £112 £129.99 instead of £169

$ 99.99 instead of $ 129 $ 149.99 instead of $ 199

You do not need a subscription to use DxO PhotoLab 3. You can install the program on two computers with the DxO PhotoLab 3 ESSENTIAL Edition or on three computers with the DxO PhotoLab 3 ELITE Edition. Photographers with a license for DxO OpticsPro or DxO PhotoLab 2 can purchase an upgrade license for DxO PhotoLab 3 by signing into their customer account on www.dxo.com. A fully-functional, one-month trial version of DxO PhotoLab 3 is available on the DxO website.

Articles: Digital Photography Review (dpreview.com)

 
Comments Off on DxO PhotoLab 3 brings improved repair tools, local adjustment masks and new camera support

Posted in Uncategorized


Ricoh says it will repair GR III cameras affected by a wobbly control dial, scroll wheel

02 Apr

Ricoh Korea and Japan have issued a statement regarding an issue with select Ricoh GR III cameras that caused the control dial of the camera jiggles more than it should, as seen in the above video shared by Photo Rumors. Following an investigation of the issue, Ricoh says it will fix affected devices free of charge and notes that the movement of the controls does not interfere with the functionality of the camera.

The translated statement says ‘The basic specification is to set a slight rotation allowance width, but as a result of investigation, it has been found that some products with the following target serial numbers have combinations with large display inclinations.’

In more clear terms (you made a valiant effort Google Translate), Ricoh anticipated a slight bit of movement, but the affected cameras show far more movement than should be happening and as a result the affected cameras will be fixed. Below are the serial number ranges Ricoh references:

  • 0010046 – 0022290
  • 2010043 – 2012044
  • 3010045 – 3010544
  • 4010041 – 4010230

The statement says Ricoh will start processing repairs for affected devices on April 8, 2019. DPReview was informed by a Ricoh spokesperson that Ricoh USA and UK will be issuing a statement tomorrow regarding the issue and the subsequent steps needed to repair affected cameras. We will update the article with that statement when we receive it.

Articles: Digital Photography Review (dpreview.com)

 
Comments Off on Ricoh says it will repair GR III cameras affected by a wobbly control dial, scroll wheel

Posted in Uncategorized


Repair site ifixit gives us a closer look at the Samsung Galaxy S10 cameras

08 Mar
Galaxy S10 triple-camera, image: ifixit

Gadget repair site ifixit has torn down the new Samsung Galaxy S10 and S10e smartphones, allowing us to get a closer look at the devices camera modules.

The S10 comes with the same main triple-camera as the S10+, featuring a 12MP primary module with 1/2.55″ sensor, 26mm equivalent focal length and a variable f/1.5-2.4 aperture. A 12MP tele lens comes with a 52mm equivalent focal length and F2.4 aperture lens in front of a 1/3.6″ sensor and the 16MP super-wide-angle has an equoivalent focal length of 12mm. S10e has to make do without the tele lens.

Galaxy S10 fron and main cameras (left) next to the equivalent S10e components, image: ifixit

In the teardown we get a close look at the triple-module which is encased in a yellow ABS or nylon plastic frame. Both tele and main camera come with optical image stabilization. ifixit says any further teardown of the camera components would have been too destructive but an X-ray image of the tele-camera shows the sensor and OIS electromagnets.

If you are thinking about repairing your S10 – camera or other components – yourself, you should probably think twice. ifixit gave the S10 a fairly low 3/10 repairability score. The good news is that a single Phillips driver takes care of all the screws and many components are modular and can be replaced independently but the charging port soldered to the main board and battery replacement is quite difficult.

X-ray of the Galaxy S10 tele-camera, image: ifixit

The ifixit team also says that glued-down glass at both front and back of the device increases the risk of breakage and makes any repairs more difficult to start with. Head over to ifixit.com for the full report.


Images used with permission from ifixit

Articles: Digital Photography Review (dpreview.com)

 
Comments Off on Repair site ifixit gives us a closer look at the Samsung Galaxy S10 cameras

Posted in Uncategorized


Canon USA revives CarePAK Plus, free accidental damage repair on EOS R, most DSLRs

23 Oct

Canon USA has reintroduced its CarePAK Plus service as a promotional incentive for most of its recent DSLR cameras, as well as for the new EOS R full frame mirrorless body. The service plan offers 13-months’ worth of free accidental damage cover, as well as two Canon Maintenance Services during that period.

The offer covers 10 of the company’s DSLR and the EOS R, and will also be accessible for those buying one of 13 lenses from the L professional series. Customers have a month to register their products for the service, and Canon boasts that it handles everything from calls and emails, to the actual servicing, so you’ll never have to deal with a third party. Below is a complete list of the participating products:

EOS R EOS 6D Mark II EF 24-70mm F2.8 II USM
EOS 1D X Mark II EOS 80D EF 70-200mm F2.8 IS II USM

EOS 5D Mark IV

EOS 77D EF 70-200mm F2.8 IS III USM
EOS 5D Mark III RF 28-70mm F2 L USM EF 50mm F1.2 L USM
EOS 5Ds RF 50mm F1.2 L USM EF 85mm F1.2 L USM
EOS 5Ds R EF 16-35mm F2.8 L II USM EF 85mm F1.2 L II USM
EOS 6D EF 16-35mm F2.8 L III USM EF 100mm F2.8 L Macro IS USM
EOS 7D Mark II EF 17-40mm F4 L USM EF 100-400mm F4.5-5.6 L IS II USM
EOS 6D Mark II

The offer applies to products purchased from authorized dealers from now until 5th Jan 2019. See the Canon website for more information.

Articles: Digital Photography Review (dpreview.com)

 
Comments Off on Canon USA revives CarePAK Plus, free accidental damage repair on EOS R, most DSLRs

Posted in Uncategorized


iFixit teardown finds Samsung Galaxy S9 Plus difficult to repair, shows dual-blade aperture

12 Mar

The team at iFixit.com has taken apart Samsung’s brand new Galaxy S9 Plus flagship smartphone and given it a pretty low repairability score of 4/10 points. The testers liked the fact that many components are modular and can be replaced independently, but found accessing the battery to be an unnecessary challenge.

The device’s display and glass back also increase the chance of breakage, and make repairs difficult to start. The need to remove the rear glass panel and disassemble the entire phone when replacing the display was listed as another negative point.

During the teardown, the iFixit crew also had a closer look at the smartphone’s 12MP optically-stabilized camera module with 2x zoom. The dual-camera comes as a single unit on a single PCB and with a single connector. Inside, they found the DRAM chips that power the 960 fps super-slow-motion mode.

The S9 Plus main camera uses a variable F1.5/F2.4 aperture, and the close-up images show the design. Instead of a diaphragm-design with several aperture blades, the lens comes with a simpler construction, comprising of two rotating, ring-like blades for switching between its two aperture values.

Head over to iFixit.com to read the full report.

Articles: Digital Photography Review (dpreview.com)

 
Comments Off on iFixit teardown finds Samsung Galaxy S9 Plus difficult to repair, shows dual-blade aperture

Posted in Uncategorized


Fading To Black: 13 Abandoned TV Repair Shops

22 May

[ By Steve in Abandoned Places & Architecture. ]

TV repair shops, once fixtures of our tuned-in society, have faded away as televisions became more reliable and the broadcast medium itself lost its relevance.

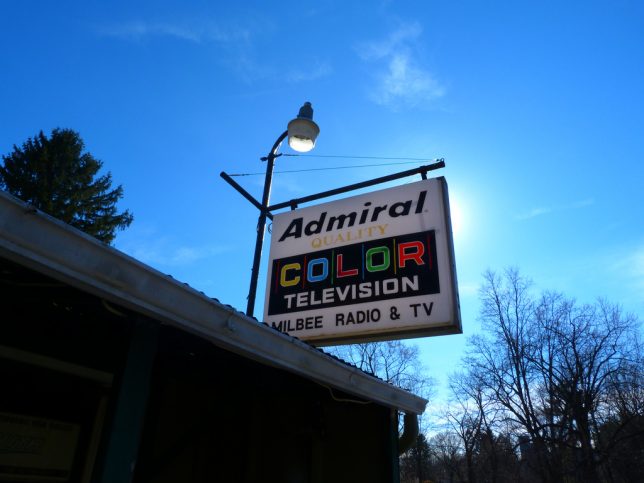
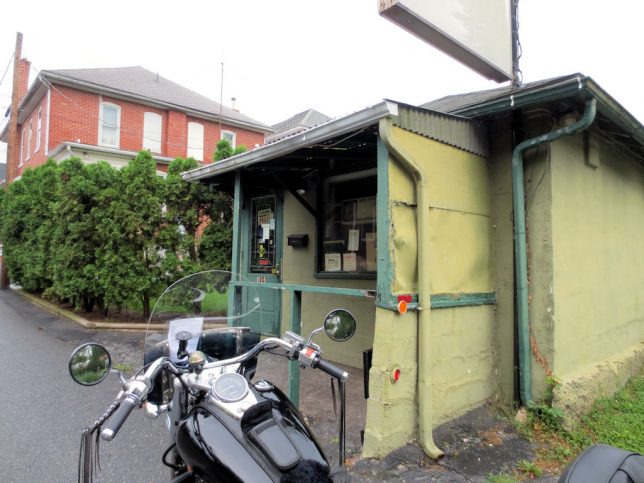
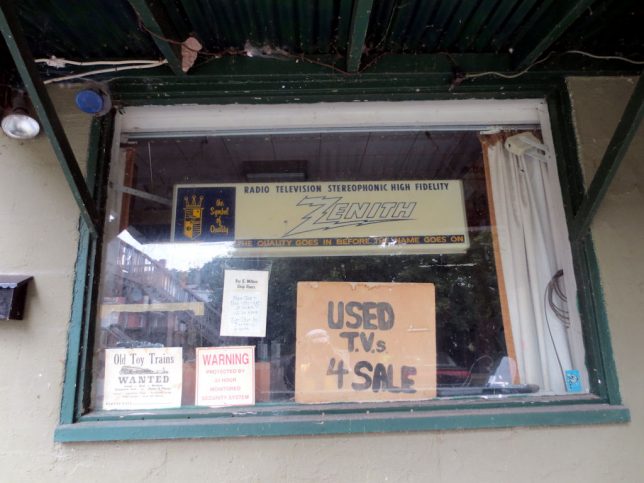
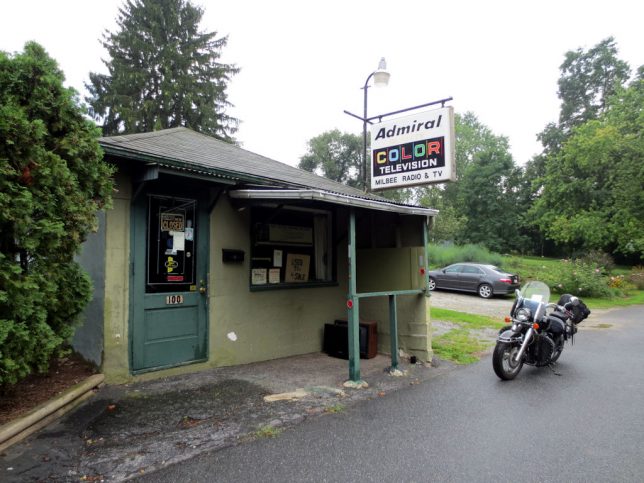
Take Milbee Radio & TV, a tiny TV repair shop supposedly operating out of Elizabethtown, PA. We say “supposedly” because neither Flickr user Katie Burkey (StarPhotographs) nor Wendyvee of RoadsideWonders have been able to find anyone actually working there – “I think this shop might be abandoned, but I never knew for sure,” stated Burkey in March of 2011.

Aside from the minuscule size of the shop (and its queasy two-tone green paint job), the gloriously retro sign tells a story all on its own. Does anyone remember brand names like Admiral, Zenith, Philco and Quasar? How long since the word “RADIO” on a sign attracted customers? Last but not least, “COLOR” television was once a feature worthy of note.

Don’t Give A Hoot

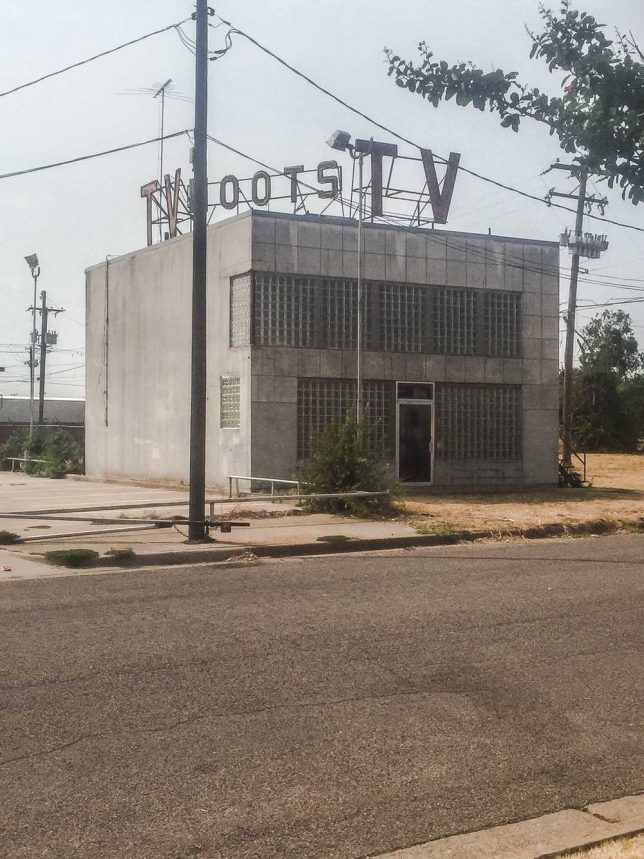
The latest entry in the Anti-Zombie Fortress sweepstakes is the former Hoots TV Service on Highway 80 West, Fort Worth, Texas. According to Joan Carroll, the glass block-enhanced blockhouse dates from 1964 and was the third (and final) location of Hoots TV.

Screen Thy Last Screen

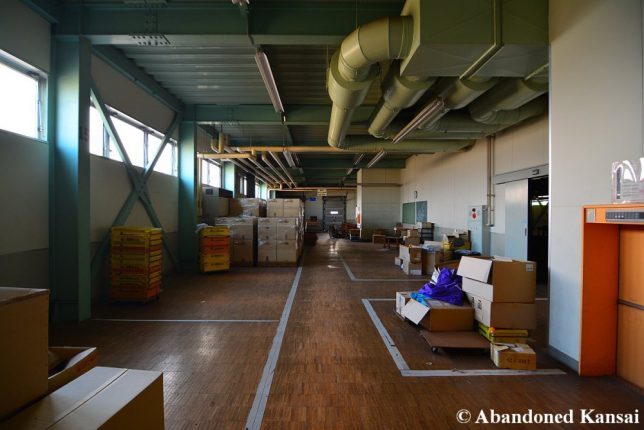
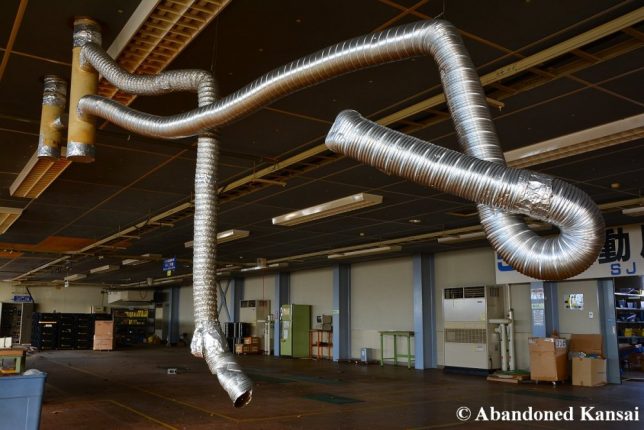
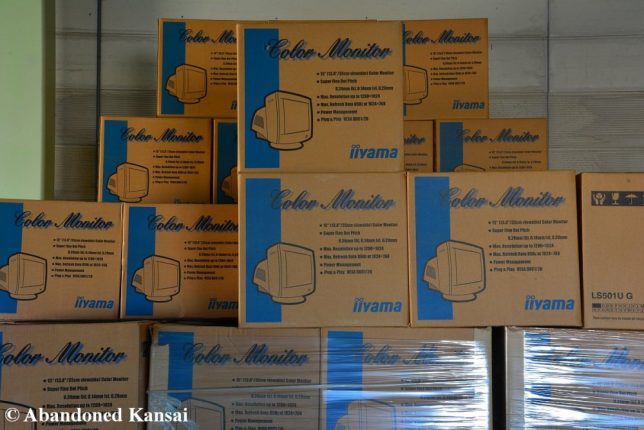
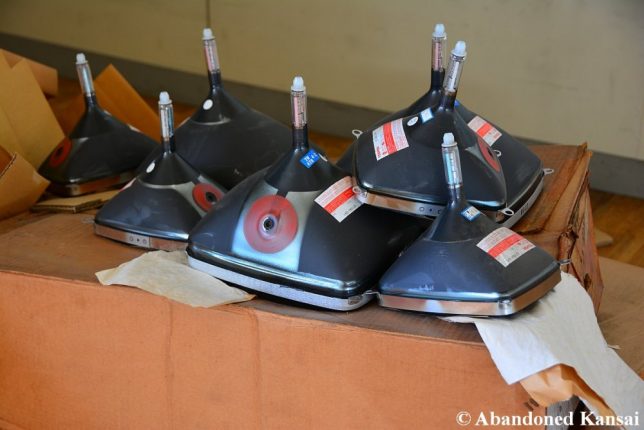
This Japanese TV and monitor repair, assembly and distribution center seems to have soldiered on until 2008, according to calendars found within by Florian and friends from the Abandoned Kansai urbex blog.

Like many Japanese abandonments, the business appears to have been closed in a hurry with much equipment and stock left in place and on shelves. Towards the end, the business serviced Sega arcade machines and monochrome computer monitors but couldn’t afford to retool when ponderous CRT screens gave way to flat-screen LCD and TFT-LCD displays.

Bad Dreams

Odd that microwave ovens were once categorized as electronic devices instead of kitchen appliances but hey, those were the days! Dream Lovers T.V. Shop (why the periods between T and V?) once sold and serviced televisions – and presumably microwaves – from this gritty shop in Nottingham, UK. Flickr user Rust Never Sleeps captured the shop’s well-aged storefront in late July of 2014.

Rough In The Dimond

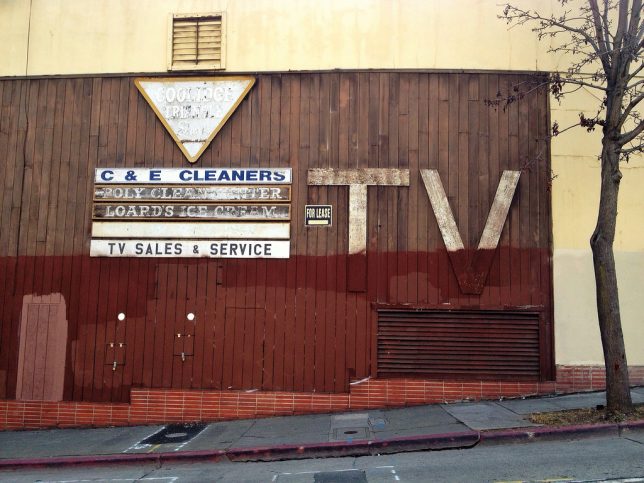
This ultra-rustic TV Sales & Service shop languishes unlamented in the cold heart of East Oakland’s Dimond (pronounced “diamond”) district. Flickr user Billy (misterbigidea) snapped the shop’s weary weathered facade in late January of 2014.

Next Page – Click Below to Read More:
Fading To Black 13 Abandoned Tv Repair Shops

Share on Facebook


[ By Steve in Abandoned Places & Architecture. ]

[ WebUrbanist | Archives | Galleries | Privacy | TOS ]


WebUrbanist

 
Comments Off on Fading To Black: 13 Abandoned TV Repair Shops

Posted in Creativity


Gold Infill: Japanese Pottery Repair Tradition Applied to Concrete

27 Jul

[ By WebUrbanist in Design & Fixtures & Interiors. ]

gold floor cracked resin

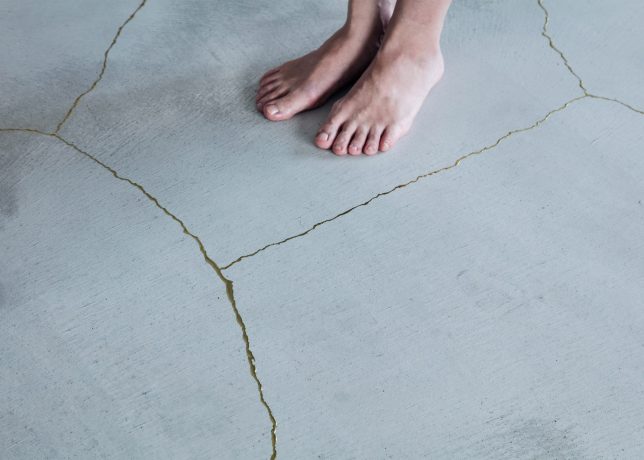
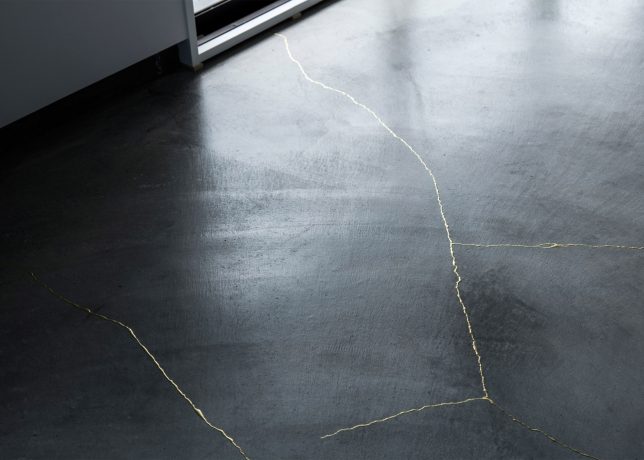
Strands of gold fill the cracks of this apartment in Kyoto, replicating in architecture a longstanding tradition of repairing pottery in a way that tells a true history of its use and reconstruction. Mixed with resin, glittering gold dust sparkles against adjacent surfaces.

goldinfill pottery

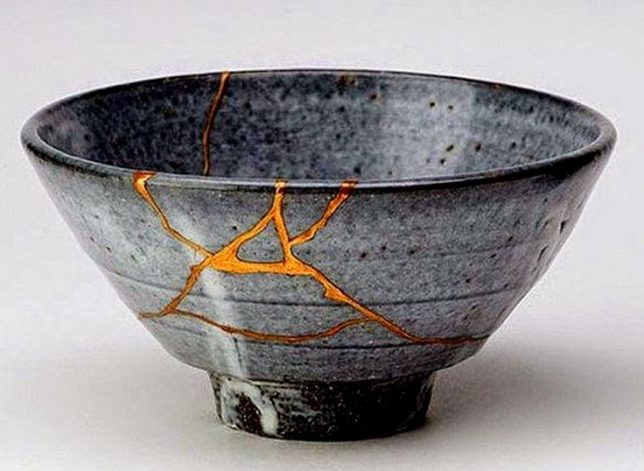
Kintsugi, which translates as “to repair with gold,” is a philosophy as much as an artistic approach. It reflects the idea that breakage and reassembly is part of the life of an object. In this case, the cracks that almost invariably form in concrete were repaired in the same fashion.

gold fills cracked floor

When Kintsugi was first employed centuries ago by a Japanese shogun, others were so enamored with the effects that, as the story goes, they began breaking their own pottery just to have an excuse to patch it back together with gold-laced lacquer.

gold concrete infill

In this case as with pottery artifacts, the effect is dazzling. Cracks stand out as something intentional, artistic and organic rather than shied away from as simply damaged. Spearheaded by architecture studio Tank, this may in turn also become more of a bigger trend, if only in Japan.

gold interior design

“The Japanese have traditionally repaired broken ceramics by gluing fragments together with lacquer and gilding the seams with gold powder to enjoy the beauty of imperfection,” said TANK. “Using traditional mortar, we emulated the art of Kintsugi in the living room by joining the cracks, thus transforming what was considered imperfect into a subject of beauty.”

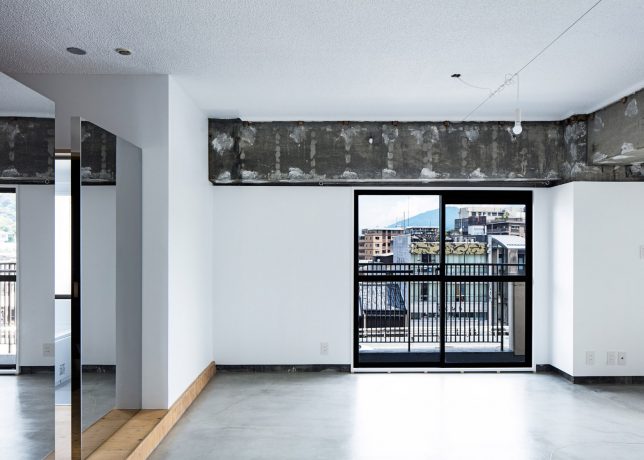
raw interior design

Meanwhile, the winding gold cracks form part of a larger puzzle, elegantly juxtaposed against raw ceilings and reflected in a series of mirrored doors. The overall effect is minimalist, but with materials and textures adding life through creative details. Depending on the time of day and type of light, the gold blends in or stands out as lighter (or darker) against cementitious surrounding surfaces.

Share on Facebook


[ By WebUrbanist in Design & Fixtures & Interiors. ]

[ WebUrbanist | Archives | Galleries | Privacy | TOS ]


WebUrbanist

 
Comments Off on Gold Infill: Japanese Pottery Repair Tradition Applied to Concrete

Posted in Creativity


Pixelmator update brings Dynamic Touch and improved repair tools

15 Jul

The Pixelmator app for iPad and iPhone has received another update, ensuring it remains one of the most powerful mobile image editing tools in the App Store. Introduced in version 2.0.2 is Dynamic Touch, which automatically adjusts the brush to the surface area of your finger that’s touching the screen. Read more

Articles: Digital Photography Review (dpreview.com)

 
Comments Off on Pixelmator update brings Dynamic Touch and improved repair tools

Posted in Uncategorized