RSS
 

Posts Tagged ‘Recommended’

9 Recommended Accessories for Your New Sony a7R III or a7 III Camera

24 Jul

The Sony a7 III is arguably the hottest and most popular full-frame DSLR on the market right now. It packs much of the power of Sony’s other full-frame powerhouses, the a9 and a7R III, into a camera that’s significantly more affordable.

If you’ve added the Sony a7III (or the a7R III) to your camera kit recently, here are 10 accessories you might want to buy as well to help you capture better photos and/or videos.

Side note: This article excludes specific lenses, flashes, and camera bags as recommended accessories since they’re hot topics in their own rights, but make sure you get some of those as well.

Sony accessories 01

1. Screen Protector

Both the Sony a7R III and a7 III are certainly very solidly built. You probably won’t need to buy additional protective accessories to shoot in most conditions (unless, of course, you plan on shooting in extreme conditions).

However, it’s a good idea to invest in a screen protector for the rear LCD screen. They’re cheap, relatively easy to apply, and they let you use Sony’s limited touchscreen functions. Just make sure to buy a screen protector that fits your camera model.

2. SD cards

Make sure you invest in at least a couple of SD memory cards to store your images in-camera. If you have multiple memory cards, a memory card wallet or holder is also great to keep them organized.

Size-wise, bigger is better given the larger file sizes of these cameras, so consider getting 32GB or 64GB cards. If you plan to shoot 4K video or take advantage of your camera’s blazing fast frames per second shooting, make sure you choose memory cards with a high write speed, such as this SanDisk 64GB USH-II SD card.

9 Recommended Accessories for Your New Sony a7R III or a7 III Camera - SD cards

3. Camera strap

Both the Sony a7 III and a7R III come with dedicated Sony camera straps. They get the job done but can be difficult to remove in a situation where you don’t want a camera strap in your way (ie. shooting on a tripod). Thus, many photographers opt to purchase third-party camera straps.

The Peak Design Slide camera strap is especially popular right now since they have the ability to easily connect and disconnect from your camera as needed. Also worth checking out are Black Rapid camera straps, especially if you have two camera bodies and need a Double Camera Harness.

Photographers looking for a more fashionable alternative may also be drawn to the HoldFast Money Maker camera strap, which is handmade from genuine or vegan leather.

4. Lens filters

Both the Sony a7 III and a7R III require detachable camera lenses that you have to buy separately. This article won’t discuss specific lenses, but no matter which ones you end up with, you should definitely have a UV filter for each of your lenses.

Not only do UV filters minimize atmospheric haze, but they also protect the surface of the lens from scratches, dust, and most other external damage.

Other handy photography filters include a polarizer and neutral density filter. These are especially applicable if you plan to shoot outdoors.

9 Recommended Accessories for Your New Sony a7R III or a7 III Camera

5. External hard drive

Today’s cameras are packed with more megapixels and high-resolution video recording capabilities than ever before. While this can be a great thing for creatives, it can be a bane on your digital media storage. This is especially true if you have the Sony a7R III, which is capable of producing massive 42-megapixel images.

To avoid filling up your computer, you’ll want at least one external hard drive, or ideally three total to make backups of your images after shooting. When selecting an external hard drive, consider getting a “tough” or version such as the LaCie Rugged Portable Hard Drive that will give you some extra protection, since hard drives can be notoriously easy to damage.

9 Recommended Accessories for Your New Sony a7R III or a7 III Camera - computer and hard drives

6. Spare batteries and a battery charger

It’s somewhat arguable if these two accessories are needed. In case you haven’t heard, Sony drastically improved the battery life in the new Z-batteries that ship with the Sony a9, a7R III, and a7 III.

In my experience with the A7rIII, these new batteries last as long as the ones that power the Canon 5D Mark III. I find that I rarely bust through a whole battery in a full day of shooting still photography. However, it’s always wise to carry a spare battery or two, just in case.

As for the battery charger, you will probably need to buy one if you have the a7 III since that camera is reportedly not shipping with a battery charger in the box. Or, you can simply juice up your camera using the next recommended accessory.

7. External battery charger

One of the most refreshing parts about switching from a DSLR to a Sony mirrorless camera is the fact that you can charge your camera without removing the battery. Simply plug your camera into a wall outlet or external battery via the USB-C port to start charging.

Best of all, you can operate your camera while it’s being charged! As far as external battery packs go, Anker makes stellar options such as this one that is slim and capable of charging not only your camera but also your cell phone.

8. Tripod

Most photography articles include a tripod as a definite “must-have” in your camera kit, but I think this is a very arguable accessory, especially as camera technology improves. If you plan to shoot architecture, real estate, products, or in low-light scenarios, you definitely need a sturdy tripod such as this beastly Manfrotto tripod that is huge, but rock solid.

However, if you’re more of a run and gun shooter or looking for a more minimalist camera setup, you can get away with something like the Manfrotto BeFree travel tripod series, or even a GorillaPod.

In particular, I’ve found the GorillaPod to be ultra convenient. It’s compact and flexible enough to throw into your bag and have it as an option to quickly stabilize your camera as needed (if at all). If you do get a GorillaPod, be sure to get the 3K or 5K option, as any smaller models are often not strong enough to support Sony a7 cameras, or DSLRs in general.

Sony accessories - photographer with pack and tripod in the mountains

9. Timelapse trigger

If you’ve owned a previous model of Sony camera such as the a7R II or an a6000, you probably used the built-in Sony apps. These unlock a host of extra features such as built-in time-lapse.

Unfortunately, Sony removed those apps from both the a7R III and a7 III cameras. That means you can’t easily do built-in time-lapses anymore. Fortunately, there are other options such as the MIOPS Smart Trigger.

In Conclusion

There you have it, nine recommended accessories (besides lenses, flashes, and bags) that you should get for your Sony a7 III or a7R III camera. Would you add any accessories to this list? Please let us know in the comments below.

The post 9 Recommended Accessories for Your New Sony a7R III or a7 III Camera appeared first on Digital Photography School.


Digital Photography School

 
Comments Off on 9 Recommended Accessories for Your New Sony a7R III or a7 III Camera

Posted in Photography


9 Recommended Accessories for Your New Sony a7R III or a7 III Camera

24 Jul

The Sony a7 III is arguably the hottest and most popular full-frame DSLR on the market right now. It packs much of the power of Sony’s other full-frame powerhouses, the a9 and a7R III, into a camera that’s significantly more affordable.

If you’ve added the Sony a7III (or the a7R III) to your camera kit recently, here are 10 accessories you might want to buy as well to help you capture better photos and/or videos.

Side note: This article excludes specific lenses, flashes, and camera bags as recommended accessories since they’re hot topics in their own rights, but make sure you get some of those as well.

Sony accessories 01

1. Screen Protector

Both the Sony a7R III and a7 III are certainly very solidly built. You probably won’t need to buy additional protective accessories to shoot in most conditions (unless, of course, you plan on shooting in extreme conditions).

However, it’s a good idea to invest in a screen protector for the rear LCD screen. They’re cheap, relatively easy to apply, and they let you use Sony’s limited touchscreen functions. Just make sure to buy a screen protector that fits your camera model.

2. SD cards

Make sure you invest in at least a couple of SD memory cards to store your images in-camera. If you have multiple memory cards, a memory card wallet or holder is also great to keep them organized.

Size-wise, bigger is better given the larger file sizes of these cameras, so consider getting 32GB or 64GB cards. If you plan to shoot 4K video or take advantage of your camera’s blazing fast frames per second shooting, make sure you choose memory cards with a high write speed, such as this SanDisk 64GB USH-II SD card.

9 Recommended Accessories for Your New Sony a7R III or a7 III Camera - SD cards

3. Camera strap

Both the Sony a7 III and a7R III come with dedicated Sony camera straps. They get the job done but can be difficult to remove in a situation where you don’t want a camera strap in your way (ie. shooting on a tripod). Thus, many photographers opt to purchase third-party camera straps.

The Peak Design Slide camera strap is especially popular right now since they have the ability to easily connect and disconnect from your camera as needed. Also worth checking out are Black Rapid camera straps, especially if you have two camera bodies and need a Double Camera Harness.

Photographers looking for a more fashionable alternative may also be drawn to the HoldFast Money Maker camera strap, which is handmade from genuine or vegan leather.

4. Lens filters

Both the Sony a7 III and a7R III require detachable camera lenses that you have to buy separately. This article won’t discuss specific lenses, but no matter which ones you end up with, you should definitely have a UV filter for each of your lenses.

Not only do UV filters minimize atmospheric haze, but they also protect the surface of the lens from scratches, dust, and most other external damage.

Other handy photography filters include a polarizer and neutral density filter. These are especially applicable if you plan to shoot outdoors.

9 Recommended Accessories for Your New Sony a7R III or a7 III Camera

5. External hard drive

Today’s cameras are packed with more megapixels and high-resolution video recording capabilities than ever before. While this can be a great thing for creatives, it can be a bane on your digital media storage. This is especially true if you have the Sony a7R III, which is capable of producing massive 42-megapixel images.

To avoid filling up your computer, you’ll want at least one external hard drive, or ideally three total to make backups of your images after shooting. When selecting an external hard drive, consider getting a “tough” or version such as the LaCie Rugged Portable Hard Drive that will give you some extra protection, since hard drives can be notoriously easy to damage.

9 Recommended Accessories for Your New Sony a7R III or a7 III Camera - computer and hard drives

6. Spare batteries and a battery charger

It’s somewhat arguable if these two accessories are needed. In case you haven’t heard, Sony drastically improved the battery life in the new Z-batteries that ship with the Sony a9, a7R III, and a7 III.

In my experience with the A7rIII, these new batteries last as long as the ones that power the Canon 5D Mark III. I find that I rarely bust through a whole battery in a full day of shooting still photography. However, it’s always wise to carry a spare battery or two, just in case.

As for the battery charger, you will probably need to buy one if you have the a7 III since that camera is reportedly not shipping with a battery charger in the box. Or, you can simply juice up your camera using the next recommended accessory.

7. External battery charger

One of the most refreshing parts about switching from a DSLR to a Sony mirrorless camera is the fact that you can charge your camera without removing the battery. Simply plug your camera into a wall outlet or external battery via the USB-C port to start charging.

Best of all, you can operate your camera while it’s being charged! As far as external battery packs go, Anker makes stellar options such as this one that is slim and capable of charging not only your camera but also your cell phone.

8. Tripod

Most photography articles include a tripod as a definite “must-have” in your camera kit, but I think this is a very arguable accessory, especially as camera technology improves. If you plan to shoot architecture, real estate, products, or in low-light scenarios, you definitely need a sturdy tripod such as this beastly Manfrotto tripod that is huge, but rock solid.

However, if you’re more of a run and gun shooter or looking for a more minimalist camera setup, you can get away with something like the Manfrotto BeFree travel tripod series, or even a GorillaPod.

In particular, I’ve found the GorillaPod to be ultra convenient. It’s compact and flexible enough to throw into your bag and have it as an option to quickly stabilize your camera as needed (if at all). If you do get a GorillaPod, be sure to get the 3K or 5K option, as any smaller models are often not strong enough to support Sony a7 cameras, or DSLRs in general.

Sony accessories - photographer with pack and tripod in the mountains

9. Timelapse trigger

If you’ve owned a previous model of Sony camera such as the a7R II or an a6000, you probably used the built-in Sony apps. These unlock a host of extra features such as built-in time-lapse.

Unfortunately, Sony removed those apps from both the a7R III and a7 III cameras. That means you can’t easily do built-in time-lapses anymore. Fortunately, there are other options such as the MIOPS Smart Trigger.

In Conclusion

There you have it, nine recommended accessories (besides lenses, flashes, and bags) that you should get for your Sony a7 III or a7R III camera. Would you add any accessories to this list? Please let us know in the comments below.

The post 9 Recommended Accessories for Your New Sony a7R III or a7 III Camera appeared first on Digital Photography School.


Digital Photography School

 
Comments Off on 9 Recommended Accessories for Your New Sony a7R III or a7 III Camera

Posted in Photography


Instagram rolls out ‘Recommended Posts’ feature, and users aren’t happy

29 Dec

Instagram is testing and rolling out features at a quick pace. Just a couple of weeks ago, the Facebook-owned photo sharing app started letting users follow Hashtags in addition to Profiles. And now, after testing the feature with a limited number of accounts, Instagram has confirmed to TechCrunch that “Recommended Posts” are being rolled out to everybody’s feed as I type this.

According to TechCrunch, the feature adds a “More Posts You Might Like” section to the bottom of your feed. But even though this feature isn’t meant to replace posts by people you follow, the response from users who have had the new feature thrust upon them is… expected. Many took to Twitter to voice their displeasure at this latest ‘indignity’ perpetrated on their feeds:

And there are plenty more where these Tweets came from. Still, just like the infamous switch from chronological order to algorithm, chances are good Instagram won’t bow to the pressure or even give users an option to disable the new feature. To paraphrase Bob Dylan: the feeds, they are a’ changin.

Articles: Digital Photography Review (dpreview.com)

 
Comments Off on Instagram rolls out ‘Recommended Posts’ feature, and users aren’t happy

Posted in Uncategorized


Instagram now lets you follow hashtags, is testing ‘recommended’ posts

13 Dec

Instagram will now let you follow hashtags in addition to individuals. The change, announced through the Instagram blog, comes about a month after initial reports surfaced that Instagram was ‘testing’ the feature with small groups of users.

As Instagram explains in its blog post, this is all about ‘enhancing’ discovery:

Every day, millions of people share photos and videos and tag them with relevant hashtags. #onthetable, #slime and #floralnails are just a few examples of hashtags that represent the many interests and passions of our community. To make these posts even more discoverable, we’re introducing hashtags you can follow.

Hashtags can be followed by clicking the big blue ‘Follow’ button on the hashtag’s landing page. Once you’ve followed a tag, top photos and stories from that tag will begin appearing in your newsfeed and stories queue up top.

One More Thing

The ability to follow hashtags began as a test back in early November, and Instagram just launched another feature test that seems likely to make it to prime time very soon. The Verge reports that Instagram is testing a ‘Recommended for You’ feature that will add posts to your news feed that it believes you will like.

These might include photos people you follow have liked, or images Instagram’s controversial algorithm believes you would enjoy based on your activity.

Instagram confirmed that the feature was being tested in a statement to the The Verge, who is also reporting that users can hide the Recommended for You section… at least for now.

Articles: Digital Photography Review (dpreview.com)

 
Comments Off on Instagram now lets you follow hashtags, is testing ‘recommended’ posts

Posted in Uncategorized


My Top Recommended Equipment for Night Photography

24 Sep

Being a Norwegian it’s hard not to be somewhat fascinated with night photography. Our winters are long and dark and when the skies are clear that means great opportunities for night photography. However, it wasn’t until I moved to Spain that I got even more obsessed with photographing the stars and I’ll admit that it’s slightly more comfortable doing so wearing shorts than three layers of clothes.

My Preferred Equipment for Night Photography - milky way shot

A lot can be said about the essential camera equipment for night photography, but in this article, I’d rather look at the equipment that I rely on in order to capture the images that I prefer. Photographers who execute more niche techniques such as star trails and deep space photography would probably add an item or two to this list.

That being said, I strongly recommend using the equipment mentioned in this article. I believe it will be hard for you to capture great images of the night sky without (most) of them.

The Camera…

The camera is your most important tool as a photographer – there’s no way around that. While upgrading your camera is expensive there are certain elements that you should consider if you desire to do better night photography.

Since you’re dealing with low-light at night you depend on using a high ISO in order to capture both the beautiful stars and the details in the landscape/scenery surrounding you. Unfortunately, entry-level cameras have a tendency to not rate well at higher ISO values. Already at a lower value such as ISO 800, they begin introducing a How to Avoid and Reduce Noise in Your Imagessignificant amount of noise. There are a few workarounds for this such as the median technique, but I won’t be getting into that in this article.

Wide Angle Lens

Besides the camera itself, you’ll also need a lens in order to capture an image. There are many different types of lenses available on the market but to get the best possible images during the night, make sure that you choose a lens with a large maximum aperture. This means that you can use an open aperture such as f/2.8 (which lets in more light).

My Preferred Equipment for Night Photography

A subtle display of Northern Lights in Lofoten.

While it might be a personal preference, I find that wide-angle lenses give the best results for night photography. Somewhere between 14-24mm is typically the best.

A Tripod

The last of the three most expensive tools is a tripod. Since you’ll be working with shutter speeds of 15-30 seconds, or even several minutes if you’re making a star trail, you depend on keeping your camera still for that long. This is hard to do without a tripod.

Unless you’re planning on photographing in harsher conditions, you don’t need to buy the most sturdy and solid tripod. However, I still recommend that you choose one that is somewhat solid and will last for a while. Low-end tripods have a tendency to break more easily and in the long run, it will cost you more than one of a higher quality.

Remote Shutter

If you plan to photograph star trails or do exposures longer than 30 seconds (i.e. use Bulb Mode), a remote shutter release is required. You don’t need to spend a lot of money on this and a simple one will do the job. However, I prefer to use one that has a small LCD screen that shows the time of your exposure and allows you to lock up the remote button.

When working with exposures shorter than 30 seconds a remote shutter release isn’t essential. In those cases, you can simply use a 2-second timer or delayed shutter release.

Natural Night Filter

The last of the tools I keep in my bag when doing night photography is a filter that I’ve grown to become a fan of during the last few months – especially when photographing in areas with light pollution.

The Natural Night Filter (I use NiSi’s but other brands such as LEE also have similar products) is made to reduce the amount of light pollution and give you a crisp image. Yes, this is relatively easy to fix in post-production but I find that the more light pollution there is the better the filter works.

Other non-camera related tools

Besides the tools mentioned above, there are a few more items I won’t leave home without when doing night photography. While all of them aren’t used in combination with a camera and don’t have a direct impact on the image itself, they are essential to get the shot:

  1. Extra layers of clothes (at least when photographing in the Arctic!).
  2. Powerful headlamp.
  3. Extra batteries for your camera (if it’s cold keep one on the inner pocket of your jacket).
  4. PhotoPills app – a great tool for planning your night sessions

My Preferred Equipment for Night Photography

What are your preferred tools for night photography? Let me know in a comment!

The post My Top Recommended Equipment for Night Photography by Christian Hoiberg appeared first on Digital Photography School.


Digital Photography School

 
Comments Off on My Top Recommended Equipment for Night Photography

Posted in Photography


Recommended Gear for Doing Long Exposure Photography at Twilight and Dusk

03 Aug

Have you ever come across beautiful cityscape photos captured at twilight and dusk (the so-called “blue hour”) with silky smooth water, like this Marina Bay (Singapore) photo below, and wonder how you could do that yourself? Assuming that you’ve already got your camera (a body and lens), let me go through some of the other gear that is required to do stunning long exposure photography at twilight and dusk.

Recommended Gear for Doing Long Exposure Photography at Twilight and Dusk

Marina Bay (Singapore), shot at 35mm, f/11, for 194 seconds (just over a 3-minute exposure).

Use a Tripod

A tripod is the single-most important piece of gear for photographers shooting at twilight and dusk. Photos shot at these hours require long exposures sometimes lasting for many seconds or even minutes. Therefore, a sturdy tripod is absolutely essential for keeping photos blur-free.

Unlike your camera body, a tripod isn’t something you will upgrade often. So, try to get the best possible tripod within your budget. A good tripod could last a lifetime! I own a Manfrotto MT190CXPRO3 Carbon Fibre Tripod (supports up to 7kg). If your tripod doesn’t come with a tripod head (like mine), get yourself a steady ball-head or 3-way style, whichever you prefer (I own Sirui K-20X Ballhead that supports 25kg).

Tripod - Recommended Gear for Doing Long Exposure Photography at Twilight and Dusk

Mini-Tripods

Mini tripods come in handy at locations where a full-size tripod isn’t allowed inside (e.g. The observation deck of a tower). I own a Joby Gorillapod Focus for DSLRs which supports up to 5kg. It has a dedicated ball head (Joby GorillaPod Ballhead X for Focus) that you can buy as a bundle, but I’m using my own ball-head (aforementioned Sirui K-20X Ballhead) as I feel it’s redundant to have two.

Mini tripod - Recommended Gear for Doing Long Exposure Photography at Twilight and Dusk

Clamp Tripod

A clamp tripod is another tool that comes in extremely handy when there is no appropriate space to set up a tripod. I own the Manfrotto 035 Super Clamp without Stud (supports up to 15kg). Into that, I plug the separately-sold Manfrotto 208HEX 3/8-Inch Camera Mounting Platform Adapter (or a cheaper alternative Manfrotto 037 Reversible Short Stud) into the socket in order to firmly mount a tripod head and camera on top of that. Then I clamp the whole setup onto handrails, etc. This setup is rock solid and is a game changer for us cityscape photographers aiming to take very sharp photos at twilight and dusk without using a full-sized tripod.

Clamp infographic - Recommended Gear for Doing Long Exposure Photography at Twilight and Dusk

This graphic shows how to mount a DSLR on Manfrotto Super Clamp by using a camera mounting platform adapter.

Steps:

  1. Plug a camera mounting platform adapter into a Super Clamp socket and secure it with the double lock system.
  2. Mount a tripod head with DSLR on the mounting platform adapter, just like you do with your regular tripod.

Clamp - Recommended Gear for Doing Long Exposure Photography at Twilight and Dusk

Neutral Density Filters

Neutral density (ND) filters help reduce the light that is coming through the lens, allowing your shutter speed to be extended much longer. This is a must have tool if you want to create the silky smooth water effect typically seen in long exposure photography.

ND filters come in different strengths such as; 3-stop, 6-stop or 10-stop. The bigger the number, the darker the filter and the less light that is let through. My favorite is 6-stop ND filter (I own a B+W 6-Stop ND Filter). With this attached to my lens, a base exposure of 2 seconds (i.e. when no filter is attached) can be extended to 128 seconds. Each “stop” of the ND filter doubles the required exposure time (2 seconds > 4 seconds [1 stop] > 8 seconds [2 stops] > 16 seconds [3 stops] > 32 seconds [4 stops] > 64 seconds [5 stops] > 128 seconds [6 stops]), which is long enough to create silky smooth water effects.

Filters come in two types, screw-on and square filters. If you’re getting screw-on filters, be careful with the size of filter you’re purchasing. It depends on the filter thread size of your lens (e.g. 77mm for Nikon 12-24mm, 67mm for Canon 10-18mm, etc. – look inside your lens cap for the filter size of that lens). If you have two or more lenses with different filter thread sizes that you’d like to use an ND filter on, get one that fits your largest lens (i.e. lens with the largest filter thread size). Then purchase a step-up adapter ring to make the single filter fit into other lenses with smaller thread sizes.

Filters - Recommended Gear for Doing Long Exposure Photography at Twilight and Dusk

Left: Screw-on ND filter. Right: Drop-in square filter (image courtesy of Tiffen).

Or, you can get a square ND drop-in filter instead, along with a holder and adapters (check out at these options we’ve reviewed and featured here on dPS). The advantage of square filters is that you only need one filter to fit all of your lenses. That said, I still prefer screw-on filters because they take up less space in my camera bag and I only own one lens that takes front filters (my trusty Nikon 18-35mm with 77mm filter thread), anyway.

Wireless Remote or Cable Shutter Release

This is another essential tool, as it lets you take photos without touching the camera and helps keep your photos sharp. No need to get a pricey one, though. I’m still using a Phottix IR-Nikon (wireless remote) that I bought years ago for $ 20 (it is available for Canon as well).

Wireless remote - Recommended Gear for Doing Long Exposure Photography at Twilight and Dusk

Long Exposure Calculator App

When you use a semi-manual mode (e.g. Aperture Priority), the shutter speed cannot exceed 30 seconds on most DSLRs. With a 6-stop ND filter used at twilight and dusk, much longer than a 30-second exposure is required. So this is where you’ll need to switch to Manual Mode and take the full control of the camera yourself.

But, how will you know the correct exposure time (shutter speed) to use when your camera no longer assists you? Well, there are a number of free phone apps that help you determine a correct shutter speed. I’m using Long Exposure Calculator app by Junel Corales (get it here for iOS devices or here for Android).

Long exposure calculator - Recommended Gear for Doing Long Exposure Photography at Twilight and Dusk

By setting your filter density (e.g. 6-stop) and base shutter speed (e.g. 2-seconds), the Long Exposure Calculator app automatically calculates the required shutter speed you will need to use (2 minutes and 8 seconds [128 seconds] in this case).

Lenskirt

A lenskirt is a handy tool when shooting through the glass window of an observation deck, hotel room window, etc., as it helps eliminate reflections (such as yourself, room lights) off of the glass window. It might catch the unwanted attention of other visitors due to its odd shape but it has worked quite well for me and has found a permanent place in my camera bag when I’m traveling.

Lenskirt - Recommended Gear for Doing Long Exposure Photography at Twilight and Dusk

Lenskirt in use on the 100th-floor observation deck of the Shanghai World Financial Center. By attaching it to the lens and its pushing suction cups onto the window, it shades the front element of the lens and cuts reflections from the glass window, leaving no chance for any stray light to get into the camera.

Conclusion

That’s all about it. I hope this will get you started with long exposure photography at twilight and dusk. For me, dusk is the most beautiful moment of the day. It ends in the blink of an eye, and that’s what makes it even more special. Try to capture the beauty of long exposure photography at twilight and dusk with this gear.

If you have any other pieces of gear you use for long exposures that you find indispensable, please share them in the comments below.

The post Recommended Gear for Doing Long Exposure Photography at Twilight and Dusk by Joey J appeared first on Digital Photography School.


Digital Photography School

 
Comments Off on Recommended Gear for Doing Long Exposure Photography at Twilight and Dusk

Posted in Photography


6 Steps to Growing Your Photography Business Using a Recommended Vendors List

26 Jan

In this article I talk about a technique used in all types of business, but of course will relate it to photography. To make it easy to understand, I am going to discuss the technique specifically for wedding photographers. But it is important to know that the technique you will learn in this article can work for any type of photography niche or genre.

Wedding cake

Utilizing a business partner vendor list to grow your business

How so? By creating something of value to offer website visitors, which will in turn get them to give you their name and email address. When someone offers you contact information in exchange for something of value, they are now considered a lead. From there you have the potential to convert that lead into a paying customer.

Let’s break it down piece by piece. I’ll start with a list and then talk about each individually:

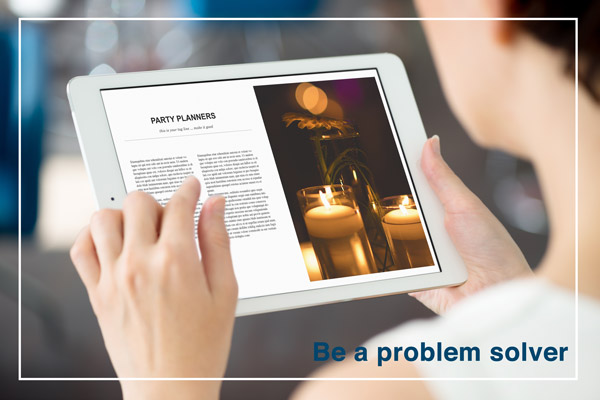
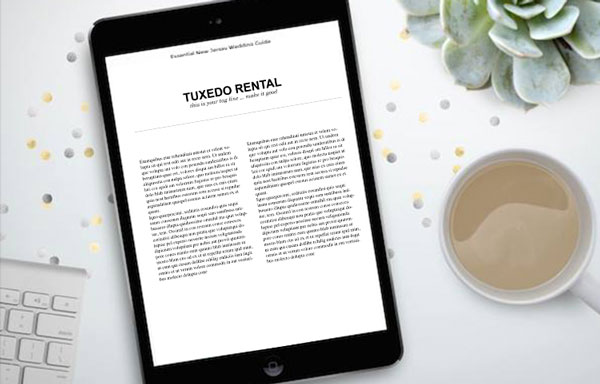
  1. Create a PDF document that is attractive to your potential customers. This PDF is intended to act as a conversion tool – a free offer.
  2. The offer utilizes a business partner vendor list by recommending preferred and partner vendors. This helps add more value to the download and also improves the relationship between you and the vendor.
  3. Create a way for site visitors to enter their contact information on a landing page, a magnetic spot like blog sidebars, or a pop-up box.
  4. Capture emails of website visitors, which then turn into quality leads (because they downloaded something specifically for their intention of hiring a photographer).
  5. The vendors included in the document are also likely to further promote the document.
  6. You now have huge potential of converting those leads into customers, via phone calls and email marketing.

Now let’s get into the nitty-gritty of each of those points. As mentioned earlier, this is geared to wedding photography. So if you are not a wedding photographer, take all I am saying and relate it to the type of photography you do.

Step one – create a PDF

The first step is to come up with a PDF document which you can offer for free on your website. Ideally it will contain everything that your potential customer would need to know about planning a wedding. It’s important that the document is branded to your business, and has an attractive design overall. You can use your letterhead (with logo of course), or a pre-made design for the task at hand (which I have made available) or templates from Keynote or PowerPoint. The important part is that your branding is in the design and that it won’t turn people away by looking unprofessional.

Photographer free pdf

Step two – utilize your list

Inside the PDF categorize it for different types of vendors. You may have a page of florists, and another for wedding venues that you recommend. Ideally make each a two-page spread if possible. One page would provide the information on the vendors, and the other page would contain your photography examples related to the vendor. Think of it like a portfolio of your best work combined with your recommended vendor list.

The beauty of this is that you are getting your photographs in front of couples planning their wedding. Your brand is there as well vendors, which the couple might also hire.

Step three – create the opt-in

Next up is creating a way convert website visitors into leads. This is a bigger section due to the complexity. By this point you will have already created the PDF, which leads will download. But the process of gathering the email addresses confuses many people.

The first step is to use an email marketing service like Mailchimp or Aweber. Both are fantastic. I personally use Mailchimp for its ease of use and pricing.

Both services offer a feature, which can automatically send emails based on certain actions. In Mailchimp it is called Automation, in Aweber it’s called Follow Up Series. There you will set up an automated email, which will be sent to anyone who signs up for the “Free PDF” list that you will have created. Definitely name the list something you will recognize immediately when logging into your account.

These services allow you to attach a PDF to an email, which is what I recommend. But if you are using a service that does not allow attachments then create a Dropbox or Google Drive link and include that in the email.

This is where the fun part starts. There are many places where you can place what’s called an opt-in form. That means, a form which asks a website visitors for a name and email address, or any other information you want to request like a phone number.
Note that the less information you request the higher your conversion rate will be – meaning, the more people will fill it out. So I typically ask for email addresses only (you will see why later).

The first place you want to place the opt-in form is on a landing page specific to the free PDF. The benefit of having a unique page for the document is connected to SEO (search engine optimization). A dedicated page can be filled with additional text and image content optimized to rank well on search engines. It can also increase the conversion rate (percentage of people who sign up compared to number of page visits) for the opt-in because there are no distractions from blog articles or other content available only your website. Services like Mailchimp and Aweber offer embed codes for your opt-in forms. You use it like you were copying and pasting HTML from YouTube, Vimeo or 500px.

The second place you can have the opt-in form is on your blog’s sidebar, or in a pop-up form. These are called magnetic areas because they draw the attention of a visitor’s eye directly to them. There are a few ways you can do the magnetic opt-ins. For sidebars you can use the standard embed code. Some services offer pop-up codes as well. For WordPress sites I recommend services like OptinMonster or Pippity, which come with many design options as well as timing and split testing so you can see what converts the best. I have helped a many photographers with this method.

Optinmonster

Step four – leads versus quality leads

Now that you have the PDF done, and everything set up for visitors to convert into leads – it is important to note the difference between a lead and a quality lead.

A lead is anyone who contacts you about anything. An example of a standard lead is a couple who contacts you for a price list. They might be interested in your services, but there is no way of knowing how interested they really are, how far along they are in their wedding planning, or how serious they are about you.

A quality lead is someone who has taken specific actions to do research and wants valuable information. For example, a quality lead would be a couple downloading your free PDF because it contains information specific to their needs. They understand that it will contain every vendor they need to know about to plan their wedding.

Quality leads have a much higher chance of converting into paying customers over standard leads. That’s because a quality lead is already more interested in your services than a standard lead.

Step five – inform your vendors

If the couple books a venue listed on your PDF, then it is highly possible they will mention you as a referral. Your vendor partners will appreciate that. So, be sure to send a copy to your partners so they know what you are offering potential customers. Then they are also more likely to promote it, and promote you.

Your best sales people are your brand advocates. Those are your customers and your business partners.

Biz partners

Step six – converting to customers

You have your free PDF and are converting site visitors into leads. You are utilizing an email marketing service as recommended. Next is where it really comes into play.

I mentioned earlier that I typically only ask for email addresses. That is because with email marketing you can learn more about your leads, so names and phone numbers are NOT essential. In fact, you may find that through nurturing those leads via email marketing that you will have more people contacting you than you contacting them.

After doing some testing, I came to the conclusion that sending one email a week to my list is most effective. You may find yourself in a different situation. But having an email marketing service that tracks statistics will help you identify the optimal sending scenario – days and times.

One effective trick I find for converting leads into paying customers is to ask a question, which warrants a reply. Whatever the question might be, you will find people replying. That is where the conversation really takes off. Something like this perhaps:

As a wedding photographer I am always so curious what types of gowns brides pick.  Please reply with the type of dress you will be wearing at your wedding.  Or if you already picked it out, I’d love to see a photo!

What have you learned

To wrap-up this article, I want to restate what you learned here and what your first step should be.

Your business partner vendors are more important than ever to your business. You can foster those relationships online, and offline, by creating a free PDF as described here. That PDF will be used as leverage for converting website visitors into quality leads. Using email-marketing you can nurture those leads and convert them into paying customers. All with a little help from a simple PDF that includes super valuable information.

New family

Once again, I used wedding photography as an example, so if you are not a wedding photographer then be sure to think hard about your vendor list and what your clients would need. Then start creating that document.

Hop to it!

Disclaimer: dPS does not agree or disagree with any recommendations made by the author. The author receives no extra compensation for these referrals and benefits in no way. He only recommends them because these are the services he uses – do your own due diligence when selecting any service for your business.

googletag.cmd.push(function() {
tablet_slots.push( googletag.defineSlot( “/1005424/_dPSv4_tab-all-article-bottom_(300×250)”, [300, 250], “pb-ad-78623” ).addService( googletag.pubads() ) ); } );

googletag.cmd.push(function() {
mobile_slots.push( googletag.defineSlot( “/1005424/_dPSv4_mob-all-article-bottom_(300×250)”, [300, 250], “pb-ad-78158” ).addService( googletag.pubads() ) ); } );

The post 6 Steps to Growing Your Photography Business Using a Recommended Vendors List by Scott Wyden Kivowitz appeared first on Digital Photography School.


Digital Photography School

 
Comments Off on 6 Steps to Growing Your Photography Business Using a Recommended Vendors List

Posted in Photography


Recommended Reading: Make Use Of Instagram

28 Dec

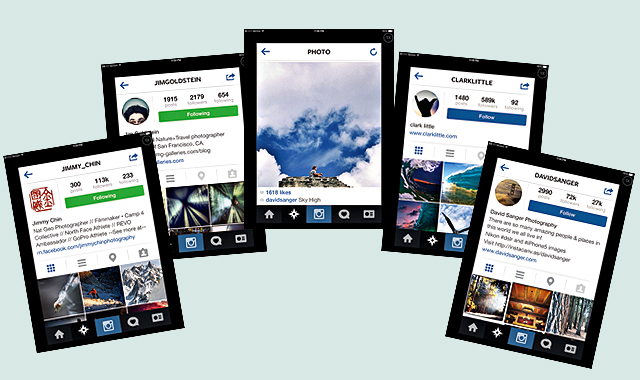
Instagram has been the source of a lot of debate and even the butt of jokes with in the photography community. I’ve written an article in Digital Photo Pro magazine discussing the potential Instagram offers to photographers of all levels.  Check out the article, Make Use of Instagram and I invite you to follow me on Instagram.

Also if you’ve missed my other Digital Photo Pro articles you can find them here:

  • Move Forward With Social Media
  • Search Engine Optimization 
  • Social Media & ­­­­­Copyright
  • Social-Media Marketing Essentials
  • Creative Commons
  • PLUS Coalition Standardized Licensing Codes
  • How I Evaluate Terms of Service for Social Media Web Sites – Google+ (my blog)
  • Evaluating Terms of Service Documents: Resources (my blog)

More of my articles on Social Media for Photographers

Copyright Jim M. Goldstein, All Rights Reserved

Recommended Reading: Make Use Of Instagram

The post Recommended Reading: Make Use Of Instagram appeared first on JMG-Galleries – Landscape, Nature & Travel Photography.


Related Stories

  • Recommended Reading: Make Use Of Instagram – Enclosure
  • Recommended Reading: Move Forward With Social Media
  • Recommended Reading: Move Forward With Social Media – Enclosure
Feed Ads by FeedBlitz
powered by ad choices


JMG-Galleries

 
Comments Off on Recommended Reading: Make Use Of Instagram

Posted in Equipment


Without Reservation: A Recommended Gear List

18 Dec

This is something I get asked about a lot, and its inclusion on the site is far overdue. The following is a list of gear in which I have complete confidence, and would recommend wholeheartedly to any photographer.

The Without Reservation list will be kept up to date going forward, so these are all subject to change at some point in the future. But as of now, this is the go-to gear that I rely upon day in and day out.

Read more »
Strobist

 
Comments Off on Without Reservation: A Recommended Gear List

Posted in Photography


Recommended Reading: Move Forward With Social Media

03 Sep
Move Forward With Social Media

Move Forward With Social Media

Curious how to leverage social media to gain exposure of your photographic work while saving a little time? In the latest issue of Digital Photo Pro magazine I cover this and more in my latest article, “Move Forward with Social Media”. As a bonus I include a web site comparison to help you weight the pros and cons of taking part in each site. Check out the article:  Move Forward With Social Media – Introduce and publicize your photography to others without falling into a time-wasting black hole


Also if you’ve missed my other Digital Photo Pro articles you can find them here:

  • Search Engine Optimization 
  • Social Media & ­­­­­Copyright
  • Social-Media Marketing Essentials
  • Creative Commons
  • PLUS Coalition Standardized Licensing Codes
  • How I Evaluate Terms of Service for Social Media Web Sites – Google+ (my blog)
  • Evaluating Terms of Service Documents: Resources (my blog)

More of my articles on Social Media for Photographers

Copyright Jim M. Goldstein, All Rights Reserved

Recommended Reading: Move Forward With Social Media

The post Recommended Reading: Move Forward With Social Media appeared first on JMG-Galleries – Landscape, Nature & Travel Photography.


Related Stories

  • Recommended Reading: Move Forward With Social Media – Enclosure
  • Talking Lightroom & Photography
  • Talking Lightroom & Photography – Enclosure
Feed Ads by FeedBlitz
powered by ad choices


JMG-Galleries

 
Comments Off on Recommended Reading: Move Forward With Social Media

Posted in Equipment