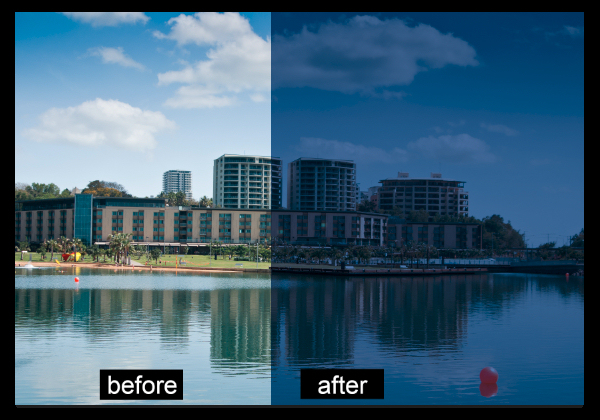
If you’re looking to use some creative enhancements on your photos in Photoshop CS6 or CC then the new Color Lookup adjustment is one to consider. The Color Lookup adjustment is used to remap the colors in an image to a set of colors that comes pre-configured and stored inside a color table file. Color Tables are used primarily with film but they are also useful for applying creative coloring to photos.
You don’t need to know anything about color tables to use this feature, as is a default set of color tables in Photoshop that you can use. Better still, if you like the effects and you subscribe to the Creative Cloud you can grab more color tables from the Adobe Speed Grade application, store them in the Photoshop PresetDLUTs folder, and use them inside Photoshop.
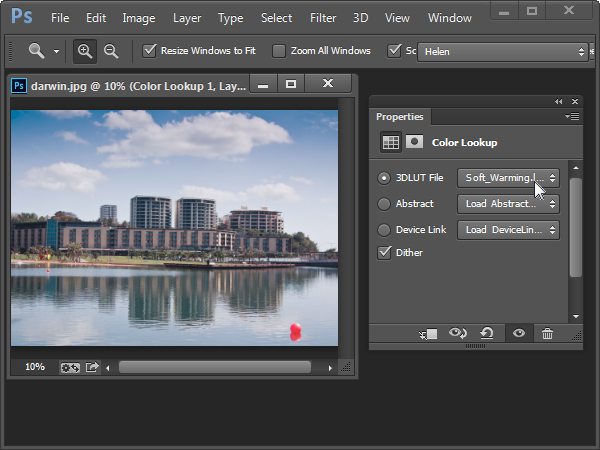
To see the Color Lookup adjustment at work open a photo and choose Layer > New Adjustment Layer > Color Lookup. This opens the Color Lookup dialog where you will find three settings; 3DLUT File, Abstract and Device Link. Select one of the options from one of the dropdown lists to see it at work. When you do this, the colors in the photo will be remapped.
For example the Soft_Warming.Look in the 3DLUT collection warms up the image.
The Moonlight.3DL option gives the image the look of being shot on a moonlit night.
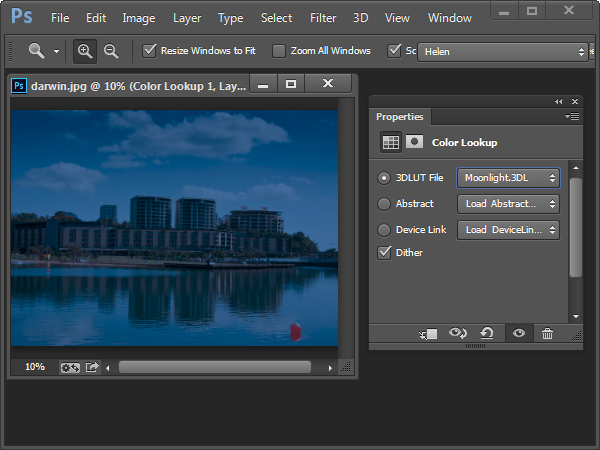
You can experiment to see which of the options you like.
Some of the options open up additional Data Order and Table Order settings which let you create different effects. The Device Link collection on a Mac includes some additional options which are not available on a PC.
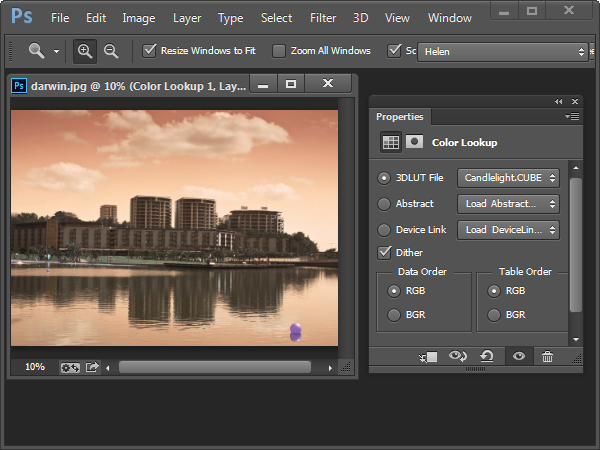
Like any other Adjustment Layer the Color Lookup option has a mask you can use to mask out the effect on selected areas of the image. You do this by selecting the mask and then paint on the image with black or grey to remove the effect from that area of the image. Paint with white to bring it back.
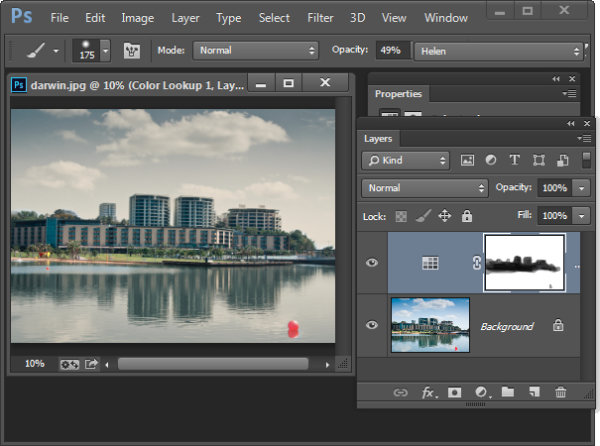
You can also use a blend mode to blend the Color Lookup adjustment into the image layer below and reduce its opacity if desired.
Here is a video tutorial for the Color Table Adjustment Layer. It includes details of how to find and use the .Look files shipped with Speed Grade in Photoshop:
If you haven’t tried this technique before give it a go and show us what you come up with. For more Photoshop tutorials check these:
- Ten Go-to Editing Tips for Using Photoshop
- 5 Photoshop Tools to Take Your Images from Good to Great
- 3 Easy Steps Using Photoshop to Making your Images POP
- 5 Easy Photoshop Tips for Beginners
The post Creatively Recolor Photos with Color Tables in Photoshop by Helen Bradley appeared first on Digital Photography School.
You must be logged in to post a comment.