Are you struggling to capture incredible shots in a humid atmosphere? This is the story of almost every photographer. If you have worked in sweltering temperatures, you might be familiar with the preparations and care your camera needs to prevent condensation. Humidity and your camera are rivals. Photographers need to store their cameras and lenses in an ideal storage humidity Continue Reading
Photodoto
Posts Tagged ‘Protecting’
A Guide To Camera Lens And Humidity: Protecting your Equipment
Flickr partners with Pixsy to create end-to-end platform for protecting image copyrights
 |
Flickr has announced a new strategic partnership with Pixsy, an online legal-tech service that helps photographers protect and enforce their copyrights. The new partnership allows Flickr Pro users an end-to-end solution to track their images and take legal action in the event a photograph is stolen and used illegally.
Starting today, Flickr Pro members can integrate their Flickr images with Pixsy’s advanced monitoring and protection platform which allows access to 1,000 monitored images, 10 DMCA takedown notices and unlimited case submissions.
 |
When a copyright infringement is detected by Pixsy, an alert will be sent to the user with the option to decide what should be done next. The press release says ‘Photographers have access to a comprehensive case resolution service to recover lost licensing revenue and damages, along with the tools to register images with the US Copyright office and send automated DMCA takedown notice.’
Pixsy works alongside law firms around the globe on a ‘no win, no fee’ basis. Pixsy says it’s handled more than 70,000 copyright infringement cases to date, resulting in millions of dollars in lost revenue.
To get started, head to your account settings page on Flickr, locate Pixsy under the ‘Pro Perks’ section and select ‘Redeem.’ From there you’ll be directed to Pixsy, where you will link your Flickr and Pixsy accounts.
For more information, head on over to Flickr’s announcement post.
Articles: Digital Photography Review (dpreview.com)
ExoLens Case for iPhone 7 supports Zeiss lenses while protecting phone
 |
ExoLens has announced the launch of its new ExoLens Case for iPhone 7, a case designed to protect the phone while also supporting the company’s ExoLens PRO with Optics by Zeiss accessory lenses. The case is made from clear impact-resistant materials that, says the company, offer ‘high-end aesthetics’ while keeping a low profile. The case can be used with and without the Zeiss PRO lenses.
ExoLens PRO owners are able to switch between the line’s various lenses without removing the case, the latter of which is described as ‘ultra durable’ with soft Black TPU material along the outer edges. ExoLens has launched the case for the iPhone 7 ($ 49.95 USD) on its website and through select global retailers, and will launch a version for the iPhone 7 Plus model later on in 2017.
Via: ExoLens
Articles: Digital Photography Review (dpreview.com)
5 Tips for Protecting Your Digital Photos
The advent of the internet has provided endless opportunities for photographers; it has →
6 Tips for Protecting Your Gear from Any Hazard and Being Prepared
There is no such thing as a magic camera, lens, filter, flash, or tripod that does it all – hence the variety of brands, focal lengths, composite materials, etc., that are available is endless. Actually, part of the fun is not just having what you need, but sometimes what you want. Like something different, even though it doesn’t have the best reviews and specs by others, or something to experiment with, to broaden your creative horizons.
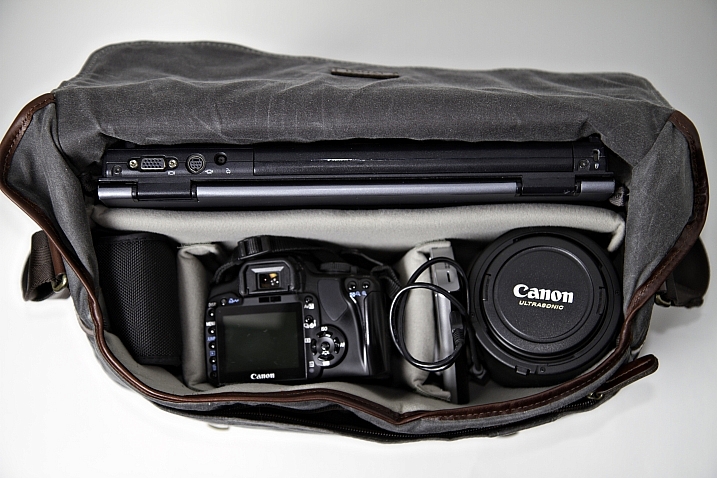
By Tiffany Joyce
But, there is one thing we all must consider when going out for a shoot, and that is what to bring, or even more importantly, what NOT to bring. Oh that agonizing decision of going through the pros and cons of each widget you could bring. There countless variables depending on personal tastes, what you will be shooting, and how long you will be on your photo shoot, just to mention a few.
There is one constant though, stuff goes wrong, things break, bags get lost, and it is not always easy to get a replacement in time, or even at all. Most of us don’t have sponsors who pay for our gear, and that last lens you just picked up was a financial hardship (that you were happy to endure). So, there are some simple pieces of advice that I have picked up from my own stupid mistakes, and from others, professionals and avid amateurs alike, which might save you and your gear in a pinch.
There are many articles on, what’s in my bag, and while it is fun to see what others are doing, the real question is what should you be doing? How much of everything do you want, and what specifics are you really going for? Do you want to bring your best gear, or will something more average do just fine with much less worry? Here are some tips for protecting your gear and being prepared for anything.
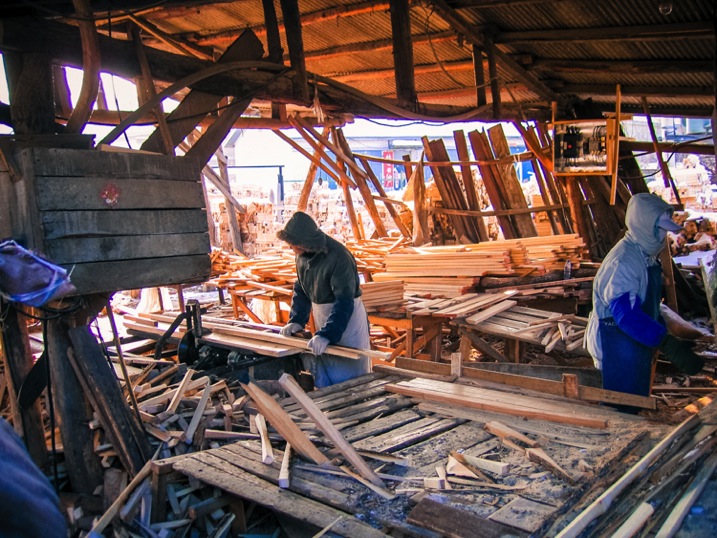
In the far NE of China this longing village was cutting down full trees, and making them into dowels to be shipped to the US to make hammers. With all the flying wood chips and dust, a UV filter was added protection.
1 – UV Filters
Better than me telling you the answer here, you can google, “Should I Use a UV Filter on my lens?”. You will find results galore, and many varying opinions. But, let me show you a picture and it may just persuade you to use one.
My lens hood was on, but I had just turned it backwards to save space while I was going to eat. My lens cap was also on. Sitting down on a street market bench to indulge, I brushed the lens cap pinching the hinges just enough that the cap popped off. Then, as momentum carried me down, a steel bench post smashed into my camera and I heard glass break. My heart sank, as horrible thoughts of my lens dying raced through my head.
It could have been my front lens element, but it wasn’t! It was my $ 35 UV filter, not my $ 900 dollar lens. For casual use, keep a UV filter on! If it breaks like mine did, a circular polarized filter can be a great backup too. Just don’t forget to turn it, to make sure you are getting the best out of your filter.
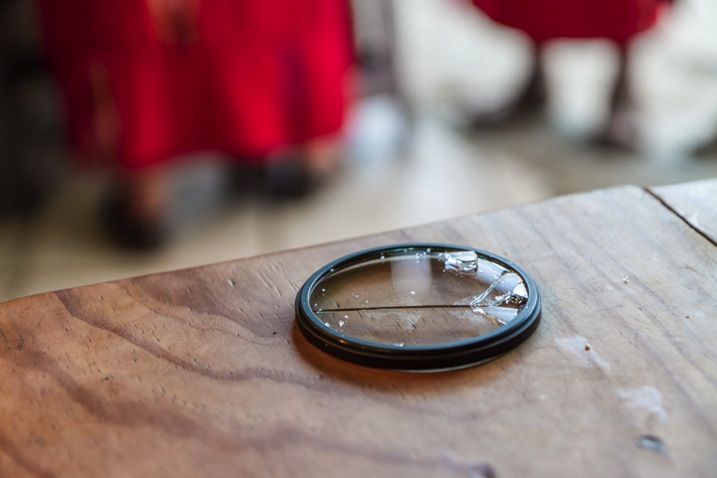
This is the glass that broke and saved my front lens element. I was in a small mountain town in central Guatemala with no possibility of replacing the lens.
2 – Lens Hoods
When I generally think of my lens hoods, image quality is what first comes to mind. Less glare, less flair, better saturation and contrast, etc. Sometimes the tulip hoods look nice on a lens, so cosmetically it can be pleasing as well. But they do add significant length, and even when screwed on backwards, not protruding outwards, they increase the diameter, especially on larger lenses, making it tough to cram into your travel bag.
Recently, in Cuba I ran across another amateur photographer, and one of his first comments after exchanging pleasantries was, where is the hood for your lens? The 70-200mm f2.8 IS is a big lens, and making it 25% longer while trying to not impose on subjects, was my deciding factor for leaving the hood at the hotel. I replied, “I have my UV filter on.” He quietly said to me that he was a glass engineer, and he politely suggested, with total altruistic intention, to keep my lens hood on. It has been on ever since.
Protection value is even better than a UV filter and image quality improvements are worth it!
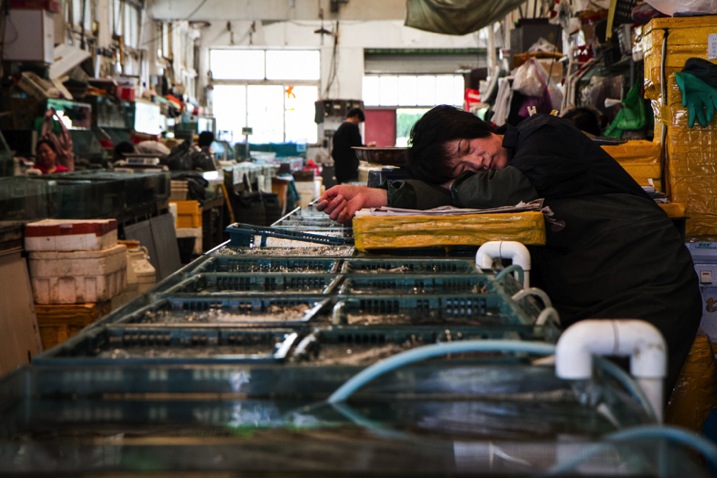
In a seafood market in a coastal city in NE China, squirming fish, spitting clams and twitching shrimp will definitely get salt water on your lens. Only a UV filter would leave you with water spots, but a lens hood helps keep the salt water off of the front element.
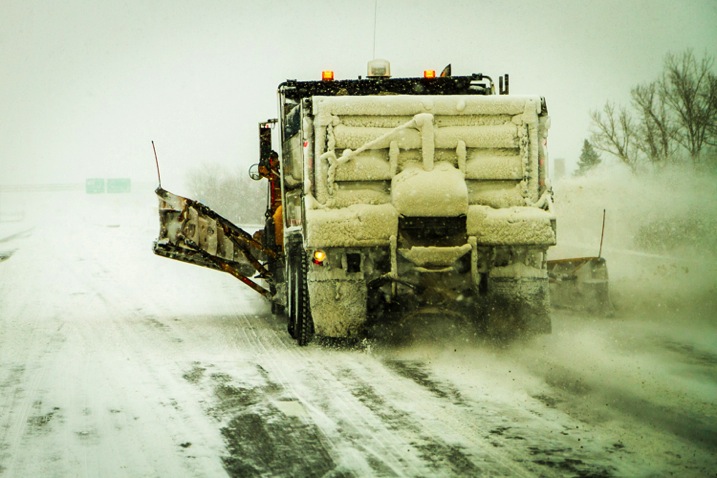
In New York State during the 2015 super snow year, following this plow, that lays gravel and salt, with my camera out the window is dangerous for a front lens element. Having all the protection of a lens hood and a UV filter is important to protect your gear.
3 – Lens Cap (front and rear)
The little lens cap: This one goes out to amateurs more than the enthusiast. If you are not shooting, keep your lens cap on. This is a very good line of defence for your front lens element. A doctor doesn’t examine a patient without protective gloves, nor should a photographer leave his lens exposed, while enjoying carnival rides or waterfalls. Keeping your lens protected is most important, but clean is essential as well.
Also, if you are switching lenses, keep an extra cap for the back of your lens in your bag. They are all the same size, unlike the front lens cap, so if you lose one it is no big deal as one size fits all. Cleaning dust, dirt, hair or oil from the inside of the lens is a nightmare.
4 – Extra things to think about when travelling
Access to your camera shop or online retailer is not possible when you’re away from home. Maybe your favorite online shop could overnight you something in any developed country, but outside the US, Canada, and some parts of Western Europe, you are out of luck.
UV filters can be found at many small electronic stores at a 20% markup or so, but the sizes available may be limited. Kit lenses these days usually have a 58m or 67mm thread size, and maybe you might get lucky if they have a 72mm filter. Anything in the 77mm or higher range will be near impossible to find. Underdeveloped nations don’t have the ability to hold stock for the occasional guy who smashed his fancy gear, (that which could feed a whole village for a week). Thus, don’t bring more, simplify. Think how you can adapt if something breaks? Like using a polarized filter or an ND filter if your UV filter bites the dust. Using an ND filter and bringing your tripod might just help you broaden your portfolio for the trip; a little blessing in disguise.
5 – CF cards
It used to be no film, no picture. Now it is no memory, no picture. Recently, I was in Central America and one trip got cancelled, and another one came up. It was a photographer’s delight, Cuba! I didn’t have my computer, and didn’t want to plug my gear into a sketchy internet bar computer. The solution in a developed country is to just stock up on a few more CF cards.
The reality is that in developing markets CF cards are not available. Finding a name brand CF card that will have 30mb/second or more, is near impossible. Developing nations are still using basic point and shoot cameras, if they have any at all, and even more popular are mobile phones with mini SD’s in them. SD cards are abundant, along with mini SD cards with adapters, but that does you no good for the higher end DSLRs. CF cards are relatively cheap and tiny compared to lenses, camera bodies and flashes. Stuff a couple extra in your bag.
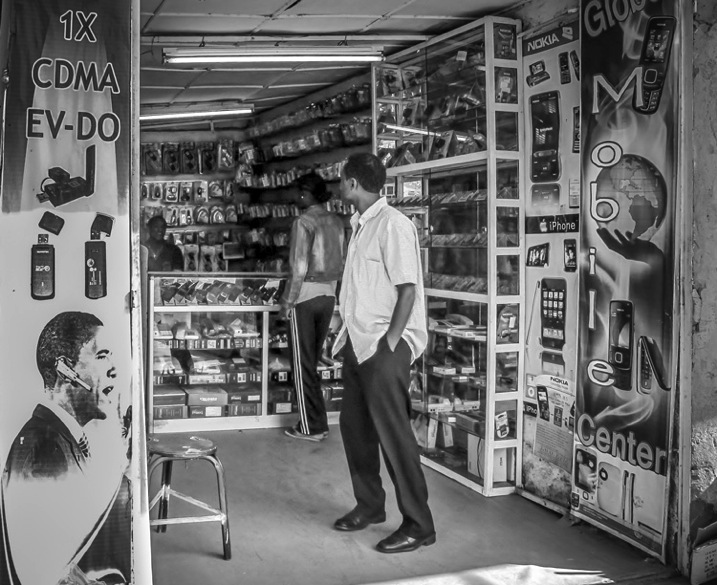
In northern Ethiopia this was the one of two stores that carried electronic goods. Most items are mobile phone related.
Getting into other parts of the world, like SE Asia and China, both of which are still in the developing stage, you will find much better luck. CF cards are available, and SD cards are going to be much cheaper. UV filters will also be available for any size. If they don’t have them in that store, ask them to get you one by the end of the day, and they will call up partner stores and send them over on the back of a moped. But you know the catch, it might not be real despite how legit it looks. In a bind, strike a deal, and you will have solved your solution at least temporarily.
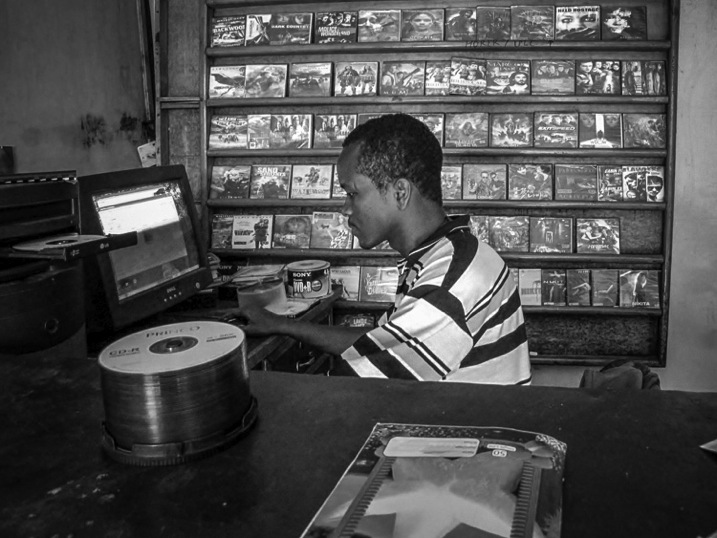
This was my second option for electronics. A desktop computer which was used for burning pirated movies and music. No possibility of finding higher end camera supplies.
6 – The Lens Pen
A final item that is a must is the lens pen. These are so compact, and convenient, to keep your front and rear lens elements clean. Make sure you use the brush first, then the moistened concave end for smudges. Ideally you would have air to blow off the lens first, but don’t use your mouth. No matter how careful you are particles of your saliva will appear on the lens giving you double duty. The lens pens are tiny and do wonders. Keep one in your bag, and one in your pocket, so you can get up close and personal to the crashing waves, market activity, or the big sports event. By the way, these lens pens can be found all over the world now. Grab a couple before you go, but if you lose one, or give one away to a local photographer, you may be able to find another.
Bottom line
So, when you are off on your next photo shoot, be prepared. You can’t anticipate everything, but even combined, all of the items on this list could easily fit in your pant’s pocket. Put all of them in a sturdy Ziploc bag, and you just added another element of protection. Wrap your camera or lens in the bag in really treacherous situations.
These tips provide a pretty good insurance policy for keeping your gear safe, and in proper working condition. Keeping your gear protected in harsh environments lets you focus on your creative ability to see and capture your favorite photographic styles, and do it with confidence too. Now, you still need to decide what major pieces of gear you want: super wide angle lens, telephotos, primes, single flash or multiple flashes, tripod, and the list goes on.
But be sure you have your UV filters screwed on, your hoods attached, your front and rear lens caps, and some extra memory, along with the most portable and simple cleaning lens pens.
What essentials do you have in your bag when you leave for a long photo shoot out of your home range?
googletag.cmd.push(function() {
tablet_slots.push( googletag.defineSlot( “/1005424/_dPSv4_tab-all-article-bottom_(300×250)”, [300, 250], “pb-ad-78623” ).addService( googletag.pubads() ) ); } );
googletag.cmd.push(function() {
mobile_slots.push( googletag.defineSlot( “/1005424/_dPSv4_mob-all-article-bottom_(300×250)”, [300, 250], “pb-ad-78158” ).addService( googletag.pubads() ) ); } );
The post 6 Tips for Protecting Your Gear from Any Hazard and Being Prepared by Branson Quenzer appeared first on Digital Photography School.
Things to Know About Protecting Your Images Online
It is the digital age and therefore vitally important to have a presence on the internet. Photographers, both professional and novice, are using the internet more than ever to showcase their skill. This is imperative from a business and marketing standpoint, but with every great tool comes those who exploit it. Photographers are stuck between marketing themselves in the most Continue Reading
The post Things to Know About Protecting Your Images Online appeared first on Photodoto.
15 Tips for Protecting Your Images While Traveling
You have saved and saved and spent a large investment to go on a trip, on your photography gear, to photograph what matters to you, and to create lasting memories and images. Losing your images is not an option. Have you thought about the precautions to help make sure your images are safe after the shutter is pressed?
Many people cringe at the thought of losing their images while traveling or any other time for that matter, and rarely do they think it will happen to them. Yet, unfortunately the reality is that people lose their precious images.
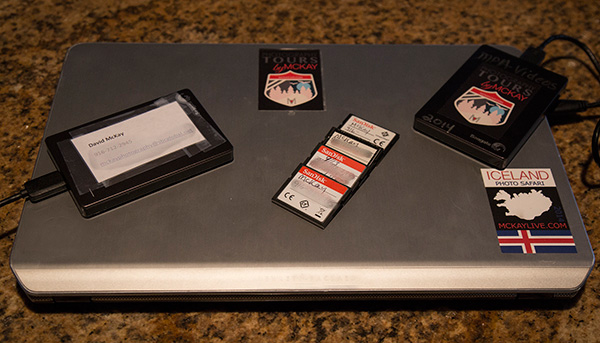
Has your memory card ever suddenly decided to give you the dreaded “error” notice? Maybe your new back-up hard drive failed or maybe you simply lost your camera bag by leaving it in the over-head bin of the airplane? Sound familiar? Maybe one of these situations has happened to you, or one of the many other possibilities that can occur to ruin all of your dream trip photography has taken place.
No you say? It hasn’t happened to you yet? GREAT! This means up until this point you have been fortunate or hopefully properly prepared. The saying “Those that back-up and those that will” comes to mind. Having lead photographic tours all around the world, the amount of times images I have seen lost by photographers, is truly staggering. Don’t let it happen to you! After all, some would argue that the most important part of their trip is their images. So why do people not take more time to properly protect the fruit of all their investment and labor, their images?
Here are some helpful tips and hints to keep your most precious commodity of your travels, your images, safe.
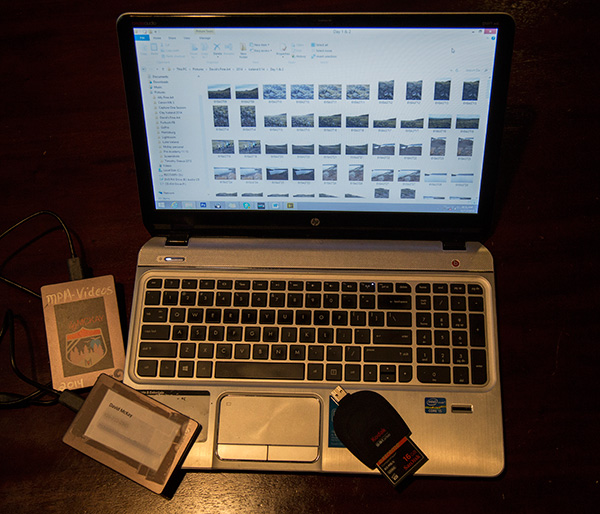
#1 Get into a system
Create an organized system and do not waiver from it! Follow the hints below, set up a system, and be consistent.
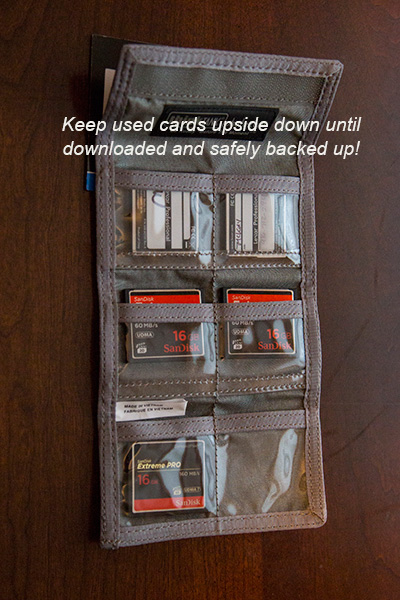
#2 Keep non-downloaded cards unique
In your card carrier case, keep all non-downloaded memory cards upside down. In this way, you know the card is not ready for use. When you have downloaded AND backed up, at that time place the card right side up again. It is now ready to use.
#3 Format your memory cards
Before each use, format and make sure your card is clean before using. This makes sure the card is completely ready to go. Of course, only do this if all of your current images on the card are downloaded AND backed up!
#4 Don’t put all your eggs(images) in one basket
Simply put, do not buy the largest memory card money can buy and shoot your entire trip on one card. Buy smaller ones, then if you lose a card or one goes bad, you at least have a portion of your trip images still.
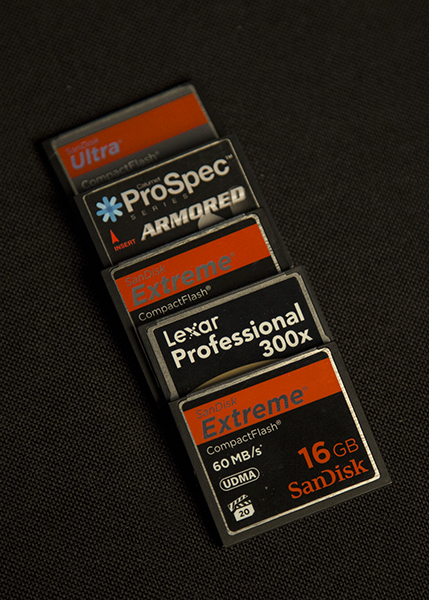
#5 Bring PLENTY of high quality memory cards
Memory cards have come down in price drastically. In order to have all your images on many different cards, invest in plenty of memory. It makes no sense to spend thousands of dollars on a trip, gear, and more only to skimp a few dollars on what holds the memories!
#6 Download and backup every day
Once you return to the hotel room, you may be tired, but your images are worth the little extra effort to download immediately and then backup to a secondary device.
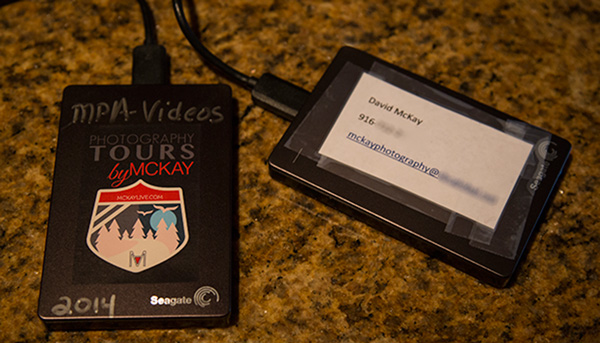
#7 Always carry an external hard drive
As soon as you download to your laptop, be sure to immediately backup to an external hard drive as well. The price of memory is so inexpensive; there is absolutely no reason to not be carrying a lightweight external hard drive.
#8 Carry your used memory cards on you physically
This reduces this risk of loss due to theft of your gear, leaving your gear accidentally, or in case you must check your gear for any reason either on a flight or gate check.
#9 Don’t erase your images
Unless you are out of cards to use and it is absolutely needed, do not erase the images. If you are downloading and backing up, now you have them in three locations. If you follow the hint about having plenty of memory, this should not be a problem.
#10 Use the dual card slot on your camera
Some cameras have dual card slots. The Canon 5d Mk3 as an example allows you to use a CF card in one and an SD in the other. When you shoot, the system can be set to automatically write to both cards. This is great, yet it does take longer to save as it requires longer write time. This is no excuse for NOT following the other hints.
#11 Shoot RAW and large Jpeg files
Recovery software available cannot recover RAW data as easily as a Jpeg. For this reason, if you shoot with both RAW and Jpeg, you have a higher likelihood of being able to recover images if a card goes bad. You may not have the best image if you lost your RAW data, but at the very least you will have a high quality Jpeg which as we all know, is still great quality. This of course requires more usage of memory, so once again, see #5 above and carry plenty of cards!
#12 Partner up
If traveling with another person or group, buddy up with a partner to carry your external hard drive of backup images and you carry theirs. In this way, your images are on you physically on your memory cards and laptop, and then in case something happens, another set is with another person.
#13 Contact info
Be sure to write your phone number and email address on all your memory cards, hard drives, laptop, card carrying case, and camera bag.

#14 Store a backup of your images from home
Answer this question: If you were away and your home had a fire, would you possibly lose your images? If the answer is yes, you have some work to do. Carry a back-up of your home computer hard drive with you or have one at another location. Also, keep hard drives in fire-proof safes.
#15 Use online storage
Many companies such as Dropbox, Carbonite, Amazon, and more offer excellent, inexpensive online storage solutions. The issue is that while traveling, you may not have good internet connections and it can take forever to load your RAW images or large files.
Do you have any other methods or tips for keeping your images safe when you travel? Please share in the comments below.
googletag.cmd.push(function() {
tablet_slots.push( googletag.defineSlot( “/1005424/_dPSv4_tab-all-article-bottom_(300×250)”, [300, 250], “pb-ad-78623” ).addService( googletag.pubads() ) ); } );
googletag.cmd.push(function() {
mobile_slots.push( googletag.defineSlot( “/1005424/_dPSv4_mob-all-article-bottom_(300×250)”, [300, 250], “pb-ad-78158” ).addService( googletag.pubads() ) ); } );
The post 15 Tips for Protecting Your Images While Traveling by David McKay appeared first on Digital Photography School.
 Make Your Online Portfolio Stand Out
 Photography Magazines: Why Print Is Losing To The Internet
 How To Deal With Copyright Infringement
 The Love Of Modelling
 Photography Will Sell Anything Except For Photography
 6 Powerful Reasons Why All Photographers Need Facebook Pages
 5 Killer Reasons Why Photographers Need Social Media
 Mastering The Photographic Workflow