RSS
 

Posts Tagged ‘Props’

How Using Props in Portraits Can Make Your Photos More Interesting

26 Sep

The post How Using Props in Portraits Can Make Your Photos More Interesting appeared first on Digital Photography School. It was authored by Kevin Landwer-Johan.

There are many ways using props can make portraits more interesting. Often photographing a person can be challenging. This can be so for both the photographer and the person being photographed. Using props can not only add interest to the portrait, but it can also help your subject relax more.

What are props and how can you use them effectively?

Image: © Kevin Landwer-Johan

© Kevin Landwer-Johan

A prop is any element you add to a photograph which adds interest or meaning to your subject or the concept you’re creating. What you can use is up to your imagination. They can be anything from an ancient tree stump to a melting ice cream cone.

Image: © Kevin Landwer-Johan

© Kevin Landwer-Johan

Props can add humor to photographs. Using a prop well with a nervous subject can help them relax. You can use props effectively to help contextualize your subject. Without a prop, a portrait may not convey much or any concept. With the addition of a prop, a portrait can take on a whole new meaning.

A prop is often used to add visual information about the person;

  • their occupation
  • hobbies
  • character
  • or location

Using props to help illustrate a story

When you’re illustrating a story using a portrait, adding a prop can add depth and meaning. A prop incorporated into a photo will tell more of a person’s story than a caption, or even a whole paragraph.

Image: © Kevin Landwer-Johan

© Kevin Landwer-Johan

Making a series of travel portraits with a visiting friend I asked her to bring along her backpack. She was going to the station to purchase a ticket for a later date and would not have brought her luggage. Having it with her for the photographs helped to create more of a visual story.

Image: © Kevin Landwer-Johan

© Kevin Landwer-Johan

The location and the train tell part of the story. Having her backpack in the pictures lets you know she was traveling, not just there to meet a friend. The more relevant visual information you can include, the more interesting your portraits become. Well-used props help stimulate the viewer’s imagination.

Image: © Kevin Landwer-Johan

© Kevin Landwer-Johan

Isolated studio portraits using props

Isolating your subject on a plain background is a popular method of taking a portrait. A subject on their own can produce great character portraits. But for many people, it can be somewhat intimidating.

Image: © Kevin Landwer-Johan

© Kevin Landwer-Johan

Using a prop can help them relax and enjoy the experience more. Having something in their hands to concentrate on distracts them from your camera. Feeling less intimidated by it, they are more likely to give you vibrant expressions.

I took a series of photographs for a small drama school. Using props helped the students feel more at ease. They were confident performers, but many of them were not so comfortable in front of the camera. Including props allowed their tutor, who was assisting me, to encourage them into character.

Image: © Kevin Landwer-Johan

© Kevin Landwer-Johan

A single prop keeps a studio portrait simple and adds meaning that would not be evident without it. Creating concepts for stock photography in this manner it’s possible to facilitate a whole series of photos.

Including props will add depth and interest to a series of photos of the same person. It can be challenging to take more than one or two different portraits of a person on an isolated background. Using props will give you more diverse options for what you can achieve.

Image: © Kevin Landwer-Johan

© Kevin Landwer-Johan

Bring your own props or use what’s available

Often asking a person to bring along their own props can help create a meaningful portrait. Using items that they relate to and tell something about themselves will add genuine feeling to the portraits.

I asked this friend if I could photograph her and also what she’d like to use as a prop. Immediately she replied, “ice cream.” She loves ice cream so it was appropriate and meant she’d enjoy the photo session. The weather was so hot that even with the air conditioning blasting the ice cream melted quickly. We went with the flow and used the prop for additional makeup as well. It was a fun session.

Image: © Kevin Landwer-Johan

© Kevin Landwer-Johan

Any well-established portrait studio has a diverse selection of props. Your subject doesn’t have to own a prop. If they can choose from a selection you have, they might find something that lights up their imagination.

Even simple things that are common can work as props. Having someone read a book or make a phone call can help them focus on what they are doing and not on your camera.

Image: © Kevin Landwer-Johan

© Kevin Landwer-Johan

Finding props on location helps to incorporate your subject in the place. Having them pick up some produce at the market, or interact with some part of the environment can make for a more illustrative portrait.

Conclusion

Working with props definitely adds diversity to photographing people. Use the props to support your subject. Having the prop and subject in the same frame is not enough. Encourage them to interact with the props in different ways. The way your subject relates to the prop is important. This will influence the feel of the photo.

Image: © Kevin Landwer-Johan

© Kevin Landwer-Johan

Work to develop a healthy relationship between your subject and their props. This is part of your job as a photographer. Doing this, you’ll create more entertaining portraits.

Have you tried using props for a portrait session? Let me know in the comments below the props you have found helpful during the session. Also, what type of props help make the most interesting portraits?


using-props-in-portraits

The post How Using Props in Portraits Can Make Your Photos More Interesting appeared first on Digital Photography School. It was authored by Kevin Landwer-Johan.


Digital Photography School

 
Comments Off on How Using Props in Portraits Can Make Your Photos More Interesting

Posted in Photography


DIY Food Photography Props on a Budget

09 May

The post DIY Food Photography Props on a Budget appeared first on Digital Photography School. It was authored by Charlie Moss.

With the rise of Instagram, every meal has become a potential subject for a photographer. We’re sharing our food through photographs like never before, and higher quality imagery gets more likes in the world of #instafood.

But how do you create that styled look to your food photographs when you’re on a budget? Not everyone has the cash to drop on a whole styling kit of tableware, linens, and backgrounds. ‘Necessity is the mother of invention,’ as the proverb says, so let me tell you about a few creative ways I’ve made the money go a little further when it comes to food photography.

Take the suggestions in this article as a starting point and be creative with your own ideas. Bring in skills you’ve already got (or would love to learn) in your quest to DIY your food photography on a budget!

Shop your home

It seems so obvious, but you’d be amazed at what you can find at home (or in the homes of your friends and relatives). The best thing about shopping your home is that everything is free! Take a minute now to take a look around your house and see what you already own that might work for food photography.

The kitchen is the first place to start – but don’t just stop at crockery and flatware! Ancient old baking trays make fabulous backgrounds, and interesting glassware can make great detail in an out-of-focus background.

Don’t neglect the bathroom as you make your shopping trip. More than once I have put food on a (clean) soap dish that happened to be beautiful in color or texture. From the living room, vases can hold a freshly cut flower for a food photography scene. Bedrooms are a treasure trove of trinket dishes, baskets, boxes, and fabrics (more than one evening dress has found its way into my shots as a textile element). Finally, check outside – weathered old plant pots or interesting bits of wood can really bring life to your food stories (once they’ve been scrubbed, of course).

On a similar note to shopping your home, don’t forget to visit your local thrift shops regularly! The staff in my local shops know me so well that they put interesting flatware, linens and ceramics aside for me now. Moreover, each item costs very, very little compared to buying them new.

Creating backgrounds and surfaces with interest

When you’re setting your scene for a styled food photograph, the background can really make or break the shot. You can purchase pre-made background boards designed especially for photographers that replicate various textures. They’re very and good, and I use them often, but they’re also quite expensive! While homemade boards don’t replace textures such as wood or marble they can be very effective for the right shot.

Top: pink stripes created with a child’s foam painting roller.
Bottom: blue, black, and grey emulsion paints applied with a kitchen sponge.

Head along to your local DIY store that sells sheet materials. There you can buy sheets of plywood. If you are lucky, the store will also cut these sheets of plywood into manageable chunks either for free or at a minimal cost.

It works out to be extremely cost-effective to create backgrounds using these boards as a base. A sheet of plywood that is 2.4m by 1.2m costs about £25 here in the UK and that makes eight neat 60cm square boards. You can paint both sides too, so it works out to about £1.50 per background (plus whatever paint you use).

Usually, I use cheap emulsion paint samplers to create backgrounds. Don’t be restricted to brushes for applying the paint either – a sponge is my favorite tool followed closely by children’s painting toys! Go bold with your designs; once you’ve made the background out of focus with a shallow aperture, you won’t see small details. Experiment with color – dark backgrounds can be as interesting as light backgrounds.

Build the set

Once you’ve created some backdrops, put one on a table next to a window and prop the other up behind it vertically like a wall. You now have a table set for a fraction of what it would cost you to buy special backdrops marketed to photographers!

Floor tiles used as backgrounds for food photography.

While you’re at the DIY store buying your plywood, check out the flooring section too. Very often DIY shops will sell sample flooring tiles for people to try at home. For just £1.50 I bought all three of the flooring tiles in the pictures above. The boards are often quite small, but if you’re shooting close-ups, they can still work really well (they’re also good for jewelry photographs).

Customised table linens

Beautiful linens can help to make a food shot pop. They feel luxurious because they’re something you usually only use for special occasions. Plus if you keep your eye out, you can often find linens with unusual textures to the fabric or fancy trim around the edge, and these can help elevate your shots to be something quite special.

Two different colours of linen fabric used for food styling. Consider the mood of your final image when selecting colours.

Table linens are, at their most basic, just a square of interesting (or not-so-interesting) fabric. To create the simplest DIY napkin that really packs a punch, head to a fabric store that sells dressmaking fabrics. Have a look through their linen selection. You’re after something heavy with lots of texture, and you’ll want half a meter of the fabric. Use sharp scissors to cut it into a large square (you should get at least two out of half a meter of fabric) and you’ve created your first designer napkin!

You can either turn the raw edges over and sew them with some matching thread or start pulling the threads away to fray them. Both styles give a different look to your shots as you can see in the shots above. Think about color when you are purchasing fabric; it can really make a difference to the mood of your shots. I’d suggest purchasing neutral colors first and then venturing out into colors when you have some good basics.

Many shops sell a ‘fat quarter’ of fabric (it is a meter of fabric cut horizontally and then vertically to make a rectangle). These cuts are the perfect size for a single oversized napkin. Once you’ve built up a stash of beautiful plain napkins, you can try venturing out into something a little more complicated.

Embellish your DIY props

If you browse the designer homeware stores, you’ll find that table linens often have intricate detailing like trim or hand-stitching on the edges. Back to the fabric shop again, and this time shop for some coordinating trim that matches some fabric you’ve got.

You can sew the trim around the edges of your napkins, or you can take some fabric glue to it. Food styling props for photography don’t have to be perfectly functional; they just have to look good on camera! Make sure you arrange your props so that any mistakes are facing away from your camera!

In the photograph above is white linen. The linen was made with very cheap white cotton fabric with fancy pompom trim stitched around the edge. It cost me around £3 in total. Considerably less than buying the fancy version I’d had my eye on in a shop! Photography is all about illusion. If the trim is particularly expensive just buy enough to go around two edges. You can style it when you shoot so that the other side doesn’t show.

The proof is in the pudding

In any good food photograph, success is measured by how much your viewer wants to eat the subject. I followed my own advice: shopping at my house, creating backdrops, buying fabric and trim, and then I photographed the results.

For under £15, I put together two completely different food photography sets that I can reuse time and time again. Moreover, the bonus is that if I don’t like the backgrounds in the future, I can paint over them time and time again!

Now it’s your turn; have a go at building yourself some props and shooting some food photos. I’d love to see what backgrounds and props you create for your food photography shots. Perhaps you can apply a skill you already know and create something really special that you just can’t buy in the shops.

Please share with us in the comments below.


The post DIY Food Photography Props on a Budget appeared first on Digital Photography School. It was authored by Charlie Moss.


Digital Photography School

 
Comments Off on DIY Food Photography Props on a Budget

Posted in Photography


How to Boost Your Creativity by Including Props in Your Photography

31 Jul

Props: are they a blessing or a curse? In photography, props can often make or destroy a photo, and because of this some people try to avoid them, some are afraid to use them, and other people love to use them.

I moved from being afraid to loving props because I found they are amazing tools to unlock creativity.

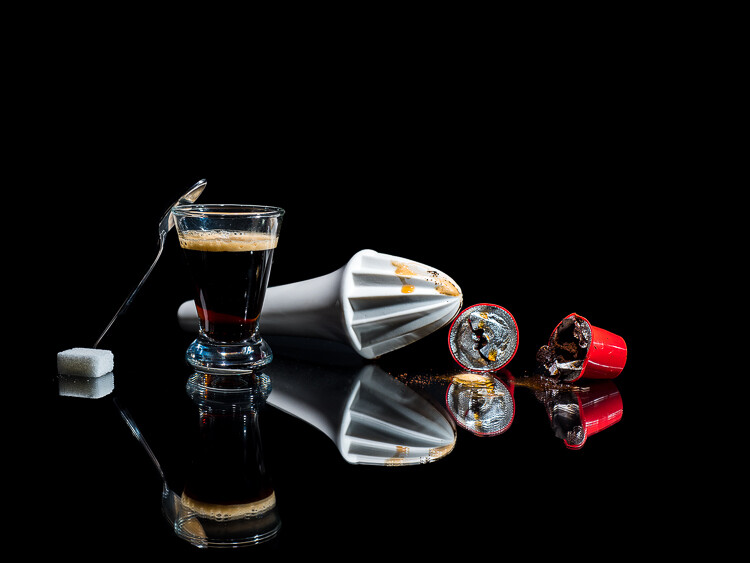
Photo00

Freshly squeezed coffee. A different way to prepare a fresh cup of coffee.

Why use props?

Usually, the role of the props in photography is to help add character and interest to a photo, or to add context to the scene.

Some kinds of photography, such as conceptual photography, cannot exist without props, as they are needed to translate the abstract concept or message into an image.

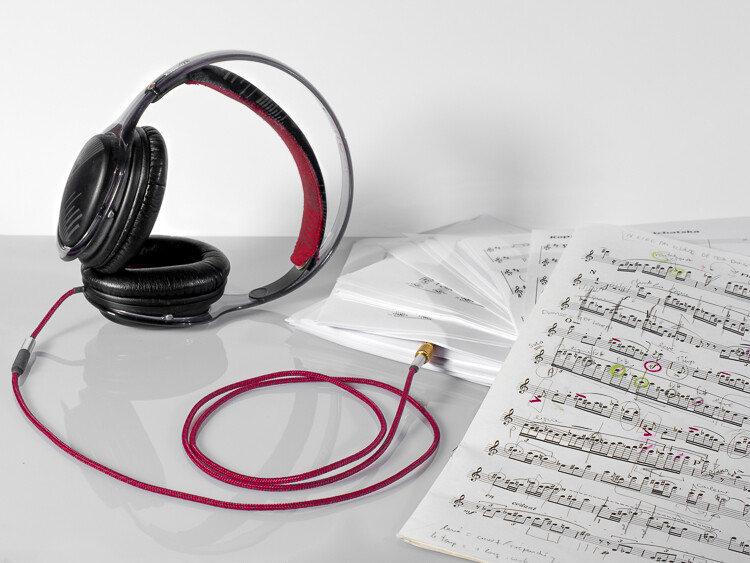
Photo01

Musical scores.

Props in commercial photography

In tabletop photography (product, food photography, and still life), props are used to build the scenography of the photo you are crafting.

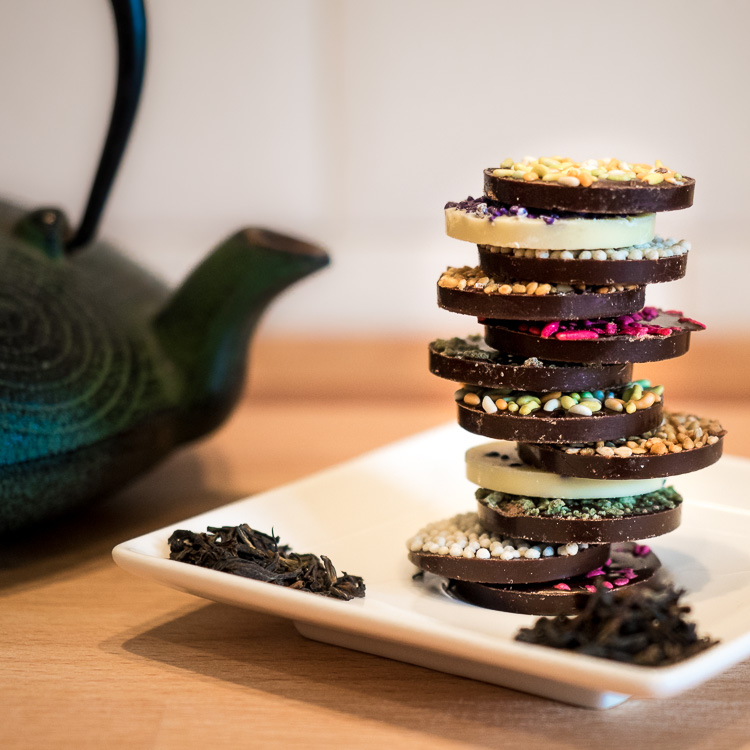
Photo02
The teapot, the plate, and tea leaves are all elements of the scenography used for the pile of chocolate biscuits in this a classic food photograph.

Props in landscape photography

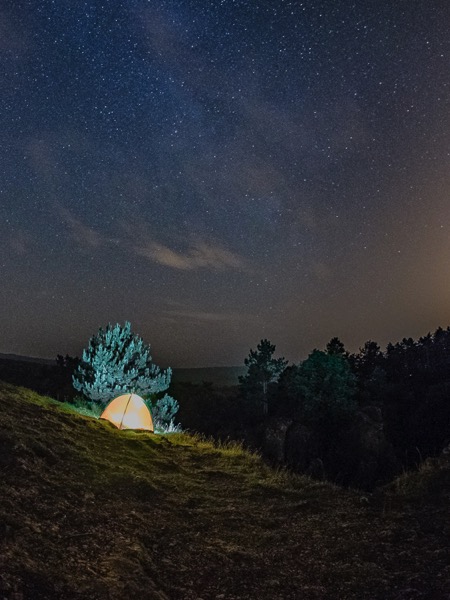
Props are sometimes present even in landscape photography, usually with the task to add interest to the foreground. A classic example would be to photograph a camp site in the wilderness, with a lit tent under a starry sky.

Photo03
This tent is, indeed, just a prop. I brought it along with me solely with the intent to add interest to this nocturnal landscape.

Props and portrait photography

Using props will also help you to create more interesting portraits. Are you into self-portraiture? Cool, but there is only so much you can do with your face, and after a while you will probably feel the need to start using props, The more creatively you can use them, the better and more interesting your portrait will be.

Photo04

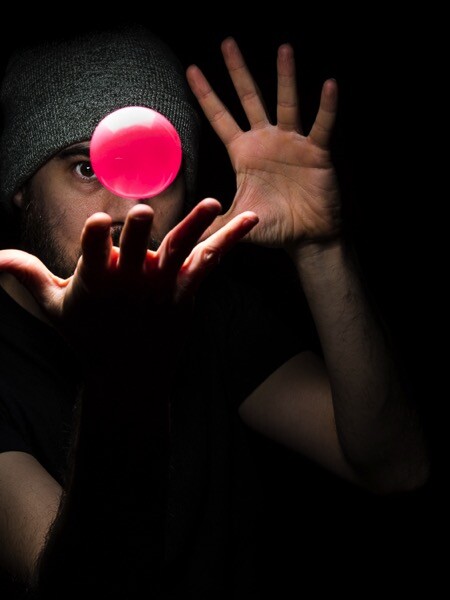
A simple ball thrown in the air with a bit of timing can make for a dynamic, “It’s a kind of magic” portrait.

So, props are all those objects that photographers add into the scene they’re photographing that are not the main subject of the image. I don’t consider hats, jewelry, wristwatches, and all those accessories your model wears for a portrait, to be props.

Another plus with props, especially in portraiture, is that they can help your model to be more comfortable in front the camera by giving him/her something to do or to focus on, thus forgetting about you and your camera.

Photo05
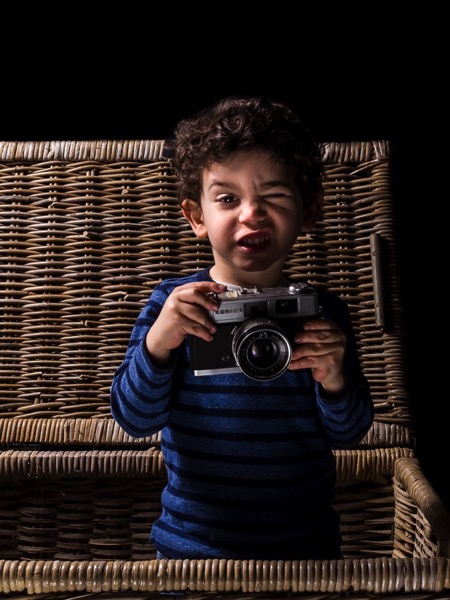
A prop in the hands of a 3 year old toddler (my son in this case) can lead to interesting results without making a fuss.

Things to look out for using props

So where is the problem with the use of props? Why people can be negative about them? My guess is because they are so widely used in photography that the risk of fall into photographic clichés is quite high.

Below are five tips to help you be creative with props, instead to fear them.

Before you continue allow me a final word. While it is true that many things can be do inside editing software, to really exercise your creativity don’t be a lazy photographer, craft your images for real as much as possible.

Photo06
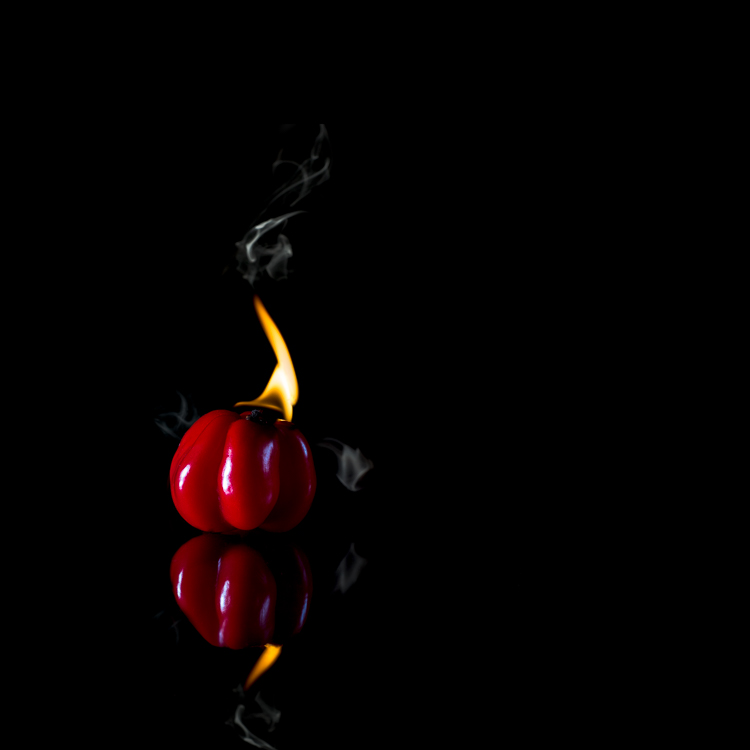
I consider the flame and the smoke in this photo of a hot pepper to be props. The fun in crafting the image with real fire and smoke was unbelievable.

Tip #1: Use a classic prop in a fresh way

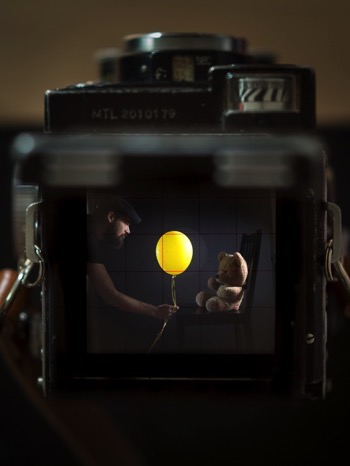
Old film cameras are classic props in portraiture, and the ways to use them are variations of my son’s portrait you saw above.

Among those cameras, the most photogenic ones are, in my opinion, the TLR (twin lens reflex) cameras, such as Rolleiflex, Rolleicord and Yashica. Because these cameras have a huge focusing screen you have to look into from above, the usual way to use these props is to have your model look down into the camera.

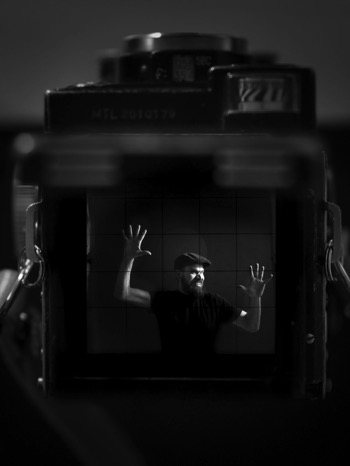
A less common way to use those TLR cameras as props is to take advantage of their massive focusing screen, which is many time larger than any SLR camera viewfinder, and to photograph the scene the TLR camera is seeing.

Once you get the setup right, don’t stop after the first shot, but experiment with poses and props.

Photo07

Trapped!

Photo08

To reveal the child inside us.

Tip #2: Build your own props

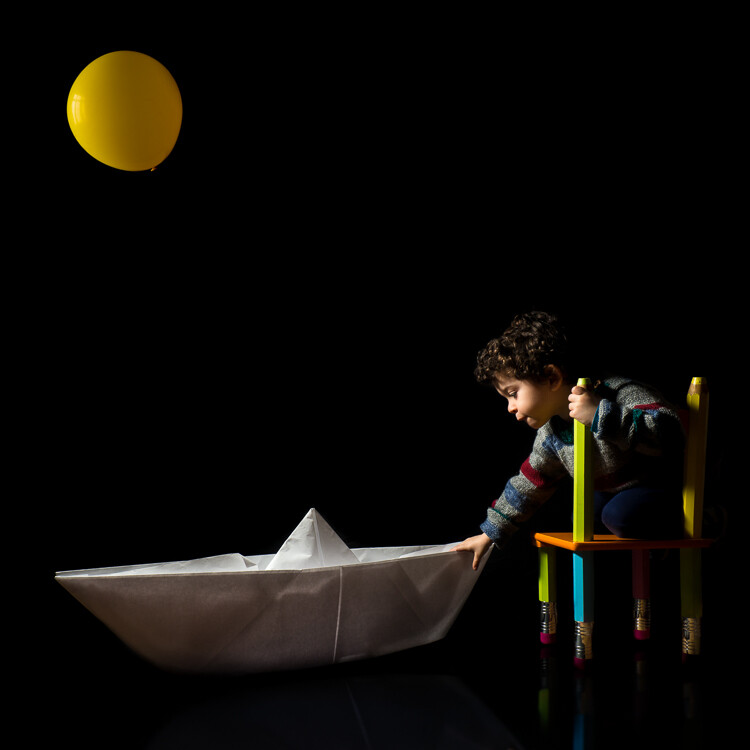
Another way to get creative with props is to craft them yourself. This will not only ensure you have unique props to work with, but the whole process of making the props will make you think more creatively about how to use them.

A one meter long, origami paper boat, and a yellow balloon are good props to make one of my son’s fantasy and childish adventures come to life.

Photo09

A fantasy childhood adventure gets real in this photo.

If you are into origami, and tired of taking the usual portraits of your children, you could try to create adventures for them by folding big paper planes or animals, or whatever you know how to do with a piece of paper. Plus, you can find plenty of origami tutorials waiting for you online.

Once again, it is true you could easily compose the adventurous portrait of your child by adding elements to the photo later in Photoshop. But, again, what fun would that be for both of you?

Tip #3: Break the physical laws and go surreal

One of my favorite prop to work with are helium balloons, those you usually buy for parties. They are colorful, cheap, long lasting and very versatile.

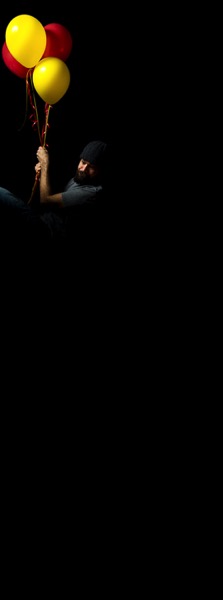
Inspiration for their use is everywhere; have you watch the animation movie Up recently? Cool, wouldn’t it be fun to fly away holding tight to a bunch of balloons?

Photo10
Up, up we go. Here the low key really helped a lot to make the pose believable.

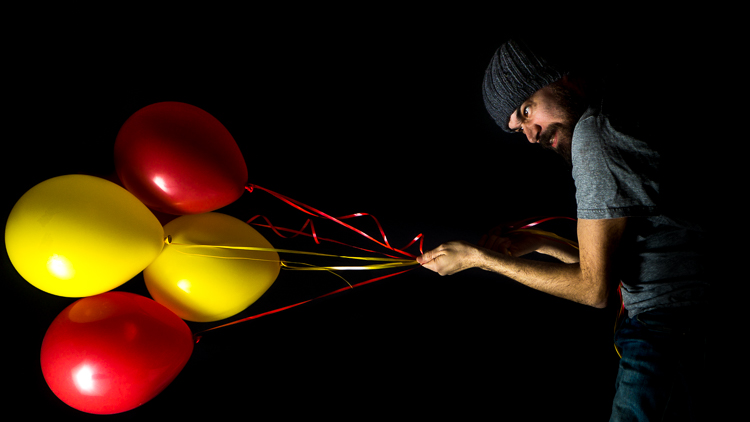
What about breaking the physical law by playing “tug of war” with those balloons, instead?

Photo11
Up and Down are quite arbitrary in this kind of photos. Here I was lying down on the floor but I tried to keep my shoulder off the ground, so that once I turned the photo 90 degrees counterclockwise, the pose was still believable. The low key helped by getting rid of the floor.

Tip #4: Prep your props

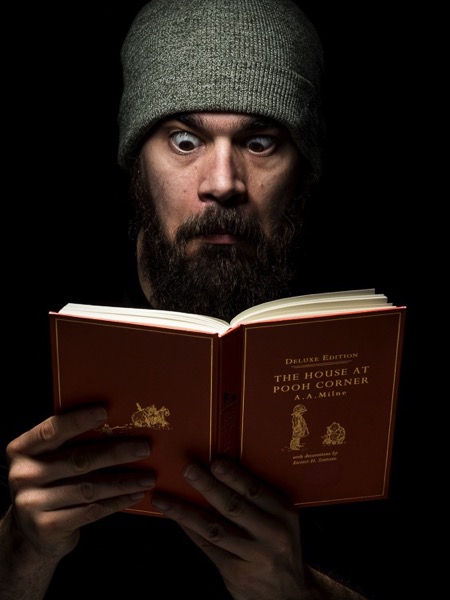
Sometimes, you can obtain something original just by prepping up a classic prop, such as the omnipresent book. Books are often used to fill a still life scene, or to get more interesting portraits.

Photo12
A funny contrast between the surprised grown up, rude, and bearded man, and the book of one of Winnie the Pooh adventures.

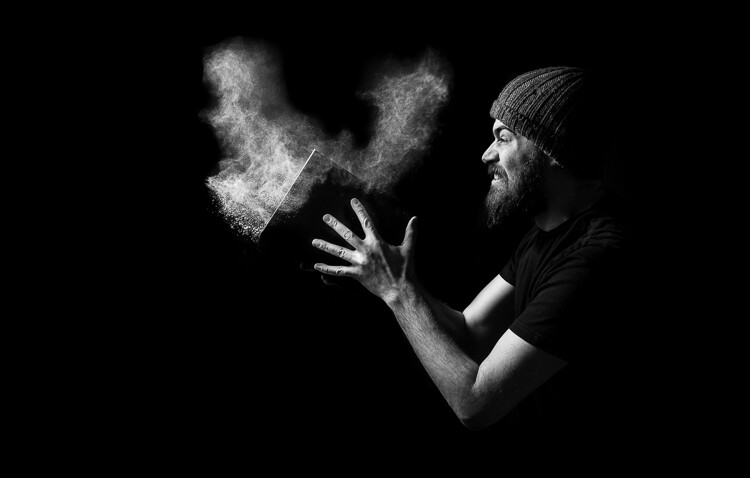
To make things more interesting, dynamic and less cliché, you can prep a book by sprinkling body powder on its pages and then have your model to blow the dust off while you take the photo. Or have him slam the book shut just before you fire the shutter, so to record of white powder flying out the book creating clouds.

Photo13

By adding body powder to the mix, you can obtain much stronger and dynamic portrait.

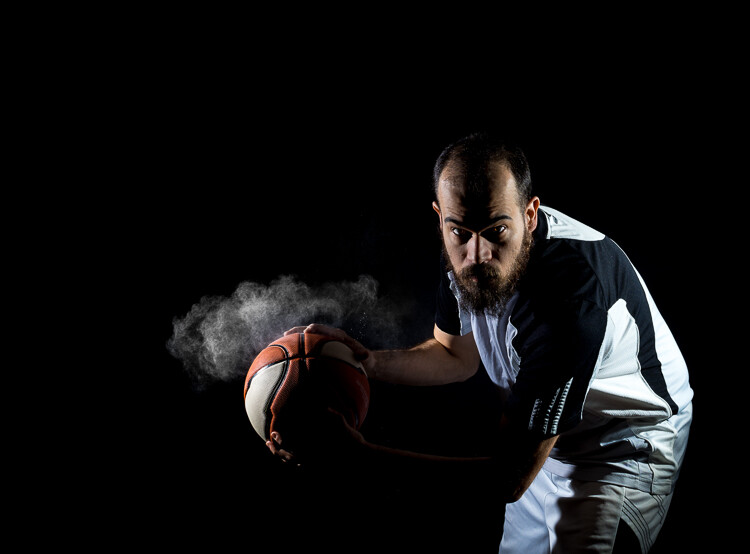
Powder makes things much more interesting, and the only limit is your creativity (or the absence of a working vacuum cleaner to clean up after the mess). You can sprinkled some body powder on a ball (another common prop) and make your model hit it with the hands just before taking the photo. You will capture great puffs of powder, helping to convey a feeling of action and power.

Photo14

Basketball and body powder mix in interesting ways.

Tip #5: Go crazy with conceptual photography

While it is challenging per se, I consider conceptual photography to be the best playground to learn to be creative with props.

When you do conceptual photography, your subject will be a concept, and the challenge is to translate it into an image by using props. At first, keep it easy, and don’t be afraid to get inspired by the work of other photographers.

Photo15

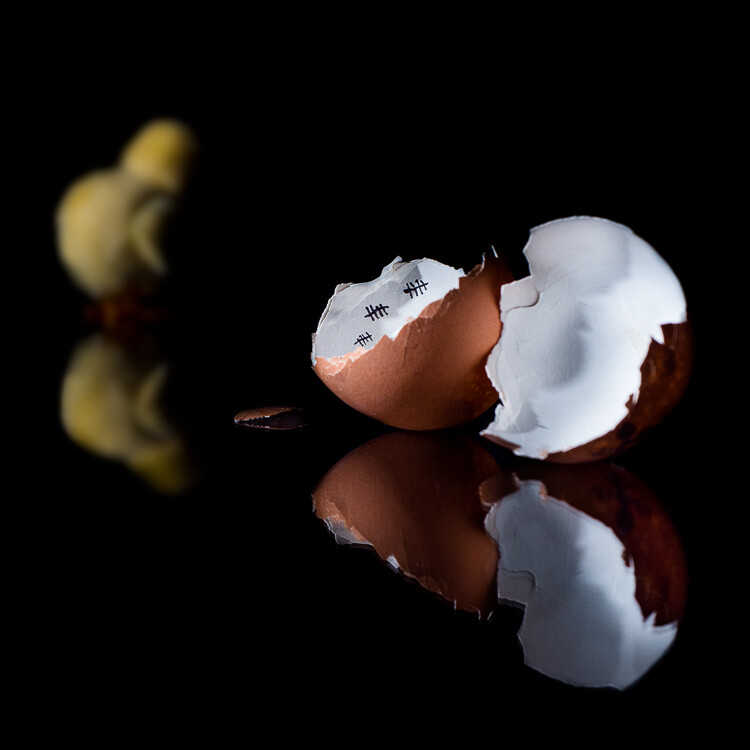
The chicken’s great escape, a concept I saw online and I made it mine by using my personal style, and adding the escaping chicken.

Because you want to convey a message, even with the simplest setup, you have to pay attention on how you place your props into the scene.

In the previous photo, the dark, out-of-focus chicken in the background is there to give the idea of the chicken moving away from the egg. While the broken shell with marks on its inside make the viewer think of it as the chicken prison. Had I placed the chicken in the foreground, in-focus and well lit as the egg’s shell, the message would have lost some strength.

When you do conceptual photography, do not focus on the photography aspect at first, but let your ideas and concepts spawn naturally from your everyday life. Are you cooking your favorite food? In that moment the idea that photography is a bit like cooking could strike you.

In photography, as in cooking, you combine what reality puts in front your lens (the ingredients) to create your vision of such reality (the finished food).

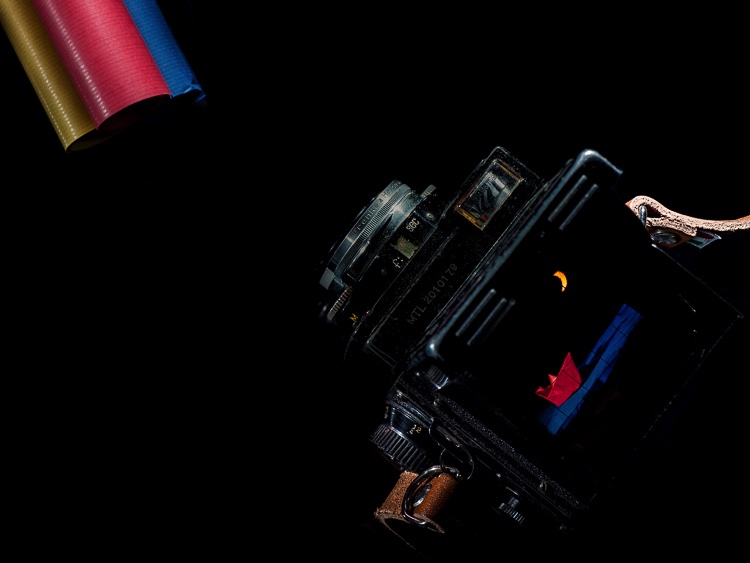
This idea struck me once and this was my personal way to translate it into a photo: the ingredients are the colorful paper rolls in front the lens of an old TLR camera, and those ingredients combine in-camera to reveal an origami nocturnal seascape crafted using the paper from the rolls. Photography magic.

Photo16
The fun of doing the origami seascape for real and the challenge to frame, focus, and light it, so I could photograph the scene through my old TLR camera, was so much more than just use an editing software to copy/paste, move, rotate, resize and bled all the different elements together.

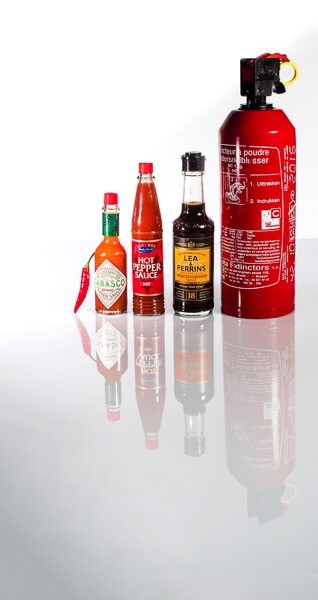
Once you start this game, you can find concepts everywhere; was your Mexican food too spicy even for a chili lover as you are? Something like that could pop in your mind.

Photo17

The most useful kit for us chili lovers.

Bonus tip: The hunt for props

Now you know how you can get creative with props in many ways, even using common ones, but it is always good to hunt for more interesting ones.

A good way to hunt for unique and weird props is to visit flea markets and shops selling kitchen supplies, vintage clothes, and such. And then, as usual, once you’ve got your props, use them in a fresh and unconventional way.

Photo18
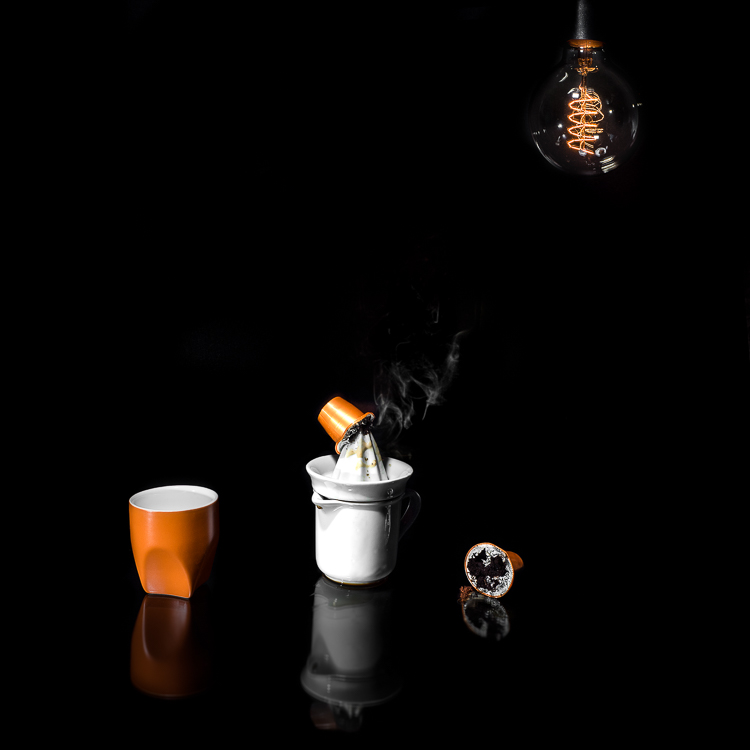
A variation of the concept shown in the photo opening this article; the same concept can be photographed in many different and original ways. Creativity is your only limitation.

Once again, the way you use and prep the props is crucial to create a convincing image. The coffee stains on the table and the squeezer, the squashed and broken capsules, and the smoke from a hidden candle, make the viewer understand what the meaning of the photo is, and the reason behind those props.

Conclusions

Don’t be afraid to use props in your photography to add something more. Just remember to use them wisely and creatively to push your photography further, and to avoid falling into photography clichés.

googletag.cmd.push(function() {
tablet_slots.push( googletag.defineSlot( “/1005424/_dPSv4_tab-all-article-bottom_(300×250)”, [300, 250], “pb-ad-78623” ).addService( googletag.pubads() ) ); } );

googletag.cmd.push(function() {
mobile_slots.push( googletag.defineSlot( “/1005424/_dPSv4_mob-all-article-bottom_(300×250)”, [300, 250], “pb-ad-78158” ).addService( googletag.pubads() ) ); } );

The post How to Boost Your Creativity by Including Props in Your Photography by Andrea Minoia appeared first on Digital Photography School.


Digital Photography School

 
Comments Off on How to Boost Your Creativity by Including Props in Your Photography

Posted in Photography


20 Cutest Newborn Baby Photo Props for Spring Session

25 Mar

The right photo props can upgrade your newborn baby shots from “just cute baby photos” to some truly moving images that even a Grumpy-cat-type of person would not resist. Every photo shoot is a whole new experience of capturing a baby’s and parents’ personalities. There are endless ways to make your photo session unique and beautiful using various photo props. Continue Reading

The post 20 Cutest Newborn Baby Photo Props for Spring Session appeared first on Photodoto.


Photodoto

 
Comments Off on 20 Cutest Newborn Baby Photo Props for Spring Session

Posted in Photography


Props Are Evil: How To Use Them For Good

21 May

A Guest Post by Lynsey Peterson.

Nothing freaks me out like props.  Every time I see a picture of flower girls holding an empty frame that is outlining a bride and groom kissing in the distance, I die a little inside.  

Whenever I am subjected to a photo that attempts to bring in a letter jacket and a football and a casual I’m-just-hanging-out-here-in-my-letter-jacket-holding-my-football expression, I try to remember that I am terrible at making coffee and therefore cannot give-up photography immediately and go get an application at Starbucks.  We have come to a place where portrait photography trends are natural and candid and while you would think that means we are leaving all props behind to die a formal, posed, and staged death, we just can’t help ourselves from wanting to put a little extra something in there.  

Something personal.  Or themed.  Or fun.  As a photographer, the logistics of getting something personal or themed or fun in an image and having it look natural are overwhelmingly complicated.  Often leading to overwhelmingly complicated images.  But if done right, a little extra something adds…….a little extra something.  Photographing people with props comes down to one basic thing: how can you make this interact with that?

Props1 1

Make it Natural

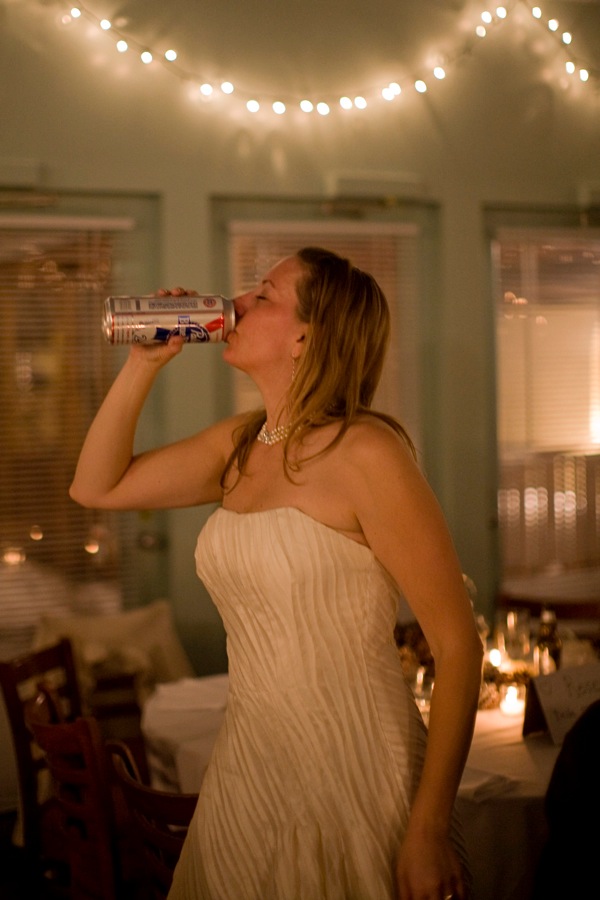
This shot doesn’t scream A PROP WAS USED HERE, though it was.  This bride did not provide me with a “must have” shot list, which of course makes her my favorite bride ever, but she had one simple request: one picture of her drinking a can of PBR in her wedding gown.  

Now admittedly when she told me that, I wanted to pass out from the biggest eye roll that has ever happened because……….how on earth was I going to pull that off?  The goal was a tongue-in-cheek stylish effort that didn’t come across as a classless snapshot.  

Had there been any posing or obvious mention of the can, it could have easily gone from sweet and funny to tasteless and tacky.  Instead it’s a near romantic take on a candid moment at a reception.  It’s rare that making a joke out of the prop or drawing obvious attention to it generates a beautiful and interesting portrait.  Since it’s already on the losing side of “one of these things is not like the other”, there is no need to point it out.

Props2 1 

Make it Different

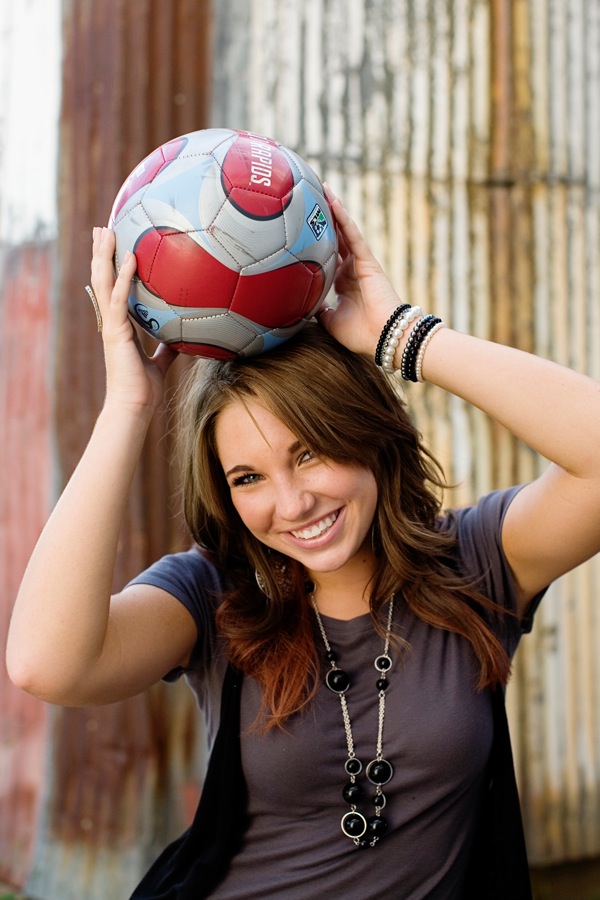
When it comes to props in portrait photography, chances are good that it’s been done before.  So do it different.  Photography is just storytelling and a prop is just another subject in your cast of characters; how many lines it gets is totally up to you.  High school seniors tend to be the group most interested in including a prop.  Which is often sports equipment and getting creative and unposed with things like sporting equipment is not an easy task.  Step out of the intended purpose and treat it like an object.  

A soccer ball doesn’t have to go at the feet, a letter jacket doesn’t have to be worn, a lacrosse stick doesn’t have to……do whatever it is that lacrosse sticks do.  The image is about a person—the viewer knows what the intended purpose is of a practical use prop.

Props3

Make it Simple

Including a prop adds another level for the eye to process, so clean up everything else as much as you can.  A tight frame, a clean background, and minimal distractions are all your friends.  Stick with them and they won’t do you wrong.

Props4

Make it Meaningful

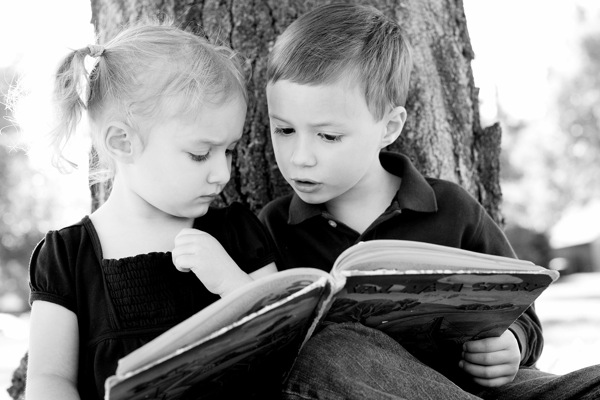
As props go, the easiest of the bunch are the ones people want included because they are highly personal and mean a great deal.  Wedding rings, special stuffed animals, maybe their cat (tip: avoid this one if you can).  The interaction here will be easier, so the key is highlighting the connection between the person and their special prop.  

The book in this photo was written by their great-grandmother and has obvious family importance.  Before this shot I took dozens of them just holding the book, wanting badly to document the entire cover.  Finally it dawned on me that the the story here was about kids having something so significantly personal and historic still able to generate their interest.  Great images are never about the prop, but the people it connects to and why.  

Props5 1

Make it Timeless

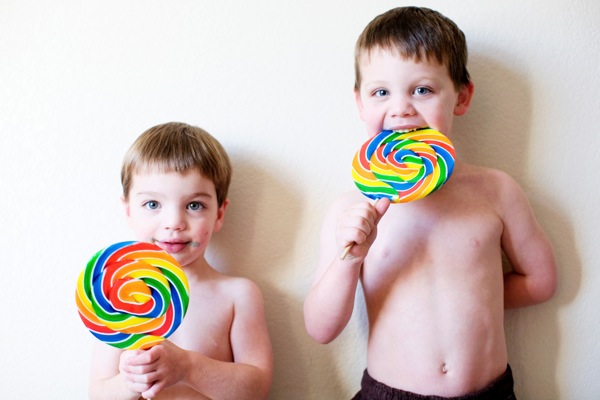
Props have a way of dating a photograph.  Take a moment to consider what the image you are about to take will feel like in 10 years.  Or 20.  Or 50.  If there is anything that can be changed, deleted, or moved so that in a decade this image will have every bit as much relevance as it has today, do it.  

These kids had on screen print t-shirts featuring cartoon characters that most of us likely won’t know in a few years.  T-shirts, messy faces, lollipops, and two boys makes for a complicated snapshot.  Colorful props, interaction, and sweet expressions makes for a timeless portrait.  

Props6 1

Make it make Sense

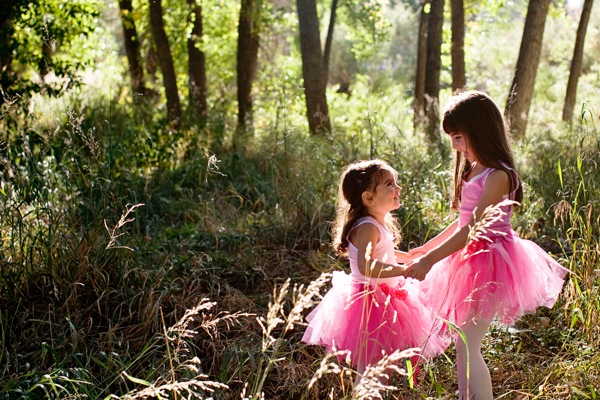
In my opinion, there is no tougher prop than a costume.  And when these sweet girls showed up in tutus at a suburban park, I had no idea how PINK TUTUS and grass and dirt were going to mix together.  Seemed a little like onion flavored ice cream.  If you take it apart piece by piece, it’s easier to vision it as a whole.  

I knew I wanted to show off the tutus full glory so the girls had to be standing.  I wanted the relationship of the sisters to play a huge role.  And I wanted it to have a feeling of magic.  Much like how I feel when I go to the park in my own pink tutu.

Props7 1

With enough creativity, almost any prop can make an image fun, personal, and interesting.  Unless someone shows up with their cat and lacrosse stick.  Then you’re on your own.

Check out more of Lynsey Peterson’s work on her website.

Post originally from: Digital Photography Tips.

Check out our more Photography Tips at Photography Tips for Beginners, Portrait Photography Tips and Wedding Photography Tips.

Props Are Evil: How To Use Them For Good


Digital Photography School

 
Comments Off on Props Are Evil: How To Use Them For Good

Posted in Photography


Portraits with Props: Weekly Photography Challenge

17 Nov

Szúrópróba

As a followup to our recent post on Adding Interest to your Portraits with Props we thought it might be fun to do one of our weekly challenges on the topic.

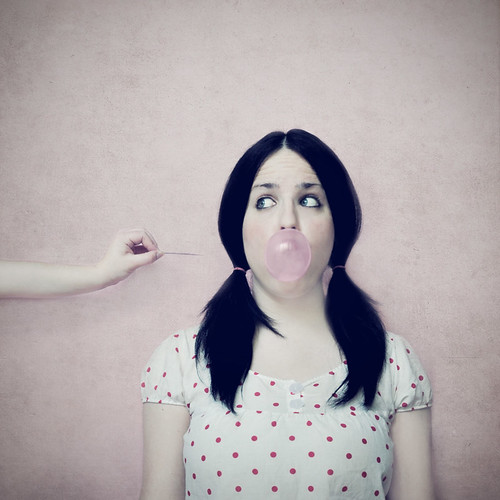
So this week your challenge is to take and share a portrait photo that has some kind of ‘prop’. Really it can be any kind of prop (subtle or not) that you like whether it be some element of clothing (a hat, scarf etc), an accessory (sunglasses), having your subject hold something (flowers, balloons, an umbrella) or do something (type on a computer, blow a bubble with gum, ride a bike) or anything else.

Have some fun with it!

Once you’ve taken and selected the ‘Portrait with Props’ image that you’d like to share – upload it to your favourite photo sharing site or blog and either share a link to it or – embed them in the comments using our embed tool to do so.

If you tag your photos on Flickr, Instagram, Twitter or other sites with Tagging tag them as #DPSPROP to help others find them. Linking back to this page might also help others know what you’re doing so that they can share in the fun.

Also – don’t forget to check out some of the great shots posted in last weeks challenge – Backyard challenge where there were some great shots submitted.

Post originally from: Digital Photography Tips.

Check out our more Photography Tips at Photography Tips for Beginners, Portrait Photography Tips and Wedding Photography Tips.

Portraits with Props: Weekly Photography Challenge


Digital Photography School

 
Comments Off on Portraits with Props: Weekly Photography Challenge

Posted in Photography


Beginners Photography Photoshop Tutorials – Digital Props

23 Dec

www.digitalphotoprops.com – Using Digital Props to create Awesome portraits is easy. I’ll show you how easy and fun it is to create a one of a kind portrait. To see more Video Tutorials and Digital Props visit-http

www.gizmolize.com | PLEASE VISIT OUR WEBSITE FOR MORE INFORMATION. Inside our website, you will find: -Free digital photography tips & tricks. -Free report “How To Shoot Digital Pics Like The Pros”. -A complete guide to digital photography. -Photography quick tips.


Beginner Photography Photoshop Tutorial Using Digital Props

16 Nov

www.digitalphotoprops.com – Using Digital Props to create Awesome portraits is easy. I’ll show you how easy and fun it is to create a one of a kind portrait. To see more Video Tutorials and Digital Props visit-http

Learn from Photographer Rick Sammon what equipment you should travel with on those Digital SLR photo assignments. Rick shares some of his tips and tricks learned over the last 20 years of travel photography.