RSS
 

Posts Tagged ‘Project’

Greater freedom: Canon’s engineers talk about the EOS R project

22 Oct

The launch of Canon’s EOS R gave us a chance to talk to a group of the engineers involved in the project. The company put forward an engineer from each of the main parts of the development process: physical design, optical design, UI design and overall product design. They talked of being given more freedom than ever before but also of the need to build on the EOS system’s strengths.

Left to right:
Koji Yoshida – Lead Engineer/Architect, Integrated Design Department 232
Manabu Kato – Deputy Senior General Manager, ICD Optical Product Development Center
Shintaro Oshima – General Manager, ICB Product Development Div 1.
Hironori Oishi – Lead Specialist, Product Design Div 1.

A new, short and wide mount

Canon has been consistent across its launch, when it’s said that the important announcement isn’t the EOS R, specifically, or the fact that there’s no mirror, but in what the RF mount allows them to do.

Manabu Kato sums up the freedom they’ve gained in terms of optical design: “people who’ve been working on lenses for a really long time have, with this new system, been able to make lenses like the 28-70mm F2 comparably easily, compared to how they had so many challenges in the past.”

“By having [more] data being transferred between the camera and lens…you can improve the autofocus, metering and image stabilization performance”

As well as allowing more ambitious optical designs, the RF mount also adds data bandwidth, moving from eight communication channels to twelve. “During shooting there’s a massive amount of data going between the lens and the camera, so making sure that was smooth was another challenge,” says Kato. “By having that huge amount of data being transferred between the camera and lens, you can improve the general performance in relation to autofocus, metering and image stabilization. And you can also add features such as the control rings on the lenses.”

The RF 28-70mm F2 lens, combined with pupil detection AF is a powerful combination. ISO 100 | 1/5000sec | F2 | Canon RF 28-70mm F2 @ 70mm (Pre-Production lens)

“You can also use DLO without any problems,” he said. Digital Lens Optimizer – Canon’s name for digital lens corrections – previously required that the camera look up the data in a database, meaning that camera firmware needed to be updated to accommodate new lenses. It’s now supplied in real time by the lens itself, so there’s no need for a look-up step.

Video, as well as stills

This real-time data flow allows the use of Digital Lens Optimizer and distortion correction in video for the first time. And it’s clear that, despite the EOS R’s comparatively modest specs in that area, Canon has done a lot of thinking about the needs of video shooters.

“Getting rid of [the mode dial] was a big decision that required a lot of consideration”

“In relation to the optical system, we gave consideration to focus breathing*, and also aperture control: you can change the aperture in 1/8th stops,” says Kato. “also the Nano USM, it’s very quiet and quick: the first time in an L lens.”

Difficult decisions

Trying to accommodate the needs of video shooters ended up leading the removal of the camera’s mode dial, says Koji Yoshida: “if you have a mode dial then the [exposure] settings will be the same for both stills and movies.”

The decision not to offer a mode dial on the EOS R was not taken lightly.

“We consulted with a lot of different people and talked about this a lot, and decided to have different settings this time,” he says. But it’s clear this isn’t a decision made lightly: “[The mode dial] is a function that’s been common in the past, so getting rid of that was a big decision that required a lot of consideration,” said Shintaro Oshima. “There was a lot of internal discussion about this point,” concurs Yoshida.

The challenge of legacy

This tension between novelty and legacy is a constant theme of our conversation. “Our aim was to carry on the traditional parts of EOS but then bring in new innovation at the same time,” says Hironori Oishi: “our biggest challenge was making this look like an EOS camera with just a single glance, you can see that it’s an EOS camera, based on the traditional styling of the EOS cameras. And also the feeling, when you hold the camera – as soon as you hold it in your hand, you know it’s an EOS.”

The M-Fn button is one of the most obvious ways in which the EOS R introduces new thinking to the EOS experience. It’s fair to say we’re not convinced by the way it currently works.

This extended to the user interface, says Yoshida: “the challenge we faced in terms of the software or the interface was making sure that it’s got the same basic controls as an EOS: to carry on that operability that EOS users are used to, then also implementing new elements into that design at the same time.”

The answer was to blend features from Canon’s existing live view and DSLR experience:, he says: “We used the mirrorless AF modes but we also also included features from the 5D Mark IV AF, like Expand AF area and large zone AF: this is the first time this has been introduced in a live view camera from Canon.”

Opportunity for innovation

The solution to these tensions seems to have been to look for opportunities to innovate while maintaining continuity: something made clear in the challenges of maintaining EF lens compatibility. Despite the EF mount already being fully electronic, Kato says: “it was difficult ensuring that compatibility. But we think that’s a big plus for the system.”

Whatever we might think of the rest of the EOS R experience, we love the idea of adding a control dial or filter mount in the EF-to-RF adapters.

Tellingly, the team looked for ways to add new features. “We also achieved the control ring adapter which brings additional value to EOS lens users,” says Kato: “The same applies to the drop-in filter adapter: it gives added value to those who already have EF lenses. We wanted to make sure that we looked after our current users of our EF lens system.”

“The control ring adapter brings additional value to EOS lens users…the same applies to the drop-in filter adapter”

Oshima stresses that the need for continuity didn’t hold the new camera back, though: “another focus was the low light limit performance. That’s a point of evolution from the EOS cameras.”

“Another focus was the low light [autofocus] limit performance”

This eye for an opportunity to innovate is perhaps most clearly seen in the way the EOS R, unlike any other mirrorless camera, closes its mechanical shutter when shut down. “we wanted to protect the sensor as much as possible from dust and light hitting the sensor,” explains Oshima: “The light coming through the lens affects the sensor in the long term. The color filter array and microlenses and also the photodiodes can all be damaged by light [if the sensor is always exposed].”

Another bright idea: Canon’s engineers worked out that if you stop-down the lens aperture blades, it reduces the risk of damaging the shutter blades, at which point you can close them to keep light and dust off the sensor.

To then protect the shutter blades, the camera stops its lens down and displays a warning not to leave it facing towards the sun, without a lens cap. “The aperture cannot be closed completely, so that message is kind of a safeguard,” explains Kato: “We’re kind of proud of the fact that with a simple idea, we’ve been able to increase value for customers.”

Just the beginning

As usual, no one was able to discuss future products. When asked whether there was any chance of an APS-C RF-mount camera, Oishi was suitably non-committal: “we’re thinking about it, but we can’t answer in detail,” he says. But the individual engineers did all discuss what they were looking forward to.

“We want to surprise and astonish you, so please expect big things”

“It gives more structural freedom in terms of design, because it doesn’t have a pentamirror”, says Oishi. “I’m excited about improvements in Digic image processor and functions that create more value and make easier to use,” says Yoshida. But it’s optics specialist Kato who seems most enthused: “This is just the start of the system,” he says, talking about F2.8 zooms and other possibilities, before settling on a broader-reaching point: “We want to surprise and astonish you, so please expect big things.”


Editor’s note: Richard Butler

Nearly ten years ago I wrote a blog post suggesting camera makers should go back and take a ‘blank sheet of paper’ approach to the way their cameras operate. Simply suggesting it is the easy bit. Actually doing it, and having to find clever solutions is quite a different matter.

Throughout our conversation, it was obvious that Canon had given its engineers more freedom than usual in this project but that there’s still a careful balancing act to avoid confusing or alienating your existing users. The nods of recognition around the table as Mr. Oshima spoke about the difficulty of decision to eliminate the mode dial said a lot about how seriously these decisions were taken.

It’s difficult to talk to people who’ve worked so hard to make a great camera and then have to publicly report that it doesn’t work as well as they’d intended. But that’s the reality of our experiences with the EOS R so far, across the DPReview team.

If nothing else, though, the team’s responses show how seriously Canon is taking the RF system as a chance to improve and innovate.I really hope we’ll see that reflected in updates to the EOS R and future products in the system.


* A change in field-of-view as the lens focuses – a minor concern for stills shooting, but potentially distracting in video [Return to text]

Articles: Digital Photography Review (dpreview.com)
 
Comments Off on Greater freedom: Canon’s engineers talk about the EOS R project

Posted in Uncategorized


Blog Project: Your Best Photos From 2016

27 Jul

It’s that time of year again and if you’re a regular JMG-Galleries reader that means one thing…
it is time to kick off the 10th annual best photos of the year blog project. This is by far my most popular blog project with hundreds of photographers taking part last year (see Best Photos of 2015, 2014, 2013,  2012, 2011, 2010, 2009, 2008 and 2007). Around this time of year people start to ask if I’d be running this project again. The answer clearly is always YES!
1. I love this project and I love that so many people get excited about it.
2. It’s a great way exercise to improve your photography (10 Ways to Top Your Best 20xx Photographs).
So with out any further delay here is how you take part to submit your best photos of 2016.

How to Participate (Read Carefully)

  1. Review & select your best photos from 2016.
    Note: Photo edit carefully narrowing down your results to your best 10 or 5 photos. Reference Pro Tips: Photo Editing with Gary Crabbe for pointers.
  2. Create a blog post on your web site or a Flickr/500px set containing your best photos from 2016.
  3. Complete the form below by Tuesday JANUARY 3rd at 11:59PM PST to take part. The following Tuesday, or there about, I’ll post a link to all submitted sites and photos on my blog. Through out the week I’ll also share the results across all my social media accounts.

Spread the Word!
Feel free to spread the word of this project on Twitter, Facebook, Google+, photo forums you frequent and/or your blogs. All who are interested in taking part are invited.


Loading…

The post Blog Project: Your Best Photos From 2016 appeared first on JMG-Galleries – Landscape, Nature & Travel Photography.


JMG-Galleries – Landscape, Nature & Travel Photography

 
Comments Off on Blog Project: Your Best Photos From 2016

Posted in Equipment


A Worthy Project for Landscape Photographers: League of Landscape Photographers

27 Jul

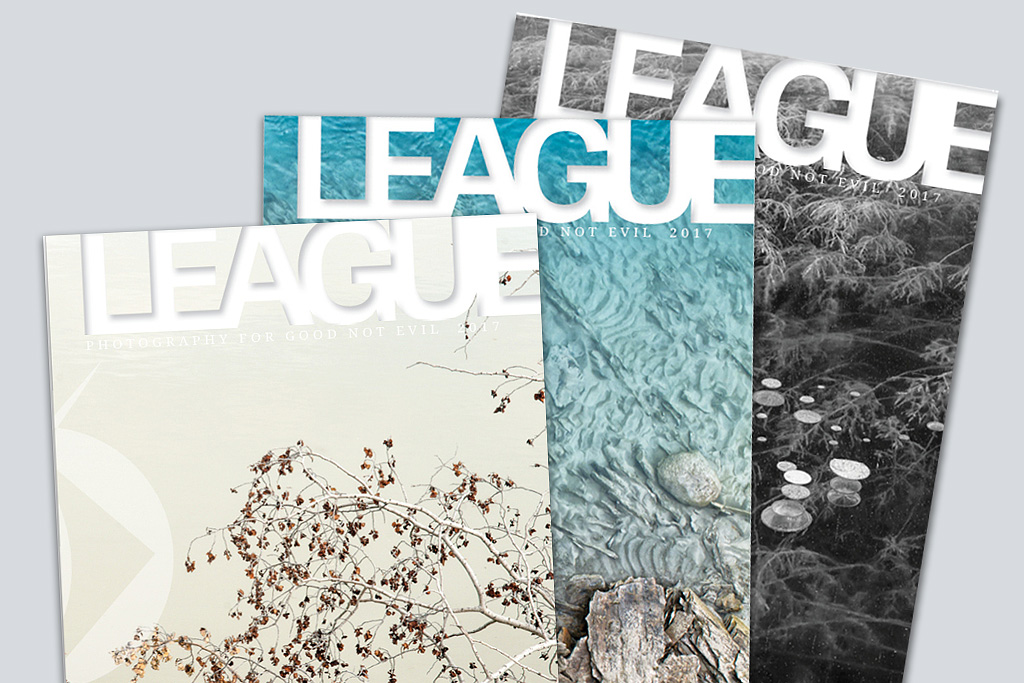
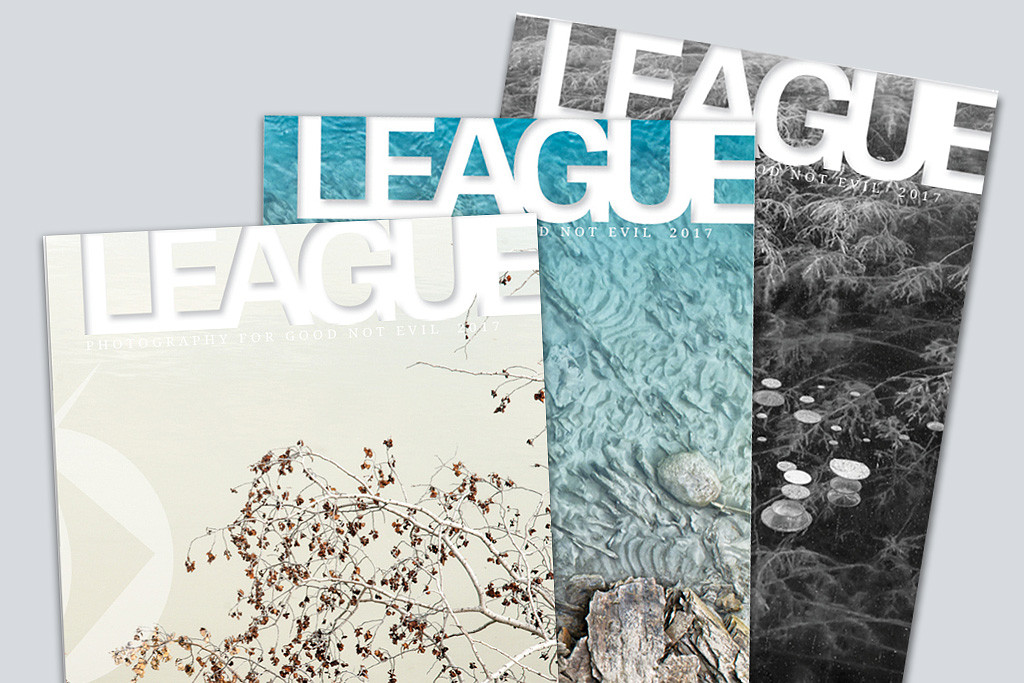
Three cover splay

Canadian landscape photographers Samantha Chrysanthou and Darwin Wiggett have created the League of Landscape Photographers, a self-identified group of artists who photograph the world around them in accordance with high ethical and artistic standards. ‘Landscape’ in this group is defined broadly to include wilderness and human interactions with and connections to the land. There is no cost to being a League member but each member must post a personalized code of ethics on their website or social media pages to join. League members share and discuss their ideas, portfolios and projects in the League Facebook group and on the League blog. The pinnacle achievement of the group is the annual, collectable fine-art Leaguemagazine to be released in the fall of 2017. There is currently a fundraising subscription campaign on until April 4 with the goal of getting $ 30,000 CAD to fund 1000 copies of the magazine that will go to subscribers worldwide. All proceeds from the subscriptions go to the creation of the magazine with its evocative imagery and high-end local printing and design. This is a magazine funded by photographers for photographers (no ads or commercial content) and funds raised go to fairly pay ALL contributors for their creativity. League magazine strives to promote photography with a conscience and show that photography can make a positive impact through thoughtful and ethical creativity.

Act quickly as their fund raising deadline is drawing near.

The post A Worthy Project for Landscape Photographers: League of Landscape Photographers appeared first on JMG-Galleries – Landscape, Nature & Travel Photography.


JMG-Galleries – Landscape, Nature & Travel Photography

 
Comments Off on A Worthy Project for Landscape Photographers: League of Landscape Photographers

Posted in Equipment


Blog Project: Your Best Photos From 2017

26 Jul

It’s that time of year again and if you’re a regular JMG-Galleries reader that means one thing…
it is time to kick off the 11th annual best photos of the year blog project. This is by far my most popular blog project with hundreds of photographers taking part last year (see Best Photos of 2016,  2015, 2014, 2013,  2012, 2011, 2010, 2009, 2008 and 2007).  It’s great to see the community of photographers that have developed around this blog project. As always I hope the exercise of picking your best photos helps improve your photography (10 Ways to Top Your Best 20xx Photographs).

So without any further delay here is how you take part to submit your best photos of 2016.

How to Participate (Read Carefully)

  1. Review & select your best photos from 2017.
    Note: Photo edit carefully narrowing down your results to your best 10 or 5 photos. Reference Pro Tips: Photo Editing with Gary Crabbe for pointers.
  2. Create a blog post on your website or a Flickr/500px set containing your best photos from 2017.
  3. Complete the form below by Tuesday JANUARY 2rd at 11:59PM PST to take part. The following Tuesday, or thereabout, I’ll post a link to all submitted sites and photos on my blog. Throughout the week I’ll also share the results across all my social media accounts.

Spread the Word!
Feel free to spread the word of this project on Twitter, Facebook, Instagram, Google+, photo forums you frequent and/or your blogs. All who are interested in taking part are invited.


Loading…

The post Blog Project: Your Best Photos From 2017 appeared first on JMG-Galleries – Landscape, Nature & Travel Photography.


JMG-Galleries – Landscape, Nature & Travel Photography

 
Comments Off on Blog Project: Your Best Photos From 2017

Posted in Equipment


‘Potato Camera’ project creates camera out of a potato – what did you expect them to do?

28 Jun

It seems that there really is no limit to human ingenuity – at least at the lower end of the scale. Evidence: the Potato Camera.

The folks at Corridor Crew have published a new project video showcasing the creation of a sorta-interchangeable lens camera features a large potato as the camera body, hollowed-out to accommodate a custom 3D-printed film chamber. The lens is essentially smashed into the front of the potato with the addition of some light-blocking material, and the film is cut into 9in / 22cm strips.

We were somewhat surprised to see that it actually works. We were not at all surprised, on the other hand, to see that it does not work well.

Via: Boing Boing

Articles: Digital Photography Review (dpreview.com)
 
Comments Off on ‘Potato Camera’ project creates camera out of a potato – what did you expect them to do?

Posted in Uncategorized


Adobe announces Project Rush, a cross-device video editing application

20 Jun

Adobe has announced development of Project Rush, a cross-device video editing application that consolidates the entire video creation workflow, from shooting to social media sharing. According to Adobe, Rush is intended to provide a more streamlined and intuitive user experience for creating videos, as well as to provide a powerful video solution for mobile users.

In contrast to traditional video creation workflows, which often require switching between specialized programs, Rush aims to put the entire workflow into one, integrated application. It supports shooting, editing, audio optimization, motion graphics, and video sharing, and provides a simplified interface for editing, color correction, audio, and titling.

Adobe says the tools available in Rush are based on the same underlying technology as some of its pro apps, including color correction technology from Premiere Pro and audio technology from Audition. Integration with Adobe Stock will provide access to free motion graphics templates which can be customized by users.

Project Rush will work across mobile and desktop platforms, and will include the same feature set in both versions. Projects will synchronize between devices using Adobe Creative Cloud.

Recognizing that a great deal of video content is now shared through social media, Rush will automatically optimize video for a variety social media platforms, as well as manage publication and scheduling of content to those platforms. Adobe did not specify which platforms will be supported.

Rush will be available in mobile and desktop applications, with both versions supporting the same feature set, meaning users will have the same tools at their disposal no matter which device they’re using. Projects will sync between devices using Adobe Creative Cloud.

Although Project Rush is unlikely to replace pro-level tools for larger productions, it may prove useful to those who don’t need the power of a dedicated non-linear editor, or those who prefer a workflow that doesn’t involve multiple programs.

Adobe did not provide a release date or pricing for Project Rush, but since it’s designed to sync across Creative Cloud it’s likely to require a Creative Cloud subscription to fully utilize its features. If you want to try Rush for yourself, you can apply to join the public beta here.

We’ll be taking a look at Rush in the near future and will share our impressions once we’ve had a chance to give it a spin.

Articles: Digital Photography Review (dpreview.com)
 
Comments Off on Adobe announces Project Rush, a cross-device video editing application

Posted in Uncategorized


Tips for Doing a Summer Project 92 to Get You Out Shooting

22 May

You’ve heard of the fabled Project 365, right? A photo a day for a year. We’ve even posted theme ideas here on dPS for those interested in a long-term project. But what about if you know that you aren’t going to make it all year, especially when the weather turns ugly and you love shooting outdoors? Enter, the Summer Project92.

What is it?

The idea is the same as the Project 365 but with a larger emphasis on getting outside and exploring your world with a camera. Keeping this project short and simple will hopefully encourage you to pick up that dusty camera and head outside. Smartphone, drone, underwater…it doesn’t matter the type of camera you are using, the point is to use it!

If you sometimes get stuck when looking for subjects, I have a list of weekly themes that should help give you some motivation. There are 13 weeks and one day to summer with the first day being June 21. So I’m going to follow the sun on this one and make all weeks start on a Thursday, just to mix it up.

Some Ideas

  • Week 1 – June 21stBlooming – There are tons of flowers out there, just begging for a portrait.
  • Week 2 – June 28thEndless Sunshine – I know it seems like the days last forever, but they are actually getting shorter, so get out there and shoot how it feels.
  • Week 3 – July 5th – It’s the Small Things – Time to get up close and personal with the little things that make nature and summer unique.
  • Week 4 – July 12thDaydreams – Most of us don’t get the entire summer off work, but that shouldn’t stop you from daydreaming.
  • Week 5 – July 19thSunsets – A whole week of sunsets? Why not! You can throw in some sunrises too if you like.
  • Week 6 – July 26thPatterns – Look for the repetitions in life.

  • Week 7 – August 2ndPlayfulness – Get playful with your shots, either of people and/or animals at play or create a playful scene.
  • Week 8 – August 9th – Heat – Oh my, is it ever hot out there!
  • Week 9 – August 16thBring on the Night – Yes, a whole week of night photography! It’s a good way to avoid the heat sometimes.
  • Week 10 – August 23rdSummers of the Past – This is a chance to dig up some memories and archive those prints from your past. Find seven favorite photos from summers of the past and share them digitally.
  • Week 11 – August 30thRoadtrip – All things cars or camping or hotels/motels or the open road.
  • Week 12 – September 6thFamily and Friends – What’s summer without good people around you to enjoy it with?
  • Week 13 – September 13thFoods of Summer – Plan ahead as you might want to shoot this one on food as the summer progresses (yes, I allow that kind of cheating in my photo projects).
  • That Extra Day – September 20thTransitions – All good things come to an end unless you are already thinking about doing a fall project?

If you don’t want to follow the schedule above, that’s just fine. There are no hard and fast rules about what to shoot and when. Although might I suggest that if you post your photos on social media, that you use the hashtag #SummerProject92? That way those of us who want to feel inspired (me!) will be able to find and comment on your work more easily.

Results

A blog, Tumblr, Instagram…the format doesn’t matter. What matters is to get out there and start shooting and sharing. And enjoy your summer! Psst, might I suggest posting some results in the dPS Facebook Group?

Forgive me for those of you in the Southern Hemisphere as I realize you are about to head into winter. You can start a #WinterProject92 and we’ll catch up with you in about six months.

The post Tips for Doing a Summer Project 92 to Get You Out Shooting appeared first on Digital Photography School.


Digital Photography School

 
Comments Off on Tips for Doing a Summer Project 92 to Get You Out Shooting

Posted in Photography


3 Lessons I Learned by Doing a Self-Portrait Project

18 Mar

As photographers, we often spend most of our time behind the camera rather than in front of it. I certainly was no exception! However, this past year, I made a conscious effort to put myself in front of my own camera more often including doing a self-portrait project. I was surprised by the ways in which those experiences have shaped the way that I now interact with my clients as a photographer.

Here are three of the lessons that I learned through my self-portrait project, as well as the ways that they’ve helped me become a better photographer.

3 Lessons I Learned by Doing a Self-Portrait Project

1. Being photographed is really awkward!

As I began my self-portrait project, one of the first things I noticed was how absolutely awkward it was to be in front of the camera. I initially started out tethering my camera but decided that I really wanted to emulate the way that my clients feel in front of the camera as much as possible, so I ended up simply using a remote.

The remote method was much more challenging and much stranger! I knew what types of posing would be most flattering in theory, but I discovered that when I was in front of the camera, sometimes the posing instructions that I’d typically use left me with a lot of questions.

When I gently rest my hand on my neck, should my fingers be open or closed? Where exactly should my hand be on my neck so that I don’t look like I’m strangling myself? When I’m looking to the side of the camera, exactly how far to the side should I look?

3 Lessons I Learned by Doing a Self-Portrait Project

Put yourself in the subject’s shoes

As photographers, we’re around cameras and photography equipment regularly – it’s just a part of our lives. It can be easy to forget that this is often not the case for our clients. Often times, clients have portraits done annually (if even that often) and may arrive for a session feeling just about as comfortable as they might at the dentist.

They know they want to end up with images that are both flattering and capture their personalities, but they aren’t quite sure how to make that happen.

Since I’ve been experimenting with self-portraits and experiencing that awkwardness first hand, I’ve started nearly every session with a brief conversation where I essentially say, “Hey, I know that having your photo taken can feel really awkward. I might ask you to stand or move your body in ways that feel strange and unnatural to you, but try to trust me – I’m on your team, and want to deliver photos that you will absolutely love!”

It’s so simple, but even just acknowledging that sometimes portrait sessions might feel a little strange and uncomfortable can go a long way towards making them much less strange and uncomfortable.

3 Lessons I Learned by Doing a Self-Portrait Project

2. Posing and wardrobe are really important

My personal photography style typically tends more towards lifestyle/documentary than styled sessions. As such, I don’t often give a ton of complicated posing directions or wardrobe instructions for my sessions.

To model that, I tried taking self-portraits in a whole variety of clothing options. I captured myself wearing everything from a hoodie sweatshirt to a dressy sweater and scarf. I tried taking portraits with my hair up as well as down, and I experimented with heavy makeup as well as no makeup. Also, I tried posing in the ways that I usually sit or stand, followed by some of my “go-to” gentle posing techniques for women.

I knew that both posing and wardrobe/styling were important, but I’m not sure that I realized just how important they were until I was able to see some side-by-side images of myself in different poses and the same pose with different clothing choices.

3 Lessons I Learned by Doing a Self-Portrait Project

The long sleeves here are important to put more emphasis on my face, as opposed to the arms like the image on the left.

Make specific wardrobe and posing suggestions

I now find myself being a bit more specific when clients ask for clothing suggestions. For example, prior to my self-portrait project, I probably would have told clients, “The most important factor is to wear something you feel comfortable in. As a general rule, most people look great in jewel tones.”

Now, I’d be more likely to say something like, “The most important factor is wearing something that you feel comfortable and confident in! When it comes to portraits, I recommend that you wear a jewel-toned jacket or cardigan with a solid black, grey, or white tank top or t-shirt underneath, which allows us so much versatility in your images.”

3 Lessons I Learned by Doing a Self-Portrait Project

Similarly, I’ve found myself giving more detailed instructions when it comes to posing, often even using my own body to demonstrate exactly what I mean. Most clients were excited to receive more specific instructions to follow – it leaves less open to interpretation, which in turn makes them feel more confident that they’ll love the end result of our session.

3. Positive affirmation is absolutely crucial

Since I wasn’t working with my camera tethered to my laptop, I had absolutely no idea how things were looking as I was shooting, so hearing comments from people as they walked by was huge! When one of my daughters walked by and said,”Oops! I can’t see your head!”, I knew I had to stop and make adjustments right away.

3 Lessons I Learned by Doing a Self-Portrait Project

Any sort of feedback like that was helpful, but when someone positively affirmed how the images were looking, it held a lot more importance than I would have thought!

For example, one afternoon a neighbor friend drove by and hollered something positive out her window as I was working on a self-portrait in the front yard. That simple comment gave me a huge confidence boost, and the next images in the set were significantly better than any of the ones I’d taken previously.

Conclusion

I’m an introvert by nature, and can sometimes have a tendency to go inside my head while I’m working. My brain is sometimes going a mile a minute, and I can forget to communicate what I’m thinking or seeing to those in front of my lens.

Since practicing self-portraits, I have really focused on positively affirming my family, friends, and clients as they’re in front of my lens. Telling them what an amazing job they’re doing with super awkward posing makes a difference. Commenting on how much you love the images so far is huge as well. Commenting on real attributes that make the person in front of your camera feel incredible makes a huge difference.

Give your friends, family, and clients the necessary feedback and positive affirmations that will allow their confidence in front of the camera to grow, and it will be a game changer for your sessions!

Have you ever done a self-portrait project? If so, what did you learn? Please share your experience and self-portraits in the comments section below.

The post 3 Lessons I Learned by Doing a Self-Portrait Project by Meredith Clark appeared first on Digital Photography School.


Digital Photography School

 
Comments Off on 3 Lessons I Learned by Doing a Self-Portrait Project

Posted in Photography


How to Use a Photography Project to Build Your Portfolio

05 Feb

Your development as a photographer can be seen as progressing through three stages: initial interest in taking photographs, development of skill, and mastery of the medium. As part of the third stage, photographic projects build your portfolio because they make you think in bigger terms. They force you to create images that flesh out a concept or theme in a way that creates a collection and a body of work.

These types of projects move you from making standalone images to creating a series of images that complete a broader vision.

Photography Projects 0001

Why a project?

Once you have moved on from taking pictures of your pets, flowers, and kids, you will likely want to learn how to improve your technique in order to capture and produce better images. Developmental projects can propel you forward. There are lots of this type of project (52-week challenges, 365-day challenges, or an A-Z project) that help you improve your skill by stretching as a photographer.

While developmental projects will hone your skills, the result can often be a series of images that are technically and aesthetically pleasing, but disjointed because of the diversity of individual challenges. Once you have mastered the mechanics of taking images, and you are looking to up your game, you need to also take your image collection up to the next level.

Photography Projects 0002

Make a consistent body of work

Most photographers who are just starting out work hard to get a consistent set of good images together and master control of their equipment. The subject matter can vary greatly because just getting practice at your craft can be a challenge.

Henri Cartier-Bresson famously stated that “Your first 10,000 photographs are your worst”.

While this really wasn’t a reference to perfecting your technique, it was more a reflection of honing your craft and your photographic style. It is also important to recognize that this statement was also made in reference to film photography, which was a much slower and more expensive process.

Because it’s common to take lots of great images without an overriding concept, this often means that looking at your images in hindsight shows that you have produced either:

  • A jumbled collection of good images with nothing that causes them to hang together
  • Or a set of images that all look the same

Photography Projects 0003

What does this mean in real terms?

A photographic project is where you decide upon a theme or concept and then deliberately capture images that fit that idea. The objective is to create a body of work rather than to improve a particular skill. You create images with a unifying theme, thereby producing a collection.

This is common approach for artists hoping to have an exhibition of their works.

Photography Projects 0004

How does this help you?

If you want to have your images exhibited or to get hired for a particular type of work, you need examples that demonstrate your ability in the specific area. For instance, if you want to get hired to take product photography, your portfolio should feature a collection of product photos.

Getting your images exhibited will usually require the approval of a curator who will look for a concept or theme to unify the images. Without a theme, you simply have a bunch of pretty pictures. With a theme, those images become powerful expressions of the overarching concept you are working on.

A theme can be anything, but the best themes create vitality and interest in your images. Outstanding photos elicit an emotional response and drive you to stare at them again and again. In addition, using the concept to guide you, you can create a set of images that can be described. It shows that your images were not taken by lucky happenstance but deliberately.

Photography Projects 0005

My leaf project

A couple of years ago, I did a series of fallen leaves that took me a long way in my development as an artist. I kind of fell into the project because as I was testing out a small prime lens I became fascinated with the incredible detail and sharpness I was seeing. I had taken a picture of a colorful leaf and loved the textures, and repeated the approach on other leaves. The resulting images were similar in color interest, texture, and subject matter.

These were images of leaves resting on a wood surface, I then mounted the prints on wood as well, creating an interesting verisimilitude. My images were well received and I used the collection for a couple of exhibitions. I also had help curating my images and dealing with the curators of the gallery. I learned a great deal in the process about how to view my images more broadly.

As part of the process, I came up with a title for the collection and an artist’s description. I am not suggesting you should take photographs of leaves, but that project jumpstarted my development as an artist and worked for me.

Photography Projects 0006

What to shoot for your photography project?

Okay, so now you are convinced that a photography project is a good idea for you, but what should your theme be? This is where you get to be creative. Ideally, don’t copy someone exactly but come up with your own theme, possibly based on something else you have seen.

Sometimes the best approach is to find a favorite image and figure out what you like about it and use that as a theme. You can also go to aggregation sites like 500px or EyeEm to see images that might inspire you. Some of these sites also present collections that show similar types of images or images from multiple photographers on a particular theme.

Sometimes your themes will work, sometimes they won’t, but if you don’t try to develop one, you will just have a collection of pretty but unrelated images. Developing a project will stretch you as an artist, create a unified body of work, and provide greater clarity to your work because you will be capturing your images deliberately, rather than by chance. Go out and pursue your vision: you won’t be disappointed.

Photography Projects 0007

The post How to Use a Photography Project to Build Your Portfolio by Mark C Hughes appeared first on Digital Photography School.


Digital Photography School

 
Comments Off on How to Use a Photography Project to Build Your Portfolio

Posted in Photography


Tips for Selecting and Doing a Successful Photography Project

19 Jan

If you find yourself stuck in a rut, can’t find anything to shoot, or just need to get shooting – here are some videos to help you select an idea and get started doing a personal photography project.

The importance of doing a photography project

Photographer Matt Day talks about the importance of doing a personal photography project and gives you some ideas and direction to get started in this video.

5 Reasons why you should do a photography project

Adam from First Man Photography has five good reasons why you should start a photography project:

    1. Find direction – break out of a rut.
    2. Improve your photography.
    3. Build a social media following.
    4. Challenge yourself – get out of your comfort zone.
    5. It’s fun!

The most important ASPECT of doing a photography project

In this short video, COOPH founder Ulrich Grill shows you five things you need for a successful photo shoot or project. They follow the acronym A.S.P.E.C.T. – can you guess what they are? If not, go ahead and watch the video now.

  • A – atmosphere
  • S – shadows
  • P – positioning
  • E – energy
  • C – contrast
  • T – timing

Still need some help starting a photography project? Try these dPS articles for more tips.

  • 12 Creative Photography Project Ideas to Get You Motivated
  • How to do a Photography Alphabet Project
  • Tips for Doing a Successful Picture-a-Day Photography Project
  • How to Start and Finish a Photography Project
  • 6 Tips for How to Build a Story and Shoot a Photo Project
  • Tips for Creating a Personal Photography Project

The post Tips for Selecting and Doing a Successful Photography Project by Darlene Hildebrandt appeared first on Digital Photography School.


Digital Photography School

 
Comments Off on Tips for Selecting and Doing a Successful Photography Project

Posted in Photography