RSS
 

Posts Tagged ‘Priority’

Aperture and Shutter Priority Modes

22 Dec

The post Aperture and Shutter Priority Modes appeared first on Digital Photography School. It was authored by Darren Rowse.

aperture priority mode and shutter priority mode explained

What is Aperture Priority mode, what is Shutter Priority mode, and why do they matter?

Over the last few months, we’ve been looking at different elements of exposure and how to move off “Auto” mode on your digital camera. We’ve looked at aperture, shutter speed, and ISO. We’ve discovered what each setting is and what impact changing it will have on your images.

But now that we’ve looked at the theory of how changing these elements impacts an image, I’d like to discuss how to use them by examining two key shooting modes that many digital cameras offer. These should help you take a step away from the automatic settings that you might be spending a lot of time with.

So if you’re ready to learn all about Aperture Priority mode and Shutter Priority mode, then let’s get started.

The elements of exposure: A quick recap

In other articles, I’ve discussed how the three elements of the exposure triangle impact one another. This is particularly important when it comes to aperture and shutter speed.

Remember:

As you increase the size of your aperture (i.e., make the hole that you shoot through bigger), you let more light onto your image sensor.

As a result, you’ll need a shorter shutter speed to get a well-exposed image.

Conversely, if you increase the length of time your shutter is open, you decrease the aperture size that you need to get a well-exposed shot.

Make sense?

Priority modes

Aperture and Shutter Priority modes are really semi-manual (or semi-automatic) modes.

They give you some control over your settings, but also ensure you have a well-exposed image.

You see, semi-automatic modes such as Aperture Priority and Shutter Priority work by letting you select some of the settings. Your camera then chooses the remaining settings (in order to create a nice exposure).

Let’s take a look at each mode separately:

Aperture Priority mode

Often, Aperture Priority mode is represented on your camera Mode dial with an “A” or an “Av.”

In this mode, you set the aperture you wish to use, and the camera sets the shutter speed based on its evaluation of the light.

When would you use Aperture Priority mode?

Aperture impacts the depth of field of your images.

(In other words: By adjusting the aperture, you change how much of your scene is in focus. A narrow aperture results in focus from foreground to background, whereas a wide aperture results in a small sliver of focus surrounded by blur.)

As a result, most people use Aperture Priority mode when they want control over the depth of field.

aperture priority mode and shutter priority mode dandelion seed head

If you want a shallow depth of field (for example, in the shot above, the depth of field is very shallow, keeping the front dandelion seed in focus but blurring out the background), you’ll select a large aperture (f/2.8, for example, as in the dandelion photo) and let the camera choose an appropriate shutter speed.

But if you want an image with everything in focus, you must pick a smaller aperture (for example, f/16) and let the camera choose an appropriate shutter speed.

When choosing an aperture in Aperture Priority mode, keep in mind that the camera will be selecting the shutter speed.

And there comes a point where shutter speeds get too long to handhold your camera (usually around 1/60s).

Once you go below 1/60s or so, you’ll need to consider using a tripod.

(Also, if you’re photographing a moving subject, your shutter speed will impact how it’s captured; a slow shutter speed will mean your subject will be blurred.)

Shutter Priority mode

Shutter Priority mode often has a symbol of “Tv” or “S” on your camera Mode dial.

In Shutter Priority, you choose the shutter speed you wish to shoot at, and you let the camera decide on the best aperture for a well-exposed shot.

When would you use Shutter Priority mode?

In our tutorial on shutter speed, we talked about how the main impact of different shutter speeds is how movement is captured in your images.

As a result, most people switch to Shutter Priority mode when they want more control over the sharpness of a moving subject.

For example, if you want to photograph a bird in motion, and you want to freeze it so there’s no motion blur, you’d choose a fast shutter speed (e.g., 1/1000s, like in the photo below). Your camera would then take into consideration how much light is available in the scene and set an appropriate aperture.

aperture priority mode and shutter priority mode tricolored heron

But if you instead want to photograph a subject with some motion blur to illustrate its movement, you might choose a slower shutter speed, such as 1/25s. And your camera will select a smaller aperture as a result.

The photo below was taken at 0.4s as the flower waved in the wind. Do you see the motion blur that the slow shutter speed created?

aperture priority mode and shutter priority mode blurry flower

But don’t forget:

As the camera chooses different apertures, the depth of field in your image will change. If you choose a fast shutter speed to freeze your fast-moving object, your camera will choose a wider aperture – and your photo will have a narrower depth of field.

My final recommendation: Practice!

As you can see, Shutter Priority and Aperture Priority do give you more control over your images – but getting used to them can take some practice.

So as you use these semi-automatic shooting modes, don’t just think about the setting that you select; also keep an eye on the settings that the camera selects for you.

I find that, when shooting in “Av” or “Tv” modes, it’s often best to bracket your shots and shoot a number of images of the same subject (when you have time) at different settings. This will ensure you’re likely to get at least one shot that meets your needs.

The best way to learn about Shutter Priority and Aperture Priority modes is to grab your camera, head out with it, and experiment. Switch to “Av” or “Tv” and start playing with the different settings (taking lots of shots as you go). Particularly pay attention to how the camera makes changes to compensate for your selections and what impact it has on the shots you take.

In Aperture Priority mode, take some shots at the largest aperture you can (i.e., use small f-numbers) and see how this blurs the background (and also increases the shutter speed). Then head to the other end of the spectrum to take some shots at the smallest aperture you can (i.e., use high f-numbers) and see how this keeps more of your image in focus.

In Shutter Priority mode, play with fast and slow shutter speeds to see how they impact your photo’s depth of field.

Don’t be frustrated if your initial shots are not what you expect; it takes practice to wrap your head around these modes. But keep in mind that, when you do master both Aperture Priority and Shutter Priority, you’ll have a lot more creative control over your shots!

aperture priority mode and shutter priority mode shallow depth of field dahlia

The post Aperture and Shutter Priority Modes appeared first on Digital Photography School. It was authored by Darren Rowse.


Digital Photography School

 
Comments Off on Aperture and Shutter Priority Modes

Posted in Photography


5 Reasons to Consider Aperture Priority Over Manual Mode

13 Jun

The post 5 Reasons to Consider Aperture Priority Over Manual Mode appeared first on Digital Photography School. It was authored by John McIntire.
Choosing aperture priority mode in difficult lighting situations can free your mind up to deal with the things that matter most to the photo, like timing, rather than messing around with the dials to get the same result.
There’s a lot to be said for the manual exposure mode on your camera. When you’re starting out, learning how to shoot in manual will help you to learn the relationship between shutter speed and aperture. This ensures that you learn what the camera is doing every time you make an exposure. It also builds the basis for you to take what you learn about exposure and correct for the camera’s inability to cope with extreme exposure situations as well as to make creative choices for your images.

After you’ve learned the ins and outs of manual mode, however, there are a few reasons why you might want to forego your hard-learned manual skills for Aperture Priority mode. This article outlines five of these reasons and details what Aperture Priority mode might offer you and your photography in some situations.

1. Aperture priority does the same job as manual mode

In manual mode, the meter in your camera is taking a reading based on your set ISO (provided you’re not using auto ISO). The chances are likely that you’ve picked a deliberate aperture setting before you even lifted the camera up. To get your exposure, you now have to alter the shutter speed so that the indicator on your camera lines up with what the meter dictates is a correct exposure.

Aperture priority does the exact same thing, except that the camera sets up the shutter speed for you.

In instances where you are trusting your camera’s light meter (let’s be honest, that’s most of the time), this will result in the same exposure every single time whether you are shooting in manual mode or aperture priority mode.

What aperture priority mode does is remove the need for you to set the shutter speed yourself. It frees you to concentrate on things like composition without having to constantly keep an eye on the meter.

Exposing for the meter in manual mode resulted in an exposure of f/11 at 1/50th of a second.

Exposing the scene in aperture priority mode just a second later resulted in the exact same exposure. f/11 at 1/50th of a second.

In situations where you need to compensate for dark or light subjects, aperture priority mode still gives you full manual control of the exposure through exposure compensation. Are you taking photos of a dark subject like a black dog? Dial in -1 stop of exposure compensation just one time and keep shooting without having to constantly adjust your settings to get to the same result. Are you taking photos of a fluffy white dog? Same again. This time, add +1 stop of exposure compensation and away you go.

Dark subjects will require you to underexpose them. In Aperture priority mode, this is easily done with exposure compensation. Once you dial in exposure compensation, you are set to go until it has to be changed again. With light-toned subjects, you will have to overexpose them to maintain the correct exposure.

High contrast subjects, like this sheep’s white face lit directly by the setting sun, will also have to be underexposed by at least a few stops.

The only difference between aperture priority mode and manual mode in these circumstances is that you will be spending more time focusing on the creation of the photos than you will be on the dials on your camera.

To be clear, I am not advocating for not learning how to use manual mode. For the best results, it is important for you to understand how your camera works in relation to exposure. Using manual mode is the best and fastest way to do that. So, please, don’t skip over manual altogether. However, once you have it down, using other modes alongside your knowledge of exposure and how it works will help you and your photos in the long run.

2. Speed

The backlighting in this image created an extremely high contrast situation. By dialing in -3 stops of exposure compensation, I was able to ensure that the issues were dealt with in a series of images with one turn of the dial.

As mentioned, using aperture priority reduces the amount of time you have to spend watching the camera’s meter. Because the camera is now setting the shutter speed for you, the only thing you have to worry about in most situations is exposure compensation. Once you set your camera to aperture priority mode, it takes only one finger (on all modern cameras that I’ve used) to adjust the exposure compensation settings.

Need to underexpose by a stop? Just turn the one (relevant) dial three clicks. Done.

The only other thing you might have to worry about is if you have the need, or want, to change your ISO. But that is going to be more uncommon.

3. Aperture priority still gives full manual control

At the risk of repeating myself, but I feel this point really needs to be driven home. Aperture priority mode gives you full manual control over your exposure. It is not automatic, or an auto mode, in any way more than it allows the camera to set the shutter speed based on the meter you are already using.  At any time while in aperture priority mode, you will still have full manual input on what exposure the camera is recording. You just have less physical steps to go through before you get there.

4. Helps to create a constant exposure in changing lighting conditions

One scenario in which aperture priority mode really shines is in changing lighting conditions. For example, if you’re out on a windy and cloudy day, the light levels can constantly shift. In aperture priority mode, your camera changes the shutter speed for correct exposure (already taking into account any exposure compensation that you might have set). Thus, helping you to achieve a consistent look for all of the images in a sequence. This is most useful in terms of shooting a sequence of images to later stitch into a panorama.

When creating a sequence of images for a panorama, aperture priority can help to ensure a consistent exposure throughout the frames.

If you were shooting this sequence in manual mode, it would require you to be constantly looking at the meter and changing your shutter speed settings as required. This isn’t a big deal, but using aperture priority mode allows you to get the same results without constant fetter over the settings.

At sunset, the light rapidly changes. Add a moving subject to that high contrast scene and you have an exposure nightmare. Aperture priority can help to maintain a fairly consistent exposure between frames.

This isn’t perfect, and extreme shifts in lighting can have drastic effects on your images and your exposure. You will still have to pay attention to the details to ensure nothing is going wrong. On normal days, however, it will work just fine.

5. TTL and HSS enabled flashes

Using aperture priority with TTL and HSS enabled flashes might just be the perfect match.

When you are using a flash with TTL (through the lens metering) and HSS (High-Speed Sync) enabled, the chances are that you are going to be working with a fixed aperture anyway.

Remember, shutter speed does not affect flash exposure, only ambient exposure. Aperture priority mode will give you the freedom to set your desired aperture and then let the camera do what it needs to match the meter.

Not only will you still have full control over the exposure compensation for the ambient, but you will also have full control over exposure compensation with the flash unit.

Again, this allows you to get the exposure where you want it one time, and then you are free to concentrate on the actual photos.

That’s it

Aperture priority can be a fantastic tool for any photographer. At the end of the day, it does the exact same thing that manual mode does. It just takes away some physical steps that you have to go through in manual mode to set the exposure.

That said, like just about everything else in photography, it is not perfect, and it won’t always be a solution.

If you take only one thing away from this article, let it be this: shooting only in manual mode does not make you a better photographer. Aperture priority and shutter priority modes do the exact same thing, just in a different way. Use whichever works for the situation you’re in.

Do you use Aperture or Shutter Priority? Share with us your thoughts in the comments below.


5 Reasons to Consider Aperture Priority Over Manual Mode

The post 5 Reasons to Consider Aperture Priority Over Manual Mode appeared first on Digital Photography School. It was authored by John McIntire.


Digital Photography School

 
Comments Off on 5 Reasons to Consider Aperture Priority Over Manual Mode

Posted in Photography


Ricoh interview: “The development of the K-series is our first priority”

06 Apr
Pictured is Mr. Takashi Arai, one of several Ricoh executives we sat down with. Mr. Arai represents the Product Planning Department, within the Product Development Center of Ricoh’s Smart Vision Business Group.

Recently we visited the 2018 CP+ show in Yokohama, Japan and booked an in-depth interview with several executives from Ricoh. Among the topics covered were the company’s new K-1 Mark II, as well as the future of both the GR series and 360 imaging with the Theta line.

The following interview has been edited slightly for clarity and flow.


What is your ILC strategy for your next generation of products?

We have lots of requests for lenses, especially from K-1 users. They want more lenses that match the higher resolution of the K-1, so that’s one objective which we would like to implement.

The K-1 Mark II, pictured here with the not-yet-released D FA* 50mm F1.4.

As you may know, we will be releasing the 50mm F1.4 SDM AW this Spring, although we cannot specify the exact date. We also have the new 11-18mm F2.8 lens for APS-C, so we’re not only focusing on full-frame. We want to enlarge [the lens selection for] both formats.

What kind of customers are buying the K1/II and KP?

Especially for the K-1, customers who are looking for higher resolution in the field of landscape photography and [appreciate] our tough body construction and weather and dust resistance. Lots of customers who really use this camera in the field are very fond of the new K-1 series.

Will we ever see another Ricoh / Pentax mirrorless camera, such as the K-01?

The Pentax K-01 was a mirrorless camera that used the full-depth Pentax K-mount, allowing full compatibility with existing Pentax lenses. While image quality was great, the camera was bulky, and there were some performance and autofocus shortcomings.

Our resources for research and development are limited and we are more focused on the development of K-series bodies and lenses. That is our first priority, and why we are currently not too involved in the development of other smaller cameras.

Speaking of smaller cameras, our readers really want a GR III – is this something you’re working on?

Good question. Although we don’t know whether it will be called ‘GR III’ or not, the study for the development of the next GR is already ongoing. We cannot say when, and how exactly it will be, but the next GR will come someday.

What is your strategy for medium-format? How has the market changed since Hasselblad and Fujifilm entered at the consumer end?

Our strategy has not really changed. The 645Z is a DSLR, a reflex camera, and the advantage of a reflex camera is that what you see is what you get [through the optical viewfinder]. On top of that, the 645Z can use Live View, so it has the advantage of having both options. We think that it’s a strong point that our competitors don’t have, and we’ll continue to develop the possibilities of what we can do with reflex cameras.

We welcome competitors like Fujifilm and Hasselblad. Together with competitors, we can expand the total medium-format market

We actually welcome competitors like Fujifilm and Hasselblad. Together with competitors, we can expand the total medium-format market. People can be made more aware of medium-format’s advantages, and we believe in the superiority of medium-format compared to full-frame.

How do you think 360-degree imaging will evolve in the coming years?

In terms of resolution, we think that it’s not yet enough and should be better. The market is expanding, but still, the current user of the Theta 360 camera is more of a ‘gadget lover.’ We want to expand the customer profile from that specific type of user to more generic users.

Do you see any development in, say, the Theta’s form factor as a way to reach other users?

Ricoh’s Theta V uses the same sensors and lenses as the older Theta S, but offers improved image quality thanks to an updated processor.

This form factor is iconic for the Theta. We think it’s important. On the other hand, if there is demand, we would like flexibly to think about any other possibilities, even for other form factors.

What else are Theta users asking for?

They’re asking for better quality of stitching, and since the camera has internal memory, there have been requests to have expandable memory. In order to respond to that kind of request, we have just released a firmware that allows the Theta V to connect to external memory using the USB port.

Photographers are interested in creating pictures [using techniques] such as composition, and [with the total 360-degree image], there is no creativity from this perspective.

From a marketing point of view, I don’t think many photo enthusiasts who are reading your articles have much interest in 360 cameras like the Theta, unfortunately. That’s because with this camera, we can take an image of all 360 degrees. But photographers are interested in creating pictures [using techniques] such as composition, and [with the total 360-degree image], there is no creativity from this perspective.

But if we capture whole [360-degree] images, we can edit those images with photo applications such as Theta+. And with that application software, photo enthusiasts can [selectively] create their own images and reflect their own sensibility. So we have to do more promotion to photo enthusiasts that use various types of editing applications.

Will we see an updated APS-C flagship camera in the future?

For the flagship APS-C model, we have just started to develop that. It’ll be the successor of the K-3 II and will be an evolution of the K-3 series.

The Pentax K-3 II was released in 2015, and now that Pentax has brought the full-frame K-1 II to market, they are beginning development on the next APS-C flagship.

How did feedback from K-1 owners feed into the planning for the K-1 II?

Feedback, especially from K-1 owners, is more focused on the upgrade services.

Existing K-1 users will be able to update their cameras for a fee – will there be any functional differences remaining between the two models after this service?

Once a user upgrades the K-1 to K-1 II, there will be no difference. Perhaps some K-1 users think it’s more prestigious to have the ‘II’ on the front.


Editor’s Note:

Pentax has a reputation for building affordable, capable and rugged DSLRs, and judging from our conversation with Mr. Arai and his colleagues, it appears as though parent company Ricoh is planning on staying the course in this regard. And while the renewed focus on updating their K-Mount lens lineup is encouraging, it must be said that the continued evolution of competitors’ mirrorless camera offerings has Pentax’s DSLR-only lineup looking a little staid.

But perhaps that’s just to be expected. After all, Ricoh is a smaller camera company, and must be highly strategic in where it invests its R&D money. This prioritization is clear in the discussion of the 645Z compared to newer mirrorless options. Since the 645Z has an optical viewfinder while still offering competitive image quality, it remains appreciably distinct from Fujifilm’s and Hasselblad’s offerings. Therefore the company is choosing to narrow its development focus to a new flagship APS-C DSLR, which is likely what more users are asking for anyway.

The confirmation that a new Ricoh GR is coming is downright exciting

Thankfully though, lenses and DSLRs aren’t all that’s in the works at Ricoh-Pentax. The confirmation that a new Ricoh GR is coming – even if all we know is that it’s coming someday – is exciting. In the age of ever-more-capable smartphones whose lenses are of a similar focal length, Ricoh’s continued development of the photographer-focused GR series shows an admirable commitment to their users and fans.

Last but not least is the Theta series. Ricoh’s newest Theta V is an impressive evolution of the previous ‘S’ model, improving image quality and features through better processing and software. The company still feels it has room to grow, not only in terms of image quality, but also mass-market appeal. It’s interesting hearing the executives’ take on the creativity (or lack thereof) of using 360 cameras, and it’ll be even more interesting to see how they continue to evolve the platform and editing software to get more Thetas into the hands of more photographers, and not just ‘gadget lovers.’

Articles: Digital Photography Review (dpreview.com)

 
Comments Off on Ricoh interview: “The development of the K-series is our first priority”

Posted in Uncategorized


Aperture Versus Shutter Priority – Which Shooting Mode to Use and When

01 Feb

I too was once a beginner and I completely understand that how difficult it is to move into using Manual Mode directly from shooting Automatic. Thankfully camera manufacturers have also thoughtfully provided us with Aperture and Shutter Priority modes. These two camera shooting modes are possibly the best ways you can understand the nature and role of aperture and shutter speed.

Aperture and Shutter Priority are semi-automatic, or we can call them semi-manual camera modes. These two modes can help you get away from the fully automatic modes (P, Auto) and at the same time get you a step closer to using Manual Mode.

What is Aperture Priority Mode?

The Aperture Priority shooting mode allows you to take control of the aperture, whereas the shutter speed and ISO (if you are set on Auto-ISO) are still controlled by your camera. This means that you can adjust the amount of light entering into the camera through the lens. So using Aperture Priority you can set the aperture value as per your need and control the depth of field.

Aperture Versus Shutter Priority - Which Shooting Mode to Use and When

Unlike the automatic modes, this mode gives you the freedom to adjust the aperture value and set the amount of blur effect that you want in your photo.

When should you use the Aperture Priority Mode?

As we discussed, Aperture Priority mode allows you to control the aperture value, which ultimately affects the depth of field. This shooting mode is ideal if you wish to adjust the depth of field as per your desire, whereas leaving the shutter speed and ISO value selection up to the camera.

Situation 1: Portraits

While taking portrait or close-up shots, I am sure you would want to keep the subject in focus and blur out the background by choosing a large aperture (small aperture value). Using Aperture Priority Mode you can manually choose the required aperture value such as f/1.8 or f/2.8 to achieve a shallow depth of field.

Aperture Versus Shutter Priority - Which Shooting Mode to Use and When

Situation 2: Landscapes

While shooting landscapes or cityscapes, you might want to have both the foreground and the background very much in focus. This is only possible if you manually choose a small aperture (high aperture value). Aperture Priority Mode gives you the freedom to select desired aperture value such as f/16 or f/22 to get deep depth of field, while your camera takes care of the shutter speed and ISO value.

Situation 3: Low lighting

Suppose you are in a dim lighting condition and your photos are coming out underexposed. By increasing the size of the aperture opening (selecting a smaller aperture value like f/1.8), you can allow more light into the camera and capture a better-exposed photo. Read: 6 Tips for Getting Consistent Results Shooting in Low Light

Situation 4: Midday bright sunlight

If you are shooting in broad daylight and are getting overexposed photos while shooting in automatic mode, you can close the aperture opening. This means that by using a higher aperture number (like f/16), you can minimize the amount of light entering the camera through the lens.

Aperture Versus Shutter Priority - Which Shooting Mode to Use and When

What is Shutter Priority Mode?

As the name suggests, Shutter Priority mode allows you to take charge of the shutter speed. Just to brainstorm, shutter speed is the duration for which the camera shutter remains open for the light to enter the camera and ht the sensor. The slower the shutter speed is set on the camera, the more the light is received by the image sensor. Similarly, the faster the shutter speed the less light would hit the image sensor.

Aperture Versus Shutter Priority - Which shooting Mode to Use and When

While you are shooting in Shutter Priority mode, you have the freedom to adjust the shutter speed as per your requirement while the camera chooses the aperture and ISO value on its own.

When should you use Shutter Priority Mode?

As we just discussed, if you want to take full control of the shutter speed and experiment with your camera then this is the ideal camera mode. Let’s look at two situations when you are most likely to shoot in Shutter Priority mode.

Situation 1: Freeze a moving subject

If you want to freeze a fast moving bird, animal, or car in your photo, using Shutter Priority mode will allow you to do so by setting a fast shutter speed. A shutter speed of anything faster than 1/500th of a second is considered ideal for freezing an object, but this may vary depending on the speed of the subject. Your camera will judge the required aperture and ISO values as per the available light.

Situation 2: Showing movement

If you are out and planning to capture star trails, light trails, or blue hour photos, you would have to select a slow shutter speed so that the subject’s movement is well captured in the single photo. To capture long exposure photos, you must carry a tripod along to avoid any kind of shake.

Aperture Versus Shutter Priority - Which shooting Mode to Use and When

Situation 3: Dim lighting

If you are in dim lighting conditions you might get underexposed photos while shooting in automatic mode. By simply reducing the shutter speed (e.g. from 1/200th to 1/50th), you can allow more light into the camera and capture a well-exposed photo.

Note: Watch out for the shutter speed going too slow as to introduce camera shake into your image;

Situation 4: Broad daylight

Let’s suppose you are shooting in broad daylight and your camera is capturing overexposed photos while shooting in automatic mode. Here you can increase the shutter speed. This means that by using a faster shutter speed (e.g. from 1/200thh 1/1000th), you can minimize the amount of light entering the camera sensor.

Aperture Versus Shutter Priority - Which shooting Mode to Use and When

Conclusion

Using Aperture and Shutter Priority camera modes enables you to get familiar with how the lens’s aperture and the camera shutter works. These modes ensure that you get well-exposed photos with your desired selection of aperture value or shutter speed, unlike automatic mode (where the camera makes all the choices for you).

So if your utmost priority is to manually choose the desired aperture value in order to get a particular depth of field, then you must shoot in Aperture Priority Mode. Otherwise, if your priority is to choose a specific shutter speed to capture something creative with the available light (freeze or blur motion), then you must go with Shutter Priority camera mode.

The post Aperture Versus Shutter Priority – Which Shooting Mode to Use and When by Kunal Malhotra appeared first on Digital Photography School.


Digital Photography School

 
Comments Off on Aperture Versus Shutter Priority – Which Shooting Mode to Use and When

Posted in Photography


Getting Your Priorities Straight – A Guide to Selecting Your Shot Priority

11 Oct

A major goal when starting out in photography is to get off Auto mode and onto the semi-automatic Aperture and Shutter Priority modes. Is it daunting at first? It can be, but I promise that wrestling creative control away from your camera and into your hands is one of the first and greatest joys of digital photography.

I teach people that a deeper reason exists for the name priority mode. The obvious one is you’re prioritizing control of shutter speed or aperture and surrendering control of the other. But also, you can teach yourself to base this decision on your shot priority.

Getting Your Priorities Straight – A Guide to Selecting Your Shot Priority

Flag dancers in Liberty Square – Taipei, Taiwan. Shot priority: Freeze motion. Shutter speed: 1/500th.

This article identifies four major shot priorities: to freeze motion, to imply motion, to create a shallow depth of field, and to create a deep depth of field. The goal is to get you to ask which of these is your priority for your next shot and then to select the appropriate mode and settings to achieve that.

Shutter Priority Mode

Shutter priority mode is marked with an “S” on Nikon and Sony cameras and “Tv” on Canon mode dials. Like your eyelid, the shutter opens and closes to expose the camera sensor to light. Through selecting this mode, you can choose how long it opens.

With Shutter Priority mode, you’re prioritizing shutter speed as the crucial element for the image you want to take. Your camera will then select a corresponding aperture to create a correct exposure. It is the mode to use when your priority is either freezing motion or implying motion.

Getting Your Priorities Straight – A Guide to Selecting Your Shot Priority

Traditional dance performance at Haemi Fortress, South Korea. Priority: Freeze motion. Shutter speed: 1/1000.

Priority #1 – To freeze motion

Much of the time when shooting, you require sharp images in crisp focus. Shutter speed is the most critical factor affecting image sharpness; however, requiring image sharpness isn’t a fully-fledged shot priority. Here, we’re talking about freezing fast motion.

Select this mode to freeze action in sports fast-moving water in landscapes, and other fast motion. For example, a runner could be frozen with a shutter speed of 1/500th of a second, whereas motorsports might require 1/2000th or faster.

Getting Your Priorities Straight – A Guide to Selecting Your Shot Priority

For this image of flag dancers in Taipei’s Liberty Square, I selected a shutter speed of 1/800th to freeze the motion. As well as freezing the dancer, the fast shutter speed also froze the flag and ensured the writing was crisp and legible.

Getting Your Priorities Straight – A Guide to Selecting Your Shot Priority

At the ghats by the River Ganges in Varanasi, India’s holiest city, I saw a procession of ladies heading downstairs and a cow heading up towards them. The animal looked ready to charge at them! I had just been shooting a game of cricket so my camera was already set to 1/1000th in Shutter Priority mode. I began shooting as the cow charged at the last two women before veering away. The cow and the women’s facial expressions were frozen, preserving a fleeting moment.

Priority #2 – To imply motion

Using Shutter Priority mode, implying motion is a beautiful effect that you can easily apply to your images. Everything from slight motion blurs to light trails to dreamy water effects are possible with a variety of moving subjects.

Imagine that you’re shooting handheld street photography and you chance upon a pair of dancing street performers. You decide you want people viewing your images later to be able to get a sense of the action, so choose to imply motion as your shot priority. Because a shutter speed of 1/500th would freeze the performers, you could try 1/250th and work down from there until the desired motion blur is achieved.

Getting Your Priorities Straight – A Guide to Selecting Your Shot Priority

While working as a tour photographer in South Korea, I was tasked with capturing tourists prepare green tea leaves. To imply motion, I took a sample shot at 1/50th and then worked down until I achieved this blur. This image was 0.4 seconds – admittedly pushing the acceptable limits of handheld photography – but thanks to my lens’s image stabilization and steady hands, I ended up with this interesting shot.

Now imagine you’re on the rooftop of a tall building at nighttime and you have a tripod. Because of the added stability a tripod allows, you can open up your shutter for significantly longer. Through selecting the right settings, you can achieve crisp backgrounds, blurred subjects, and light trails that build on top of each other.

Getting Your Priorities Straight – A Guide to Selecting Your Shot Priority

A nighttime cityscape of Seoul’s Han River and Namsan Tower featuring blurred white and red light trails. I used a shutter speed of 15 seconds to allow the light from numerous cars to reach my sensor, accumulating into long streaks of light in the final image. No golden rule exists for the number of seconds, so just enjoy experimenting.

Aperture Priority Mode

Aperture Priority mode is marked with an “A” on Nikon and Sony cameras and “Av” on Canon dials. Like an iris in a human eye, aperture represents the hole that opens to expose the camera sensor to light. Through selecting this mode, you can choose how wide or narrow to open the aperture. The lower the f-number, the wider the hole. Controlling aperture is mainly used to affect what is known as depth of field.

You’ve seen portraits where the subject is in crisp focus but the background is beautifully blurry; this is called a shallow depth of field. Also, you’ve seen fantastic landscapes that are in sharp focus throughout the image from front to back; this is a deep depth of field.

Through selecting Aperture Priority mode, you’re marking aperture as the crucial element for the image you want to take. Your camera will then select a corresponding shutter speed to create a correct exposure. It is the mode to use when your priorities are creating either a deep or shallow depth of field.

Getting Your Priorities Straight – A Guide to Selecting Your Shot Priority

Stall owner at the Mother’s Market in Imphal – Manipur, India. Priority: Shallow depth of field. Aperture selected: f/2.0.

Priority #3 – To create a shallow depth of field

As a travel photographer specializing in portraits, creating a shallow depth of field is often my priority. This allows me to have my photo subject (i.e., a person’s face, and more specifically their eyes) in crisp focus, while the background melts away in a dreamlike blur. To achieve this effect, you want to select a low aperture value.

If you’re shooting with a kit lens, the lowest value available to you might be f/3.5. However, with a fixed focal length lens (prime), this will be lower, making this type of lens perfect for portrait photography. Let’s take a look at the two example images below.

Getting Your Priorities Straight – A Guide to Selecting Your Shot Priority

A Hindu lady showing her devotion during the Ganga Aarti ceremony – Varansi, India. When I’m out meeting people and taking portraits, I make sure my Sigma 35mm 1.4 Art lens is on my camera body. The aperture selected for this shot was f/1.4, ensuring a beautifully blurry background.

Getting Your Priorities Straight – A Guide to Selecting Your Shot Priority

A resident of Houtong Cat Village – Northern Taiwan. Aperture selected: f/2.8. This is a great example of shallow depth of field. The front of the cat’s paws are blurred and so is the back of its body. There is just a thin focal plane in sharp focus. The lower the aperture value selected, the thinner this slice of the focal plane becomes. For this shot, I spot focused on the cat’s left eye, ensuring that this was the sharpest spot of the image.

Priority #4 – To create a deep depth of field

By contrast, a deep depth of field enables front to back sharpness throughout an image, making it the shot priority to select for landscape photos. If the lowest aperture values provide the thinnest focal planes and the blurriest backgrounds, then surely the highest aperture values provide the best landscape settings, right? Wrong. Your lens may be capable of f/22 but please don’t select it.

The highest aperture values can create image distortion. I recommend not going above f/16 for landscape photography with a tripod, and not going above f/11 handheld. A solid choice for handheld landscapes is actually f/8 because it provides a mid to deep depth of field while enabling a lower ISO and faster shutter speed for a sharper image.

Getting Your Priorities Straight – A Guide to Selecting Your Shot Priority

Beautiful Itsukushima Shrine at Miyajima, one of “The Three Views of Japan” – Hiroshima Prefecture. A higher aperture value creates a narrower hole through which light reaches your sensor. A deep depth of field is one of the main effects, which in landscape photos creates front to back sharpness. For this image, I selected an aperture of f/7.1 and spot focused on the pool of water in the foreground.

Getting Your Priorities Straight – A Guide to Selecting Your Shot Priority

On the road to “Zero Point”, the end of the road heading north in the Sikkimese Himalayas, and looking back toward Yumthang Valley – Sikkim, India. This is a simple handheld landscape shot, for which I selected f/8 because my shot priority was a deep depth of field.

Conclusion

Remember these four major shot priorities and put them into practice using the Aperture and Shutter priority modes. Don’t forget to share your work and comments below.

The post Getting Your Priorities Straight – A Guide to Selecting Your Shot Priority by Ben McKechnie appeared first on Digital Photography School.


Digital Photography School

 
Comments Off on Getting Your Priorities Straight – A Guide to Selecting Your Shot Priority

Posted in Photography


Lush Life: 12 Verdant Architecture Projects Making Plants a Main Priority

26 Sep

[ By SA Rogers in Architecture & Houses & Residential. ]

Not all architecture incorporating lots of living greenery is doomed to remain an unrealistic rendering, depicting buildings that can’t structurally support the weight of all the soil and water needed to keep full-sized trees alive. Architect Thomas Heatherwick built ultra-strong concrete pillars into his 1000 Trees design, for example. Other buildings take a subtler approach, choosing ivy, potted plants or existing trees rooted in the ground. All of these projects attempt to meld urban architecture with lush gardens in the hopes of cleansing the air, storing CO2 to mitigate climate change and providing enhanced access to green spaces in cities.

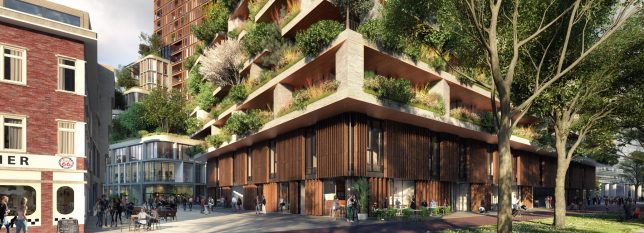
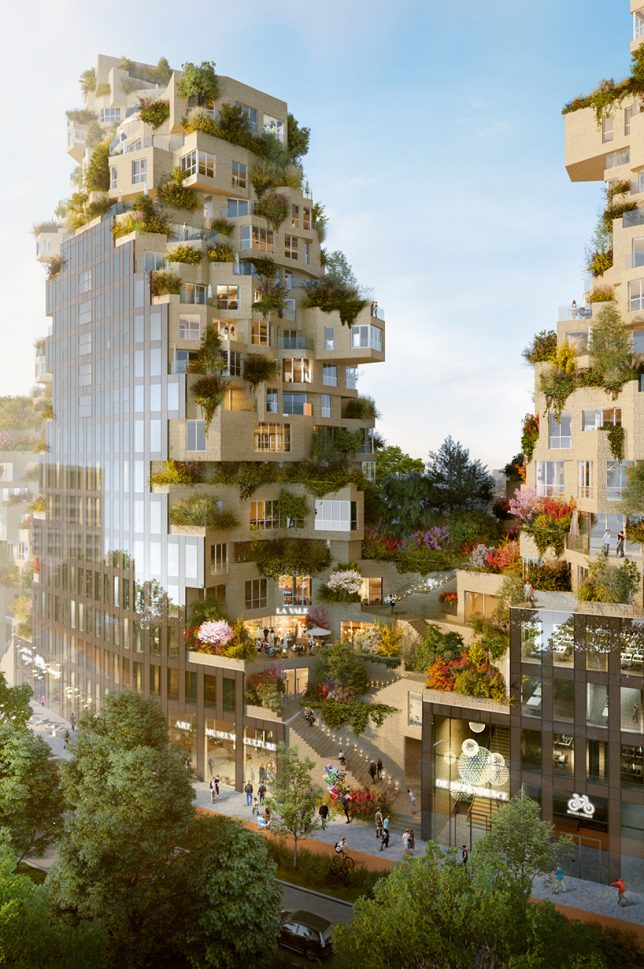
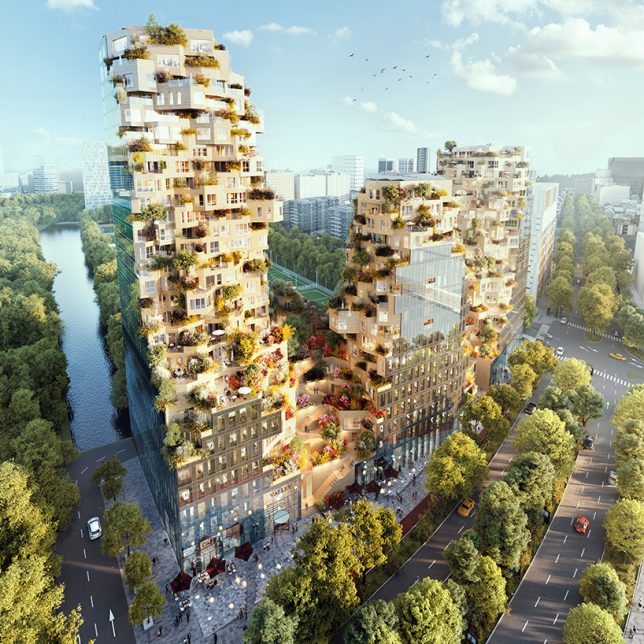
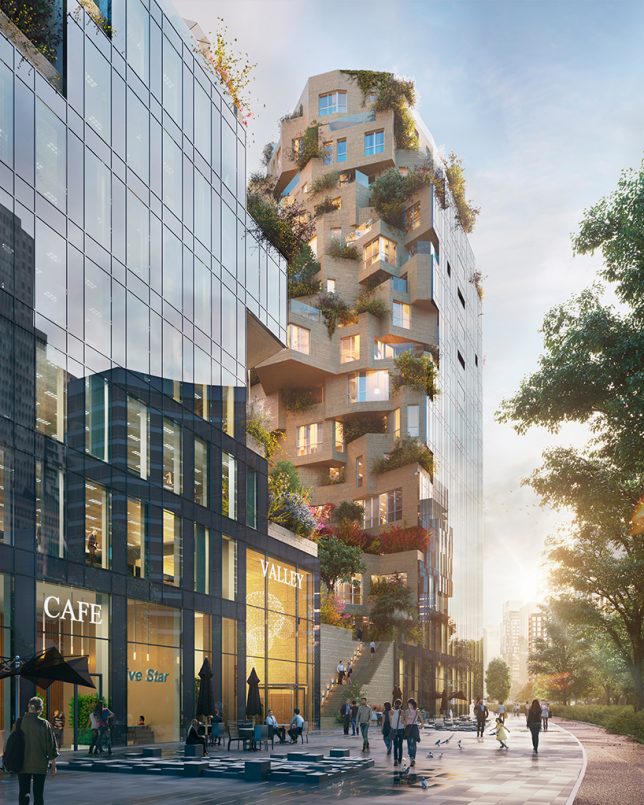
Valley: Green-Terraced Towers by MVRDV in Amsterdam, The Netherlands

Construction began in August 2017 on MVRDV’s ambitious ‘Valley,’ a mixed-use complex of green-terraced towers in Amsterdam’s central business district. ‘Valley’ is notable not only for its unusual offset stacking of volumes , creating an irregular shape, but also for all the greenery it supports. The towers include 196 apartments, 7 stories of offices, shops, restaurants, cultural facilities and a three-story parking lot.

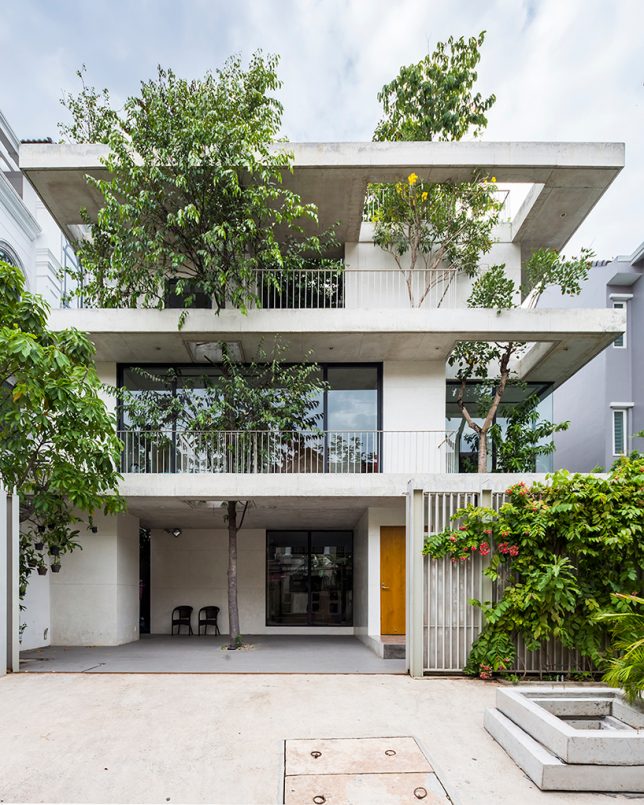
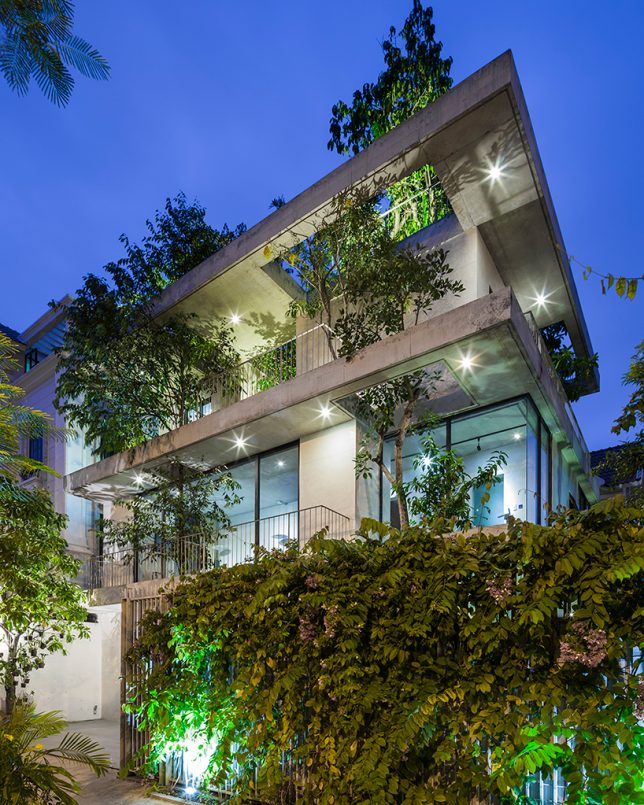
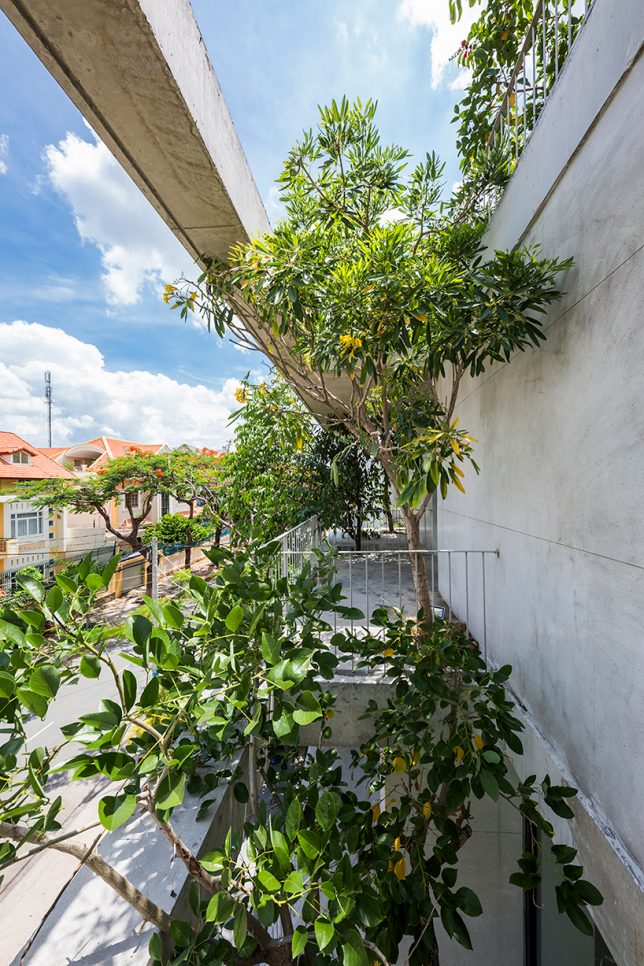
House for Trees by VTN Architects in Ho Chi Minh, Vietnam

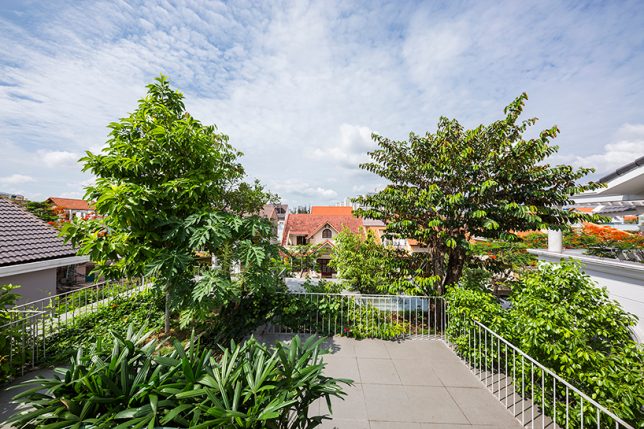
VTN Architects approached ‘House for Trees’ as a way to alleviate the lack of access to green spaces as well as poor air quality found in big cities like Ho Chi Minh. This residential project incorporates trees into its design, envisioned by the firm as a “small park in a dense neighborhood.” The trees are set into deep planter boxes disguised among the concrete volumes of the house, with cut-outs allowing their crowns to rise as high as they like.

Nautilus Eco Resort by Vincent Callebaut in the Philippines

The Nautilus Eco Resort by Vincent Callebaut is designed as a ‘zero emissions, zero waste, zero poverty’ development for the Philippines in response to environmental and social problems in the country, like overfishing, pollution and mass tourism. The project would be built from reused or recycled materials, self-sufficient in producing its own energy and food, and engage volunteer ecotourists in cleaning up plastic waste that washes up onto the area’s beaches. It consists of a series of shell-shaped hotels and apartment towers spiraling around a central island housing a nautical center and scientific research laboratories. The plant walls cool the buildings as they grow food.

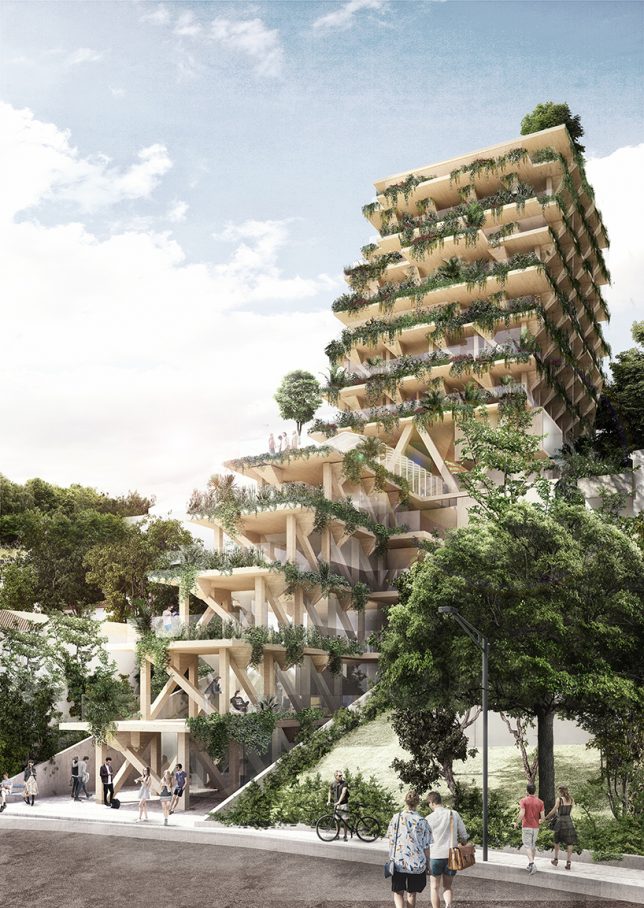
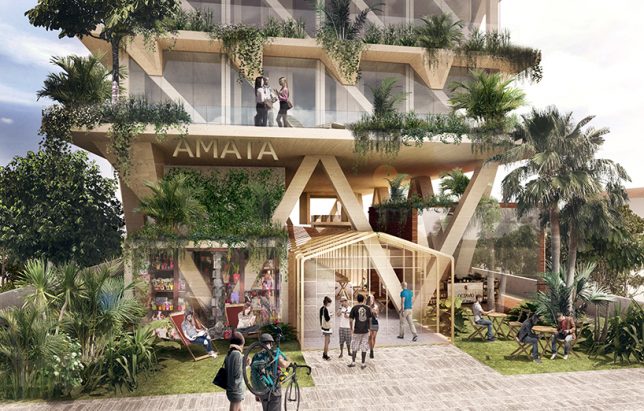
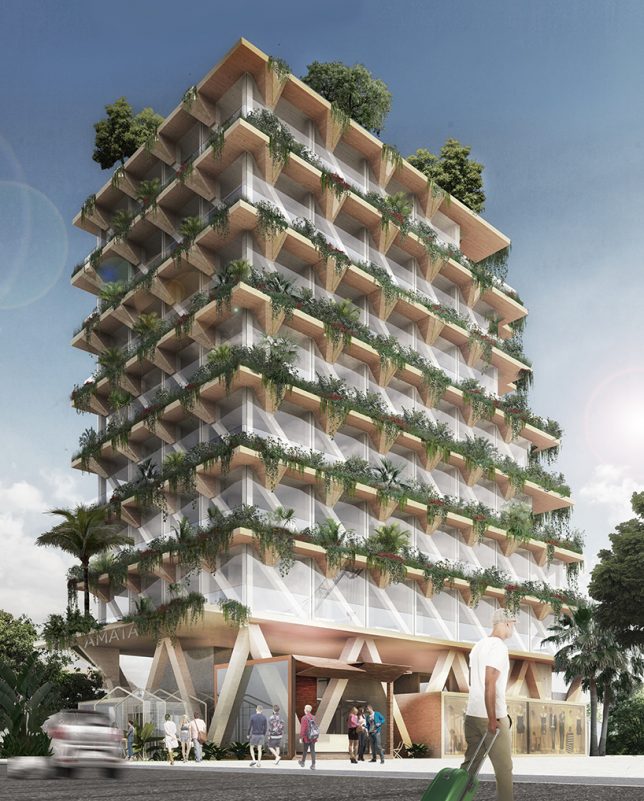
Amata + Triptyque Timber Building in São Paulo, Brazil

Constructed entirely from Brazilian timber, this building is a collaboration between architecture studio Triptyque and forest management company Amata. The building aims to be a giant carbon sink, contributing towards the fight against climate change. Each square meter of wood is capable of absorbing a metric ton of carbon dioxide from the environment. The 13-story building contains co-working, co-living and dining spaces, the edges of its terraces dripping with living plants.

Next Page – Click Below to Read More:
Lush Life 12 Verdant Architecture Projects Making Plants A Main Priority

Share on Facebook


[ By SA Rogers in Architecture & Houses & Residential. ]

[ WebUrbanist | Archives | Galleries | Privacy | TOS ]


WebUrbanist

 
Comments Off on Lush Life: 12 Verdant Architecture Projects Making Plants a Main Priority

Posted in Creativity


Adobe officially admits speeding up Lightroom is ‘top priority’

12 Jul

Spend any time chatting with fellow photographers about Adobe Lightroom and you’re bound to hear about performance issues. It’s one of the most common and widespread complaints: even with tons of RAM, a great graphics card, and a powerful CPU, many computers still struggle to keep Lightroom running smoothly.

Until now, Adobe itself has stayed pretty much silent on the matter, but in a post on the company’s Lightroom Journal blog, they finally fessed up and are asking for your help.

“I would like to address concerns recently voiced by our community of customers around Lightroom performance,” writes Tom Hogarty, photo product management at Adobe, “as improving performance is our current top priority.”

The post goes on by stating that Adobe already understands many of the worst “pain points” and are “investing heavily” in improving those areas. “Over the past year we’ve added numerous enhancements to address your performance concerns,” says Hogarty, “but we understand we will have a lot of work to do to meet your expectations.”

And speaking of expectations, this is where you come in. Adobe wants to work with customers to identify the most important and bothersome workflow and performance issues that need fixing. So if you’re frustrated by the slow plodding pace of Lightroom and you want to be part of the solution, you can gripe about issues general and specific by filling out this survey.

Articles: Digital Photography Review (dpreview.com)

 
Comments Off on Adobe officially admits speeding up Lightroom is ‘top priority’

Posted in Uncategorized


Why Aperture Priority Mode Isn’t Always the Best Choice

03 Jul

There are a lot of common mistakes to make in photography, but possibly the most frequent is to shoot in Aperture Priority mode when it’s not the best choice.

There are many situations where shooting in Aperture Priority is ideal, such as when you are using a tripod and your shutter speed does not matter, when you are in strong sunlight, when you are shooting a scene with a wide-angle lens and nothing is moving, or when you want a very shallow depth of field for aesthetic purposes.

However, in most other situations it is beneficial to shoot in Shutter Priority mode (or manual mode).

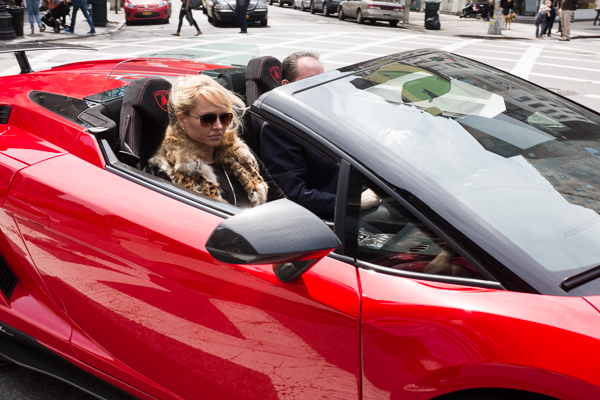
Lamborghini, SoHo

Lamborghini, SoHo – Shutter Speed priority can be much more effective for Street Photography, where spontaneous shots occur frequently, and freezing motion is very important.

I see this problem most often when people are traveling. They will stick their camera on Aperture Priority for the entire day, forgetting that the light sometimes will not be strong enough to yield a shutter speed fast enough to offset camera shake or to freeze moving subjects, particularly if their lens aperture does not go below f/4 or f/3.5.

The result is that they will come home and many of their images will be blurry, when they didn’t have to be.

Your shutter speed is the first line of defense for creating a sharp image. The rule of thumb is that the shutter speed should be at least one over the focal length of the lens to offset handheld camera shake. I like to add a little extra speed to that to be safe, so if you are shooting at 50mm on a full frame camera, I would keep the shutter speed at least at 1/80th. On a cropped sensor however, such as an APS-C camera, a 50mm might be the equivalent of an 80mm view, so I would shoot at least at 1/100th of a second.

You can see, especially if you are using a telephoto focal length, how quickly and easily your shutter speed can go below this threshold when on Aperture Priority and not in strong, direct light.

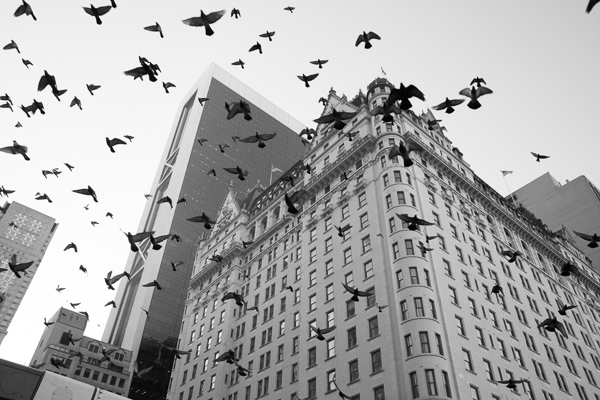
Plaza Hotel

The Birds and Plaza Hotel. A spontaneous shot on Shutter Priority at 1/500th and ISO 800.  On Aperture Priority there is a much stronger chance that I would have yielded too slow of a shutter speed, especially since it was overcast and late in the day.

When there are moving subjects in a scene such as people, 1/320th or 1/250th is often a good shutter speed to freeze their motion. So when traveling, I use 1/320th as my baseline shutter speed and will lower it for the situations where there is no motion or when the light is extremely low. This guarantees that no matter what I capture, it will be sharp, including the spontaneous moments. Often, because I shoot this way and prefer to also shoot with an aperture of f/8 or above, I will raise the ISO to 800, 1600, or even 3200 in areas with very low light. This will add more grain/noise to the image, but especially on the newer digital cameras you will quickly notice that the technical quality and sharpness of your images will actually be improved, despite this grain.

Now you might be saying that you are able to shoot in Aperture Priority mode (or Manual mode) all of the time and can pay attention to the corresponding shutter speeds so you never have a problem. That’s great, and in that case, please keep shooting in Aperture Priority. I do not want to stop you from shooting in a way that works well for you. If you know your camera settings well then you can effectively shoot in any situation with any of these modes.

However, I teach a good amount of students and I would guess that about 80 percent of them come in shooting in Aperture Priority. Then, when I look at their photos, for a good portion of these students, way too many of their photos turn out blurry, or have some sharpness issues. They will pay attention to their aperture but then zoom for a shot and not notice that the shutter speed is lower than their focal length, or not notice that is too low to freeze the motion of a subject. I find that switching them over to Shutter Priority for these situations puts the shutter speed in their mind first and then they can pay attention to the corresponding aperture to achieve the largest depth of field possible (if you are purposely looking to create a shot with a shallow depth of field, then Aperture Priority would be ideal.)

Particularly for travel photography in cities or in areas with people, often when I explain to students to try photographing around 1/320th of a second and a higher ISO, they quickly remark about how much sharper their photos become.

Give it a try and see if yours do too.

The post Why Aperture Priority Mode Isn’t Always the Best Choice by James Maher appeared first on Digital Photography School.


Digital Photography School

 
Comments Off on Why Aperture Priority Mode Isn’t Always the Best Choice

Posted in Photography


Getting off Auto – Manual, Aperture and Shutter Priority modes explained

04 Apr

Macro image of a digital camera's controls set on autoYou may have heard that once you get a DSLR you need to learn to shoot in manual and only ever use that mode. That if you are using the Aperture or Shutter Priority you’re cheating and if you want to be more like a pro you have to shoot in Manual only, all the time. To that I say “horse pucky”! (if you’re old enough to remember M.A.S.H. you’ll get that reference).

What you’ll learn from this article:

  • what each of the A (Av), S (Tv) and M modes are, a definition of each
  • what types of situations I would choose each of them and why
  • some advantages of A (Av) and S (Tv) over manual
  • some advantages of Manual and when it’s the only choice
  • some things to look out for

The three manual shooting modes what are they?

  1. Manual mode: this mode puts you in full control of the three settings on your camera that control the exposure (commonly known as the exposure triangle).  ISO, aperture and shutter speed. In manual you will be making all of those choices.
  2. Aperture priority:  (A on Nikon, Av on Canon) this mode has you in control of two of the three exposure controls:  ISO and aperture.  The camera will select an appropriate shutter speed to give you a correct exposure.
  3. Shutter priority: (S on Nikon, Tv on Canon) this mode once again puts you in control of two of the three exposure settings, this time it is ISO and shutter speed.  The camera will select the aperture for a correct exposure.

There are of course other factors involved that will affect the exposure such as what Metering Mode you’re using and Exposure Compensation. More on the latter later.

Shot in Aperture mode to control Depth of Field

Shot in Aperture mode to control Depth of Field

How do you decide which mode to use?

I actually use the Aperture and Shutter priority modes more often than I use Manual. How I decide which mode to use is based on my subject matter and what is my goal of the image as follows:

  • I choose Aperture Mode when I want to control depth of field (DoF) as my top priority.  Such as to create shallow DoF for a portrait, people photos, or any time I want a blurred background (choose a large aperture like f2.8 or f1.8). That also applies if I want a larger DoF as well such as for a landscape photo, group portraits, or shots where I want maximum detail and sharpness (choose a smaller aperture like f11 or smaller)
  • I choose Shutter Mode when my top priority is controlling motion, either freezing or blurry it. So freezing for subjects like sports or action and I will choose a faster shutter speed such as 1/500th or faster depending on the subject. Subjects like flowing water, waterfalls, or panning a moving subject I will select a slower shutter speed like 1/15th for panning and 2-5 seconds for flowing water. (for more on this topic read my article Using Shutter Speed to Freeze or Blur Motion)
  • I switch to Manual Mode in a few specific instances: doing a portrait where the subject is not moving; night photography; pretty much any time I’m using a tripod; doing HDR bracketed exposures (even though my camera does 7 on AEB I still use Manual when on tripod); when using studio lighting; certain times when using a speedlight (such as working in a dark room and I want to maintain some ambient light levels)

Here’s some example images taken with each of the modes as explained above.

Shot in Aperture mode to control Depth of Field

Shot in Aperture mode to control Depth of Field

Shot using Shutter Priority to use a panning technique and slow shutter speed

Shot using Shutter Priority to use a panning technique and slow shutter speed

Shot in manual mode for night photography challenges

Shot in manual mode for night photography challenges

Things to watch out for and keep in mind

ISO: remember that when you select either A or S mode you are still choosing the ISO
I usually select my ISO first, based on the lighting conditions I’m shooting in.  If it’s bright sunlight I go to 100 or 200.  If it’s subdued light, shade or overcast I might bump it up to 400. For indoors or dimly lit rooms I may go to 800 or higher up to 3200 if necessary (you need to test to know the upper limits of your ISO and where you’re comfortable shooting with your camera, mine will yield pretty decent results even at 6400 and beyond).How I know I’ve gone high enough with the ISO, is if I have a fast enough shutter speed to eliminate camera shake when hand holding.  If I’m on a tripod, I’m usually shooting a ISO 100 or 200 because I can use any shutter speed safely.

Check your shutter speed when in A mode
Just because the camera is picking the shutter speed does not mean it will give you a nice sharp image. Yes it will choose a shutter speed to give you the correct exposure, but if you set up your camera for ISO 100 at f16 in dark room you’ll wind up with a pretty slow shutter speed like 1/2 of a second perhaps, and without a tripod you’ll get blur from camera shake.So keep your eye on the shutter speed the camera is picking and if it is too slow (I suggest you follow the 1/focal length rule for minimum shutter speed – for more on getting sharp images read my article 5 tips for Getting Sharper Images) readjust the ISO, the aperture or both – picking a higher ISO will help, so will choosing a larger aperture like f4 as that will let the camera pick a faster corresponding shutter speed.

Multiple bracketed exposures using Manual for HDR processing

Multiple bracketed exposures using Manual for HDR processing taken during my Drumheller Workshop

Watch for exposure warning notices in A or S modes
Your camera is pretty smart but it can only work within its own limitations. So it will tell you if you’ve gone outside that boundaries of what it can adjust for you.  This will show up as a flashing warning in your viewfinder. I’ll give you an example for both Aperture and Shutter modes.

Scenario #1 in Aperture mode if you choose say ISO 800, F1.8 on a bright sunny day the camera will tell you there is simply too much light and give you a flashing shutter speed (your fastest) like 1/4000th of a second.  If you take the photo it will be overexposed which is what the camera is warning you above.  Choose a lower ISO or smaller aperture and try again until the warning is gone.

Scenario #2 in shutter mode in a darkened room with settings of ISO 400 and 1/1000th of a second you will likely get a flashing aperture shown in your viewfinder (the largest your lens goes to such as f3.5 or f5.6).  To correct this you need to choose a slower shutter speed and likely a larger ISO as well until that warning disappears.Side note: this is why kit lenses with a maximum aperture zoomed in of f5.6 become somewhat limiting. Grab yourself a simple 50mm f1.8 for low light conditions, it’s an inexpensive great lens to have in your bag

Painting with Light during night photography on my Drumheller workshop

Painting with Light during night photography on my Drumheller workshop

Exposure compensation in Manual
There is often confusion among students about using Exposure Compensation when in Manual mode.  This behaves differently depending in the camera you have, in Canons for example it just doesn’t apply, as it is has no affect. When using a Nikon if you shift the Exposure Compensation to say +2 what it does it adjusts the scale you see in your viewfinder to reflect that so if you then set the exposure to match the “0″ mark it will give you a +2 exposure. I’d personally find that even more confusing, so if you want +2 just set your exposure in Manual so that it shows +2 on the scale.

Summary

Steps I use are these:  

  1. choose ISO first
  2. decide whether motion or depth of field are most important and choose my shooting mode
  3. set my shutter speed or aperture for the results I want
  4. check for warnings and slow shutter speeds
  5. review image and correct as necessary

Tell me what you do and if you find this information helpful.

Post originally from: Digital Photography Tips.

Check out our more Photography Tips at Photography Tips for Beginners, Portrait Photography Tips and Wedding Photography Tips.

Getting off Auto – Manual, Aperture and Shutter Priority modes explained


Digital Photography School

 
Comments Off on Getting off Auto – Manual, Aperture and Shutter Priority modes explained

Posted in Photography


Digital Photography – Photographing Outdoor Sports Part 2 Shutter Priority

19 Dec

blog.jaredpolin.com Here in part 2 I go into detail on using Shutter Priority for shooting sports outdoors. What is it, what are the benefits of using it and how it works. Make sure you watch the very end for a sneak peek of shooting better hockey pictures. Shot with the NIKON D3S