RSS
 

Posts Tagged ‘preparing’

Tips for Preparing for a Portrait Session

21 Sep

A portrait session can be a nerve-racking event. There’s so much to remember and prepare before the actual press of the shutter button. It takes a lot of prep work. People don’t always realize what goes into being ready.

Even if you’re an amateur taking pics of your family and friends, there are some important steps to take if you want to capture some really beautiful images. Here are some tips to help you out.

Tips for Preparing for a Portrait Session - girl jumping into the water

In some cases, planning for a shoot is really simple. In this case, we took the kids to the beach at sunset to shoot some pics we could share on social media.

Logistics and Planning

This is the part where you discuss the portrait session with your friends or clients. You need to pick a date, location, and a time. You should also discuss backup dates in case the original plan doesn’t work.

If you’re shooting professionally, you need to get the contract signed, collect a deposit and ensure that clients know under which circumstances their deposit (retainer) is refundable.

Image Sharing

If you are taking family pics at a reunion and you intend to share these photos with everyone, consider setting up an online photo album you can send to everyone. It’s much easier to share the pics this way.

Make sure you have everyone’s email so that they can all download the images afterward. It’s a huge pain to email people separately. You’re taking the pictures to stay in control and don’t overwork yourself sending them to everyone. They can take some of the responsibility.

If there are older family members, consider printing out a set of instructions they can use for accessing and downloading the images. I’ve run into that issue before and found myself driving an hour to click download on someone’s computer.

kids running in the water - Tips for Preparing for a Portrait Session

Another from the sunset shoot of informal family pics.

The Style and Portrait Session Design

It’s also a good idea to discuss the type of look and feel you want to create in the portrait session. If you’re working professionally, this is really important. Make sure you and the clients are on the same page.

Do they want relaxed, candid images or do they prefer something more formal? Clothing can affect the look of a photo shoot so be sure to discuss attire. If you’re snapping pics at a family event, you probably won’t have much control over the look of the images unless you plan and get everyone on board.

I’ve seen families choose themes like “Old West” for a fun afternoon of photos. At some reunions, I’ve seen groups create a t-shirt they all wear to commemorate the pics.

A friend of mine set up a photo booth at a Christmas party. Everyone was asked to bring one piece of “bling” for their photo. When paired with the props and the background she created, it was a ton of fun.

portrait of a boy by a tree - Tips for Preparing for a Portrait Session

In this case, I was working with a family. Prior to the shoot, I visited the home and we discussed possible locations.

Location Matters

The chosen location can also affect the look and feel of a shoot. Consider a big comfy couch in a brightly lit room versus wooden dining room chairs on a studio backdrop. The background can considerably change the feel of an image so plan carefully.

Props

Collect some props for the portrait session. If you’re working with really young people like toddlers, it is really helpful to have things to distract the kids. Teenagers love goofy items they can hold and use for posing.

If you’re working with your own kids, it can be a huge battle to get them to cooperate. I find other people’s kids far more flexible, but if I want to photograph my kids, it’s a huge ordeal.

So think about styling the shoot in such a way that your little ones will cooperate. This might mean including their favorite toy is in the image. That’s okay! Go with it because it’s far better to get a positive, happy image than a forced angry looking smile.

Tips for Preparing for a Portrait Session - 3 ladies smiling and laughing

This was another paid session. The family had gathered for a 50th-anniversary celebration. They were dressed semi-formal for the occasion.

Be Informed and Plan Ahead

Make sure you do your research. Know the area in which you are going to be shooting. It’s helpful to visit the site before the shoot so you can be familiar with all the little nooks and crannies.

Plan your route to the photo shoot if you can’t visit before the big day. Download offline instructions to your phone in case you lose your connection. It’s happened to me once that I lost the signal and drove around for ages before I could find the location.

Get Permits if Needed

Double check to be sure you don’t need a permit for shooting at a specific location. Some places require you to buy a permit. So don’t get caught without one.

I know of a family that planned to do photos in the Distillery District here in Toronto only to learn they could not photograph each other when they were halfway through the shoot. I’ve also seen a family get in a lot of trouble for trespassing on private land. All they wanted to do was take a family pic for their Facebook profiles.

So double check that you can visit and use the site you want for the session. If you’re shooting professionally, permits and property releases are a must so be sure to take care of the entire nitty gritty well before the day of the shoot.

Backup Plans are Essential

Have a Plan B. Always! Have an alternative plan at the ready. You never know what may go wrong. Have a family member bring an extra camera (or rent or borrow one) in case yours breaks. Choose an alternate site if the first won’t work.

Just be prepared. The reality is that when things go wrong, they usually go horribly wrong. So try to plan for every possible road bump in advance.

girls in the snow doing a selfie - Tips for Preparing for a Portraits Session

This shoot was planned for months. Friends were happy to join me for a day of photographs in the winter.

Day of the Portrait Session

Always make a checklist of items that you can use to help you pack up and be ready for the photoshoot. It’s really frustrating to leave equipment at home.

Arrive early! This should go without saying. You don’t want to make people wait.

Check the weather forecast and make sure you can contact people in case of emergencies. Get contact numbers from folks.

Be prepared to have fun! Just before everyone arrives or your clients show up at the studio make sure you’ve relaxed a little. I know some photographers who take 5 minutes to have a coffee before shooting. Others will sit and meditate for a few minutes beforehand.

Whatever works for you, just make sure you are confident and enthusiastic before you begin shooting. Your nerves will affect the quality of your work so don’t let them control you.

Conclusion

Photography is so much more than picking up a camera. To take memorable images, you need to put in some effort and plan out the event. So think carefully about the shoot and make sure you have everything ready.

If you are prepared and relaxed you will enjoy the event more, and so will those you are photographing!

girl blowing snow off her hand - Tips for Preparing for a Portraits Session

We wanted to create some of those images where you make snow dust. Of course, there was just too much white space around our chosen location. So sometimes your plans won’t work.

Tips for Preparing for a Portraits Session

We tried a lot of different locations.

Tips for Preparing for a Portraits Session

Eventually, we chose to shoot portraits that were much different from our initial plans.

Finally, make sure you share with us some of the ways you prepare for a photography session. Let’s get a good base of tips together we can use to our benefit.

The post Tips for Preparing for a Portrait Session appeared first on Digital Photography School.


Digital Photography School

 
Comments Off on Tips for Preparing for a Portrait Session

Posted in Photography


Leaked: Sigma preparing to release 14-24mm F2.8 DG HSM Art lens

09 Feb

$ (document).ready(function() { SampleGalleryV2({“containerId”:”embeddedSampleGallery_5721547623″,”galleryId”:”5721547623″,”isEmbeddedWidget”:true,”selectedImageIndex”:0,”isMobile”:false}) });

Earlier today, Sigma sprang a pretty major leak ahead of the CP+ show in Japan. According to leaked images from Nokishita, Sigma is planning to add a 14-24mm F2.8 DG HSM Art lens to its ultra-wide angle lineup very soon. In fact, it looks like Nokishita got their hands on all of Sigma’s standard product shots.

You can scroll through them above, and see some rumored specifications below:

  • Mount: Canon, Nikon, Sigma
  • Lens construction: 17 elements in 11 groups
  • Number of diaphragm blades: 9 (circular aperture)
  • Maximum photographing magnification: 1: 5.4
  • Size (Sigma mount): ? 96.4mm x 135.1mm
  • Weight (Sigma mount): 1,150g

Of course, this isn’t the Sigma 70-200mm that’s been rumored (and hoped for) since before the Photo Plus Expo, but it does make for an impressive lineup of ultra-wides in the much-beloved Sigma Art series.

If previous experience is anything to judge by, Nokishita’s product photo leaks usually come just days (sometimes less than 24 hours) before an official announcement, so we’re expecting this lens to make landfall very soon.

Articles: Digital Photography Review (dpreview.com)

 
Comments Off on Leaked: Sigma preparing to release 14-24mm F2.8 DG HSM Art lens

Posted in Uncategorized


*Updated* Adobe is preparing a major Lightroom Classic performance update, and we got to try it

30 Jan

This article has been updated to include results from a 2015 quad-core Apple MacBook Pro.

Adobe Lightroom Classic users have been pining for a serious performance update for ages—even Adobe admitted that Lightroom performance was lackluster, and improving it was ‘top priority.’ Well, it looks like ‘top priority’ is going to pay off very soon.

Late last week, Adobe told DPReview that it has a significant Lightroom Classic performance update in the works. The update—which is “coming soon”—is supposed to improve performance across the board for anybody using a multi-core machine with at least 12GB of RAM. Or, in Adobe’s own words:

In this upcoming Lightroom Classic 7.2 release, we were able to make significant strides with our partners at Intel on addressing key performance issues. We have optimized CPU and memory usage so that performance will scale better across multiple cores on computers with at least 12 GB of RAM.

Adobe claims the update will result in:

  • Faster import and preview generation
  • Faster walking of images in the Loupe View
  • Faster rendering of adjustments in Develop
  • Faster batch merge operations of HDR/Panos
  • Faster export

The company’s own benchmarks back up this claim in a big way. Adobe shared these results with DPReview, revealing substantially improved export times between the current v7.1 and the upcoming v7.2.

Adobe Export Test

Adobe tested the new build on three machines:

  1. A 10-core iMac Pro with 32GB of 2666MHz DDR4 RAM, a 3GHz Intel Xeon W processor, AMD Radeon Pro Vega 64 graphics card with 16GB of RAM.
  2. An 8-core Windows 10 PC with 64GB of 2400MHz DDR4 RAM, a 3.2GHz Intel Xeon E5-1660 processor, and an Nvidia GeForce GTX 1080 graphics card with 8GB of RAM.
  3. A 10-core Windows 10 PC with 64GB of 2400MHz DDR4 RAM, a 2.9GHz Intel Core i9 7960X processor, and an Nvidia Quodro P2000 graphics card

Each of the three showed significant speed improvements when exporting 100 heavily edited Raw files as either full-resolution JPEGs or full-resolution DNGs:

  • The 10-core iMac Pro exported JPEGs 29.5% faster and DNGs 43.7% faster
  • The 8-core Windows 10 PC exported JPEGs 32.5% faster and DNGs 32.4% faster
  • The 10-core Windows 10 PC exported JPEGs 48.3% faster and DNGs 64.7% faster

Additionally, while subsequent tests of the current version got slower and slower on the Windows, version 7.2 fixes this problem. In other words: Lightroom Classic will no longer slow down over the course of a long editing session on Windows machines.


Our own tests also showed a noticeable speed boost when it came to exporting files, and a massive increase in performance on import. Adobe gave us early access to the new build, and we tested it alongside the current version of Lightroom Classic CC twice. We ran an initial export test on a 2016 13-inch MacBook Pro, with 16GB Ram and a 3.3GHz dual-core i7 processor running macOS 10.12.6, and found a modest but still significant speed improvement of around 11%.

After speaking to Adobe’s technical experts, we then conducted a follow-up import and export test on a Mid-2015 15-inch MacBook Pro. Specifically, a Retina model with a 2.2GHz quad-core Intel Core i7, 16GB of RAM, and Intel Iris 5200 Pro graphics card. It’s not exactly in the same class as the 8+ core powerhouses that Adobe seems to have lying around, but it’s arguably closer to the average setup for an enthusiast or semi-professional photographer. Also, despite being an older machine, we knew that according to Adobe, more cores would give us a better chance of seeing some serious performance gains.

As such, these results replace our earlier published figures.

DPReview Import Test (2015 Quad-core MacBook Pro)

When importing 130 Raw files from the Fujifilm X-T2 (7.6GB in total), we saw a major performance boost in LR Classic CC 7.2, on our quad-core 2015 MacBook Pro. Roughly 80%, in fact.

  • LR 7.1 – 4:05 (245 seconds)
  • LR 7.2 – 50 seconds

DPReview Export Test (2015 Quad-core MacBook Pro)

When exporting the same 130 Raw files as JPEGs (quality level 80, Adobe RGB), after heavy edits (including exposure, shadow/highlight adjustment, lens corrections and luminance noise reduction) we saw a modest performance improvement in LR Classic CC 7.2 compared to 7.1. Roughly 10% when averaged out – very similar to the 11% performance increase we saw when we ran the earlier test on our dual-core 2013 Mac.

  • LR 7.1 – 11:08 (668 seconds)
  • LR 7.2 – 10:16 (616 seconds)

Adobe was adamant that this update is just the beginning. The company is “pleased with these performance improvements” and believes Lightroom Classic users will be please as well, but Adobe also told us it is “far from done.” The company promises continued performance optimizations and improvements in future releases of Lightroom Classic CC.

For now, we’re just happy to see the first fruits of that “top priority” promise Adobe made last year.

Articles: Digital Photography Review (dpreview.com)

 
Comments Off on *Updated* Adobe is preparing a major Lightroom Classic performance update, and we got to try it

Posted in Uncategorized


Leak: Profoto is preparing to release its first ever speedlight, the Profoto A1

17 Sep

$ (document).ready(function() { SampleGalleryV2({“containerId”:”embeddedSampleGallery_1817966601″,”galleryId”:”1817966601″,”isEmbeddedWidget”:true,”standalone”:false,”selectedImageIndex”:0,”startInCommentsView”:false,”isMobile”:false}) });

It seems Profoto is preparing to announce a new line of products: an A-series of speedlights. The lighting company is known for its powerful, high-end flashes, monolights, and modifiers, but a product page leak shows Profoto is preparing to target a slightly less high-end user with something called the Profoto A1 Air TTL.

The unofficial Profoto A1 speedlight popped up briefly on a French distributor’s website complete with a full description and plenty of product shots to prove that this isn’t just some silly rumor. While the page has since been taken down, DIY Photography managed to dig up a cached version (here’s the Google translated version) so you can read about the product in full glory.

The unique-looking speedlight features a rounded head with a focusable Fresnel lens for a “softer” effect than your typical speedlight. It will boast 76 watts of power, features TTL capability, and supports High Speed Sync at up to 1/2000th of a second. Inside you’ll find a lithium ion battery that’s good for 360 full power flashes on a charge, and your recycle time is just 1.2 seconds.

The A1 allegedly comes with three magnetic modifiers that attach to the flash head, and an optional light box can be attached in the same way, as well as a few color filters.

All of this is still unconfirmed, of course, but this is as close to a full announcement leak as we’re going to get. The official release will allegedly happen on September 18th, but if you’re interested in the Profoto A1 Air TTL we suggest you start saving your pennies now… the flash will supposedly cost somewhere in the range of 990 Euro or about $ 1,190 USD.

Articles: Digital Photography Review (dpreview.com)

 
Comments Off on Leak: Profoto is preparing to release its first ever speedlight, the Profoto A1

Posted in Uncategorized


Olympus preparing to bring updated OM-D-like Stylus 1s to UK market

18 Jun

Olympus has announced that the Stylus 1s compact superzoom will be coming to the UK in early summer, and will cost £429.99. The camera, an updated version of the original Stylus 1, has already been on sale in Japan since the end of 2014 and was launched in the USA in April this year. Read more

Articles: Digital Photography Review (dpreview.com)

 
Comments Off on Olympus preparing to bring updated OM-D-like Stylus 1s to UK market

Posted in Uncategorized


Preparing for a Successful Client Photo Session

11 Feb

“Watch out”, she yelled a little too late as I slipped on an icy patch of snow and tumbled unceremoniously, almost flat on my face. The first thought racing through my head was, “My camera! Please God let nothing happen to my camera!”. Had I researched the location and the weather prior to my photoshoot, I would have realized that the temperatures had dipped quite a bit the night before, freezing the melting snow on the ground. A few hundred dollars later (my lens took the brunt of my fall and the focus ring got dislodged) with my ego a little bruised, I now always check the weather report before I head out. My car is my traveling studio and has everything I would ever need for any type of situation – photography related or otherwise!

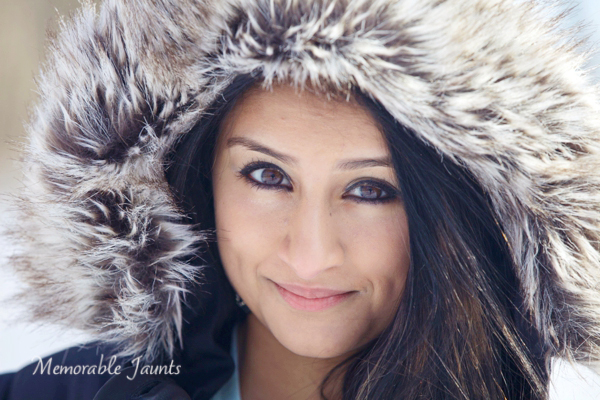
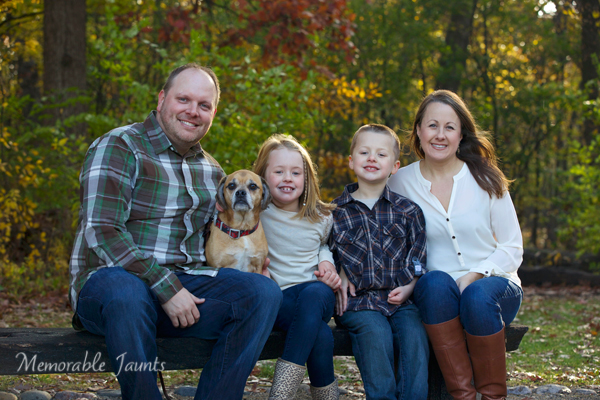
Digital Photography School Preparing for your client photoshoot Memorable Jaunts

No matter what your level of photography expertise, a little anxiety or nervousness before a client photo session is very normal and typical. But with a little preparation ahead of time, you can reduce the anxiety, be confident that you have prepared for almost any eventuality, and actually have fun with your clients. I agree that preparations takes on different meaning for different types of client sessions – these are basic guidelines.

#1 Equipment related preparations

This is almost a no-brainer, but something that needs to be reiterated every single time. Recharge camera batteries, reformat memory cards, and clean lenses and cameras. Always carry spare batteries and extra cards. If you are going to be out for the whole day, carry your battery charger. You never know where you might find an electrical outlet, and those few extra seconds of battery life might just come in handy. I am very particular in downloading my images as soon as I get home from a client session. But that does not always happen, and there have been a couple of times where I had images on my card from prior shoots. There is nothing more unnerving than trying to remember if you have downloaded old images (or not) in front of your clients who are ready to be photographed.

#2 Location related preparations

Being a wedding and family photographer in Chicago means I have to deal with different types of clients, with different needs and expectations. Plus, weather is a huge factor in scheduling photo sessions. I am a natural light, outdoor photographer – that is what I do best. In a pinch, I will photograph indoors but that is not my first choice.

For family photo sessions, I have a few locations where I am very comfortable photographing. Those are my go-to location recommendations for my clients but every once in a while, I will get a client who wants to dictate the location. It could be a special place with special memories. This is where google maps comes in very handy. If it’s a local spot close to home, I will scope out the location prior to the shoot. But that is not always practical, especially with out of town weddings and engagement sessions, so I rely on google maps (any similar map tool will also do). Additionally ask around. I belong to several online groups of photographers and often times a quick question to the group gets me all the information I need about a particular location.

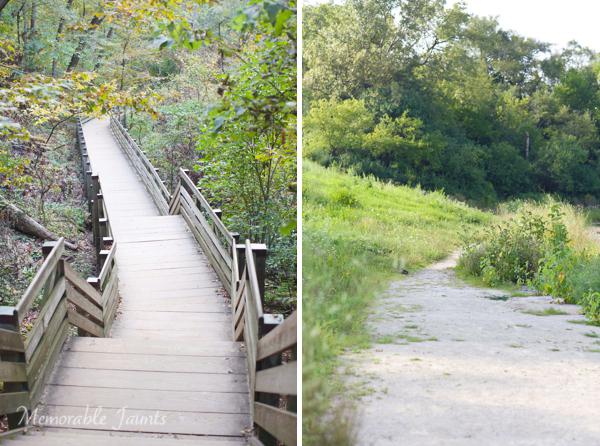
Digital Photography School Preparing for your client photoshoot location scouting Memorable Jaunts

Invest in location scouting ahead of time, you never know what hidden gems you may find.

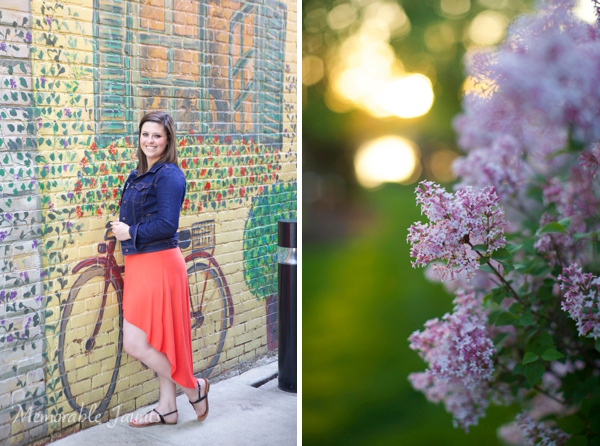
Digital Photography School Preparing for your client photoshoot Location scounting Memorable Jaunts

The bike mural was hidden in an alleyway and could have been easily missed had I not scouted the location ahead of time.

#3 Business related – contracts, model releases and questionnaires

This might be different based on your own photography business, but generally having a contract and a model release is advisable. This helps in level setting for both parties. My workflow is such that clients are required to sign a contract and a model release form prior to the actual session. But life does get in the way and sometimes they forget. I always carry spare model release forms with me – clients are more than happy to sign the forms at the end of session rather than having to go back home and mail out the materials. With my wedding photography clients, I have the couple fill out a detailed questionnaire – this has specifics like names, relationships of people in the wedding party and wedding photo shot list. The more details I can get from the bride, the better prepared I am, even before the main event.

#4 Visualize and plan your poses

A little preparation goes a long way! Hopefully by following the above tips, you are feeling confident and prepared for the photo shoot. Take it a step further and visualize your session even before it happens. Research poses and looks you want to capture that are a true representation of your work. Mentally walk through the shoot. Having an idea of what, when and where will really help you create a road map of how you want to execute the shoot.

It is also okay to write down must-have poses and shots, and refer to them periodically during the shoot. I always take a few minutes during the shoot to check the back of my camera. I am open and honest with my clients and tell them that I want to make sure I have gotten the shot I visualized. Sometimes I also show them the back of the camera to see what I am seeing. Clients appreciate this feedback and it makes them feel like they are doing the right thing. Happy clients = confident clients = happy photographer! Remember that most clients are not professional models and putting them at ease is as much a part of your job as is taking pictures.

A little preparation and previsualization really helps in getting images that resonate with you and your brand.

A little preparation and previsualization really helps in getting images that resonate with you and your brand.

#5 Save the best for last

This goes hand in hand with #4. Most people get very self-conscious when a camera is pointed at them no matter how prepared they are. Often times the first 10 minutes of the shoot are the most awkward and uncomfortable for both parties. Do your best to set them at ease, talk to them from behind the camera, and encouragement them. Since you have pre-visualized your shoot, and also scoped out the location ahead of time, you know the best poses and the best light and location backdrop.

Save this for the last 10-15 minutes of the session. By this time the clients have warmed up to you and the camera and are having a good time. They are more open and receptive to trying out new things ensuring you have the shots that you want.

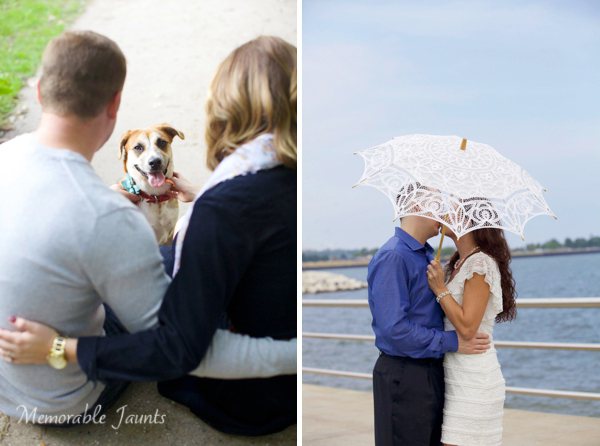
Traditional Outdoor Family Portraits Memorable Jaunts

One of the last frames of this outdoor family photoshoot – everyone was really relaxed and happy!

Of course, there are still a lot of things that can go wrong no matter how prepared you are. The weather might take a sudden turn for the worse, your car might have a flat tire 20 minutes before the session, the family might cancel at the last minute (I speak from experience). The key is to be prepared for all the obvious and apparent ones and just roll with the punches for the things you cannot control.

googletag.cmd.push(function() {
tablet_slots.push( googletag.defineSlot( “/1005424/_dPSv4_tab-all-article-bottom_(300×250)”, [300, 250], “pb-ad-78623” ).addService( googletag.pubads() ) ); } );

googletag.cmd.push(function() {
mobile_slots.push( googletag.defineSlot( “/1005424/_dPSv4_mob-all-article-bottom_(300×250)”, [300, 250], “pb-ad-78158” ).addService( googletag.pubads() ) ); } );

The post Preparing for a Successful Client Photo Session by Karthika Gupta appeared first on Digital Photography School.


Digital Photography School

 
Comments Off on Preparing for a Successful Client Photo Session

Posted in Photography


Preparing your Model and Background for a Successful Composite

24 Oct

A Guest Post by Tom Di Maggio from Tom Di Maggio Photography.

When I posted the my article about creating Eye Catching Composites I got some comments and a lot of emails asking for more details on my post processing technique.

This article will be more focused on how to achieve the wanted effect. I will describe the technique used for the background as well as the one used on the subject. I used Lightroom 4, Photoshop CS6 and NIK Color Efex Pro 4 to achieve this. I presume that the reader has a basic understanding of Layers and Blending Modes in Photoshop.

Untitled

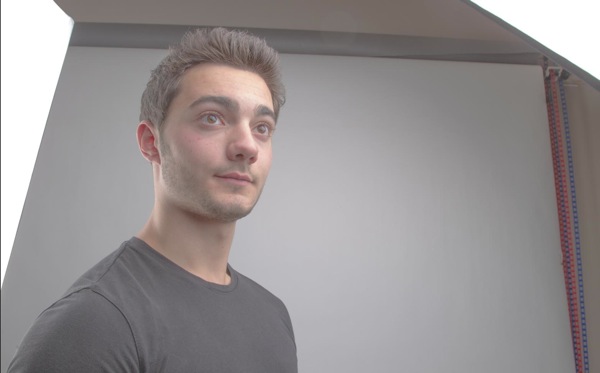
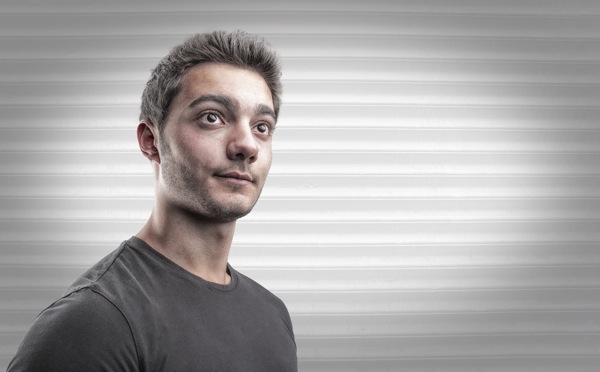
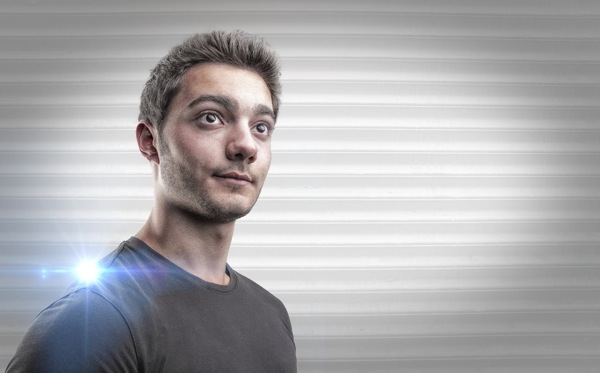
Here’s a picture of the original to the left and the finished picture to the right.

As with any picture the background is very important for the final feel of the image, for this one I choose an old stock photo of a metal door. I didn’t want it to be as hard though, I wanted something bright and soft with a touch of hardness. I placed the picture on top of a white Layer and reduced it’s Opacity until I had the visual impact I was going for. In this case it was 13% only. I could have used a different blending mode but I am a fervent adherent to the “KISS” principle…

As with most of my pictures I tend to darken the borders or lighten the center of the image in order to draw the eye to where I want it to go. In this case the background itself is bright enough, so I use another Layer with a slight vignette. To achieve this I use the elliptical selection too and draw a rough ellipse. I invert the selection and feather it with a value of 250. You can repeat this step a few times until the feather suits your wish. Finally I just fill it with black and adjust it’s opacity to where I think it will fit for the end result. I have to say here that I usually end up readjusting the vignette once the image is finalized. Group the Background Layers into a folder that you will call “Background” and hide it, we won’t need it until after the masking procedure. Actually as I always start with my backgrounds I always end up fine-tuning it after the subject is in place. One could argue that I should start with the subject, but I feel that I slightly adapt the post processing of my subject to the background. I feel that it makes it easier to blend the subject better into the background.

Untitled

The door original on the left, with an Opacity of 13% (over a white Layer) in the middle and the final version with the vignette on the right.

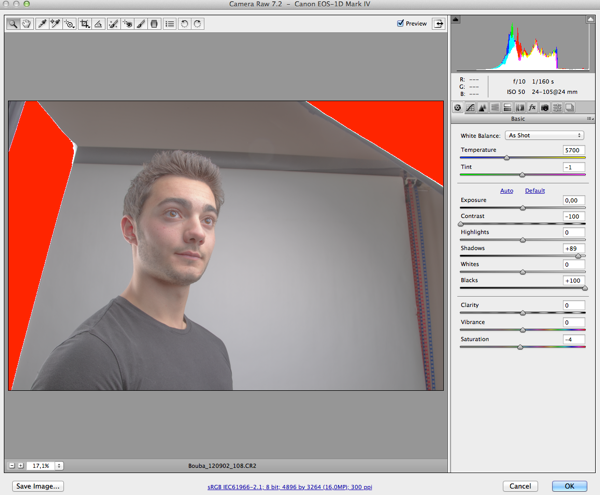
As you can see with the original picture I tend to slightly underexpose my composite pictures. If I wasn’t going to use this picture for a composite it would have lit it a bit lighter than this. For the post processing technique I use it is vital not to loose any detail in the picture. I don’t do any adjustments to the picture at this stage. In Lightroom I simply right click the image and choose the option: Open in Photoshop as Smart Object. You will now see a new Layer in Photoshop that has a small square in it. If you double click on that little square it will open the adjustment panel for that Layer. This is where I remove as much contrast from the image as I can without loosing and detail. I drag the contrast slider all the way down to -100 and the shadows slider to the right until it starts creating artifacts. Depending on the picture I will also drag the Blacks slider to the right. Basically what I want to achieve here is a picture that has the less amount of contrast possible. Once you are happy with the way the picture looks you can click “ok”. Keep in mind that you will be able to come back to this screen and adjust the settings until you are confident with the outcome of the procedure.
?

Subject Layer1
Here’s the first Layer where most of the contrast has been removed.

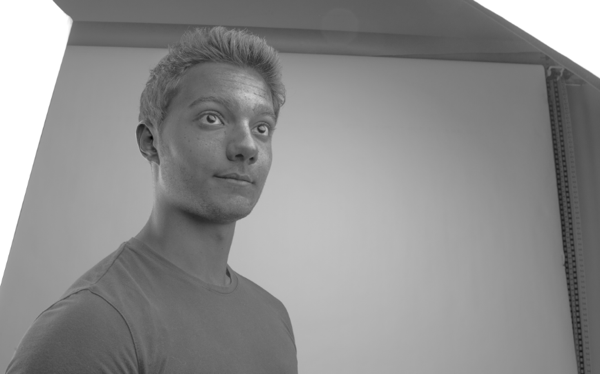
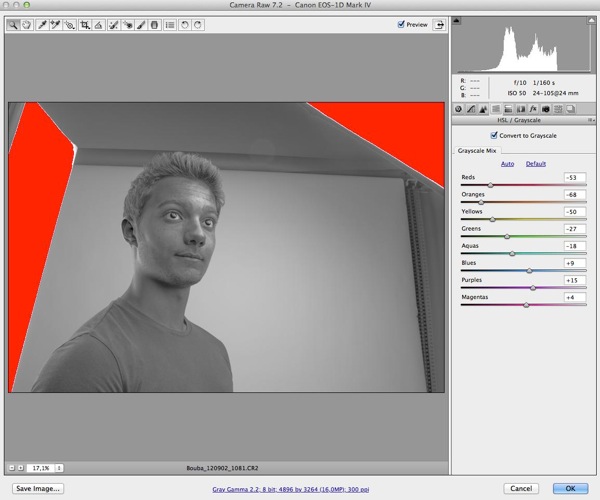
Once done I create a copy of this smart object as another smart object. To do this I right click on the Layer I want to duplicate and choose copy to new Layer as smart object. Double click on the small square again and choose the “HSL” button and switch the image to B&W by checking the “Convert to Grayscale” tick box. You can argue here that there are better ways to get a black and white picture, and I would be the first one to agree with you. But the goal here is not to convert the image to Black & White but to get some contrast and detail back into the picture. Sometimes I slightly adjust the brightness at this step, but that’s about it. Then I change the blending mode of this Layer to overlay and check the result. If I want to fine tune something at this stage I do it on one of the two Layers by double clicking the little square and going back into the adjustments panels. More often than not it will be the saturation and brightness of the picture. I sometimes also play with the opacity of the B&W Layer. It is important at this stage that you like the combination of the two Layers as we will now move on to steps that will make it harder to adjust these things.
?

BW
The Black & White Smart Object Layer
??
Bw adj
The BW adjustment Panel

Color adj
The color adjustment

If you’ve followed these steps you will have two Layers by now. We will merge these two into a new Layer by hitting the Command-Control-Shift-E keys on the keyboard. This will create a third Layer that we will apply a Gaussian blur filter to. I usually choose a value between 10 and 15 here for the blur. Again this is a matter of taste and you should experiment a bit with this. Change the blending mode to Overlay and turn the Opacity down to somewhere around 30 to 40 percent. Hit the Command-Control-Shift-E keys again and choose Filter-Other-High Pass with a value of 3 or 4 and change the Blending Mode to Overlay again. These two Layers will sharpen the image a bit and give it some colors back that went lost during the first steps of the post processing. You can play around with the Opacity of the blurred Layer until it fits your taste. I usually group the four Layers into one Layer Folder at this stage.

Merge BasePicture of the 4 Base Layers merged together.
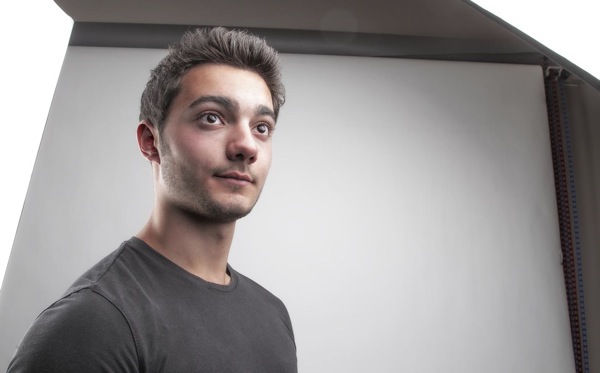
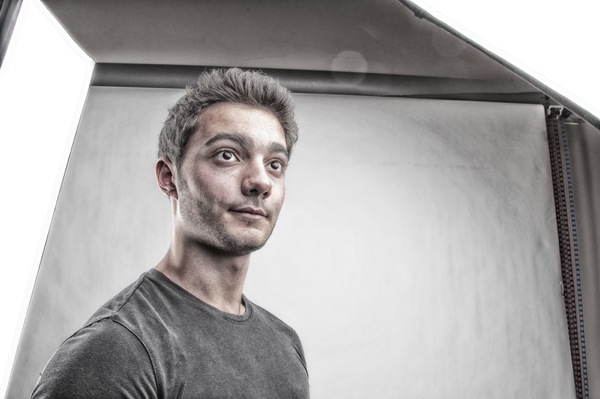
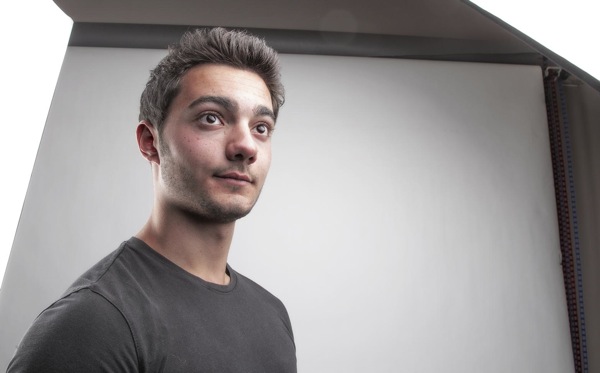
The next steps are purely image/skin corrections and optional. That being said I use them on every picture that includes a face. For this we have to merge the Layers again to a single one. We do this by using the same keyboard shortcut as before: Command-Control-Shift E and name that Layer “Blur”. And then simply duplicate the Layer again with Control-J and name that Layer “Apply”. Group both Layers to a new Folder. Apply a Gaussian Blur with a value of 22 on the “Blur” Layer. (The value has to be 22 for this to work). Select the “Apply” Layer and choose the Menu Image – Apply Image. In the window that just opened choose the “Blur” Layer in Layer and Subtract as Blending. Set the scale to 2 and the offset to 128. (These are the values that you need to use for this to work). Hit ok and change the Blending Mode of the “Apply” Layer to Linear Light. If you’ve done this correctly and with this Group on and off you should see no difference at all. Now you can choose the “Healing Tool” and start cleaning up the skin of the subject on the “Apply” Layer. What this does is to allow you to “heal” the skin without changing the color values. It will only affect texture. It’s a very effective way to clean up skin or other surfaces without loosing or changing the color values of the subject. This is a technique I use a lot and depending on the image this is where I will spend most of the time. As you can see on the image below I also brightened up the image a tiny bit with a Brightness Layer Adjustment.

HL Corr
Picture after the corrections. In this case only the face was retouched.

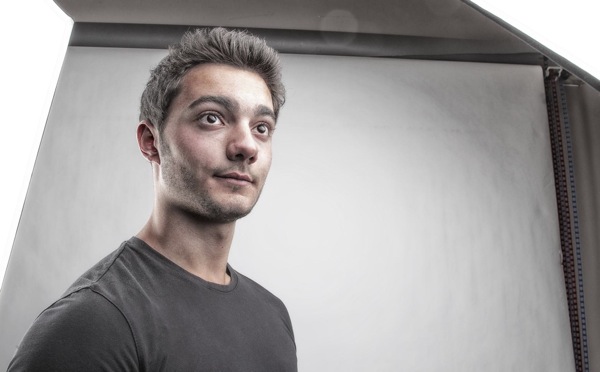
At this point I export a copy of the image into Color Efex Pro 4 and apply the three following effects on it: Bleach Bypass, Tonal Adjustments and Detail Extractor. There are no fixed values for this. I adjust them to the individual picture. I do however overdo this phase on purpose as I will play around with the opacity on the Layer in Photoshop. Once done save the image and import it as a Layer into Photoshop at the top of the Layers. Adjust the Opacity until the effect is as strong as you need it to be. I sometimes use a Layer Mask here if I want to do some fine tuning to the effect.
??
Color Efex Pro
This is the picture after the Color Efex Pro treatment.

CE merge
As you can see it’s hugely overdone, but on the right the final look with the opacity set at ….

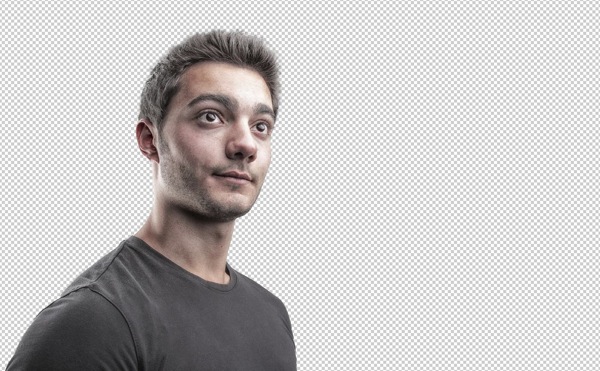
This leaves us with the last part of the workflow. The extraction or masking of the subject. To be honest this is quite fast nowadays. There are multiple ways to extract a subject from it’s background.The method I will describe is the one that works best for me at the moment. I start by creating an automatic selection of the subject with the Quick Selection Tool. Then I zoom in and make sure I didn’t miss anything and try to make the selection as precise as possible. Doing this at this stage will save some time later on in the process. Once happy with the selection click on the “Refine Edges” Button at the top of the screen. This is where a lot of people will do things differently, I check my selection against a white and a black background. This will show me most of the areas I will have to correct later on. I use the Refine Radius Tool around the hair a bit without changing any settings. I then will feather the selection by 1 or 2 pixels and contract it by 1 or 2 pixels. That’s it for the moment….. I will do the rest manually on the Layer Mask. Hit ok and select the Layer Mask. Usually one can notice imperfections around the hair and some fringing around the contours of the body. I use the much underestimated Smudge Tool at this point. Set it’s strength to 20% (average value to start with) and adjust it’s size to fir the area I am fixing and start smudging the mask in the direction of the subject. I usually spend a lot of time at this step to do this carefully and I keep on adjusting the size and strength of the Smudge Brush depending on the area I am working on. I Keep on doing this all around the subject until the extraction is precise enough for the purpose.

Extract

The extraction is done. I verify it against black and white backgrounds to get a better result.

Now I can reactivate the background and check the Layer Mask of the extraction and fine tune it to fit the background exactly. At this stage I am done with the heavy work. Sometimes at this stage you might notice that the subject doesn’t really fit the background, it sticks out in terms of color toning. This can be fixed by using color adjustment Layers on both the subject and the background in Photoshop. Or you can do it the same way I do by doing this in Lightroom. You can do this with manual adjustments or by using presets in Lightroom.

Final noflare
The final image

I wanted to add some flare to the picture as I wanted to make it a bit more attracting to the eye. To do that I used a stock photo of flare on a black background and changed the Blending Mode to “Screen” in order to let through the flare only. And I also noticed at this point that I wanted the subject to be a bit brighter, so I added an adjustment Layer to achieve this.

Final PS
?
The final Photoshop version with Flare and adjusted Brightness.

See more of Tom Di Maggio’s work at Tom Di Maggio Photography, InFocus Photography and on his Flickr Account.

Post originally from: Digital Photography Tips.

Check out our more Photography Tips at Photography Tips for Beginners, Portrait Photography Tips and Wedding Photography Tips.

Preparing your Model and Background for a Successful Composite


Digital Photography School

 
Comments Off on Preparing your Model and Background for a Successful Composite

Posted in Photography


Preparing for Winter SUP (Stand Up Paddling) Season

18 Oct


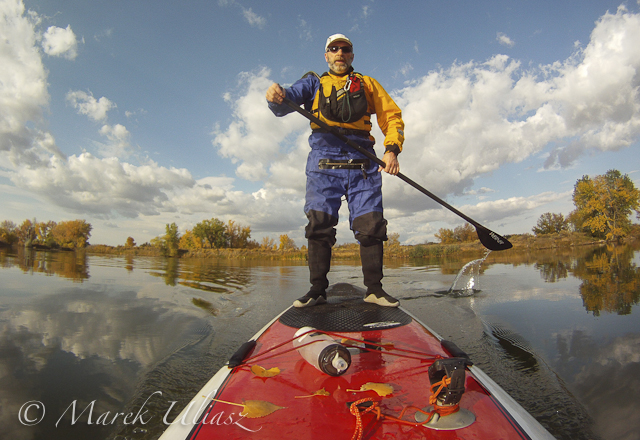
stand up paddling in drysuit

October 13, 2012. Paddling Expedition Bark SUP in Beaver Pond (Arapaho Bend Natural Area, Fort Collins) and trying a drysuit in preparation for a cold season. Camera: GoPro Hero.

I haven’t paddled in my drysuit for years. Last time I used it probably 5 or 6 years ago when paddling in rain and snow on the Dismal River in Nebraska during Thanksgiving Day weekend. I am going to use the drysuit on a SUP in cold season. Of course, it’s not so much fun as paddling in shorts. I just need to replace my neck gasket.

Related posts:
SUP (Stand Up Paddleboard) in Riverbend Ponds Natural Area
Bark Expedition Stand Up Paddleboard in Fall Scenery


paddling with a camera

 
Comments Off on Preparing for Winter SUP (Stand Up Paddling) Season

Posted in Photography


AdoramaTV: Behind The Scenes: Preparing for a HTDT Interview: Adorama Photography TV

23 Dec

Adorama Photography TV presents: In this episode Mark shows us how he prepares for a How’d They Do That? interview. View related videos at the Adorama Learning Center: www.adorama.com


Episode 16 , preparing a photography portfolio

17 Nov

Putting together a print portfolio for your photography? Here are some suggestions. More info at prophotolife.com, video episode 16

 
Comments Off on Episode 16 , preparing a photography portfolio

Posted in Photography Videos